
Finishing a needlepoint project feels great, but once you’re done stitching, you might wonder what to do next.
After spending so many hours creating something beautiful, it only makes sense to display it the right way.
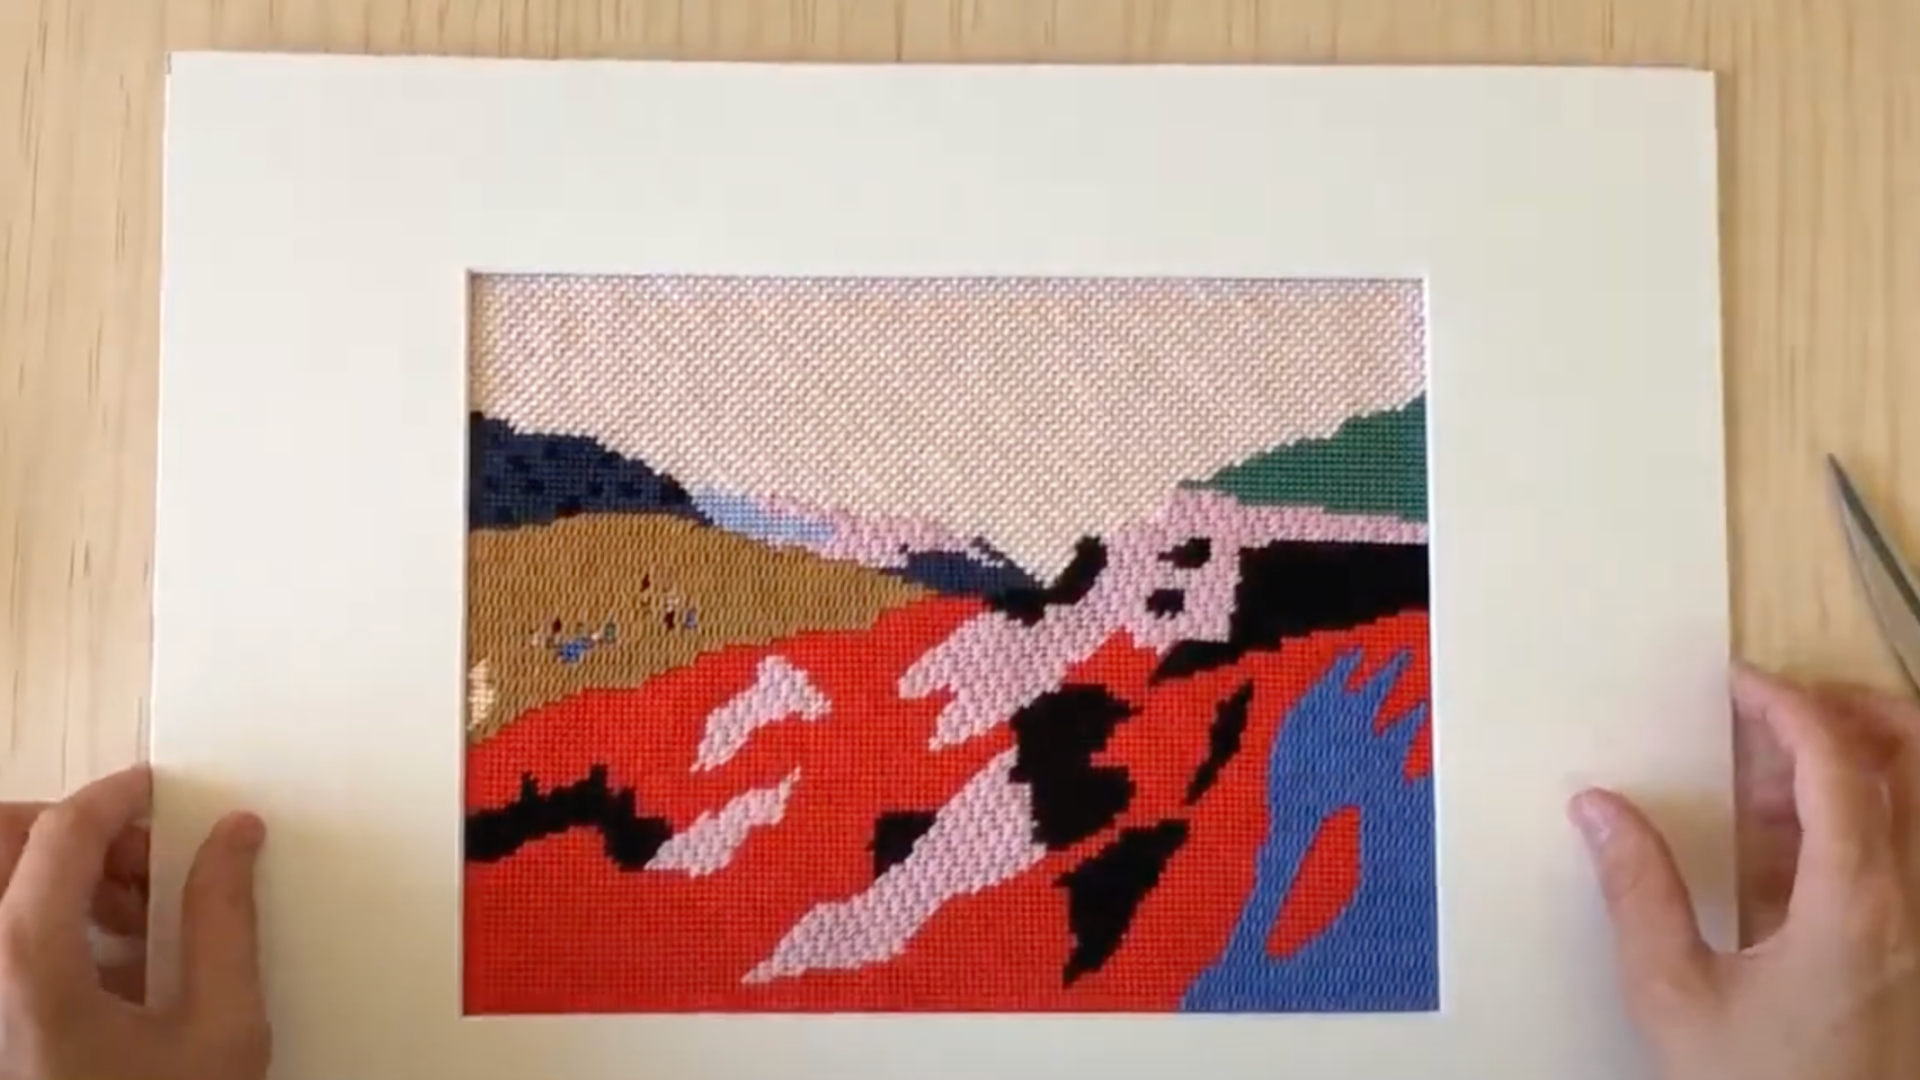
Framing your needlepoint does more than protect your work; it turns it into a piece of art that you can proudly hang in your home.
In this guide, I’ll show you how to frame your needlepoint step-by-step using easy-to-find materials.
You won’t need any special tools or expensive supplies. I’ll teach you how to stretch, secure, and frame your piece so it looks clean and professional.
If it’s your first project or your tenth, you’ll find this method simple and satisfying.
Let’s get your needlepoint ready to display, just like it deserves.
Why Frame Your Needlepoint?
Framing your needlepoint isn’t just for looks; it helps protect and preserve your work. After all the time you spent stitching, it deserves to be kept safe and looking great for years.
A frame shields your needlepoint from dust, dirt, and curious hands. The glass or acrylic cover helps protect it from sunlight and moisture, which can damage fabric over time.
It also keeps the canvas from sagging or stretching, which can happen if it’s left unsupported.
Most importantly, framing gives your work a finished, polished look. It turns your needlepoint into real wall art that you’ll be proud to display.
Tools and Materials You’ll Need
Before you begin framing your needlepoint, it’s important to have all your tools and materials ready. This will make the process smoother and help you get the best results without needing to stop midway.
- Blocked needlepoint canvas
- 3mm thick foam board (cut to fit the frame)
- Deep-set frame (e.g., from IKEA)
- Mat board with an opening matching your design
- Stainless steel dressmaker pins
- Paper tape
- Ruler or square
- Scissors or a hard object to press the pins
How to Frame Needlepoint
The framing process isn’t difficult, but it requires patience and attention to detail. Follow these steps carefully to achieve professional-looking results.
1. Center the Canvas on the Foam Board
Lay your needlepoint face-up on a clean, flat surface. Then place the foam board on the back side of the canvas.
Measure with a ruler from each edge of the design to the edges of the board. This will help you center it evenly.
Mark the position with small pencil dots so you can keep it aligned when flipping it over.
Check from all sides to ensure it’s straight. Once it’s in the frame, even a small tilt will be noticeable, so take your time to get this part just right.
2. Secure the Canvas with Pins
Flip the foam board and canvas so the back of the canvas faces up. Start by placing one pin in the middle of each side.
Work your way out from the center, adding pins every 1 to 2 inches. Push them in at a slight angle for a better hold.
Don’t stretch the canvas too tight, just enough to smooth out any wrinkles. Pulling too much can mess up your stitches.
For larger pieces, put a heavy book in the middle while you pin the edges. This helps keep everything flat and even as you work.
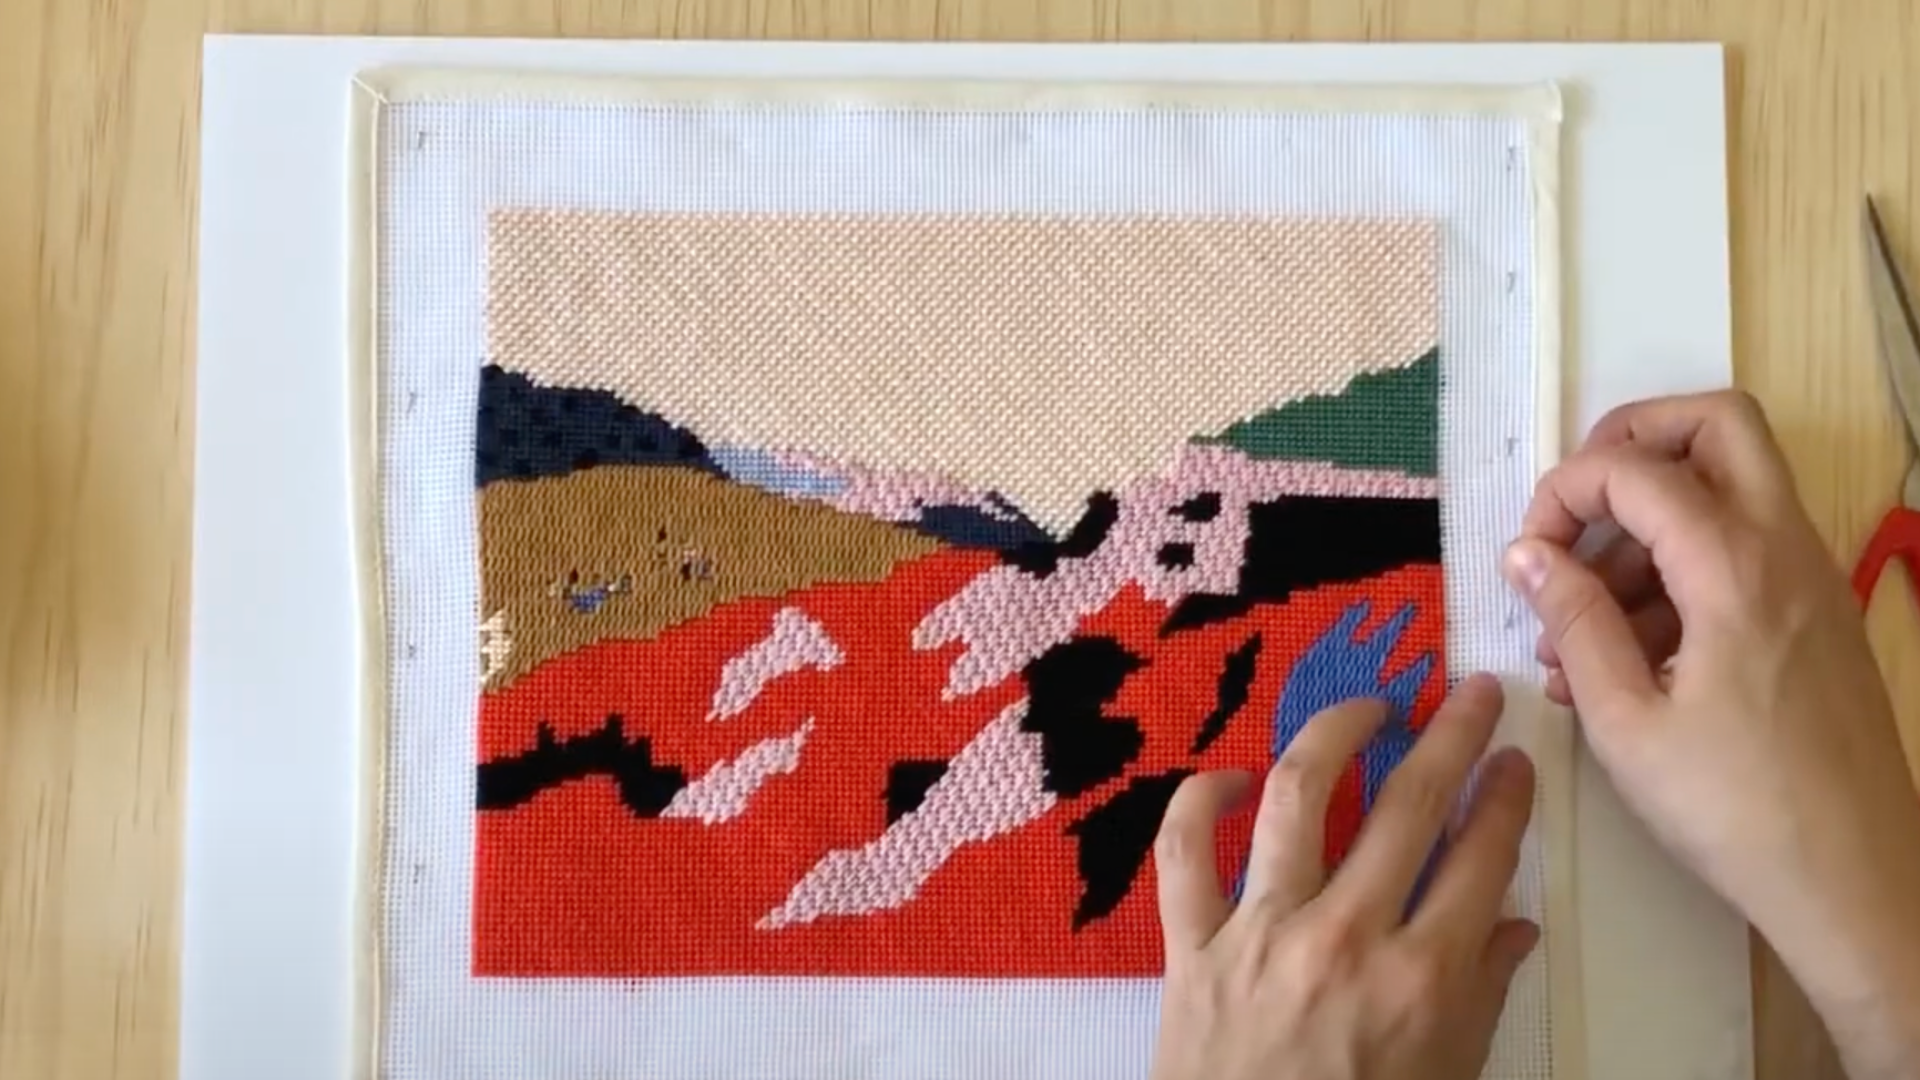
3. Tape Down Excess Canvas

Once your canvas is pinned in place, fold the extra fabric over the back of the foam board. Use paper tape to secure it neatly.
At the corners, fold the fabric like wrapping a gift, make clean diagonal folds and tape them down tightly.
Trim away any thick or bunched-up fabric. To avoid making the back too bulky, leave just 1 to 2 inches of extra material.
Smooth the edges with your fingers to check for any raised spots or bumps. Fix any uneven areas now before you move on to framing.
4. Assemble the Frame
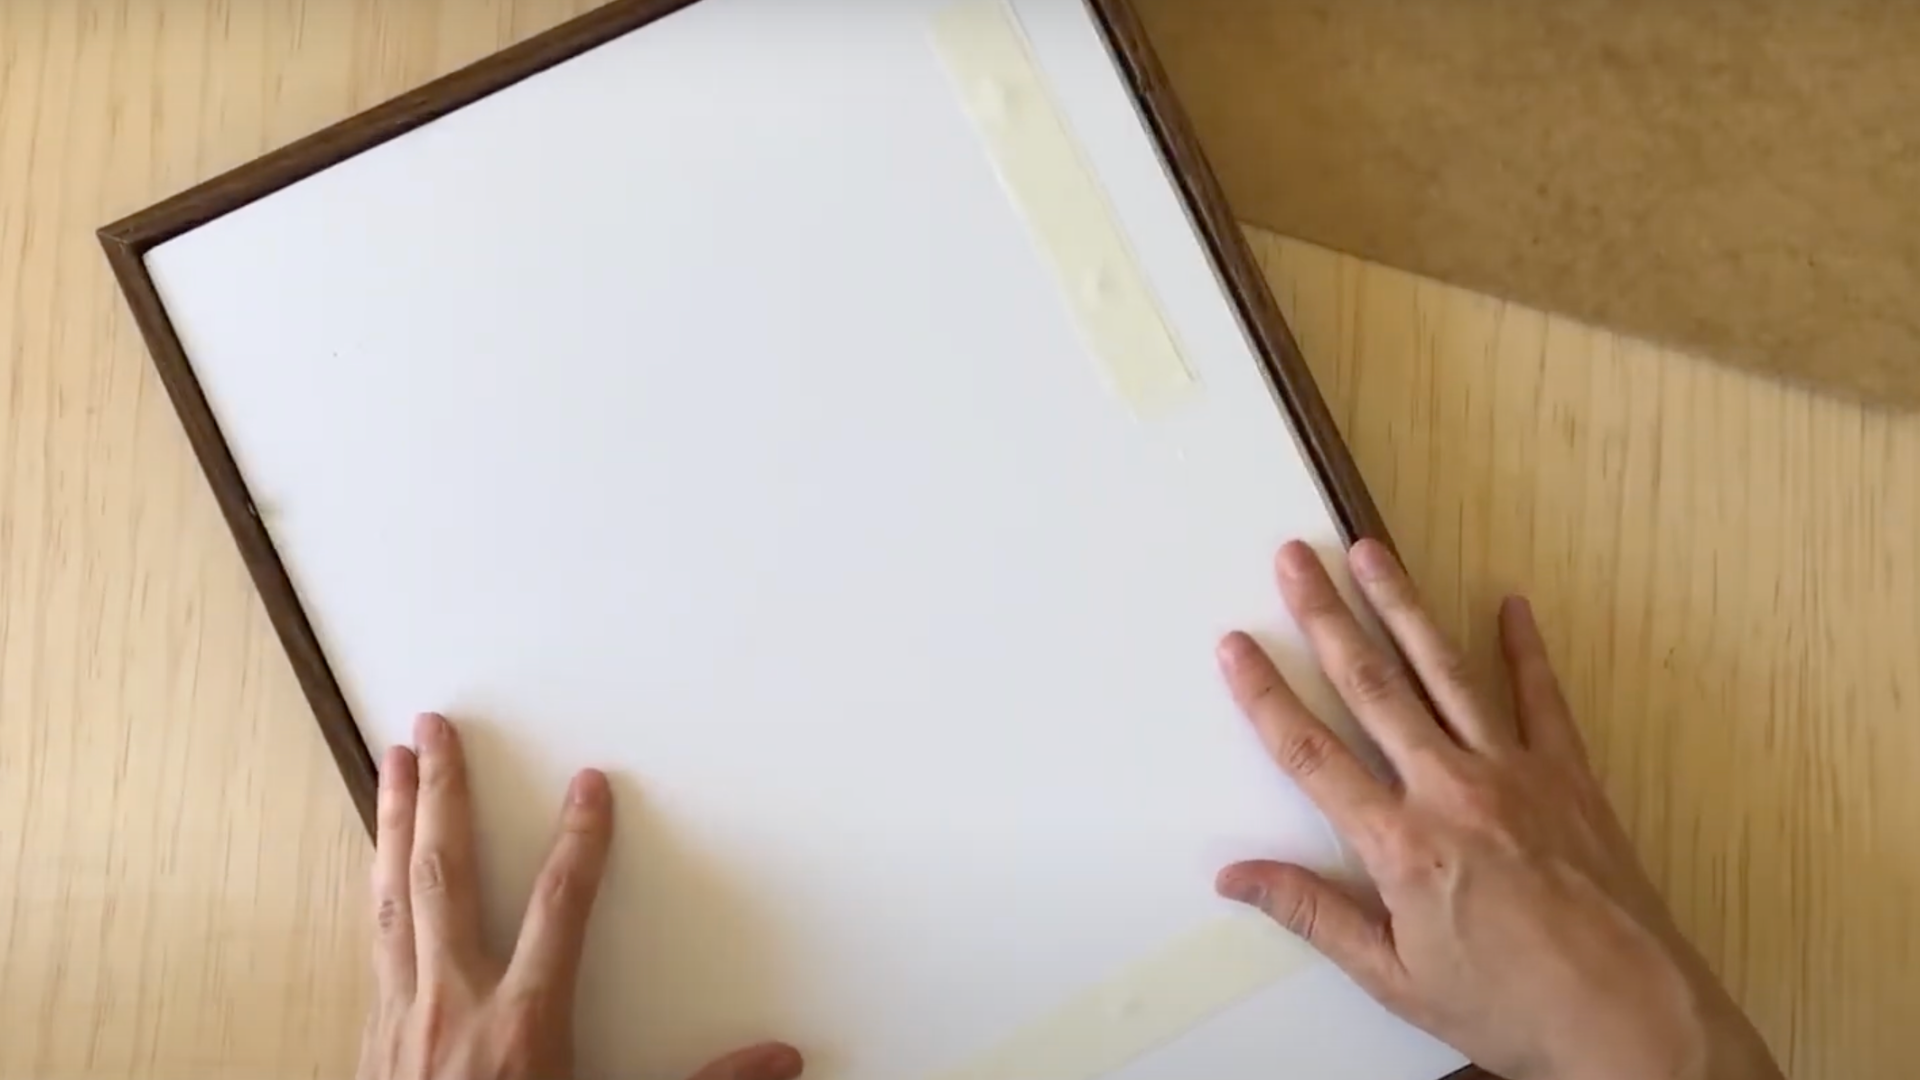
Put the mat board on top of your mounted needlepoint. Make sure the opening frames your design perfectly.
Then insert the foam board with the canvas into the frame. It should fit snug but not so tight that it bends.
Check your frame design, some use clips or bendable tabs to hold everything in place. If your frame has a backing board, add it now for extra support.
Just make sure all the layers fit inside the frame without bulging or feeling forced.
5. Final Touches
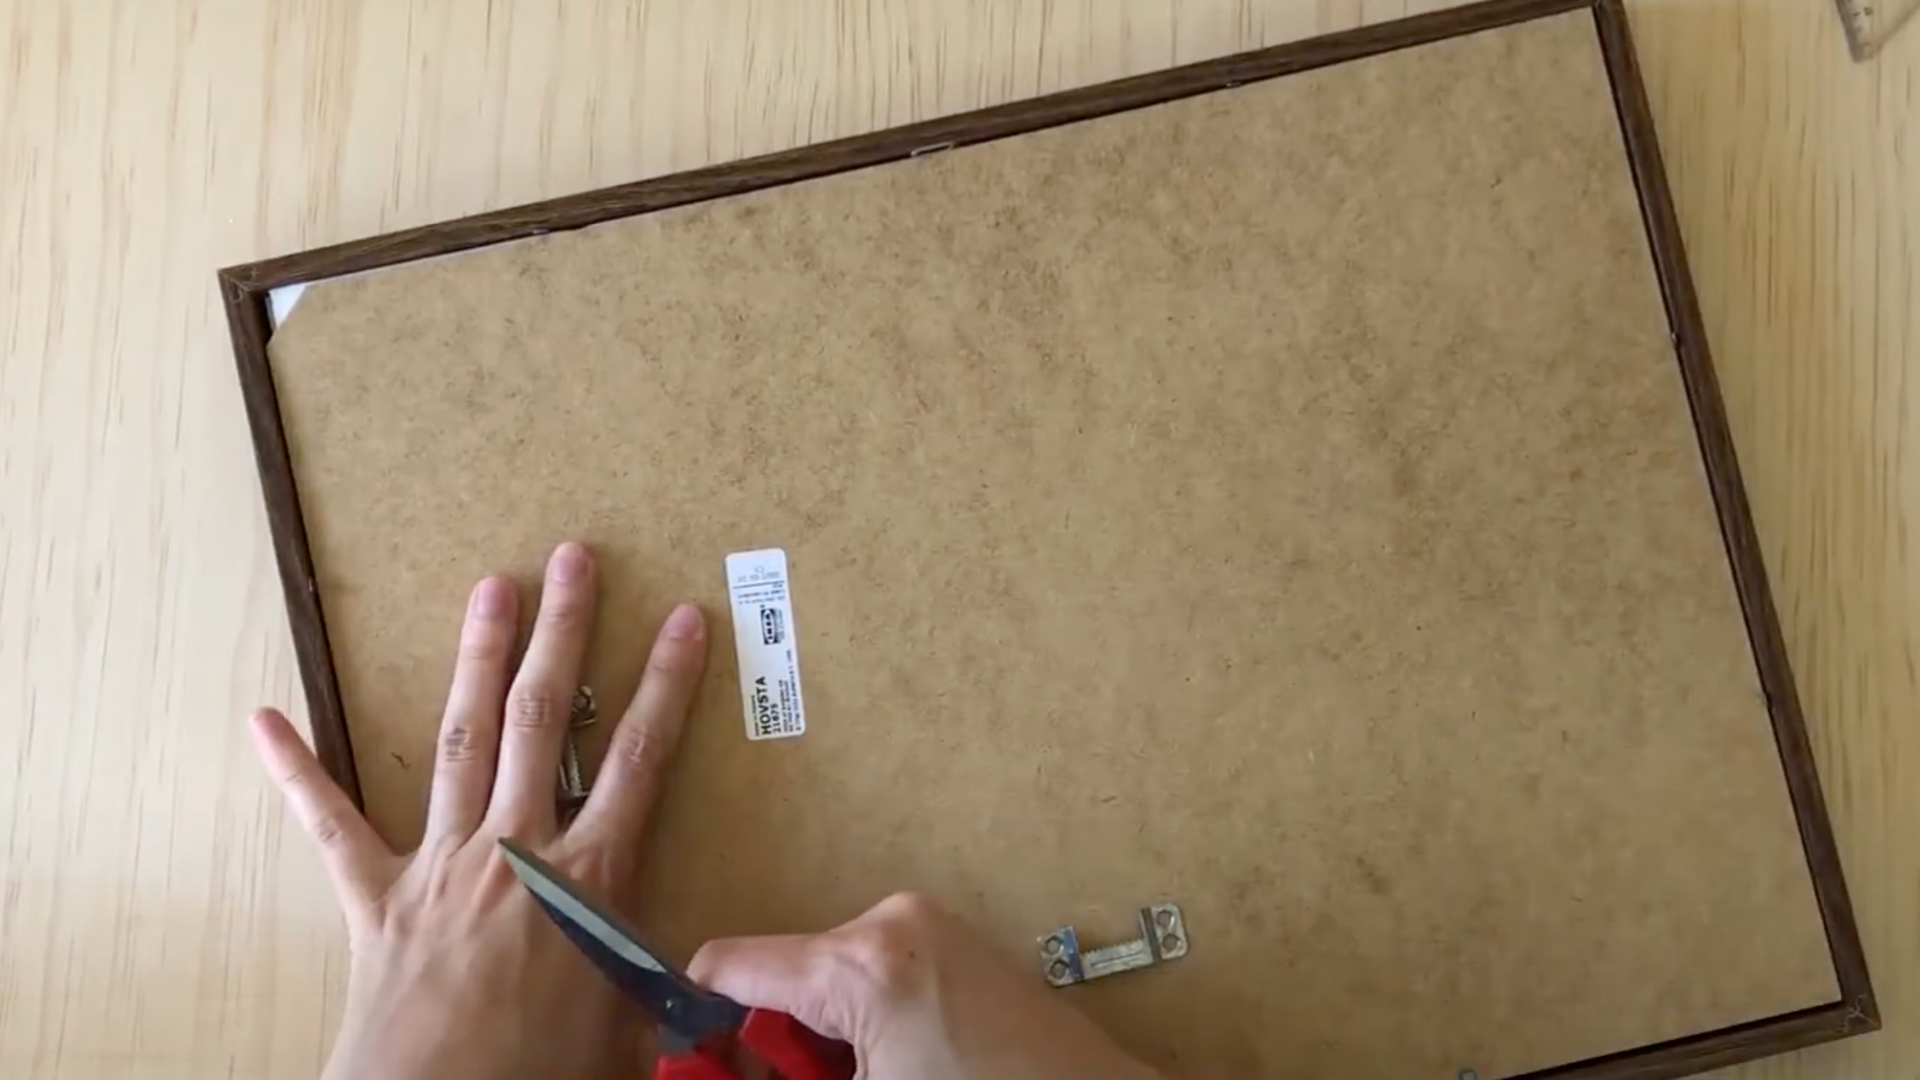
Wipe off any fingerprints from the glass or acrylic before closing the frame completely. Then, look at the front and sides for any misalignment.
Fix anything that seems uneven or off-center. If your frame doesn’t have hanging hardware, attach it now.
Place a level in the center so your artwork hangs straight. Then, lean your framed needlepoint against the wall and take a step back.
Look at it from a distance to find the perfect spot for hanging. Enjoy the finished result—you’ve earned it!
Want a clear look at how it all comes together? Watch this helpful video from @UnwindStudio, it’s an easy, step-by-step guide that makes the framing process simple and fun to follow.
Community Discussions Surrounding Needlepoint Framing
The needlepoint community has plenty of opinions when it comes to framing.
Some stitchers prefer traditional methods, while others go for more modern approaches depending on their style and needs.
A common debate is whether to use glass. Some like the protection it provides, while others think it diminishes the texture and feel of the stitches.
Another topic is professional framing versus DIY. Professionals use high-quality materials, but they can be costly. DIY framing is budget-friendly and gives you more control over the final look.
Online groups like Reddit’s r/Needlepoint and Facebook communities are great places to learn. People share tips, mistakes, and finished projects.
Sharing your work often leads to helpful feedback and creative ideas, so don’t hesitate to ask questions and get involved.
Tips for Preserving Your Needlepoint
Once your needlepoint is framed and displayed, properly caring for it will help keep it looking beautiful for years.
- Keep it out of direct sunlight: UV rays can fade thread colors and damage the fabric over time.
- Avoid high-humidity areas: Bathrooms or damp basements can lead to mold or fabric warping.
- Dust regularly: Use a soft cloth or duster to gently remove buildup from the frame and glass.
- Use glass cleaner carefully: Spray cleaner on a cloth—not directly on the frame—to avoid moisture seeping in.
- Consider UV-protective glass: This helps block light damage and keeps colors brighter longer.
- Rotate your needlepoint displays: Switching them out occasionally reduces wear and gives your walls a fresh look.
- Check yearly for sagging or pests: Look behind the frame for signs of loosened fabric, moths, or other damage.
Location, cleaning, and a few simple habits make a big difference in how well your work holds up over time.
Conclusion
Framing your needlepoint turns your hard work into a lasting piece of art.
It’s not just about making it look nice; it also protects your stitching and helps it stay in great shape over time.
The steps in this guide give you everything you need to frame your piece with care. Taking the time to do it right will ensure that you enjoy your needlepoint on display, not hidden in a drawer.
A framed needlepoint can match any room style, if your home is modern, classic, or something in between. It adds a personal, meaningful touch to your space.
Do you have a favorite framing tip or a question about your project? Share it in the comments, I’d love to hear from you!
Frequently Asked Questions
How Much Does Professional Needlepoint Framing Cost?
It usually costs $100–$300, depending on size and materials. Custom shops charge more than chain stores but offer better quality and experience with needlepoint projects.
Can I Use Regular Picture Frames for Needlepoint?
Yes, if the frame is deep enough. Choose a shadow box or deep-set style to fit the foam board and canvas without pressing the stitches too tightly.
How Do I Clean Dust Off My Framed Needlepoint?
Use a soft vacuum brush on the low setting. For glass-covered pieces, wipe gently with ammonia-free cleaner sprayed onto a cloth, not directly on the glass.
How Long Will Properly Framed Needlepoint Last?
With good framing and care, needlepoint can last over 50 years. Keep it away from sunlight, moisture, and clean it gently to help preserve its color and shape.