
Yes, you can spray paint door knobs safely and effectively! In this guide, I’ll show you exactly how to transform your old, outdated door hardware into fresh, modern pieces.
You’ll learn which materials work best, the step-by-step process, and how to make your painted knobs last longer. I’ve personally painted dozens of knobs in my home and saved hundreds of dollars compared to buying new hardware.
If you’re updating your home on a budget or want to try a new color scheme, this DIY solution is perfect.
The best part? You don’t need any special skills – just some basic supplies and a little patience. Your door knobs will look brand new without the hefty price tag of replacements.
What You’ll Need
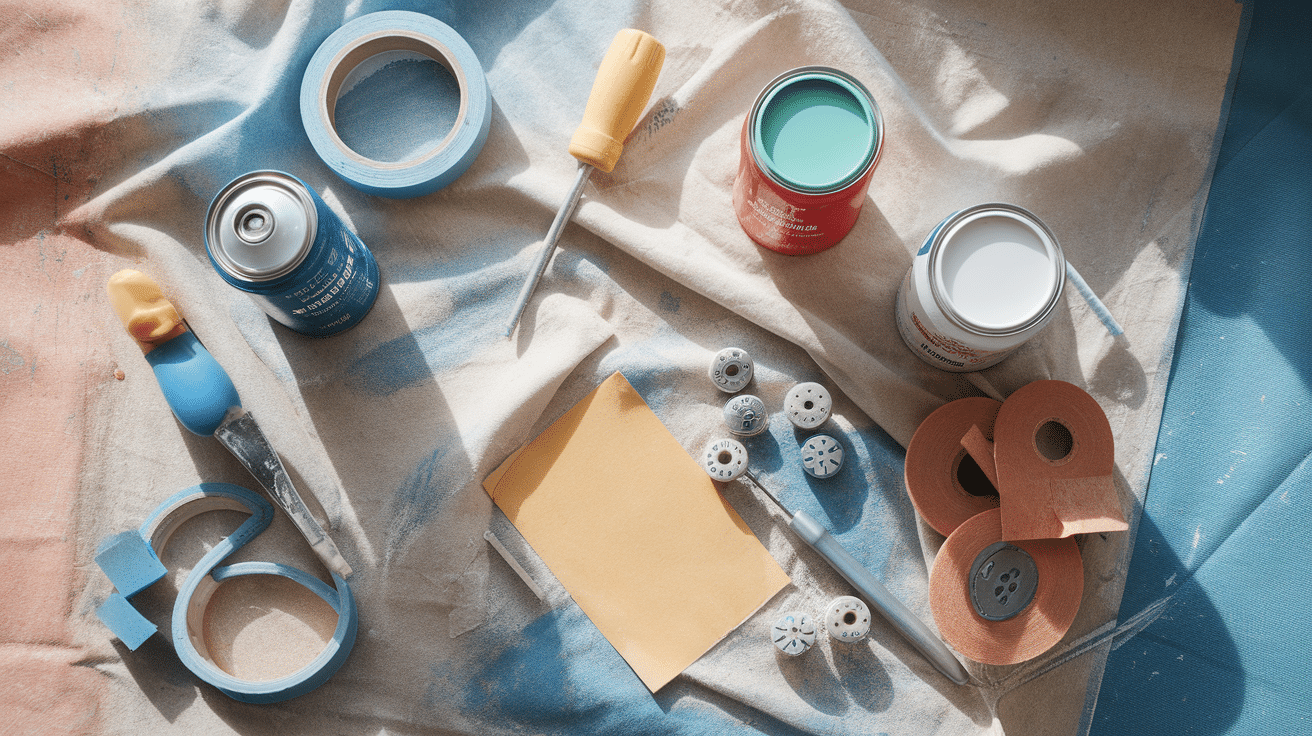
- Metal primer spray paint
- Metal spray paint in your chosen color
- Fine-grit sandpaper
- Degreaser or cleaning solution
- Small screwdriver
- Clear topcoat spray (optional)
- Painter’s tape
- Cardboard for painting surface
Step-By-Step Instructions
1. Remove All Parts (Knobs, Screws, Plates)
Start by removing the knobs, screws, and plates from your doors. Use the appropriate screwdriver (usually Phillips or flathead) to take everything apart carefully. Most doorknobs have visible screws on the interior side plate.
Remove these first, then the knob should separate into two pieces. Be careful not to lose any small springs or mechanisms inside. If you have lever handles, look for a small slot or hole at the base where you can insert a thin tool to release the handle.
2. Label Everything with Tape or Marker
Put small pieces in plastic bags and label which door they came from. This makes reassembly much easier later. I like to use masking tape and write directly on it—”Main Bathroom,” “Front Door,” etc. If you’re doing multiple doors at once, this step is crucial!
If you’re not confident about remembering the arrangement, take photos of how everything fits together before disassembly. Trust me, this small step saves huge headaches later when trying to figure out which parts belong where.
3. Clean Thoroughly Using Degreaser and Toothbrush
Door knobs collect oils from hands and dirt over time. I use a good degreaser and an old toothbrush to clean every nook and cranny. Regular dish soap works well for this purpose, but a stronger degreaser like TSP substitute gives even better results for really dirty hardware.
Pay special attention to crevices and textured areas where grime builds up. Let the parts dry completely before proceeding to the next step. This cleaning step is essential for good paint adhesion—any leftover oils or dirt will cause the paint to bubble or peel later.
4. Scuff the Surface with Sandpaper
Lightly sand all surfaces with fine-grit sandpaper (220-grit works perfectly). This creates tiny scratches that help the paint stick better to the metal. Don’t skip this step!
You don’t need to remove all the existing finish – scuff it up enough to give the primer something to grip. Focus on smooth, shiny areas that would otherwise be slippery for paint.
Be thorough but gentle—you’re not trying to remove material or create texture. After sanding, wipe away all dust with a clean cloth slightly dampened with alcohol to ensure a perfectly clean surface.
5. Tape Over Parts You Don’t Want Painted
Painter’s tape should be used to cover any areas that shouldn’t get paint, such as keyholes or internal mechanisms. For locksets, mask the keyhole and internal locking components. Paint can gum up these mechanisms and make your lock unusable.
Use small pieces of tape and press down firmly around the edges to prevent paint from seeping underneath.
For complex shapes, you can use a hobby knife to trim the tape to fit precisely. Take your time with this step – it’s much easier to tape now than to scrape off unwanted paint later!
6. Place on Cardboard or Foam for Painting
Set up your pieces on cardboard or foam so you can easily rotate them while painting. I stick small nails or pushpins into cardboard to hold the knobs upright while spraying.
This keeps them elevated and allows you to spray all sides without touching wet paint. Set this up in a well-ventilated area, preferably outdoors or in a garage with the door open.
Lay everything out with enough space between pieces to prevent overspray from hitting adjacent items. If you’re working outside, consider the wind direction — even a light breeze can carry spray paint onto unwanted surfaces.
7. Spray in Thin Coats (Don’t Rush)
Apply a thin coat of primer first, then your color in thin, even layers. Multiple light coats work much better than one heavy coat. Hold the can about 8-10 inches away from the surface and use steady, sweeping motions.
Don’t hold the spray in one spot – this causes drips and runs. Wait about 30 minutes between coats (check the can for specific instructions).
I usually apply 2-3 light coats of primer and 2-3 light coats of color. The surface should look slightly wet but not dripping. Patience really pays off here – rushing with heavy coats leads to drips, uneven texture, and longer overall drying time.
8. Let Dry Completely — 24 Hours Is Best
Be patient! I wait at least 24 hours before handling the painted pieces, even if they seem dry earlier. Spray paint may feel dry to the touch within an hour, but it continues to cure and harden for much longer. Handling it too soon can leave fingerprints or smudges in the semi-cured paint.
Temperature and humidity significantly affect drying time—cool or humid conditions require even longer drying periods. If possible, let the pieces dry in a dust-free, warm environment. I’ve found that a full 24-48-hour drying period makes a huge difference in the final durability of the finish.
9. Add Topcoat for Extra Durability (optional)
A clear topcoat adds extra protection against wear and tear, especially for frequently used doors. This step is technically optional, but I highly recommend it for doorknobs that get daily use. Use a clear spray designed for metal surfaces. I prefer a satin finish, as it looks more like factory hardware than high gloss.
Apply 2-3 light coats of clear topcoat using the same technique as your color coats. The clear coat creates a barrier that takes the daily abuse instead of your color coat.
This significantly extends the life of your paint job, especially on exterior doors or bathroom/kitchen doors that see heavy use and cleaning.
10. Reinstall and Test if Everything Works Smoothly
Put everything back together and make sure the mechanisms still work properly. Reference your labels and photos from step 2 if you’re unsure about any components. Be careful not to overtighten screws, which can crack fresh paint.
If any moving parts seem sticky, check for paint buildup in pivot points and gently remove it with a small tool.
Test the locking mechanism several times to ensure it operates smoothly. If you have any issues, it’s easier to fix them now than after you’ve reinstalled all your hardware. Once everything is working correctly, step back and admire your handiwork – the transformation can be truly amazing!
For a more detailed and visual guide, look at this YouTube Tutorial by @OriginallyWorn
How Long Does It Last?
When done correctly, spray-painted door knobs can last 2-3 years with normal use. For less-used doors, they might look good for 5+ years. The durability depends on:
- How well you prepped the surface
- Quality of paint used
- Amount of daily handling
- Whether you used a protective topcoat
Pros and Cons of Spray Painting Knobs
Pros:
- Cost-effective: Much cheaper than buying new hardware
- Customizable: You can choose any color you want
- Quick results: The whole project can be done in a weekend
- No special skills needed: Anyone can do this with basic tools
Cons:
- Not permanent: Will eventually show wear with regular use
- Prep work required: Good results need proper preparation
- Potential mess: Spray paint can get on other surfaces if you’re not careful
- May chip: Without proper prep and topcoat, paint can chip over time
Real-Life Tips to Make It Last Longer
I’ve learned a few tricks to make my painted knobs last longer:
- Use quality paint specifically made for metal surfaces
- Don’t skip the primer – it makes a huge difference in adhesion
- Apply at least two clear topcoats on high-traffic doors
- Let each coat dry fully before applying the next
- Avoid cleaning with harsh chemicals after painting
- Consider using a small brush for touch-ups when needed
Extra Tip: Paint Other Hardware, Too
While you’re at it, consider painting other hardware to match:
- Hinges: These are often overlooked but can make a big difference in the overall look
- Door stops: Small details that tie the whole door together
- Window latches: Create a coordinated look throughout the room
- Cabinet pulls: Kitchen and bathroom cabinets can get an instant update
- Light switch plates: These inexpensive items become custom pieces with a coat of paint
Creating a consistent hardware finish throughout a room or your entire home gives a custom, high-end look. The transformation is particularly striking when you change dated brass hardware to modern matte black, brushed nickel, or oil-rubbed bronze finishes. This comprehensive approach makes your DIY project look professional rather than piecemeal.
Conclusion
Spray painting door knobs is a budget-friendly way to refresh your home’s look. I’ve transformed ugly brass knobs into sleek black, brushed nickel, and even copper finishes—all for a fraction of replacement costs. This simple DIY project can be completed in a weekend with amazing results that last for years.
The secret is proper preparation. Don’t skip the cleaning, sanding, or priming steps. Apply multiple thin coats rather than one thick layer. And remember to add that protective topcoat on frequently used doors.
For about $20 in supplies, you can update every door in your home. This is one of the most cost-effective home improvements I’ve done, and the results are truly impressive. Your friends will never believe you didn’t buy brand-new hardware!
Frequently Asked Questions
What Type of Spray Paint Works Best?
Look for spray paint specifically designed for metal surfaces with rust prevention. Brands like Rust-Oleum and Krylon make products specifically for metal that have excellent adhesion and durability.
How Many Cans of Spray Paint Will I Need?
One can usually covers 6-8 door knobs plus their backing plates. I recommend having an extra can on hand, especially if you’re doing multiple colors or need additional coats.
Can I Use This Method on Exterior Door Knobs?
Yes, but make sure to use exterior-grade spray paint and apply an extra topcoat for weather protection. UV-resistant clear coats will prevent fading from sun exposure.
How Do I Fix Paint Drips or Runs?
Wait until the paint is completely dry, then lightly sand the drip with fine sandpaper and apply another light coat. Prevention is best – use thin coats to avoid drips altogether.
Will Painted Knobs Chip Easily?
With proper preparation and application, painted knobs are surprisingly durable. The keys are thorough cleaning, proper sanding, quality primer, and a protective topcoat.