
Have you ever looked at those expensive barstools in furniture stores and thought, “I could make those myself”? Well, you’re right! Building your own barstools is one of the most rewarding weekend projects you can tackle.
When you make your own stools, you get to pick the exact height, style, and finish to match your kitchen or home bar. Plus, you’ll save money compared to buying pre-made options.
There’s something deeply satisfying about sitting on furniture you built with your own two hands. Friends will ask, “Where did you get these?” and you’ll get to smile and say, “I made them.”
In this guide, I’ll walk you through the entire process, from selecting materials to applying the final finish. No fancy woodworking skills needed – just basic tools and a willingness to learn.
By the end of this article, you’ll have everything you need to create sturdy, good-looking bar stools that fit your space perfectly.
Tools and Materials You’ll Need
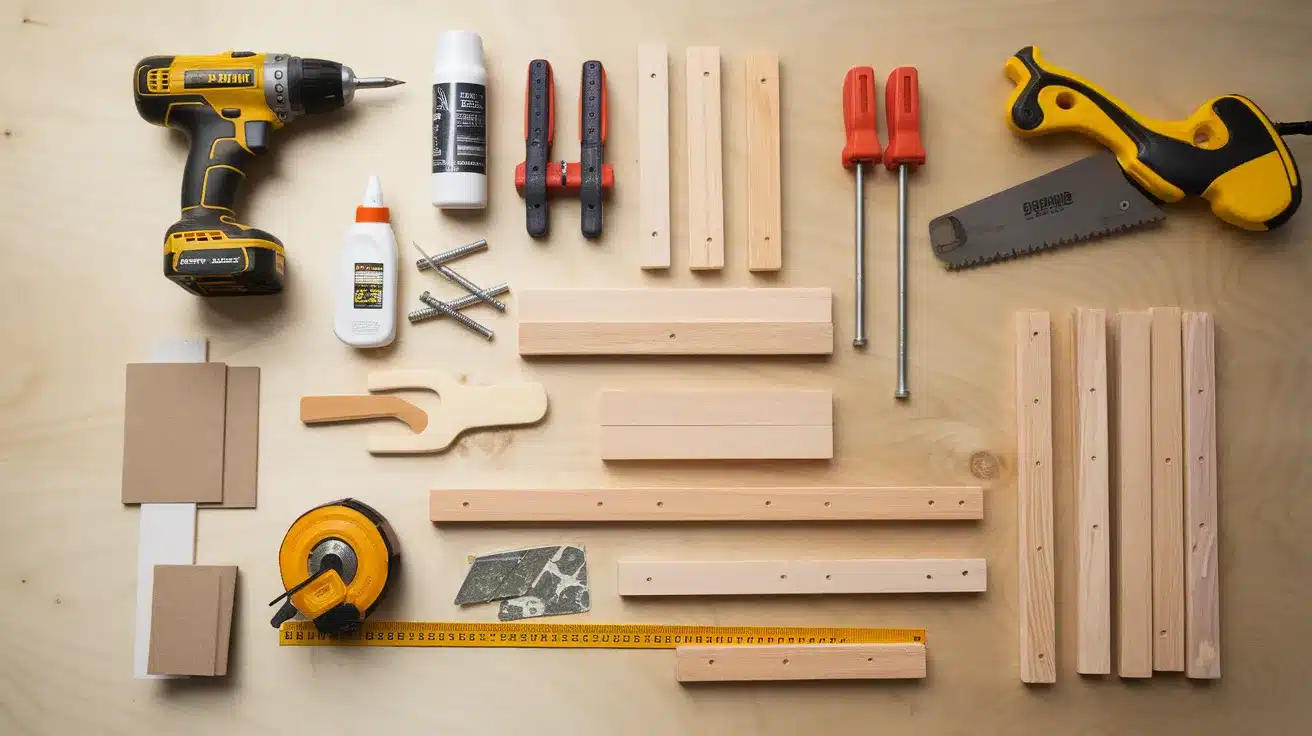
Before we start building, let’s gather everything you’ll need. I’ve kept this list simple – you probably have many of these tools already.
Basic Tools
- Measuring tape
- Pencil
- Safety glasses
- Circular saw or miter saw
- Drill with various bits
- Screwdriver (both Phillips and flat-head)
- Sandpaper (medium and fine grit)
- Level
- Clamps (at least 4)
Materials
- 2×4 lumber for the legs (quantity depends on stool height)
- 1×12 board for the seat
- Wood screws (1½” and 2½”)
- Wood glue
- Wood stain or paint
- Clear polyurethane for sealing
- Footrest material (metal pipe or wooden dowel)
For Cushioned Seats (Optional)
- Foam padding (1-2″ thick)
- Fabric of your choice
- Staple gun and staples
- Scissors
- Spray adhesive
Don’t worry if you’re missing a few items. You can pick these up at any hardware store. Remember to measure twice, cut once! This old saying has saved me from countless mistakes.
Choosing the Right Wood and Style
The wood you pick will define how your stools look and last. I always tell my friends to think about where the stools will go before choosing materials.
Wood Options
- Pine: Budget-friendly, easy to work with
- Oak: Strong, nice grain, takes stain well
- Maple: Hard, smooth, great for painting
- Walnut: Beautiful dark color, more costly
Common Stool Styles
- Backless: Simple and tucks under counters
- With backrest: More comfort for longer sitting
- Swivel seats: Fun but more complex to build
Think about your kitchen’s look. Do you have warm woods or cool metals? Keep your stools in the same family. What finish do you want? Natural wood shows grain, while paint offers endless color options.
Step-by-Step Guide to Building the Bar Stool Frame
Building the frame is the foundation of your stool. Get this right, and the rest falls into place. Let me walk you through each step clearly.
Step 1: Measure and Plan
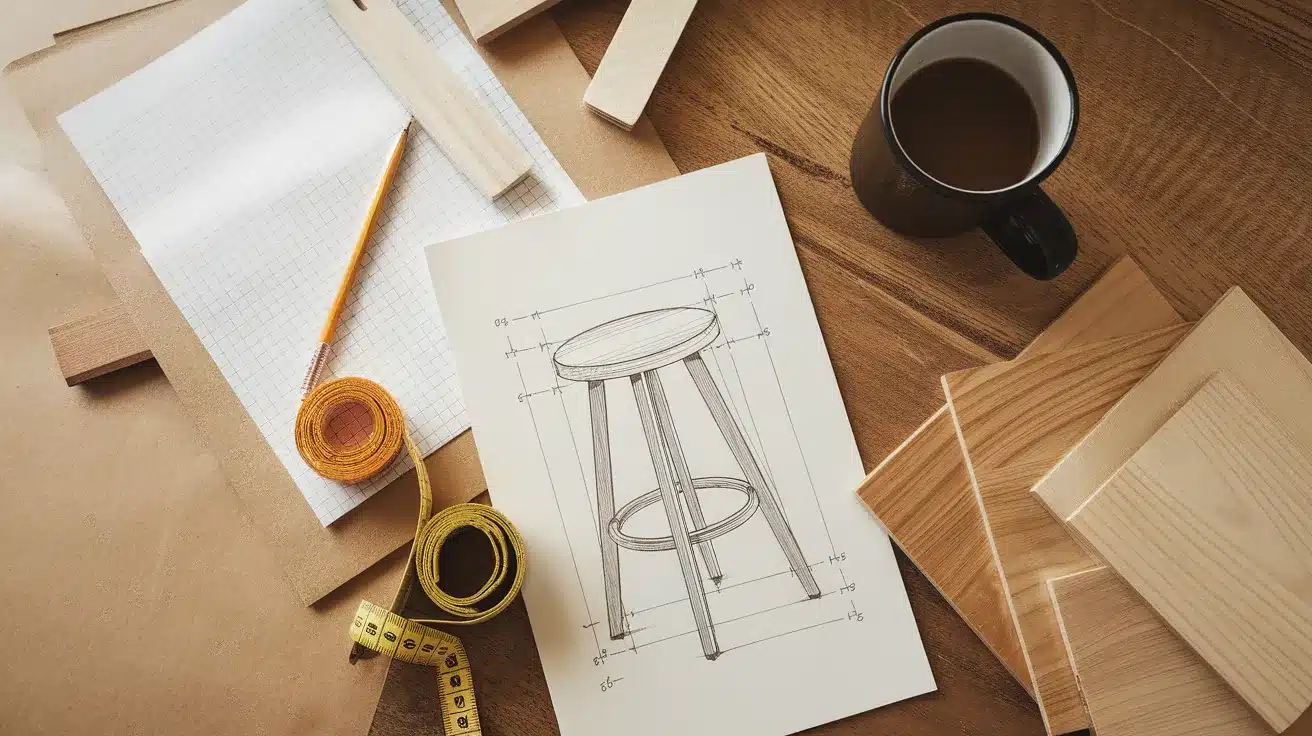
Planning is the foundation of any successful stool project. Start by deciding on the height that works for your needs. For standard 36″ counters, 24″ stools work best. If you have a taller 42″ bar, choose 30″ stools for comfort.
Write down all measurements on paper before cutting any wood. This simple preparation step saves time and materials later. Draw a quick sketch showing the dimensions for the legs, supports, and seat to use as your building guide.
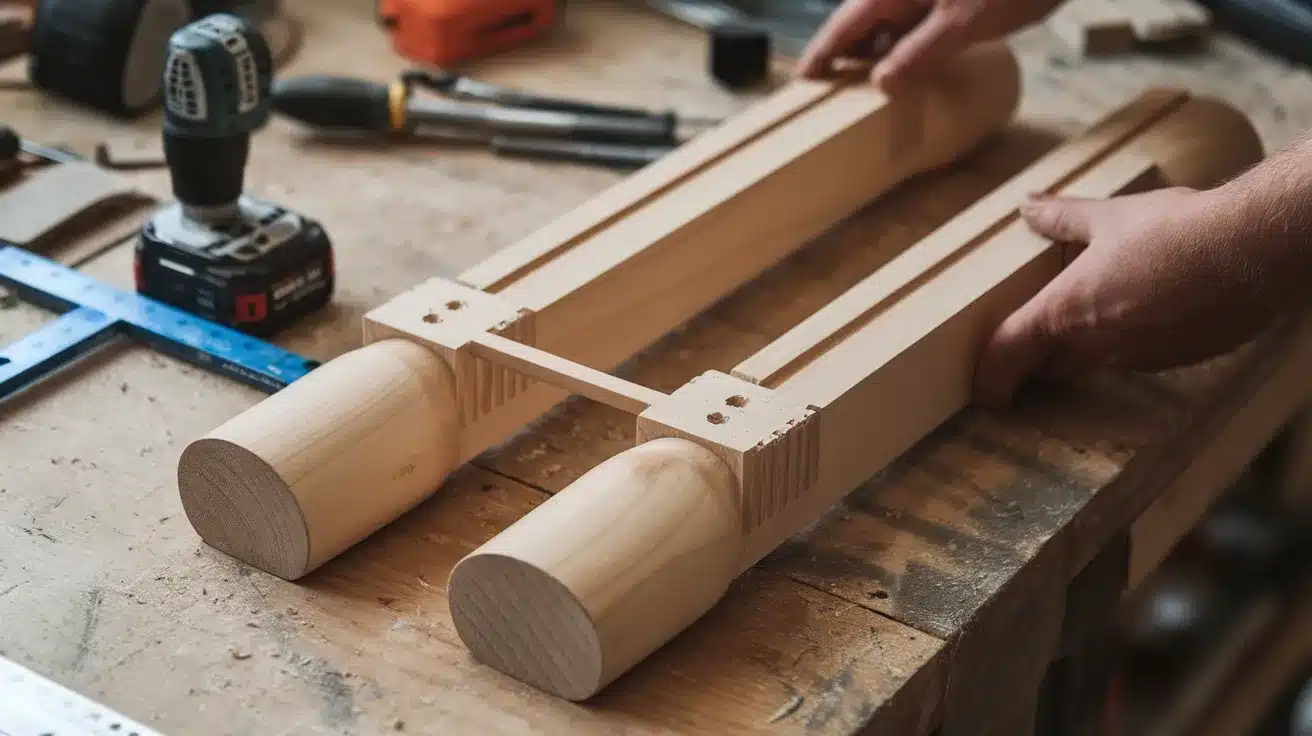
Step 2: Cut the Legs
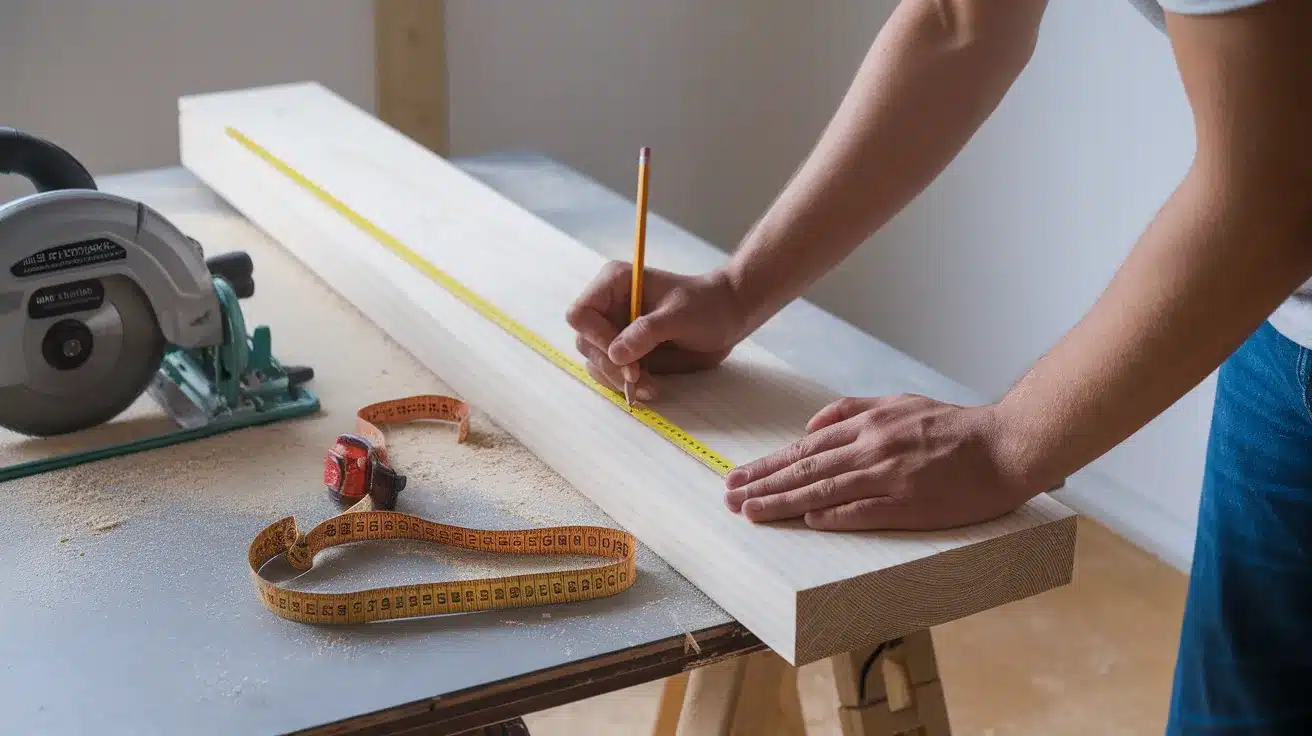
The legs determine the stool’s stability and height. When measuring your 2x4s for the legs, add an extra inch to your planned seat height. This accounts for the thickness of the seat that will sit on top.
Precision matters here – cut all four legs to exactly the same length. Use a stop block on your saw to ensure consistency. Even small differences of 1/8″ can cause annoying wobbling when the stool is finished.
Step 3: Cut Support Pieces
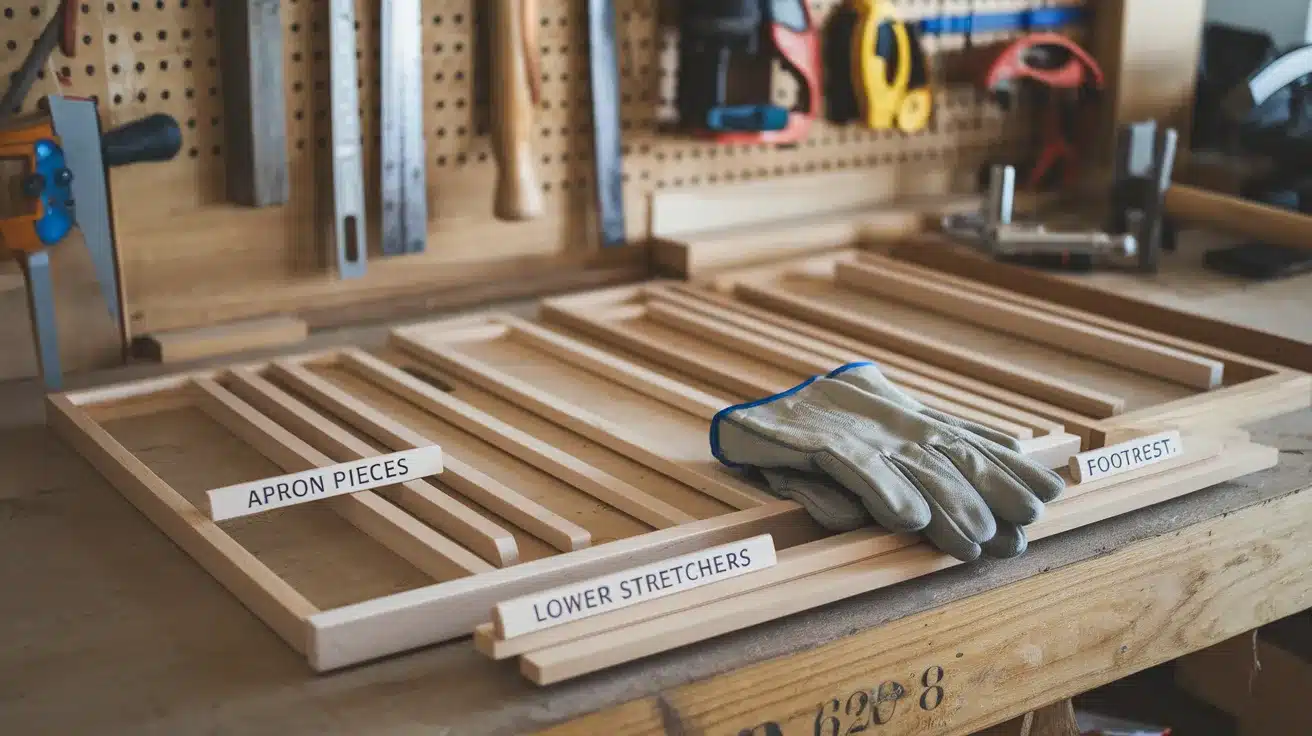
For each stool, prepare the following support pieces like 4 apron pieces that will connect the legs just under the seat, 4 lower stretchers to join the legs near the bottom for stability and 1 footrest piece for comfort.
Measure twice and cut once. Label each piece as you cut it to avoid confusion during assembly.
Step 4: Assemble the Legs and Apron
Begin assembly by laying two legs parallel, approximately 14″ apart. Position the apron pieces between the legs at the top, where they’ll support the seat.
Apply wood glue to all joining surfaces before securing them with hardware. Pre-drill holes through the apron into the legs to prevent the wood from splitting.
Secure the joints with 2½” screws. Before the glue sets, check that your corners form perfect 90-degree angles using a square tool.
Step 5: Add the Lower Stretchers
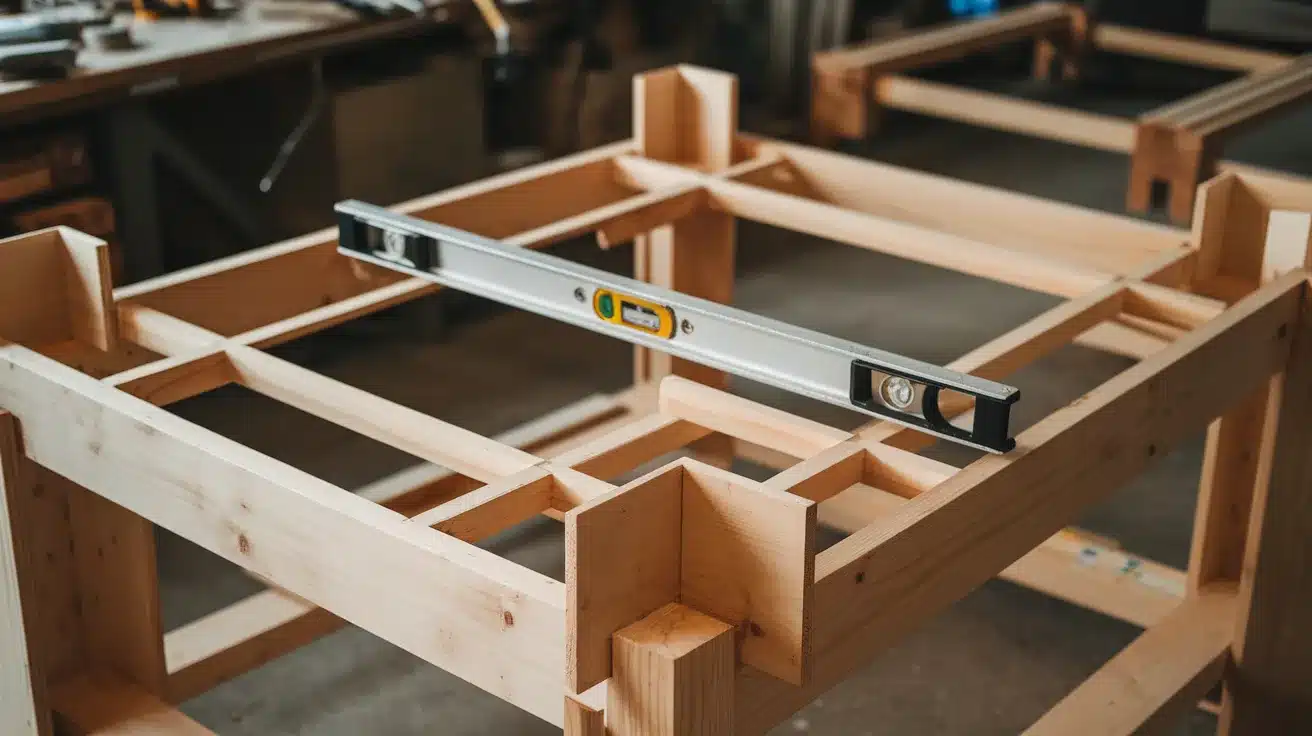
Connect the remaining two legs using the same method as in Step 4. Then, join both leg sets together using the lower stretchers.
These lower support pieces are essential for stool stability. Without proper bracing near the floor, the stool will feel unsafe when someone sits on it.
Step 6: Install the Footrest
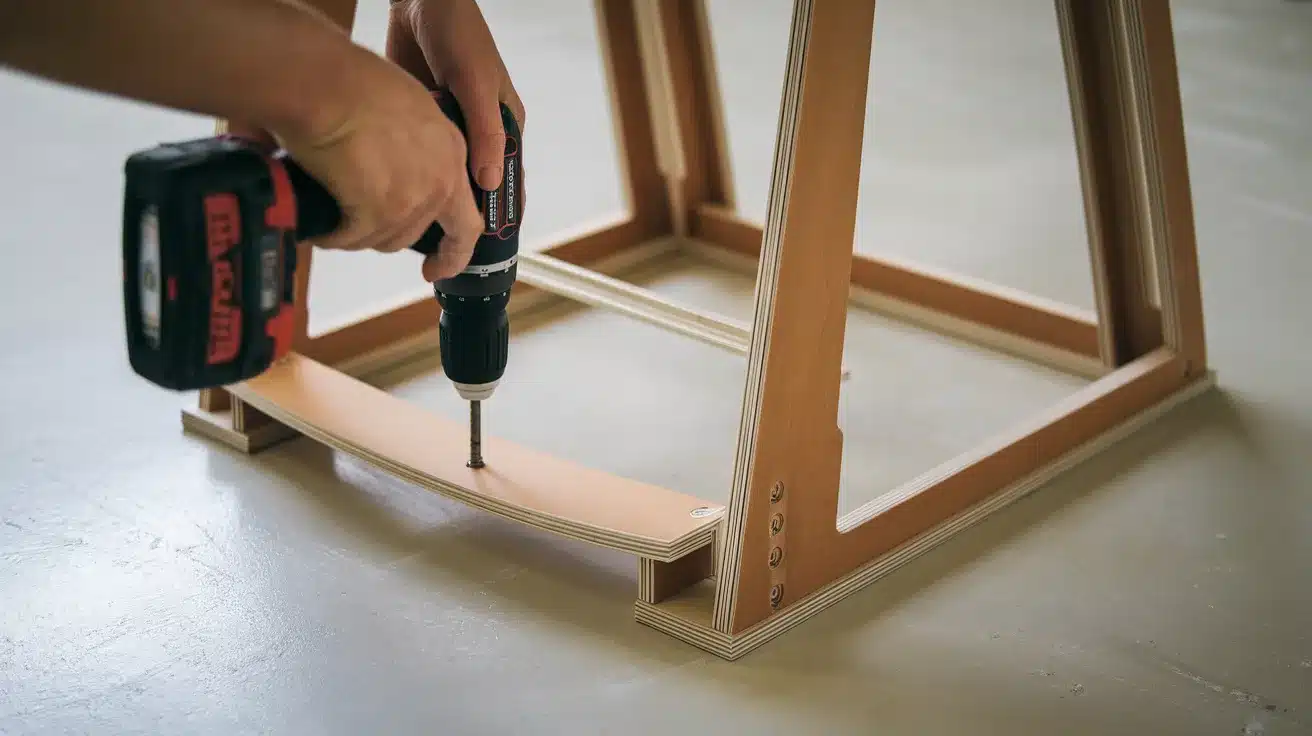
The footrest adds both comfort and structural strength. Position it approximately 7″ from the floor, which is the most comfortable height for most people.
Attach the footrest using screws driven from the inside of the frame so they remain hidden.
Before adding the seat, place your stool frame on a flat surface to check for wobbling. If it doesn’t sit evenly, sand the longer leg(s) until the frame rests perfectly flat on the floor.
Adding a Seat: Wood, Upholstery, or Cushion Options
Once your barstool frame is built, it’s time to decide on the seat. You’ve got a few great choices: wood, upholstered, or cushioned. Each one gives a different vibe and level of comfort.
1. Choosing Your Seat Type
The seat is where you get to put your personal touch on the stool. I’ve made dozens of stools with different seat types, and each has its benefits.
Wood seats look clean and last forever but can be hard during long sits. Cushioned seats add comfort but need more care over time. Upholstered options bring color and softness to your space.
2. Wood Seat Option
A solid wood seat is the simplest option. Cut a 1×12 board into a 14″ square or 14″ circle using a jigsaw. Sand the edges smooth, especially if you’re making a round seat. Round over the edges with sandpaper for comfort.
To attach a wood seat, flip both the frame and seat upside down. Center the seat on the frame. Pre-drill holes through the apron into the seat, then drive 1½” screws to secure it. I like to countersink these screws so they sit below the surface.
3. Cushioned Seat Option
For a cushioned seat, start with a wood base as described above. Cut foam to the same size as your wood seat. Spray adhesive helps keep the foam in place during the next steps.
Cut your fabric about 4″ larger than your seat on all sides. Place the fabric face-down, then the foam, then the wood seat (bottom up). Pull the fabric tight and staple it to the underside of the wood, working from the middle of each side outward.
Fold the corners neatly, like wrapping a present, before stapling them. This gives you a clean finish with no bunching.
4. Attaching Your Finished Seat
Regardless of which seat type you choose, the attachment method is similar. Place the seat centered on your frame. Mark where the screws will go, then pre-drill holes to prevent splitting.
For upholstered seats, I use longer screws (2″) and drive them from underneath the apron up into the seat base. This hides all hardware for a cleaner look.
5. Final Adjustments
Once your seat is attached, sit on the stool to test it. Does it feel wobbly? Tighten any loose screws. Is the seat comfortable? You can always add a thin cushion later if a wooden seat feels too hard.
For stools that will be used daily, check all connections after a few weeks of use. Sometimes wood shrinks slightly, causing screws to loosen.
Finishing Touches: Sanding, Staining, or Painting
Finishing your stool makes all the difference. This is where your hard work really shines. Let me show you how to get that smooth, professional-looking finish.
Sanding For Smoothness
Start by sanding all surfaces with medium-grit (120) sandpaper. This removes any rough spots or splinters. Next, switch to fine-grit (220) sandpaper for a silky-smooth finish. Always sand in the direction of the wood grain to avoid scratches.
Pay extra attention to:
- Edges that might touch skin
- The top of the seat
- Any areas with dried glue spots
Wipe away all dust with a damp cloth when done. I like to let the wood dry completely before moving to the next step.
Staining Options
If you want to bring out the natural beauty of the wood, staining is your best bet. Here’s my simple process:
- Apply wood conditioner first (especially for pine)
- Use a clean rag to apply stain in even strokes
- Wait 5-15 minutes (check the can instructions)
- Wipe off excess stain with a clean cloth
- Let dry for 24 hours
Try testing your stain on scrap wood first. The color often looks different once applied!
Painting Process
Paint gives you endless color options. For best results:
- Apply a wood primer first
- Let it dry completely
- Sand lightly with 220-grit sandpaper
- Apply the first coat of paint
- Let dry
- Apply a second coat for even coverage
Thin coats work better than one thick coat. They dry faster and don’t drip as much.
Sealing For Protection
Sealing your stool protects all your hard work. Whether you’ve stained or painted it, a clear topcoat adds years to its life.
Apply 2-3 coats of polyurethane with a foam brush. Let each coat dry fully, then lightly sand between coats with very fine sandpaper (320 grit).
The final coat should be left unsanded for maximum shine and protection.
Let your finished stools dry for at least 48 hours before using them. This gives the finishes time to fully harden.
Unique Designs for DIY Bar Stools
When making your barstools, you have the chance to create something that fits your space perfectly. Let’s see some design ideas that can make your stools stand out:
1. Farmhouse Style with X-Brace
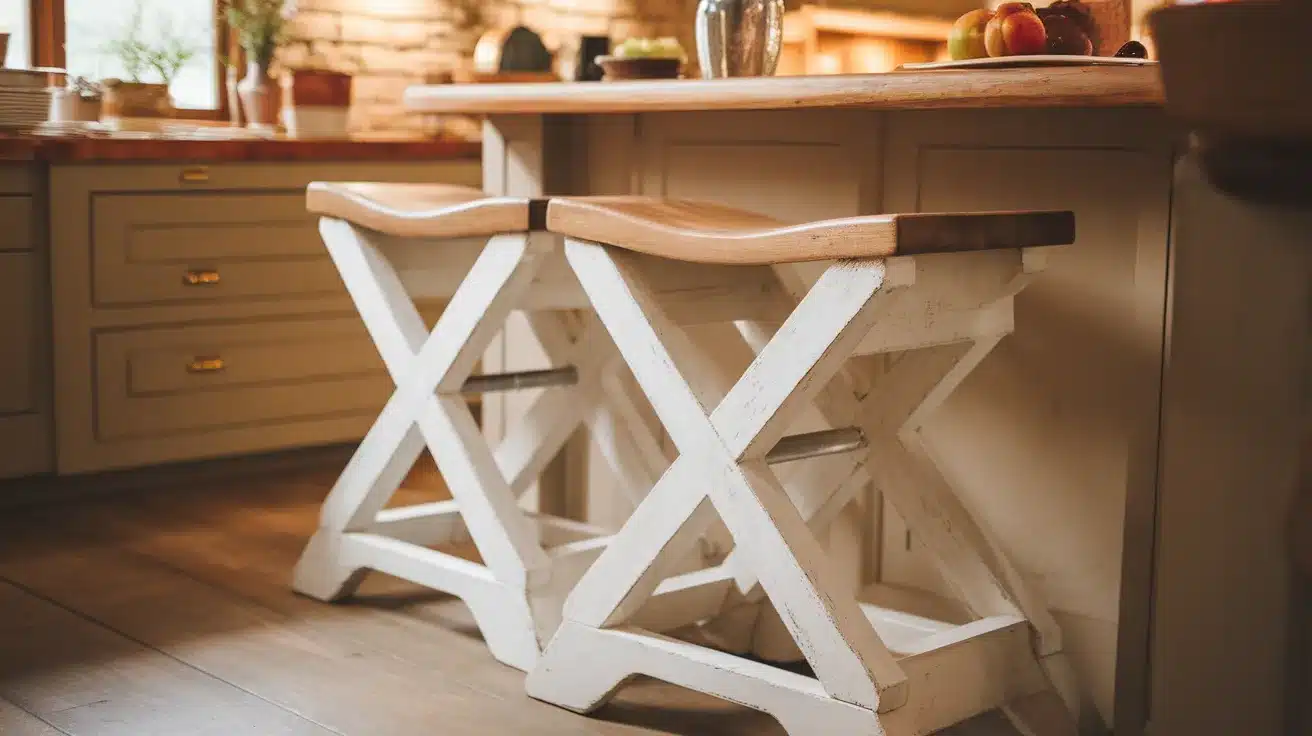
I built these for my sister’s kitchen, and they became the center of attention. The classic X-shaped braces between the legs give these stools that warm, country feel while adding extra stability. The slightly distressed white paint on the legs contrasts beautifully with the natural wood seat.
Unique features:
- X-braces between legs for added strength
- Two-tone finish (painted legs with natural wood seat)
- Slightly distressed edges for character
- Wider than standard seat for comfort
2. Industrial Pipe and Wood Combo

This design combines rugged steel pipes with warm wood for a look that fits perfectly in modern apartments. I used black iron pipe fittings for the footrest and base supports. These parts come ready to assemble from hardware stores, making this an easier build than it looks.
Unique features:
- Metal pipe footrests that wrap around all sides
- Reclaimed wood seat for character
- Exposed hardware as a design element
- Can be made adjustable with the right pipe fittings
3. Mid-Century Modern Angled Legs
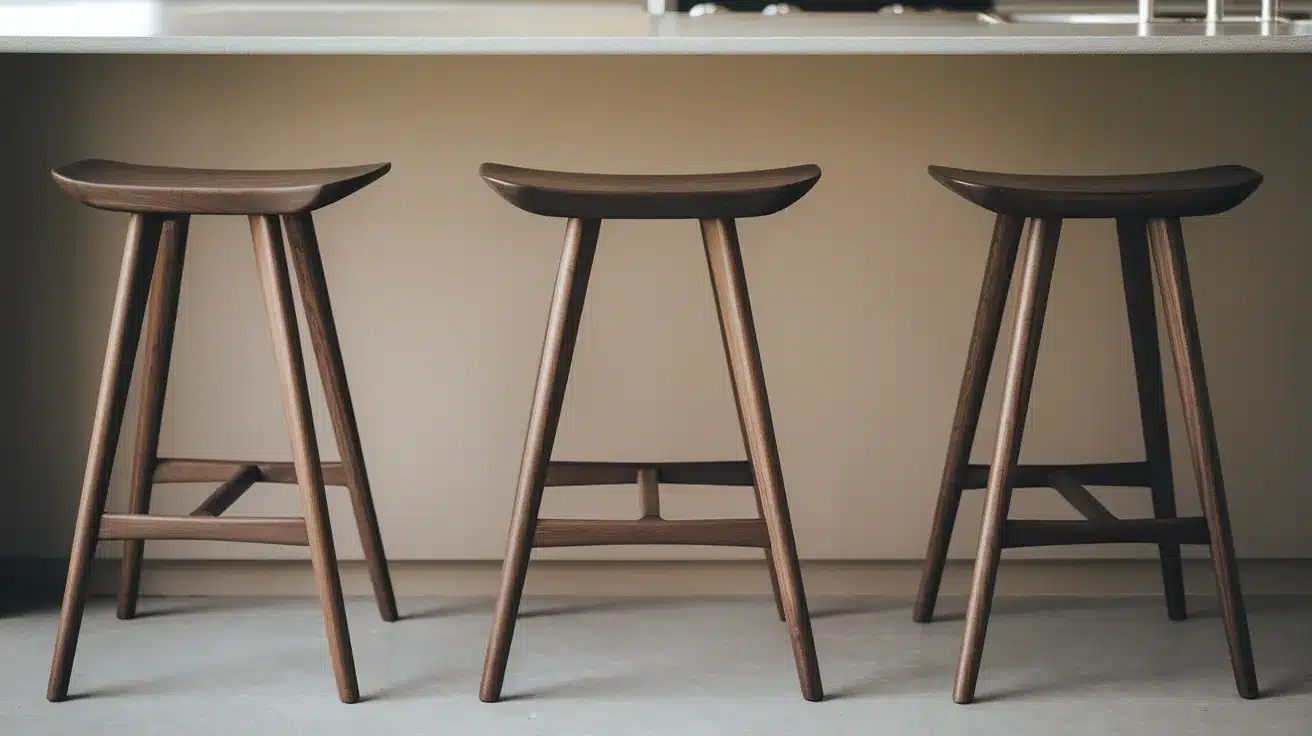
These stools have legs that angle outward slightly, giving them that classic mid-century look. I used walnut for these, but any darker wood works well. The clean lines and minimal design make these perfect for contemporary spaces.
Unique features:
- Legs that angle out at 15 degrees
- Rounded triangular seat shape
- Hidden screws for clean lines
- Optional thin cushion attached with velcro strips
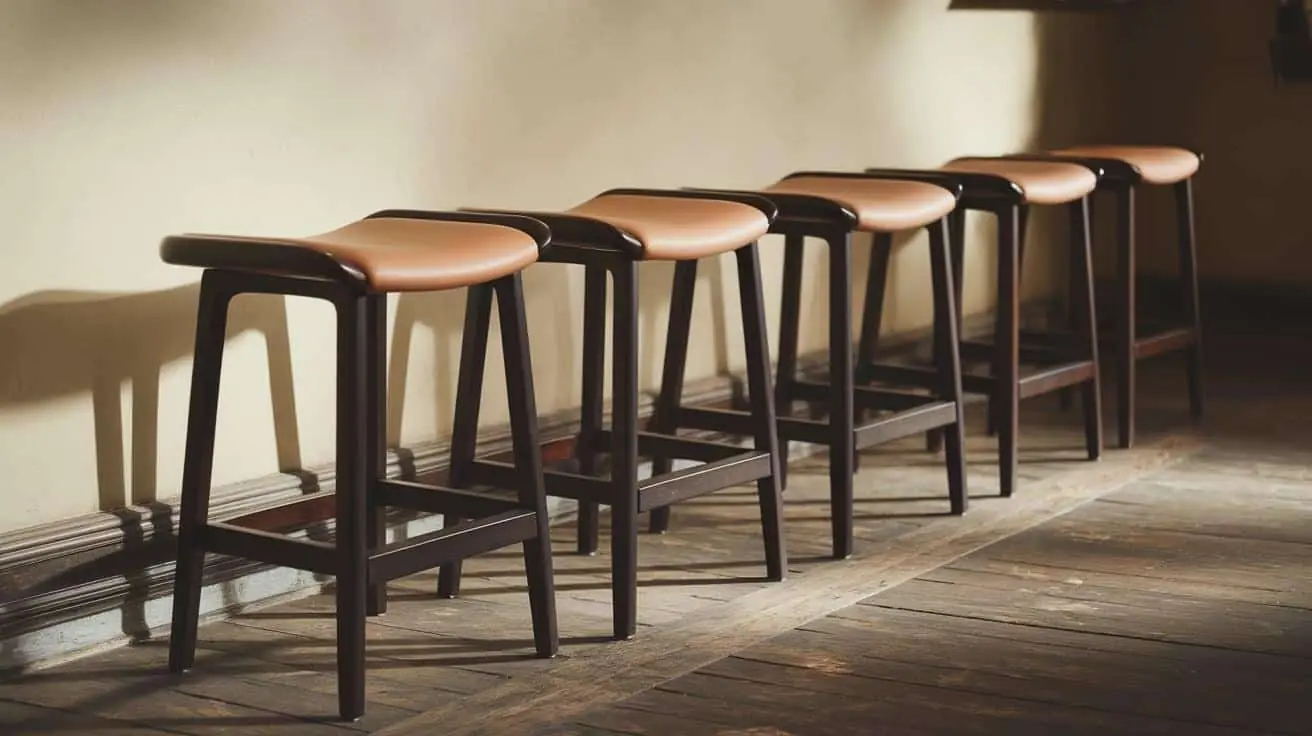
4. Swivel Seat with Backrest

Adding a swivel mechanism and backrest transforms a basic stool into something much more functional. I bought the swivel hardware online and attached it between the seat and frame. This design takes more time but creates stools that guests fight over at gatherings.
Unique features:
- 360-degree swivel seat
- Curved backrest for comfort
- Padded seat with faux leather upholstery
- Higher-quality hardware requirements
5. Stackable Minimalist Design
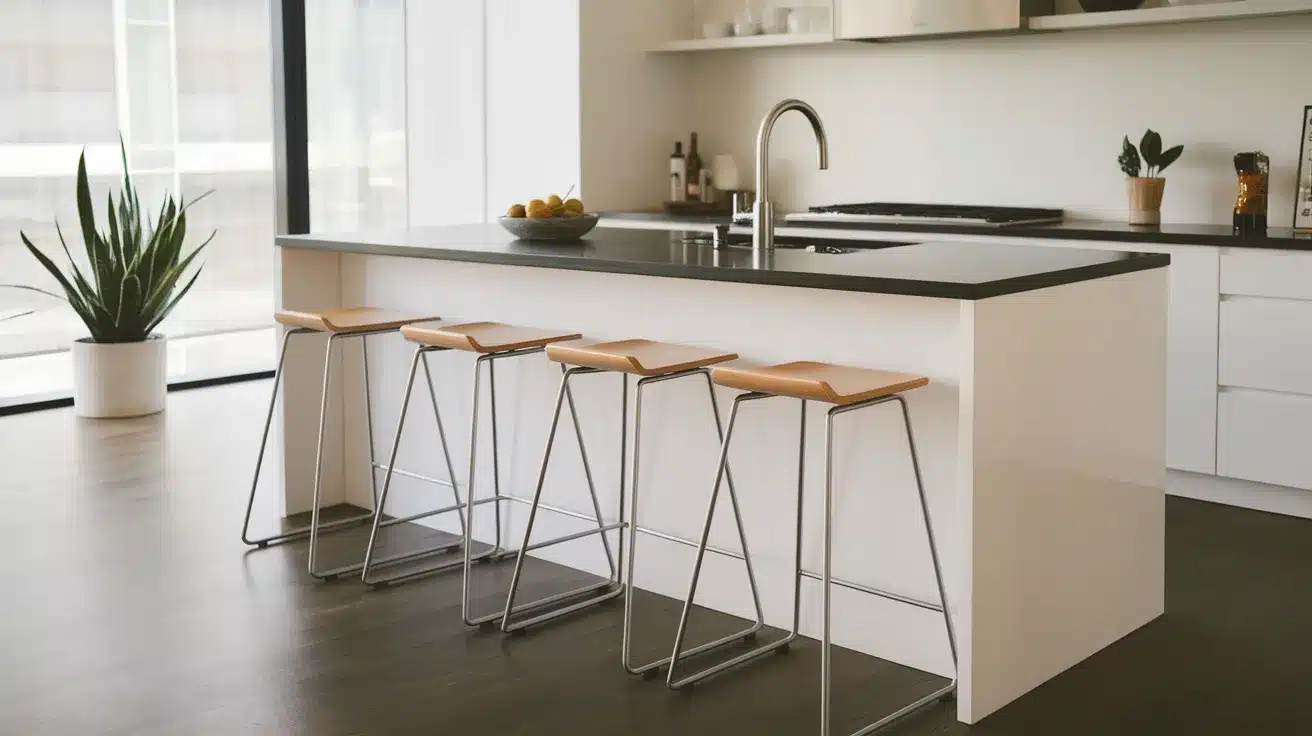
Sometimes, you need to save space when stools aren’t in use. These stackable stools solve that problem with their clever design. I created them with slightly tapered legs and a thinner seat profile that allows them to nest together.
Unique features:
- Nesting capability saves storage space
- Ultra-clean lines with no visible hardware
- Lightweight design makes them easy to move
- Special joinery techniques for strength without bulk
Troubleshooting Common DIY Bar Stool Mistakes
Even the most careful builders run into problems. I’ve made pretty much every mistake possible while building stools over the years. Let’s see how to fix the most common issues that might pop up during your project.
1. Wobbly Stool Syndrome
Wobbling is the most common problem with homemade stools. If your stool rocks back and forth, check if all legs are exactly the same length. Place the stool on a flat surface and look for gaps under the legs. Mark the longer legs and sand them down gradually until all four touch the ground evenly.
If the wobble comes from loose joints, disassemble the loose section. Clean off old glue, apply fresh wood glue, and clamp tightly. Add a small screw at a different angle for extra strength. I once saved a seriously wobbly stool by adding corner brackets on the inside of the joints where they wouldn’t be seen.
2. Misaligned Parts
When pieces don’t line up correctly, it can make your stool look homemade in the wrong way. For seats that aren’t centered, loosen the screws, adjust the position, and retighten. If the legs aren’t parallel, you might need to use a speed square to check the angles and make adjustments.
Remember that wood can shift slightly as humidity changes. Leave a tiny bit of wiggle room in your joints rather than forcing pieces together. I’ve learned that using clamps to hold everything in perfect alignment while the glue dries makes a huge difference in the final look.
3. Uncomfortable Seating
An uncomfortable stool defeats its purpose, no matter how good it looks. If your wood seat feels too hard, you don’t need to start over. Simply add a removable cushion with ties or velcro. For seats that are too small, consider making a larger top piece that overlaps the existing seat.
The height might also be off. The standard bar height is 30″ from floor to seat top, while counter height is 24″. If your stool is too tall, you can cut down the legs. If it’s too short, adding furniture glides or feet to the bottom can add an inch or two of height without rebuilding.
4. Finishing Flaws
Blotchy stains or dripping paint can ruin the look of your stool. For a blotchy stain, sand it all off and start over with wood conditioner first. For drips in paint or polyurethane, let it dry completely, sand smooth, and apply a fresh coat more thinly.
If the finish feels rough, it’s usually dust that settled during drying. Sand lightly with very fine sandpaper (320 grit or higher), wipe with a tack cloth, and apply one final, thin coat of finish in a dust-free area. I close off the room and wait an hour after cleaning before applying the final finishes.
5. Structural Weakness
If your stool feels weak or flexes when someone sits on it, you need to add support. Cross braces between the legs make a huge difference in stability. You can add these even after the stool is built. For seats that flex, add a support piece underneath running across the grain of the seat board.
Don’t ignore creaking sounds – they usually signal loose joints that will get worse over time. Tighten all screws and reinforce with glue where possible. One trick I use is placing a small shim in wobbly joints, secured with wood glue, then clamped until dry.
Conclusion
Building your own barstools is truly satisfying. There’s something special about creating furniture that becomes part of daily life in your home.
Don’t worry if your first stool isn’t perfect. Each one you build will be better than the last. I still use the first wobbly stool I ever made – imperfections and all.
The best part? You now have stools that fit your space exactly at a fraction of store-bought prices. Plus, you’ve learned skills you can use for countless other projects.
I’d love to see what you create! In the comments below, share photos of your finished stools and tell me about any clever tweaks you made to the design.
Happy building, and enjoy those custom stools for years to come!