
The Honda Maintenance Minder System is a smart feature that helps Honda owners keep track of their vehicle’s maintenance needs.
Monitoring various aspects of your car’s performance provides timely reminders for necessary maintenance tasks.
This system is important because it tailors maintenance schedules to your driving habits and conditions, ensuring your Honda receives care when needed.
Regular maintenance prevents costly repairs, improves reliability, enhances safety, and contributes to better fuel economy.
The Maintenance Minder System makes it easy for owners to stay on top of their vehicle’s maintenance requirements.
In this guide, we’ll provide step-by-step instructions on interpreting and resetting the system’s codes, empowering Honda owners to maintain their vehicles confidently.
Decoding the Honda Maintenance Codes
Understanding the Honda Maintenance Minder System codes is essential for keeping your vehicle in optimal condition.
The system displays two types of codes: main codes (A and B) and sub-codes (1-7), which provide detailed information about the maintenance tasks required.
Main codes
- Code A indicates that your Honda requires an oil change, typically when the engine oil life drops below 15%. This crucial maintenance task helps keep your engine lubricated and running smoothly.
- Code B means that your vehicle needs an oil change and other important maintenance tasks such as tire rotation, air filter replacement, or brake fluid inspection. These tasks help ensure your Honda’s overall performance and safety.
Sub-codes provide more specific details on the maintenance required, below we have detailed all the seven codes, what are their relevance, and why is it important for you to know.
- Rotate tires and check tire inflation and tread condition: This helps extend the life of your tires and ensures even wear.
- Replace air cleaner element, dust, and pollen filter; inspect drive belt: These tasks help maintain optimal engine performance and cabin air quality.
- Change automatic transmission fluid (use Honda ATF DW-1): Regular transmission fluid changes help prevent costly transmission repairs.
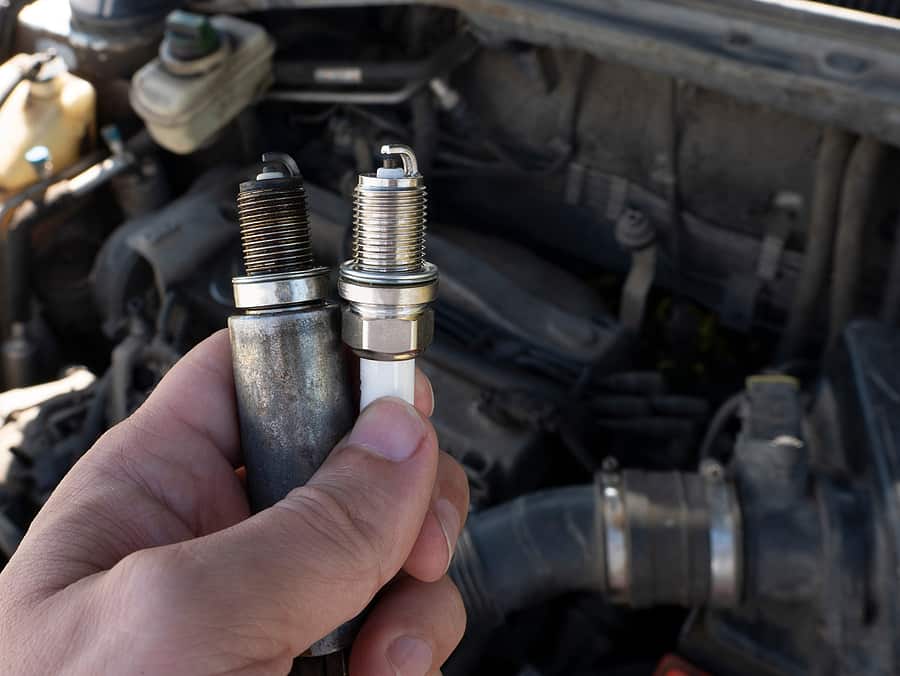
- Replace spark plugs and inspect valve clearance and timing belt if equipped: These tasks are critical for maintaining engine performance and efficiency.
- Replace engine coolant (use Honda-recommended coolant): Regularly replacing coolant helps prevent engine overheating and corrosion.
- Change rear differential fluid (AWD models only): This task is important for maintaining the health of your Honda’s all-wheel-drive system.
- Replace brake fluid: Changing the brake fluid at recommended intervals helps ensure your braking system’s performance and safety.
When a main code appears, it’s accompanied by one or more sub-codes indicating the exact services needed.
For example, “A1” means your Honda needs an oil change (Code A) and tire rotation (Sub-code 1).
“B124” indicates an oil change, tire rotation, air filter replacement, and spark plug replacement are due.
It is also pertinent to note that regular maintenance based on these codes is crucial for several reasons; here are a few of them:
- Ensures your Honda receives timely care to maintain optimal performance, preventing breakdowns and extending its lifespan
- Prevents costly repairs by addressing issues proactively, saving you money in the long run
- It improves vehicle reliability, safety, and fuel economy and reduces emissions, giving you peace of mind on the road
- Helps your Honda run smoothly and efficiently for many miles, ensuring you get the most value out of your investment
By familiarizing yourself with the Maintenance Minder codes and promptly addressing the maintenance tasks they indicate, you can take great care of your Honda and enjoy all the benefits of a well-maintained vehicle.
The codes make it easy to know exactly what services your car needs to stay in top condition, eliminating guesswork in vehicle maintenance.
Regularly following the Maintenance Minder System’s recommendations keeps your Honda running at its best and demonstrates responsible vehicle ownership.
By staying on top of these maintenance tasks, you’ll be able to confidently drive your Honda, knowing that you’re doing your part to keep it in optimal condition for years to come.
Honda Oil Life Percentages Explained
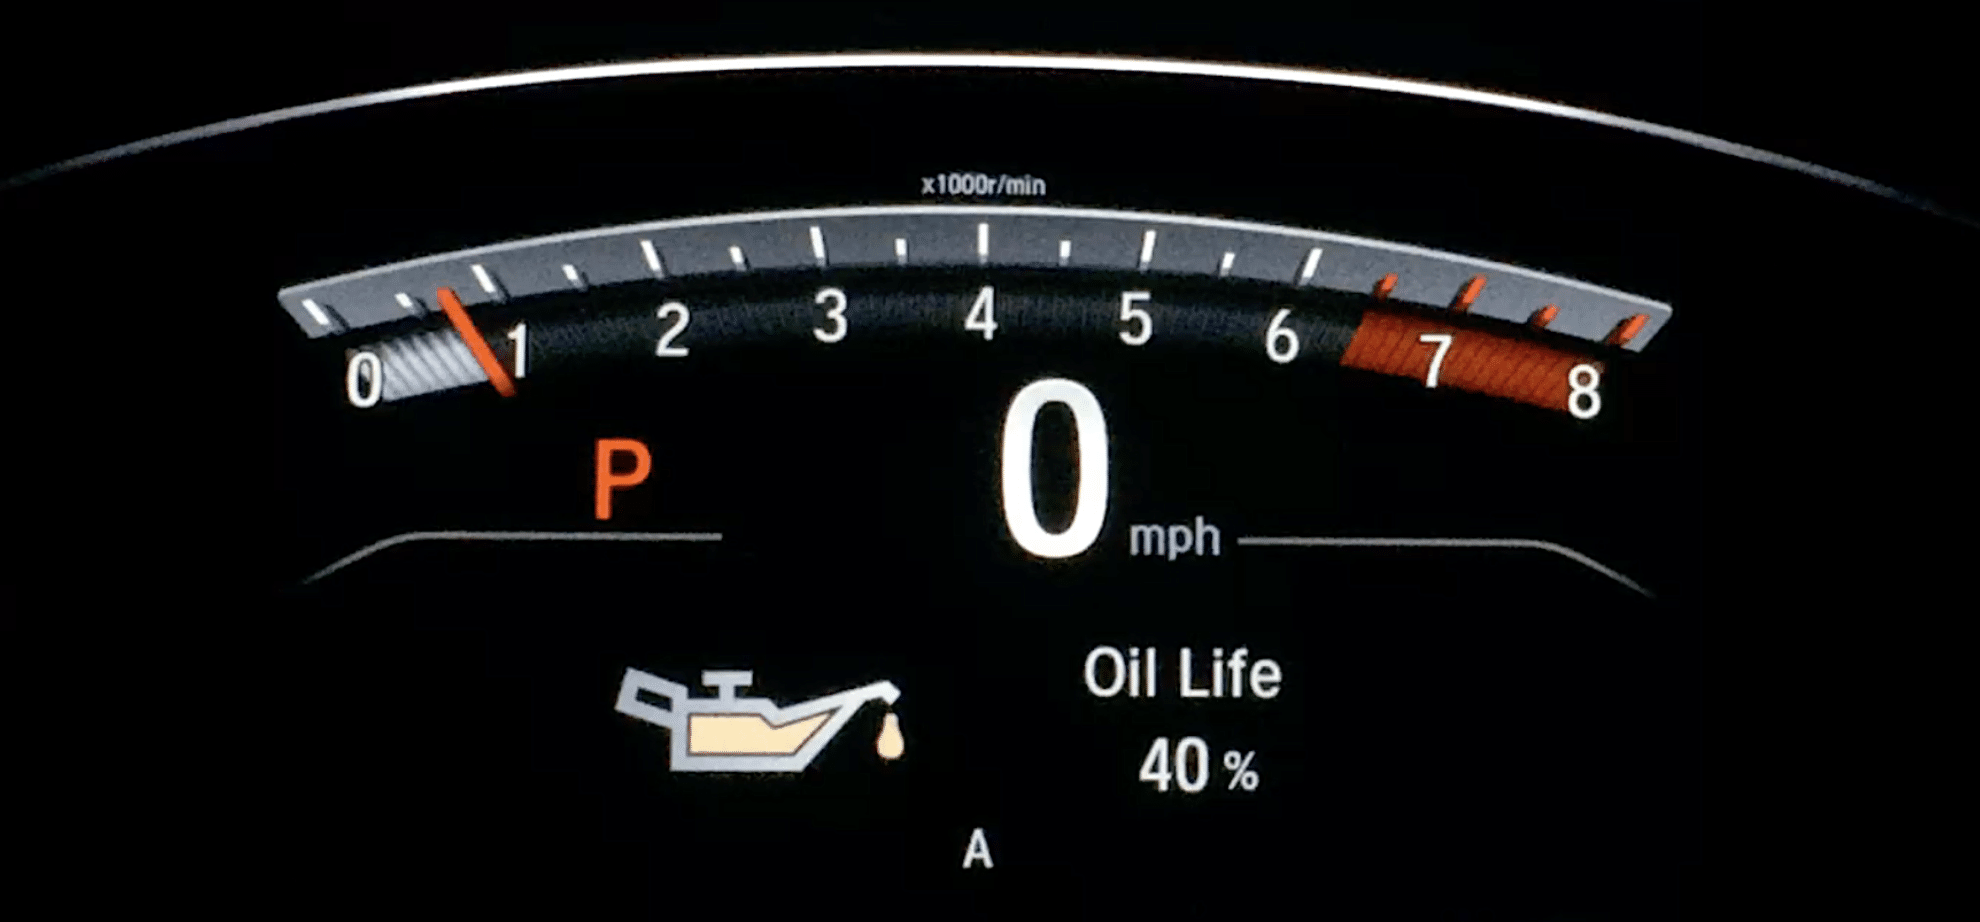
The Honda Maintenance Minder system continuously monitors your vehicle’s oil life, displaying it as a percentage that ranges from 100% (fresh oil) to 0% (oil life-depleted).
This intelligent system helps you keep track of when an oil change is due based on your driving habits and conditions.
As the oil life percentage decreases, the system provides key insights and recommendations:
- At 15% oil life, the Maintenance Minder suggests that service will be due soon. This is a good time to schedule an appointment with your mechanic or prepare for a DIY oil change.
- When the oil life reaches 5%, the system indicates that service is due immediately. If you haven’t already, make arrangements to have your vehicle serviced promptly.
- Once the oil life hits 0%, the Maintenance Minder alerts you that the service is past due. At this point, you should not delay the oil change any further, as running your vehicle with severely degraded oil can lead to engine damage.
By monitoring the oil life percentages and following Maintenance Minder’s recommendations, you can ensure that your Honda receives timely oil changes, promoting optimal engine performance and longevity.
Step-by-Step Guide to Resetting Honda Maintenance Codes
It is important for you to take note of the steps involved in resetting Honda maintenance codes.
This helps you to monitor essential aspects all by yourself without having you to care much about any grave consequences.
Follow along to take a dive into the detailed step-by-step guide to resetting the Maintenance Codes:
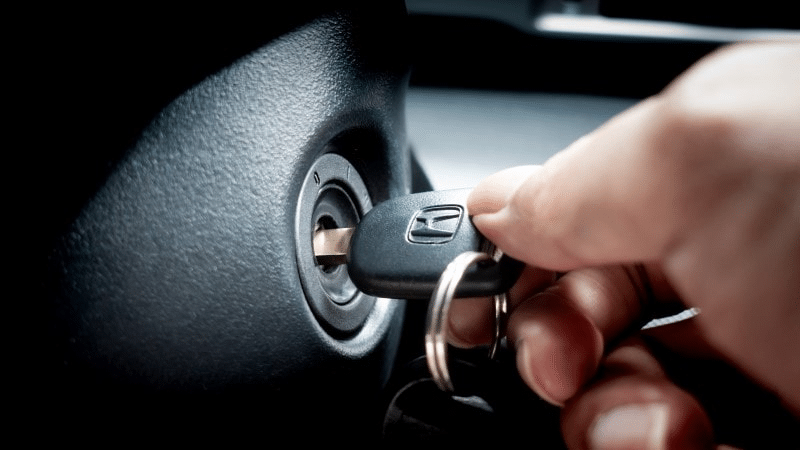
Step 1: Turn on the Ignition
- Locate your vehicle’s ignition and insert the key. Turn the key to the “ON” position, which is typically the second position just before the engine starts. You should hear a chime, and the vehicle’s electrical systems will power up, illuminating the dashboard lights.
- It’s important not to start the engine during this process, as you only need the electrical systems to be active.
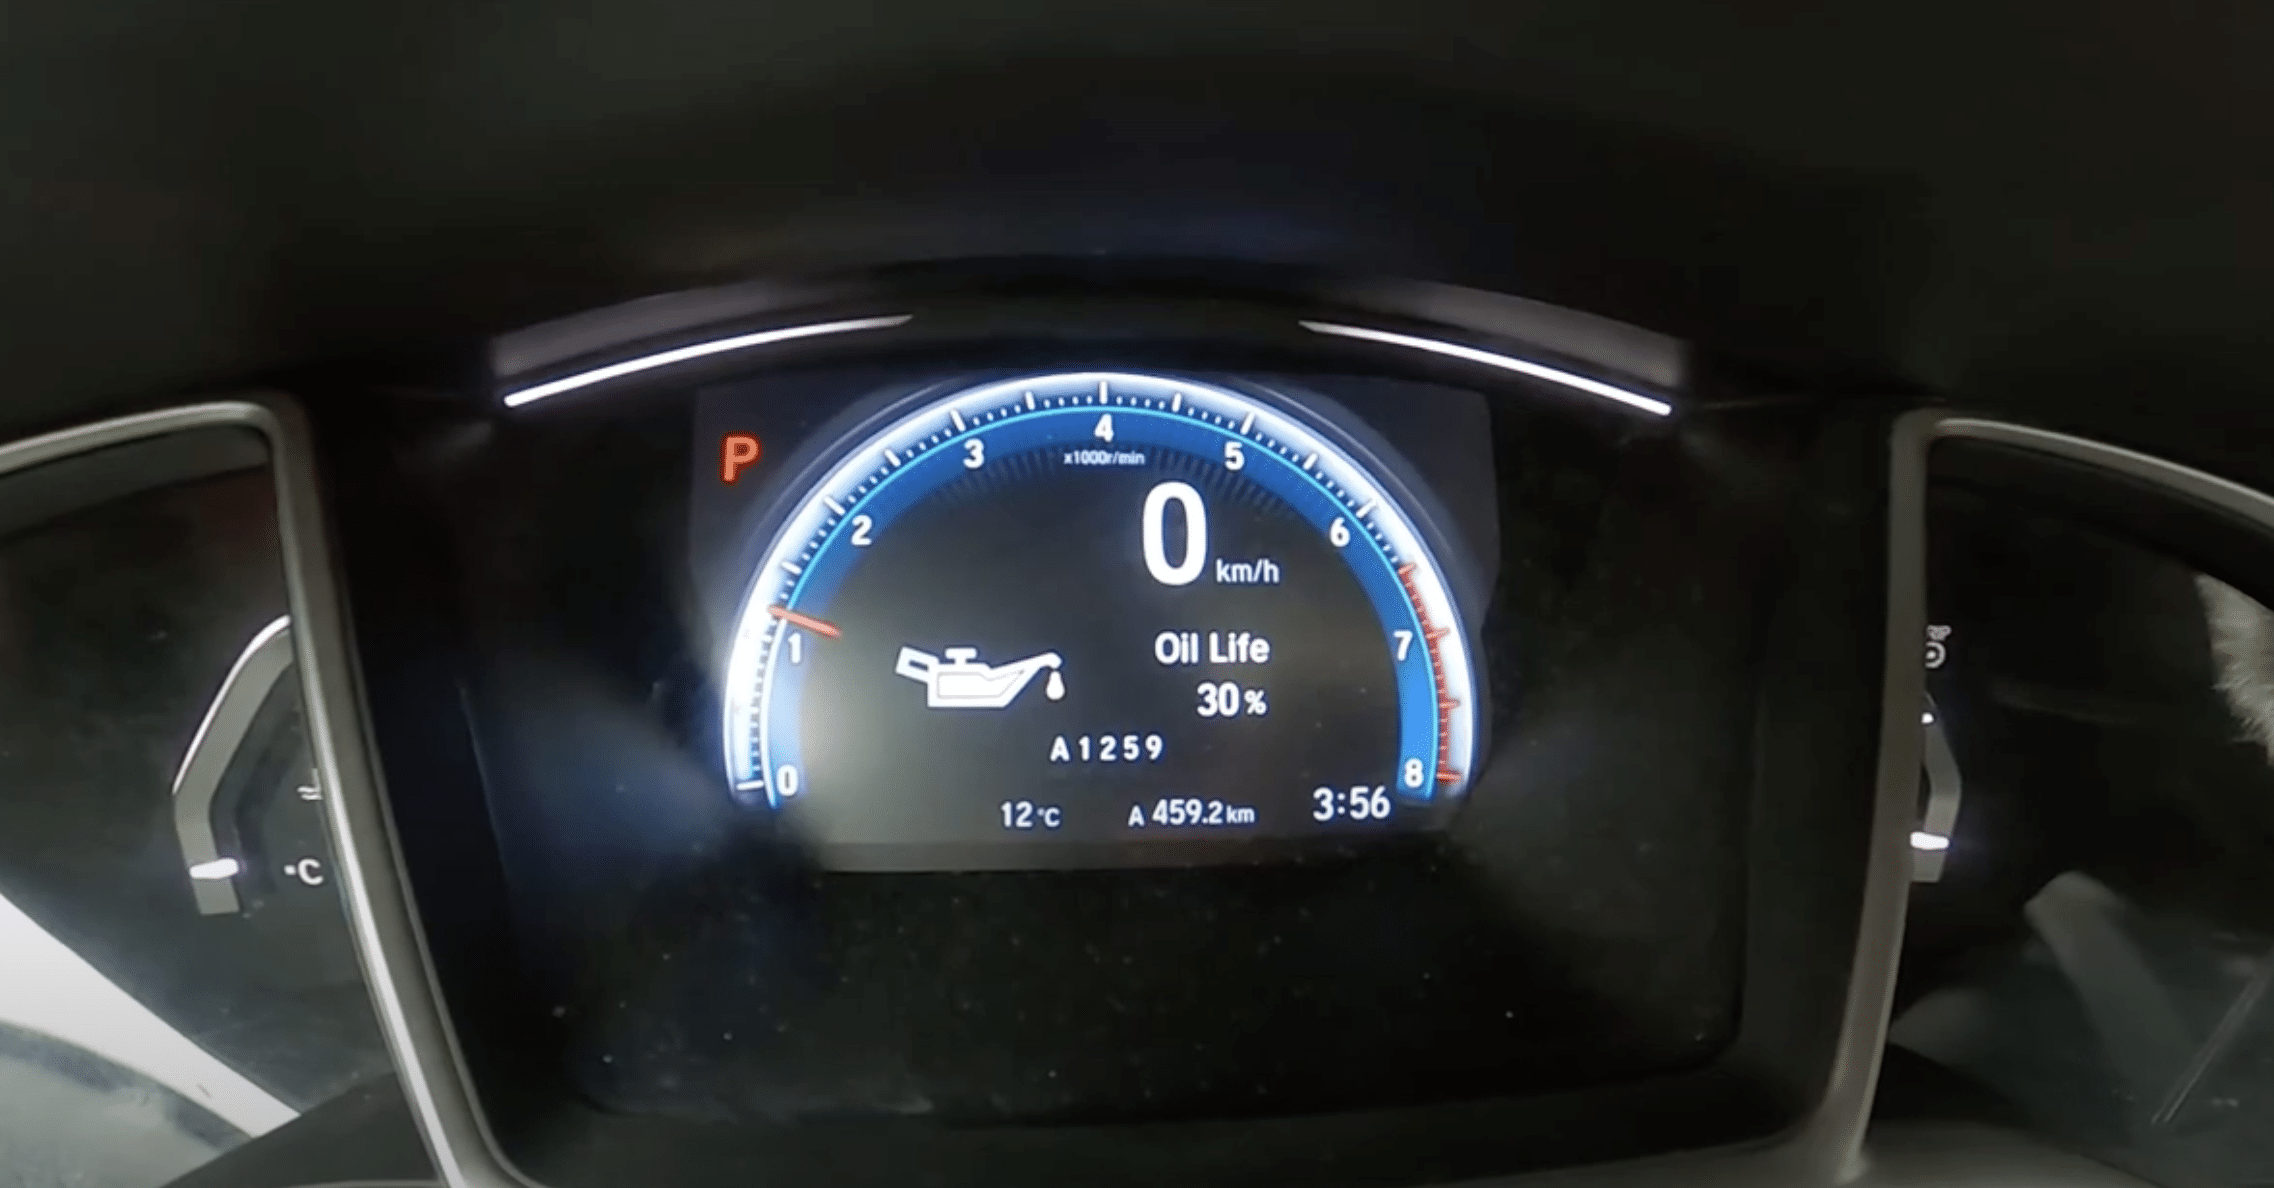
Step 2: Navigate to the Maintenance Minder Screen

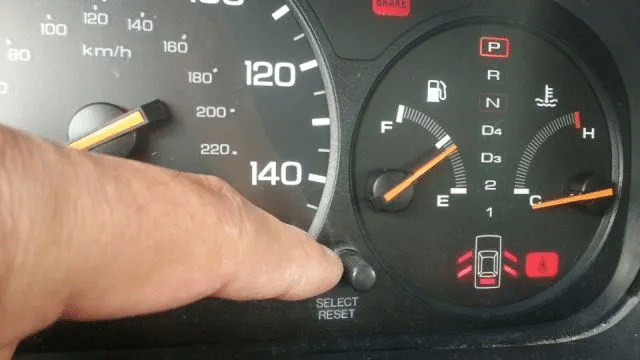
- With the ignition in the “ON” position, locate the “SEL/RESET” button on your steering wheel or the control knob typically found near the dashboard, often on the lower left side.
- Press the “SEL/RESET” button repeatedly until you navigate to the “Engine Oil Life” or “Maintenance Minder” screen on the vehicle’s display. This screen will show you the current oil life percentage and any maintenance codes indicating the services required.
- Take note of the maintenance codes displayed, as you will need to select these codes individually for resetting in the next step.
Step 3: Select the Maintenance Code to Reset
- Now that you’ve located the maintenance codes on the screen, press and hold the “SEL/RESET” button for approximately 10 seconds until the display changes to a screen that says “Maintenance Reset” or a similar message.
- If your vehicle has multiple maintenance codes displayed, use the “SEL/RESET” button to scroll through and select the specific code you want to reset. This is important if you’ve only completed certain maintenance tasks and don’t want to reset codes for services that have not yet been performed.
- In some Honda vehicles, you may have the option to reset all codes at once. If this applies to your model, you may see an “All Due Items” option. Select this only if you’ve completed all the required maintenance tasks indicated by the codes.
Step 4: Confirm the Reset
- After selecting the specific maintenance code(s) you want to reset, press and hold the “SEL/RESET” button again, this time for about 5 seconds.
- The display will then prompt you to confirm the reset. It may display a message like “Reset Maintenance Item” or “Are you sure?” This is a safeguard to prevent accidentally clearing codes before the maintenance has been completed.
- To confirm the reset, press and hold the “SEL/RESET” button once more for another 5 seconds. If done correctly, the maintenance code(s) you selected should disappear from the display, indicating a successful reset.
Step 5: Turn Off the Ignition
- Once you’ve confirmed the reset and the maintenance codes have been cleared, turn the ignition key back to the “OFF” position. This action saves the reset settings and ensures the maintenance minder notifications no longer appear on your dashboard.
- It’s crucial to turn the ignition off after the reset to ensure the changes are stored in the vehicle’s memory.
Final Check
- As a final step, it’s a good idea to double-check that the reset was successful. Turn the ignition back to the “ON” position without starting the engine, just as you did in Step 1.
- Using the “SEL/RESET” button, navigate back to the “Engine Oil Life” or “Maintenance Minder” screen, as described in Step 2.
- Verify that the reset maintenance codes no longer appear on the screen and that the oil life percentage has been restored to 100%. If the codes are still present or the oil life percentage hasn’t changed, repeat the reset process, ensuring you follow each step carefully.
By following this detailed step-by-step guide, you should be able to confidently reset the Honda Maintenance Codes on your vehicle.
If you experience any difficulties or have specific questions related to your Honda model, it’s always best to refer to your vehicle’s owner’s manual or reach out to your local Honda dealer for expert assistance.
Maintenance Tips and Best Practices
While the Honda Maintenance Minder system is an excellent tool for keeping track of your vehicle’s service needs, it’s important to remember that regular maintenance checks and good practices go beyond just following the reset codes.
Here are some additional tips to keep your Honda running smoothly:
Regular Maintenance Checks
In addition to the maintenance tasks indicated by the Minder system, it’s crucial to perform regular checks on various components of your vehicle:
- Tire Pressure: Check your tire pressure at least once a month and before any long trips. Properly inflated tires not only ensure safety but also improve fuel efficiency and extend tire life.
- Spark Plug Condition: Inspect your spark plugs during the recommended service intervals. Clean, well-functioning spark plugs are essential for optimal engine performance and fuel economy.
- Engine Coolant Levels: Regularly check your engine coolant levels to prevent overheating and engine damage. Top up the coolant if necessary, and ensure there are no leaks in the system.
- Brake Fluid: Check your brake fluid levels monthly. Low brake fluid can indicate worn brake pads or a leak in the brake system, compromising your safety.
- Air Filter: Inspect your air filter at least once a year and replace it if it’s dirty or clogged. A clean air filter ensures proper engine breathing and improves fuel efficiency.
By staying on top of these regular maintenance checks, you can catch potential issues early, prevent costly repairs, and extend the life of your Honda.
When to See a Professional

Having the assistance of Honda maintenance codes is a great thing to have; however, going with just that might not be an ideal option that you will do to yourself.
There are certain warning signs that must be aware of and thus require your intervention to see a professional at the earliest:
1. Warning Lights: If any warning lights on your dashboard remain illuminated after resetting the maintenance codes, it’s best to have a professional diagnose the issue. Warning lights can indicate serious problems that require immediate attention.
2. Unusual Noises: If you hear any strange noises coming from your engine, brakes, or suspension, it’s wise to have a mechanic inspect your vehicle. These noises can be signs of wear, damage, or impending failure.
3. Fluid Leaks: If you notice any fluid leaks under your car, such as oil, coolant, or brake fluid, it’s essential to have a professional identify and fix the problem. Leaks can lead to serious damage if left unchecked.
4. Vibrations or Pulling: If your vehicle vibrates excessively or pulls to one side while driving, it may indicate issues with your suspension, alignment, or brakes. A professional can diagnose and correct these problems to ensure your safety and prevent further damage.
5. Major Service Intervals: Even if your Maintenance Minder codes don’t indicate the need for a major service, it’s still recommended to have a professional inspect your vehicle at specific mileage intervals, such as every 30,000, 60,000 or 90,000 miles. These inspections can uncover potential issues not detected by the Minder system.
By combining the Minder system’s guidance with good maintenance practices and timely professional help, you can ensure your Honda stays reliable, safe, and efficient for years to come.
Conclusion
Understanding and utilizing the Honda Maintenance Minder system is a valuable tool for every Honda owner.
By familiarizing yourself with the main codes and sub-codes, you can stay on top of your vehicle’s maintenance needs and ensure its longevity and performance.
However, it’s crucial to recognize that the Maintenance Minder system is not a substitute for professional help when needed.
If you encounter warning lights, unusual noises, fluid leaks, or other concerning symptoms, it’s best to seek the assistance of a qualified mechanic.
By combining the guidance of the Maintenance Minder system with good maintenance practices and timely professional help, you can keep your Honda running smoothly for years to come.
We hope this article has provided you with a clear understanding of how to interpret and reset Honda Maintenance Minder codes, as well as some valuable maintenance tips and best practices.
We’d love to hear your thoughts on this topic; let us know how you found this article helpful in maintaining your Honda vehicle.