
Garlic is one of the most useful plants to grow at home. It tastes great in food and is easy to grow with just a little care.
Many people enjoy planting it in their backyard or even in a small garden.
It takes time, but the steps are simple to follow. Growing garlic at home is also a good way to save money.
Fresh garlic from the garden often tastes better than store-bought. With a little effort, anyone can grow it.
This article will walk you through how to grow garlic, from planting to harvest. It’s a helpful way to get started with growing food at home.
Why Grow Garlic at Home?
Growing garlic at home is simple, low-cost, and has many benefits. Garlic from the garden tastes fresher and stronger than the kind you buy at the store.
You also save money because one bulb can give you many new bulbs. Garlic is easy to care for and doesn’t need much space.
It can grow well in a pot, a raised bed, or a small garden. It does best in sunny spots with healthy, humus-rich soil.
When you grow garlic yourself, you know what’s in your food: no chemicals, no sprays, just clean, fresh garlic straight from your garden to your kitchen. It’s a smart and healthy choice.
Different Types of Garlic You Can Grow
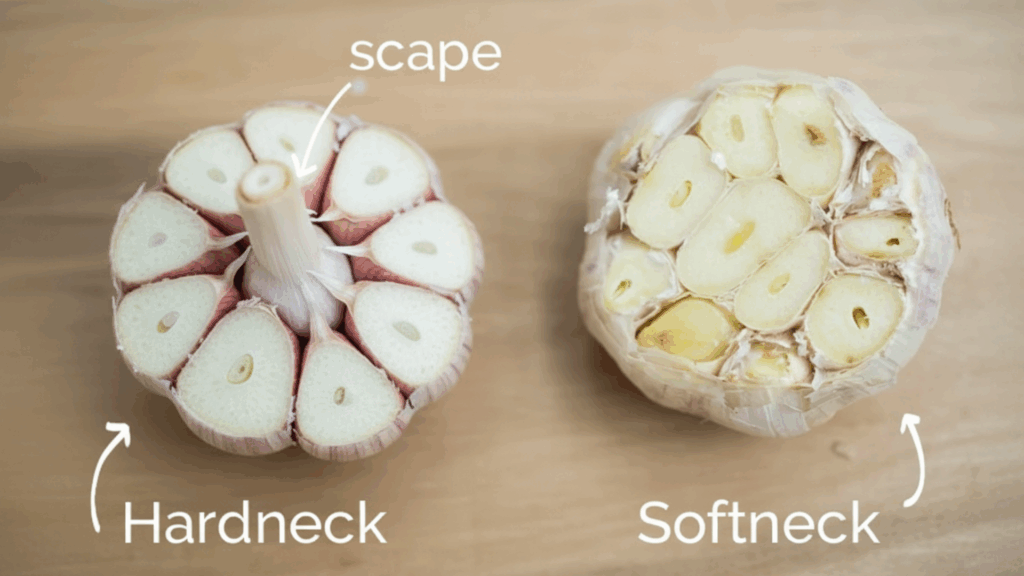
Before you start planting, it helps to know the two main types of garlic:
Softneck Garlic
- Grows well in mild winters (USDA zones 8–10).
- Stores longer, sometimes up to 9 months.
- Grows more cloves per bulb.
- Has soft, flexible stems, great for braiding.
Hardneck Garlic
- Works best in colder climates (USDA zones 3–7)
- Has a stronger, richer taste.
- Grows fewer but larger cloves.
- Produces garlic scapes (green curly stalks) in spring.
You can grow either kind at home. Choose what fits your area and your taste.
Best Time to Plant Garlic
Garlic grows best when planted at the right time. The season you choose can affect the size and quality of the bulbs.
| Planting Season | Best Time | Benefits | Notes |
|---|---|---|---|
| Fall (Best Option) | 4–6 weeks before ground freezes (usually Oct–Nov) | Larger bulbs, stronger roots, better results | Needs mulch for winter protection |
| Early Spring | As soon as the soil can be worked (Feb–Mar) | Still grows well, faster harvest | May result in smaller bulbs |
What You’ll Need to Grow Garlic
You don’t need fancy tools to grow garlic. Here’s a list of simple things that will help:
- Garlic bulbs (from a seed supplier or garden store)
- Garden trowel or shovel
- Compost or aged manure
- Humus soil or good garden soil
- Mulch (like straw, dry leaves, or pine needles)
- Raised bed, garden plot, or deep container
- Watering can or hose
Avoid using garlic from grocery stores, as it is often treated to prevent sprouting.
How to Prepare and Plant Garlic
Garlic grows best in rich, loose, and well-draining soil. Good soil helps the roots spread and gives the plant the nutrients it needs.
1. Test and Improve the Soil

Start by testing your soil using a basic tester kit. Garlic prefers a pH level between 6.0 and 7.0. If needed, adjust the pH with garden lime or sulfur.
Then, improve your soil by mixing in compost and humus. Humus soil is full of organic matter from decayed plants.
It holds moisture without staying soggy, feeds the garlic, and supports strong root growth.
2. Clear and Smooth the Bed

Use a shovel or rake to break up big chunks of soil. Garlic grows best in soft, loose dirt where the roots can spread out easily.
Remove stones, sticks, and weeds. These can block the cloves from growing well.
Once the area is clear, rake the surface flat. A smooth bed makes planting easier and helps each clove sit at the right depth in the ground.
3. Break and Choose Garlic Cloves

Take a garlic bulb and gently break it into single cloves. Do this just before planting to keep them fresh.
Keep the papery skin on each clove. Choose only the biggest, firmest cloves; these grow into the largest bulbs. Avoid planting:
- Small or soft cloves
- Moldy or dried-out cloves
- Cloves without skin
Save the small ones for cooking instead.
4. Plant the Garlic Cloves
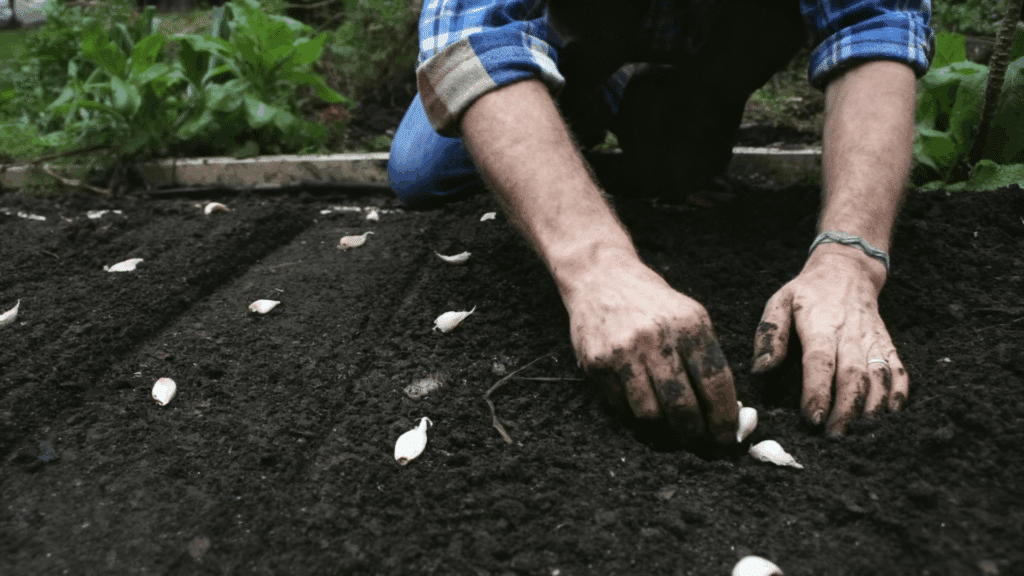
Pick a sunny spot that gets at least 6 to 8 hours of sunlight a day. Garlic loves full sun, even during the cooler months.
Plant each clove with the pointy end up and the flat end down. Dig a hole about 2 inches deep. Place the cloves 4 to 6 inches apart in rows. Keep each row about 12 inches apart.
If you’re planting in a pot, space the cloves 3 to 4 inches apart, and use a container at least 8 inches deep with drainage holes.
5. Water the Soil
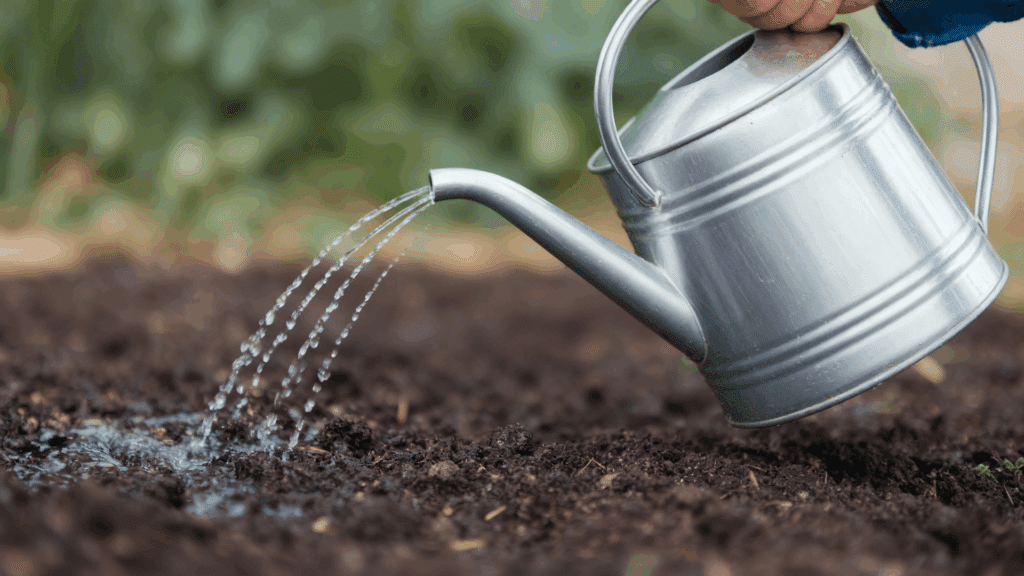
Right after planting, water the soil well. This helps settle the soil around the cloves and starts the growing process.
Keep the soil moist but not wet. Garlic does not grow well in soggy soil, which can cause the cloves to rot.
Check the soil with your finger; if the top inch feels dry, it’s time to water. Be gentle to avoid washing the cloves out.
6. Add Mulch

After watering, cover the soil with mulch to help the garlic grow strong. Use 2 to 4 inches of straw, dry leaves, pine needles, or grass clippings.
Mulch keeps the soil warm in cold weather and helps hold in moisture. It also blocks weeds from growing around your garlic.
Avoid using thick, wet mulch that stays soggy, as it can lead to rot or fungus problems.
Signs It’s Time to Harvest Garlic
Garlic is usually ready to harvest in June or July, depending on when you planted it. Look for these signs:
- The bottom leaves turn yellow or brown, but the top leaves are still green.
- You can feel full bulbs under the soil surface.
To harvest:
- Use a garden fork or small shovel to loosen the soil.
- Gently lift the garlic by the stalk, don’t pull too hard or the bulb may snap.
- Shake off extra soil, but do not wash the garlic.
How to Cure and Store Garlic

Once you harvest your garlic, it’s important to let it dry out, or cure, before storing. Curing helps the garlic last longer and keeps it from molding.
Hang garlic in small bundles or lay it flat on a screen or shelf. Place it in a shady, dry, and breezy spot, never in direct sunlight.
Let it cure for 2 to 3 weeks, until the outer skin is dry and papery. The neck and roots should also feel dry.
After curing, trim the roots and stalks (unless you plan to braid them). Store the bulbs in a paper bag, mesh bag, or open basket. Keep them in a cool, dark, dry place. Never store garlic in the fridge; it may sprout early.
- Softneck garlic lasts 8 to 9 months.
- Hardneck garlic lasts 4 to 6 months.
Taking Care of Your Garlic
Garlic is easy to care for, but a few simple steps will help it grow strong and healthy. Here’s how to look after your garlic once it’s in the ground:
- Water regularly but lightly: Keep the soil moist, not soggy. Water once or twice a week, depending on rainfall. Reduce watering when the weather is cool or wet.
- Keep the area weed-free: Weeds take nutrients and space. Gently pull weeds by hand so you don’t disturb garlic roots.
- Feed the soil naturally: Use compost or fish emulsion in early spring for extra nutrients. Avoid chemical fertilizers that can damage the soil.
- Watch for pests and diseases: Check leaves for yellow spots or damage. Remove infected plants and don’t plant garlic in the same spot each year.
- Cut scapes if needed: If growing hardneck garlic, remove curly green stalks (scapes) in late spring. This helps bulbs grow bigger.
- Stop watering before harvest: Stop watering about two weeks before harvest. This allows the bulbs to dry and makes curing easier.
Wrapping Up
Growing garlic at home teaches patience and care. Watching a small clove turn into a full bulb is a slow but satisfying process.
It’s a quiet reminder that good things take time. Garlic doesn’t ask for much, just sunlight, healthy soil, and a little attention.
In return, it gives you something useful, tasty, and homegrown. It’s a small step toward eating better and wasting less.
Ready to give it a try? Grab a few cloves, find a sunny spot, and start your garlic-growing journey today.