
Tired of boring, expensive tiles? I was too. In this guide, I’ll show you exactly how to paint your beautiful tiles from start to finish.
I started painting tiles last summer to save money on my kitchen update. What began as a budget fix turned into my favorite hobby.
You’ll learn:
- Which tiles work best (and which to avoid)
- A complete supply list with budget options
- Step-by-step painting techniques I’ve perfected
- How to make your designs last for years
I’ve painted over 100 tiles now and made every mistake possible. My tiles have survived daily use in my kitchen and bathroom for over a year without chipping or fading. If I can do this with no artistic background, you absolutely can too.
Let’s transform those plain tiles into something special.
How I Did It: Step-By-Step Tile Painting Guide
When I started my tile painting project, I had no idea what I was doing. After some trial and error (and a few complete failures), I developed this simple process that works every time. Follow these steps for the best results with minimal frustration.
What You’ll Need Before You Start
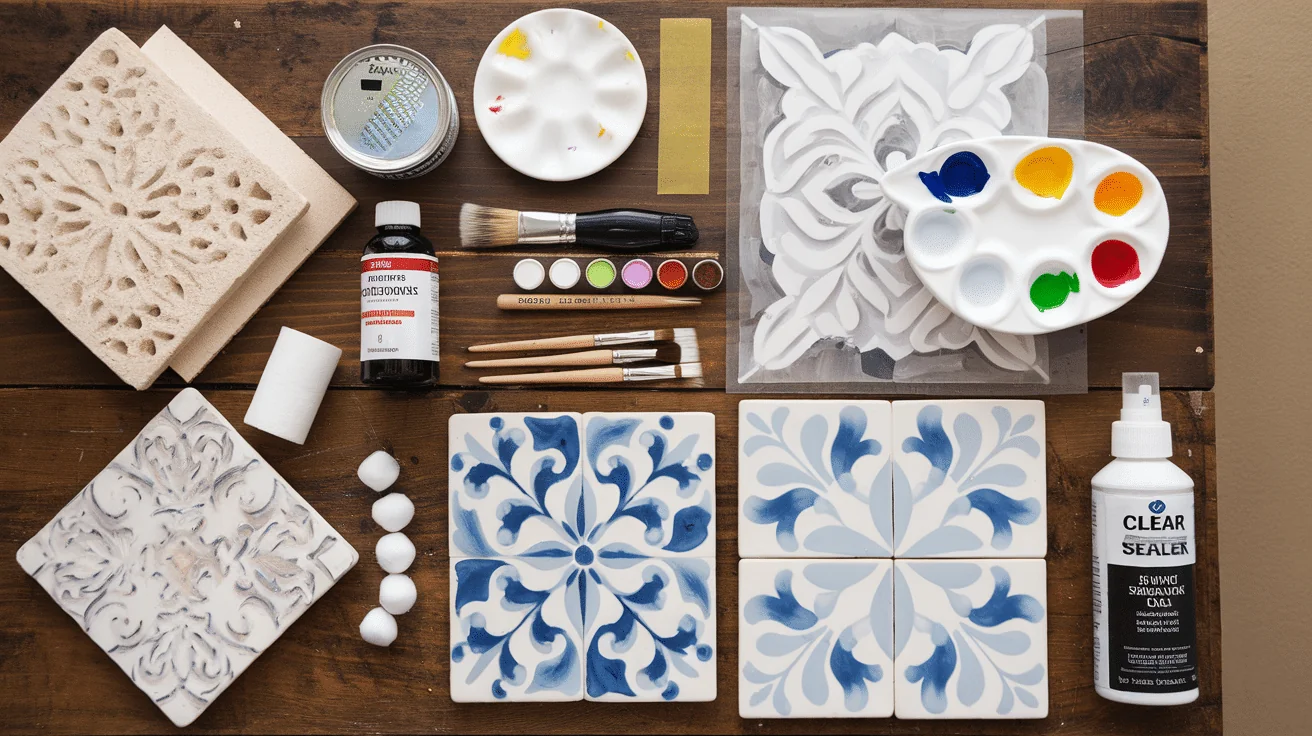
- Ceramic or porcelain tiles
- Fine-grit sandpaper (220 grit works well)
- Rubbing alcohol
- Cotton balls or clean cloth
- Acrylic paints (I use artist-grade for better colors)
- Small paintbrushes in various sizes
- Paint palette or paper plate
- Pencil for sketching designs
- Clear acrylic sealer spray
- Old newspapers to protect your work surface
- Optional: stencils or painter’s tape for clean lines
Picking the Right Tiles to Paint
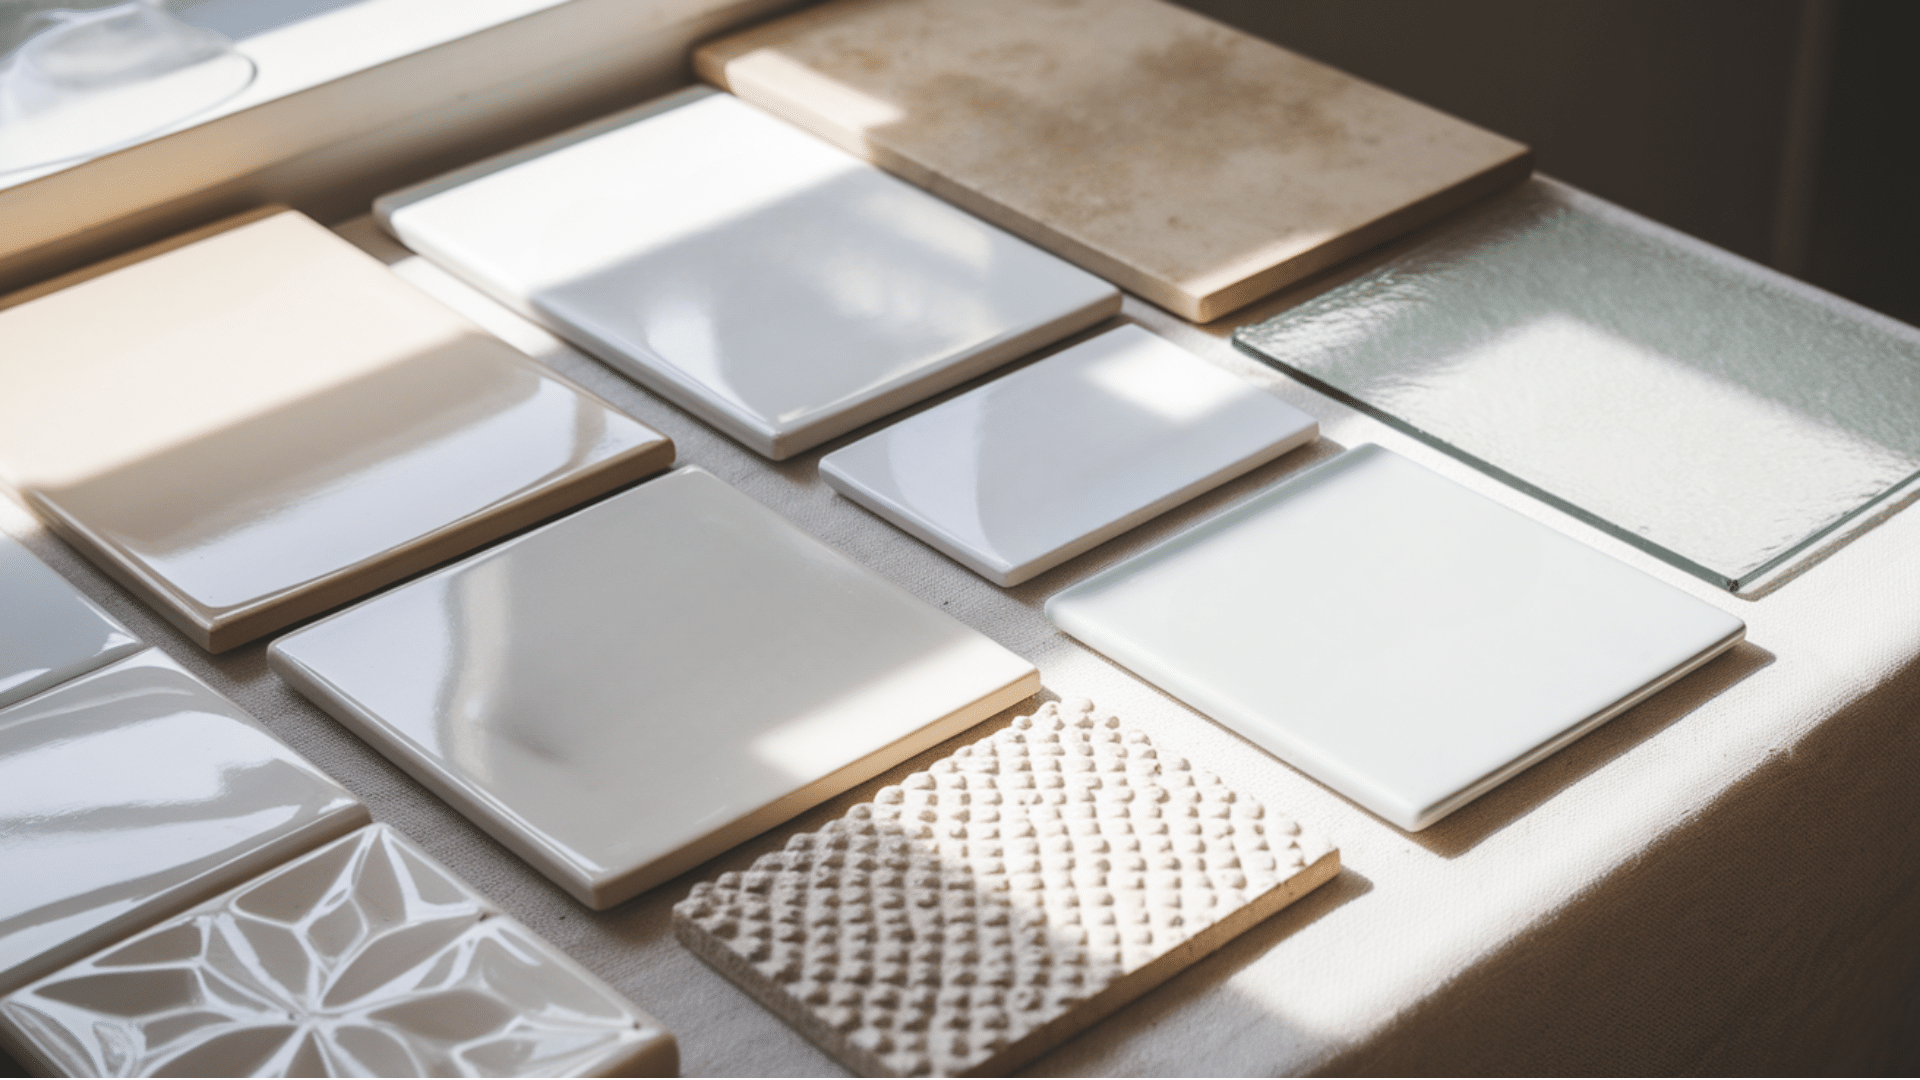
- Plain ceramic tiles work best for beginners – they accept paint well with minimal prep
- Porcelain tiles also work but might need extra preparation steps
- White tiles make colors pop, but cream or light-colored tiles work well too
- Avoid high-gloss tiles – paint won’t stick well to the slippery surface
- Skip very textured tiles – they make it hard to create clean designs
Where to find affordable tiles:
Local hardware stores have basic white ceramic tiles for less than $1 each. Check clearance sections – I found 50 tiles for 70% off just because of damaged packaging.
Thrift stores often have leftover tiles from other people’s projects. Online marketplace apps are good for finding unused renovation leftovers.
You can also ask friends or family who recently completed renovation projects if they have extras, as most contractors order about 10% more than needed.
Construction surplus stores and Habitat for Humanity ReStores often carry discontinued tile lines at steep discounts.
Picking a Design that Fits You

These are some of the design sources that I use:
- Children’s coloring books have simple outlines perfect for beginners
- Free printable stencils online can be traced onto tiles
- Nature-inspired patterns from leaves, flowers, or seashells
- Cultural designs like mandalas, folk art, or Moroccan patterns
- Vintage wallpaper and fabric designs work beautifully on tiles
Tip: Print out or draw your design to the exact size of your tile first. It helps to see how it will look before committing paint to tile.
Getting Your Tiles Ready to Paint

This prep step makes a huge difference:
- Wash tiles with warm soapy water and let dry completely
- Lightly sand the surface with fine-grit sandpaper
- Wipe with rubbing alcohol to remove any dust or oils
- Let dry for 15 minutes before painting
Painting Tips that Helped Me
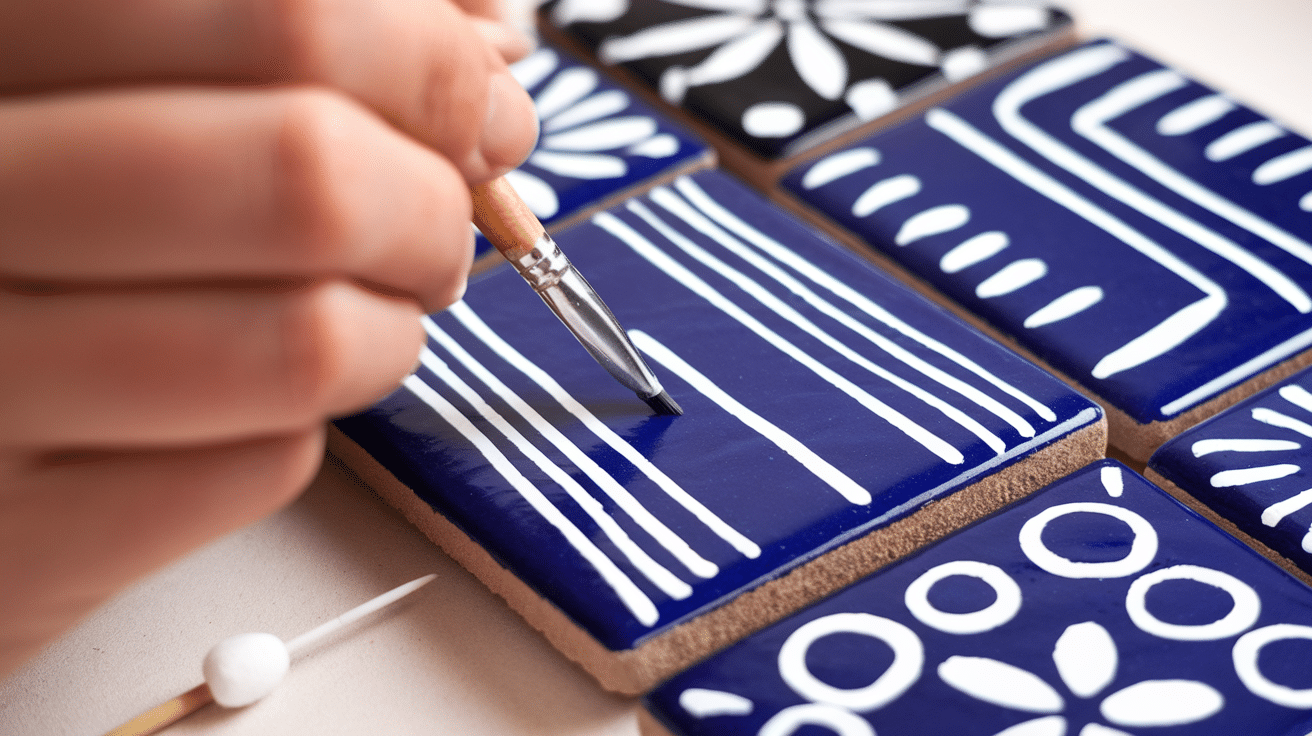
- Paint in thin layers rather than thick ones – thick paint often cracks
- Let each color dry completely before adding another next to it
- Hold your brush at a 90-degree angle to the tile for best control
- If you make a mistake, quickly wipe it with a damp cotton swab while still wet
- My secret trick: Use a toothpick for tiny details and dots – it works better than the smallest brushes!
Making It Last: Sealing the Tile
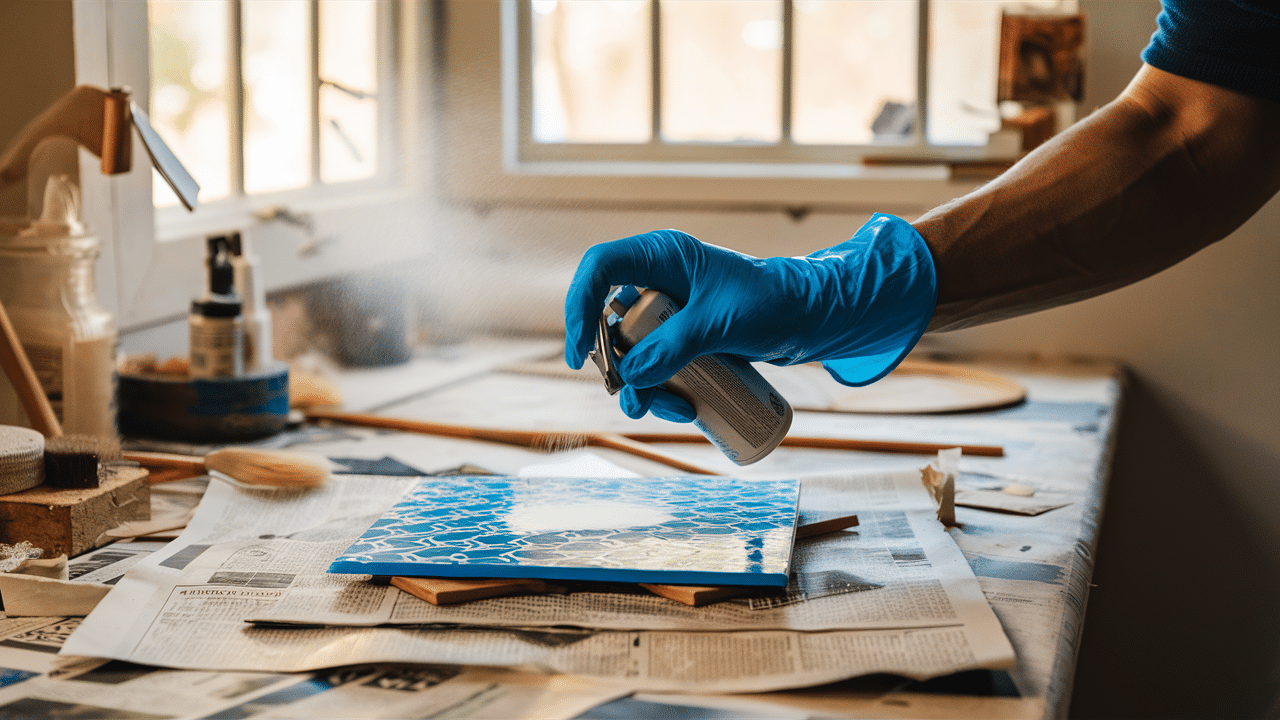
Sealing is not optional if you want your work to last:
- Let paint dry for at least 24 hours
- Apply clear acrylic sealer in a well-ventilated area
- Spray in light, even coats (3-4 total)
- Wait 30 minutes between coats
- Let cure for 72 hours before handling much
What I Learned Along the Way
Patience makes perfect tiles. My best work happens when I don’t rush. Taking breaks helps me spot mistakes I might miss when looking too long. Also, natural light is best for painting – I can really see the true colors.
Other valuable lessons from my tile-painting journey is that consistency matters – For a set of tiles, mix enough paint for all of them at once to maintain color consistency.
And practice on paper first – I sketch my design on paper tiles before painting the real thing, temperature affects drying times as paint dries faster in warm, dry conditions and slower in cold or humid environments.
Quality matters for some supplies like good brushes made the biggest difference in my results, more than expensive paints and taking photos helps track progress – I now photograph my work at different stages to see how far I’ve come.
Ways to Use Leftover Painted Tiles

Don’t toss extra or practice tiles! I turn mine into:
- Trivets for hot dishes – Group 4-6 tiles together and glue cork backing to protect your table. I made a set for my dining table that gets compliments every time we have guests.
- Refrigerator magnets – Glue small magnets on the back of tiny tiles. These make perfect little gifts and help use up the smallest leftover pieces.
- Mosaic projects – Break imperfect tiles into pieces and create beautiful mosaic frames, flowerpots, or tabletops. My garden stepping stone combines broken tiles from three different projects.
- Bases for candles – A single tile makes a classy base for candles, protecting surfaces from wax drips. I painted holiday-themed ones that I bring out seasonally.
- Garden markers – When sealed extra well with outdoor sealer, painted tiles make durable garden markers. I painted herbs and vegetables on mine for my garden.
- Outdoor decoration – Hang weather-sealed tiles from a fence or garden wall for pops of color. My garden fence features a row of painted tiles that brightens up the space.
The best thing about repurposing tiles is that “mistakes” or practice pieces find new life instead of ending up in the trash. My earliest attempts, which weren’t good enough for my kitchen backsplash, now serve other purposes throughout my home.
Simple Tile Design Ideas You Can Try
If you’re new to hand-painting tiles, these beginner-friendly designs will help you create beautiful results without advanced artistic skills:
Mandala Patterns
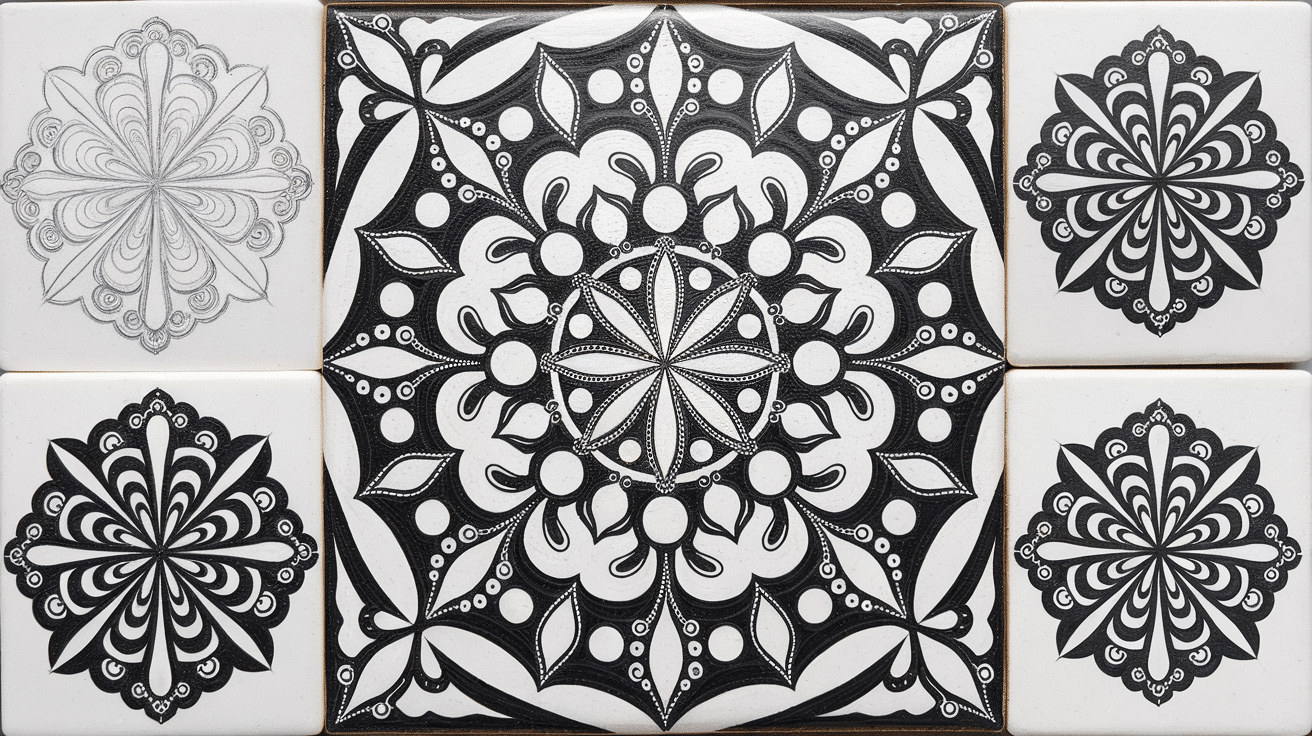
Start from the center and work outward in circles. Use a pencil to mark the center of your tile and lightly sketch circles as guides. Add simple dots, lines, and curves in a symmetrical pattern. This design is perfect for beginners because small imperfections aren’t noticeable in the overall pattern.
Abstract Color Blocks

Create geometric shapes with painter’s tape, then fill with different colors. Peel the tape off when the paint is dry but not fully cured. I love how modern these look, and they’re almost impossible to mess up. Try complementary colors for a striking effect.
Polka Dots or Stripes
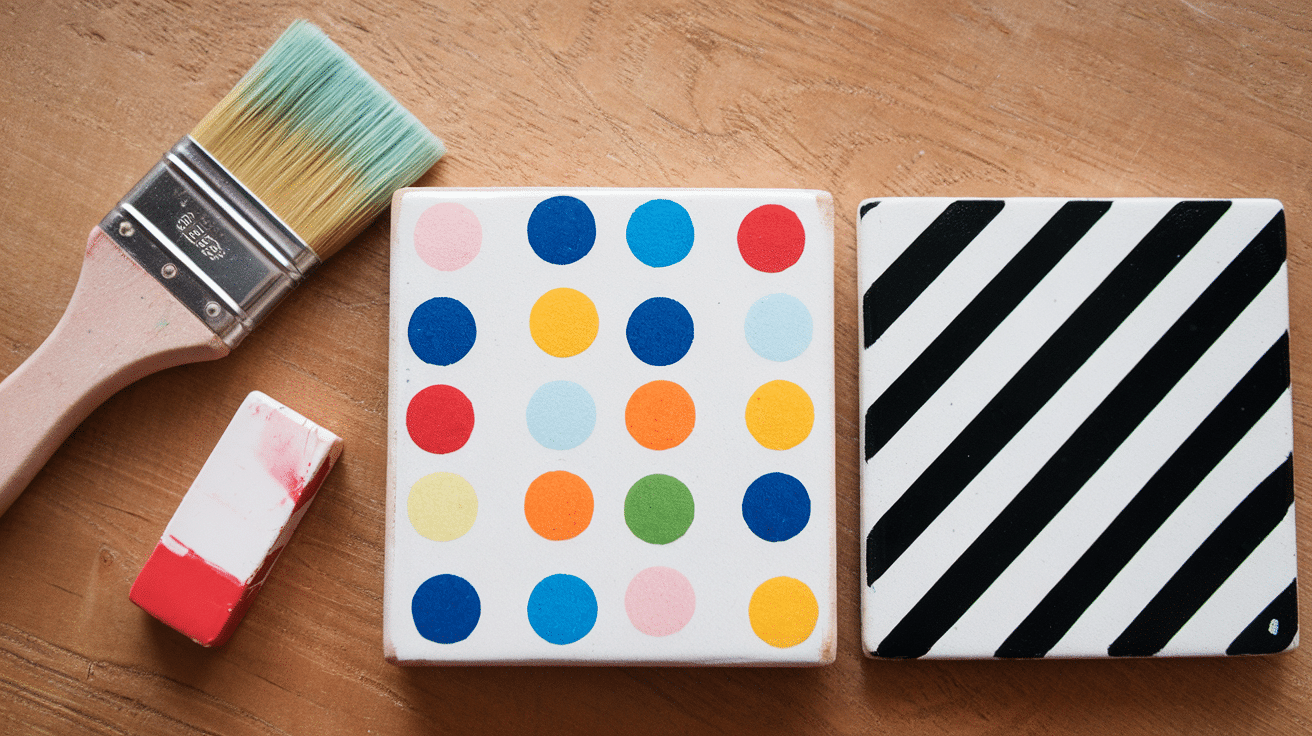
Sometimes, the simplest designs look the most professional. Use the eraser end of a pencil dipped in paint for perfect dots or painter’s tape for clean stripes. Varying the sizes of the dots creates visual interest.
Leaf Prints
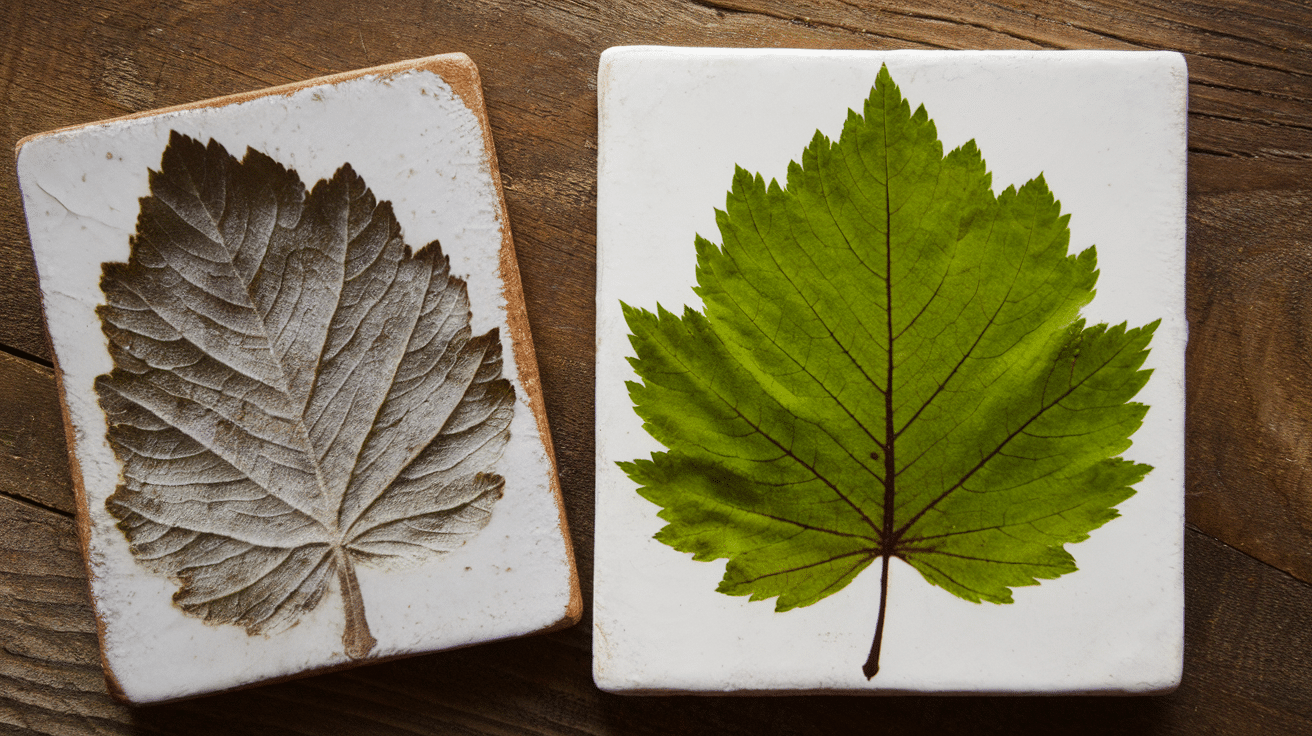
Collect leaves with prominent veins. Paint one side of the leaf, then press it painted-side-down onto your tile. Gently peel it off to reveal a detailed natural print. This technique creates unique patterns that look much more complex than they are to make.
Faux Marble
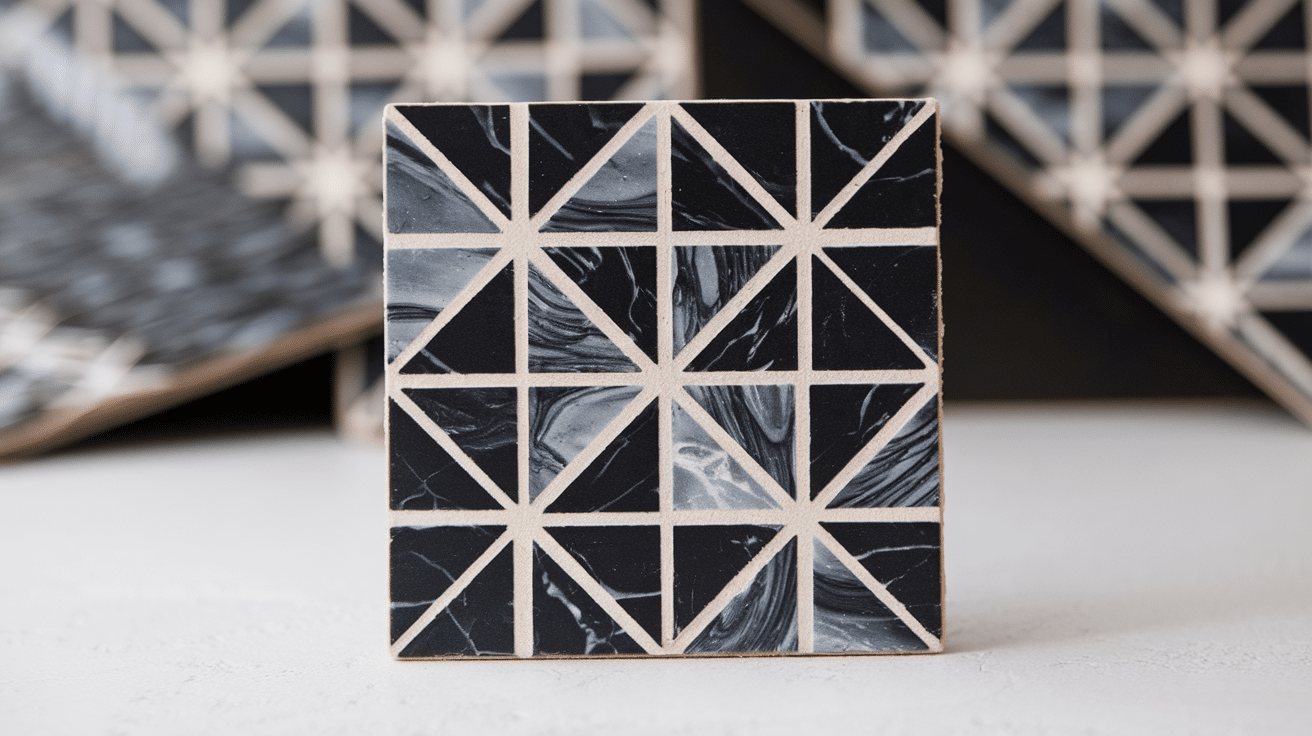
Swirl a few complementary colors together for a marble-like effect. I use a toothpick to create veining in white over a gray or black base. My bathroom now features these tiles as soap dishes, and guests always ask where I bought them.
Botanical Line Art
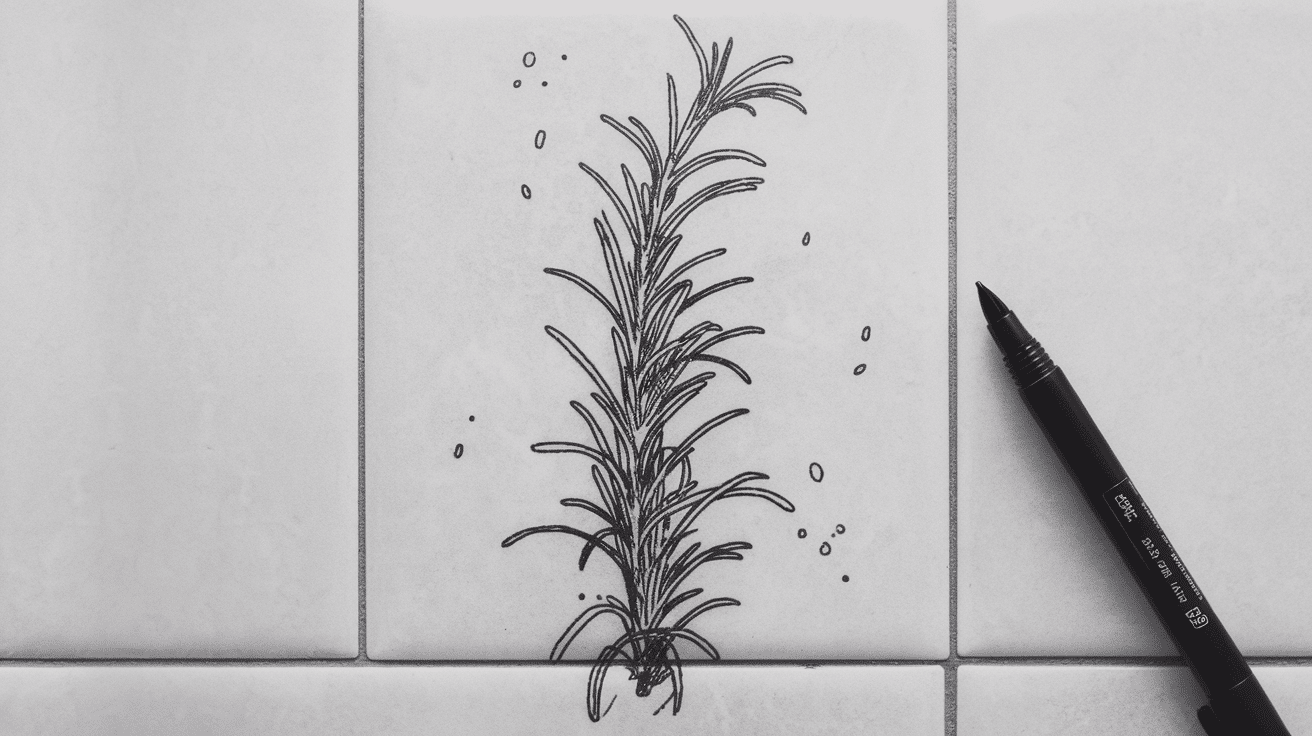
Simple black outlines of plants, leaves, or flowers on a white background create a minimalist look. You don’t need advanced drawing skills—focus on basic shapes and outlines. I made a set of herb outlines for my kitchen.
Perfect beginner friendly designs I’ve tried
- Ombre effect – Blend from one color to another across a set of tiles
- Starry night – Dark blue background with simple white dots and swirls
- Honeycomb – Hexagon shapes in varying colors
- Monogram tiles – A single letter in a decorative style
- Mediterranean-inspired – Blue and white geometric patterns
- Botanical line art – Simple black outlines of plants on the white tile
- Faux marble – Swirled patterns that mimic expensive stone
Common Mistakes to Avoid
- Not cleaning tiles properly
- Using too much water with paint
- Applying sealer too soon
- Using the wrong type of sealer
- Handling tiles too soon
- Painting in poor lighting
- Not testing colors together first
- Ignoring the working temperature
- Skipping the primer on glossy tiles
- Using low-quality brushes
Wrapping Up
After painting over 100 tiles, I still find it relaxing and rewarding. It’s not always perfect—I still make mistakes—but that’s part of the beauty of handmade items.
The process taught me patience and gave me a creative outlet that also saves money. My friends now request tiles as gifts, and I’m happy to make them.
Each tile tells a story of where I was in my creative journey. Some designs are inspired by nature, others by geometric patterns I spotted in everyday life.
The most satisfying part is seeing my work permanently installed in homes, bringing color and personality to otherwise plain spaces.
Whether you want to update your home on a budget or try something new, hand-painted tiles are worth a shot. Start small, be patient, and enjoy watching your simple tiles transform into something special.
Frequently Asked Questions
Will These Work as Floor Tiles?
I don’t recommend it for high-traffic areas. Even with a good sealer, the paint may wear off. It’s better for walls or decorative use.
Can I Use Other Types of Paint Besides Acrylics?
Oil-based paints also work but take much longer to dry. Watercolors aren’t suitable, as they won’t adhere properly.
How Many Coats of Paint Should I Apply?
Usually, two to three thin coats work better than one thick coat. Light colors might need more coats for full coverage.
Can These Tiles Be Used Outdoors?
Yes, but use an outdoor-rated sealer and avoid direct exposure to harsh weather. My garden stepping stones need resealing once a year.
How Long Will the Painted Design Last?
With proper sealing and care, my oldest tiles still look great after three years of use in my kitchen.