
Have you ever looked at your tired couch pillows and wished for a quick makeover? You’re in the right place. This guide will walk you through creating your pillow covers with materials you probably already have at home.
Are you tired of expensive store-bought options that never quite match your style? I’ve been there, too. After years of trial and error (and plenty of crooked seams), I’ve discovered methods that even beginners can master.
In this article, you’ll learn:
- Which fabrics work best for different rooms
- Simple measuring techniques that ensure perfect fits
- Three no-sew options for those without sewing machines
- Quick finishing touches that make homemade covers look professional
No fancy equipment is needed—just basic supplies and about an hour of your time. By the end, you’ll have custom pillow covers that look store-bought but cost a fraction of the price.
Let’s transform those pillows!
Why Make Your Pillow Covers?
I used to spend way too much on new pillows whenever I wanted to freshen up my living room. What a waste! Once I started making my covers, everything changed.
You might wonder if it’s worth the effort. Trust me, it is.
Money Talks
Store-bought pillow covers can cost $20-40 each. Making your own will cost about $5-10 per cover. That’s a serious savings when you’re doing a whole room!
Perfect Match Every Time
Have you ever found the almost perfect pillow? With DIY covers, you choose exactly what you want, like, the fabric pattern that matches your room, the exact shade of color you need and the texture that feels right against your skin.
No more “close enough” purchases. Sometimes, I make seasonal covers. Summer brings bright florals, while winter calls for cozy textures. Swapping them takes seconds.
Learning Something New
There’s something satisfying about pointing to pillows when friends visit and saying, “I made those.” Even my first attempts, with crooked seams and all, brought me joy. Your skills will improve with each cover you make.
Choosing the Right Fabric

Picking the perfect fabric is crucial for pillow covers that look great and last. Let me guide you through this important first step.
Think About Texture, Color, and Durability
The fabric you choose sets the tone for your entire project. I’ve learned this the hard way after making covers that looked stunning but felt scratchy against my skin.
Texture: matters more than you might think. Smooth cotton provides casual comfort, while velvet adds luxury. Linen gives a relaxed, lived-in feel that works in almost any space.
Color: It can transform a room. Bold colors make statements, while neutrals blend with existing decor. Consider how the color will look in different lighting throughout the day.
Durabilityis essential, especially for everyday use. Some beautiful fabrics won’t stand up to pets, kids, or regular lounging. I once made covers from delicate silk that tore within weeks!
Consider Where the Pillow Will Go
Location determines almost everything about your fabric choice:
- Sofa pillows: Need to withstand daily use. Cotton canvas, denim, and outdoor fabrics work wonderfully here.
- Bedroom pillows: Can be softer and more delicate. Flannel, jersey knit, or silk blends feel luxurious against your face.
- Reading nooks: Benefit from textured fabrics that provide both comfort and support. Try corduroy or textured cotton blends.
- Outdoor spaces: require special water-resistant and UV-protected fabrics that won’t fade or grow mildew.
I always recommend touching fabrics in person before buying whenever possible. Online shopping can lead to surprises when the texture isn’t what you expected!
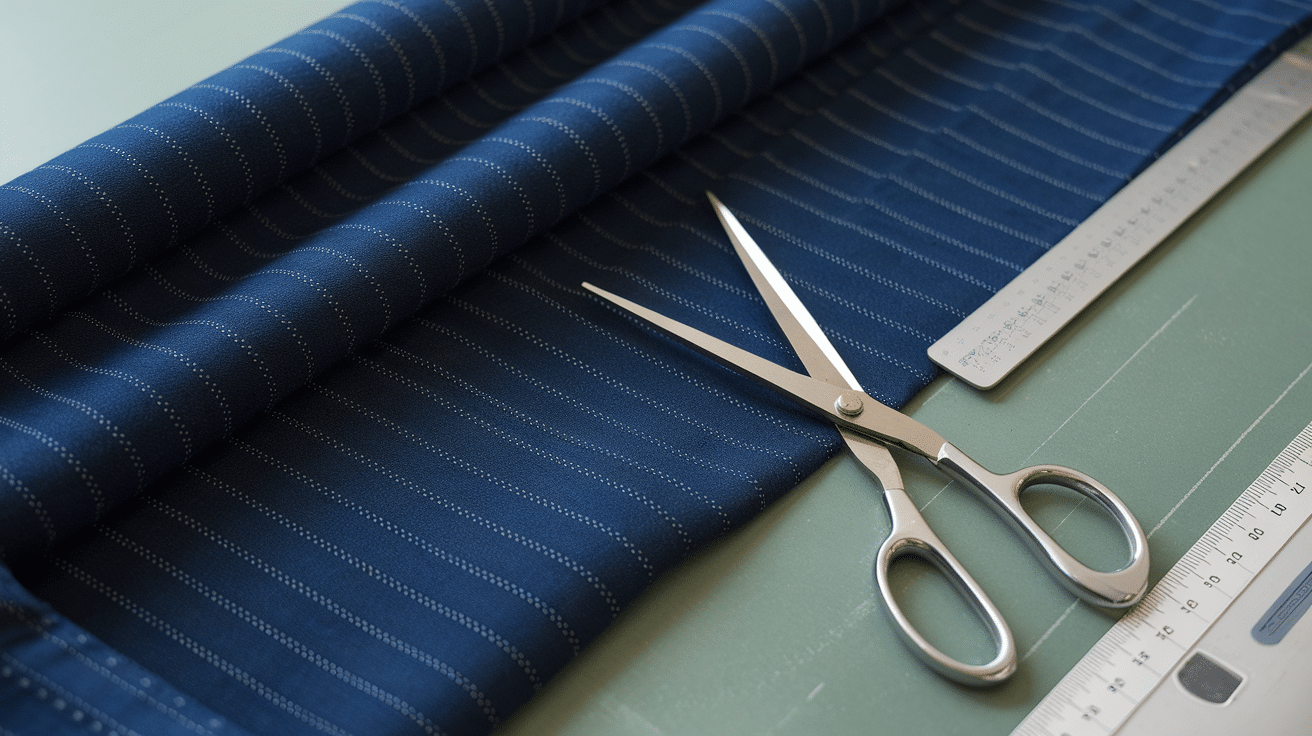
Fabric #1 – Light Gray/blue Paisley “fume Barkley”
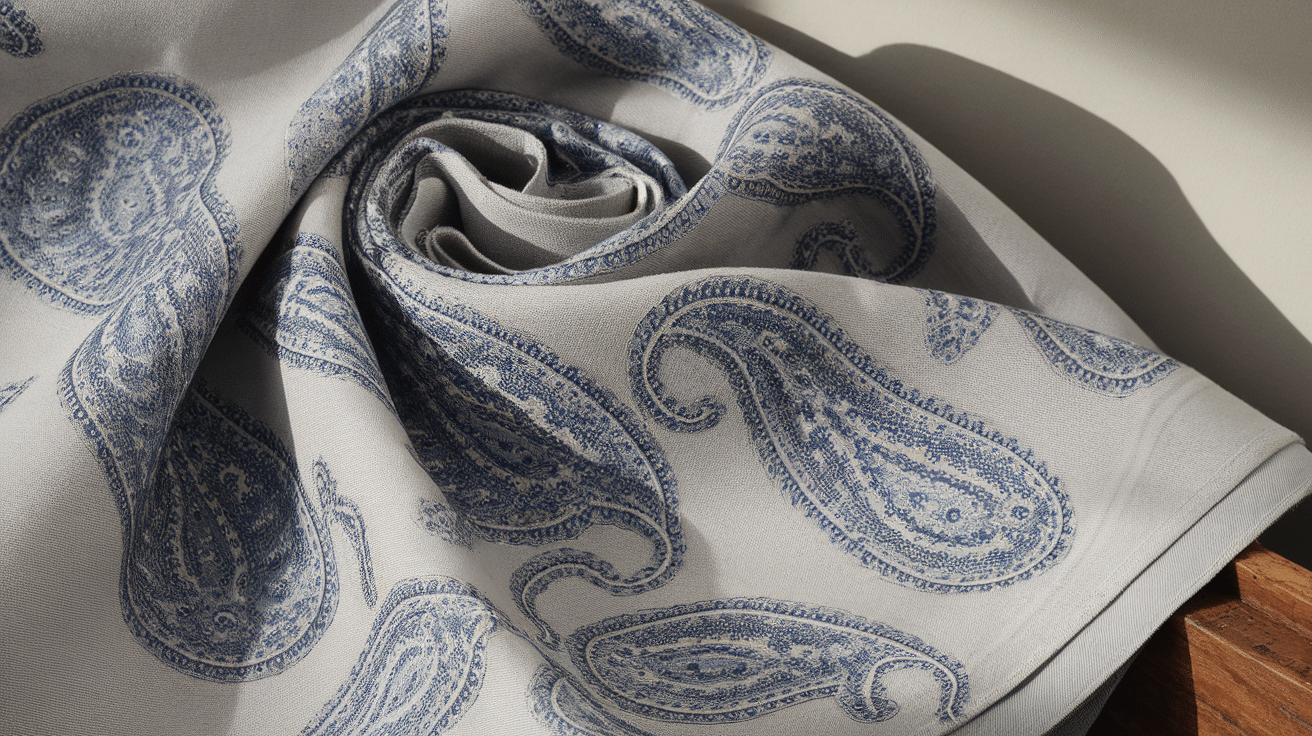
The Fume Barkley fabric offers a perfect balance of subtle design and versatility. I’ve used this in several projects, and it never disappoints.
Soft Colors that Work Well in Cozy or Neutral Rooms
This fabric’s gentle gray-blue palette creates a calming atmosphere wherever it’s placed. The soft coloring doesn’t compete with the existing decor but rather enhances it.
I’ve found it pairs beautifully with:
- White or cream furniture
- Natural wood tones
- Other blue or gray accent pieces
- Silver or brushed nickel fixtures
What makes this fabric special is how it changes throughout the day. Morning light brings out the blue undertones, while evening lighting emphasizes the gentle gray.
The Paisley Adds Pattern without Being Too Bold
- Paisley can sometimes feel overwhelming, but the Fume Barkley gets it just right. The pattern is visible enough to add interest but subtle enough not to dominate your space.
- This makes it perfect for mixing with solid-colored pillows. I like to pair it with solid navy or light gray pillows for a coordinated look that isn’t matchy-matchy.
- The pattern also hides minor stains better than solid fabrics, making it practical for homes with children or pets. This isn’t just about looks—it’s about creating pillow covers that work in real life.
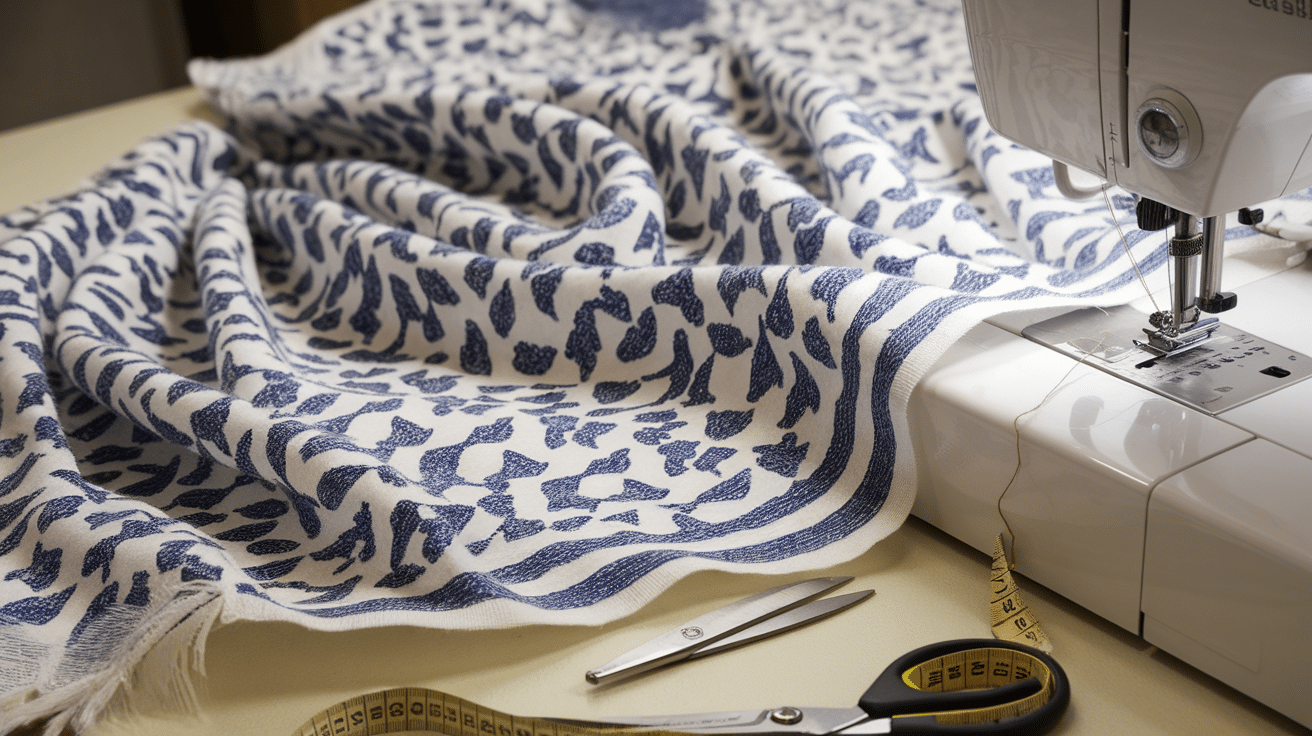
Fabric #2 – Striped Linen
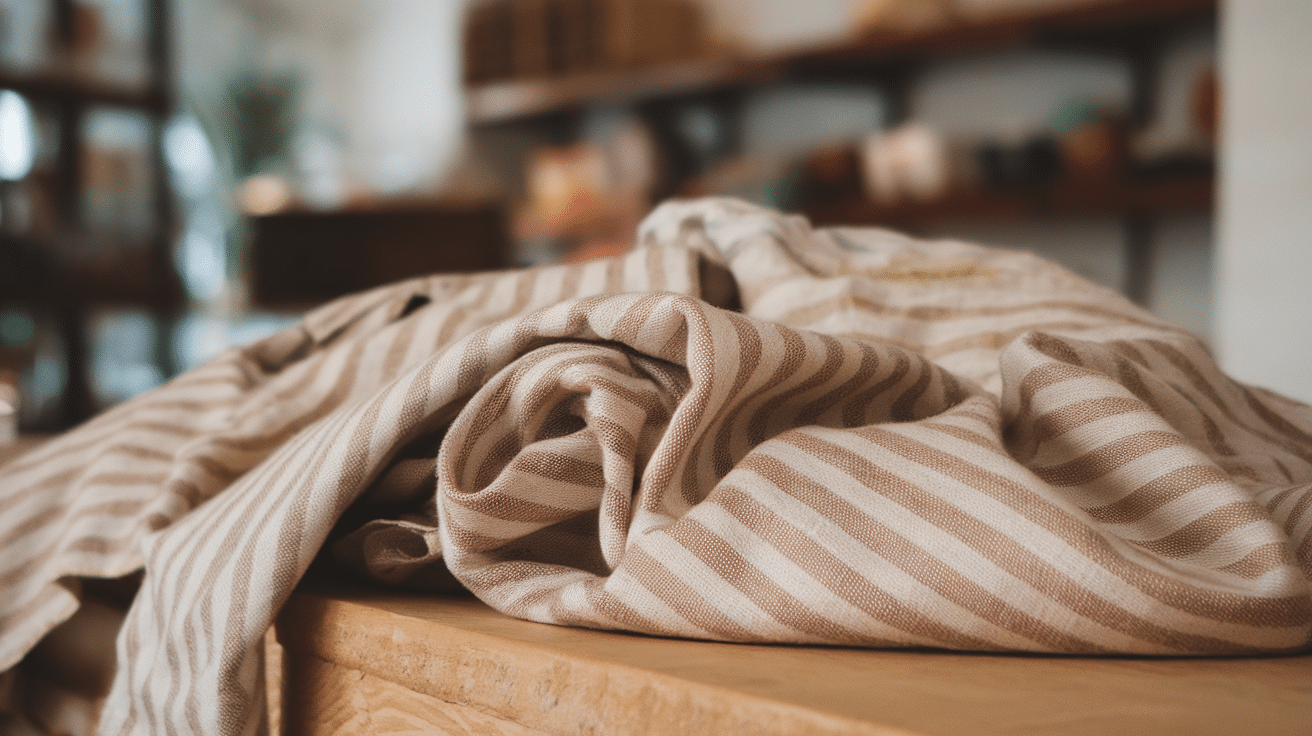
I discovered this gem of a fabric last summer and was instantly drawn to its effortless charm. Unfortunately, it’s currently sold out online, but I’ll explain why it’s worth waiting for a restock.
Great for A Relaxed, Coastal, or Farmhouse Feel
The striped linen captures that laid-back vibe that makes spaces feel instantly welcoming. When I added these covers to my living room, guests would always comment on how “comfortable” the space felt.
This fabric works wonders in:
- Beach cottages or coastal-inspired rooms
- Farmhouse kitchens and sitting areas
- Sunrooms and screened porches
- Any space where you want that “kick off your shoes” atmosphere
Linen has a natural, wrinkled texture that’s easy to love
Don’t fight the wrinkles—they’re part of linen’s character! This fabric gets softer with each wash while maintaining its distinctive texture.
I love how linen breathes and adapts to your body temperature. It feels cool in summer and somehow cozy in winter. Plus, that slight rumpled look means less ironing for you.
Neutral Stripes Go with Almost Anything
The beauty of these subtle stripes is their versatility. I’ve successfully paired these pillow covers with:
- Solid colored furniture
- Floral or botanical prints
- Geometric patterns
- Even other stripes (keep them different scales!)
The neutral palette ensures these covers can move from room to room as your decor evolves. They’re the perfect “investment” fabric that won’t look dated next season.
Fabric #3 – Natural/taupe/green Linen
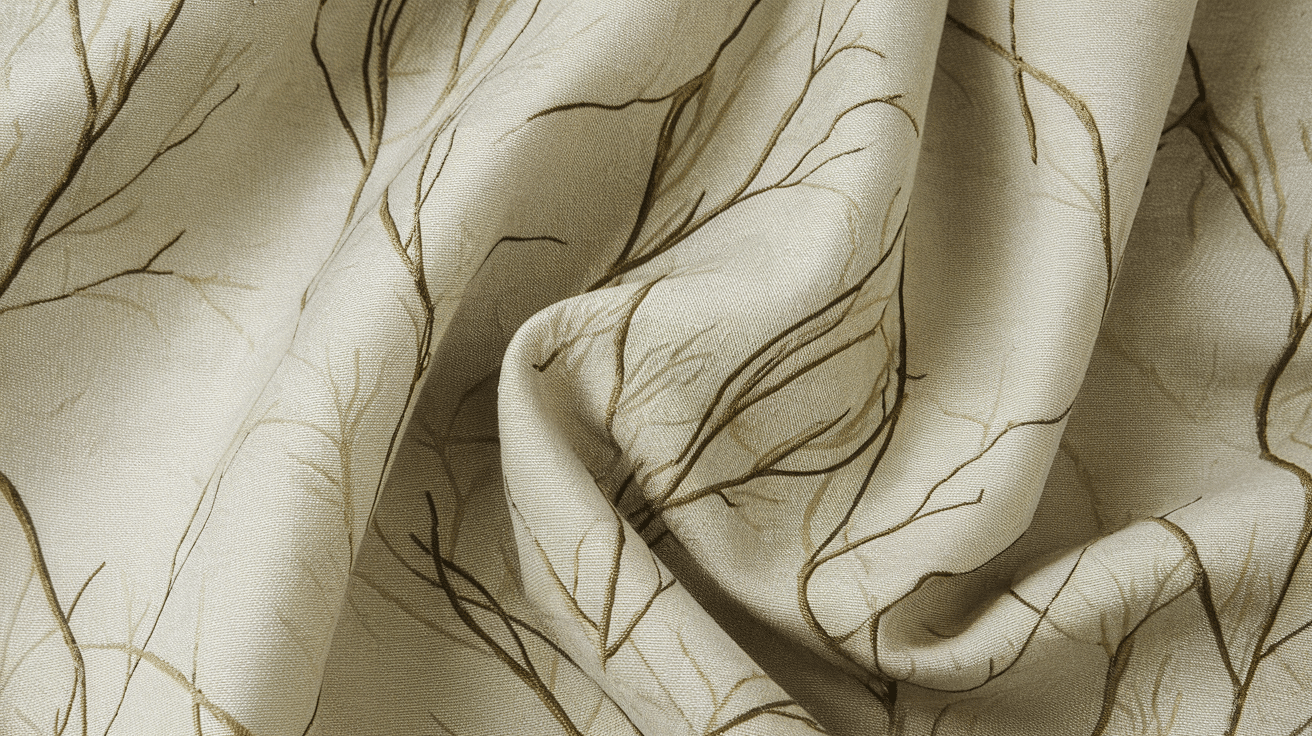
Another fantastic option that sadly isn’t available right now, but I’m including it because it’s worth watching for when it comes back in stock.
Earthy Tones for A Warm, Grounded Look
This fabric brings the outdoors in with its beautiful natural palette. I added these covers to my reading nook, and they transformed the space instantly.
The combination of natural and taupe creates depth without heaviness.
These earthy colors:
- Create a calming atmosphere
- Complement wooden furniture beautifully
- Hide minor soil marks better than lighter fabrics
- Work in all seasons without feeling out of place
What I particularly love about this fabric is how it anchors a room. Even in spaces with lots of visual elements, these earthy tones help create balance.
Subtle Green Adds a Soft Pop of Color without Overpowering
This linen’s secret weapon is its hint of green. It’s just enough color to feel fresh without screaming for attention.
This touch of green:
- Connects your indoor space with nature
- Adds life to neutral color schemes
- Creates visual interest without being trendy
- Pairs beautifully with plants and natural elements
I’ve found this fabric particularly effective in rooms with houseplants – the green picks up their color without competing. It’s also perfect for people who are nervous about adding color but want something more interesting than beige.
Despite being sold out, keep an eye out for this fabric. Its versatility makes it worth the wait!
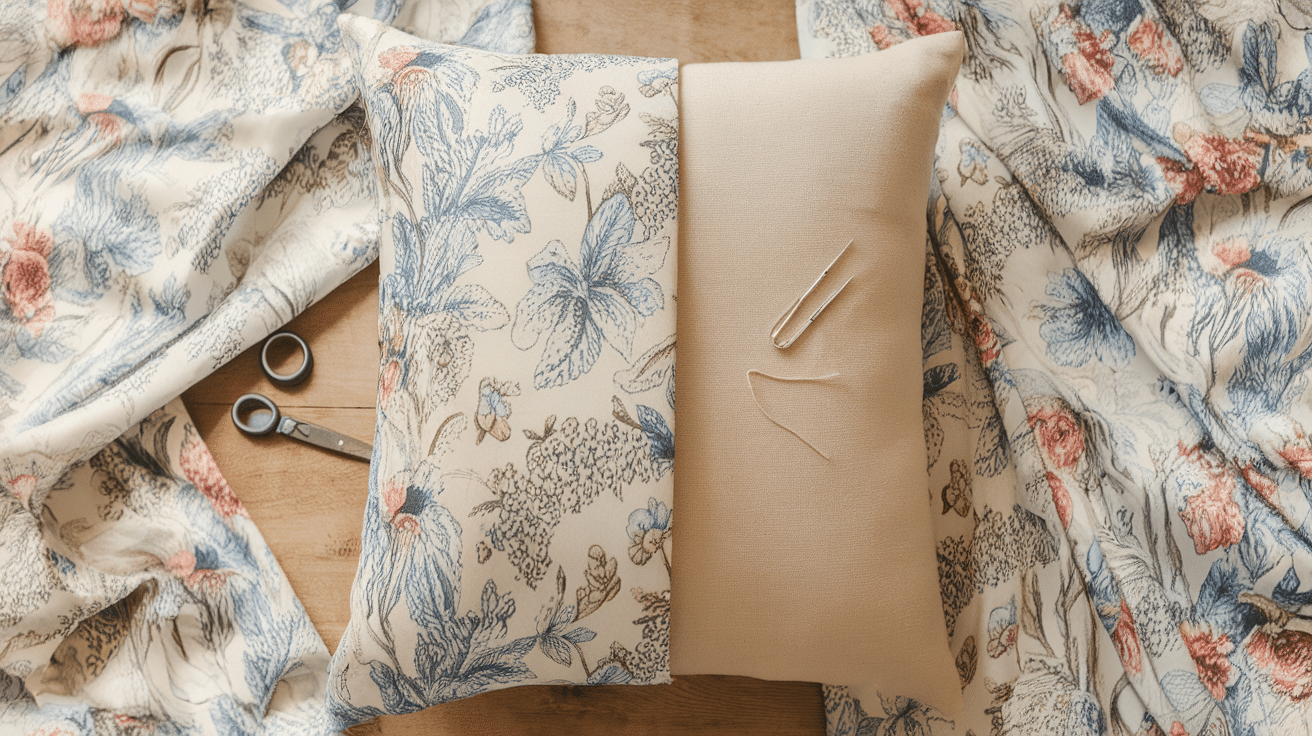
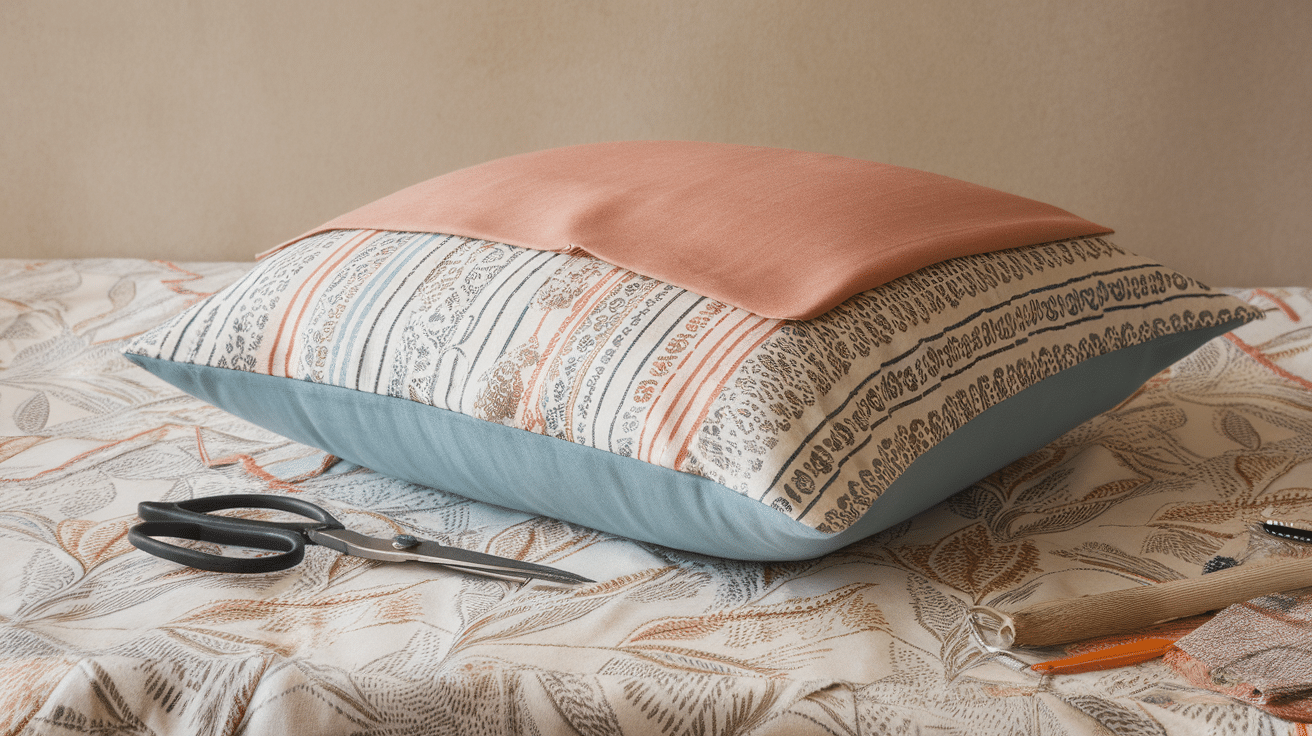
Simple DIY Throw Pillow Cover: Step-By-Step
Creating your own throw pillow covers is a quick, satisfying project that can instantly refresh your living space.
This beginner-friendly guide walks you through making a basic envelope-style pillow cover that requires minimal sewing skills and can be completed in under an hour.
What You’ll Need
- Your fabric
- Scissors or rotary cutter
- Sewing machine or needle and thread
- Measuring tape
- Pillow insert
- Pins
Step 1: Cut Your Fabric
This first step sets you up for success with your pillow cover project. Getting the measurements right now will save you headaches later!
- Cut one square the size of your pillow. Measure your pillow insert first. For an 18×18 inch pillow, cut a piece that’s 18×18 inches. I like a snug fit, but if you prefer a looser look, add an extra inch.
- Cut two smaller pieces (these will overlap on the back). For the back pieces that create your envelope closure, cut two rectangles that are the same width as your front piece but about 2/3 of the height. For an 18×18 inch pillow, cut two pieces that are 18×12 inches each.
The beauty of this method is that it creates a clean finish without zippers or buttons. These three simple pieces will come together to make a professional-looking cover that’s easy to remove for washing.
I always double-check my measurements before cutting. It’s frustrating to realize you’ve cut a piece too small and have to start over!
Step 2: Sew the Hemline
This step gives your pillow cover that professional finish and creates the opening for your pillow insert.
- Take the two smaller back pieces. Lay each rectangle flat on your work surface. These will form the back of your pillow cover with a neat overlapping closure.
- Fold and sew a hem along one long side of each rectangle. For each rectangle, fold one of the long edges over about ¼ inches. Then fold it over again another ¼ inch to hide the raw edge completely. Pin this folded hem in place. Using your sewing machine or needle and thread, sew a straight line close to the inner fold. This creates a clean, finished edge that won’t fray.
- This creates a clean edge where the pillow slips in. These hemmed edges will overlap in the middle of your pillow’s back, forming an envelope-style opening. The double-folded hem not only looks tidy but also prevents the fabric from fraying after repeated use and washing.
I like to use matching thread for a seamless look, but contrasting thread can add a fun decorative touch if that fits your style!
Step 3: Layer the Fabric
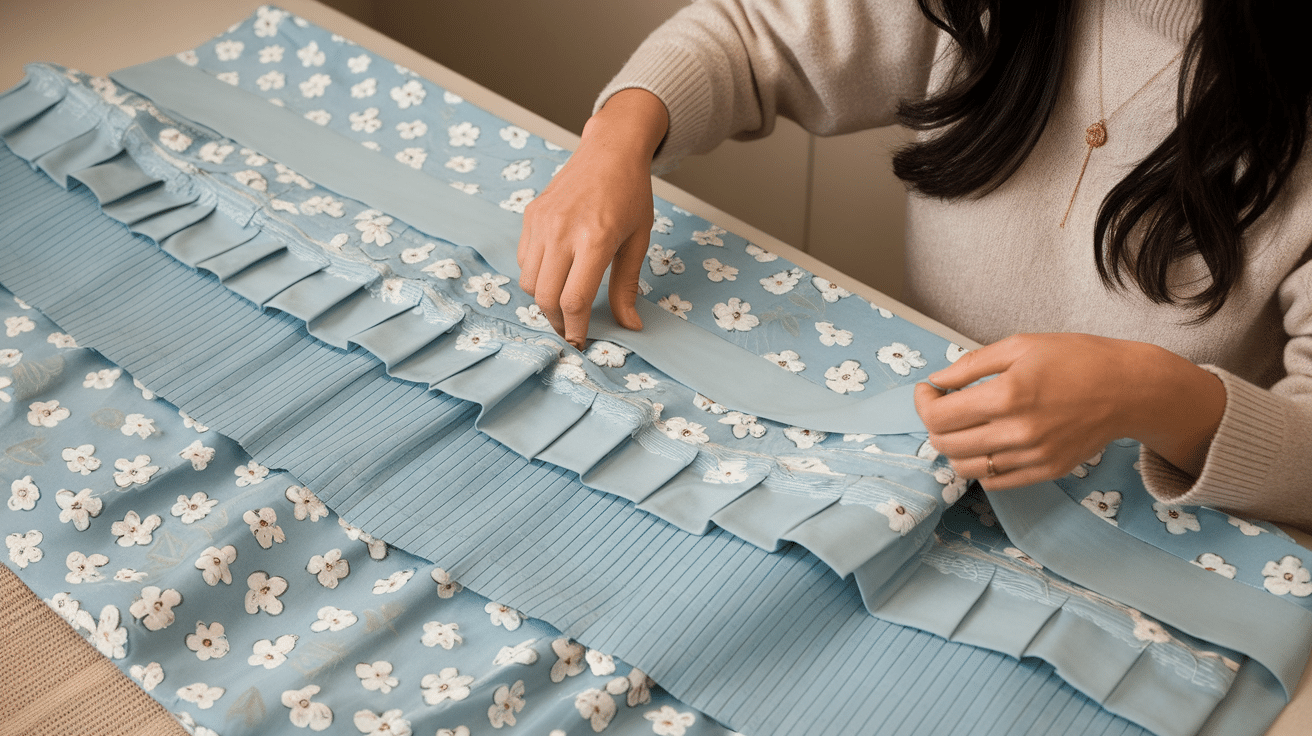
Now comes the part where your pillow cover starts to take shape! This step involves positioning the pieces correctly before sewing them together.
- Lay the large square face-up. Spread your front piece on a flat surface with the patterned or “right” side facing up. Smooth out any wrinkles to ensure your final product looks crisp.
- Place the two smaller hemmed pieces face-down on top, overlapping Take your two back pieces with the freshly sewn hems and place them on top of your front piece. The stitched edges should overlap in the middle, and the “right” sides of the fabric should be facing down (touching the right side of your front piece). Make sure the outer edges of these back pieces align perfectly with the edges of your front piece. The hemmed edges will create your envelope opening in the center.
- Pin around the edges. Insert pins all the way around the perimeter of your square, about an inch apart. This holds all three layers in place while you sew. I always add extra pins at the corners and where the back pieces overlap for added security. Nothing is more frustrating than having pieces shift while sewing!
This layering technique creates what sewers call a “fabric sandwich,” with all the raw edges aligned and ready to be sewn together in the next step.
Step 4: Sew Around the Edges
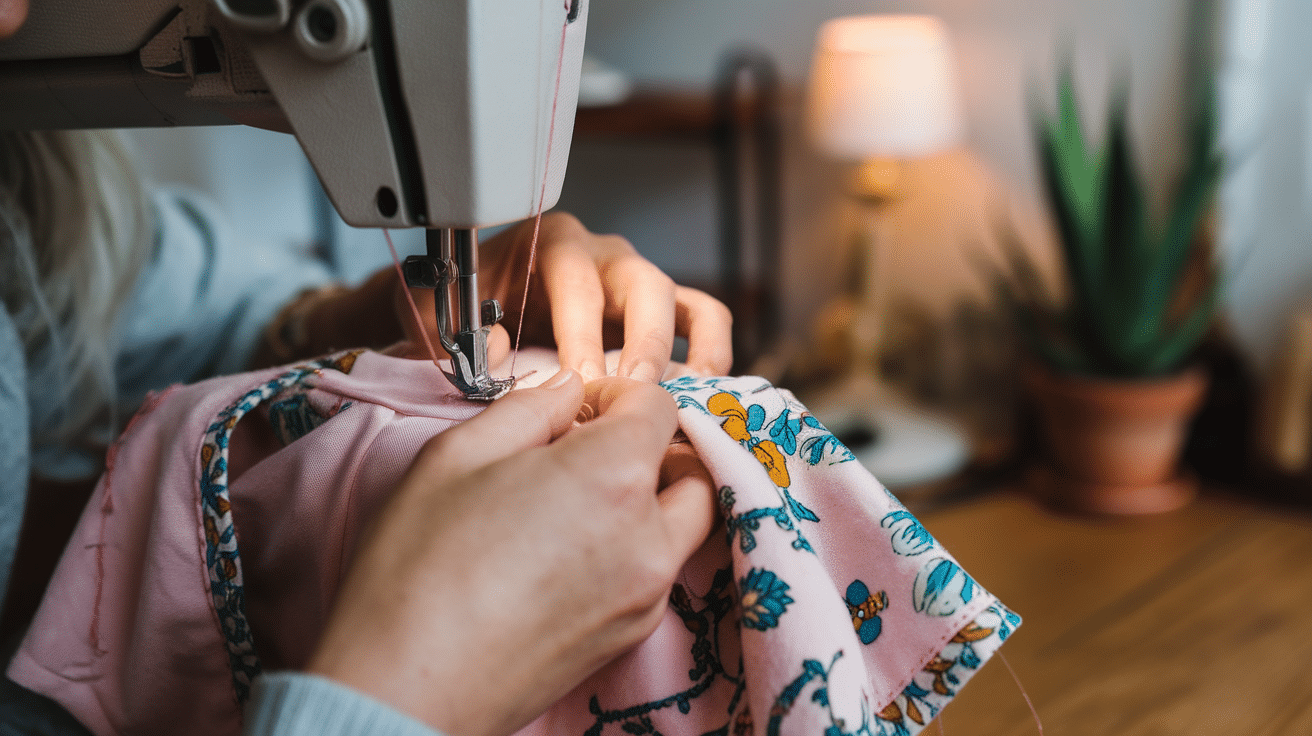
I’ll show you how to finish your project with neat edges. This step brings everything together!
- Grab your pins and sewing machine. It’s time to create those clean edges that make your work look professional.
- Take both fabric pieces and place them right sides together. Are they aligned perfectly? That’s good!
- Now, secure all edges with pins about 2 inches apart. This prevents shifting while you sew.
- Set your machine to a medium stitch length. Nothing fancy is needed here.
Begin at any corner. Lower the presser foot and start sewing with a ½” seam allowance. That means you’ll keep your stitching line ½ inches from the raw edge all around.
Keep these points in mind:
- Sew slowly around corners for better control
- Backstitch at the beginning and end
- Remove pins as you approach them
When you reach a corner, stop with the needle down in the fabric. Lift the presser foot, rotate your work, and then continue sewing. This creates sharp, clean corners.
Are your corners going to get heavy use? Reinforce them by sewing over the corner stitches twice. This extra step prevents tears where stress happens most.
Almost done! Trim any loose threads when you finish the final side.
Step 5: Turn It Right Side Out
Find the opening you left earlier. This is your turning point. Reach inside with your fingers and pull the fabric through. Take your time to avoid tearing the stitches.
You’ll see your project take shape as it turns. The corners will look rounded at first.
Push out each corner from the inside. Use your fingers for this.
If the corners are stubborn, try:
- A pencil eraser
- A chopstick
- A capped pen
Be gentle! Too much force might damage the fabric. Smooth your hands over everything to flatten the seams. Check that all corners look even. Your project now shows its right side with crisp, professional corners.
Step 6: Add the Pillow Insert

Grab your pillow insert. This gives your creation shape and comfort. Find the opening at the back of your cover. Push the pillow through this opening. Start with one corner first.
If it feels tight:
- Fold the insert in half
- Push it through gradually
- Adjust as you go
Once inside, fluff and shake to fill all corners evenly. See how your fabric comes alive now? The design shows perfectly. Step back and admire what you’ve made! Your handmade pillow is ready to brighten up your space.
Extra Tips for Success
Pre-wash Your Fabric: I always pre-wash my fabric before starting. This prevents any surprise shrinkage after you’ve made your pillow. There is nothing worse than a perfect pillow that suddenly gets smaller after washing!
Mix and Match Fabrics: Don’t stick to just one look! Using different patterns and textures together can create a more interesting space. Bold stripes with subtle florals? Go for it! Your couch or bed will look professionally designed.
Iron as You Go: Keep that iron handy during your project. Pressing seams as you work makes everything line up perfectly and gives your pillow that crisp, professional finish. This small step makes a big difference.
Make a Bunch: Once you’ve made one pillow, the next ones go much faster! I find it efficient to create several at once, assembly-line style. You’ll have a transformed room in no time, and they make wonderful gifts, too.
Try different sizes for visual interest. Small squares, rectangles, and even round pillows work well together!
Conclusion
Making your pillow covers is both rewarding and practical. I’ve shown you the simple steps, from fabric selection to adding the final insert.
You now have the skills to transform any room with custom pillows that perfectly match your style and budget. If you’re making just one special accent piece or a collection to refresh your entire space, these handmade touches add warmth and personality that store-bought items can’t match.
The best part? Once you’ve mastered these basic techniques, you can experiment with different fabrics, sizes, and even decorative elements like buttons or trim.
Your creativity is the only limit! So gather your materials, set aside a little time, and enjoy the satisfaction of creating beautiful, professional-looking pillows that will brighten your home for years to come.