
A deck can start looking faded and worn faster than most people expect. I’ve learned that a good stain job does more than improve the color. It also helps protect the wood from the sun, rain, and everyday wear and tear.
The good news is that you do not need to be a pro to get solid results.
In this guide, I’ll share how to stain a deck step by step using simple tools and easy methods.
You’ll learn how to clean and prepare the wood, choose the right stain, avoid common mistakes, and apply stain evenly for a smooth finish.
I’ll also cover how to stain a deck with a roller if you want a faster way to cover large areas.
By the end, you’ll feel ready to give your deck a fresh, clean look that lasts.
Signs Your Deck Needs Staining
A deck usually shows visible changes as the stain protection wears away over time.
- Faded or gray color: Sunlight and weather exposure can make deck boards lose their rich color and develop a dull, worn appearance
- Water soaking into the wood: If water no longer beads on the surface, the old stain protection has likely worn away completely
- Cracks, splinters, or rough texture: Dry unprotected wood may crack, splinter, or feel rough, making the deck less safe and comfortable
- Mold, mildew, or dark stains: Moisture trapped inside untreated wood can cause mold, algae, and discoloration that damages the deck surface
- Peeling patchy or uneven finish: Old stain may wear unevenly or peel away, showing the deck needs a fresh stain for protection and appearance
Things You Should Know Before Staining a Deck
Before staining a deck, it is important to prepare the wood properly for the best results. A clean, dry, and smooth surface helps the stain absorb evenly and last longer.
Check the weather before starting, because rain or high humidity can affect drying and leave an uneven finish.
Most deck stains work best in mild temperatures, with several dry days ahead. You should also choose the right stain type based on the wood condition and the look you want.
Transparent stains show more wood grain, while solid stains provide stronger coverage.
Always test the stain on a small hidden area first to confirm the color and finish.
Taking time to prepare the deck correctly can improve appearance, increase durability, and protect the wood from sunlight, moisture, and daily outdoor wear.
Tools and Materials Needed to Stain a Deck
Having the right tools and materials before you begin can make deck staining easier, faster, and more professional-looking from start to finish.
How to Stain a Deck Like a Pro?
The staining process works best when each step is completed in the correct order, with enough drying and preparation time between stages
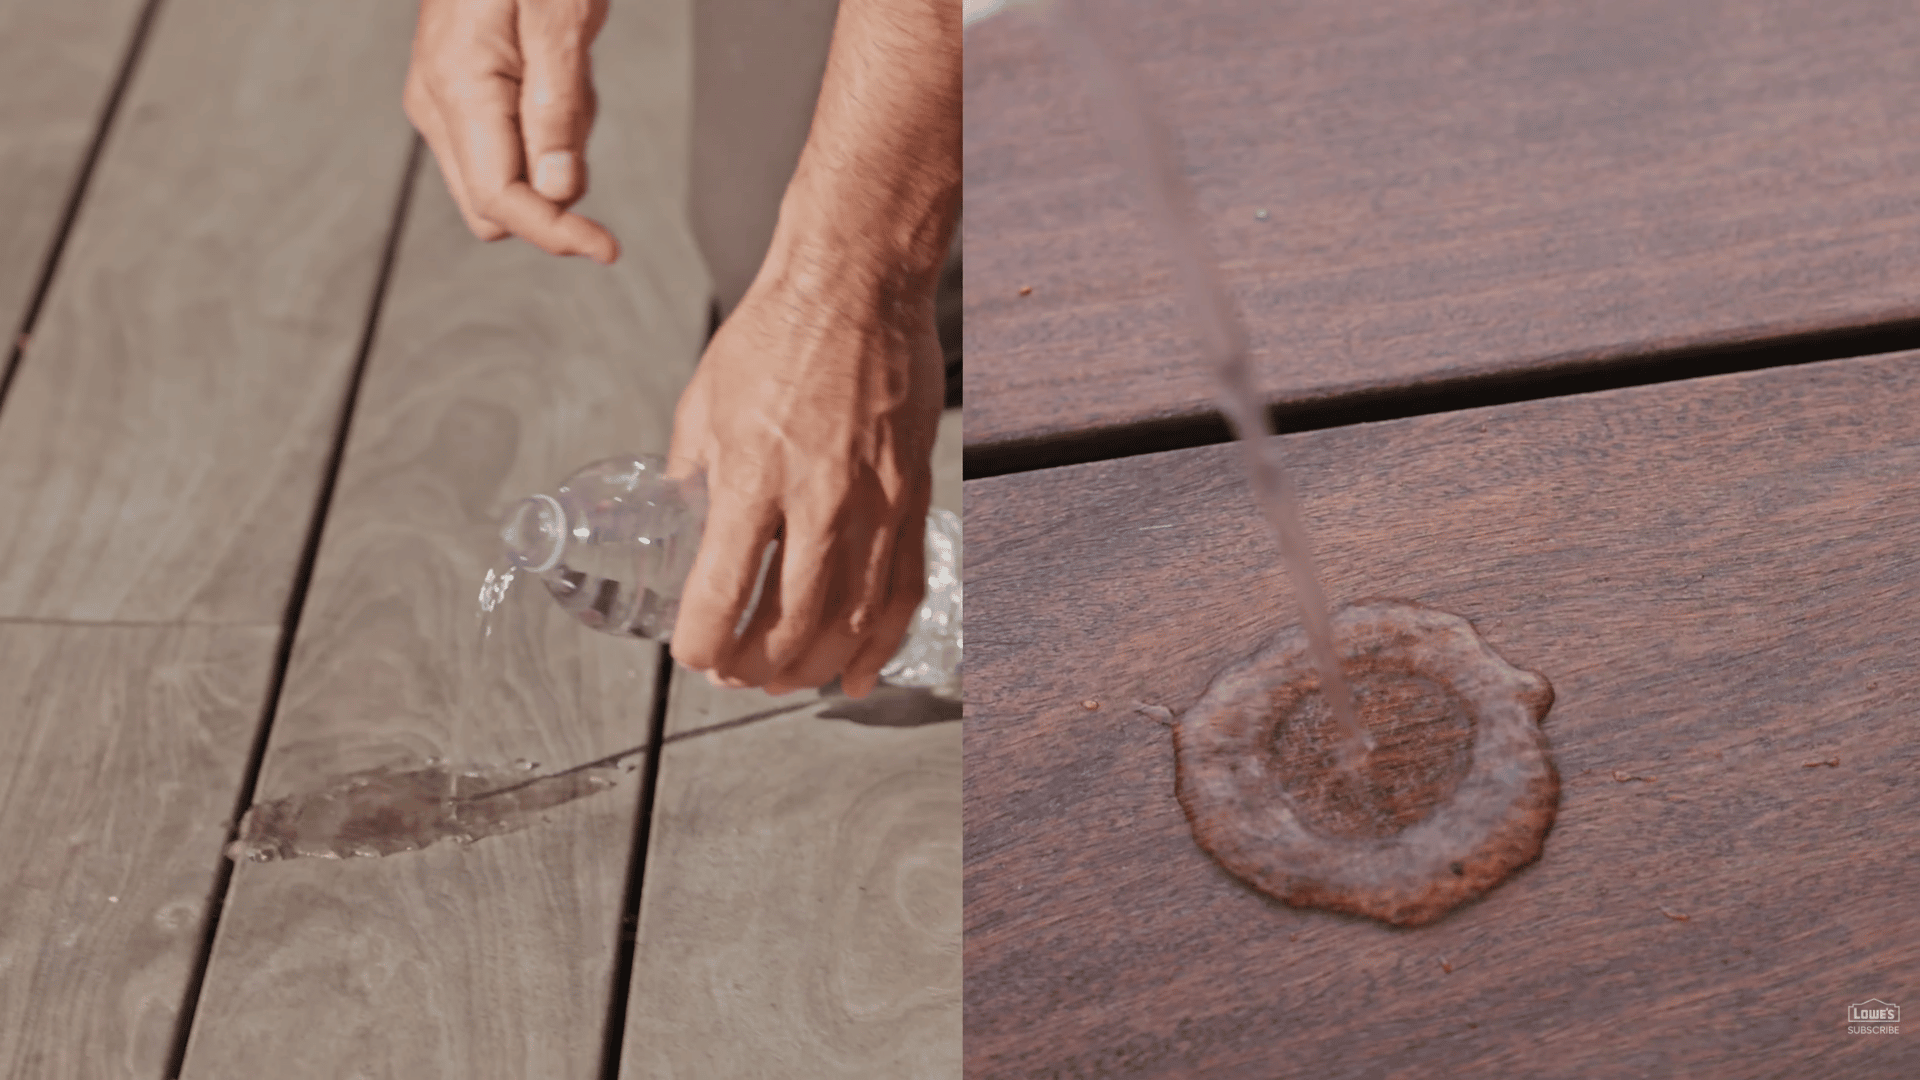
Step 1: Check If Your Deck Needs Refinishing
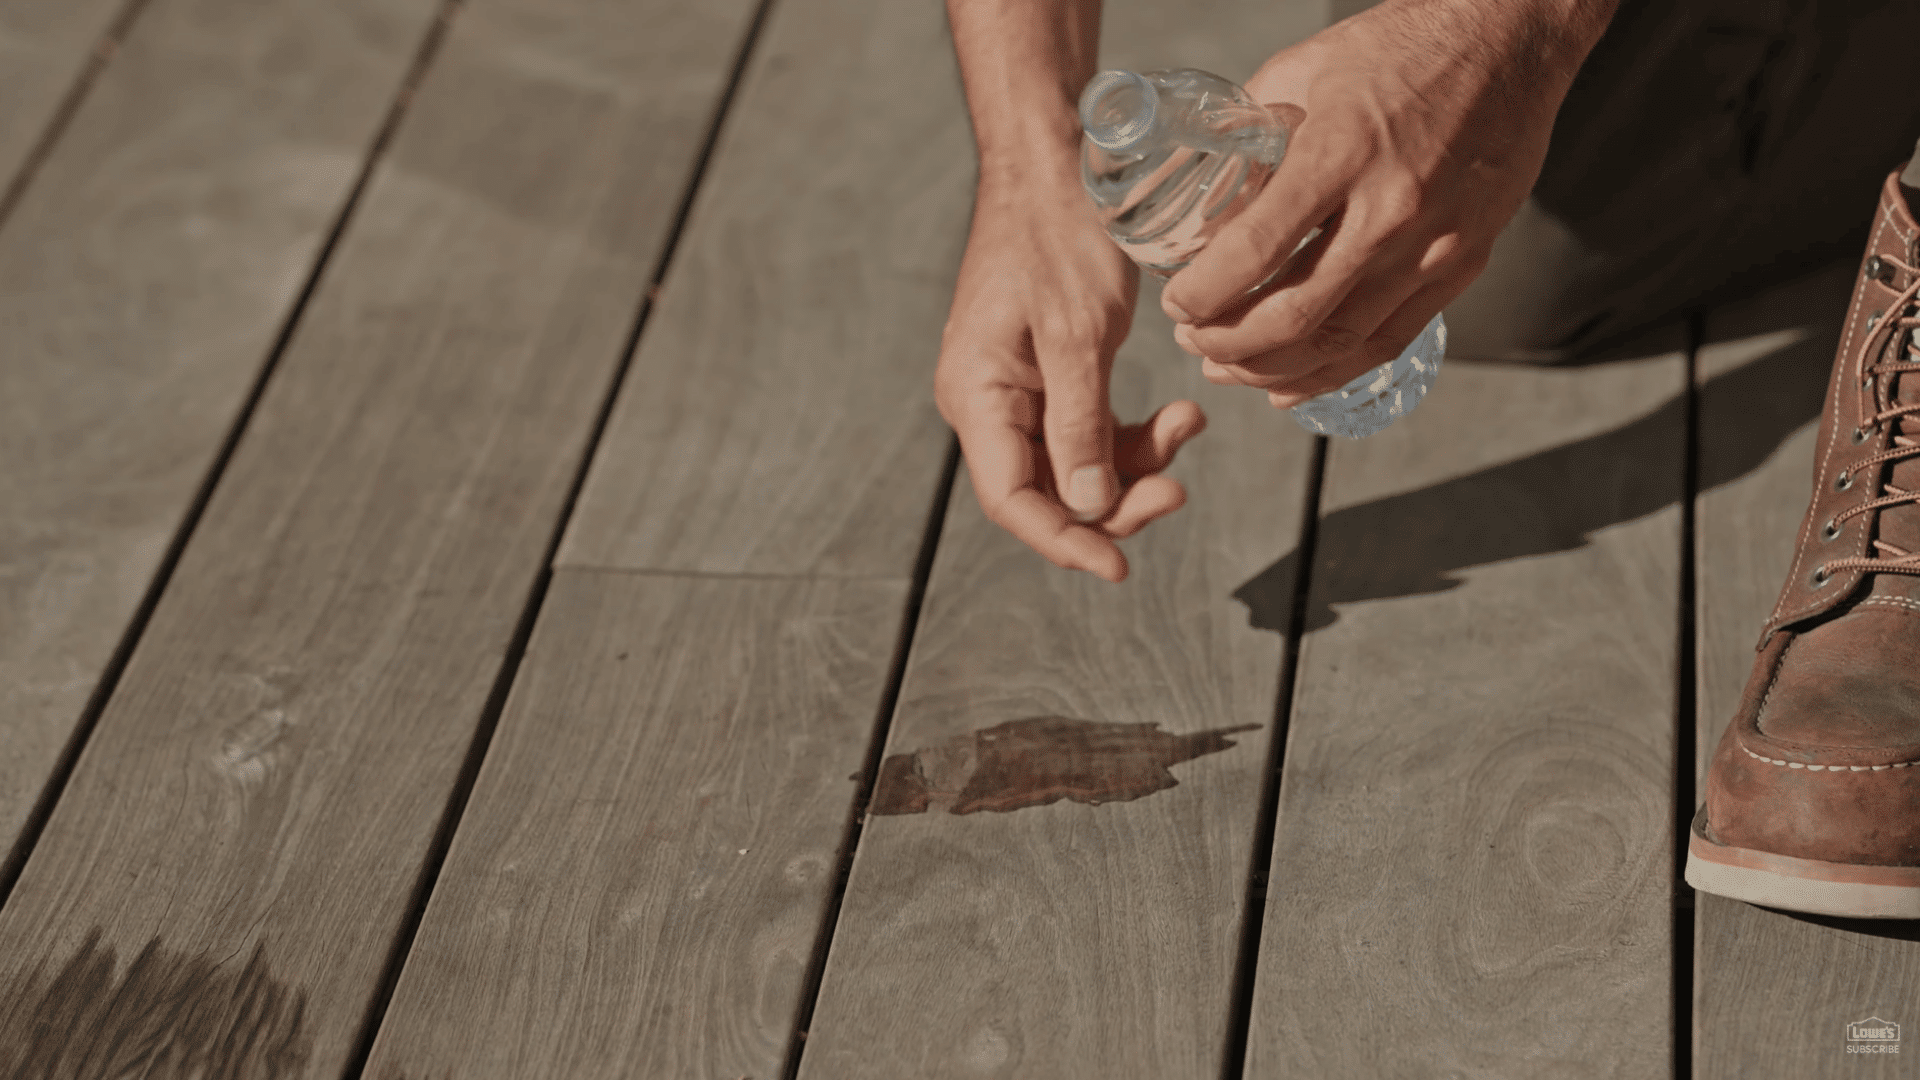
Start by inspecting the deck for fading, gray wood, stains, or visible weather damage.
To check if the old stain still protects the surface, pour a small amount of water onto the deck. If the water beads up, the stain is still working properly.
If the water soaks into the wood quickly, the protective layer has likely worn away, and the deck needs refinishing.
This simple water test helps determine whether your deck is ready for cleaning, sanding, and a fresh coat of stain.
Step 2: Apply Wood Stripper
Use a wood stripper to remove old stain and sealer before applying a fresh finish. Pour the stripper into a pressure washer, then spray the entire deck surface evenly.
Use a broom or stiff brush to spread and scrub the solution into the wood for better coverage.
Let the stripper sit for about 15 minutes to properly loosen the old finish. Avoid letting the stripper dry in direct sunlight, because this can reduce effectiveness.
If needed, lightly mist the surface with water to keep it damp during the process.
Step 3: Scrub Tough Stains
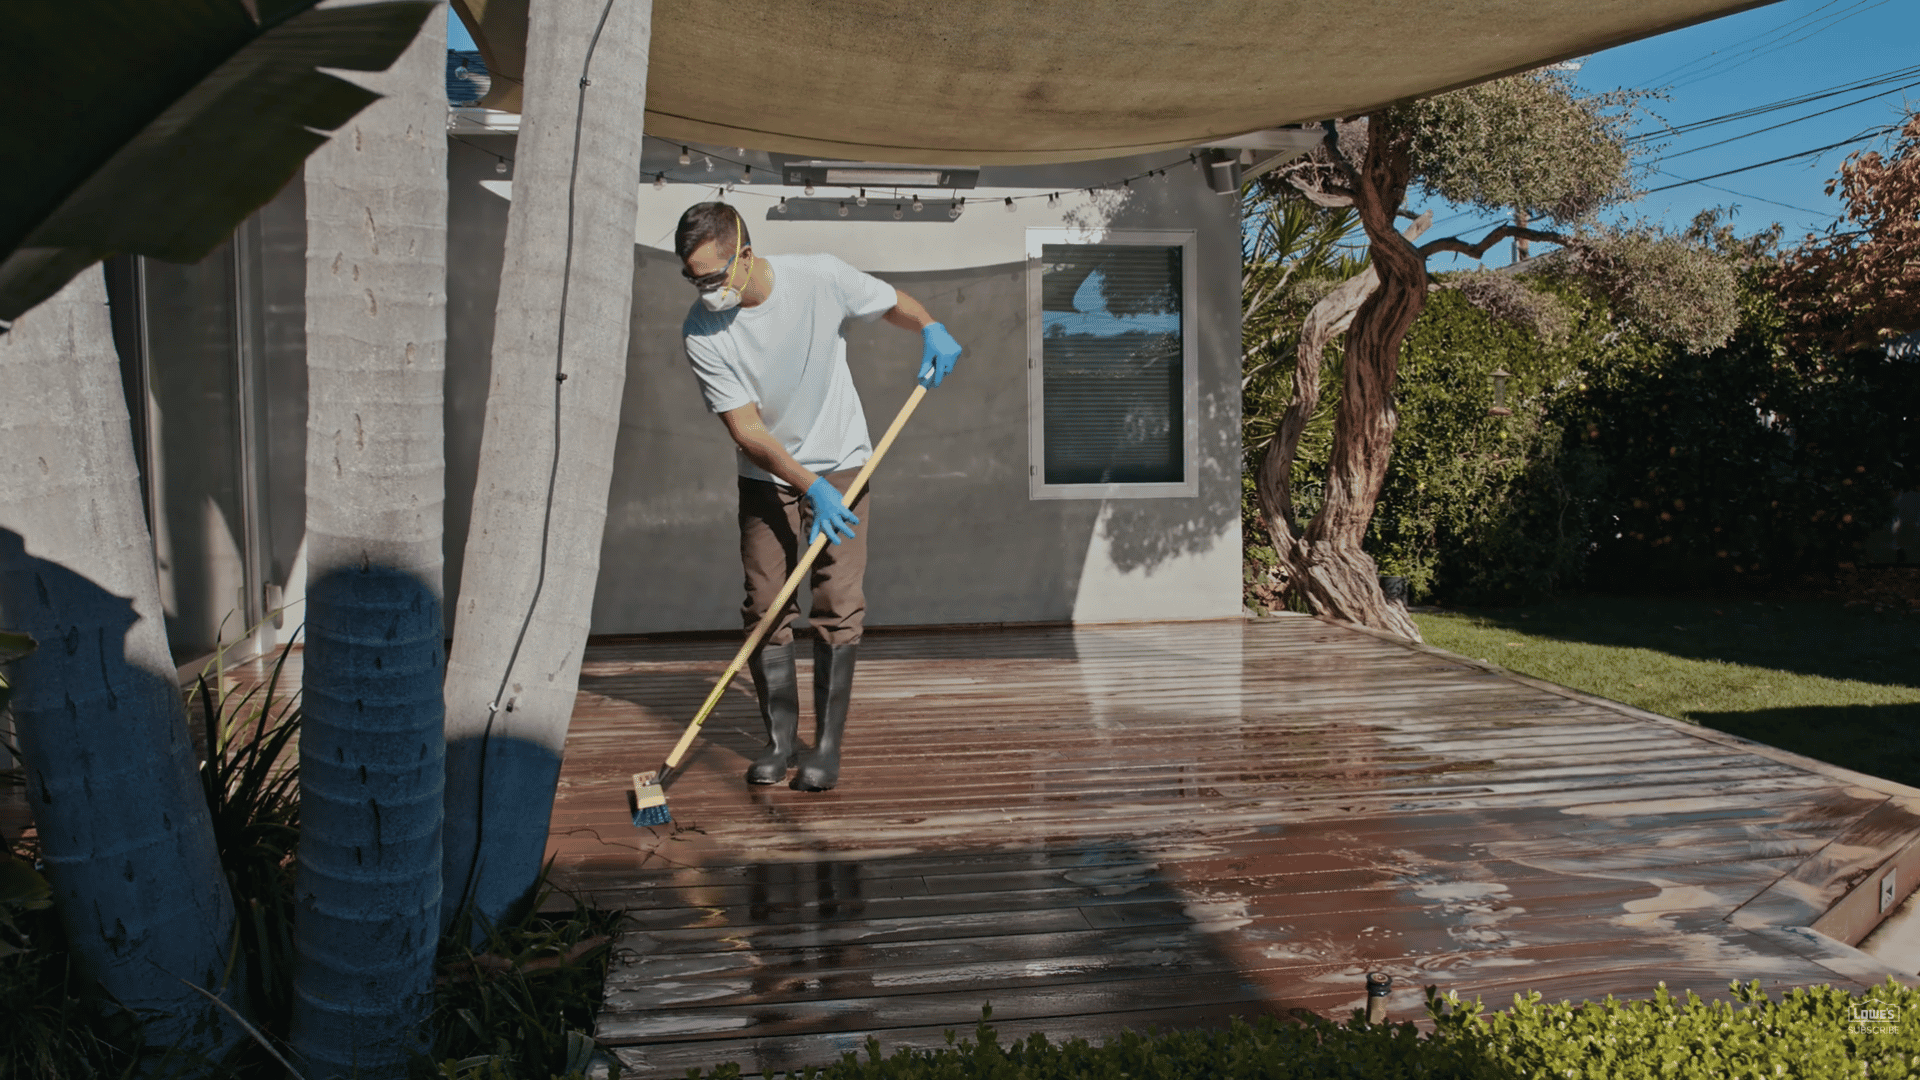
Use a stiff push broom to scrub stubborn stains and help the wood stripper reach deeper into the deck surface.
Scrubbing loosens trapped dirt, old stains, and buildup from the wood grain more effectively than spraying alone.
Focus on heavily stained or weathered areas where grime has collected over time. Apply firm, even pressure while working across the boards to avoid uneven cleaning.
This step improves stain removal and helps prepare the deck for a smoother, more even finish before refinishing begins.
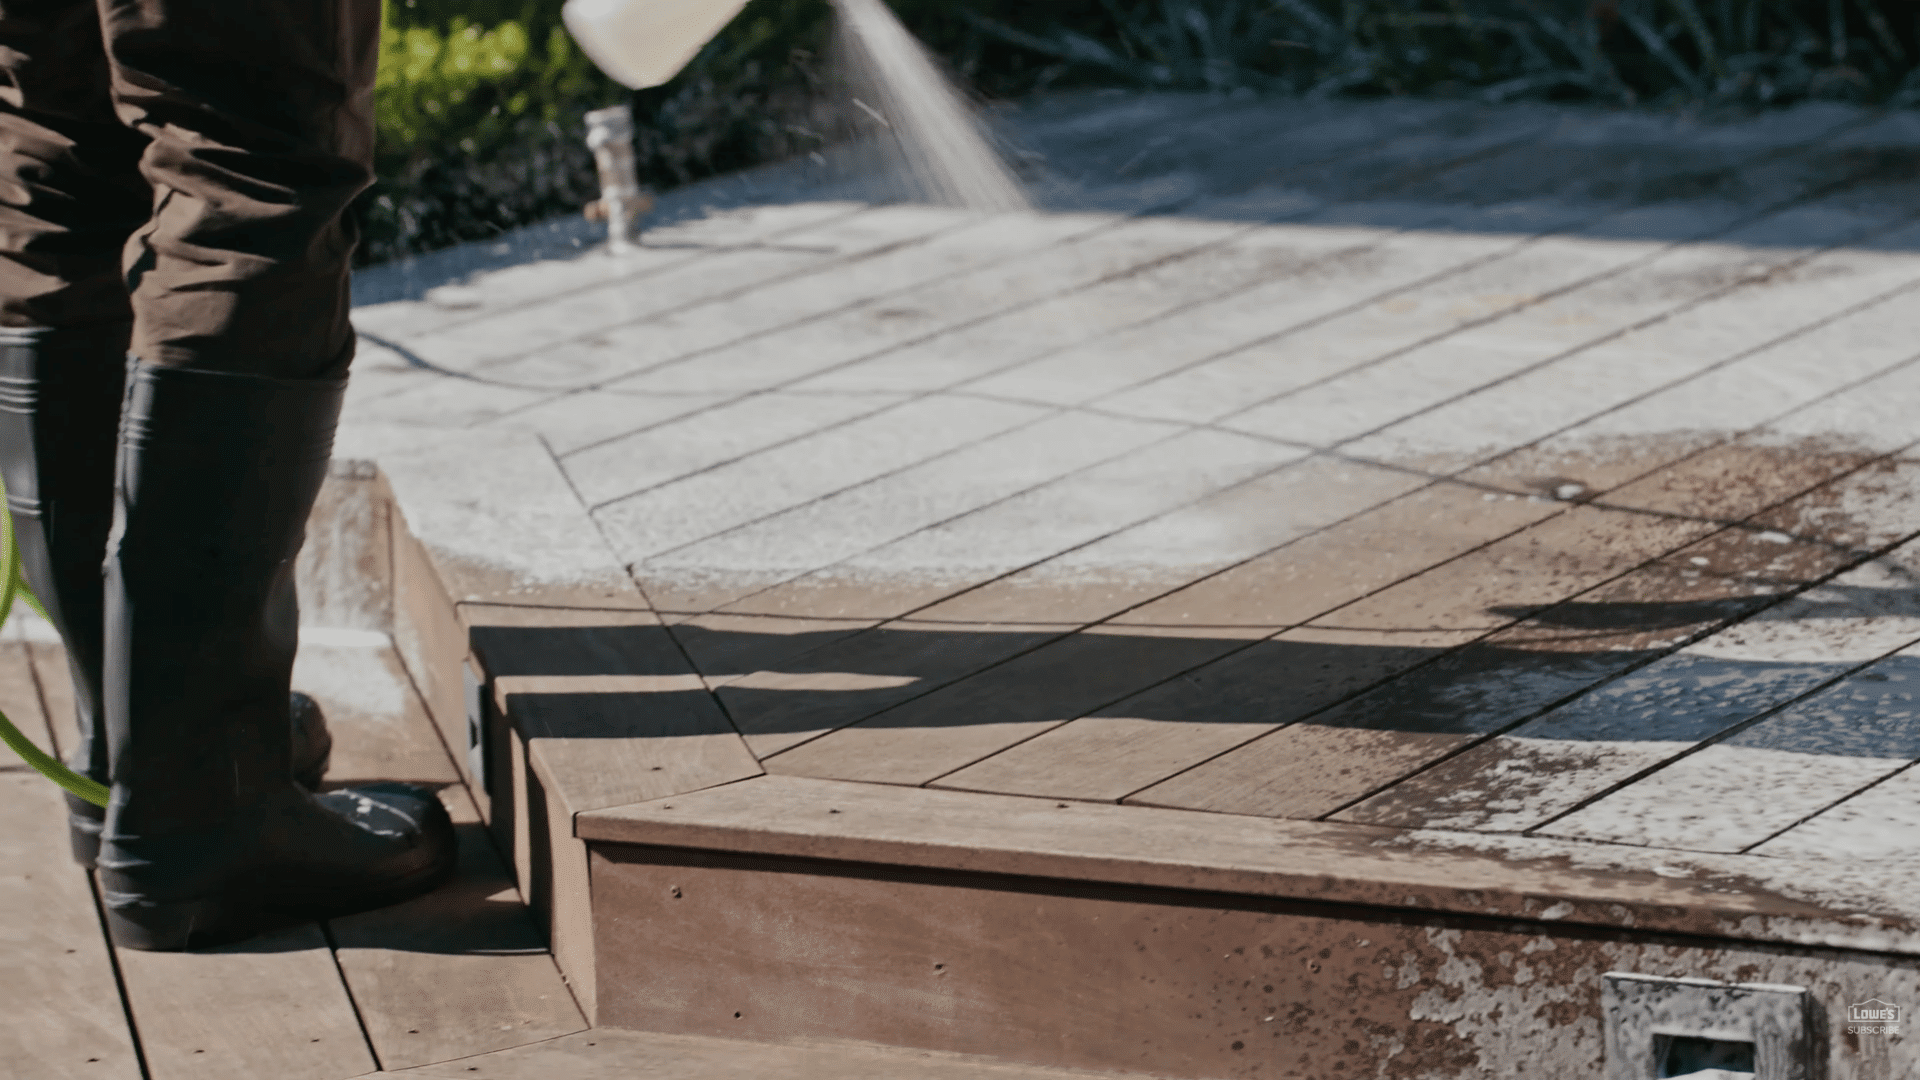
Step 4: Pressure Wash the Deck
Pressure wash the deck thoroughly to remove loosened stain dirt and leftover stripper residue from the wood surface.
Use a 40-degree white pressure washer tip for safer, even cleaning. Keep the nozzle at a consistent height to avoid uneven marks on the wood.
Overlap each cleaning stroke by about fifty percent for full coverage, and feather the spray at the end of every pass for a smoother finish.
Never start or stop the pressure washer directly on the deck, as this can damage the wood surface.
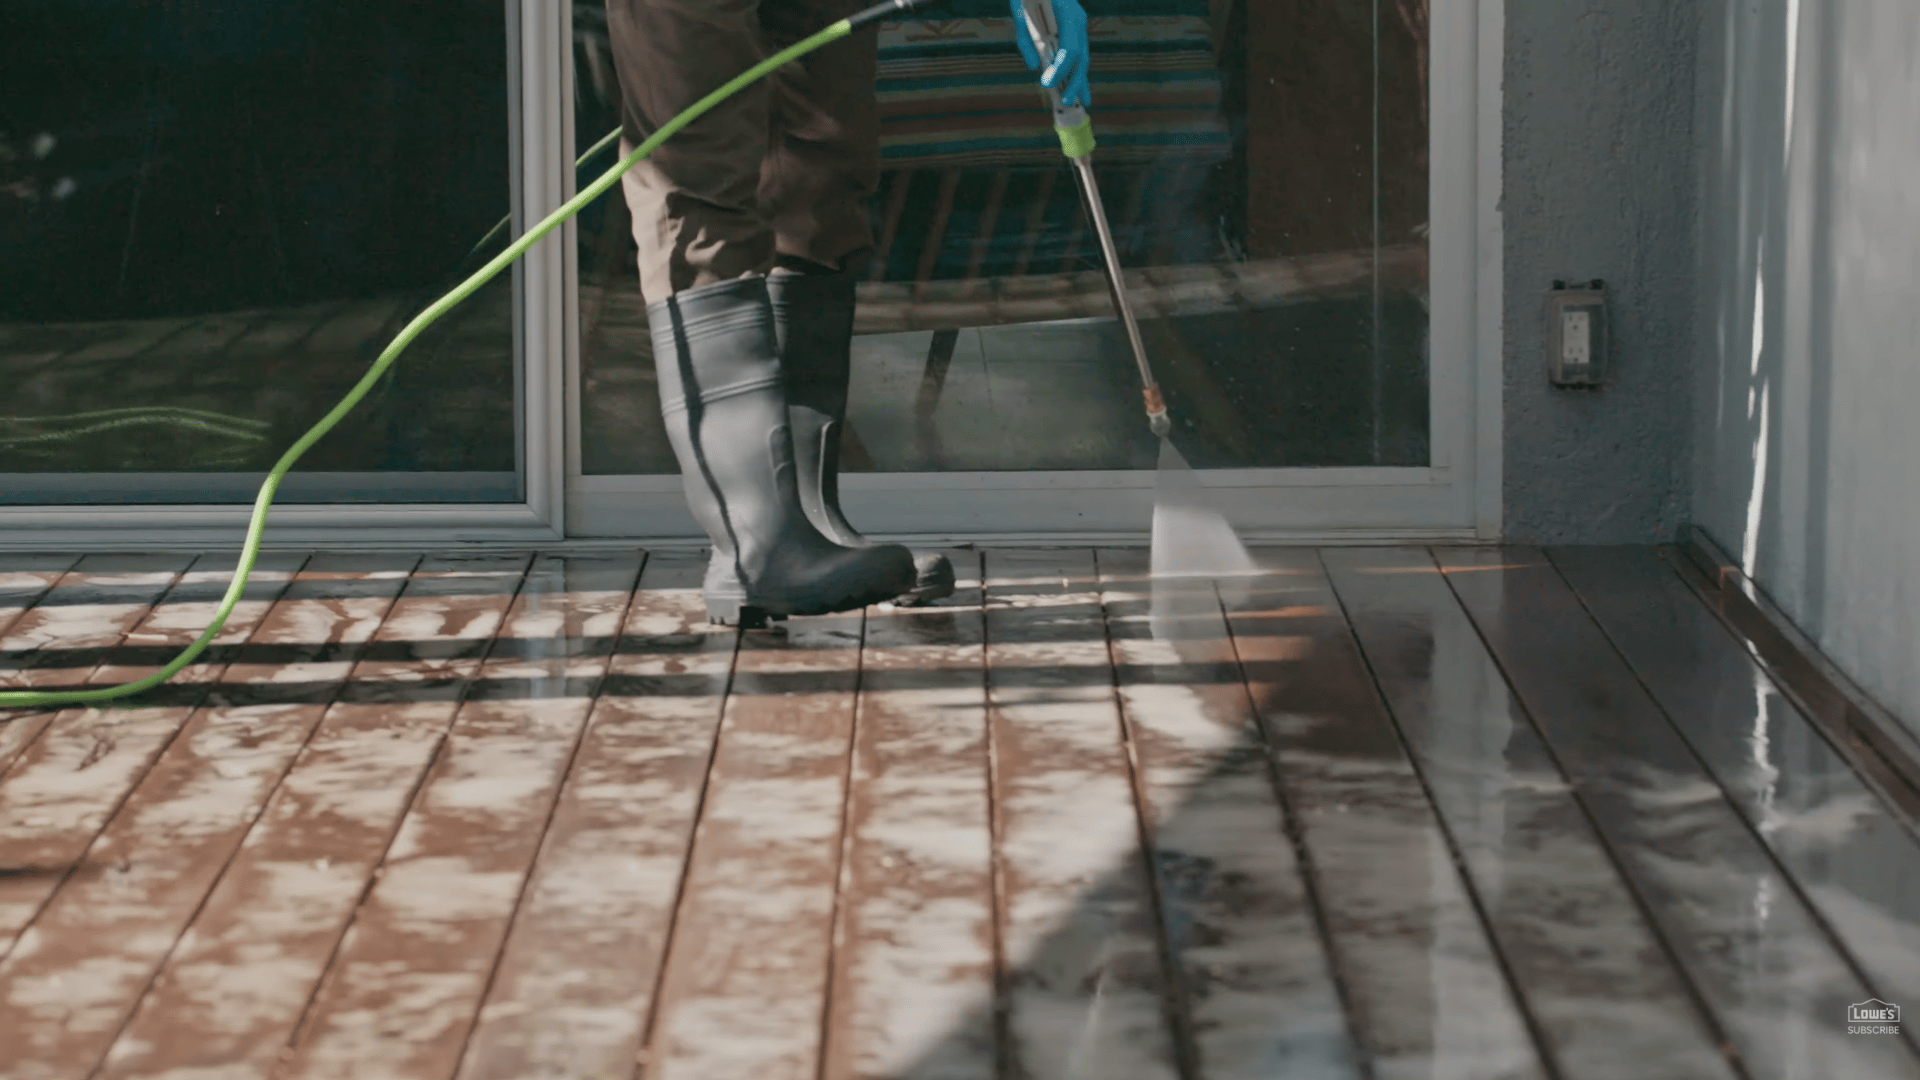
Step 5: Rinse the Deck Thoroughly

Use a garden hose to rinse away any remaining stripper residue after pressure washing the deck.
A thorough rinse helps remove leftover chemicals, dirt, and loosened stains from the wood surface.
Pay close attention to nearby plants, siding, and surrounding areas, because stripper residue can damage surfaces if left behind.
Continue rinsing until the water runs clear and the deck feels clean to the touch.
This step also helps prepare the wood for drying, sanding, and the next stage of the staining process.
Step 6: Apply Wood Cleaner and Brightener
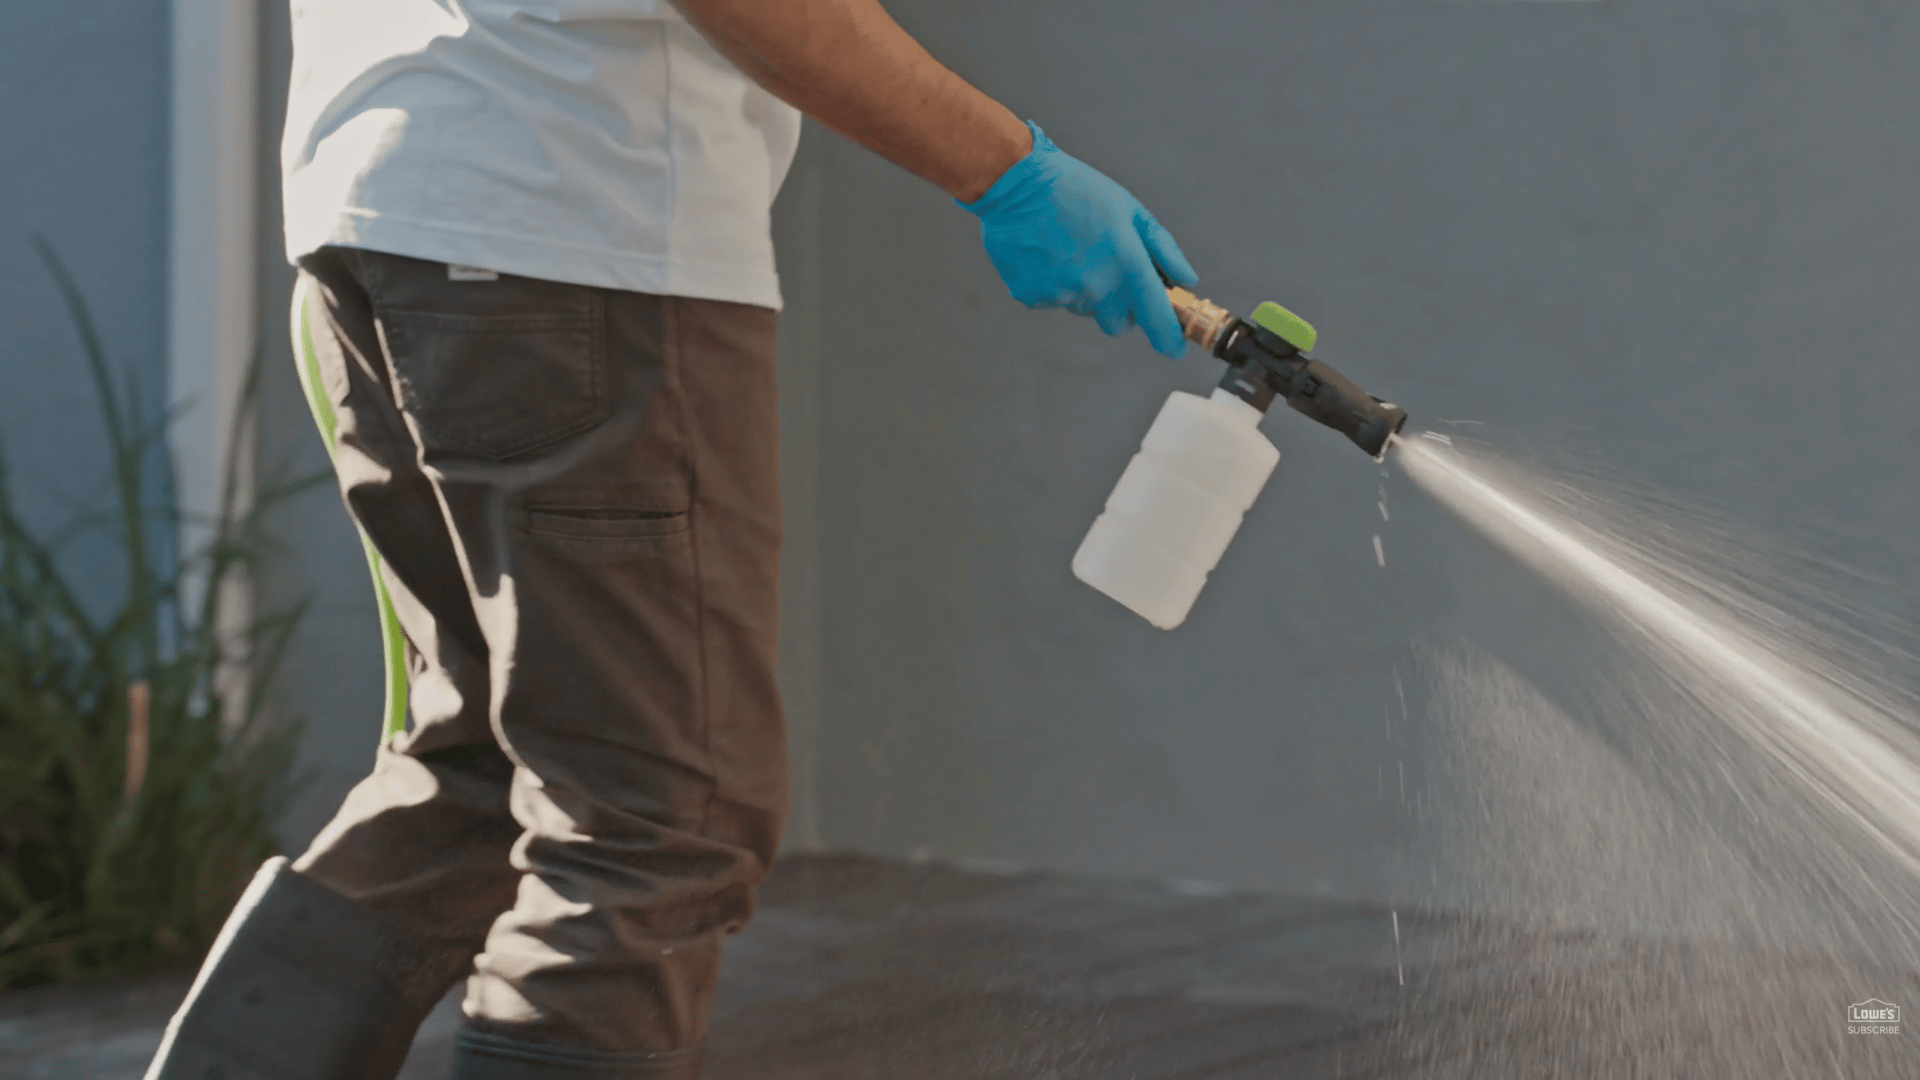
While the deck is still wet, apply a wood cleaner or wood prep product to help brighten the surface and improve stain absorption.
Spray the solution evenly across the entire deck, ensuring all boards are properly covered.
Let the product sit for about 15 minutes so it can break down stains, rust marks, and leftover residue from the previous finish.
After the waiting period, rinse the deck thoroughly with clean water. This step helps restore the natural wood appearance and prepares the surface for staining.
Step 7: Sand Problem Areas

After the deck dries completely, use a random orbital sander with fine-grit sandpaper to smooth the wood surface and remove any remaining stains or rough areas.
Focus on spots that feel uneven or still show signs of old finish.
Feather the sanded sections gently into the surrounding wood so the surface looks even and natural.
Once sanding is finished, use a leaf blower to remove all dust and debris. A clean, dust-free surface helps the stain absorb more evenly and improves the final appearance.
Step 8: Protect Nearby Surfaces
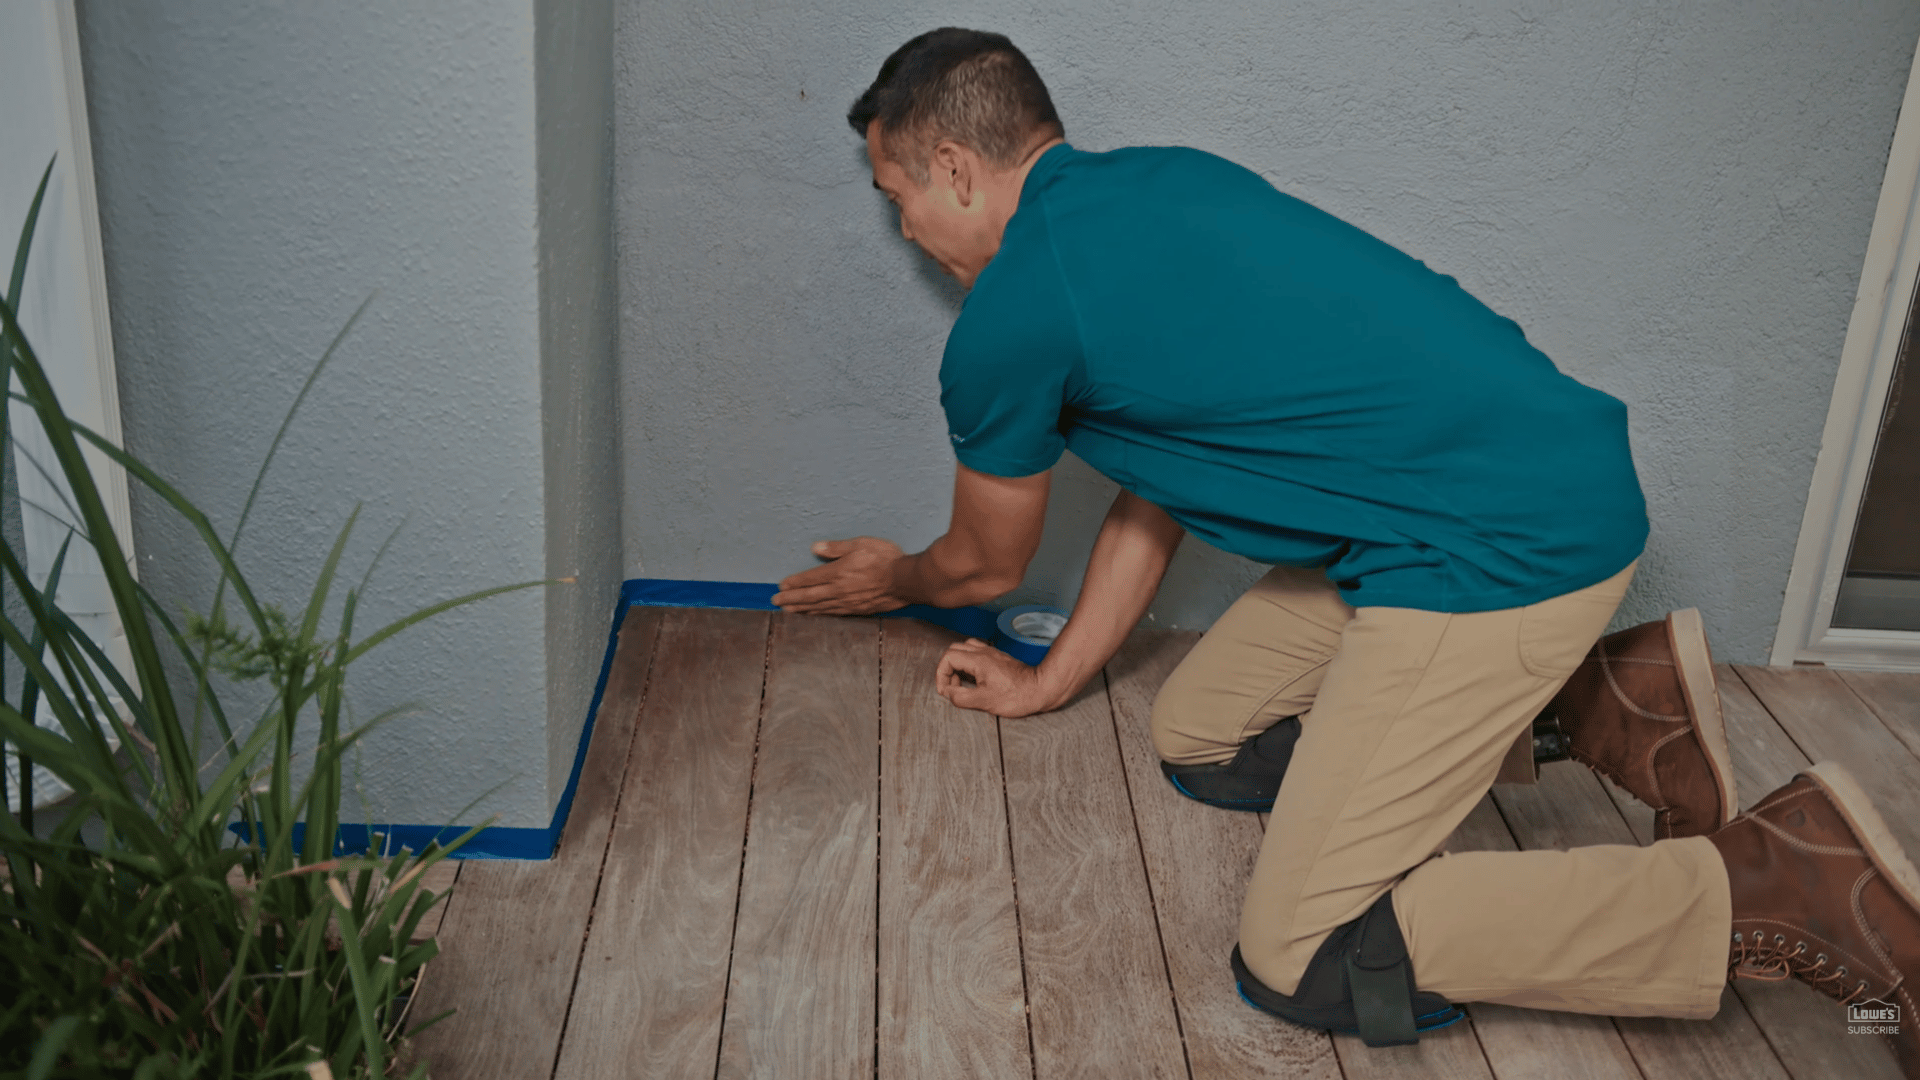
Before staining, tape off siding, walls, railings, and nearby areas you want to protect from accidental splashes or drips.
Proper masking helps create cleaner edges and prevents stains from damaging surrounding surfaces.
Use contractor’s paper instead of plastic when covering nearby areas because paper absorbs stain drips more effectively.
Plastic can cause stains to run or pool, creating messy marks and extra cleanup.
Taking time to protect nearby surfaces makes the staining process cleaner, safer, and easier to manage from start to finish.
Step 9: Apply the Deck Stain
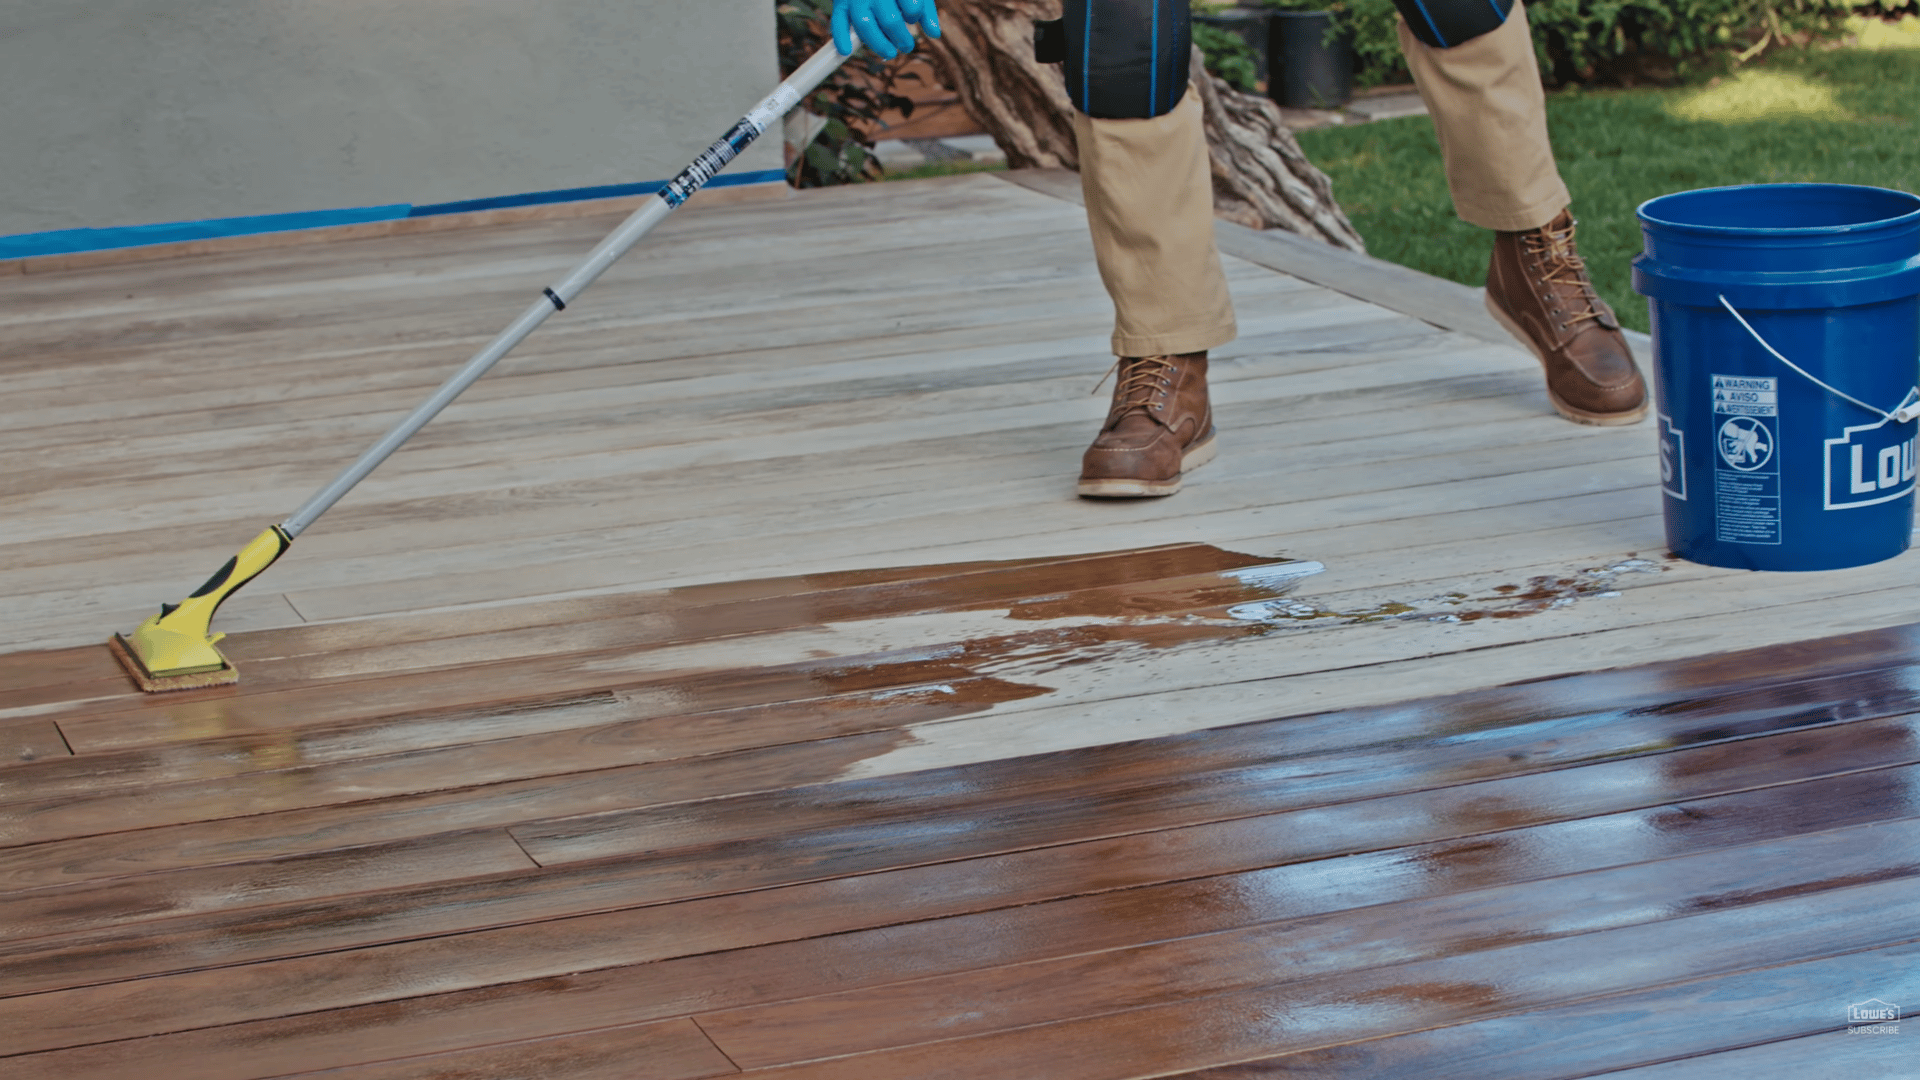
Use a stain pad instead of a roller for better control and to reduce splatter during application.
Begin staining from one corner of the deck and work with the natural wood grain for a smoother, more even finish.
Apply stain in small sections to prevent lap marks and uneven drying. Avoid leaving puddles or heavy buildup on the surface because excess stain can dry unevenly.
If too much stain collects in one area, gently wipe it away using a clean, dry stain pad for a cleaner final appearance.
Step 10: Stain the Deck Stairs
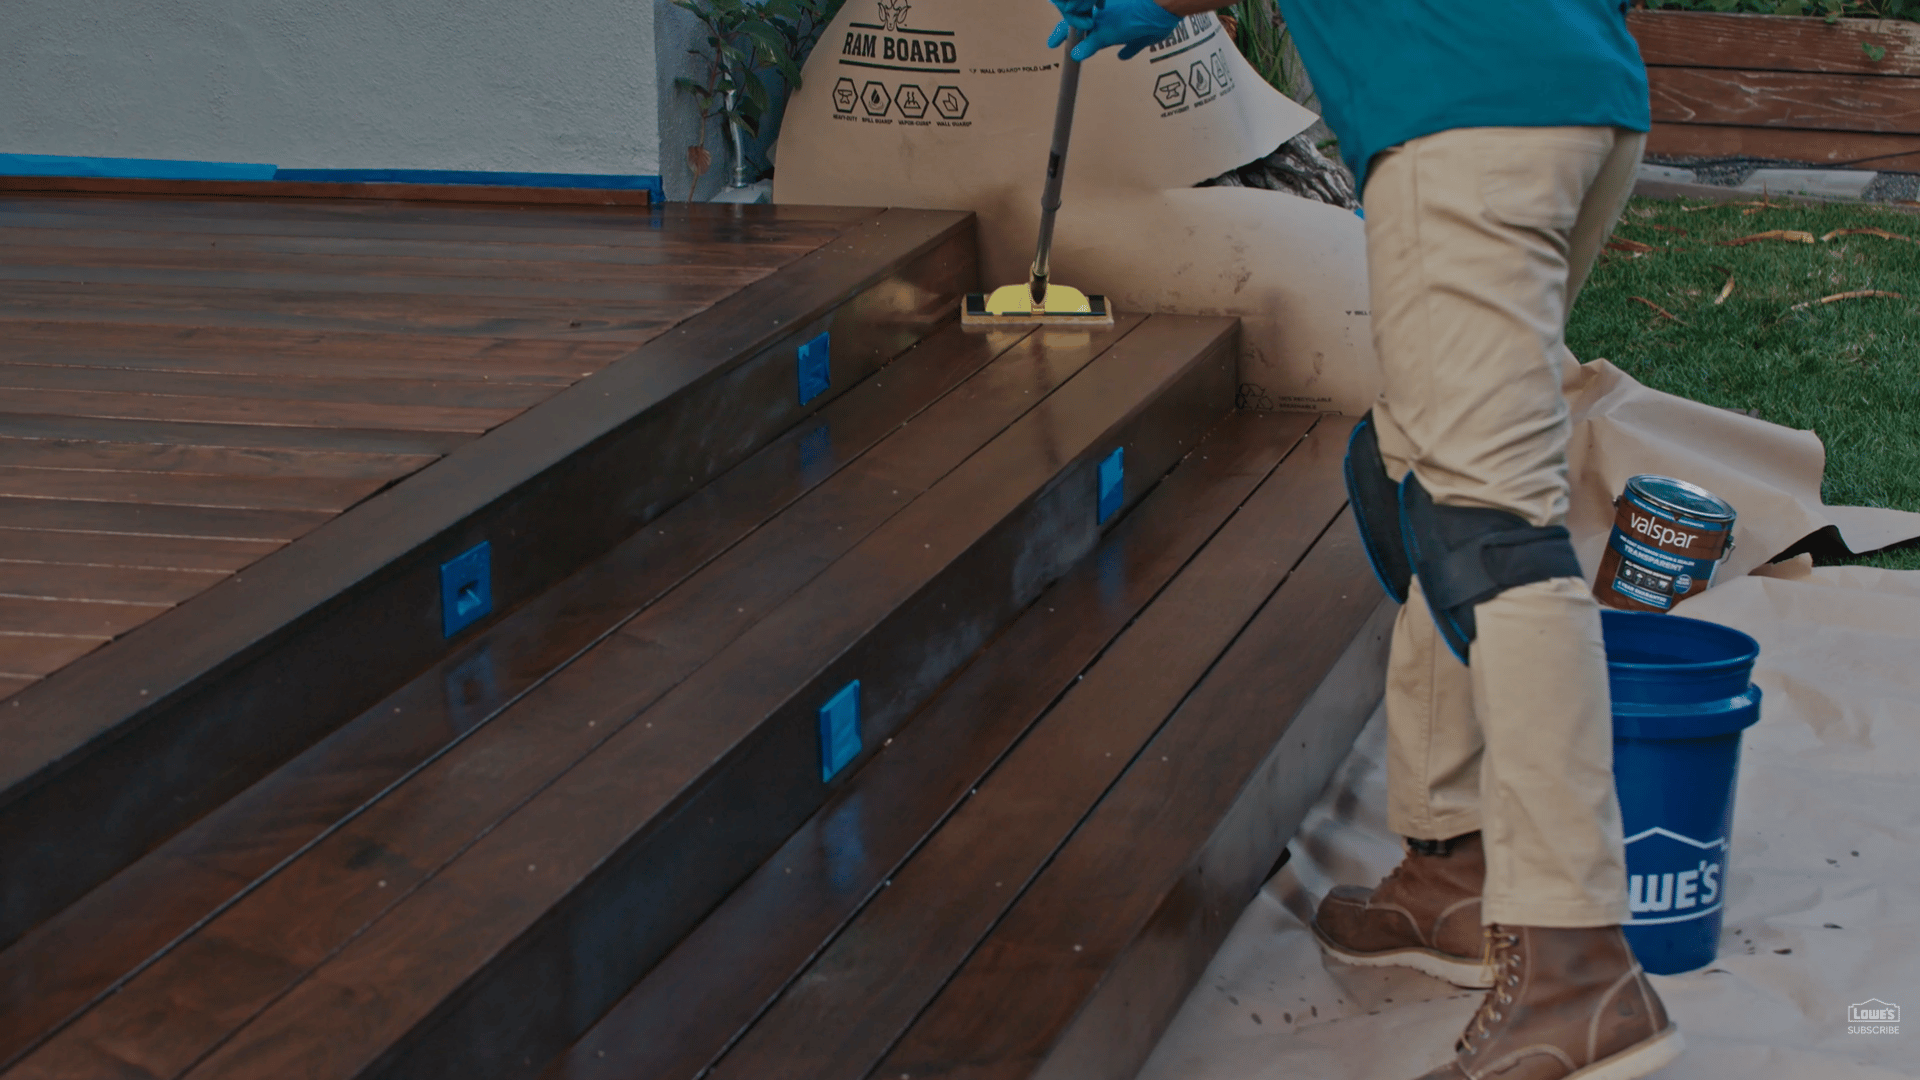
For stairs and vertical surfaces, use an airless sprayer to apply stain quickly and evenly across the wood.
After spraying, use a brush or stain pad to back-brush the surface, working the stain deeper into the wood grain for a smoother finish.
If you do not have an airless sprayer, a simple spray bottle can also help apply stain in smaller areas.
This method works especially well around corners, edges, railings, and other tight spaces that are harder to reach with larger tools.
Step 11: Test the Finished Deck
Once the stain has fully dried, repeat the same water test used earlier by pouring a small amount of water onto the deck surface.
This time, the water should bead up rather than soak into the wood.
Beading water is a clear sign that the stain has sealed the deck properly and created a protective barrier against moisture.
A well-sealed deck is better protected from rain, sunlight stains, and everyday outdoor wear, which helps extend the life of the wood.
Step 12: The Result
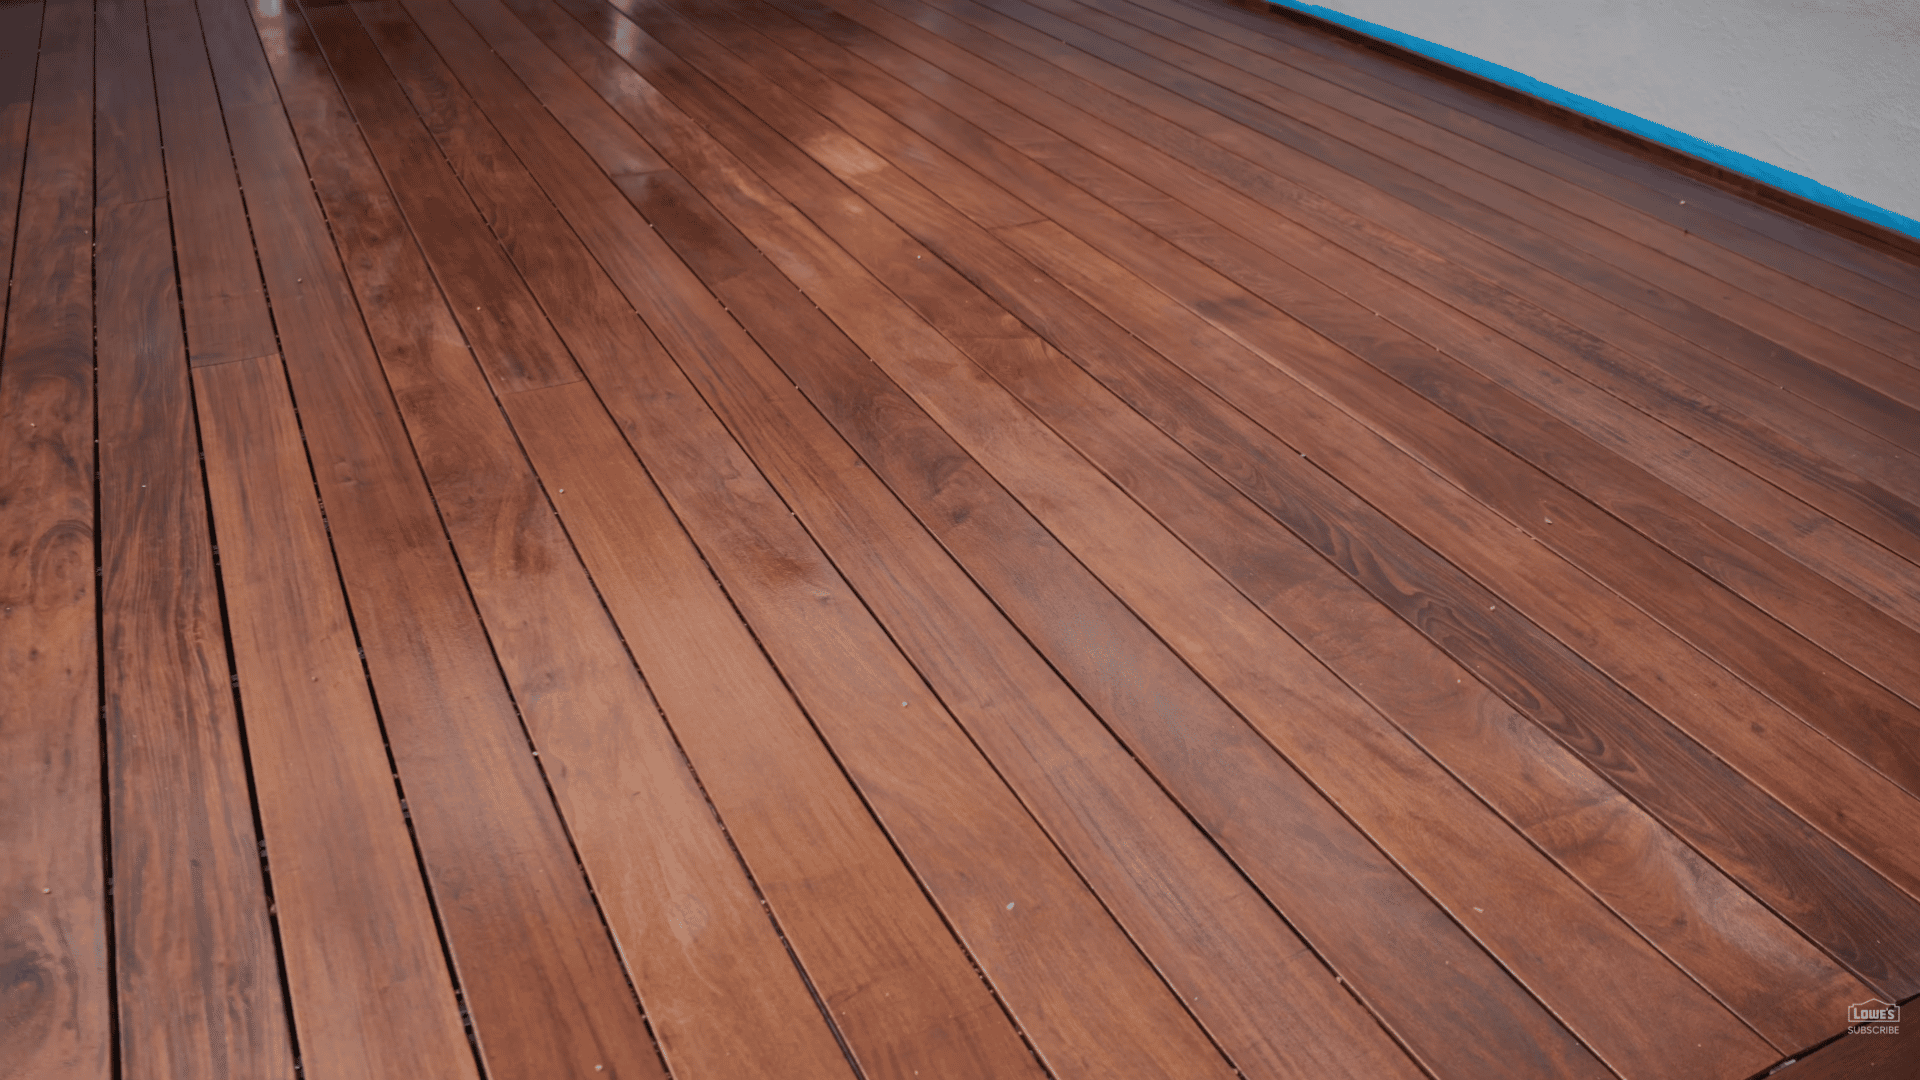
The deck is now fully stained and sealed, creating a fresh, protected finish that helps guard the wood against moisture, sunlight, and daily wear.
Allow the stain to dry completely before placing furniture, rugs, or decorations back onto the surface.
Drying times may vary depending on weather conditions, temperature, and the type of stain used.
Walking on the deck too early or moving heavy items back too soon can leave marks or damage the new finish before it fully cures and hardens properly.
This tutorial is based on a helpful video by Lowe’s Home Improvement. You can check out the original video on their YouTube channel here or watch it below.
How to Maintain a Stained Deck?
Regular care helps protect the stain finish and keeps the deck looking clean, attractive, and long-lasting throughout the year
- Clean the deck regularly: Sweep away dirt, leaves, and debris often to prevent stains, moisture buildup, and surface damage over time
- Wash the surface gently: Use mild deck cleaner and water to remove grime, mold, and mildew without damaging the stained finish
- Check for wear and damage: Inspect the deck for fading, cracks, peeling stain, or water absorption at least once every year
- Prevent moisture buildup: Keep water from pooling on the surface and trim nearby plants to improve airflow around the deck
- Restain when needed: Apply a fresh coat of stain every few years to maintain the color protection and overall wood durability
What Is the Best Time of Year to Stain a Deck?
The best time to stain a deck is during spring or early fall when temperatures stay mild, and weather conditions remain dry and stable.
Most deck stains work best between 50 and 90 degrees, with low humidity and no rain expected for at least 2 days.
Avoid staining in extreme heat, as direct sunlight can dry the stain too quickly, leading to uneven coverage.
Dry wood is also very important because moisture prevents the stain from soaking into the surface properly.
Before staining, the deck should remain dry for at least 24 to 48 hours after rain washing or pressure cleaning. Proper weather and dry wood help the stain absorb evenly and last much longer.
Common Mistakes to Avoid when Staining a Deck
Avoiding these common mistakes can help the stain last longer and give your deck a smoother, more professional finish
| Mistake | Why It Causes Problems |
| Staining wet wood | Moisture prevents the stain from absorbing properly and can lead to peeling, uneven color, or poor protection |
| Applying too much stain | Thick layers can create sticky spots, uneven drying, and a blotchy appearance on the deck surface |
| Skipping cleaning or sanding | Dirt, rough spots, and old residue can stop the stain from absorbing evenly into the wood |
| Working in direct sunlight | Heat causes the stain to dry too quickly, which may leave lap marks and uneven coverage |
| Ignoring weather conditions | Rain, humidity, or cold temperatures can slow drying and damage the fresh stain finish |
| Moving furniture back too soon | Heavy furniture can leave marks, scratches, or damage before the stain fully cures |
Conclusion
Staining a deck may seem like a big project at first, but with the right preparation and steps, it becomes much easier and more rewarding.
A freshly stained deck not only improves the appearance of your outdoor space but also protects the wood from moisture, sunlight, stains, and everyday wear.
Taking the time to clean, sand, and apply stain properly can help your deck stay strong and beautiful for years.
Small maintenance steps can keep the finish looking fresh for years. Restoring or staining a deck takes effort, but the results are worth it.
If you have tried staining a deck yourself, share your experience, favorite tips, or challenges in the comments below.
Frequently Asked Questions
What’s the Average Cost for a 20×20 Deck?
Staining a 20×20 deck usually costs between $ 800 and $2,000, depending on deck condition, stain type, and labor costs.
How Often Should You Stain a Deck?
Most decks should be stained every 2 to 4 years, depending on weather exposure, foot traffic, and the stain quality.
Can You Stain an Old Deck?
Yes, old decks can be stained after proper cleaning, sanding, and repairs to help restore color and protect the wood.