
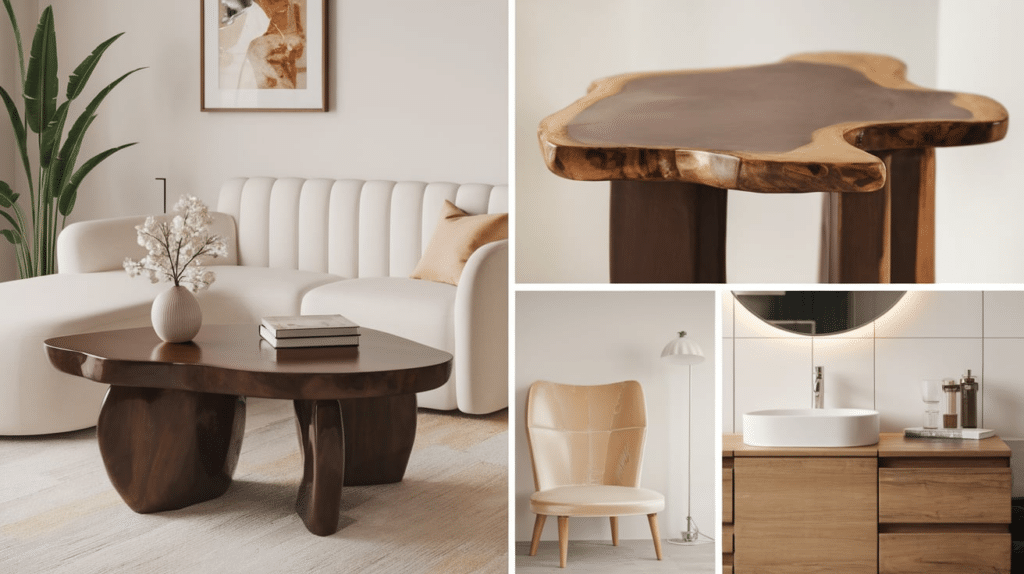
Fake wood surfaces like laminate or veneer can sometimes look a little too artificial. But with the right stain, you can make them look more like real wood and add some style to your home or furniture.
Staining faux wood is a simple and affordable way to improve its appearance without spending a lot of money. Whether you’re working on a DIY project or just want to refresh an old piece of furniture, it’s a great option.
In this guide, we’ll walk you through the step-by-step process, from prepping the surface to choosing the right stain and applying the finish. With just a little time and effort, you can give your faux wood surfaces an upgraded new look that fits perfectly with your style.
Understanding Faux Wood

Faux wood is a material made to look like real wood but isn’t actually wood. It’s often used in furniture, flooring, and decor because it’s cheaper and easier to maintain. There are different types of faux wood, like laminate, veneer, and MDF (Medium Density Fiberboard).
- Laminate is a thin layer of material that looks like wood, often used in countertops and furniture.
- A veneer is a thin slice of real wood glued onto a base of another material, like MDF.
- MDF is a dense board made from wood fibers that can be coated with a wood-like finish.
Even though faux wood looks like real wood, it’s not as easy to stain or paint. But with the right techniques, you can still make it look great and match your style. That’s where staining comes in!
Why Stain Faux Wood?
Staining faux wood is a great way to improve its look and make it blend better with your home decor. While faux wood might look fine on its own, adding a stain can give it a richer, more natural wood look. Some reasons why staining faux wood is a good idea are:
-
Enhance Appearance: Staining can make faux wood look like real wood. It gives the surface depth and character, making it look more natural.
-
Match Your Style: Whether you want a light oak look or a dark walnut shade, staining allows you to customize the color to match your furniture or room decor.
-
Affordable Update: Staining is a cost-effective way to refresh old furniture or pieces made from faux wood without spending a lot of money on replacements.
-
Durability: When done properly, staining can also add a protective layer, helping your faux wood surfaces last longer and resist wear.
Staining faux wood is a simple and budget-friendly way to make your space look more polished and stylish. It’s a quick project that can transform the look of your furniture or home.
Choosing the Right Stain
When it comes to staining faux wood, picking the right stain is super important! The type of stain you choose can affect how the final project looks and how long it lasts.
1. Know the Types of Stains

There are a few different types of stains, and each one has its own benefits:
-
Gel Stain: This is a thick stain that doesn’t drip much. It’s great for faux wood because it sits on top and gives an even finish. Gel stains are perfect for laminate and veneer surfaces.
-
Oil-Based Stain: Oil stains soak into the wood (or faux wood) and usually provide a deeper color. They have a stronger smell and take longer to dry, but they last longer and give a richer look.
-
Water-Based Stain: These stains dry faster and have a lighter smell. They’re also easier to clean up with soap and water. However, they don’t soak in as deeply as oil stains, so they might not give as rich a finish on faux wood.
2. Pick the Right Color

Choosing the right color can completely change the look of your faux wood. When deciding on a stain color, think about the look you want:
-
Light Colors: Lighter stains like oak or honey give a fresh, natural look. These are great if you want your faux wood to look bright and airy.
-
Medium Colors: Walnut or chestnut give a rich, warm look without being too dark. They’re a good middle ground and work well with most furniture.
-
Dark Colors: Darker stains like espresso or ebony give a sleek, modern appearance. They’re perfect for a dramatic look or to match with darker furniture or decor.
f you’re not sure what color to choose, test it on a small, hidden area first to see how it looks before staining the whole piece.
3. Consider the Finish
The finish of your stain affects how shiny or matte your piece will look:
-
Glossy Finish: Gives a shiny, polished look. It’s great for a modern or classy style but can show scratches more easily.
-
Satin or Matte Finish: These finishes give a softer, more natural look. They’re perfect for a more relaxed, rustic vibe and don’t show wear as quickly.
4. Think About Durability

If the faux wood is going to get a lot of use, like a table or a cabinet, durability is important. Oil-based stains tend to be more durable and resistant to wear, while water-based stains may wear off faster but are easier to touch up.
Before you stain the entire piece, always do a swatch test first. Different faux wood surfaces might react differently to the stain, so it’s always best to test first. Choosing the right stain is all about what look you want and how much maintenance you’re willing to do.
How to Stain Fake Wood
Staining faux wood might seem tricky, but it’s actually a simple process if you follow the right steps. With a little time and effort, you can make your fake wood furniture or decor look like real, natural wood. A detailed guide on how to stain fake wood:
Step 1: Gather Your Supplies
Before you begin, make sure you have everything you need:
- Sandpaper (220-grit)
- Clean cloth or rag
- Bonding primer
- Gel stain or oil-based stain (depending on your preference)
- Brush or foam applicator
- Painter’s tape (optional)
- Polyurethane or polycrylic finish (optional for protection)
Step 2: Clean the Surface
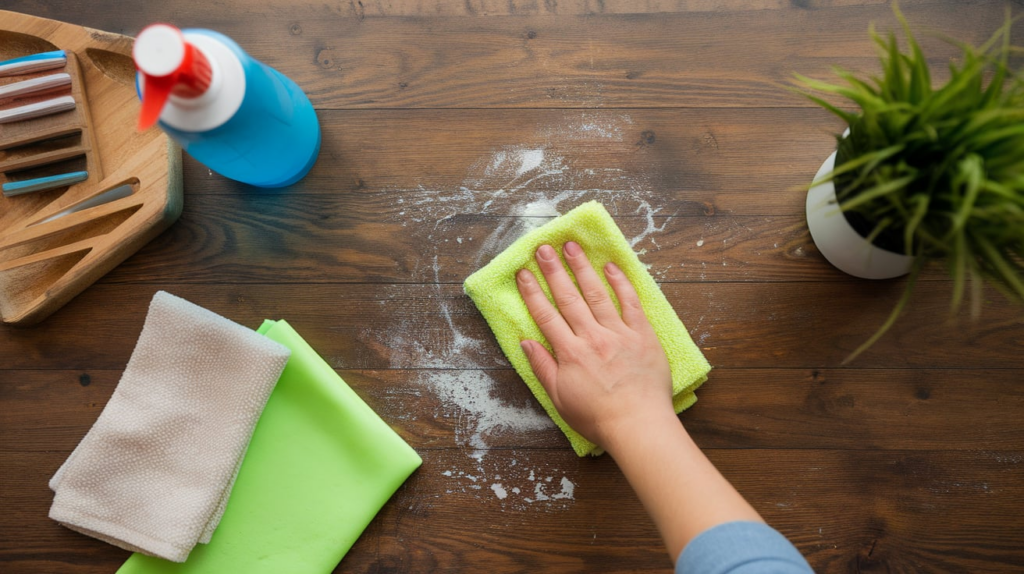
Start by cleaning the surface to remove any dirt, dust, or grease. You can use a mild detergent and water to wipe it down, ensuring that the surface is completely free of debris. A clean surface allows the primer and stain to adhere properly.
Make sure to dry it thoroughly before moving on to the next step, as any moisture left on the surface can interfere with the stain’s ability to absorb evenly.
Step 3: Sand the Surface Lightly
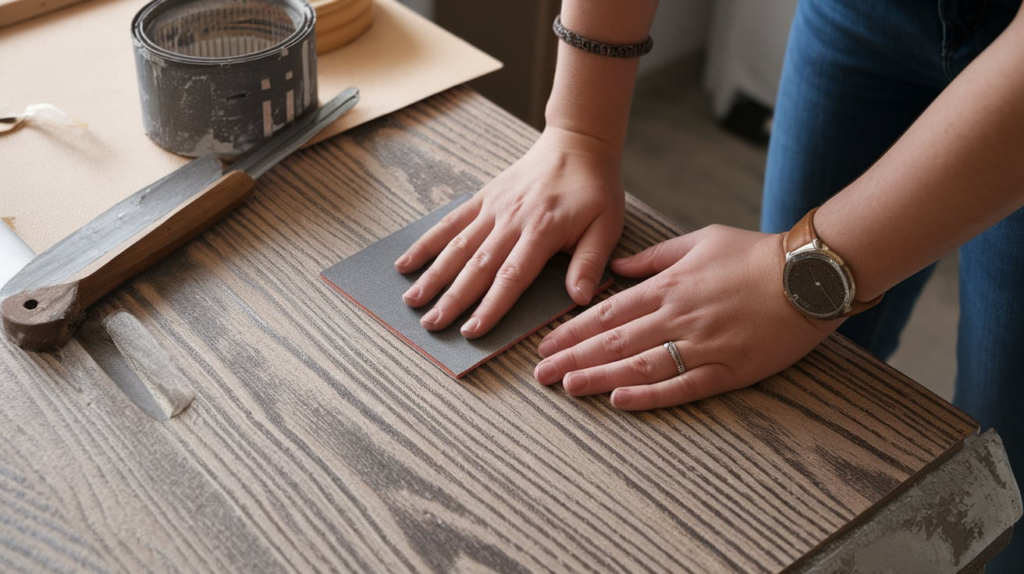
Faux wood surfaces are smooth, which can make it harder for the stain to stick. Lightly sand the surface with fine-grit sandpaper (220-grit) to create a bit of texture.
Don’t sand too hard—just enough to rough up the surface a little. After sanding, wipe off any dust with a clean, damp cloth and let the surface dry.
Step 4: Apply a Bonding Primer
Now, it’s time to apply a bonding primer. This helps the stain stick to the surface by creating a base layer that allows for better adhesion. Use a brush or roller to apply a thin, even coat of primer, making sure to cover the entire surface.
Let it dry completely before moving forward. Follow the instructions on the primer’s label for drying times, as they may vary depending on the brand and type of primer you use.
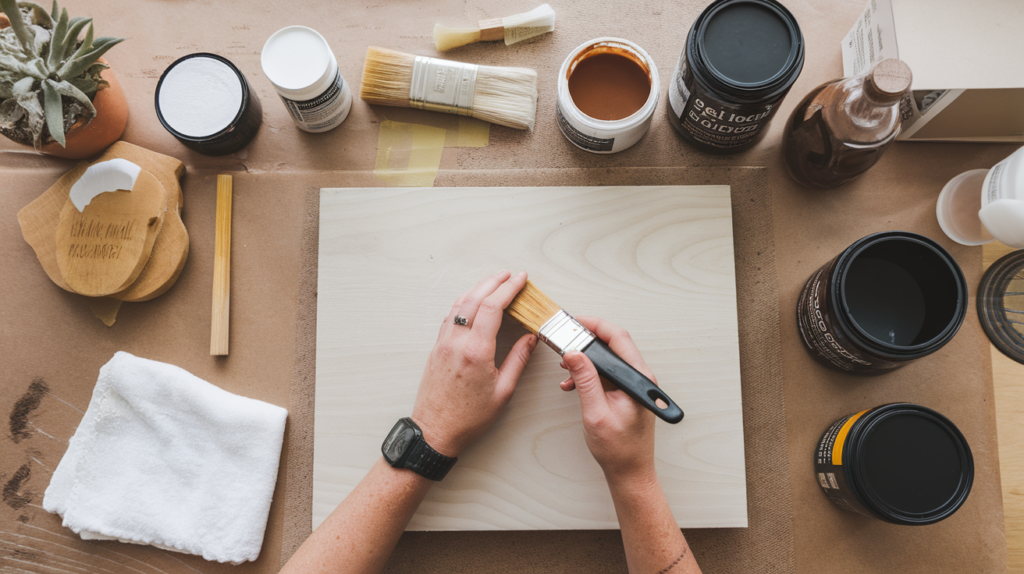
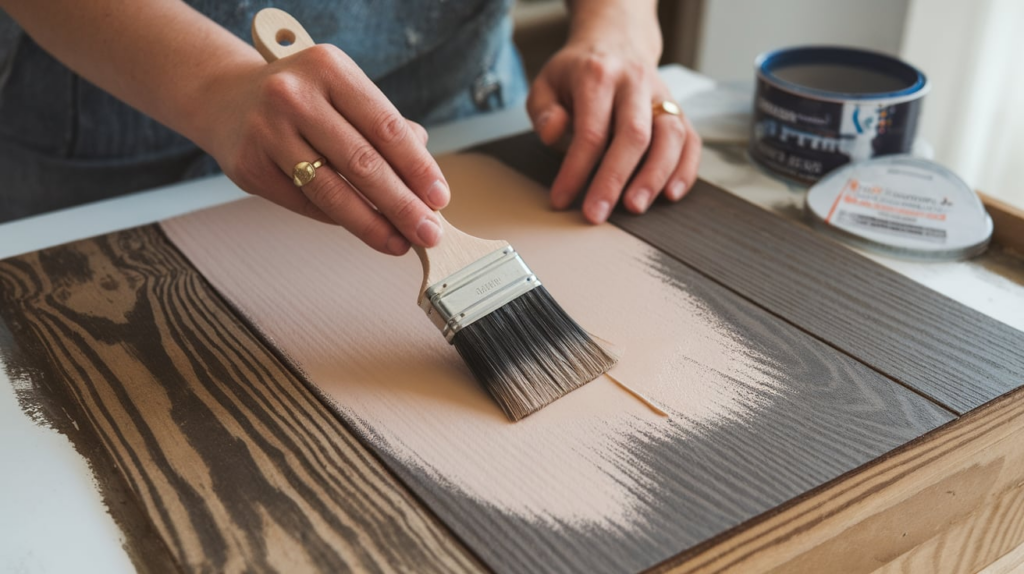
Step 5: Apply the Stain
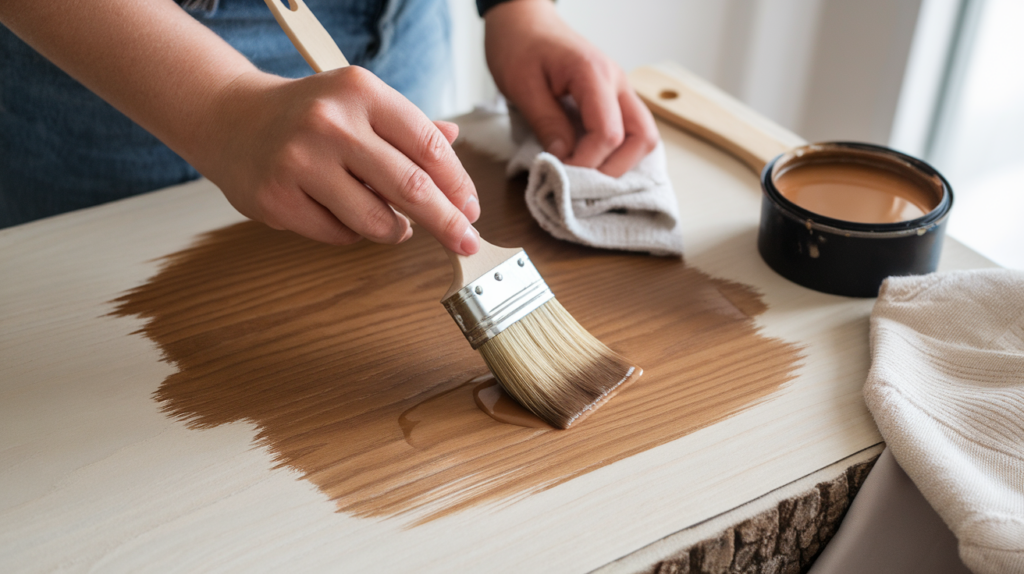
Using a brush or foam applicator, apply the stain to the faux wood. Work in small sections, following the grain of the wood. Don’t rush—make sure the stain is evenly applied. Allow the stain to sit for a few minutes (check the product’s instructions for the exact time), then use a clean cloth to wipe off any excess.
The longer you leave the stain on, the darker the color will be, so wipe it off sooner for a lighter shade or let it sit longer for a darker finish.
Step 6: Allow the Stain to Dry
After you’ve wiped off the excess stain, let the surface dry completely. Drying time can vary based on the type of stain you used and the environment, but it usually takes 24-48 hours. Make sure the surface is completely dry before touching or applying anything else.
Step 7: Apply a Protective Finish (Optional)
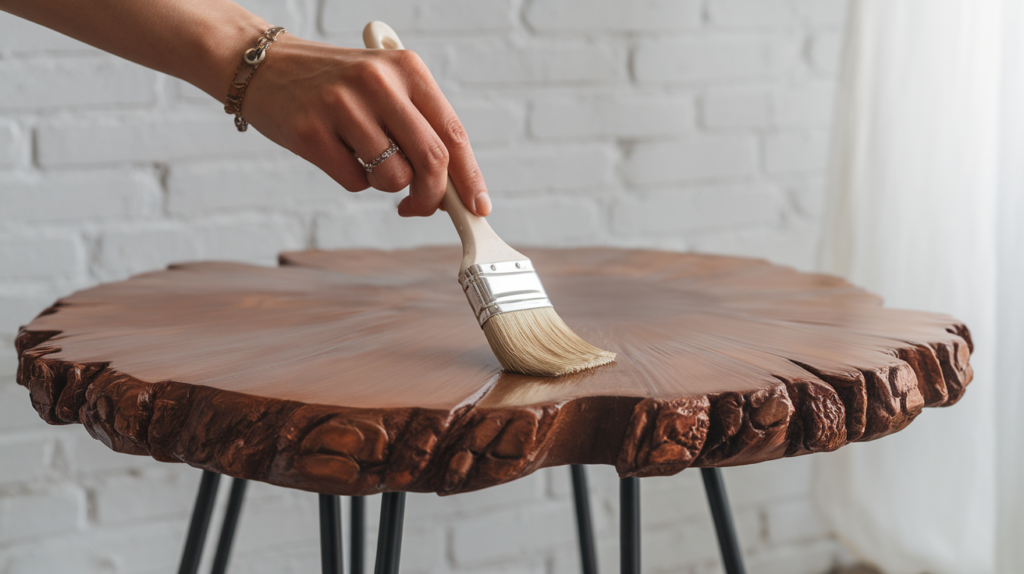
Once the stain is dry, you can apply a clear protective finish. This will protect the surface from wear and tear and give it a nice shine. You can use either a polyurethane (for a glossy or satin finish) or polycrylic (for a more matte finish).
Apply the finish with a clean brush in thin, even coats. Let each coat dry before applying another. Usually, two to three coats will provide great protection.
Step 8: Reassemble and Enjoy

After the finish is completely dry, remove any painter’s tape if you used it, and carefully reassemble your furniture or decor. Be gentle to avoid smudging the fresh finish. Now, you can enjoy your newly stained faux wood piece that looks just like real wood!
Take a step back and admire your hard work—whether it’s a piece of furniture, cabinets, or decor, the transformation will be worth the effort.
Staining faux wood is an easy way to upgrade your furniture or decor without spending a lot of money. If you’re working on furniture, cabinets, or even a small project, following these steps will help you get the perfect finish.
Take your time and be patient, and you’ll have a unique, customized look for your faux wood surfaces!
Tips and Tricks for Staining Faux Wood
Staining faux wood can be a fun and rewarding project, but to ensure the best results, here are some helpful tips and tricks!
- Use a Foam Brush: It helps apply the stain evenly without leaving brush marks.
- Work in Small Sections: Stain small areas at a time to avoid uneven coloring or drying.
- Wipe Off Excess Quickly: After applying the stain, wipe off excess immediately to avoid dark patches.
- Don’t Over-sand: Light sanding is enough—too much can damage the faux wood surface.
- Apply Multiple Thin Coats: It’s better to build up the color gradually rather than applying one thick coat.
- Ventilate Well: Open windows or use fans for better airflow, especially with oil-based stains.
- Test Before Full Application: Always test the stain on a hidden area to make sure you like the color.
- Use Protective Finish: Apply a clear topcoat to protect the stained surface and keep it looking great longer.
These simple tips will help you get a smooth, even finish on your faux wood!
Conclusion
In conclusion, staining faux wood is a fantastic way to enhance the look of your furniture or home decor without breaking the bank. By following the right steps—prepping the surface, choosing the right stain, and applying it properly—you can achieve a stylish, natural wood look on laminate, veneer, or MDF.
The key is to take your time, test the stain before going all in, and choose a protective finish to keep your project looking great for longer. Whether you’re working on a small DIY project or refreshing old furniture, staining faux wood is a simple and affordable way to make it stand out.
Remember, with a little patience and the right techniques, you can make faux wood look just as good as the real thing. So go ahead, get creative, and enjoy the transformation!
Frequently Asked Questions
What type of stain is best for faux wood?
Gel stains are great for faux wood because they sit on top of the surface and give an even finish. Oil-based and water-based stains can work, but gel stains are generally easier to apply.
Can I use a water-based stain on faux wood?
Yes, you can use water-based stains, but they might not penetrate as deeply as oil-based stains. They are quicker to dry and easier to clean up.
Can faux wood stain look like real wood?
Yes, with the right technique and stain, faux wood can look very similar to real wood. Gel stains are especially effective at achieving a natural wood-like finish.
How do I clean faux wood after staining?
Once the stain is dry, use a damp cloth to wipe away any dust or dirt. For ongoing maintenance, gently clean the surface with a mild detergent and water.