
Have you been looking at your walls with bumps and spots after painting? I was in the same spot last year.
Straining your paint is easier than you think. With some basic supplies and a little patience, you can get smooth, professional results without any lumps or debris ruining your hard work.
In this guide, I’ll walk you through:
- How to strain paint step-by-step
- The basic tools you’ll need (nothing fancy)
- Common mistakes and how to avoid them
Many people skip this step, thinking it’s not necessary. I had those same thoughts! But after seeing the difference in my results, I found a simple approach that works well.
You don’t need to be an expert. This guide breaks everything down into small, manageable steps that anyone can follow.
Trust me – if I could get perfect, smooth paint jobs after learning this technique, you can too.
Why Strain Your Paint?
Before we get into the how-to, let’s talk about why straining your paint makes sense:
- Better finish: Remove lumps and debris for a smooth surface
- Tool protection: Prevents clogging of brushes, rollers, and spray equipment
- Time saver: Avoid stopping mid-project to clean clogged equipment
- Cost effective: Extend the life of older paint that might have dried bits
- Professional results: Get the same smooth finish that pros achieve
I started straining my paint last year when I noticed tiny bumps on my walls after painting. The difference was amazing – smooth walls with no imperfections.
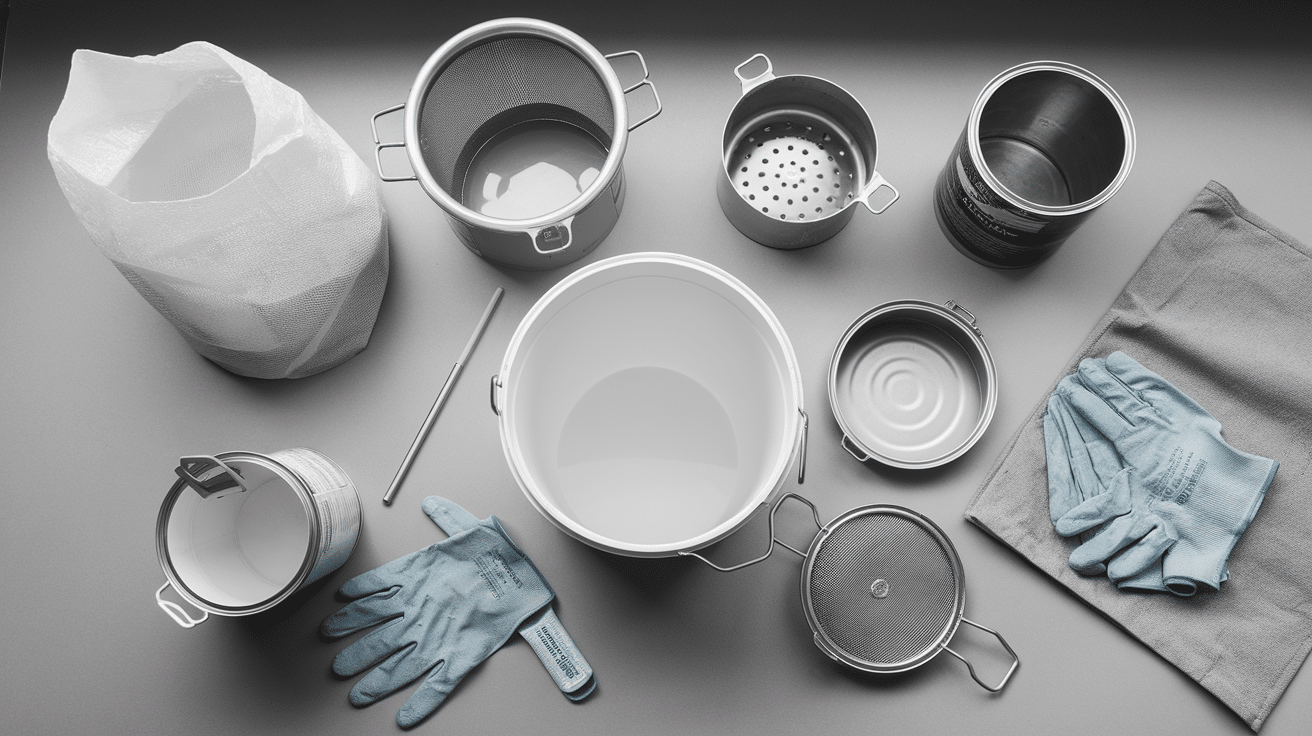
Supplies You’ll Need
Before starting your paint straining project, gather these basic supplies:
- Paint strainer (bag, cone, or pump style)
- Clean bucket or container
- Paint stirrer
- Disposable gloves
- Drop cloth to protect your work area
- Clean rags for wiping spills
Most of these items are inexpensive and available at any hardware store. The strainers themselves typically cost just a few dollars each.
Step-by-Step: How to Strain Paint
Breaking down complex tasks into manageable steps transforms overwhelming challenges into achievable goals. By carefully dividing your project into clear, logical stages, you create a roadmap that reduces stress and increases confidence.
Each small step brings you closer to completing the entire task with less anxiety and more success.
1. Get Your Supplies Ready
Before starting your paint straining project, carefully collect all necessary supplies to ensure a smooth process.
You’ll want to have your specific paint on hand, select the appropriate strainer for your particular job, prepare at least one clean bucket (and potentially a second for backup), put on disposable gloves to keep your hands clean, and lay down a drop cloth or newspaper to protect your work surface from potential spills.
Taking a moment to gather these items beforehand will help you work efficiently and minimize any potential mess or interruption during the paint straining process.
2. Prepare Your Paint
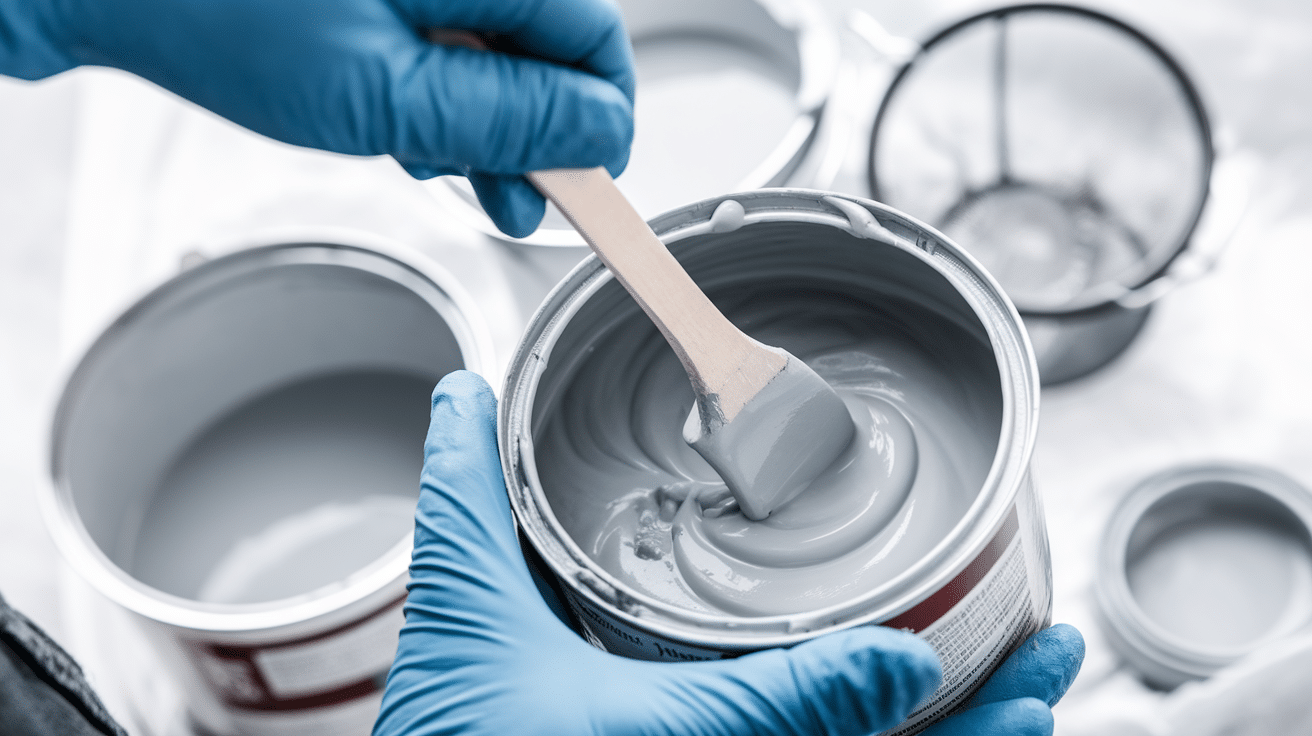
Before beginning the paint straining process, thoroughly stir the paint using a paint stick, ensuring you reach deep into the bottom of the can to mix in any settled pigments.
This crucial step helps create a uniform color and consistency throughout the paint. As you stir, carefully inspect the paint for any visible chunks or debris that might interfere with a smooth application.
Proper mixing is essential for achieving an even finish and identifying any potential imperfections that could affect your painting project. Taking the time to prepare your paint correctly sets the foundation for a professional-looking result.
Good stirring is essential – even if you’ll be straining, you want the paint’s color and consistency to be uniform.
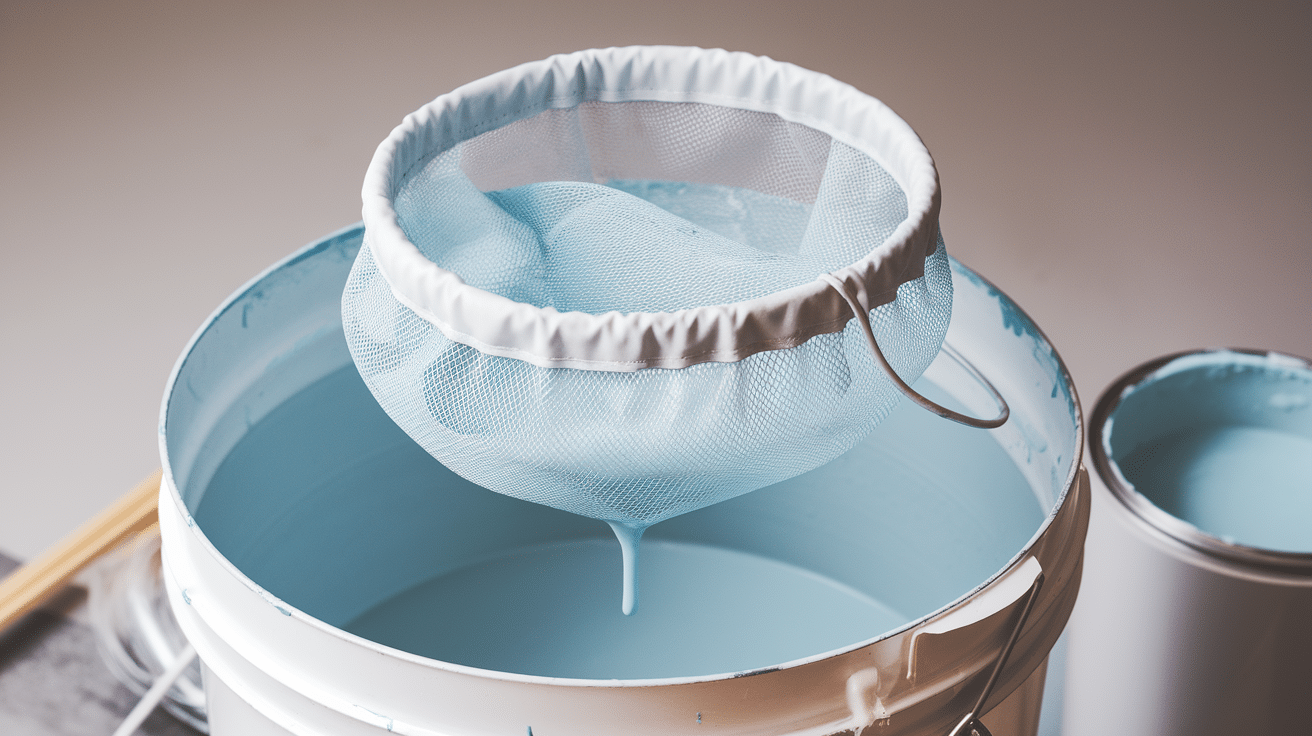
3. Using a Bag Strainer

When using a bag strainer, start by carefully positioning the strainer bag inside a clean bucket, ensuring it sits securely. Gently fold the bag’s edges over the bucket rim, creating a stable setup.
If your strainer has an elastic band, use it to secure the bag in place further. Begin pouring the paint slowly and deliberately into the center of the bag, allowing gravity to filter the paint through the mesh naturally.
Resist the temptation to force or push the paint through, as this can cause splashing or compromise the straining process. Patience is key – let the strainer work its magic, catching any unwanted particles and ensuring a smooth, clean paint result.
Pour carefully to avoid splashing and give the paint time to filter through naturally.
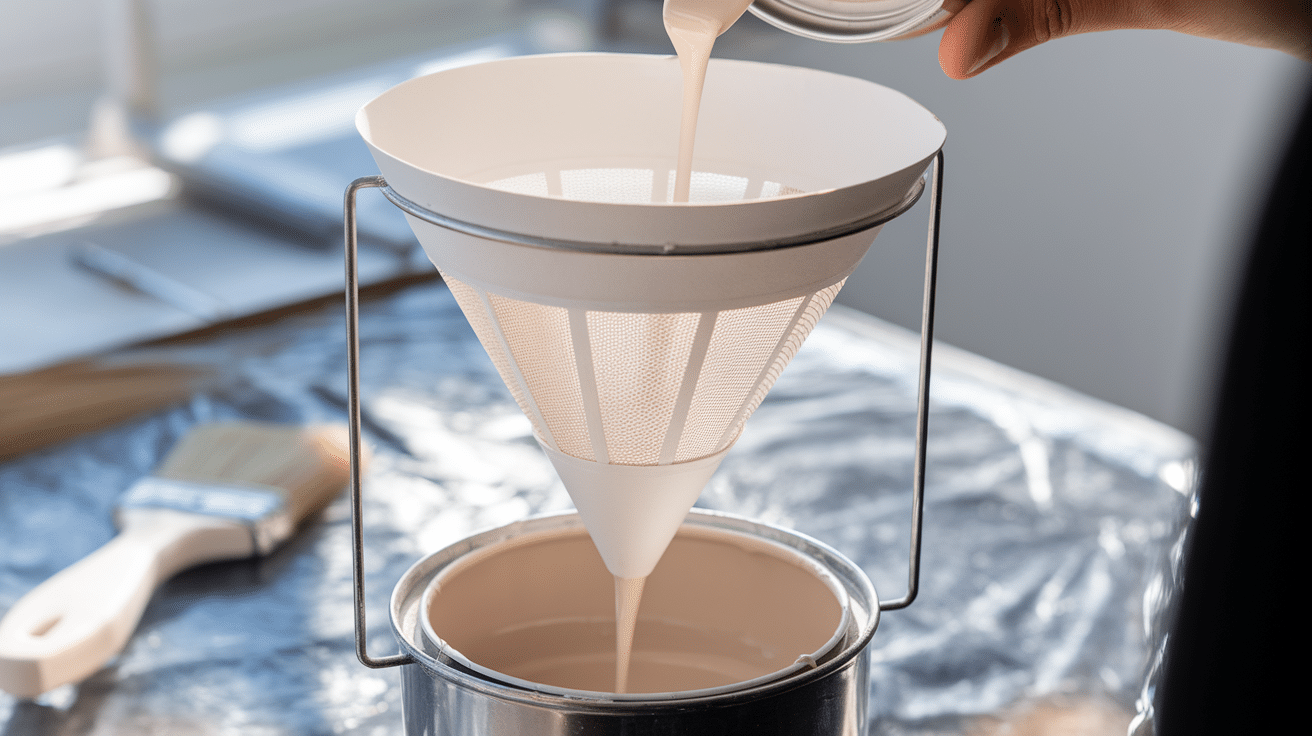
4. Using a Cone Strainer
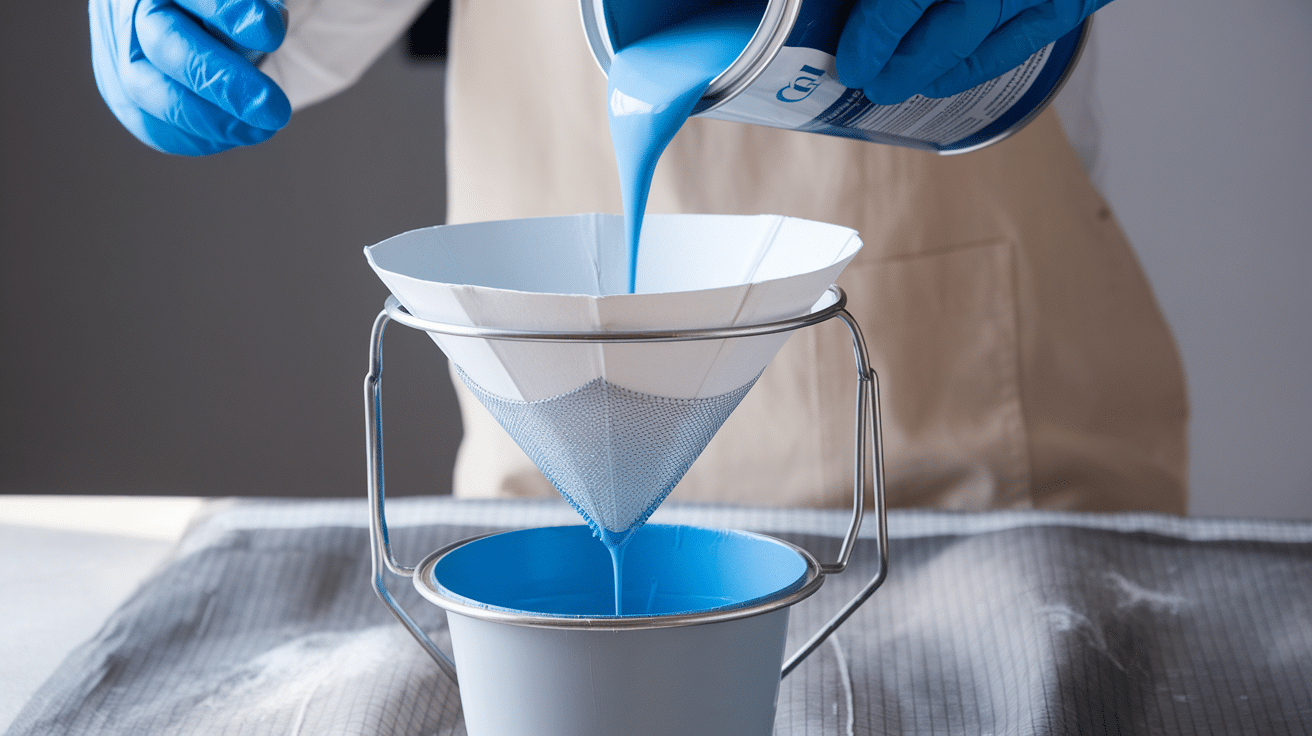
When working with cone strainers, start by positioning the strainer holder securely over a clean bucket to catch the filtered paint. Carefully place the cone-shaped strainer into the holder, ensuring it’s stable and centered. To prevent messy overflows, pour the paint in small, controlled amounts rather than all at once.
This approach allows the paint to filter through gradually, giving the strainer time to catch debris and impurities. Patience is crucial—let the paint flow naturally through the cone, avoiding any temptation to rush or force the process.
The slow, steady approach ensures cleaner, smoother paint filtration that will ultimately improve your painting results.
Cone strainers work great for smaller amounts but can be messy if overfilled, so take your time.
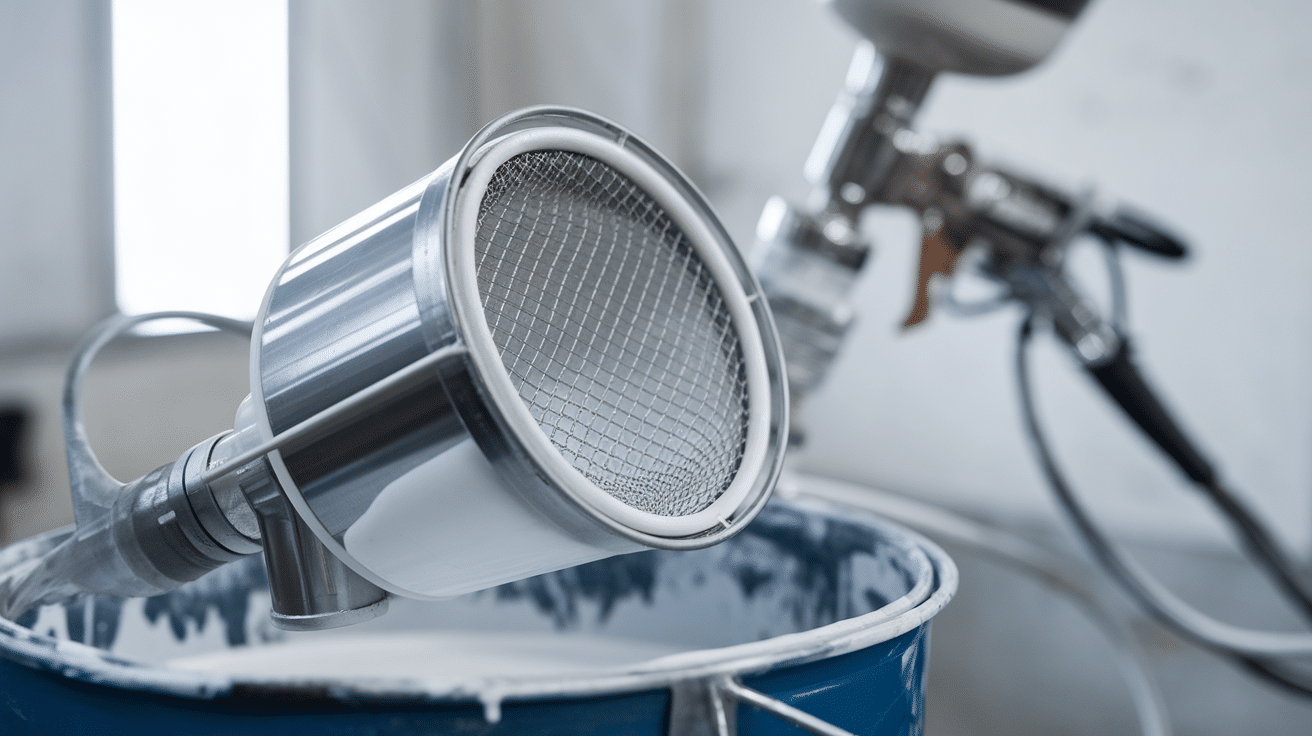
5. Using a Pump Strainer
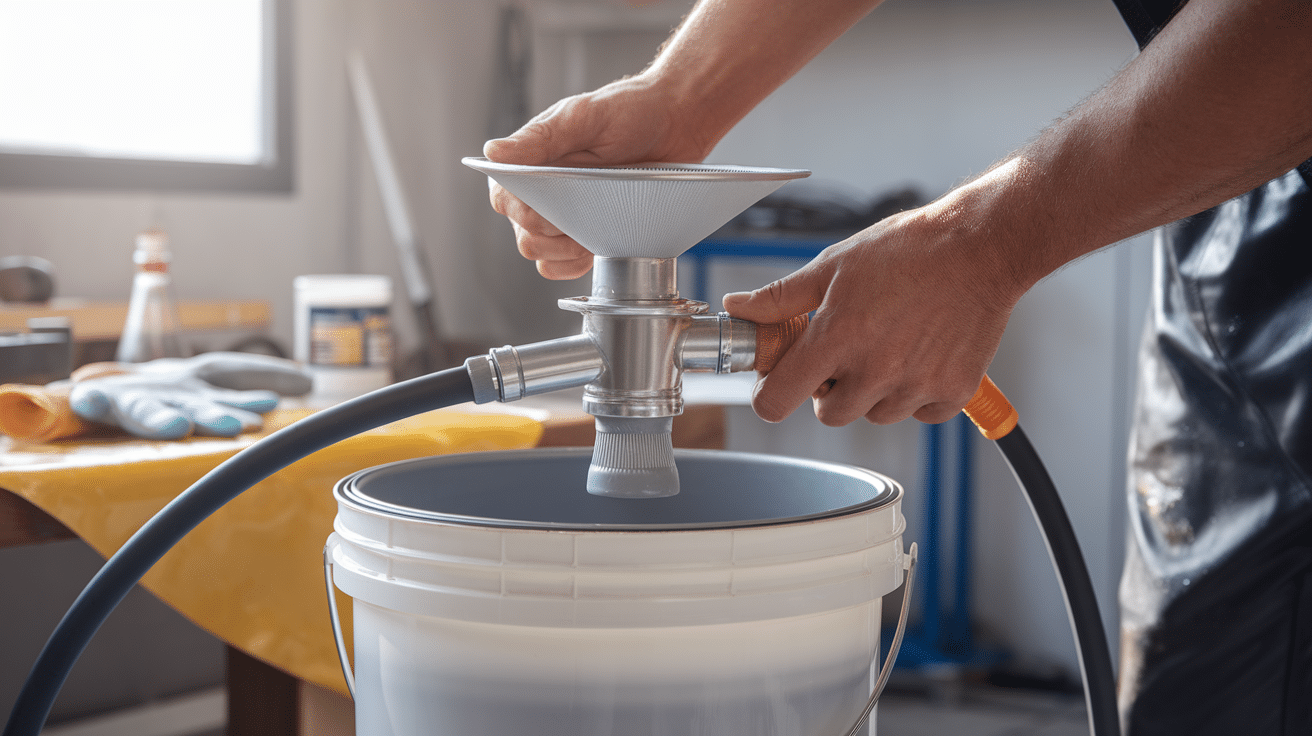
When using spray equipment for paint straining, begin by carefully attaching the pump strainer to your paint bucket, ensuring a secure and proper connection.
Next, carefully thread your spray hose through the designated opening, following the manufacturer’s specific instructions. Proper installation is critical to ensure smooth paint flow and effective filtration during the spraying process.
This method helps prevent clogs and ensures a consistent, clean application by filtering out debris as you work, ultimately leading to a more professional and polished finish.
Pump strainers save time by filtering as you work, but they must be attached correctly to be effective.
Types of Paint Strainers
Different jobs call for different strainers. Here’s what you need to know:
1. Bag Strainers
These fit over buckets and are ideal for larger paint quantities. They come in two styles-
The plain top version requires you to hold them in place while pouring, which can sometimes be tricky but works well for quick jobs.
The elastic top version, on the other hand, has a stretchy band that secures around the bucket rim, keeping the strainer firmly in place without needing to hold it.
This hands-free option is particularly helpful when you’re working alone or need to pour larger amounts of paint.
2. Cone Strainers
These are shaped like funnels and work well for smaller paint amounts.
Cone strainers usually need a holder to stay upright while you pour paint through them. They come in different mesh sizes to accommodate various paint types and filtering needs.
They’re particularly handy for small to medium jobs when you don’t need to strain an entire gallon at once, making them perfect for touch-ups or smaller projects.
I find these most useful for touch-up projects or when I’m only using part of a paint can.
3. Pump Strainers
These connect directly to spray equipment and keep paint flowing without clogging nozzles. They filter paint continuously as you work, catching debris before it can reach the spray mechanism.
This ongoing filtration saves significant time on larger spray projects since you won’t need to stop and clean clogged nozzles, allowing for smoother application and fewer interruptions.
The right strainer makes all the difference in how smooth your painting process will be.
Helpful Tips for Smooth Results
These extra tips can make a big difference:
- Take your time – rushing can cause spills or missed particles
- Use the right mesh size – thicker paints need larger mesh
- Strain just before use, not days ahead
- Try the pantyhose trick – in a pinch, clean nylon stockings can work as a strainer
The pantyhose trick saved me once when I ran out of strainers in the middle of a project!
Common Mistakes and How to Avoid Them
Let me share the hard-learned lessons from my early painting experiences. These insights come directly from my own mistakes, which can save you time, frustration, and potential rework.
Clogged strainer that won’t let paint through
When choosing a paint strainer, it’s crucial to match the mesh size to the specific type of paint you’re using. Using a strainer with too fine a mesh for thick paint can create unnecessary frustration and slow down your project.
The key is to select a strainer with an appropriate mesh size that allows your paint to flow smoothly while still catching unwanted debris.
- Cause: Using too fine a mesh for thick paint
- Fix: Match your mesh size to your paint type
Paint Is Leaking Around the Edges
A common mistake when straining paint is failing to secure the strainer correctly, which can lead to messy spills and contamination.
Before pouring your paint, take a moment to carefully inspect the strainer’s positioning. Ensure the edges are properly folded over the bucket rim and there are no loose areas that could cause leakage.
- Cause: Not securing the strainer properly
- Fix: Double-check edges and folds before pouring
The strainer collapses into the bucket
When straining paint, adding too much weight too quickly can cause the strainer to collapse or become unstable. To prevent this, pour the paint slowly and carefully, allowing the strainer to maintain its shape and position.
- Cause: Too much weight too quickly
- Fix: Pour slowly and support the strainer if needed
Paint still has lumps after straining
When your strainer’s mesh is too large, it may fail to catch all the unwanted particles in your paint. In such cases, you have two effective solutions.
First, consider switching to a finer mesh strainer that can more effectively filter out smaller debris and impurities.
- Cause: The Strainer mesh is too large for your needs
- Fix: Use a finer mesh or strain twice
Taking your time with each step will help you avoid most of these issues. Remember that rushing usually leads to problems later.
Conclusion
Taking a few extra minutes to strain your paint is one of those small steps that makes a huge difference in your results. Smooth, clean paint means:
- No bumps or spots on your finished surface
- Less time fixing mistakes later
- Tools that work better and last longer
This simple process typically adds just 5-10 minutes to your project preparation but can save hours of touch-up work later.
Now that you know exactly how to strain paint properly, you’re ready to tackle your painting projects with professional-level results. Your walls, furniture, or craft projects will thank you!
Have you tried straining paint before? Did you notice a difference in your results? Share your experience in the comments below!
Frequently Asked Questions
Can I reuse paint strainers?
Most strainers are meant for one-time use. While you might get a second use from some types, they’re inexpensive enough that fresh ones are usually best.
What’s the best way to clean strainers if I want to reuse them?
Rinse thoroughly with warm water right after use (for water-based paints) or an appropriate solvent (for oil-based paints). Let dry completely before storing.
Are certain strainers better for specific paints?
Yes – thicker paints like latex work better with larger mesh sizes, while finer finishes might need finer mesh. Most strainers will specify which paint types they work best with.
Do I always need to strain paint?
Brand new, high-quality paint might not need straining if you’ll be using it all immediately. However, straining is always a good practice, especially for older paint or important projects.