If you’re looking to lighten up your pine furniture or wood accents, bleaching can be a great solution. Pine wood, while beautiful, can sometimes have dark spots, stains, or uneven coloring that make it look worn out. Bleaching helps brighten the wood, remove stains, and even out its color, giving it a fresh, new look.
If you’re working on a piece of furniture, wood paneling, or any other pine surface, wood bleaching is an easy way to restore its natural feel.
In this guide, I’ll walk you through everything you need to know about bleaching pine wood, from choosing the right bleach to applying it safely. You’ll also get tips on how to maintain and finish the wood after bleaching.
Why You Should Bleach Pine Wood
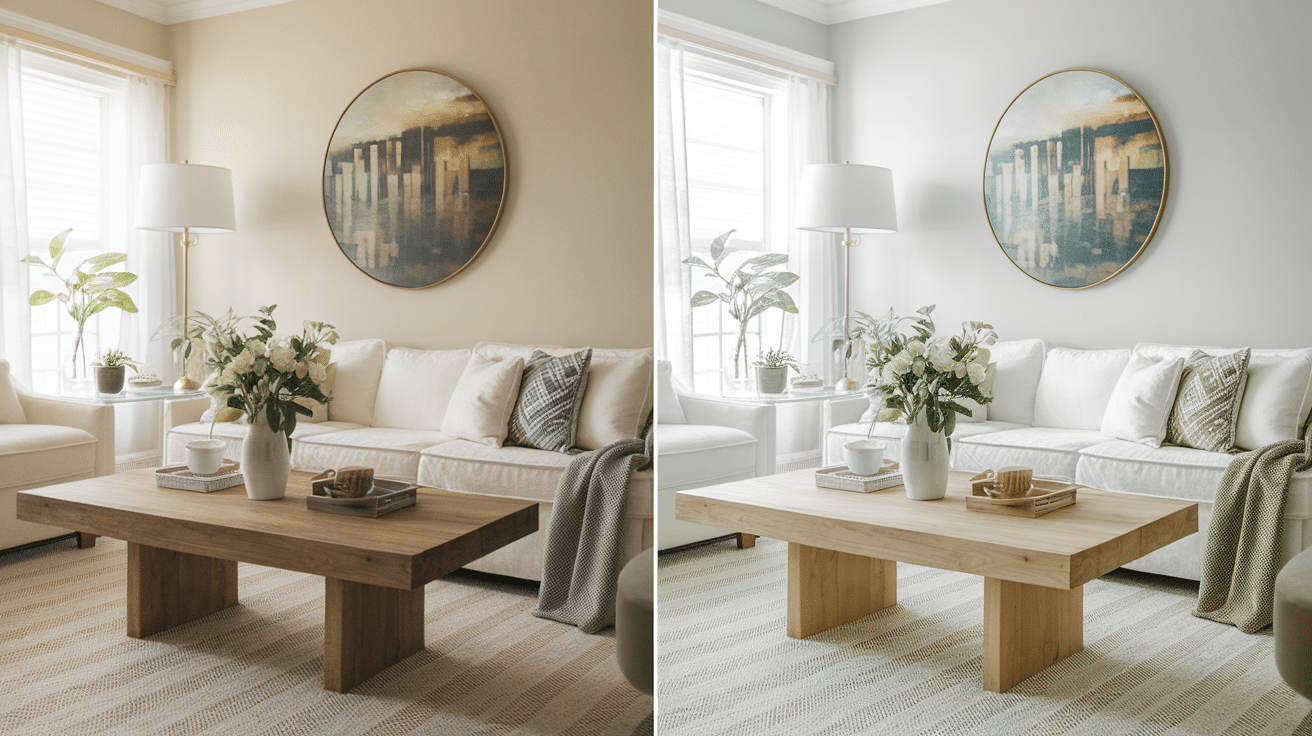
Bleaching pine wood is a great way to give it a fresh, new look. Over time, pine can become darker or uneven in color due to age, stains, or exposure to sunlight. Bleaching helps lighten the wood, making it look brighter and more uniform.
This is especially helpful if you’re working on a piece of furniture, flooring, or wood paneling that has picked up stains or has a yellowish tint. By lightening the wood, you can bring out its natural look and make it easier to match with other décor in your home.
Another reason to bleach pine wood is that it prepares the wood for staining or finishing. If you want to apply a new stain or varnish, bleaching ensures that the wood will absorb it evenly, giving you a smoother and more professional-looking finish. Overall, bleaching pine wood can make your projects look brand new!
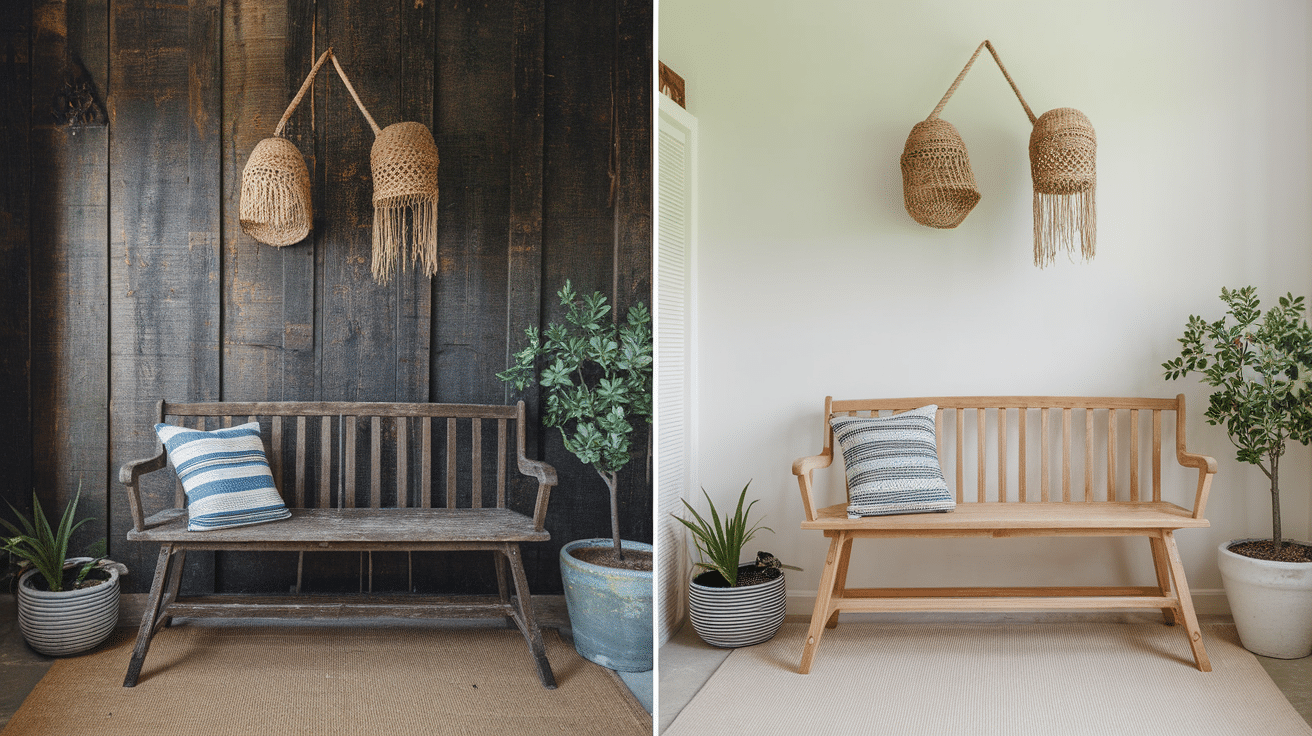
Pine Wood Before vs After Bleaching
When you look at pine wood before and after bleaching, the difference can be striking! Bleaching pine wood helps to lighten the natural color, remove stains, and give the wood a fresh new look.
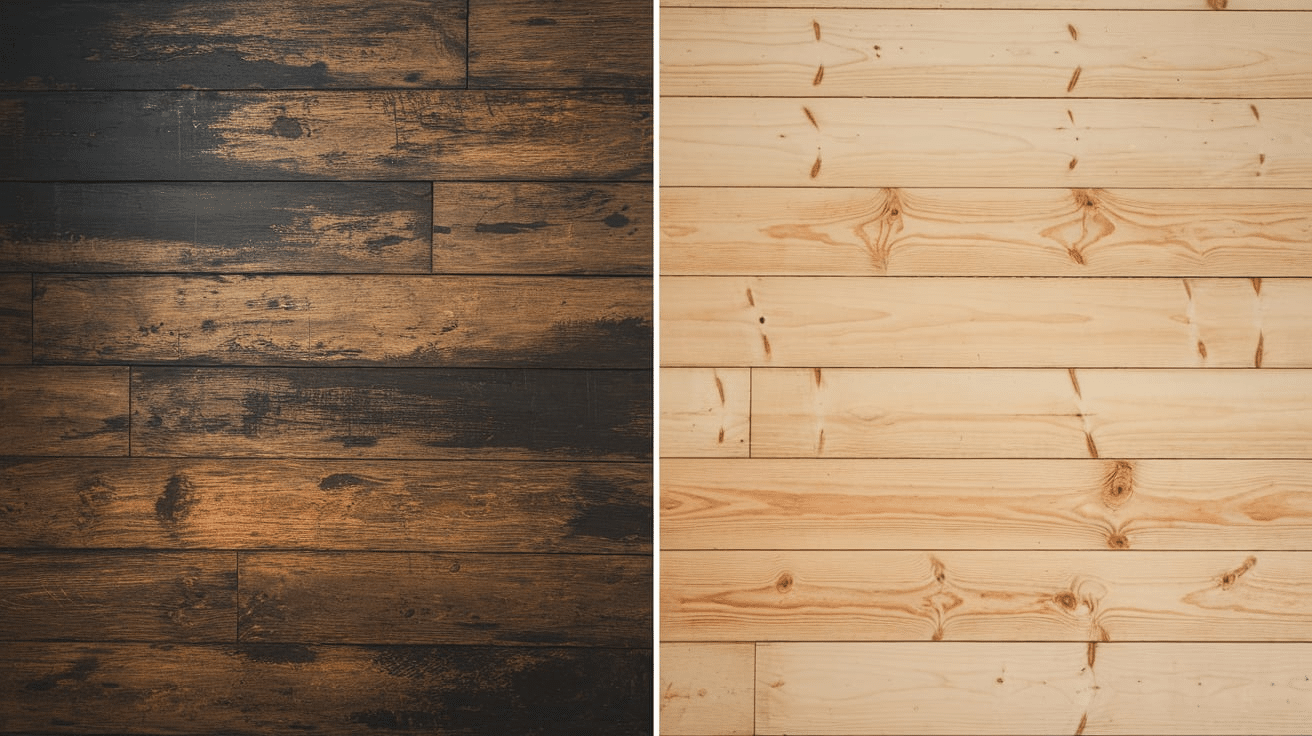
1. Color Change
- Before Bleaching: Pine wood typically has a warm, yellowish tone. Over time, it can darken due to exposure to sunlight, dust, or stains, making it look dull and worn out.
- After Bleaching: Once you bleach the pine, the color lightens significantly. The yellowish tint fades, and you’ll see a much lighter, almost creamy or pale look. The bleaching process can also help even out color, making the wood look more uniform across the surface.
2. Stain Removal
- Before Bleaching: Pine wood is more prone to stains, whether from water, food, or furniture marks. These stains can make the wood look uneven and unattractive.
- After Bleaching: Bleaching works wonders for removing stains. While some tough stains may need extra attention, bleaching can help lighten or even completely remove most marks, giving your pine wood a cleaner, fresher appearance.
3. Wood Grain Visibility
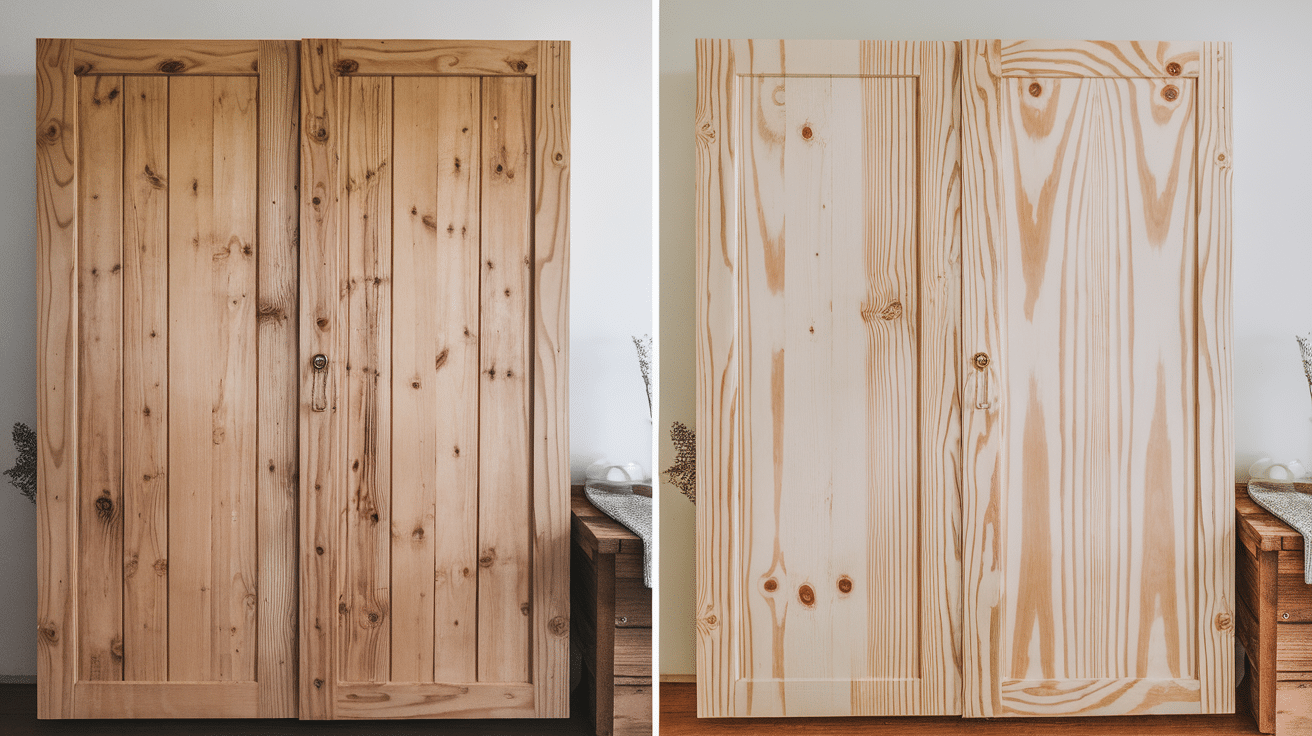
- Before Bleaching: The natural grain of pine wood can sometimes be hard to see if the wood is dark or stained. The darker color can hide the unique patterns that run through the wood.
- After Bleaching: Once you bleach the wood, the grain becomes more visible. The lighter color makes the wood’s natural lines and textures stand out, giving it a more polished and classic look. It enhances the overall beauty of the wood and allows its unique characteristics to shine through.
4. Uniformity of Color
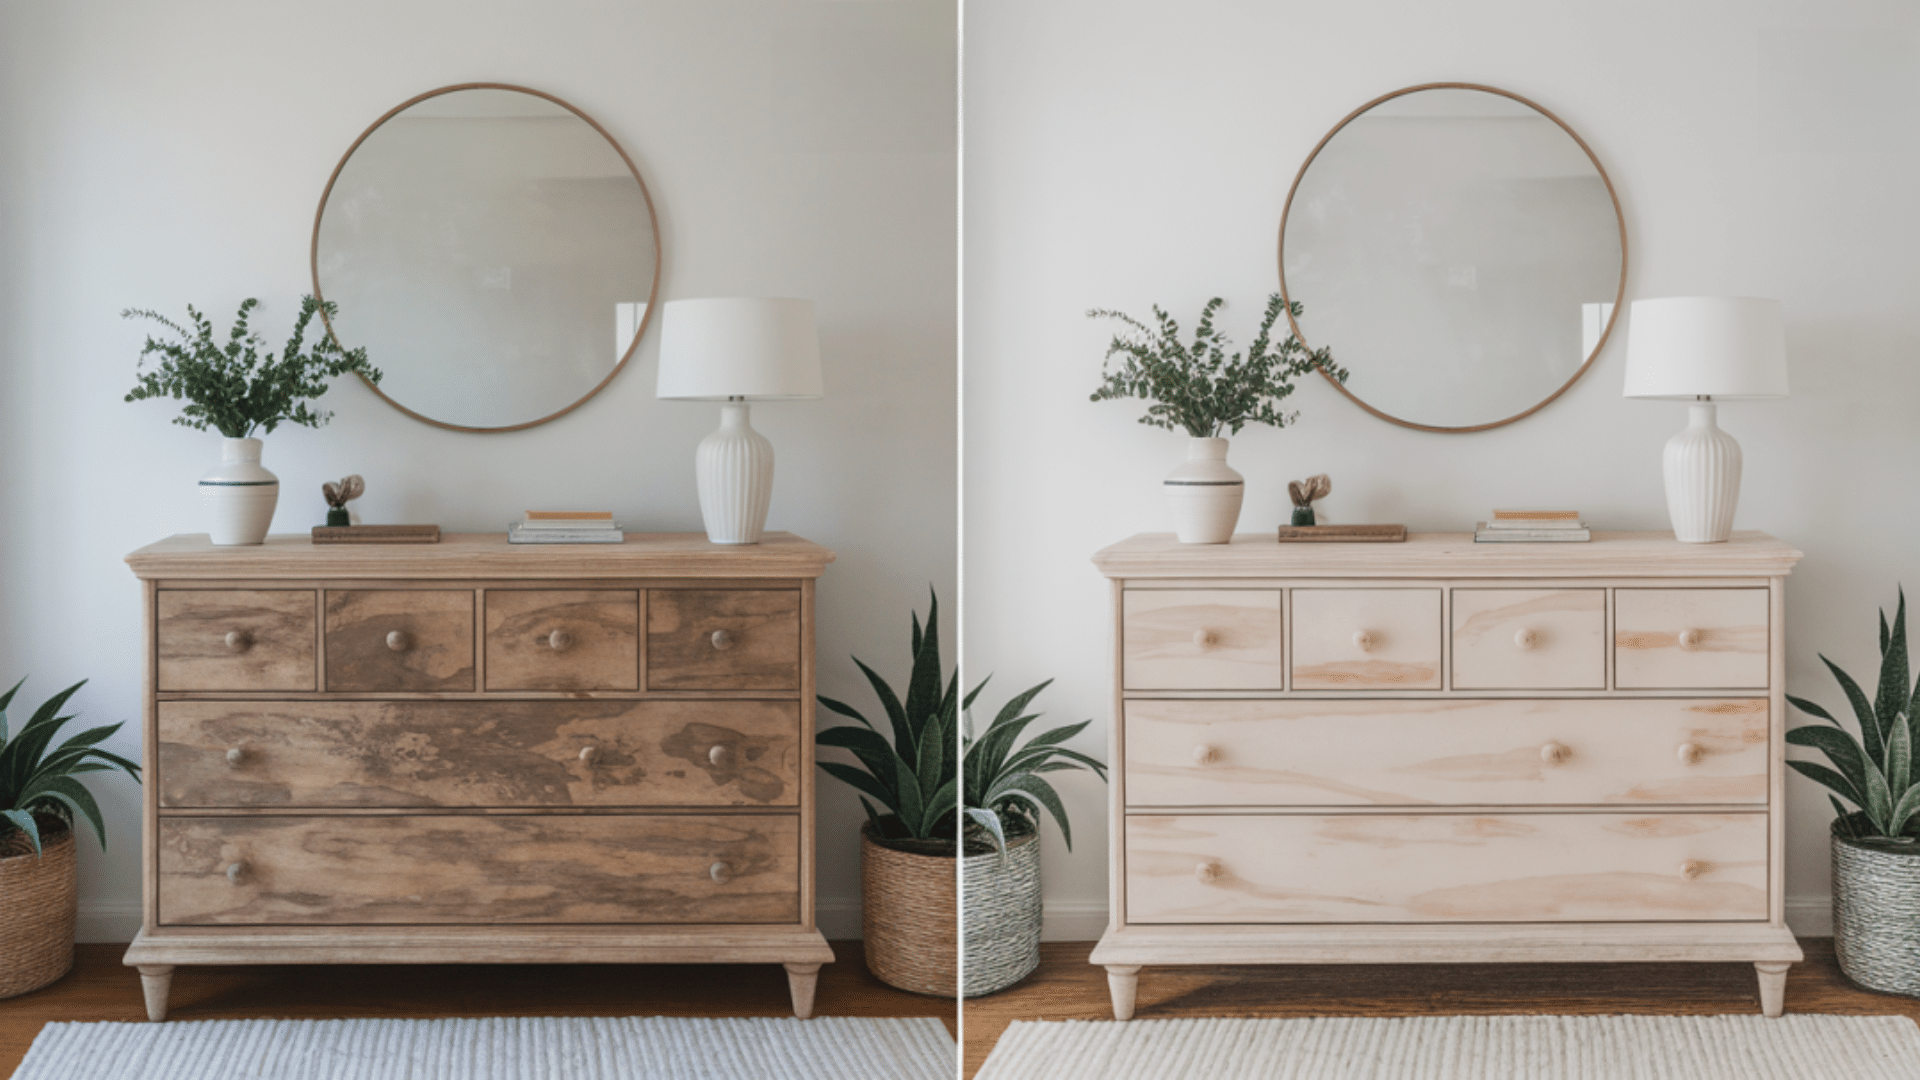
- Before Bleaching: Pine wood often has natural color variations, which can make it look uneven. Some spots may be darker than others, or the wood may have areas that appear blotchy.
- After Bleaching: Bleaching helps to even out these color differences, creating a more uniform appearance. The wood looks more consistent across its surface, which can be especially useful if you’re planning to stain or finish the wood afterward.
5. Age and Patina
- Before Bleaching: Over time, pine wood can develop a certain “patina” or aged look, which can give it a warm, vintage charm. However, this look may not always be desired, especially if the wood has darkened too much or looks too worn.
- After Bleaching: Bleaching removes some of that aging, brightening up the wood and giving it a fresh, more modern feel. If you want to restore the wood’s original lightness without completely losing its character, bleaching is a great option.
6. Surface Texture
- Before Bleaching: If your pine wood has an old finish, like varnish or stain, the surface might feel rough or uneven. The wood may also be slightly raised from water or dirt stains.
- After Bleaching: After bleaching, the wood may feel a bit smoother, but you might need to sand it to achieve the best results lightly. Sanding after bleaching can also help with the smoothness of the wood and allow the finish to adhere better if you’re planning to stain or seal it.
7. Finished Look
- Before Bleaching: Pine wood before bleaching can look somewhat dull or have an outdated appearance if it’s been exposed to the elements or used for a long time.
- After Bleaching: Bleached pine wood looks brighter, cleaner, and more modern. The lighter color can complement a variety of home styles and décor, from rustic to contemporary. Whether you’re using the wood for furniture or flooring, the after-effect of bleaching can give it a brand new life.
Bleaching pine wood can completely transform its appearance, taking it from dark, worn-out, or uneven to bright, fresh, and new. Whether you want to restore the wood’s natural light color or prepare it for staining bleaching is a simple and effective way to bring your pine wood back to life.
The “before and after” difference is remarkable, and the results can last for years if properly maintained. If you’re looking to give your pine furniture, flooring, or panels a makeover, bleaching is definitely worth considering!
Choosing the Right Bleaching Method
Choosing the right bleaching method is important to get the best results for your pine wood. There are different types of bleaches you can use, and each one works a little differently.
1. Two-Part Wood Bleach (A/B Bleach): This is a powerful bleaching method that can significantly lighten wood. It’s great if you want to make a big change in the color of your pine. It comes in two parts that you mix together and apply to the wood. This method is perfect for getting a light, uniform color.
2. Oxalic Acid: Oxalic acid is a milder option that’s often used to remove rust stains or brighten the wood without drastically changing its natural color. If you have specific stains on your pine but still want to keep its natural look, this might be the best choice.
3. Hydrogen Peroxide and Lye: This method is a combination of hydrogen peroxide and lye, which can lighten wood very effectively. However, it can be a bit tricky to handle because the chemicals can be harsh, so you’ll need to be careful and follow the instructions closely.
4. Household Bleach: If you want a simple and easy option, regular household bleach can be used. It’s not as strong as other methods, but it can still work if you’re looking for a light change. It’s best used for smaller jobs or when you’re just trying to freshen up the wood a little bit.
Each method has its own benefits, so think about how much of a change you want and how easy you want the process to be. Make sure to follow all safety guidelines and choose the right bleach for the job!
Step-by-Step Guide to Bleaching Pine Wood
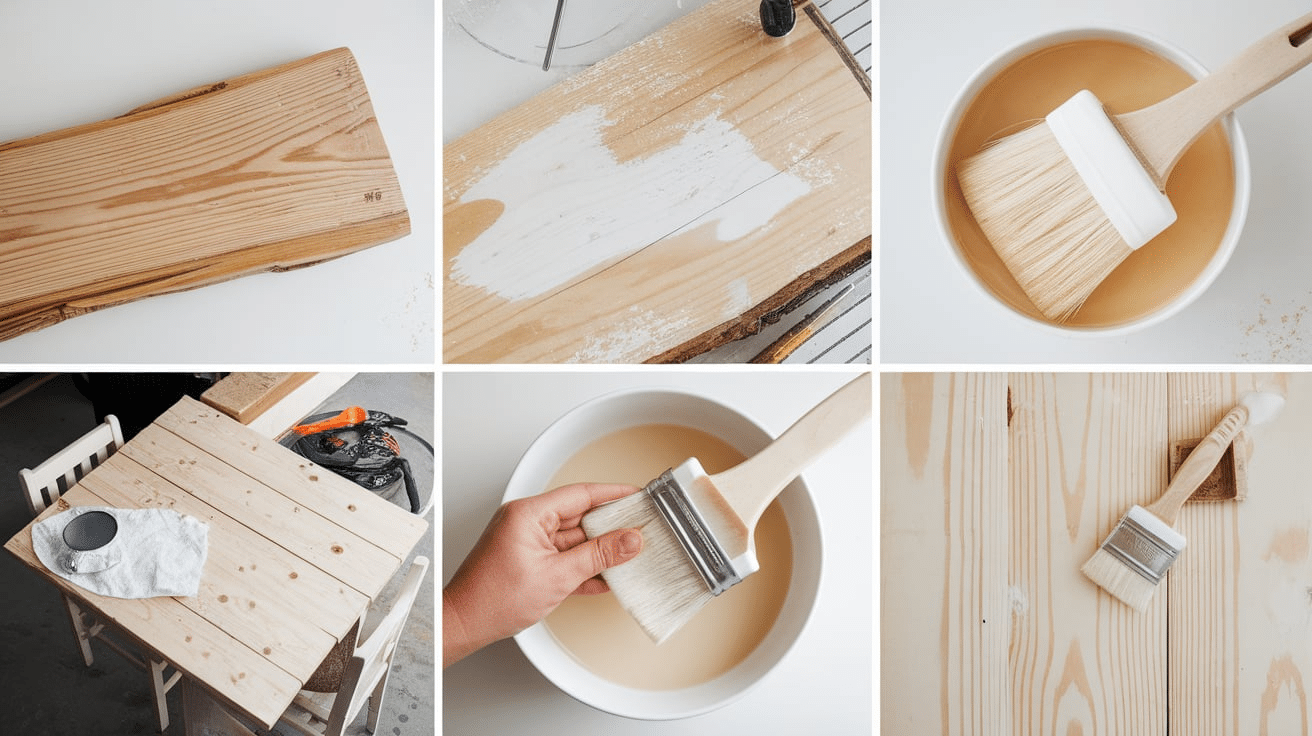
Bleaching pine wood is a great way to brighten up its color and give it a fresh, new look.
Step 1: Prepare Your Work Area
Before you start, make sure you’re working in a well-ventilated area. Bleaching chemicals can have strong fumes, so open windows or use fans to keep the air fresh. Lay down some protective coverings, like drop cloths or old newspapers, to protect your floors and furniture.
Step 2: Clean the Wood
Start by cleaning the wood to remove any dust, dirt, or grease. You can use a mild cleaner and a soft cloth. If the wood has any sticky spots, like old glue or resin, make sure to clean those off as well. Let the wood dry completely before moving on to the next step.
Step 3: Remove Any Old Finish
If your pine wood has a layer of paint, varnish, or stain, you’ll need to remove it before bleaching. You can use a paint stripper or sandpaper for this. Sand the surface lightly to make sure the bleach can reach the wood evenly. Start with a coarser sandpaper and finish with a finer grit for a smooth surface.
Step 4: Prepare the Bleach Solution
Follow the instructions on the bleach product you’re using. If you’re using a two-part bleach (like A/B bleach), you’ll need to mix the two parts together in a container. Be sure to wear gloves when handling the bleach, as it can be harsh on your skin.
Step 5: Apply the Bleach
Using a brush or a clean cloth, apply the bleach solution evenly to the pine wood. Work in small sections to make sure the bleach covers the wood completely. Be careful not to apply too much at once; a light, even coat is best. Make sure to coat the entire surface that you want to bleach.
Step 6: Let the Bleach Work & Neutralize It
Once you’ve applied the bleach, let it sit for about 15 minutes to an hour, depending on the type of bleach and how light you want the wood. After the bleach has worked, rinse the wood with clean water to remove any leftover bleach. Some bleaches may also require a neutralizing solution, so be sure to check the product instructions. Wipe off any excess moisture with a clean cloth and let the wood dry completely.
Step 7: Finish the Wood
Now that your wood is lightened and smooth, you can finish it with a protective coating. You can apply a clear wood finish, wax, or stain, depending on the look you want. Be sure to follow the instructions on your chosen finish and let it dry fully before using or handling the wood.
Following these steps will help you bleach your pine wood safely and effectively. With a little patience and care, you’ll end up with perfectly lightened wood that looks great and is ready for any project you have in mind!
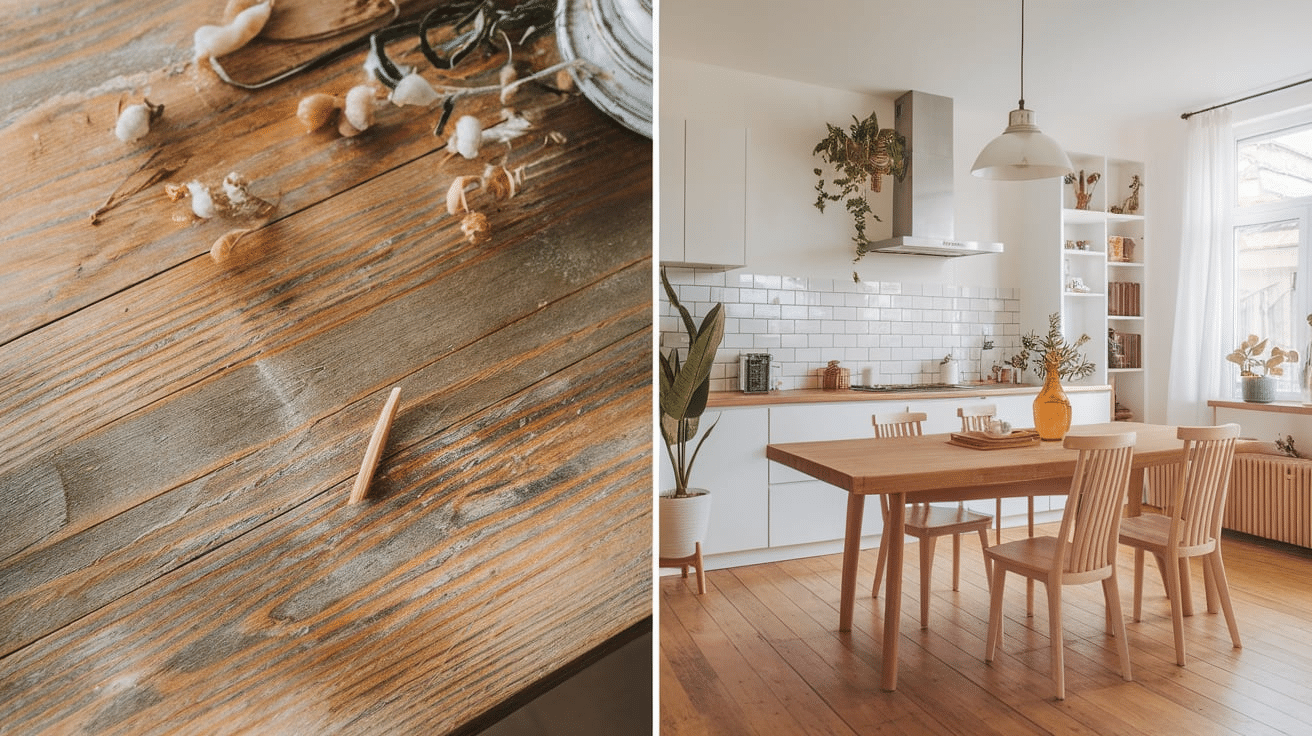
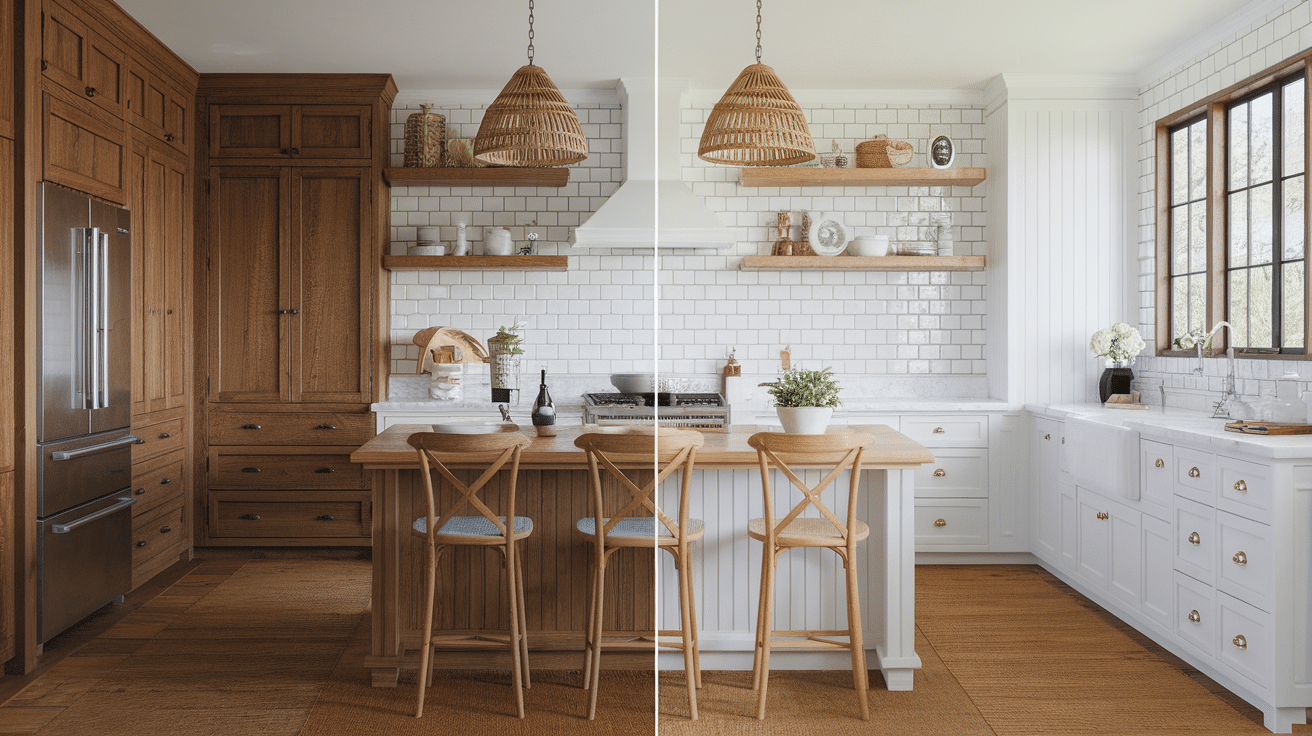
Different Pine Wood Projects Before and After
When bleaching different pine wood pieces, the before and after results can vary depending on the type of wood and how it’s treated.
1. Pine Furniture (Tables, Chairs, etc.)
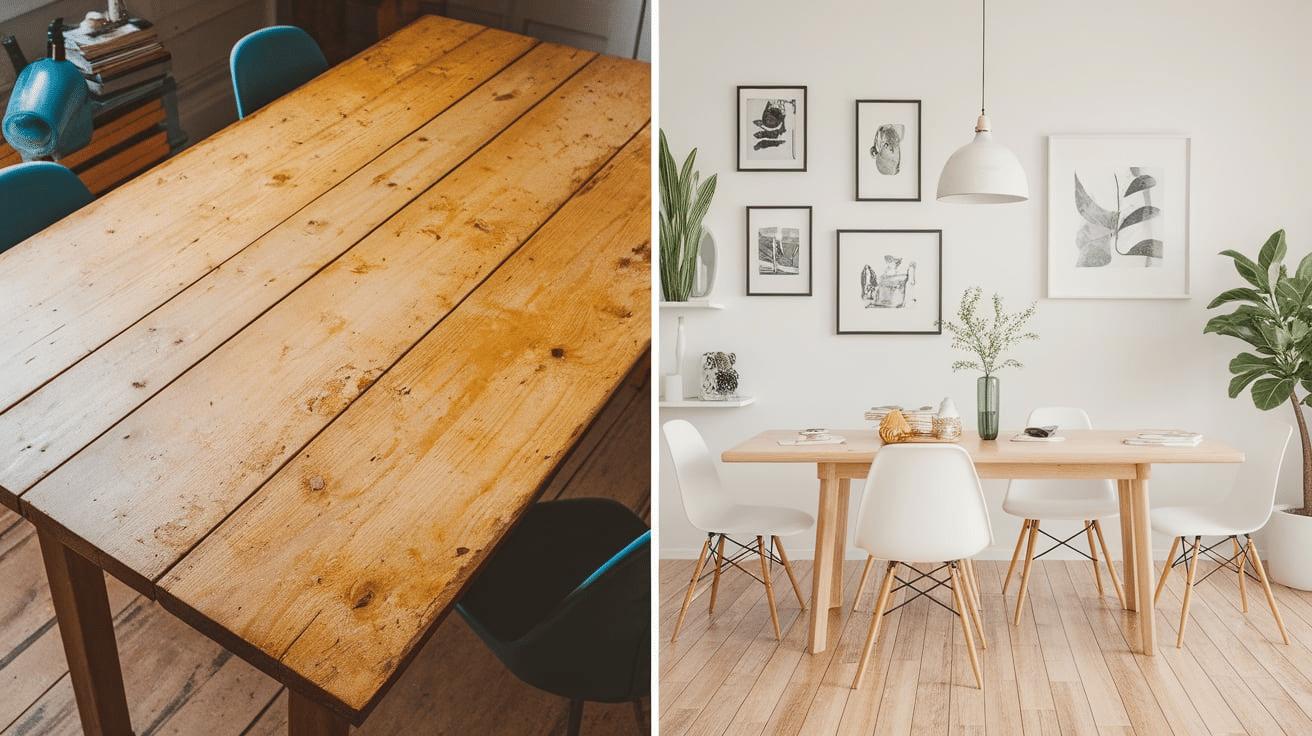
- Before: Pine furniture may have a yellowish tint, dark stains, or signs of wear and tear. It could look dated, scratched, or uneven in color.
- After: Bleaching lightens the wood, removes stains, and evens out the color. The grain becomes more visible, and the furniture looks fresh, bright, and clean. It also gives it a more modern, polished appearance, making it easier to stain or finish with a new color.
2. Pine Wood Paneling
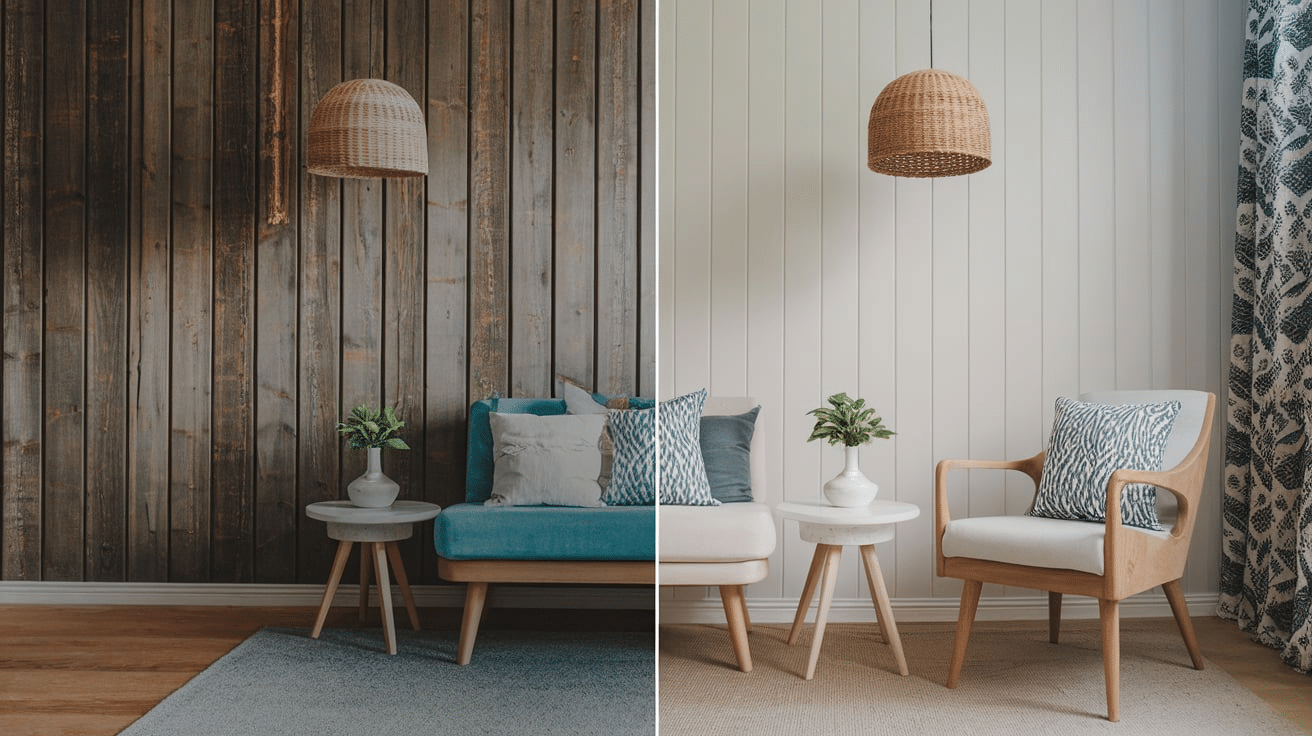
- Before: Pine paneling often darkens over time and may develop patches of uneven color, making the room feel heavy or outdated.
- After: Bleaching the paneling brightens the wood, making it look lighter and more uniform. This gives the room a more open, airy feel and can help refresh the overall look of your space.
3. Pine Flooring
- Before: Over time, pine floors can become dull and discolored from foot traffic, sunlight, and spills. They may have dark patches or uneven areas that make the floor look worn.
- After: Bleaching the pine floors makes them look much lighter and smoother. The process can also reduce discoloration and bring out the natural grain, giving the floors a fresh, clean, and uniform appearance.
4. Pine Wood Beams
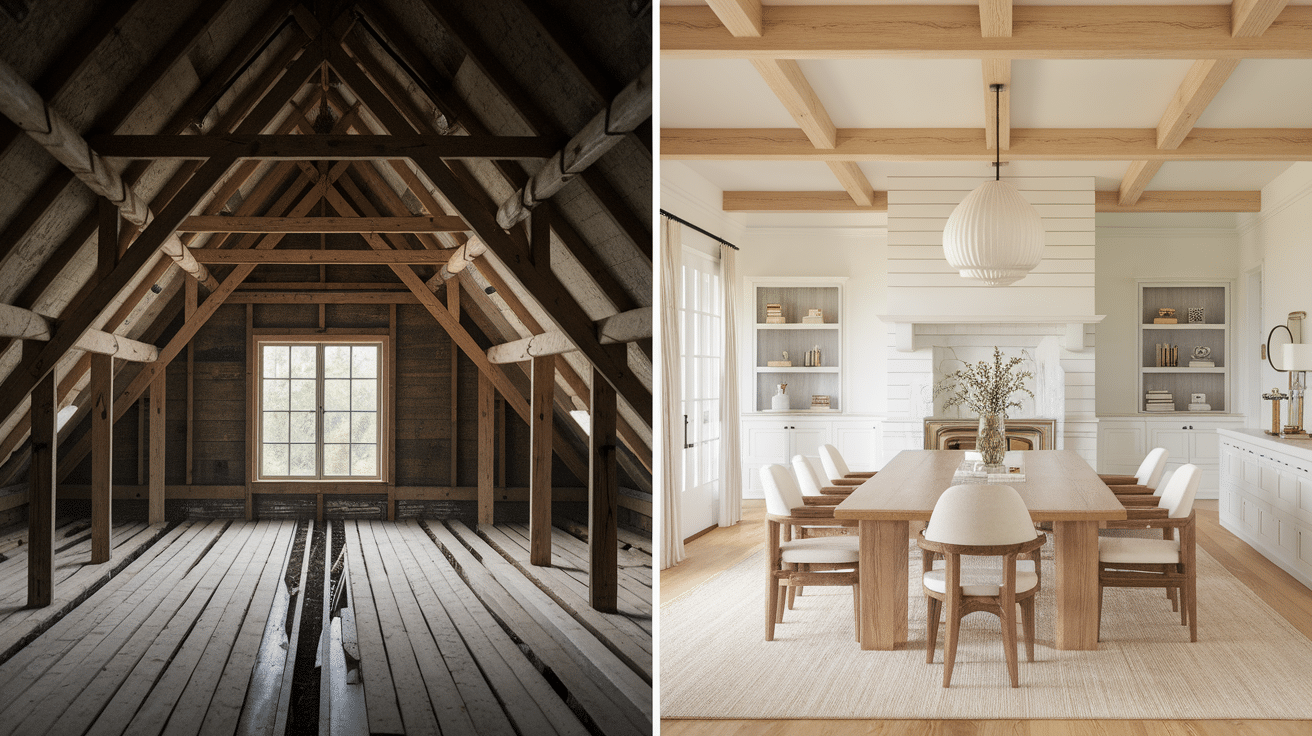
- Before: Pine beams can darken with age or have a yellowish, uneven tint. They may also have old stains from exposure to moisture or oils.
- After: Bleaching helps to lighten the beams, remove stains, and make the wood appear brighter and more even in color. This can create a more modern and refreshed look, especially in rooms with rustic or natural décor.
5. Pine Doors
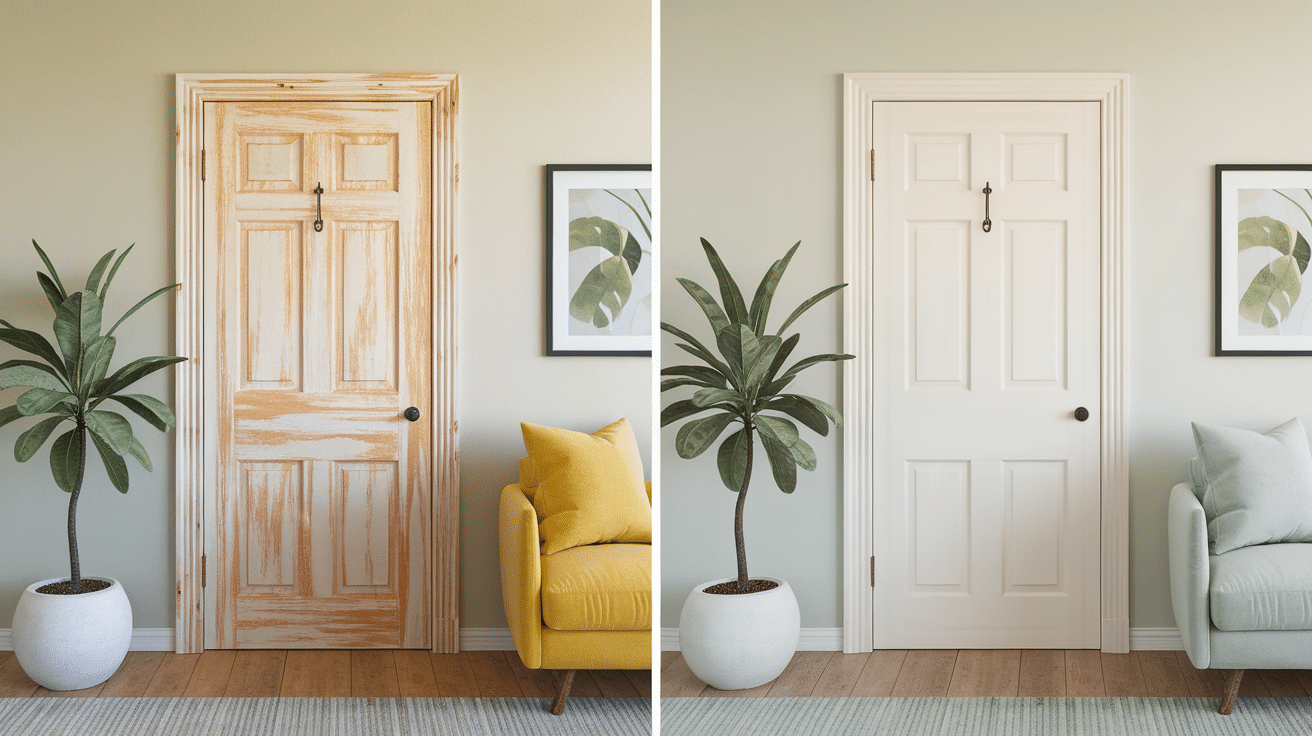
- Before: Wooden pine doors can become discolored, especially if exposed to sunlight. Over time, they may develop dark spots or patches that look uneven.
- After: After bleaching, the door’s color becomes more even and lighter. This also enhances the natural grain, giving it a fresh, new look. Bleaching can make the door blend better with lighter-colored walls or frames.
6. Pine Cabinets
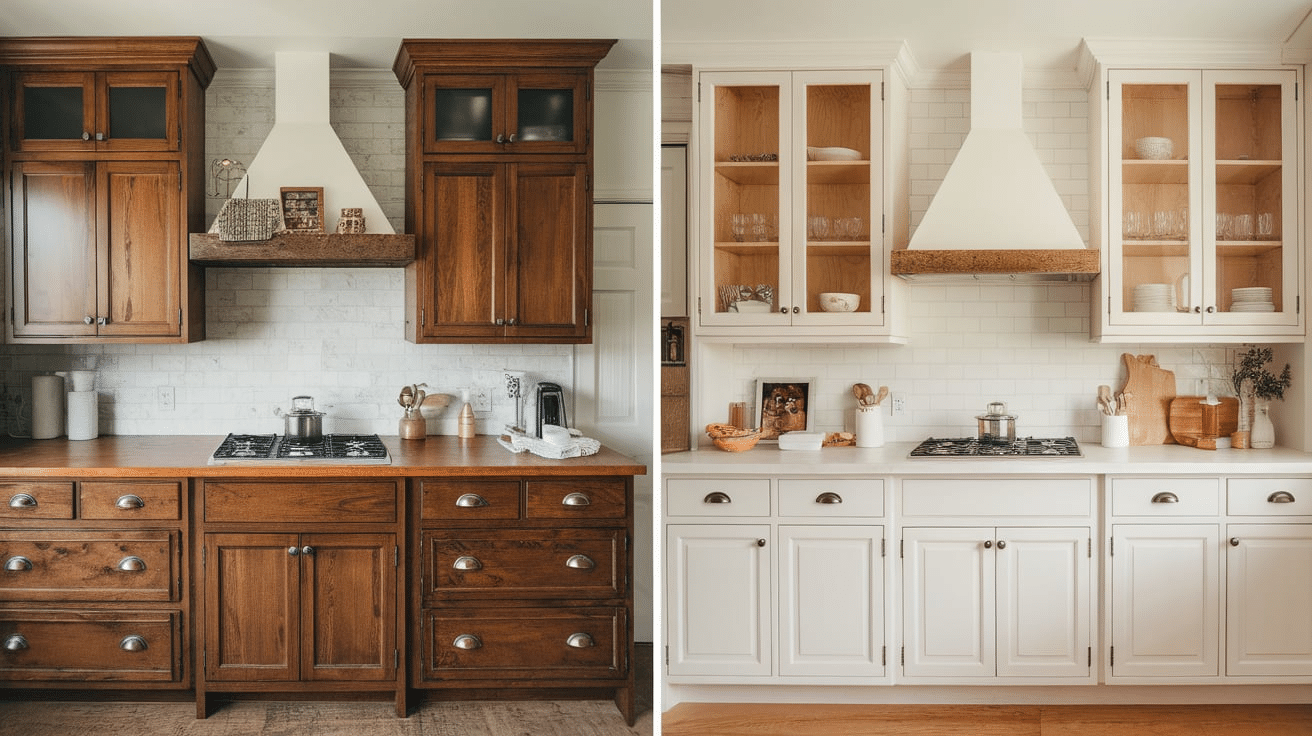
- Before: Pine cabinets can become stained or darken over time from daily use, cooking oils, or sunlight. The original wood color may not match anymore, and some areas could look blotchy.
- After: Bleaching removes stains and dark patches, giving the cabinets a lighter, more uniform appearance. The bleach also enhances the grain, and the wood is ready for finishing, which makes the cabinets look brand new.
7. Pine Wood Craft Pieces
- Before: Small pine craft pieces, like shelves or small boxes, may have a natural yellowish tone or uneven stain. They could also have marks or scratches from handling.
- After: Bleaching lightens the wood and makes it look more polished. The color becomes more even, and the grain is more noticeable. This gives the pieces a clean, smooth finish, perfect for painting or adding a fresh new design.
In all these cases, bleaching brings pine wood to a much lighter and more even color, improving the overall appearance of the pieces and making them easier to work with for further refinishing or staining.
Bleached vs Unbleached Pine Wood: Which Is Better
Whether bleached or unbleached pine wood is better really depends on the look and style you’re going for, as well as the specific project you’re working on. Here’s a comparison to help you decide:
Bleached Pine Wood:
Pros
- Brighter Look: Bleaching lightens the wood, making it look fresh and clean. It’s perfect if you want a lighter, more modern appearance.
- Uniform Color: Bleaching helps even out any discoloration or stains, giving the wood a more consistent and uniform look.
- Enhances the Grain: The bleaching process can highlight the wood’s natural grain, making it more visible and appealing.
- Prepares for Staining: Bleached wood creates an even base for staining or finishing. If you want to add a new color or finish, bleaching ensures the wood absorbs it evenly.
Cons:
- Can Be Too Light: Sometimes, bleaching can remove too much of the natural warmth and color of pine, which may not be desirable for everyone.
- Requires Maintenance: Depending on the bleach you use, you may need to sand and finish the wood afterward, which takes extra time and effort.
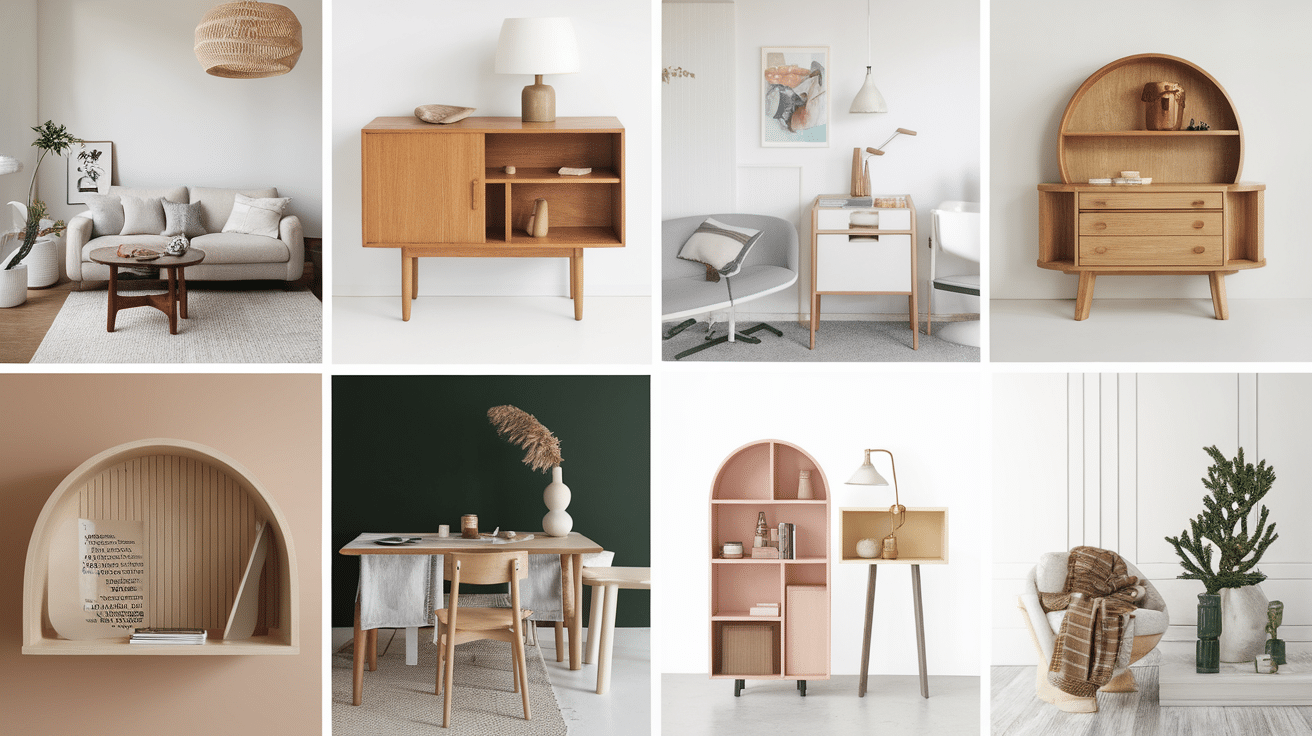
Unbleached Pine Wood

Pros
-
- Natural Warmth: Unbleached pine has a warm, golden or yellowish tone that many people love. It gives a rustic or traditional look to furniture, floors, or decor.
- More Character: The natural imperfections in the wood—like knots, color variations, and grain patterns—are more pronounced in unbleached pine, giving it a unique, one-of-a-kind appearance.
- Less Maintenance: Unbleached pine typically requires less work upfront compared to bleaching, as there’s no need for cleaning, bleaching, or sanding.
Cons
- Darkening Over Time: Unbleached pine can darken and develop stains as it ages, especially if exposed to sunlight or moisture. This may result in uneven color.
- Stains and Imperfections: Pine’s natural color can sometimes have blotchy spots or stains that don’t look as polished as bleached wood.
Which Is Better?
- Go for Bleached Pine if you prefer a lighter, cleaner look, want to remove stains or discoloration, or plan on staining the wood a different color.
- Choose Unbleached Pine if you love the natural warmth and character of the wood, and you want a more rustic, natural feel without making any drastic changes to the color.
Ultimately, it comes down to your personal preference and the look you want to achieve for your project!
Common Mistakes To Avoid
When bleaching pine wood, there are a few common mistakes you’ll want to avoid to get the best results:
-
Not Cleaning the Wood First: If you don’t clean the wood before bleaching, dirt or grease can affect how the bleach works. Always wipe down the surface before you start.
-
Using the Wrong Bleach: Different bleaches work for different jobs. Make sure you choose the right one for your project. For example, don’t use regular household bleach if you need a bigger color change.
-
Skipping the Sanding: Sanding the wood before bleaching helps the bleach soak in better. If you skip this step, the wood might not bleach evenly.
-
Over-Applying Bleach: Applying too much bleach can lead to uneven results or damage the wood. Go slow and apply in thin layers.
-
Not Following Safety Rules: Always wear gloves, goggles, and work in a well-ventilated area. Bleaching chemicals can be harsh, so protect yourself!
Avoiding these mistakes will help you get the best, safest results when bleaching pine wood.
Conclusion
Whether you choose to bleach or leave your pine wood unbleached depends on the look you want to achieve. Bleaching pine wood can give it a fresh, lighter appearance, helping to remove stains and create a more uniform color.
It’s perfect if you want a clean, modern look or plan to add a new finish. On the other hand, unbleached pine offers a natural, warm look with visible grain and character, ideal for rustic or traditional styles. Both options have their benefits, and it really comes down to personal preference.
Whatever you decide, just remember to follow the proper steps for bleaching or maintaining your pine wood to get the best results. With the right care, your pine wood can look beautiful and last for years to come!