
Hanging curtains sounds simple. But most people end up with crooked rods, mismatched heights, and holes in the wrong spots.
It’s one of those tasks that looks easy until it isn’t. A small measuring mistake at the start can throw off the whole look of a room.
The curtains end up too short, too bunched, or just plain off. That’s a lot of wasted time and effort.
The curtains to hang right don’t need to be complicated. With the right steps and a little patience, anyone can get a clean, polished result on the very first try.
How High and Wide Should You Hang Curtains?
Getting the height and width right makes all the difference. Hang the rod too low, and the room feels small and cramped. Go too narrow, and the windows look awkward and pinched.
Most designers suggest hanging the rod 4 to 6 inches above the window frame.
And for width, the rod should extend 8 to 12 inches beyond each side of the window. This helps the curtains frame the window properly without blocking natural light.
These numbers aren’t random. They’re based on what actually looks good in real homes.
Choosing the Right Curtain Length and Style
Picking the right curtain length changes how a room feels completely. The wrong choice can make even a nice space look off.
- Measure from The Rod to The Floor First: Always start by measuring from the curtain rod down to the floor. This gives the base number to work with.
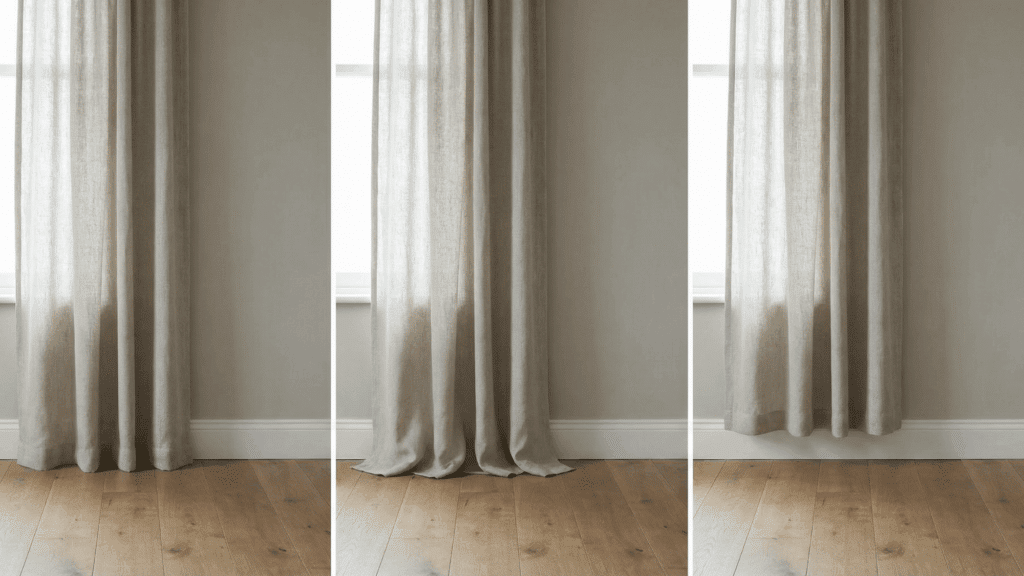
- Pick the Right Hem Style: Curtains can skim the floor, puddle on it, or float just above. Each style creates a different look and mood.
- Match Length to Room Type: Longer curtains suit living rooms and bedrooms. Shorter ones work better in kitchens and bathrooms for practical reasons.
- Choose Fabric Based on Function: Sheer fabrics let light in while heavier ones block it. Think about privacy needs before picking a style.
- Stick to One Style per Room: Mixing curtain styles in the same room can look messy. Keeping it consistent gives a cleaner, more pulled-together result.
Step-by-Step Curtain Installation Instructions for Beginners
Putting up curtains doesn’t have to feel overwhelming. Follow these simple steps and the job gets done right.
Step 1: Gather All the Tools and Materials
Before starting, it helps to have everything ready in one place. The tools needed are a drill, screwdriver, measuring tape, pencil, and a level.
Having the right curtain rod, brackets, screws, and wall anchors on hand saves a lot of back-and-forth. Preparing ahead means the job moves faster and with fewer interruptions along the way.
Step 2: Mark the Bracket Positions on the Wall
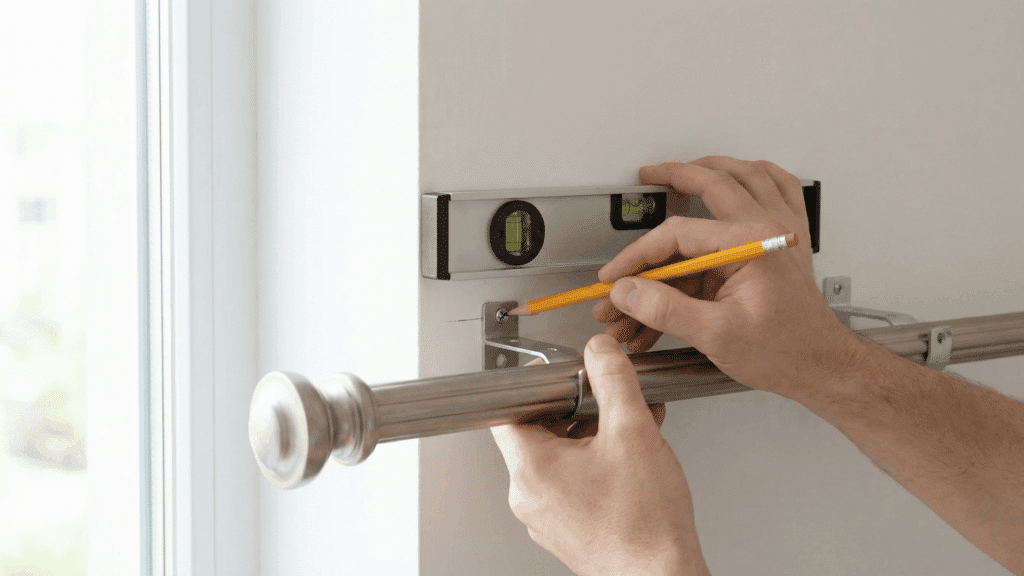
Hold the curtain rod up against the wall at the desired height. Use a pencil to mark where each bracket will go.
A level helps make sure both marks sit at the exact same height. Getting this step right matters a lot. Even a small difference between the two sides will make the finished curtain look visibly crooked.
Step 3: Drill the Holes and Insert Wall Anchors
Once the marks are in place, it’s time to drill.
Use the right drill bit size for the wall anchors being used. If the wall is drywall without a stud behind it, wall anchors are a must. They hold the bracket firmly in place.
Skipping this step often leads to brackets pulling out of the wall over time.
Step 4: Secure the Brackets to the Wall
Push the wall anchors into the drilled holes first. Then line up each bracket and screw it in firmly. Give each bracket a gentle tug after screwing it in. It should feel solid and not wobble at all.
A loose bracket at this stage will cause problems later, so taking a moment to double-check is always worth it.
Step 5: Hang the Curtain Rod and Panels
Thread the curtain panels onto the rod before placing them on the brackets.
Once the panels are on, rest the rod into the bracket holders and lock it in place. Step back and check that everything looks level and even.
Adjust the panels so they hang evenly on both sides for a neat, finished look.
Curtain Installation for Different Wall Types
Not every wall is the same. Knowing the wall type before drilling saves a lot of trouble and damage.
1. Drywall: The most common wall type in homes. Always use wall anchors here since screws alone won’t hold brackets securely enough.
2. Plaster Walls: Older homes often have plaster walls. These need a masonry drill bit and extra care to avoid cracking the surface while drilling.
3. Brick or Concrete Walls: These walls are the toughest to drill into. A hammer drill and masonry anchors are absolutely necessary for a secure and lasting hold.
4. Wood Walls: Screws go directly into wood without needing anchors. Just make sure to pick screws that are long enough to grip the wood firmly.
5. Tiled Walls: Drilling into tiles risks cracking them. Using a tile drill bit at a slow speed helps get through without causing any unwanted damage.
6. Stud Walls: Finding the stud first makes installation much stronger. Screwing directly into a stud means no anchors are needed at all for solid support.
Curtain Hanging Mistakes to Avoid
Small mistakes during curtain installation can affect the whole look of a room. Here are the most common ones to watch out for.
- Hanging the rod too low: Placing the rod close to the window frame makes ceilings look lower and the room feel smaller than it actually is.
- Using the wrong size rod: A rod that’s too short makes curtains look cramped and prevents them from opening and closing smoothly without bunching up.
- Skipping the level: Eyeballing bracket placement almost always leads to a crooked rod that throws off the entire look of the finished curtains.
- Choosing the wrong curtain length: Curtains that are too short look awkward and unfinished, while the right length instantly pulls the whole room together.
- Not using wall anchors on drywall: Skipping wall anchors on drywall causes brackets to loosen over time and eventually pull right out of the wall.
Conclusion
Hanging curtains the right way comes down to a few key things: correct measurements, the right tools, and knowing the wall type being worked with. Avoiding common mistakes saves time, effort, and a lot of unnecessary frustration.
A well-hung curtain doesn’t just cover a window. It changes how a room feels completely.
Start with one window, follow the steps, and see the difference it makes. For anyone looking to take their space further, checking out other home improvement tips on the blog is a great next step.
Got questions or tips to share? Drop them in the comments below.