
Terracotta pots have always had a special place in my home.
Their warm, earthy color feels grounded and natural, but I’ve found that with just a bit of paint, they can also become fun, vibrant pieces of decor.
From brightening up a windowsill to adding color to my porch or creating handmade gifts for friends, painting these simple clay pots has become one of my favorite creative pastimes.
In this guide, I’ll walk you through how I prepare and seal my pots, why a white base coat makes a difference, and share easy painting ideas that anyone can try.
These designs are great for beginners and can be done with minimal supplies.
I’ll also include helpful tips that I’ve learned along the way to make sure your pots turn out beautiful and durable, indoors or out.
If you’ve ever wanted to personalize a plant pot, now’s the perfect time to start.
Why Paint Terracotta Pots?
Painting terracotta pots isn’t just about adding color; it’s a creative and practical project with lasting benefits.
For one, it gives you the freedom to customize your pots to match any room, season, or personal style.
A soft pastel pot might brighten a nursery, while bold geometric patterns can add flair to your patio.
Beyond looks, painted and sealed pots are more functional, too.
I also love how relaxing the process is. If I’m painting alone on a quiet afternoon or getting the kids involved, it’s always an enjoyable and low-pressure activity.
Plus, hand-painted pots make heartfelt, budget-friendly gifts, especially when paired with a little plant or herb.
How to Paint Terracotta Pots: Step-by-Step Preparation & Painting
These steps ensure your pots are clean, sealed, and ready to handle detailed paintwork.
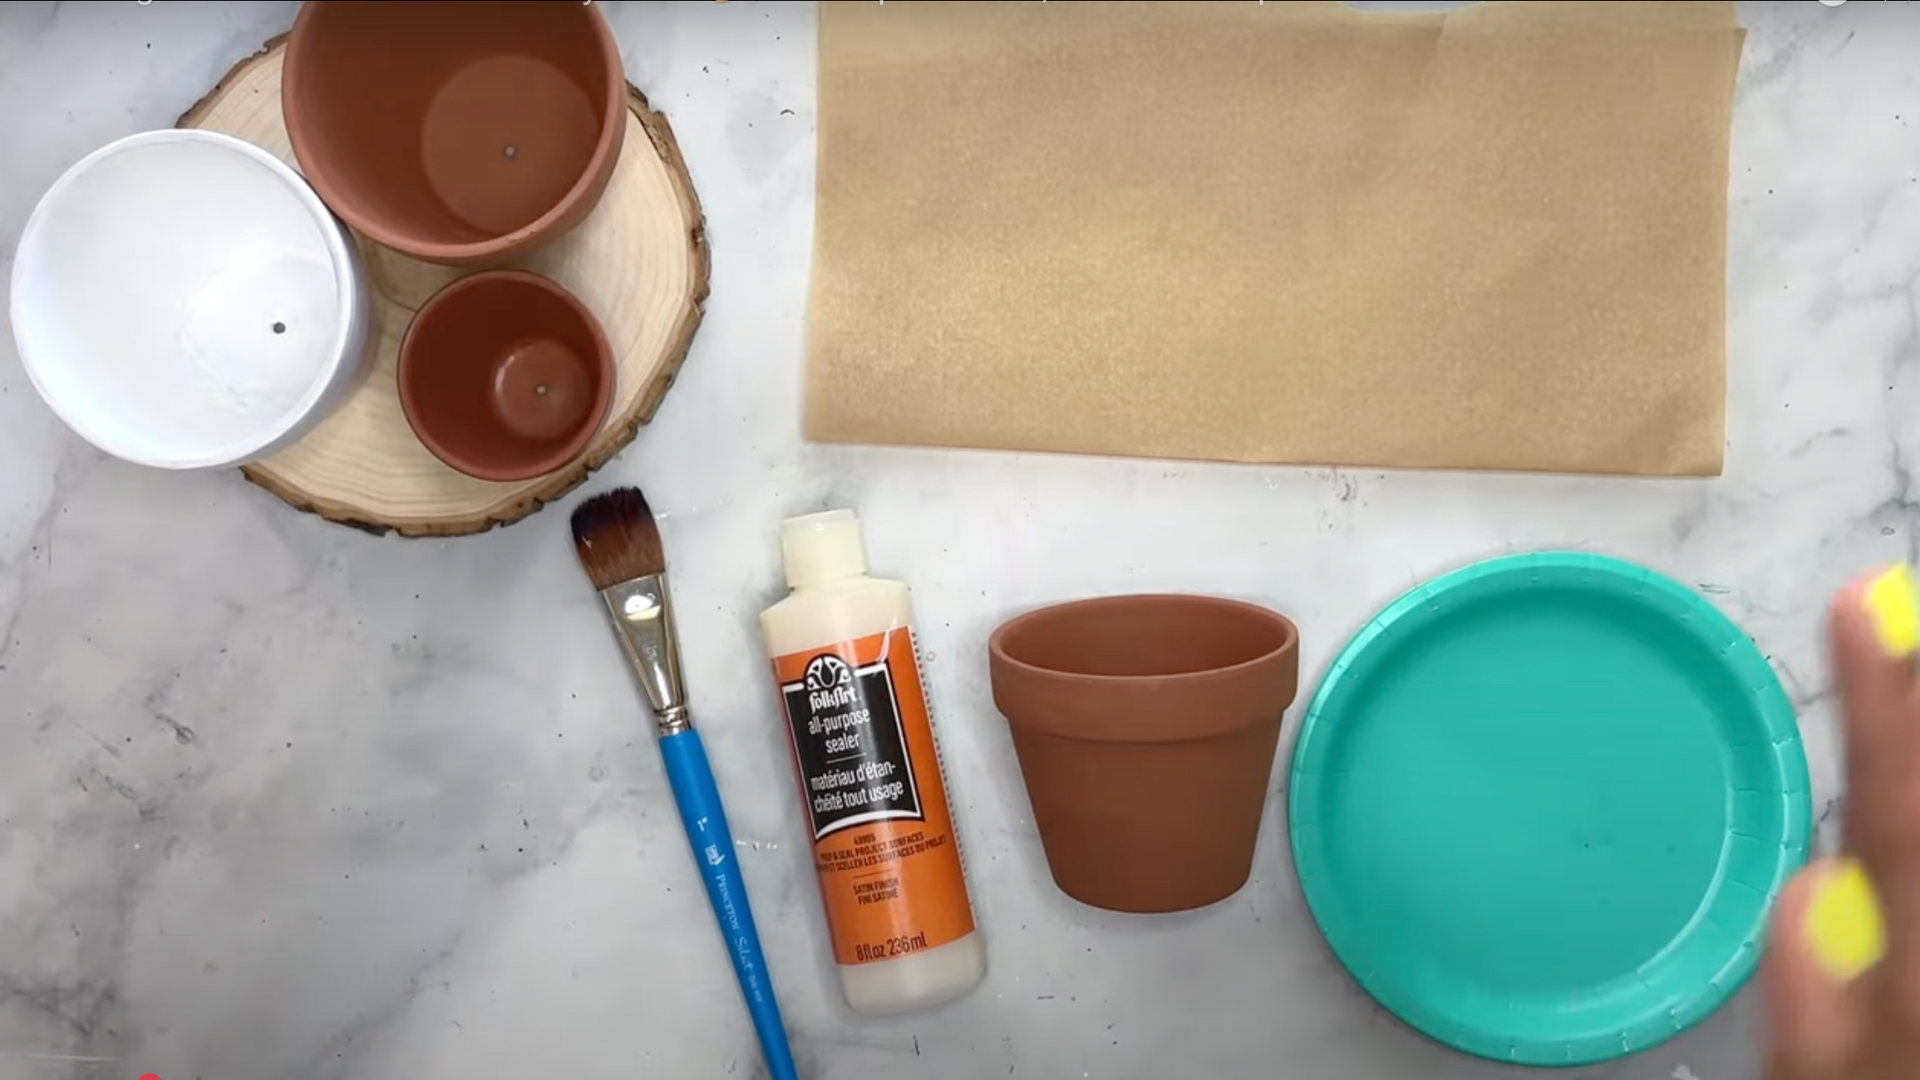
Materials Needed
You don’t need much to get started, just a few basic supplies that are easy to find and simple to use.
- Terracotta pots (any size)
- Dry paper towel or cloth (for cleaning)
- Water-based acrylic sealer
- Titanium White acrylic paint (for base coat)
- Acrylic paints or paint markers (for decorating)
- Foam and detail brushes
- Clear topcoat sealer (spray or brush-on)
Optional extras, such as Q-tips, skewers, or stencils, can enhance certain designs, but they aren’t necessary for most projects.
Step 1: Clean the Pot
Before you begin sealing or painting, it’s essential to start with a clean surface to help everything stick properly.
- Start by wiping your terracotta pot thoroughly with a dry paper towel.
- This helps remove dust, dirt, and loose particles that may interfere with painting.
- A clean surface ensures better adhesion for both the sealer and paint.
- Avoid using water at this stage; a dry cloth is all you need.
- Be sure to clean both the inside and outside of the pot for best results.
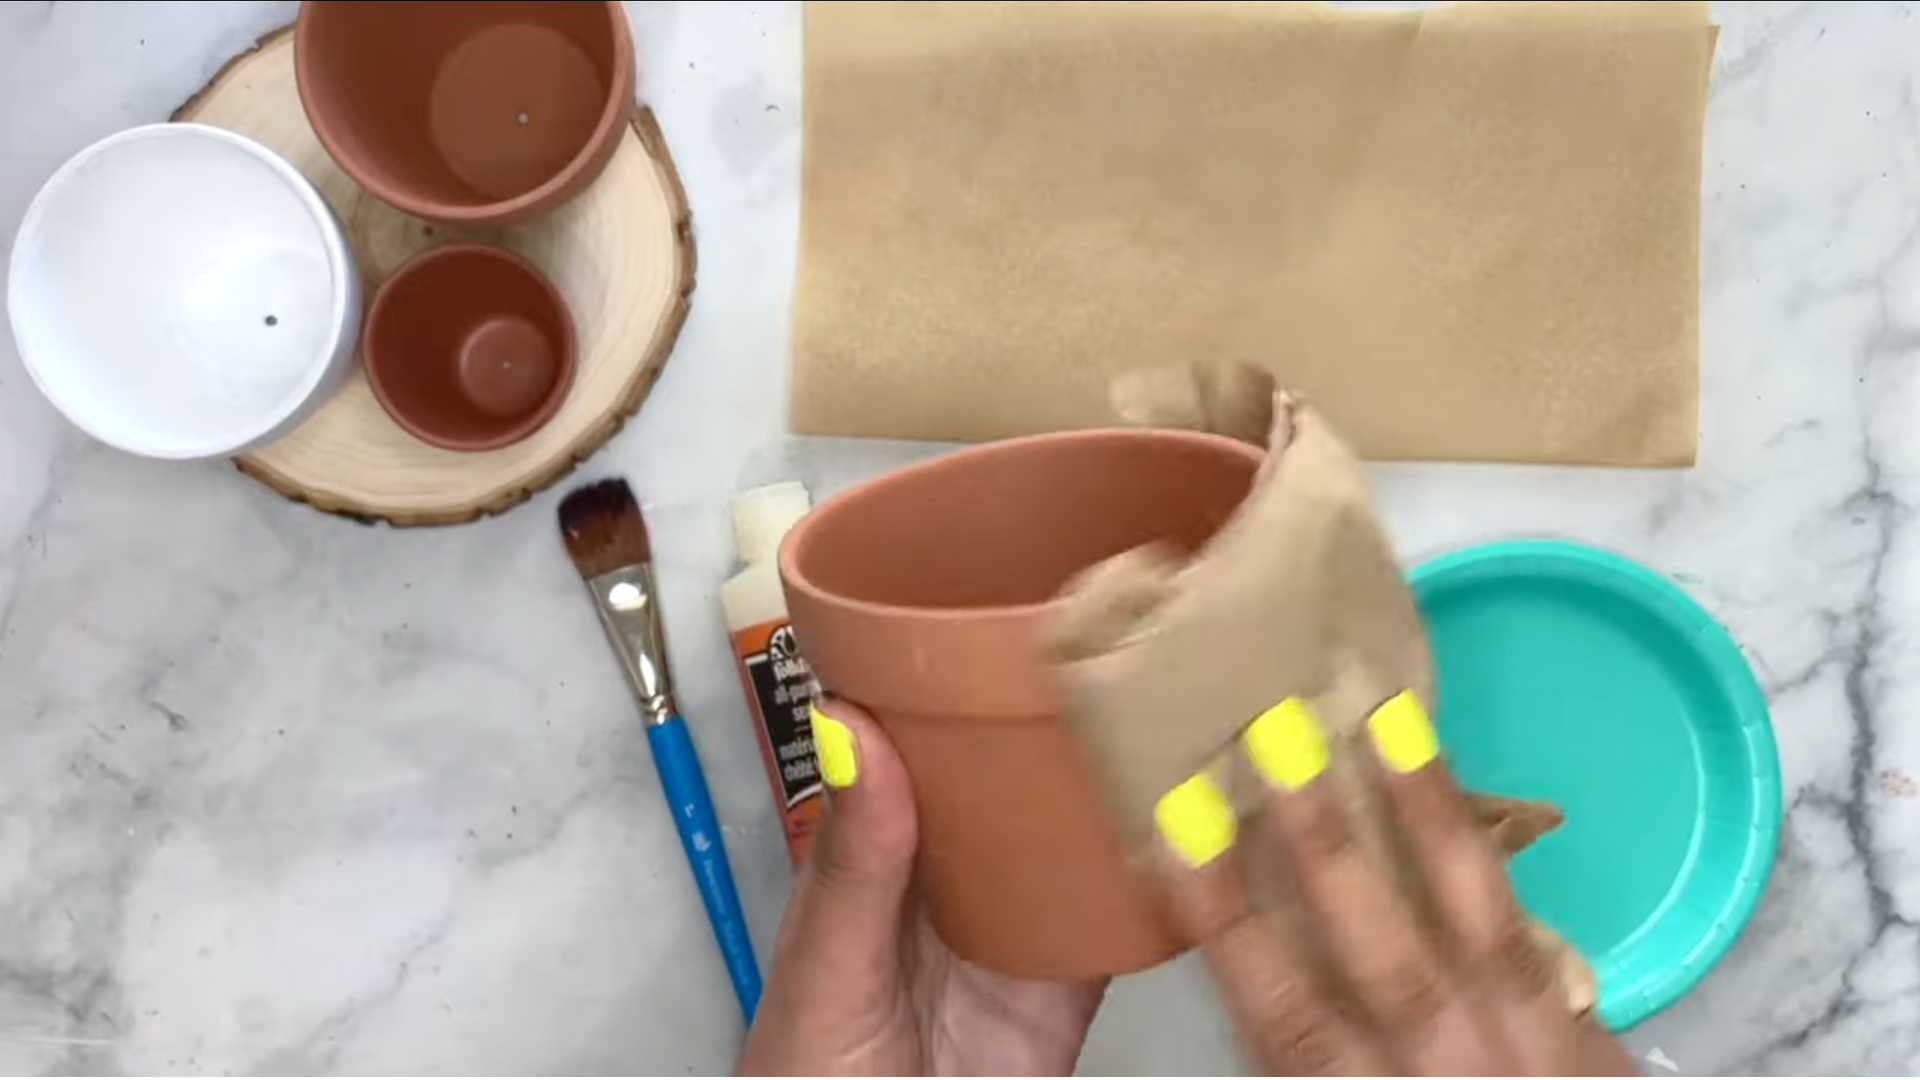
Step 2: Seal the Pot
Terracotta is porous, so sealing it prevents water from seeping through and damaging your design.
Use a water-based, non-toxic sealer like FolkArt All-Purpose Sealer.
- Apply using a clean brush in vertical strokes.
- Seal both the inside and outside of the pot.
- Let the first coat dry fully before adding a second.
Step 3: Apply a White Base Coat
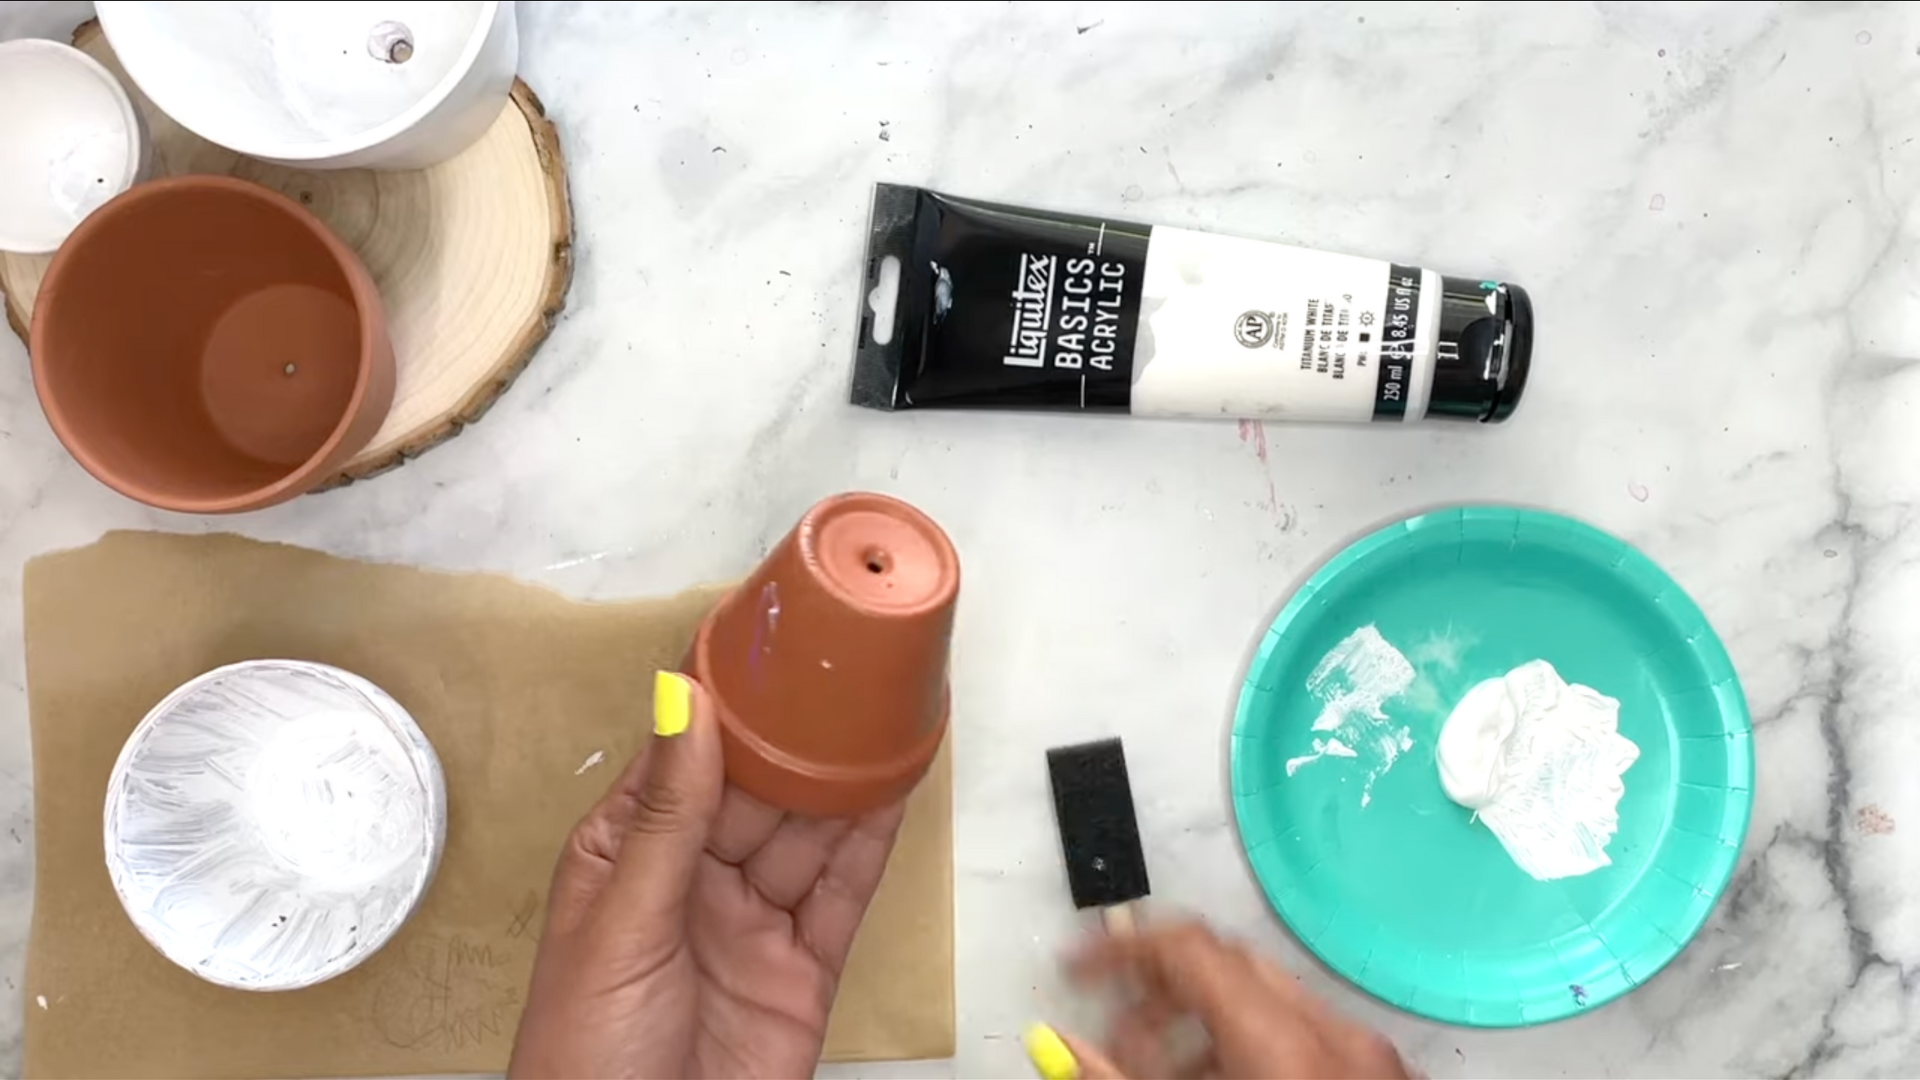
A white base coat helps make your colors stand out and keeps the finish smooth.
- Use Titanium White acrylic paint.
- Apply 2–3 coats using a foam brush.
- Let each coat dry completely before applying the next.
Step 4: Paint What You Like
Now that your base coat is dry, it’s time to add your creative touch.
- Use acrylic paints or paint markers to create your design.
- Choose from the six ideas in this guide or come up with your own.
- Use small brushes for detail work and larger ones for background areas.
- Let each layer of paint dry before adding another to avoid smudging.
- Don’t be afraid to mix colors, try new shapes, or experiment with different patterns.
This is your chance to make the pot truly yours, so have fun with it.
Step 5: Finishing Off
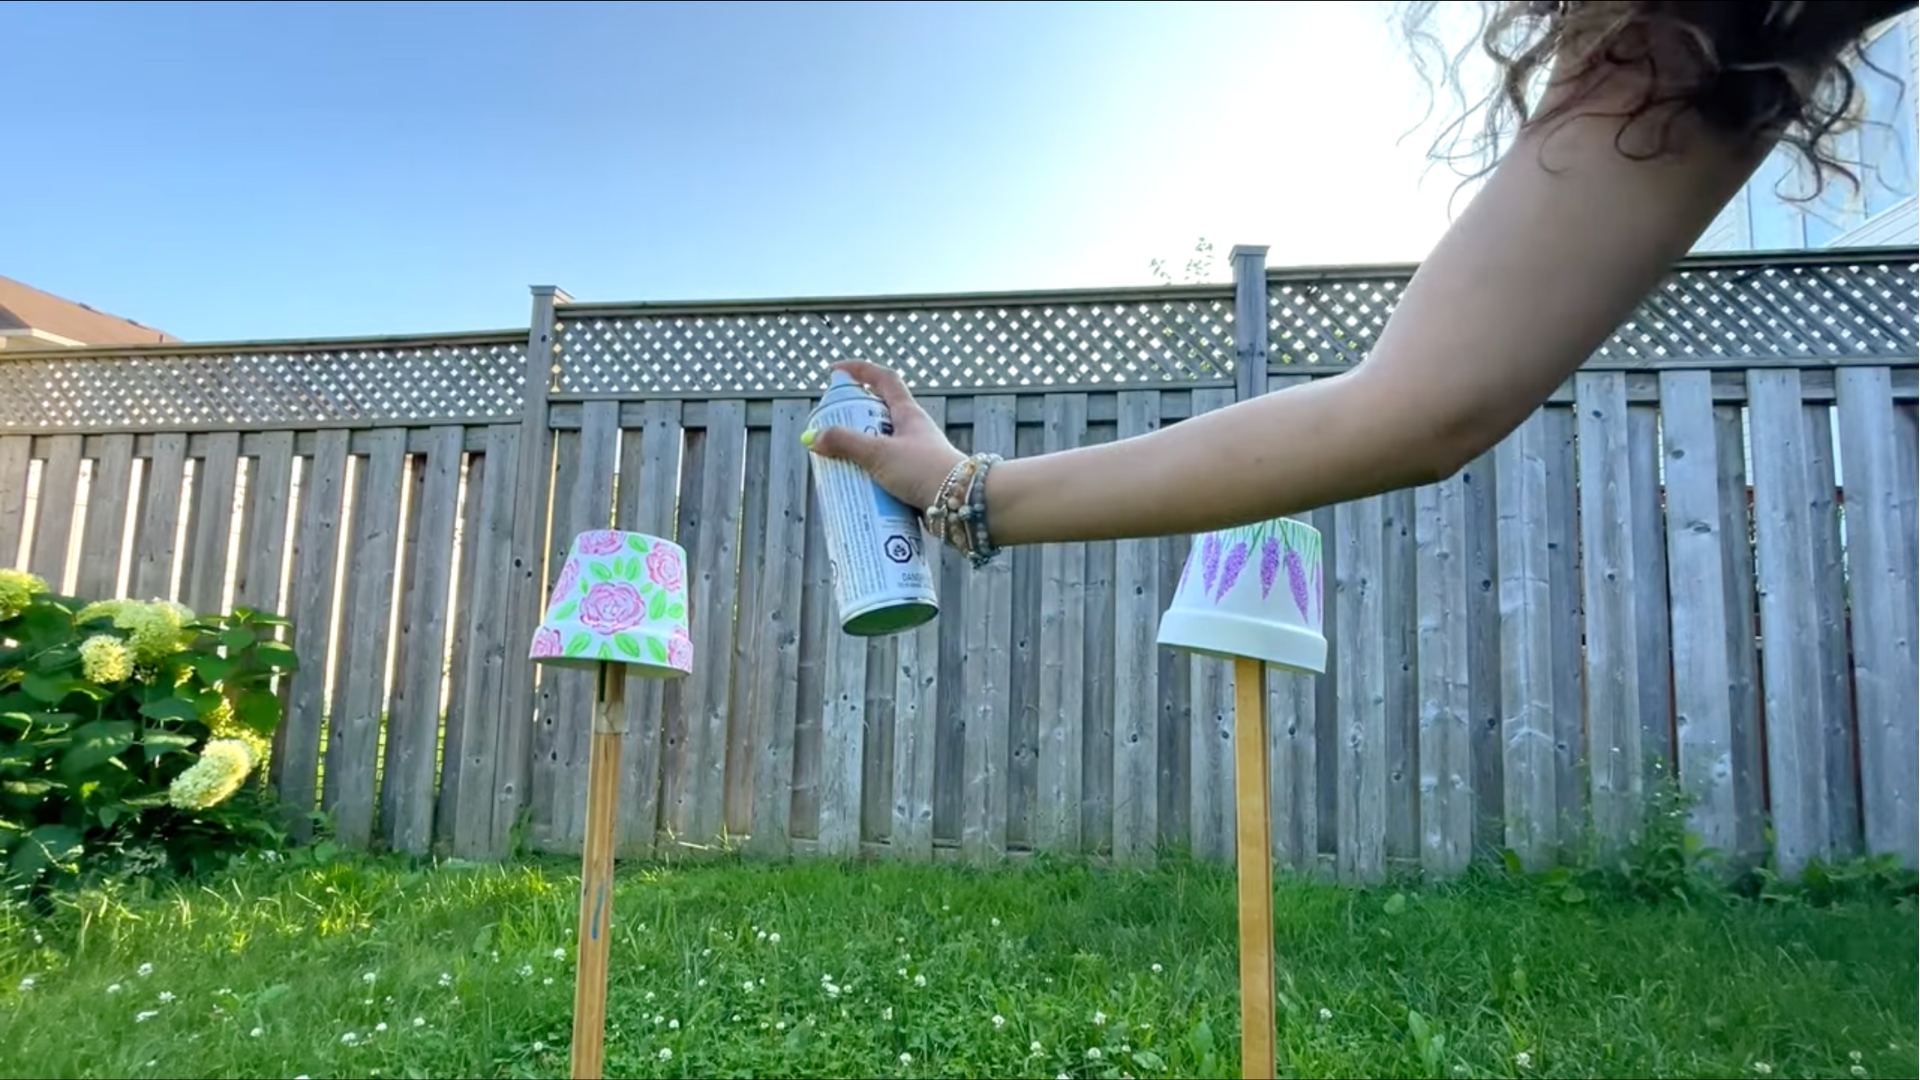
Protect your artwork with a clear sealer.
Options:
- Spray Sealer: Fast and convenient, ideal for applying multiple coats outdoors.
- Brush-On Sealer: Ideal for indoor use with less odor.
Apply two coats, letting each one dry completely.
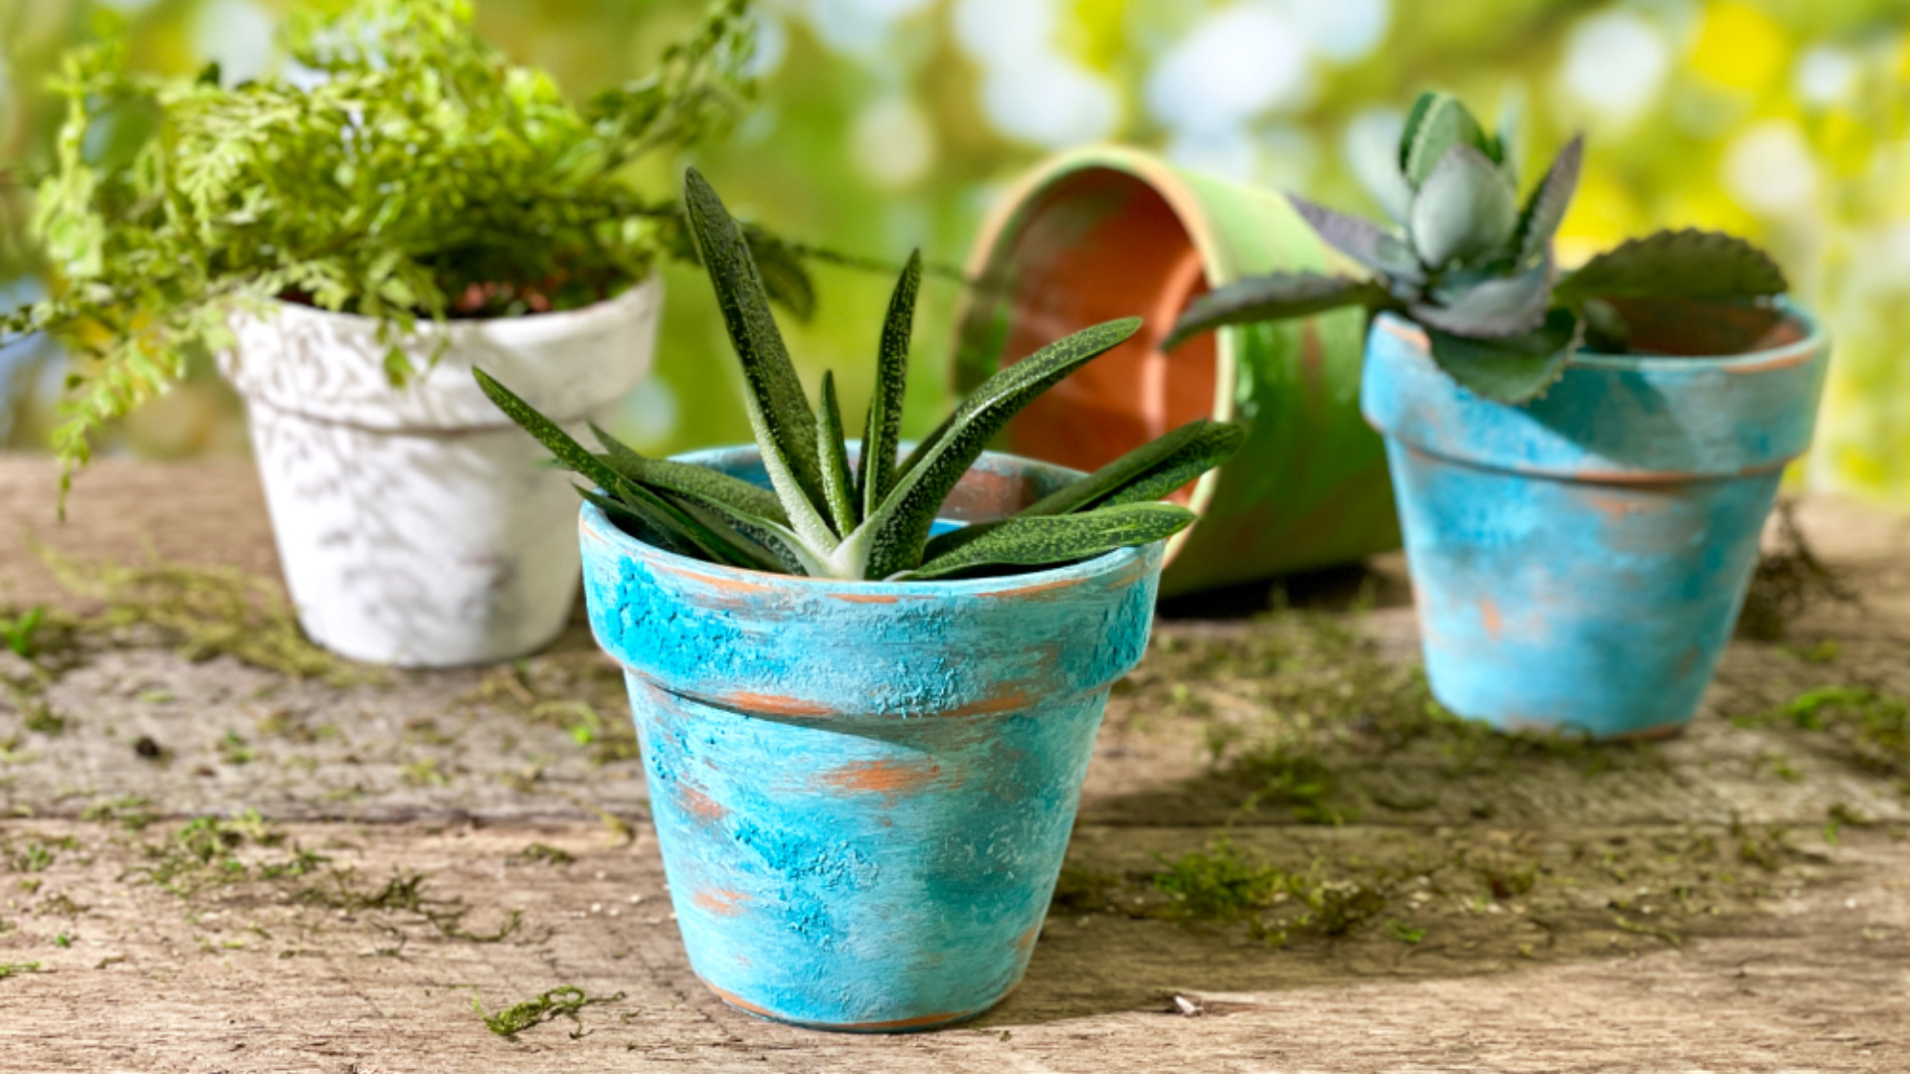
Creative Terracotta Pot Painting Ideas
Now that your pots are prepped and primed, it’s time for the fun part: adding color and personality.
1. Lavender Flower Pot
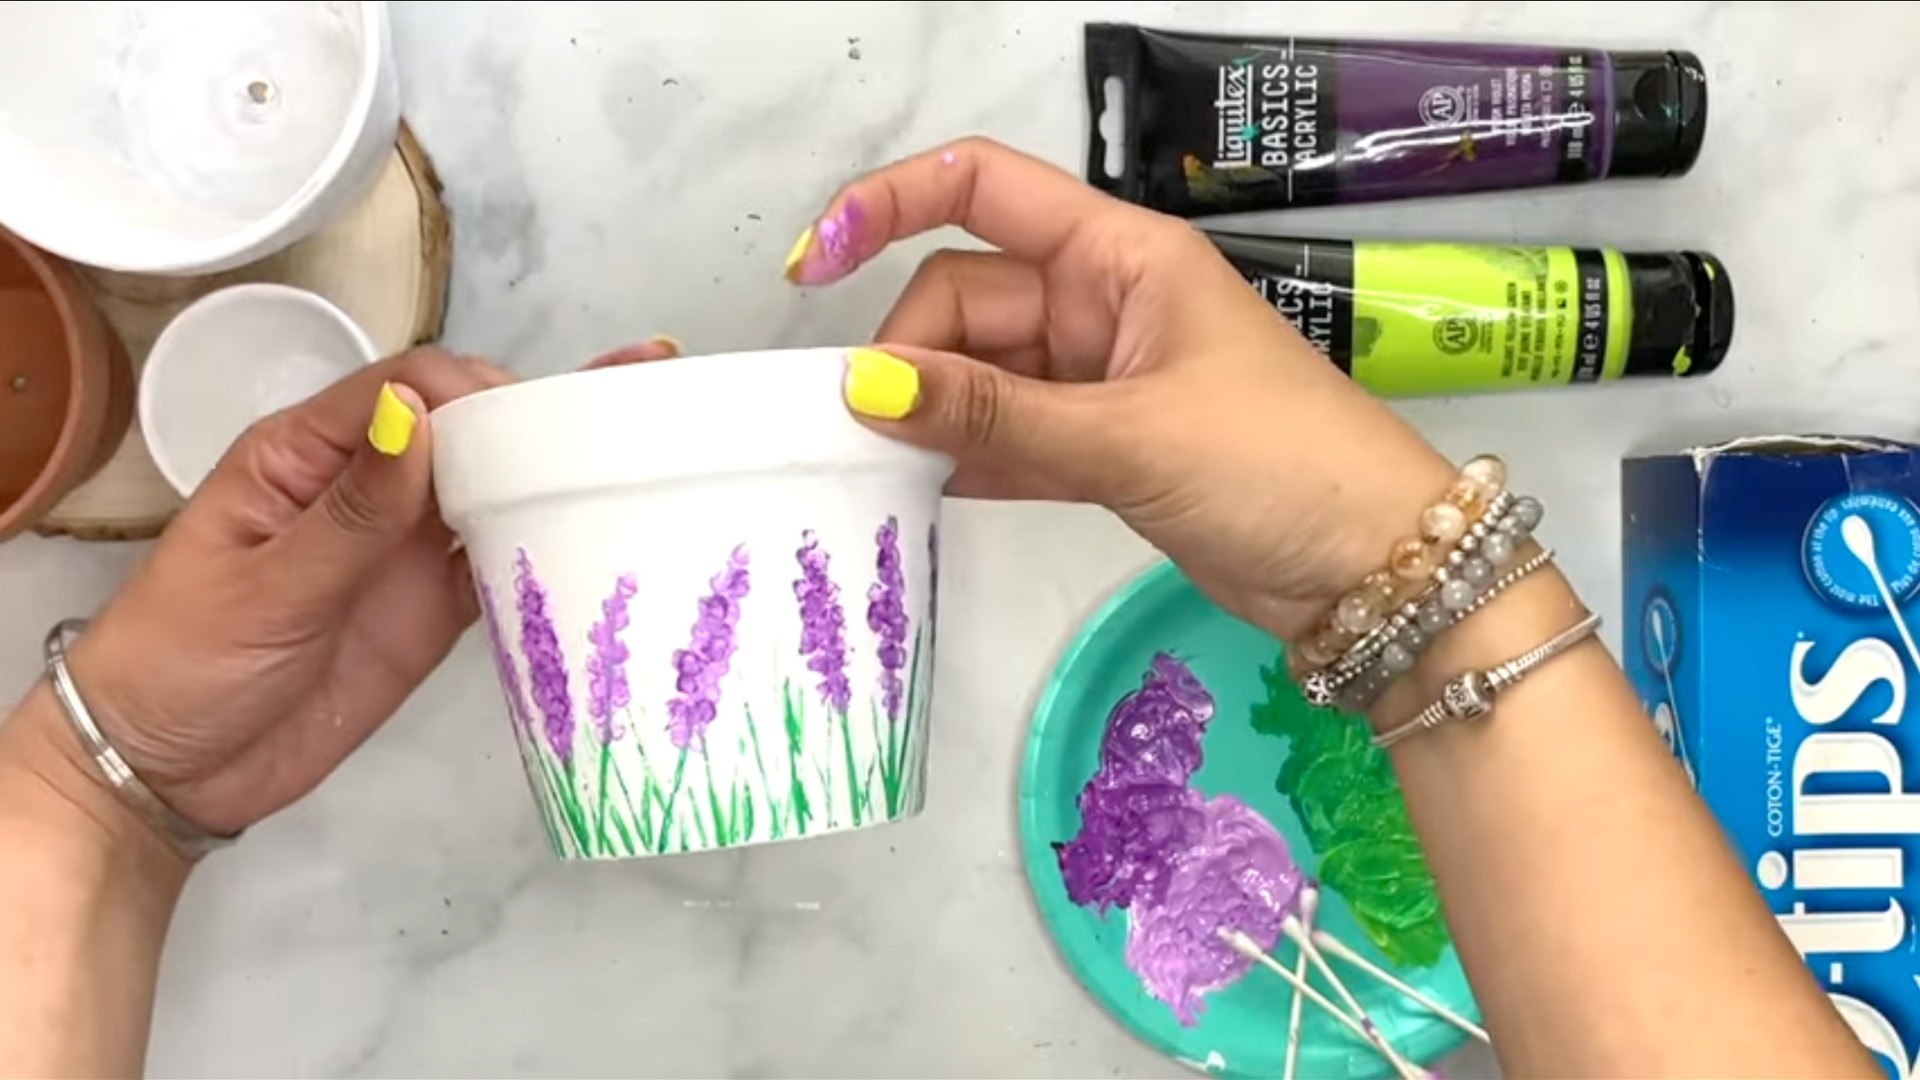
Create a calm, floral vibe with lavender stems and soft purple petals.
- Use a skewer dipped in green acrylic to stamp the stems.
- Dab lavender petals with a Q-tip. Mix different purples for more depth.
- Let the paint dry before sealing.
2. Ice Cream Cone Pot
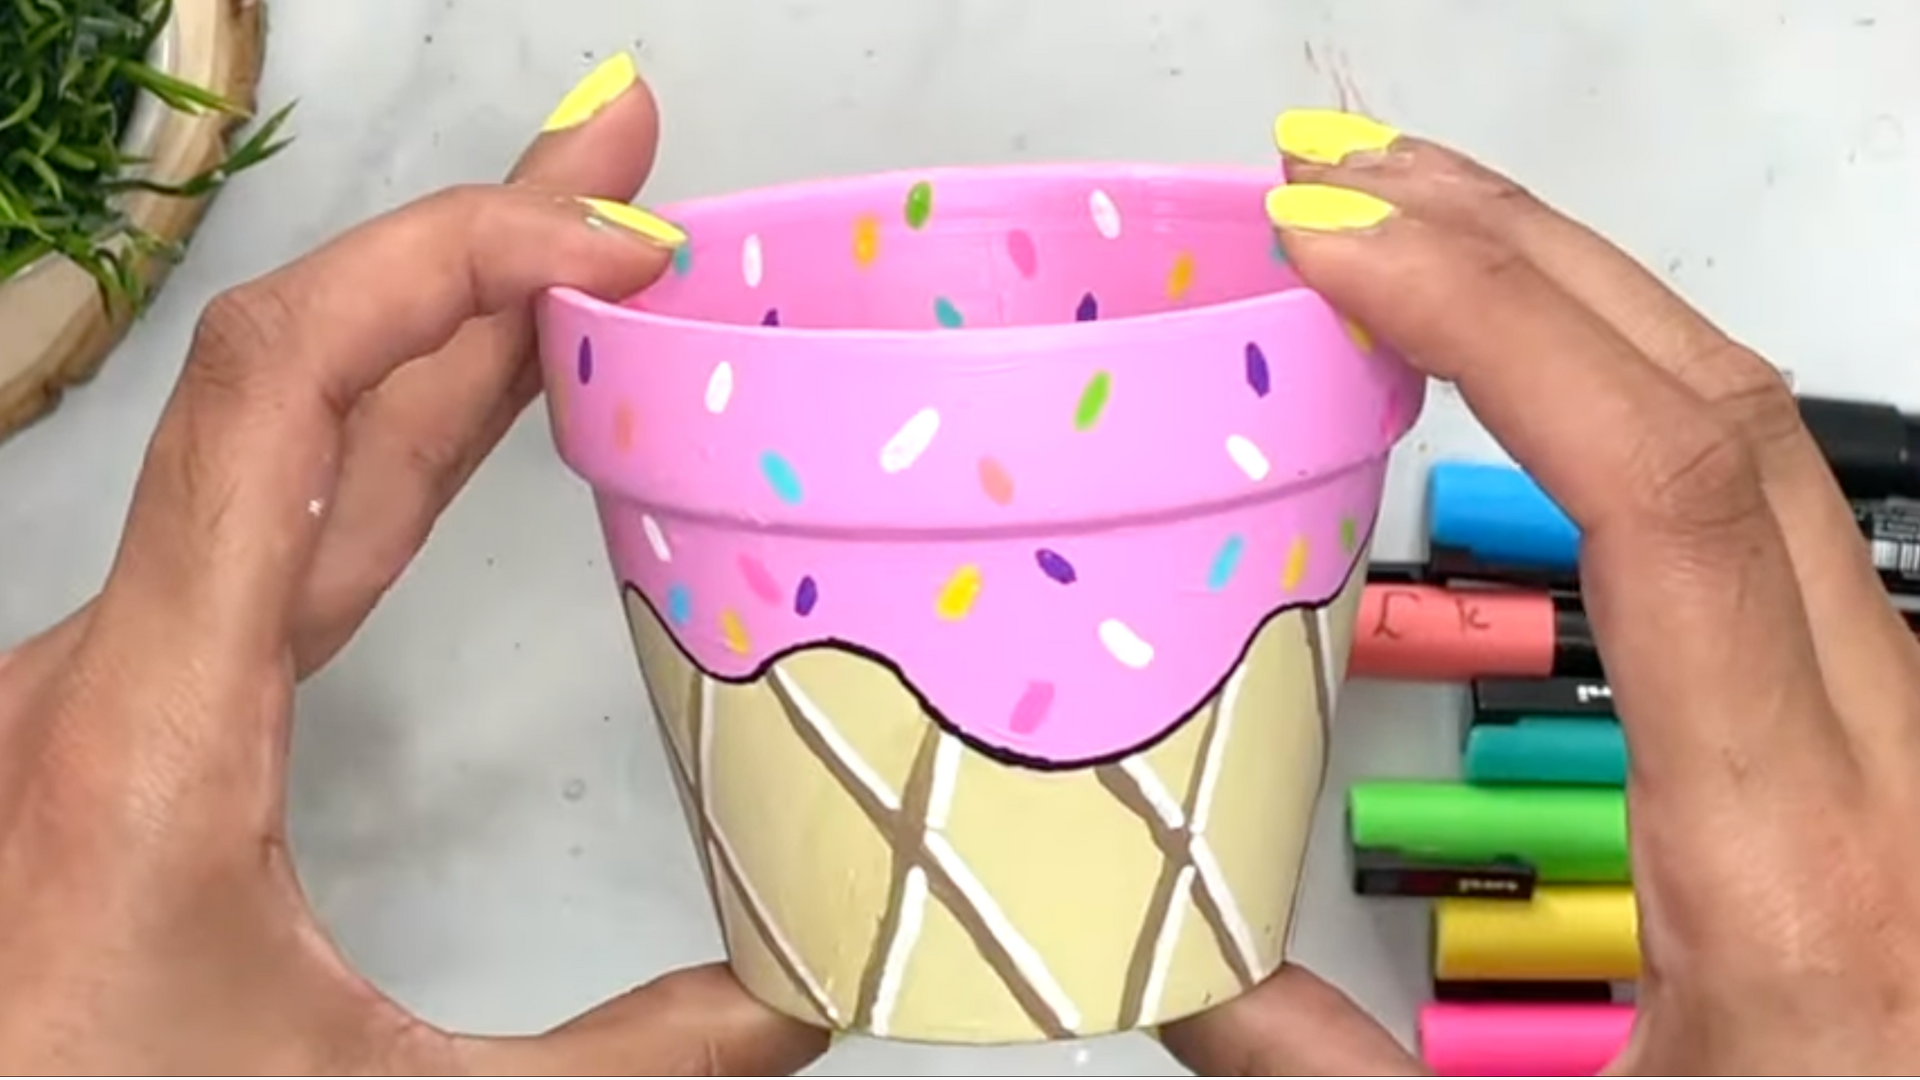
This sweet design looks like melting ice cream on top of a waffle cone.
- Paint pink drips around the rim for the “ice cream.”
- Paint the base in beige and layer it for opacity.
- Add brown crisscross lines for a waffle cone texture.
- Finish with multicolored sprinkles and a black outline.
3. Cute Face Pot
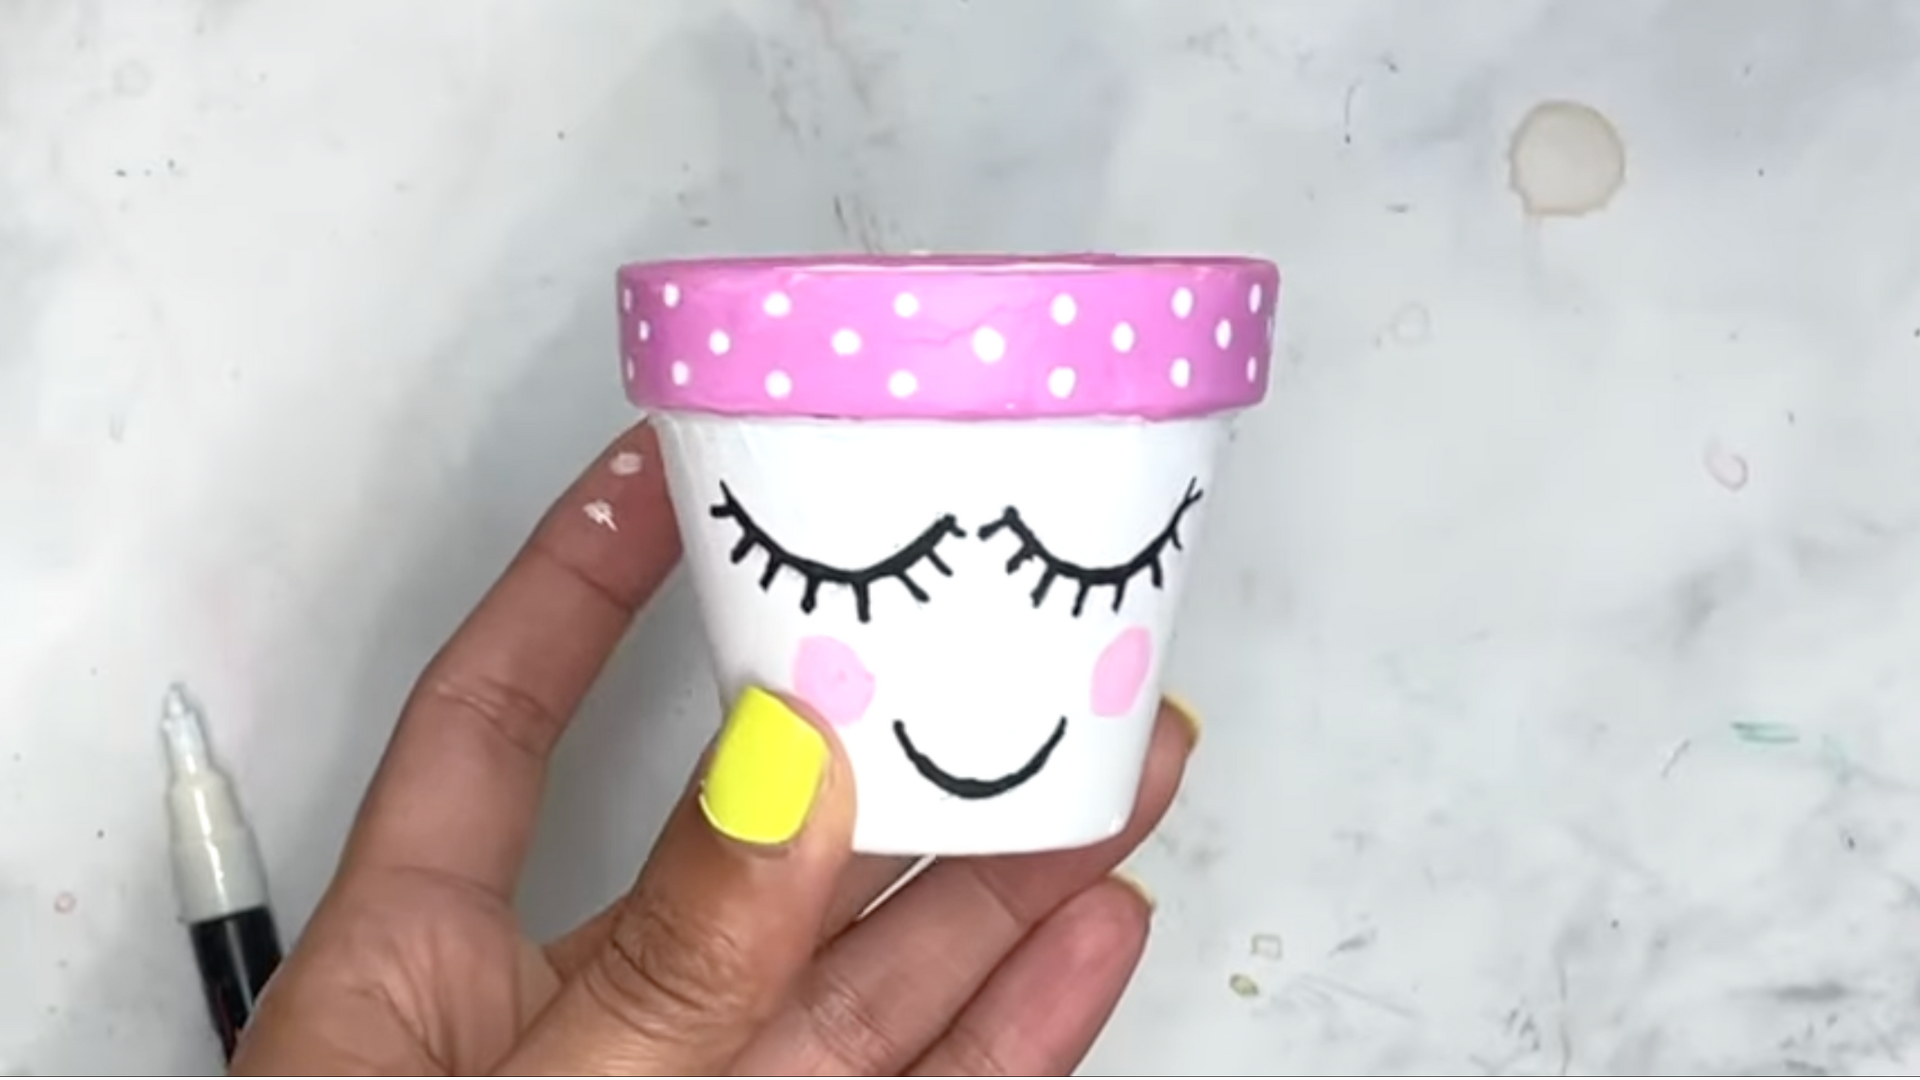
Add some charm with this playful and adorable smiling face design.
- Lightly sketch closed eyes, lashes, and a smile.
- Trace over with a black paint pen or fine brush.
- Add pink cheeks and polka dots on the rim.
4. Buzzy Bee Pot
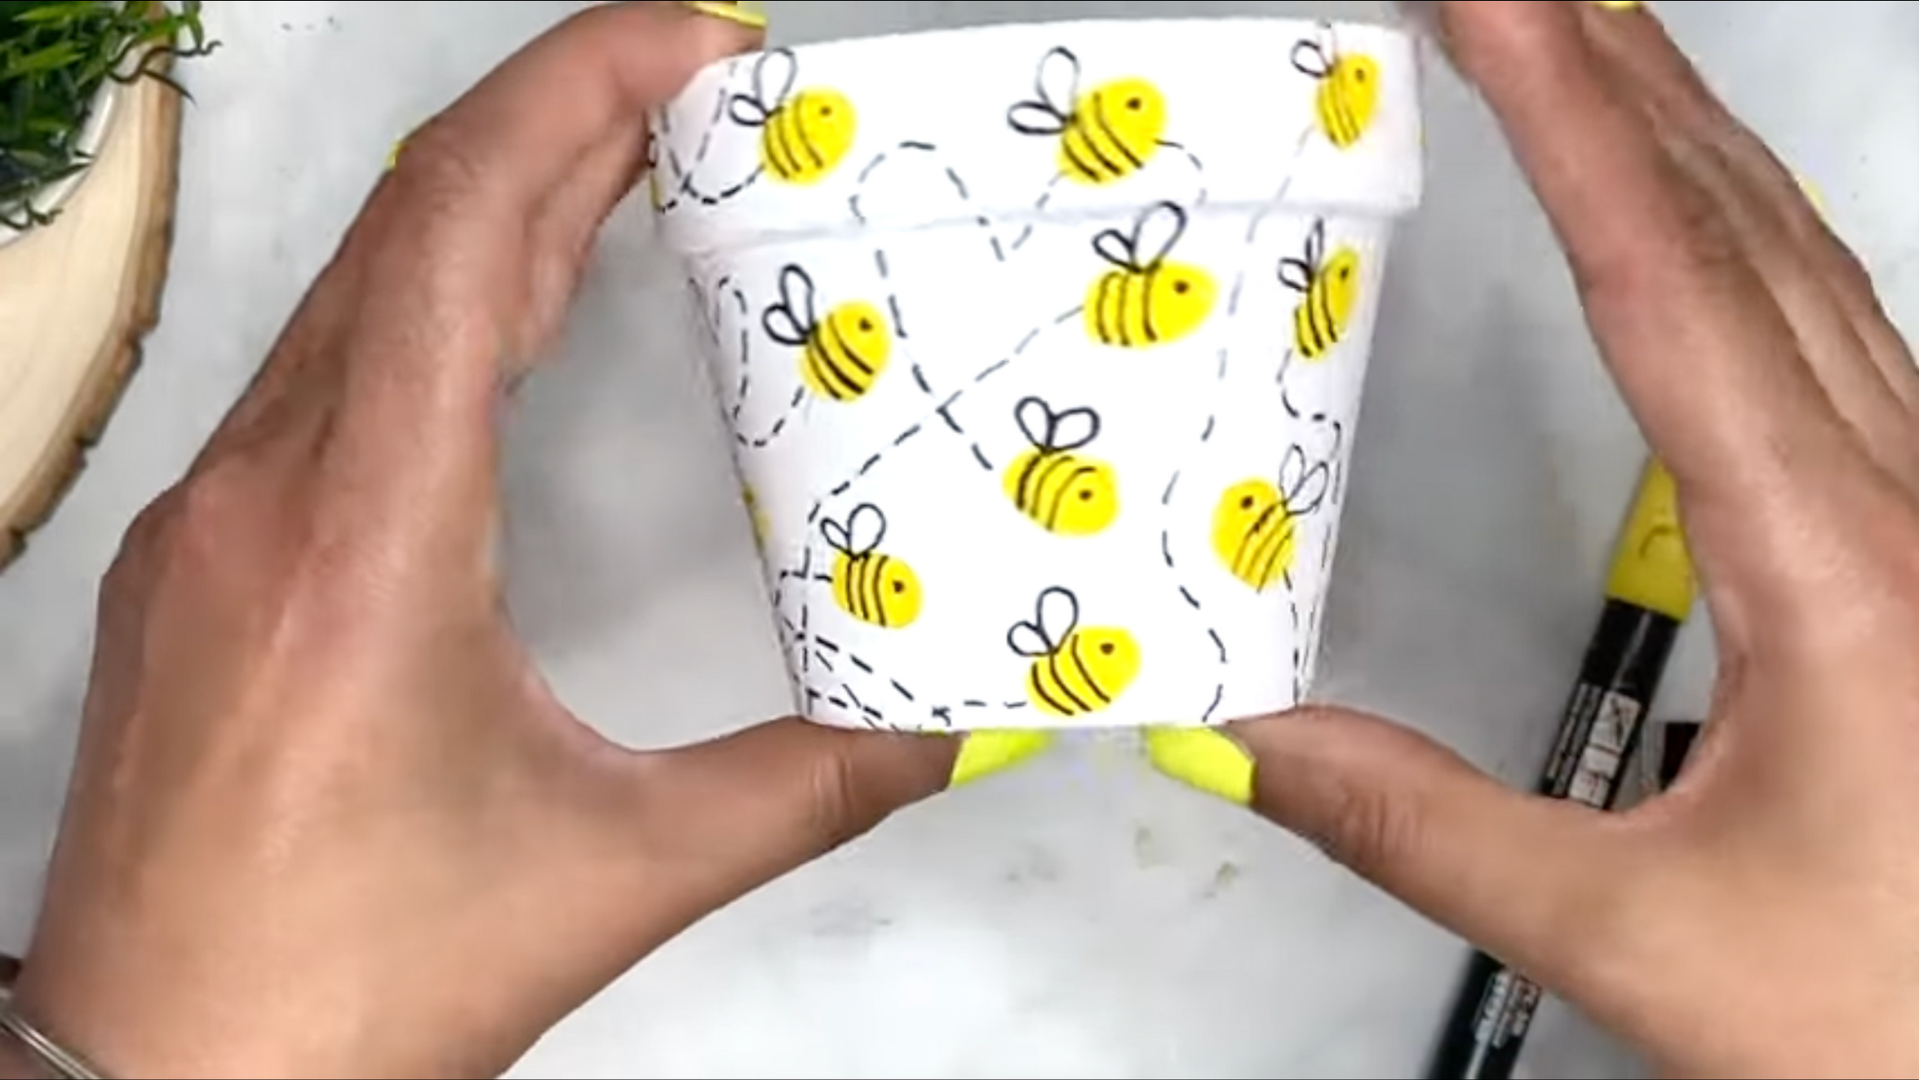
This whimsical bee design brings motion and cuteness to any space.
- Paint small yellow ovals for bee bodies.
- Add black eyes, stripes, and heart-shaped wings.
- Draw dashed flight paths around the pot.
5. Graffiti Hearts Pot
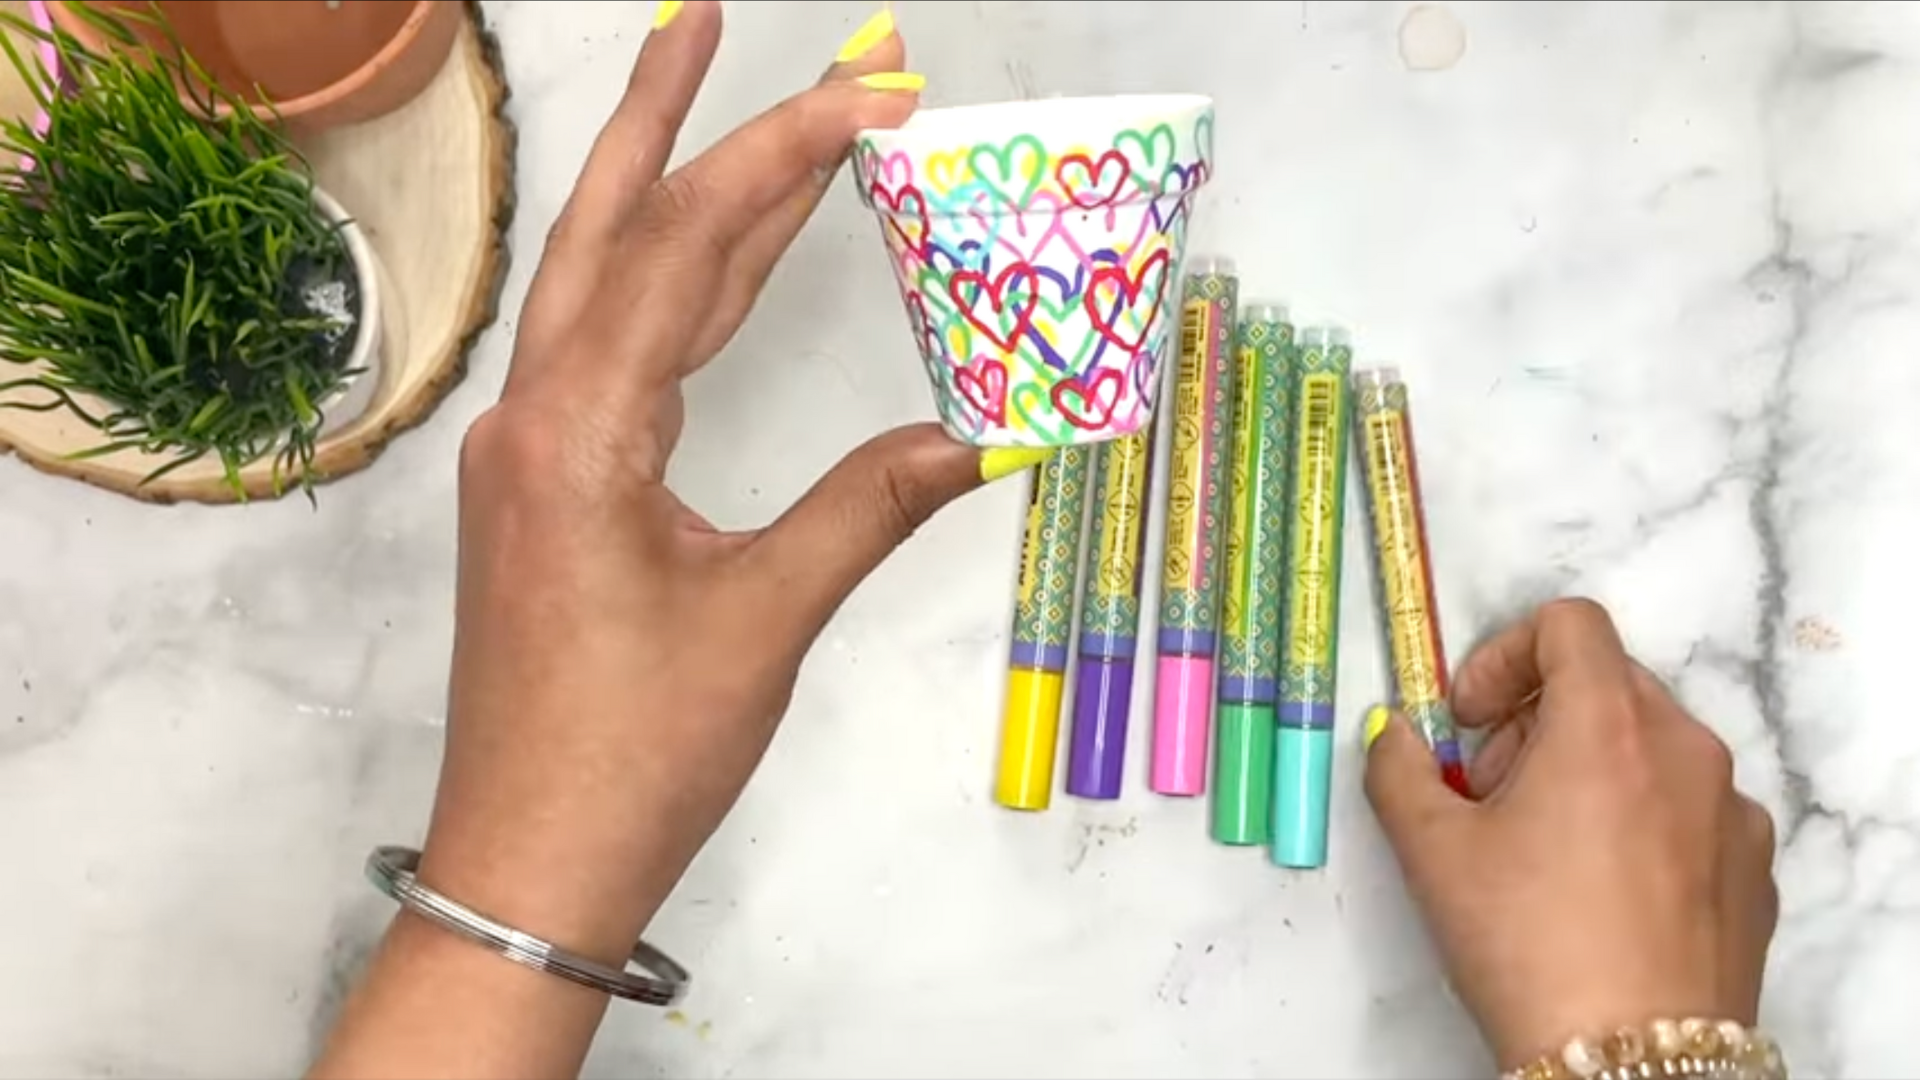
A bold and expressive design layered with overlapping colorful hearts.
- Start with large yellow hearts in different sizes.
- Add layers using pink, turquoise, and purple.
- Let some hearts overlap for that graffiti effect.
6. Abstract Rose Pot
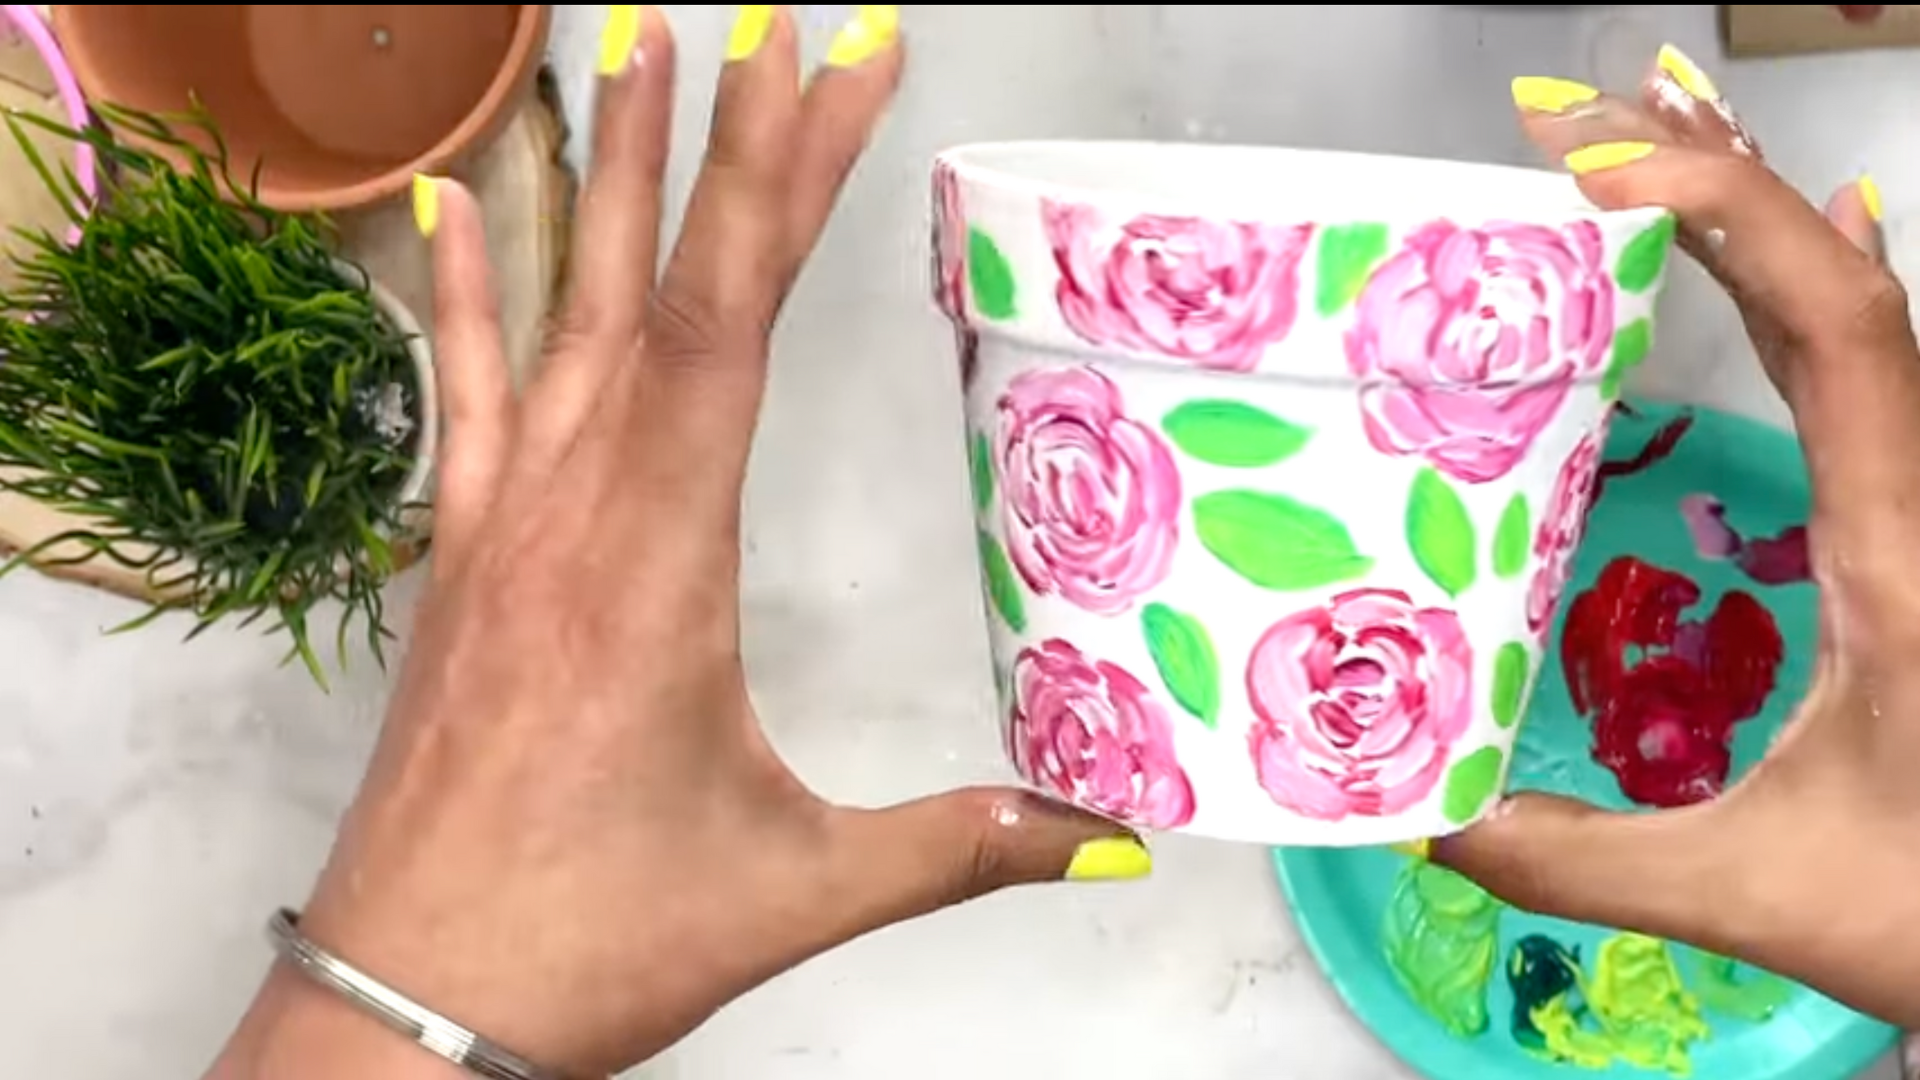
Loose brushstrokes and layered colors make these roses pop.
- Paint circular swirls in magenta or red for roses.
- Add highlights using white paint while still wet.
- Fill in spaces with light and dark green leaves.
For a more detailed understanding, watch “Painting Terracotta Pots with Easy Ideas DIY Tips To Seal, Paint and Topcoat Your Pots” by @Jasmine – Feeling Nifty Painting Tutorials.
Tips for Success
A few extra pointers to help you get the best results from your painted terracotta pots:
- Plan Your Design: Sketch ideas or use stencils before painting directly on the pot.
- Thin Your Paint for Detail Work: Thinned acrylic glides more smoothly for fine lines.
- Use Quality Brushes: Invest in a few good-quality brushes for crisp edges and soft blends.
- Layer Carefully: Let each paint layer dry fully to avoid smudging.
- Seal Smart: Always seal in a ventilated area. Use matte for rustic looks or gloss for shine.
- Mixed Media: Paint markers, sponges, and stamps are great tools for effects and textures.
- Experiment Freely: Don’t be afraid to mix and match styles, combine bees with lavender or graffiti with faces for a truly one-of-a-kind piece.
Conclusion
Painting terracotta pots is more than just a craft; it’s a creative process that turns everyday objects into artful displays.
With a little prep and imagination, you can design pots that reflect your personality, brighten your home, and make wonderful gifts for others.
From soft florals and buzzing bees to bold hearts and whimsical cones, the six ideas in this guide are just the beginning.
If you’re crafting solo or setting up a painting day with friends or kids, these projects are easy to follow and endlessly customizable.
So go ahead, seal your pot, pick up your brush, and let your creativity take root.