

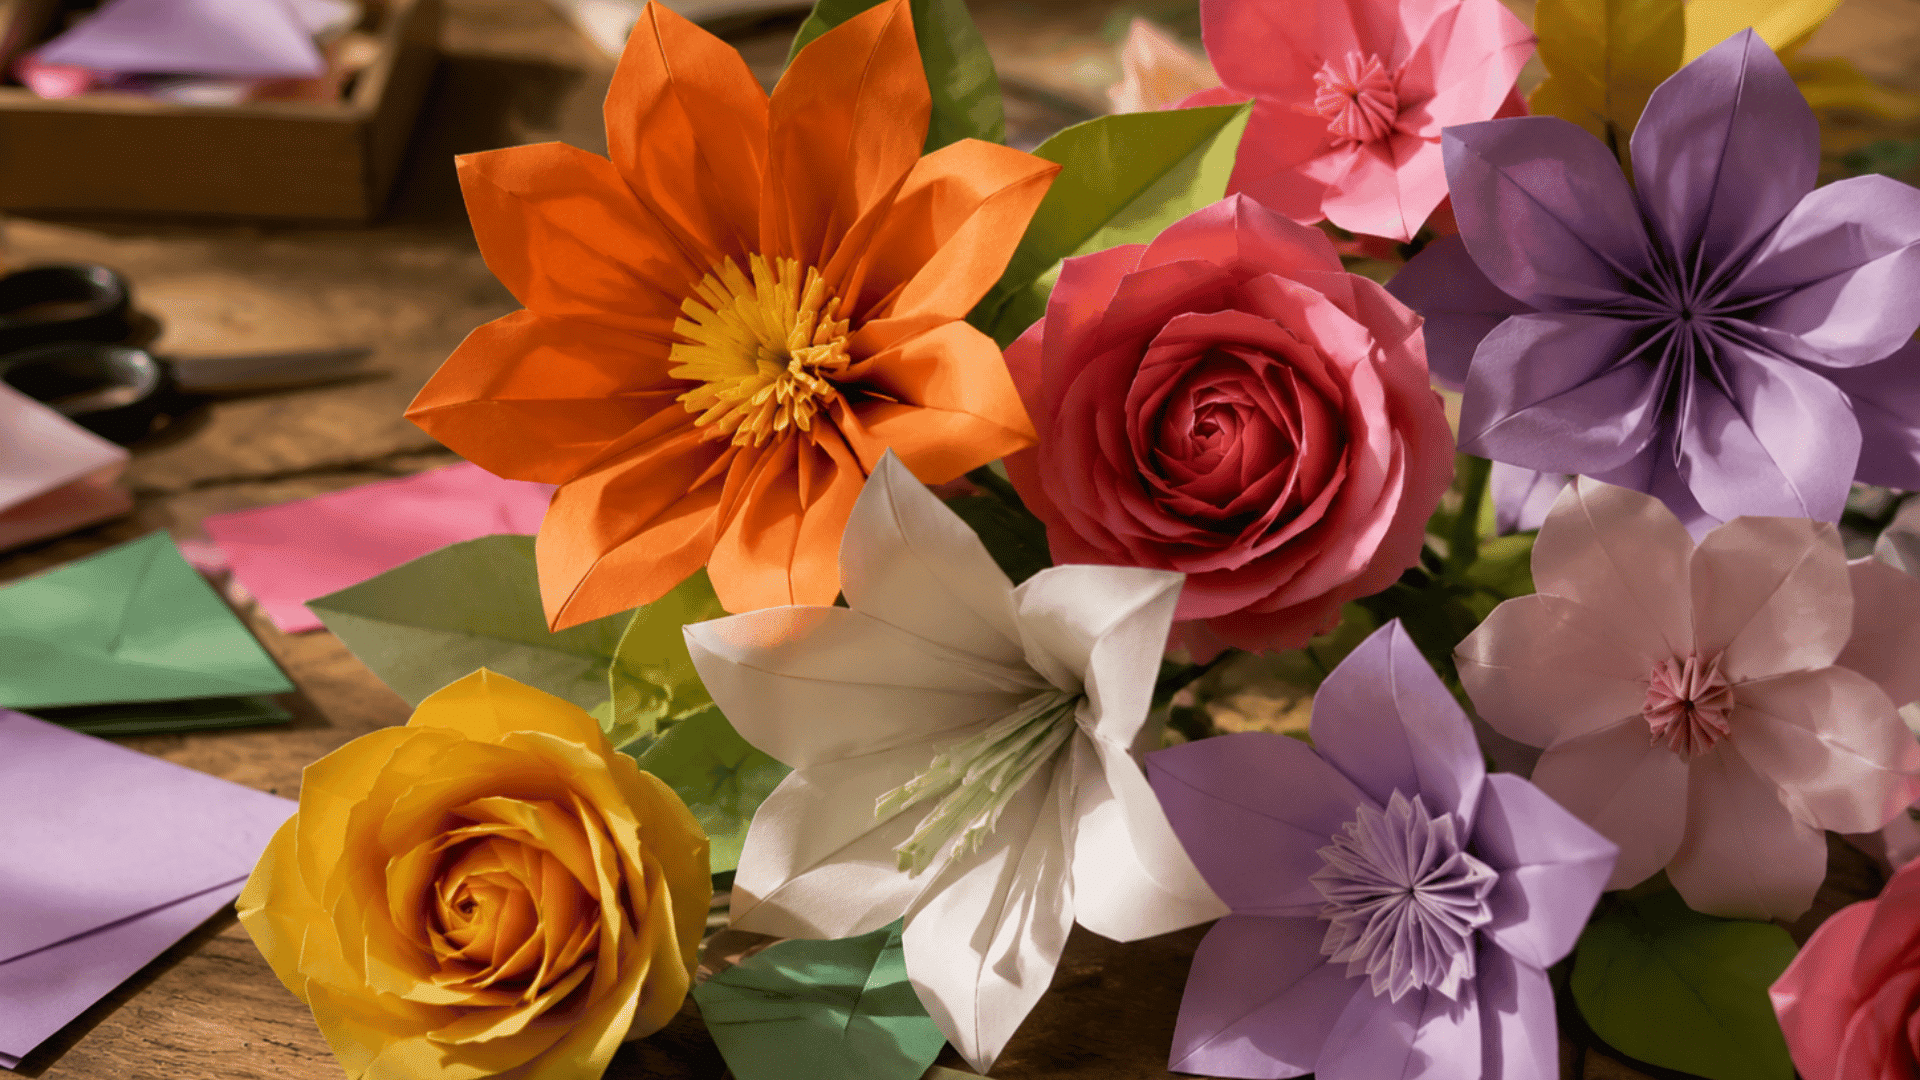
I’ve noticed that DIY paper flowers have become popular because they are an easy way to add color and style to homes, gifts, parties, and special events without spending too much money.
I like using them for wall decor, table centerpieces, and handmade gifts because they can match almost any theme or color.
Unlike real flowers, paper flowers can also last a long time when stored properly.
Another reason people enjoy making paper flowers is that they are beginner-friendly and easy to customize.
You can create different flower styles, sizes, and colors with simple craft supplies.
In this guide, I’ll cover the supplies you need, step-by-step instructions, useful tips, and creative ideas to help you make beautiful paper flowers at home.
Supplies Needed for Paper Flower Crafts
You do not need a large craft setup to make paper flowers. A few basic supplies are enough for most beginner projects. Start with simple tools before buying extra decorations or special craft items.
- Colored Paper or Crepe Paper
- Scissors
- Glue or Glue Gun
- Pencil and Ruler
- Floral Wire or Sticks
- Paint or Markers
- Glitter and Beads
- Curling Tools for Petals
- Tape and Ribbon
How to Choose the Right Paper Type?
The paper you pick can change how your flower looks and feels. Some papers are soft and easy to shape, while others hold firm petals better.
| Paper Type | Best For | Texture & Look | Easy for Beginners? | Tips |
|---|---|---|---|---|
| Crepe Paper | Real-looking flowers | Soft, stretchy, detailed | Yes | Great for roses and peonies |
| Tissue Paper | Puffy flowers and pom-poms | Thin and light | Yes | Works well for party decor |
| Cardstock Paper | Strong flower petals | Thick and sturdy | Medium | Good for large flowers |
| Construction Paper | Kids’ crafts | Slightly rough | Yes | Easy to cut and fold |
| Origami Paper | Small folded flowers | Smooth and thin | Yes | Best for folded designs |
| Scrapbook Paper | Decorative flowers | Printed and colorful | Medium | Adds patterns and texture |
| Coffee Filters | Soft layered flowers | Light and airy | Yes | Easy to dye with colors |
| Printer Paper | Simple practice flowers | Plain and smooth | Yes | Good for learning basic shapes |
| Watercolor Paper | Painted flower crafts | Thick with texture | Medium | Handles paint without tearing |
| Kraft Paper | Rustic flower styles | Brown and natural-looking | Medium | Good for farmhouse decor |
How to Make Paper Flowers?
Paper flowers are fun to make and work well for gifts, party decor, or room styling. You only need a few craft supplies and simple folding or cutting steps to get started.
Step 1: Start with a Simple Circle
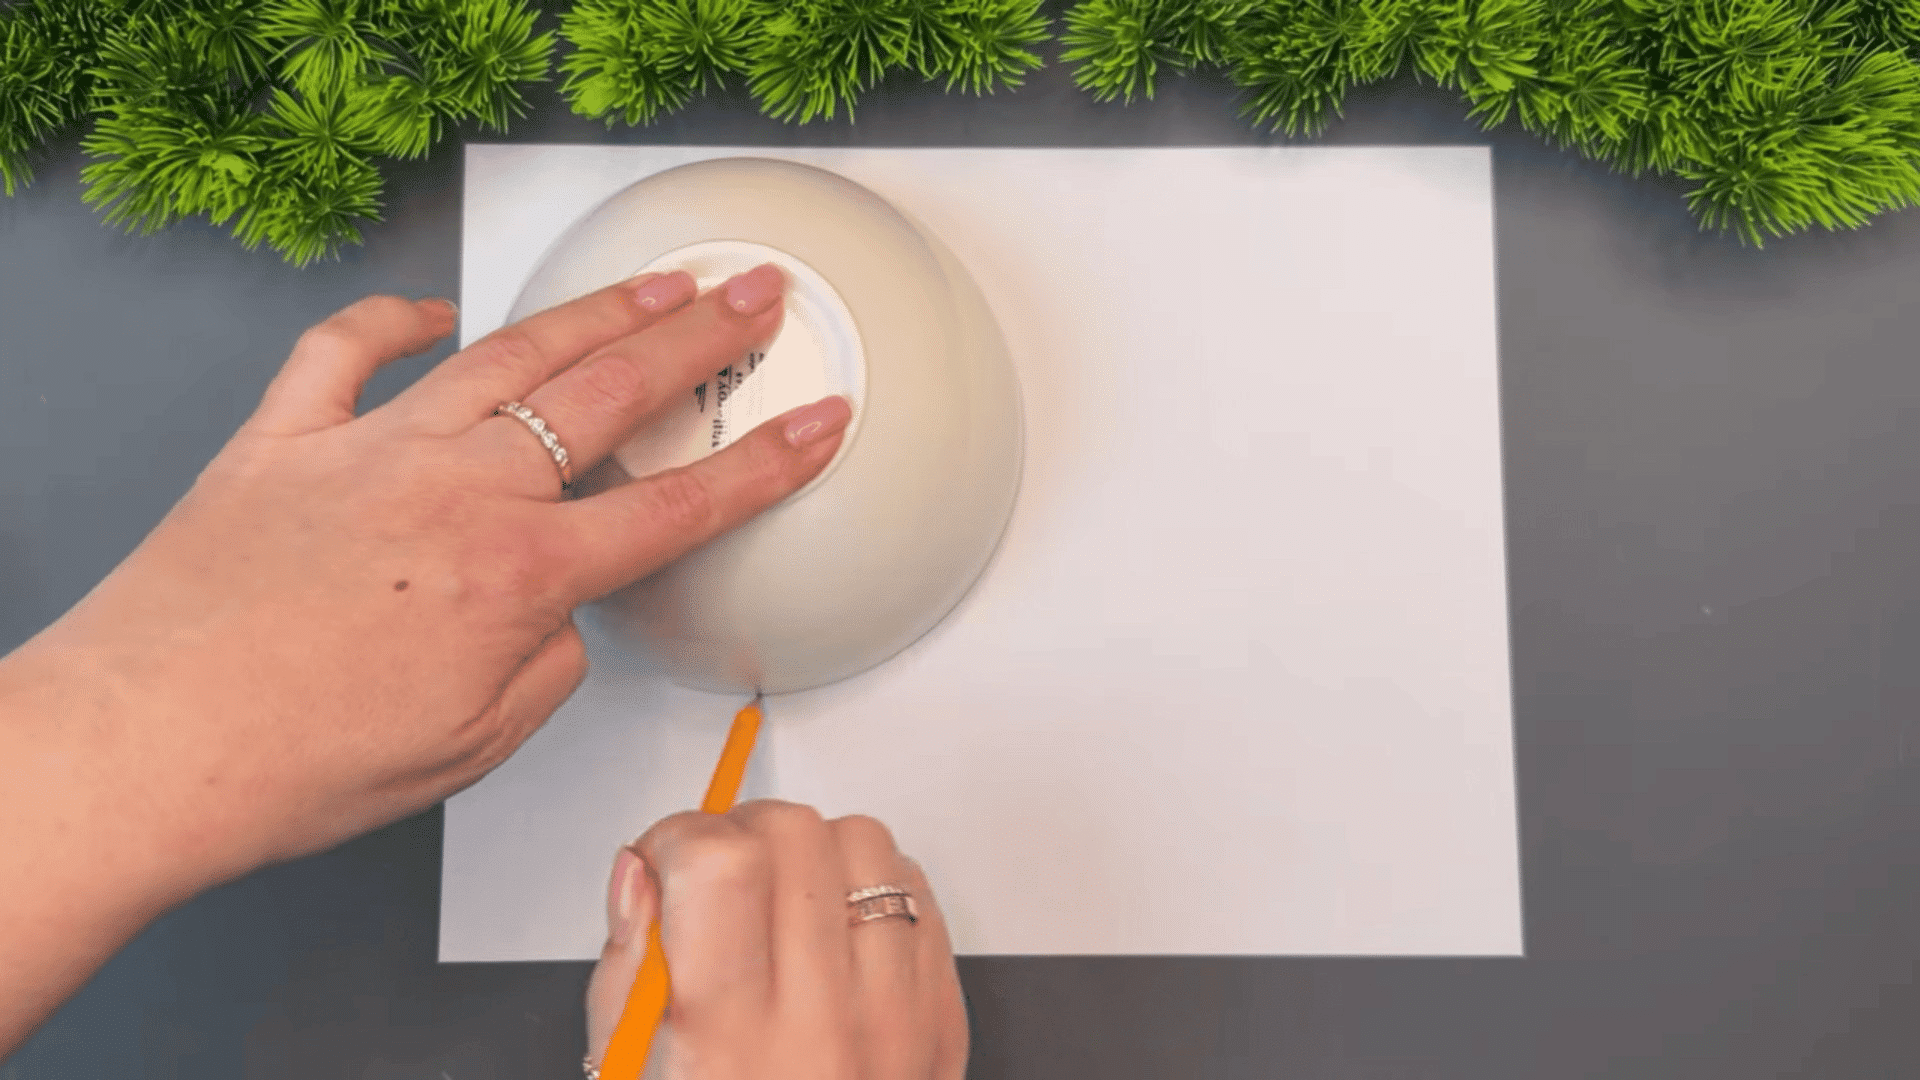
Place a round bowl or plate in the center of the paper. Hold it still and trace around the edge with a pencil to create a neat circle.
This circle will be the base shape for the flower, so keeping it even helps the later steps look cleaner.
You can make the circle larger for big flowers or smaller for simple designs. Use light pencil lines so they are easier to erase after cutting the shape.
Tip: A bowl with a smooth edge usually gives a cleaner and more even circle.
Step 2: Cut Out the Circle
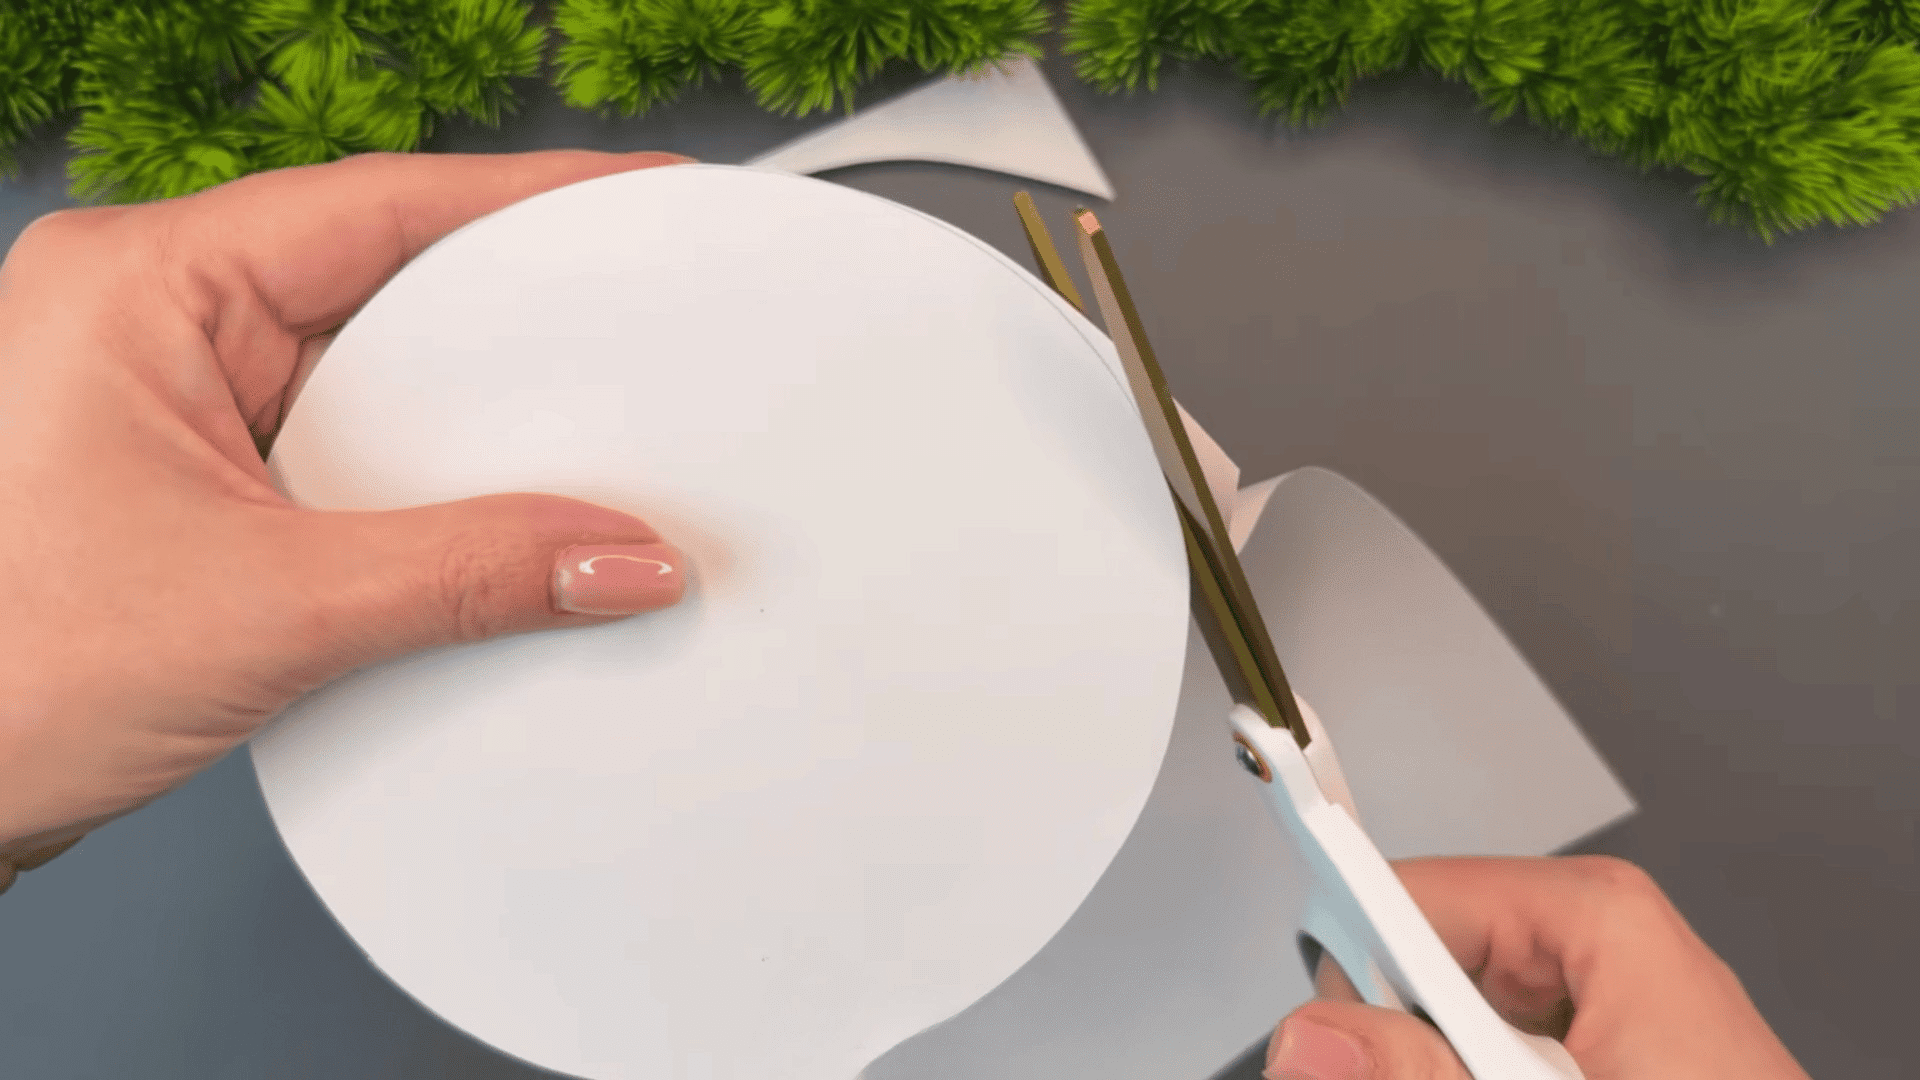
Carefully cut along the pencil line to separate the circle from the rest of the paper. Turn the paper slowly while cutting because it helps keep the edges smooth and even. You do not need to rush this step.
A clean circle makes the flower look neater later, when you start folding and shaping the petals.
Try to keep your scissors steady and follow the outline as closely as possible for the best shape. Small uneven spots can be trimmed after cutting if needed.
Tip: Smaller scissors are often easier to control when cutting curved shapes like circles.
Step 3: Make Two Simple Folds
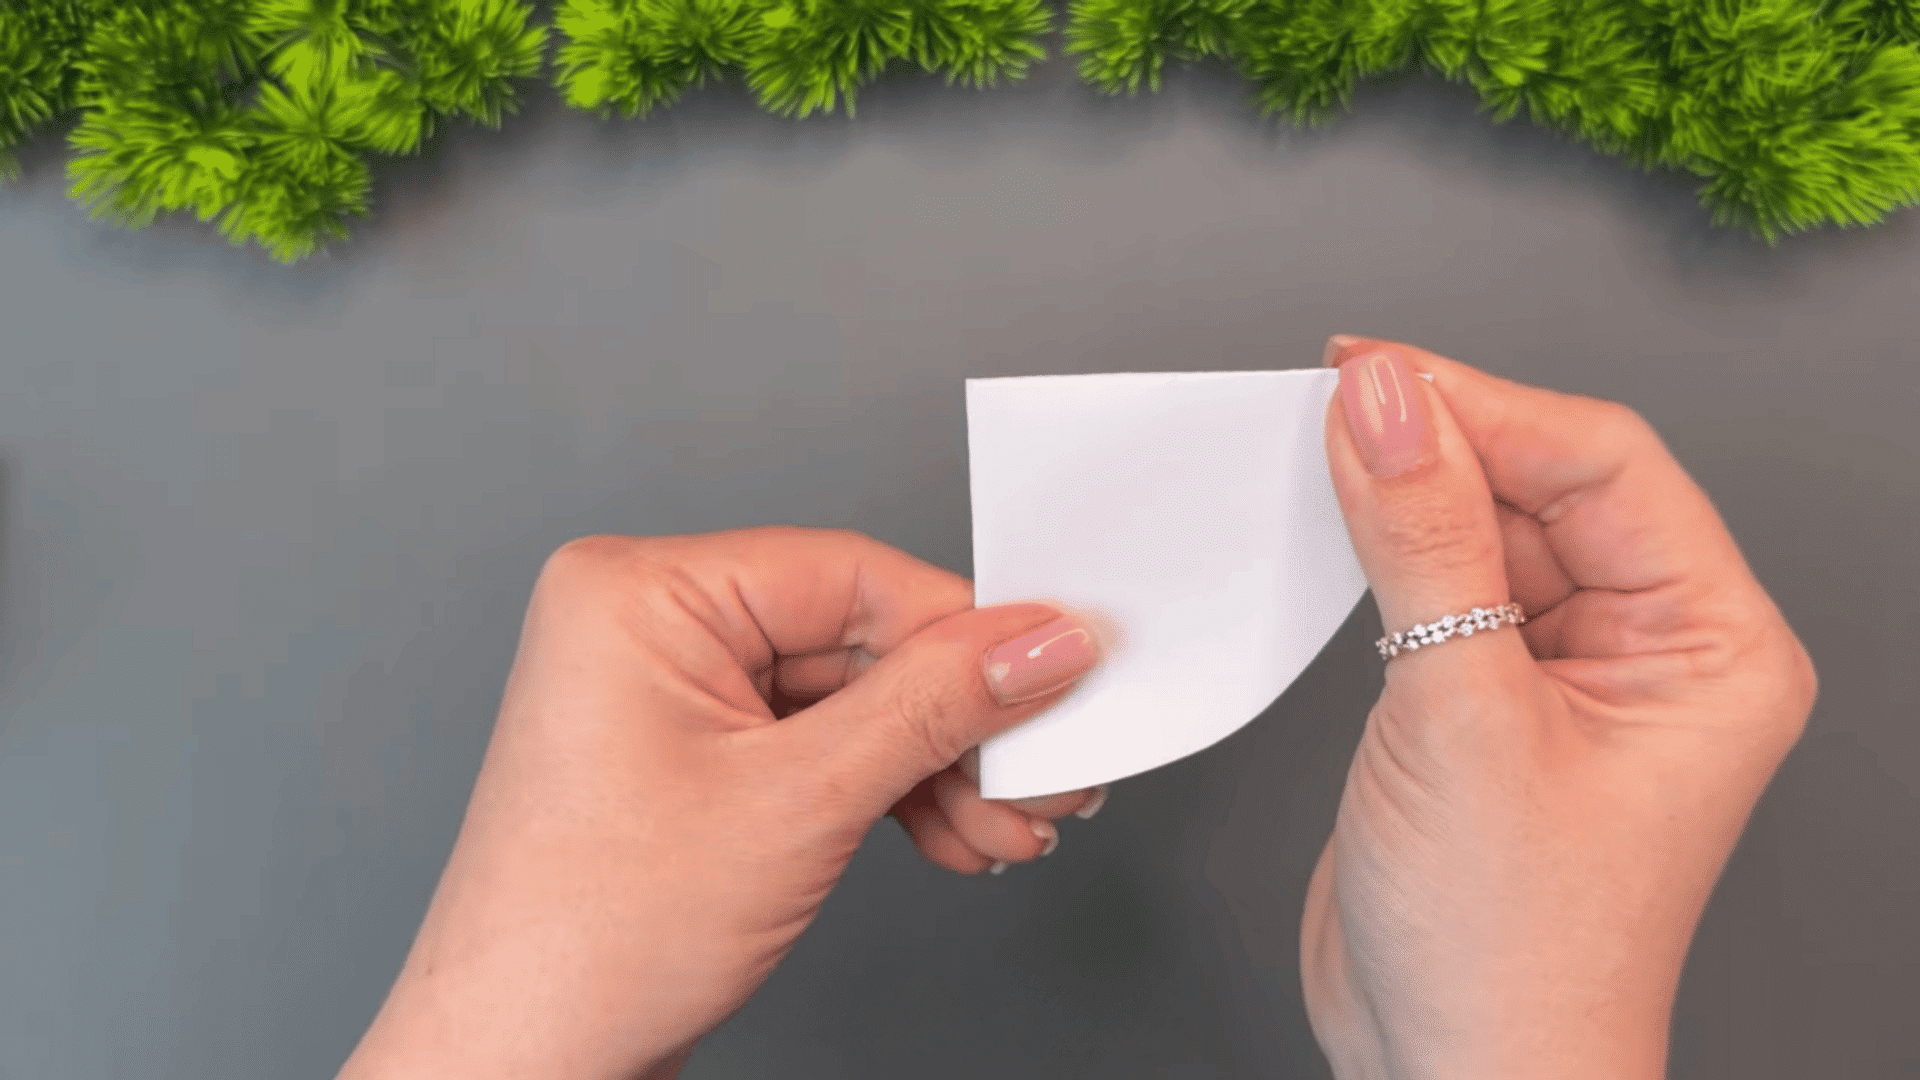
Take the paper circle and fold it in half to create a semicircle. Then fold it in half again to make a smaller section.
Press along the edges with your fingers so the folds stay neat and easy to work with later.
These folds help guide the petal shapes in the next steps and keep the flower balanced. Try to line up the edges carefully before pressing the folds so the shape stays even.
Neat folds can make the flower look cleaner once it is opened again.
Tip: Press the folded edges gently with a ruler or fingernail to make sharper crease lines.
Step 4: Cut and Round the Petals
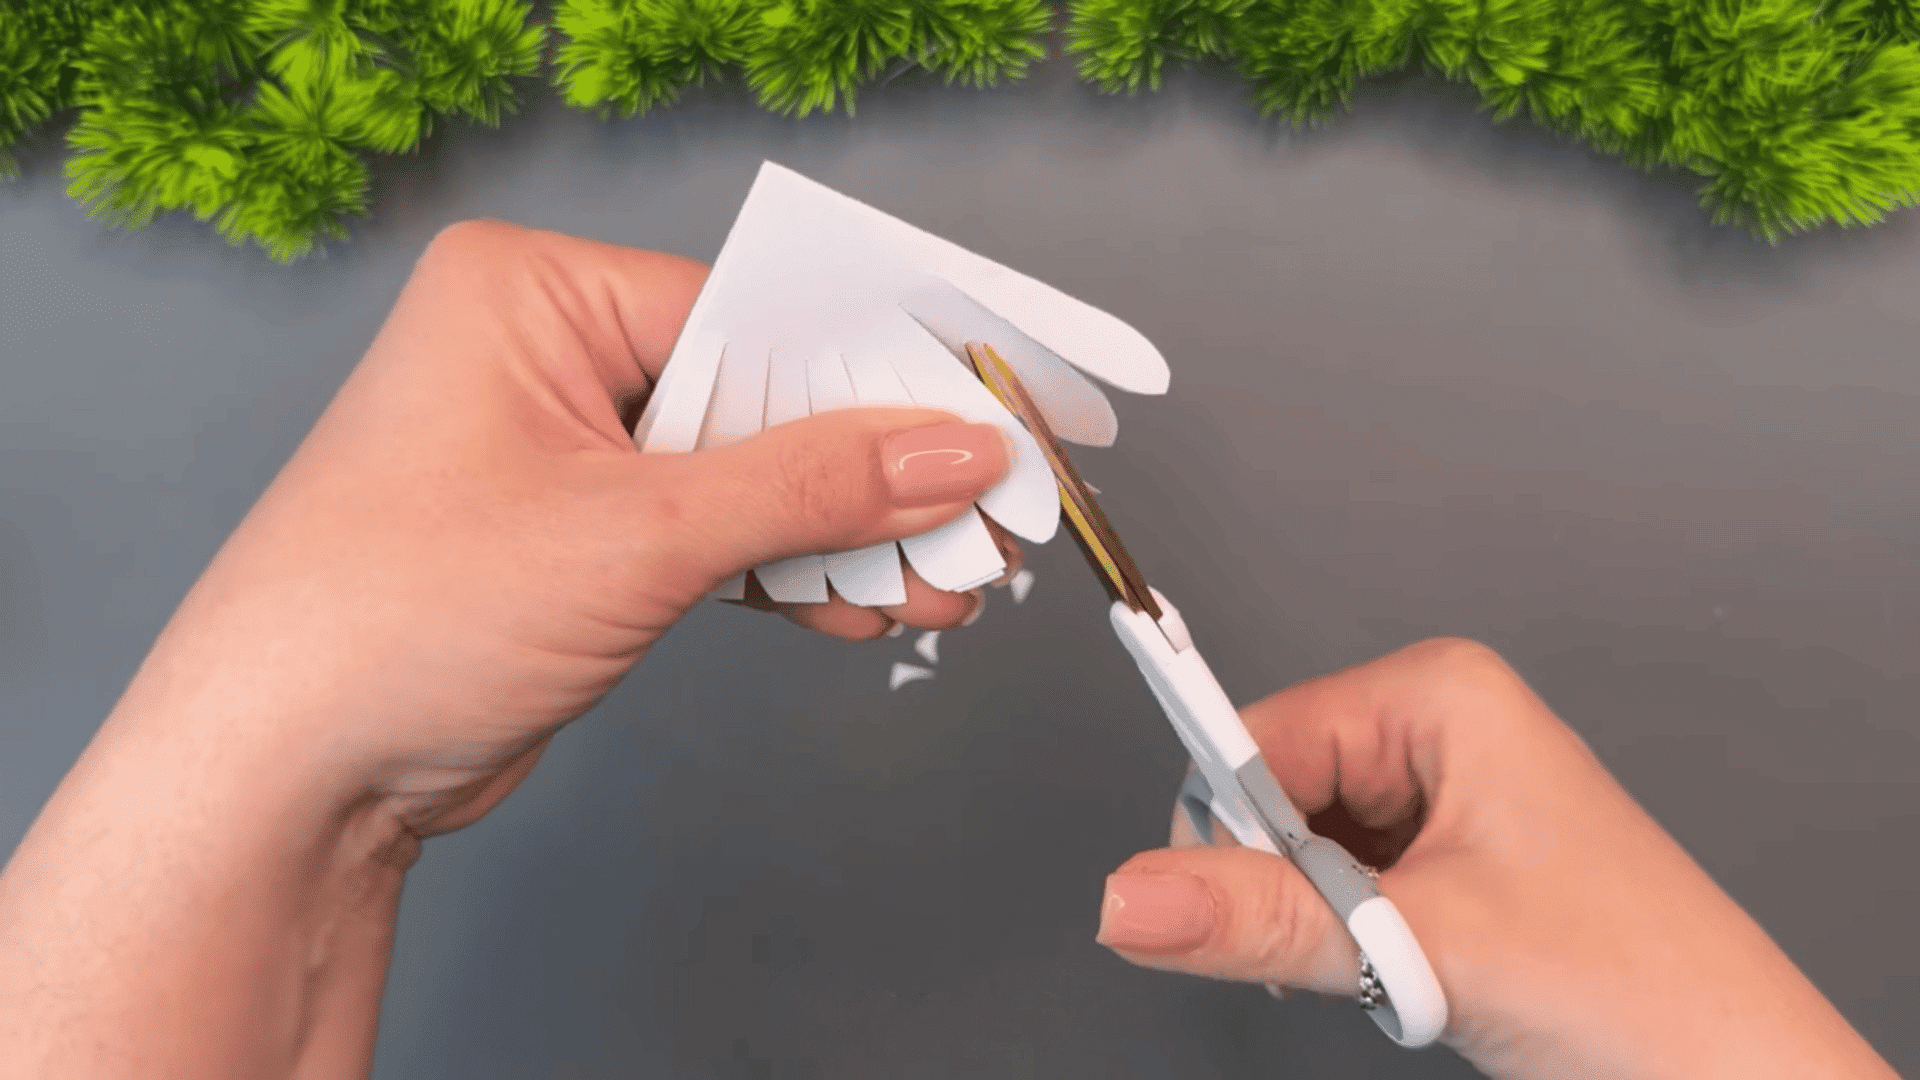
Use scissors to cut small lines along the folded edge without cutting all the way through the paper. Then round the corners to create soft petal shapes.
Even cuts help the flower open more neatly in the next step. Curving the edges also gives the petals a smoother and more natural look.
Keep the cuts shallow and evenly spaced so the paper does not tear when unfolded.
Small, careful cuts usually work better than deep ones and help the petals stay balanced and clean after opening the flower.
Tip: Slowly turning the paper while cutting can make the curved petal edges look smoother.
Step 5: Cut Toward the Center
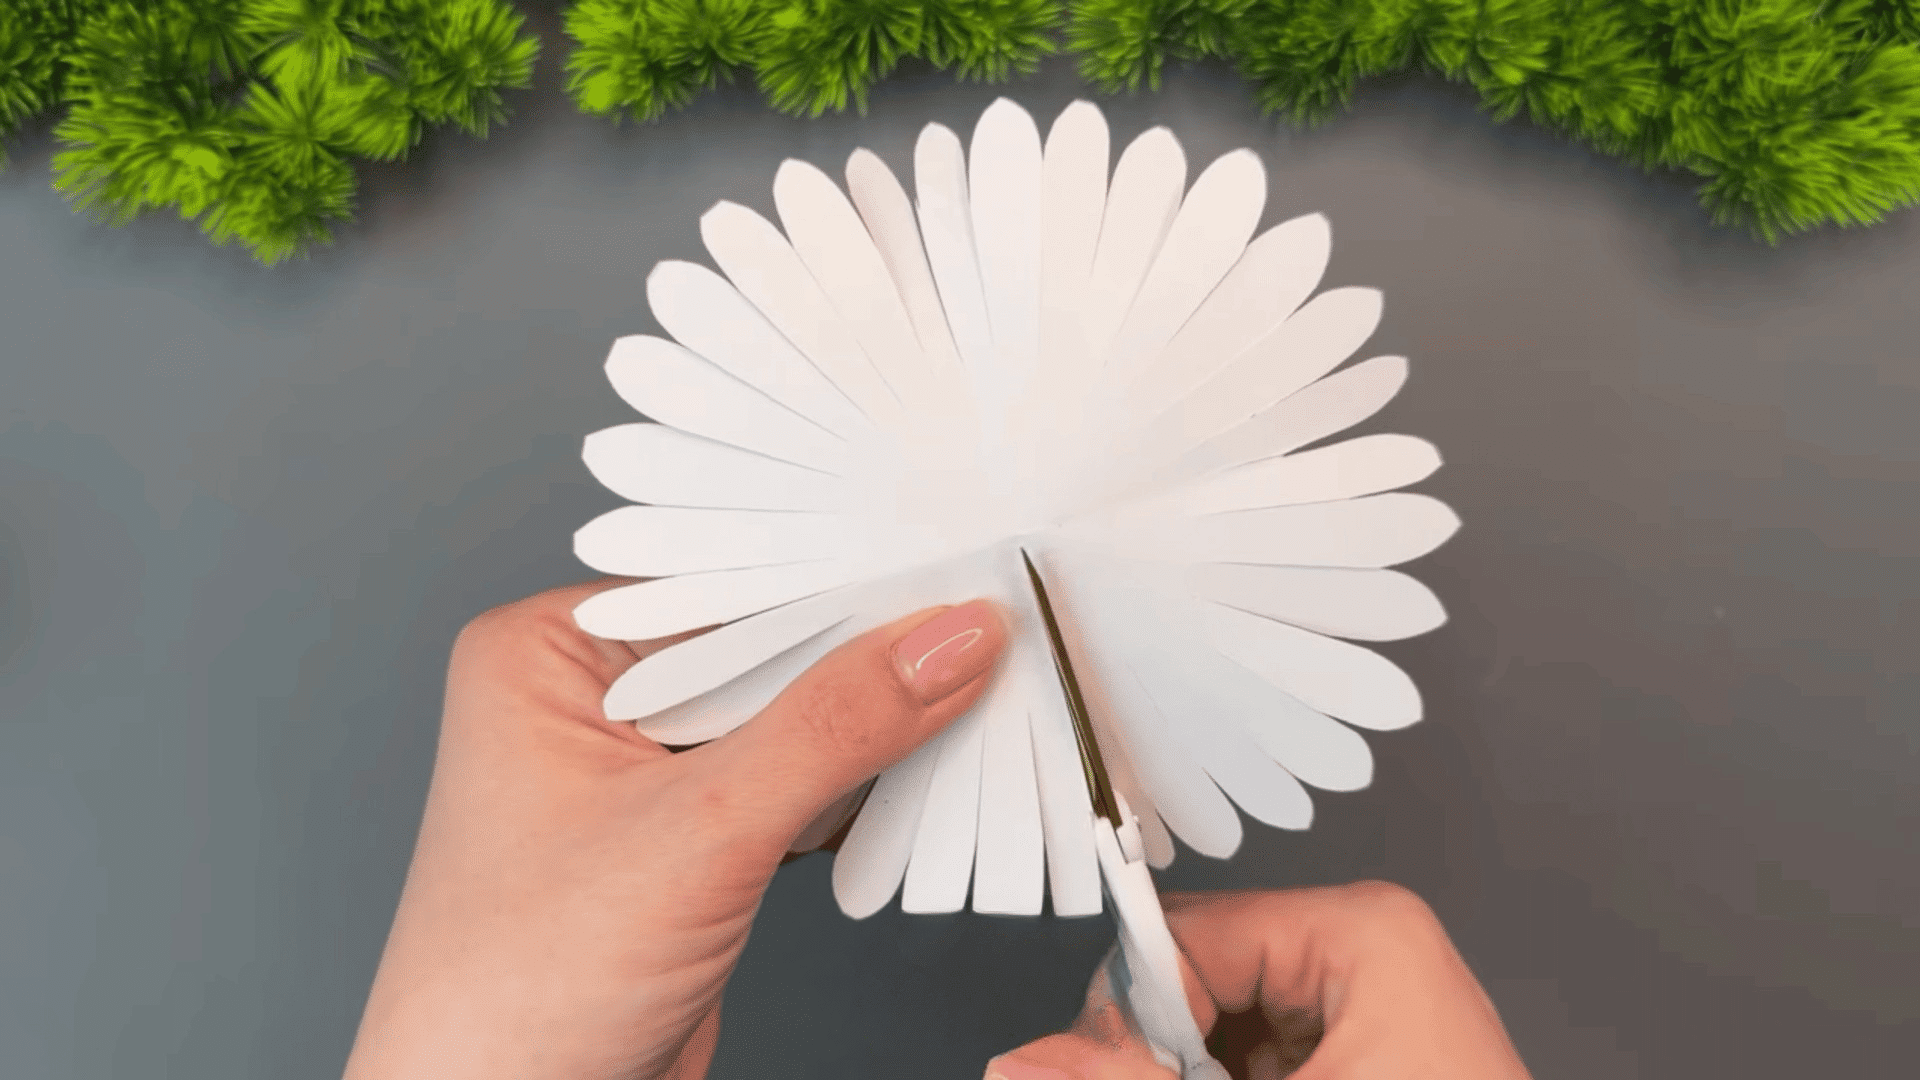
Open the paper flower carefully and choose one space between two petals. Use scissors to cut a straight line from the outer edge toward the center of the flower.
Stop cutting once you reach the middle area. This cut helps you overlap the flower later to give it more shape and depth.
Cut slowly and keep the line straight so the flower stays balanced when the edges are joined together. A careful center cut can make the final flower shape look cleaner and easier to assemble.
Tip: Smaller cuts are easier to adjust later if you need the flower to curve more.
Step 6: Curl the Petal Edges
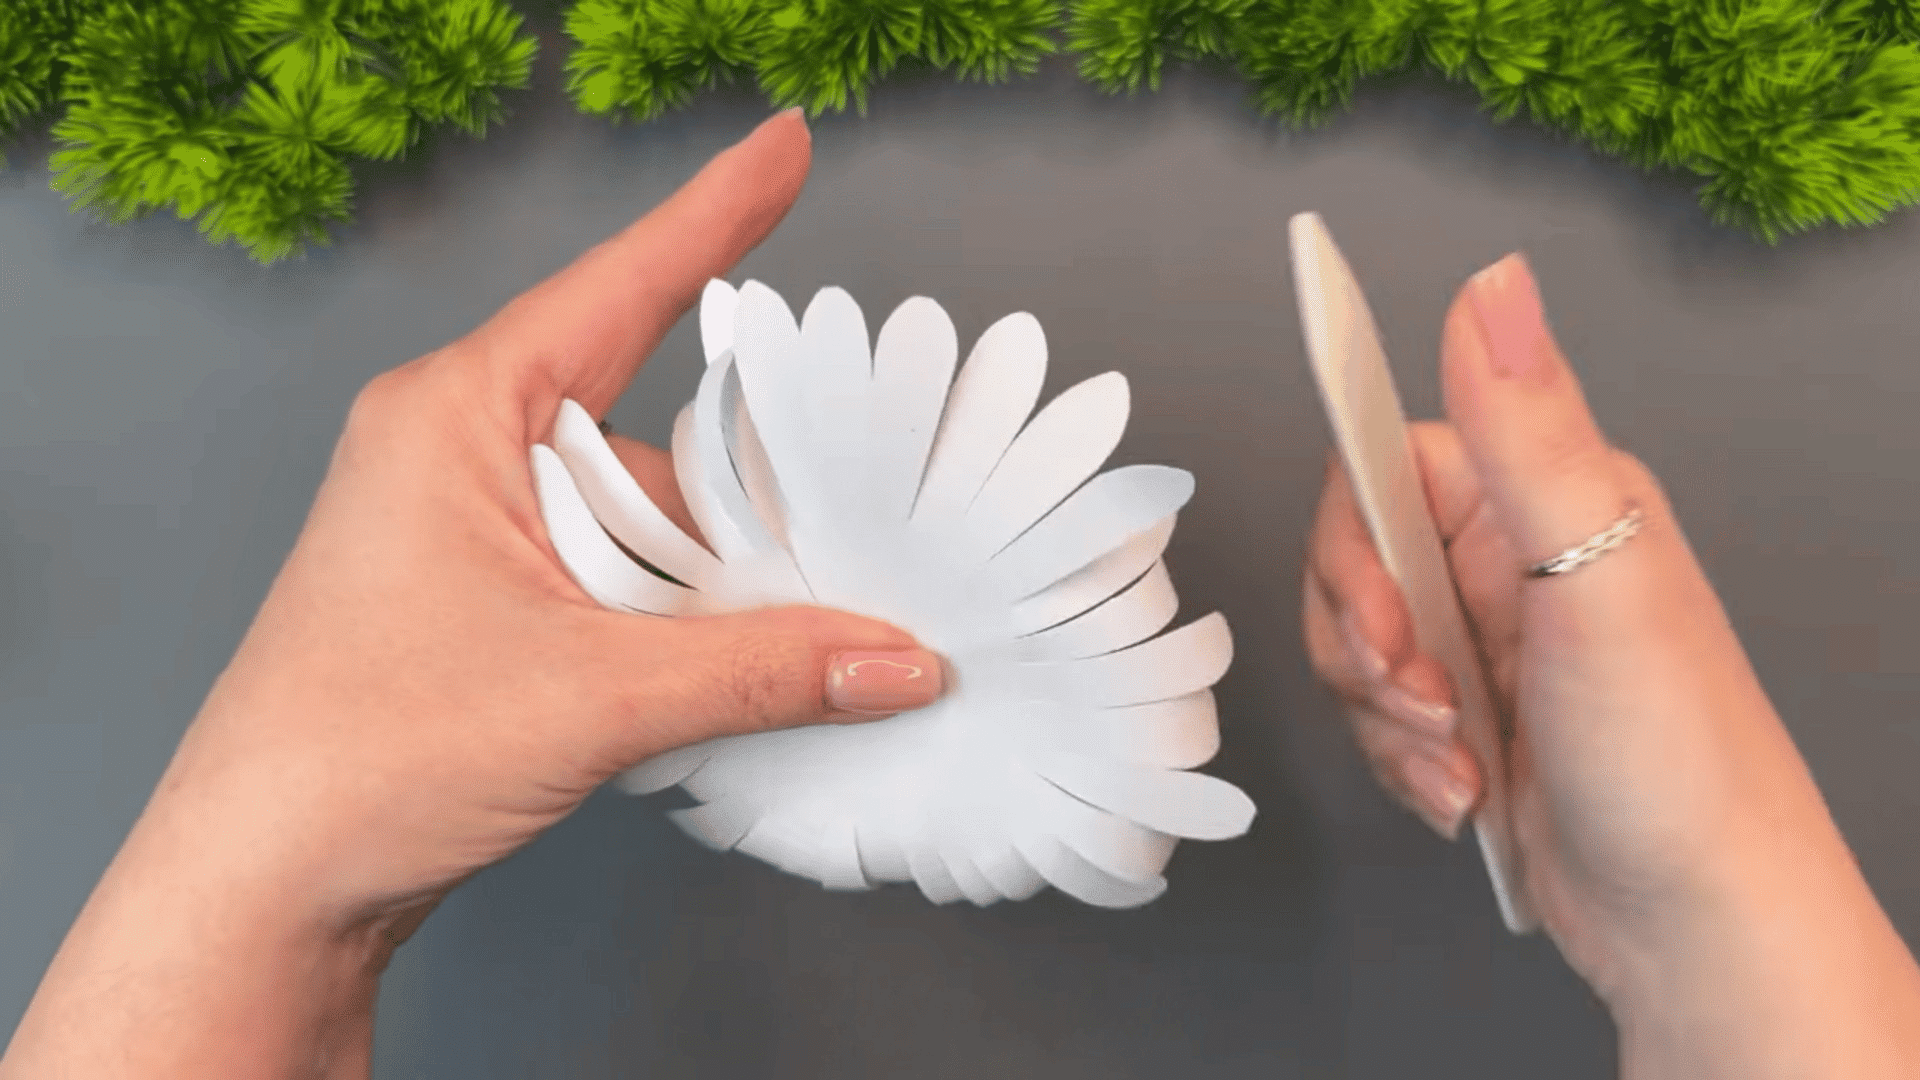
Use a curling tool, pencil, or the edge of scissors to gently bend each petal outward. This helps the flower look fuller and less flat once it is assembled.
Move slowly and curl one petal at a time so the paper does not crease too hard.
Light curves usually look better than sharp bends because they give the petals a softer shape.
Try to keep the petals curved in a similar direction for a cleaner finished flower. Small adjustments can also help the flower look more even after opening it fully.
Tip: A pencil works well for beginners because it is easier to control while curling the petals.
Step 7: Glue the Flower Shape Together
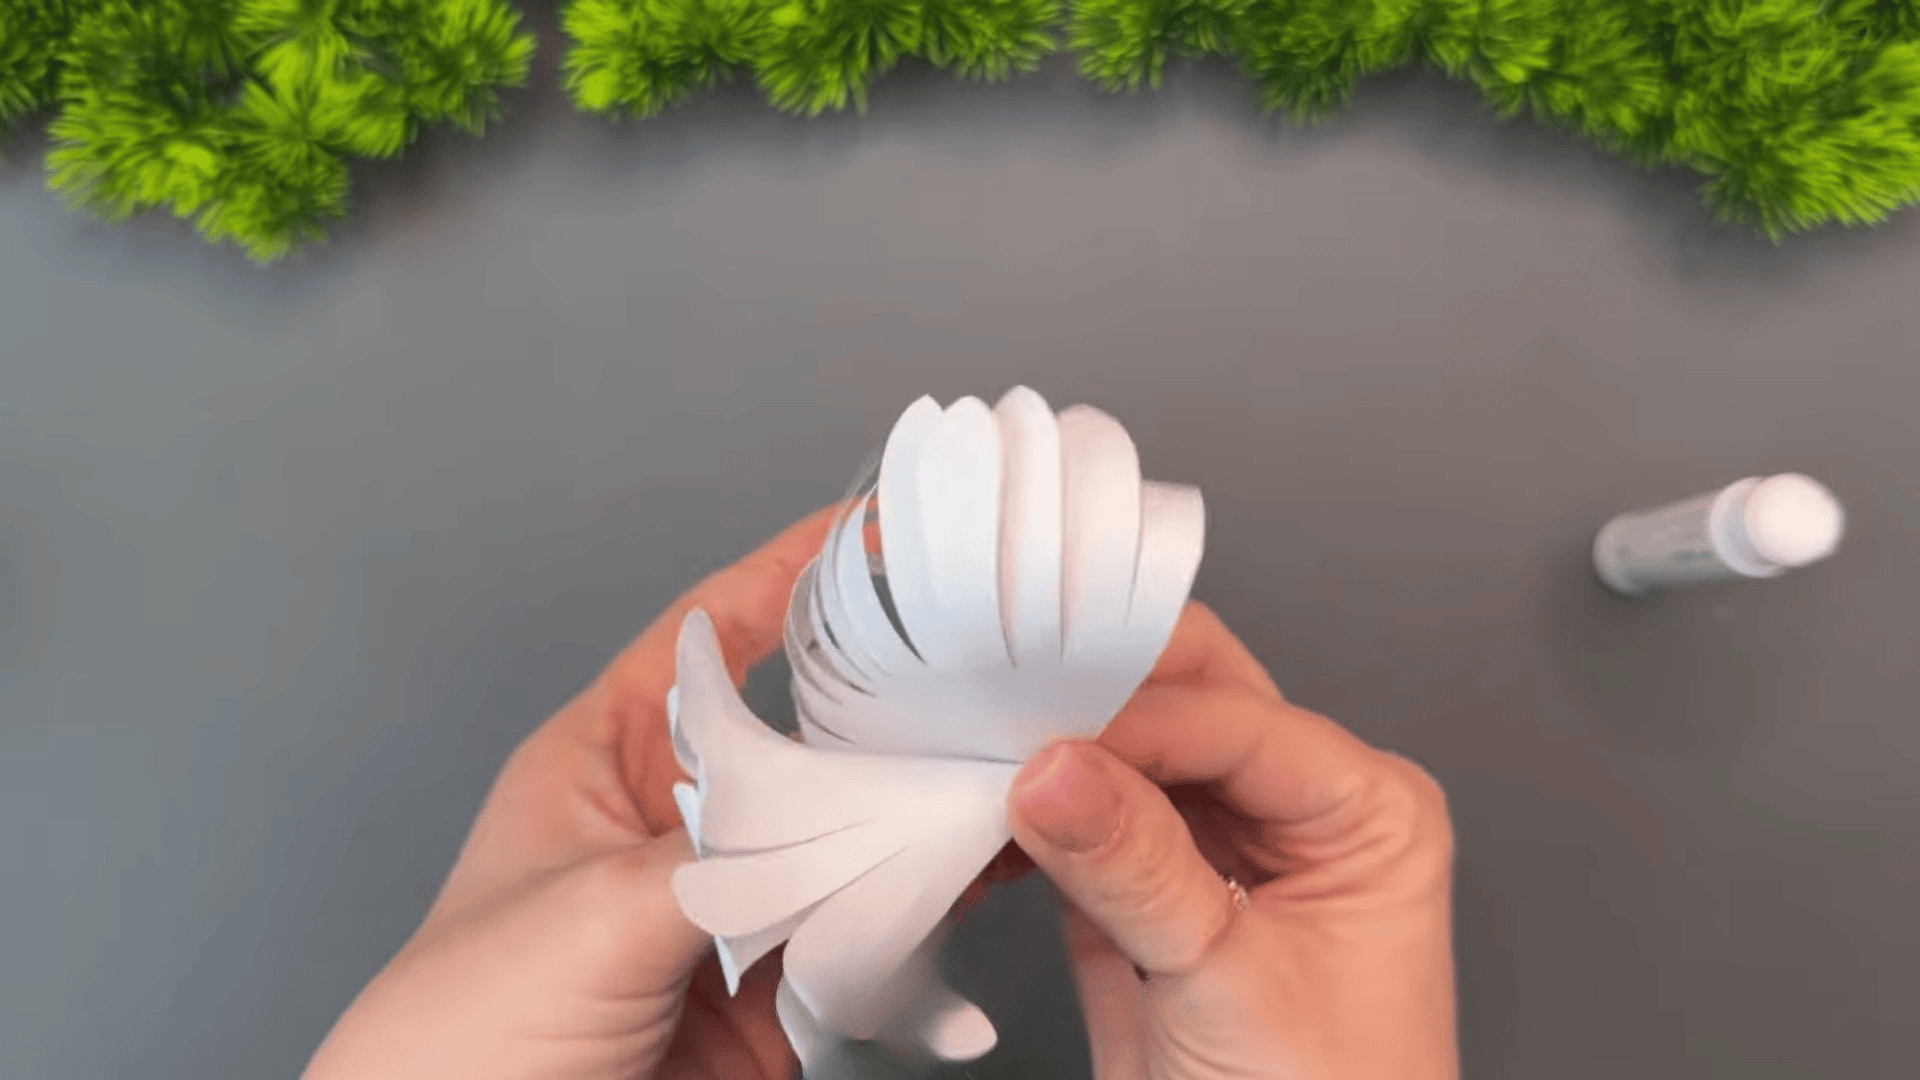
Apply a small amount of glue along the cut edge of the flower, then gently overlap the sides to create a rounded flower shape.
Hold the paper in place for a few seconds so the glue can stick properly. Using a small amount of glue helps keep the paper clean and easier to shape.
Make sure the flower stays balanced while the glue dries so the petals keep their curved form.
Tip: Glue sticks work well for paper crafts because they dry neatly and are less messy than liquid glue.
Step 8: Make the Flower Center
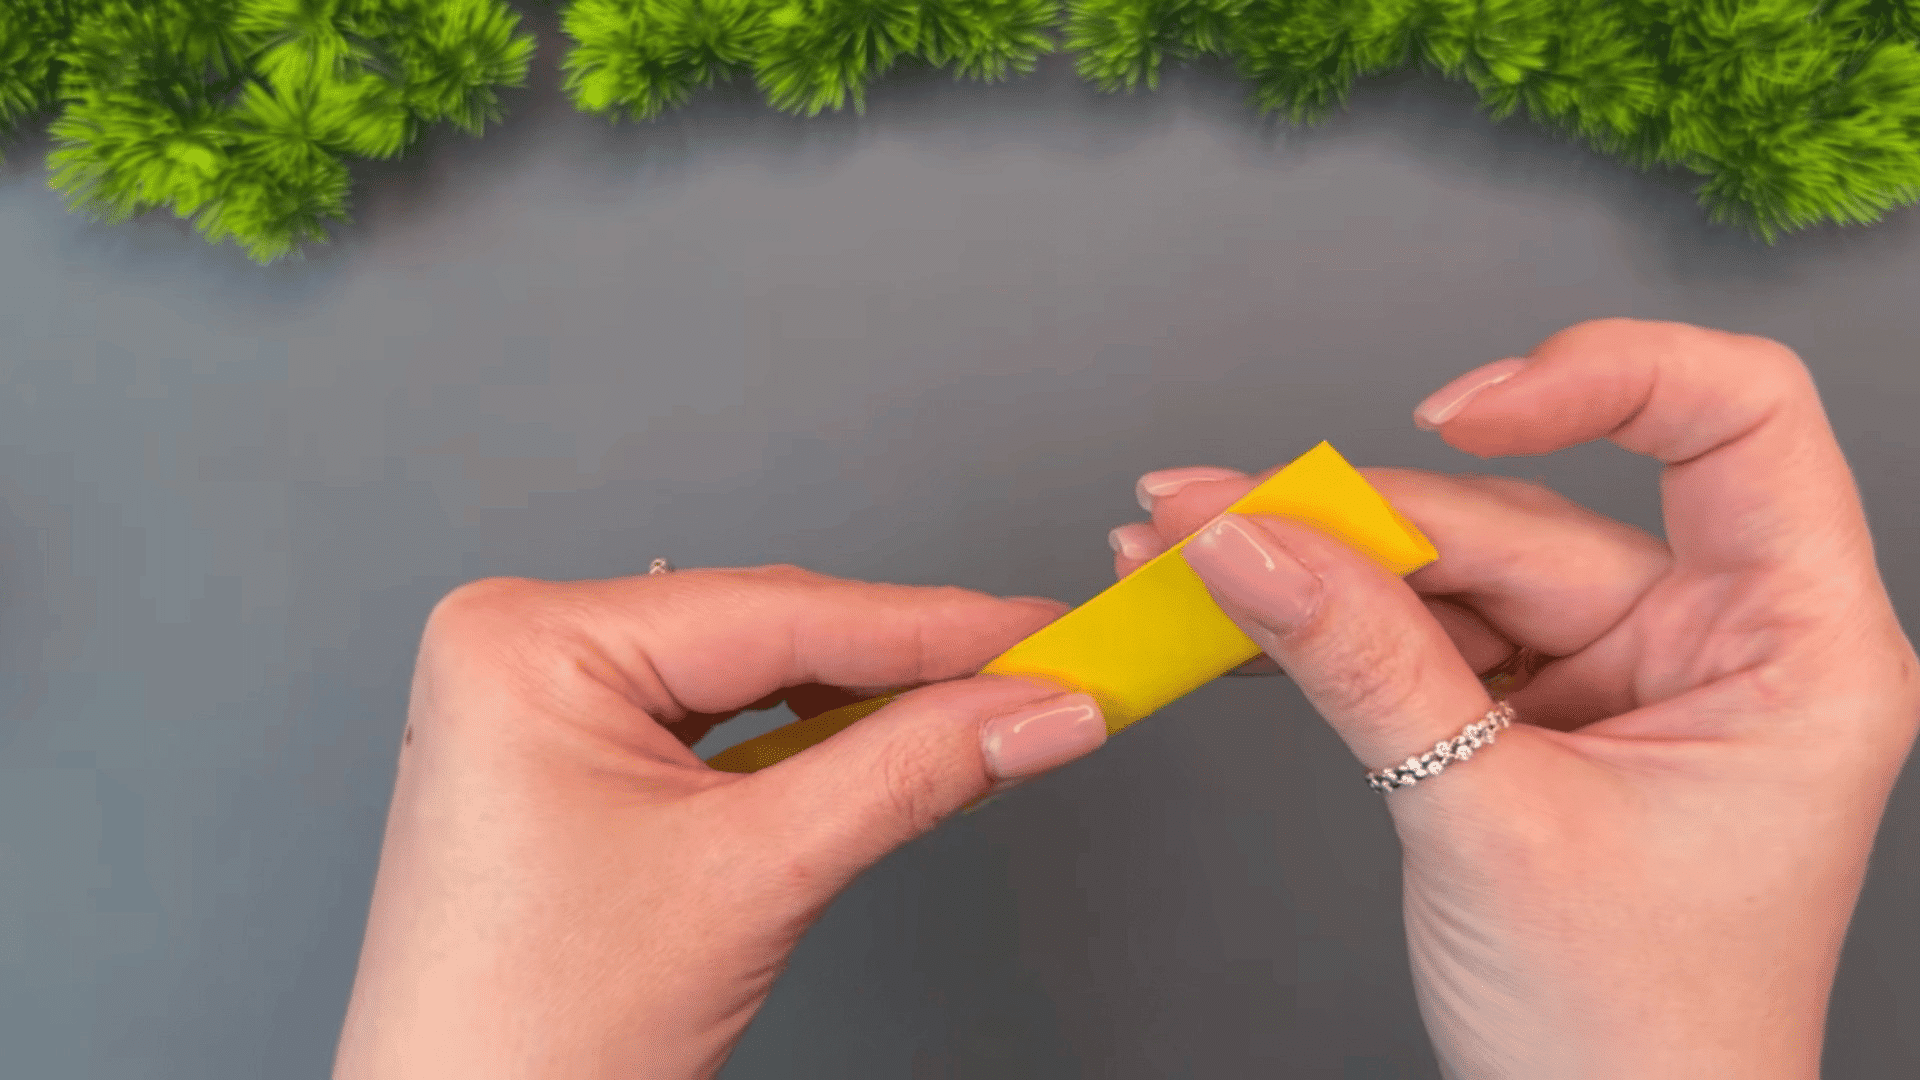
Take the small yellow paper rectangle and fold it evenly in half. Press along the folded edge gently so the paper stays flat and neat.
This folded piece will be used as the center part of the flower in the next steps.
Try to line up the edges carefully before folding, so the shape looks clean and balanced. A neat fold can make the flower center easier to attach later.
Do not worry if the fold is not perfect because the petals will cover most of the center once assembled.
Tip: Running your fingernail along the fold can help create a sharper crease line.
Step 9: Cut Small Fringe Lines
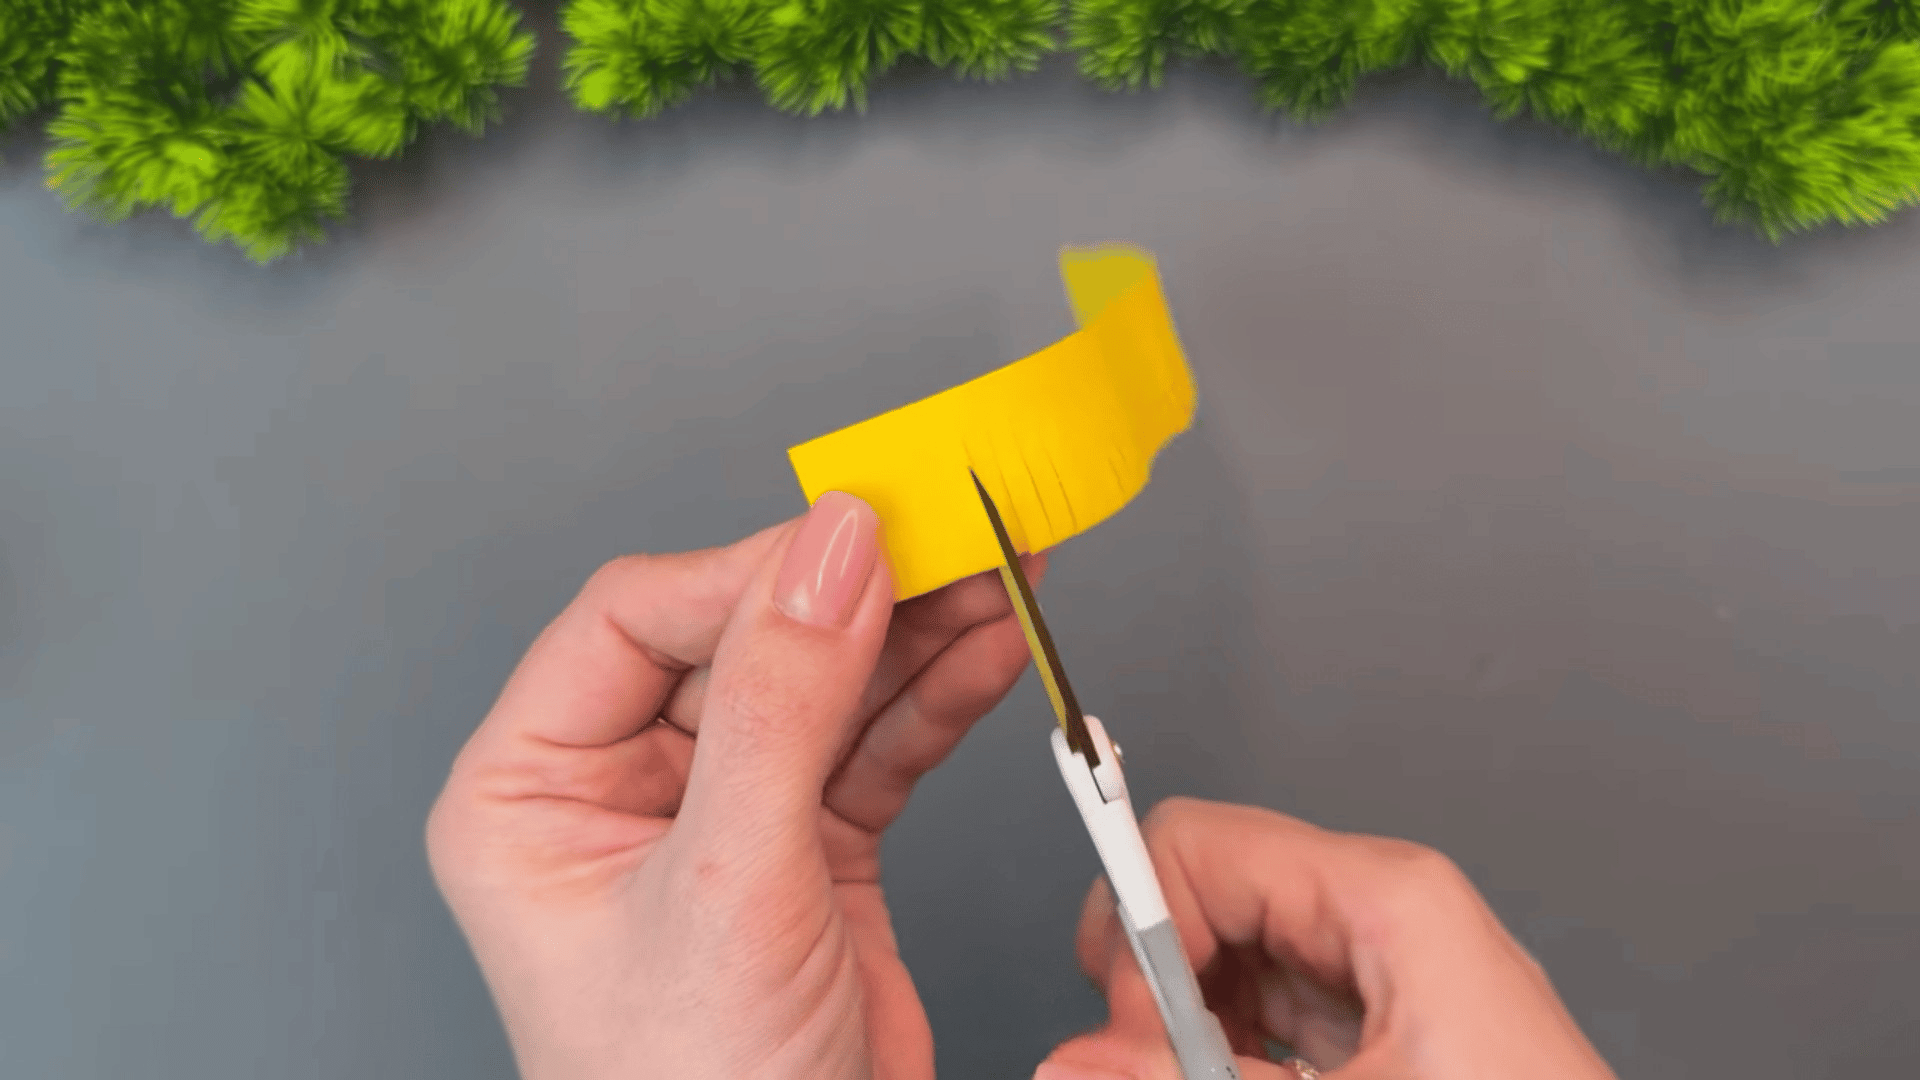
Use scissors to make small, thin cuts along the folded yellow paper strip. Cut from the open edge toward the folded side, but do not cut all the way through.
These thin cuts will create the soft center texture for the flower once the paper is rolled and opened.
Keep the cuts close together and evenly spaced so the flower center looks fuller and more balanced. Slow and careful cutting usually gives cleaner results.
The thinner the strips are, the softer the flower center will look after shaping and attaching it.
Tip: Smaller scissors can make it easier to cut neat and even thin lines.
Step 10: Secure the Folded Paper
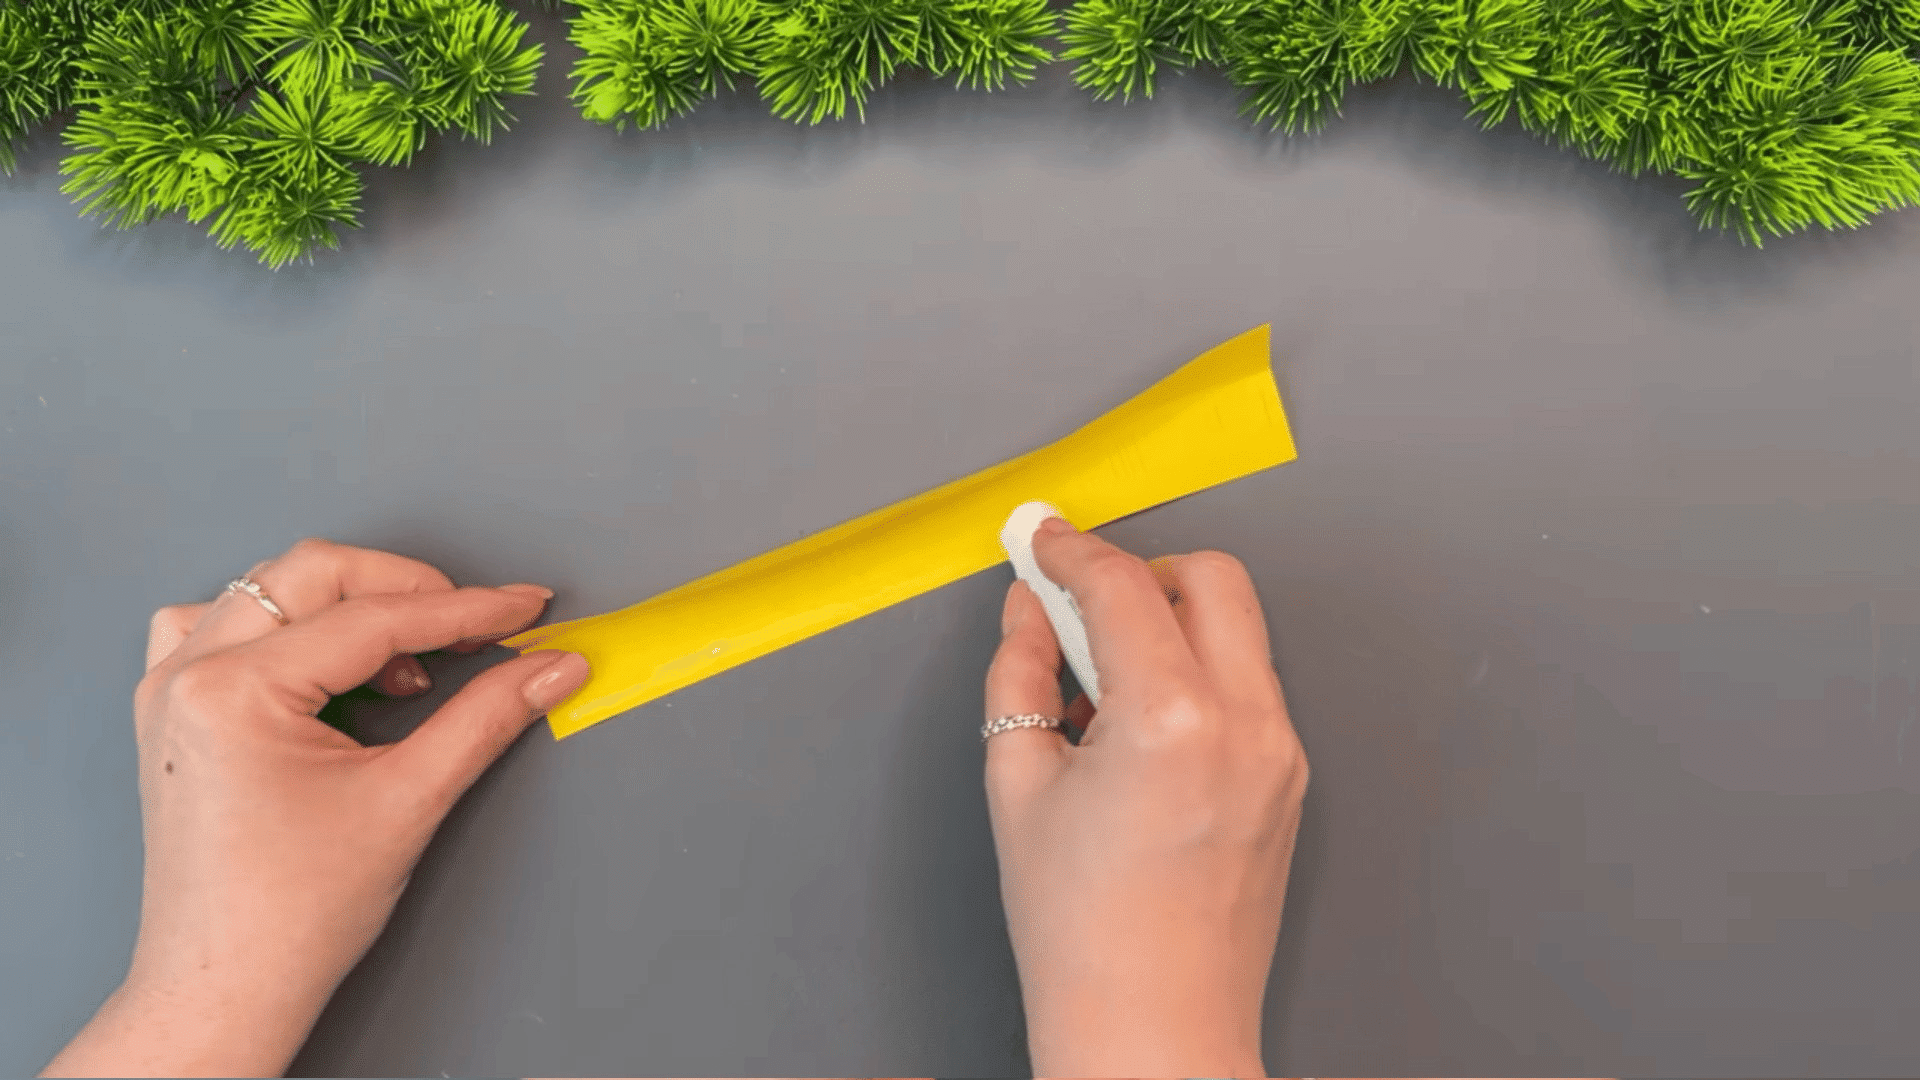
Fold the yellow paper strip in half along the open side and press the edges together gently.
This helps keep the thin cut strips in place and makes the flower center stronger when rolled later.
Apply a small amount of glue so the paper stays neat and does not become too wet. Press the folded strip lightly for a few seconds to help the glue hold properly.
Keeping the fold even will also make the flower center look cleaner once it is attached inside the petals.
Tip: A glue stick usually works best because it spreads evenly and dries without making the paper wrinkle.
Step 11: Roll the Flower Center
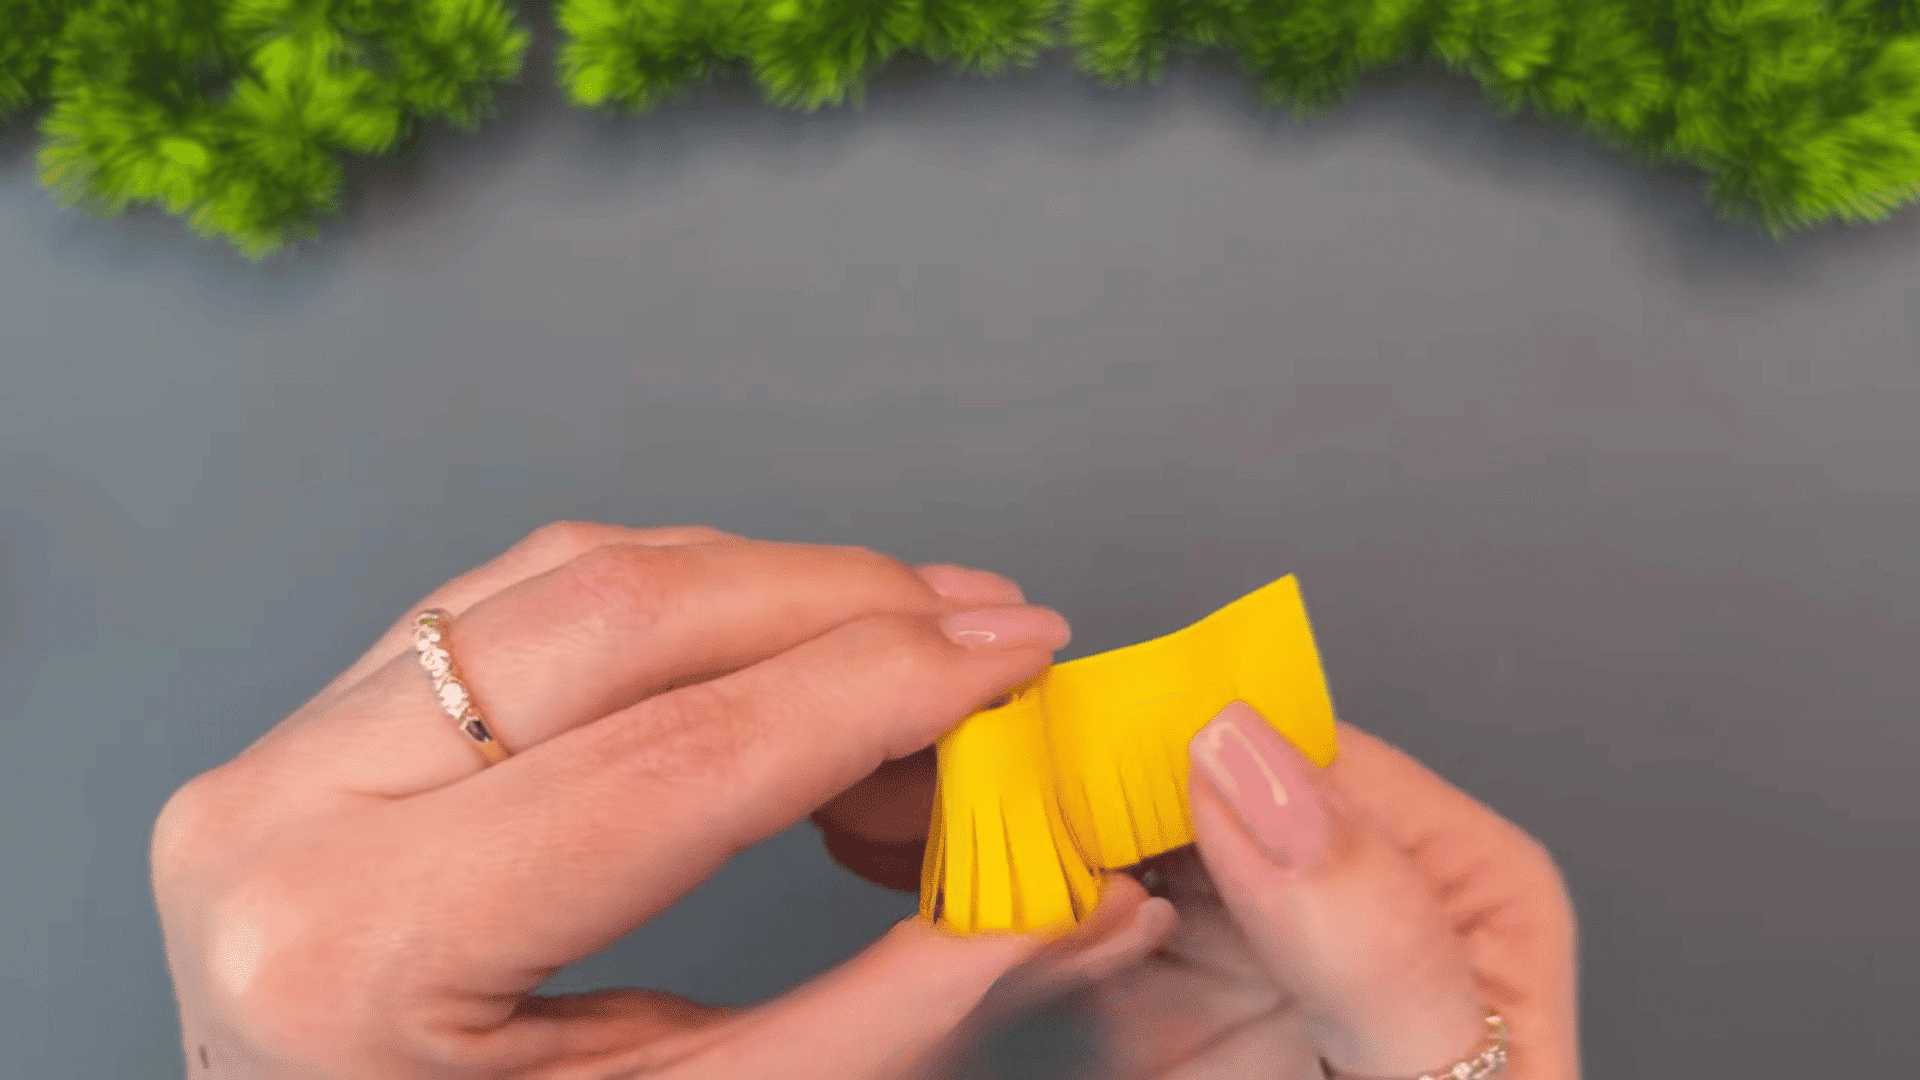
Start rolling the yellow paper strip tightly from one end to the other.
Keep the folded side at the bottom while rolling so the thin cut strips stay on top and spread outward later. Roll slowly and press gently as you go to help the shape stay firm and even.
A tight roll usually makes the flower center look cleaner and easier to attach inside the petals.
Once you reach the end, add a little glue to keep the pistil from opening. Let it dry for a few seconds before using it.
Tip: Rolling the strip around a stick or pencil can help keep the center shape even.
Step 12: Make the Paper Stem
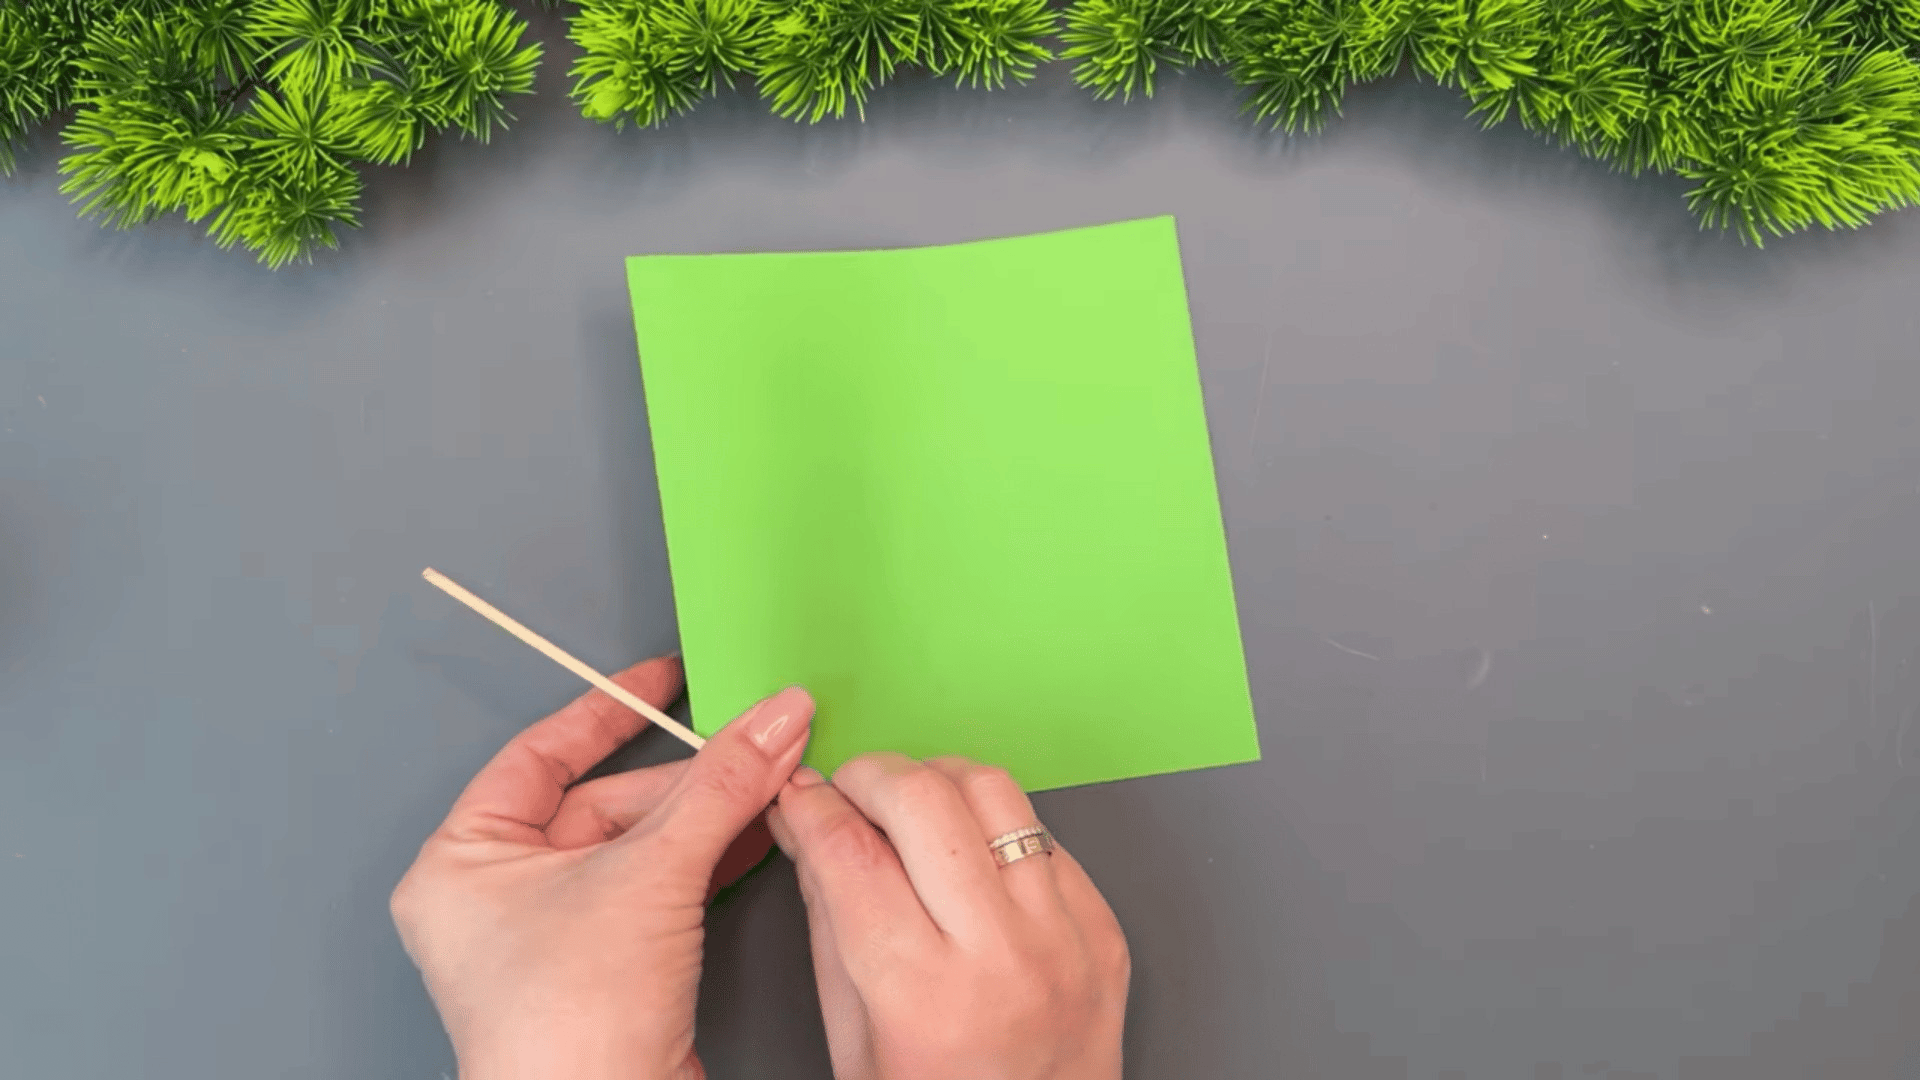
Place the wooden stick at one corner of the green paper and start rolling the paper around it tightly. Keep rolling slowly so the stem stays thin and even from top to bottom.
Once you reach the end, add a little glue to hold the paper in place.
Rolling the paper tightly helps the stem feel stronger and keeps it from opening later. Press the glued edge gently for a few seconds so it sticks well.
A smooth stem will also make the finished flower look cleaner and easier to hold.
Tip: A thinner stick usually makes rolling the paper easier and keeps the stem neat.
Step 13: Attach the Flower to the Stem
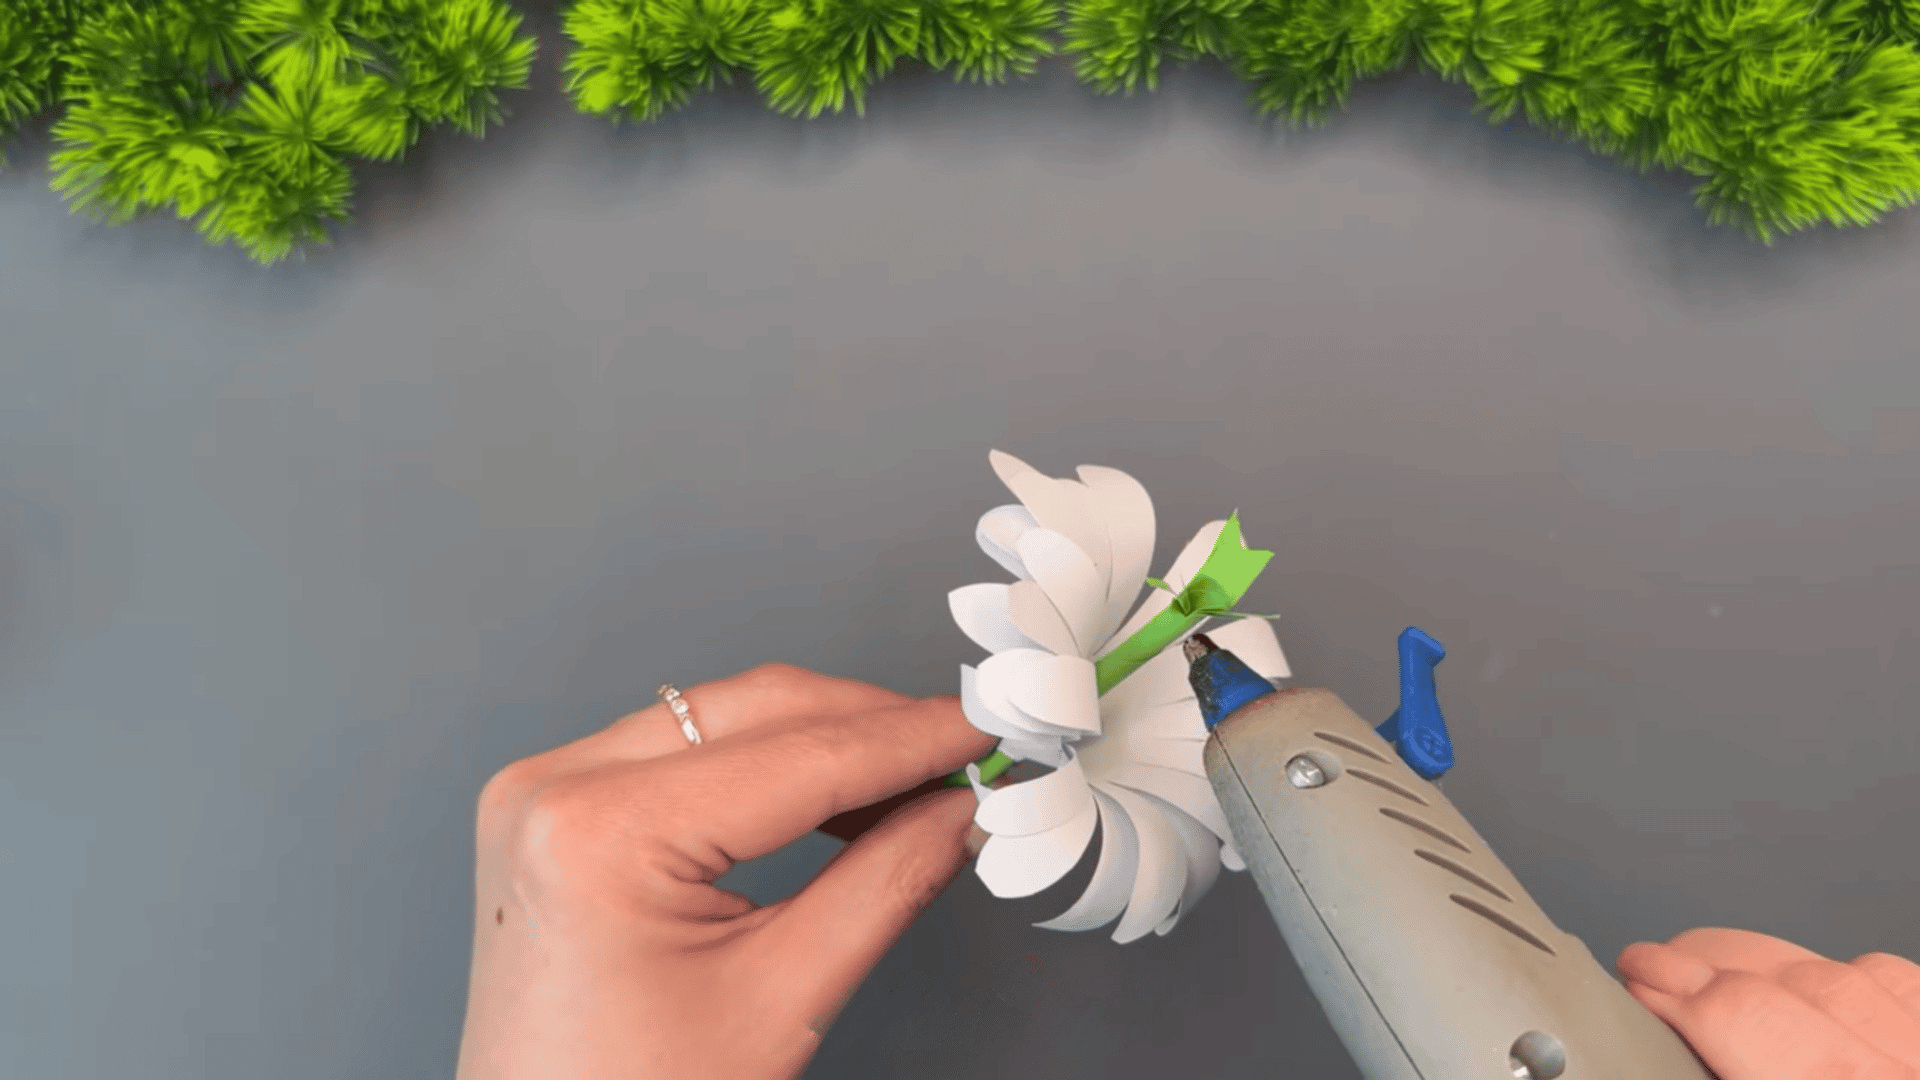
Carefully make a small cut or opening at the bottom center of the flower. This opening allows the stem to pass through and connect the flower pieces together properly.
Slide the stem through the hole slowly so the petals keep their shape.
Once the stem is in place, attach the flower center and secure everything with hot glue.
Keep the opening small so the flower fits tightly around the stem and stays balanced. Adjust the petals gently after assembling to help the flower look fuller and more even.
Tip: Twisting the stem slightly while inserting it can help it pass through the center more easily.
Step 14: Glue the Flower Center
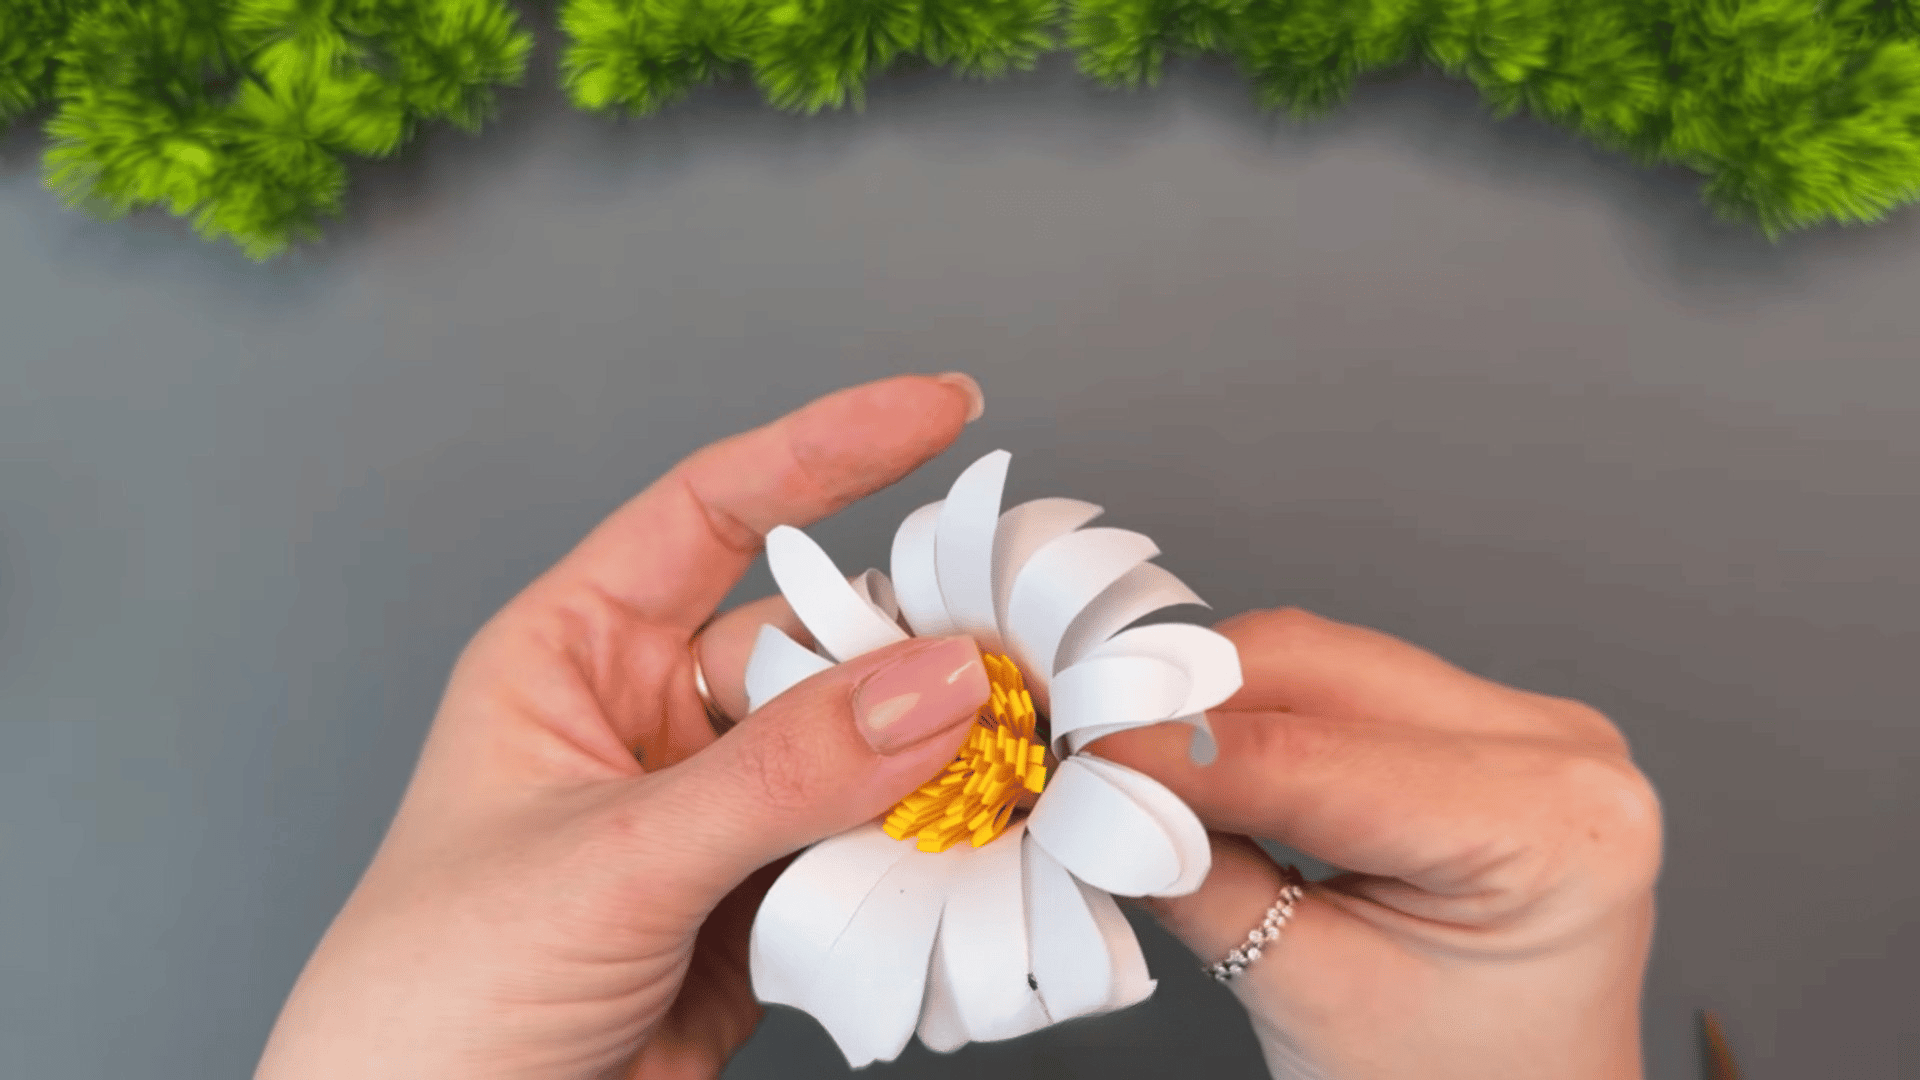
Place a small amount of glue at the center of the flower, then gently press the rolled yellow pistil into place.
Hold it for a few seconds so it sticks properly and stays centered between the petals. Adjust the petals slightly if needed to help the flower look more balanced.
Keeping the pistil in the middle helps the flower look cleaner and more natural once finished.
Do not use too much glue because extra glue can spread onto the petals and make the center look messy after drying.
Tip: Tweezers can help place the pistil more neatly if the flower center is small.
Step 15: Add a Leaf
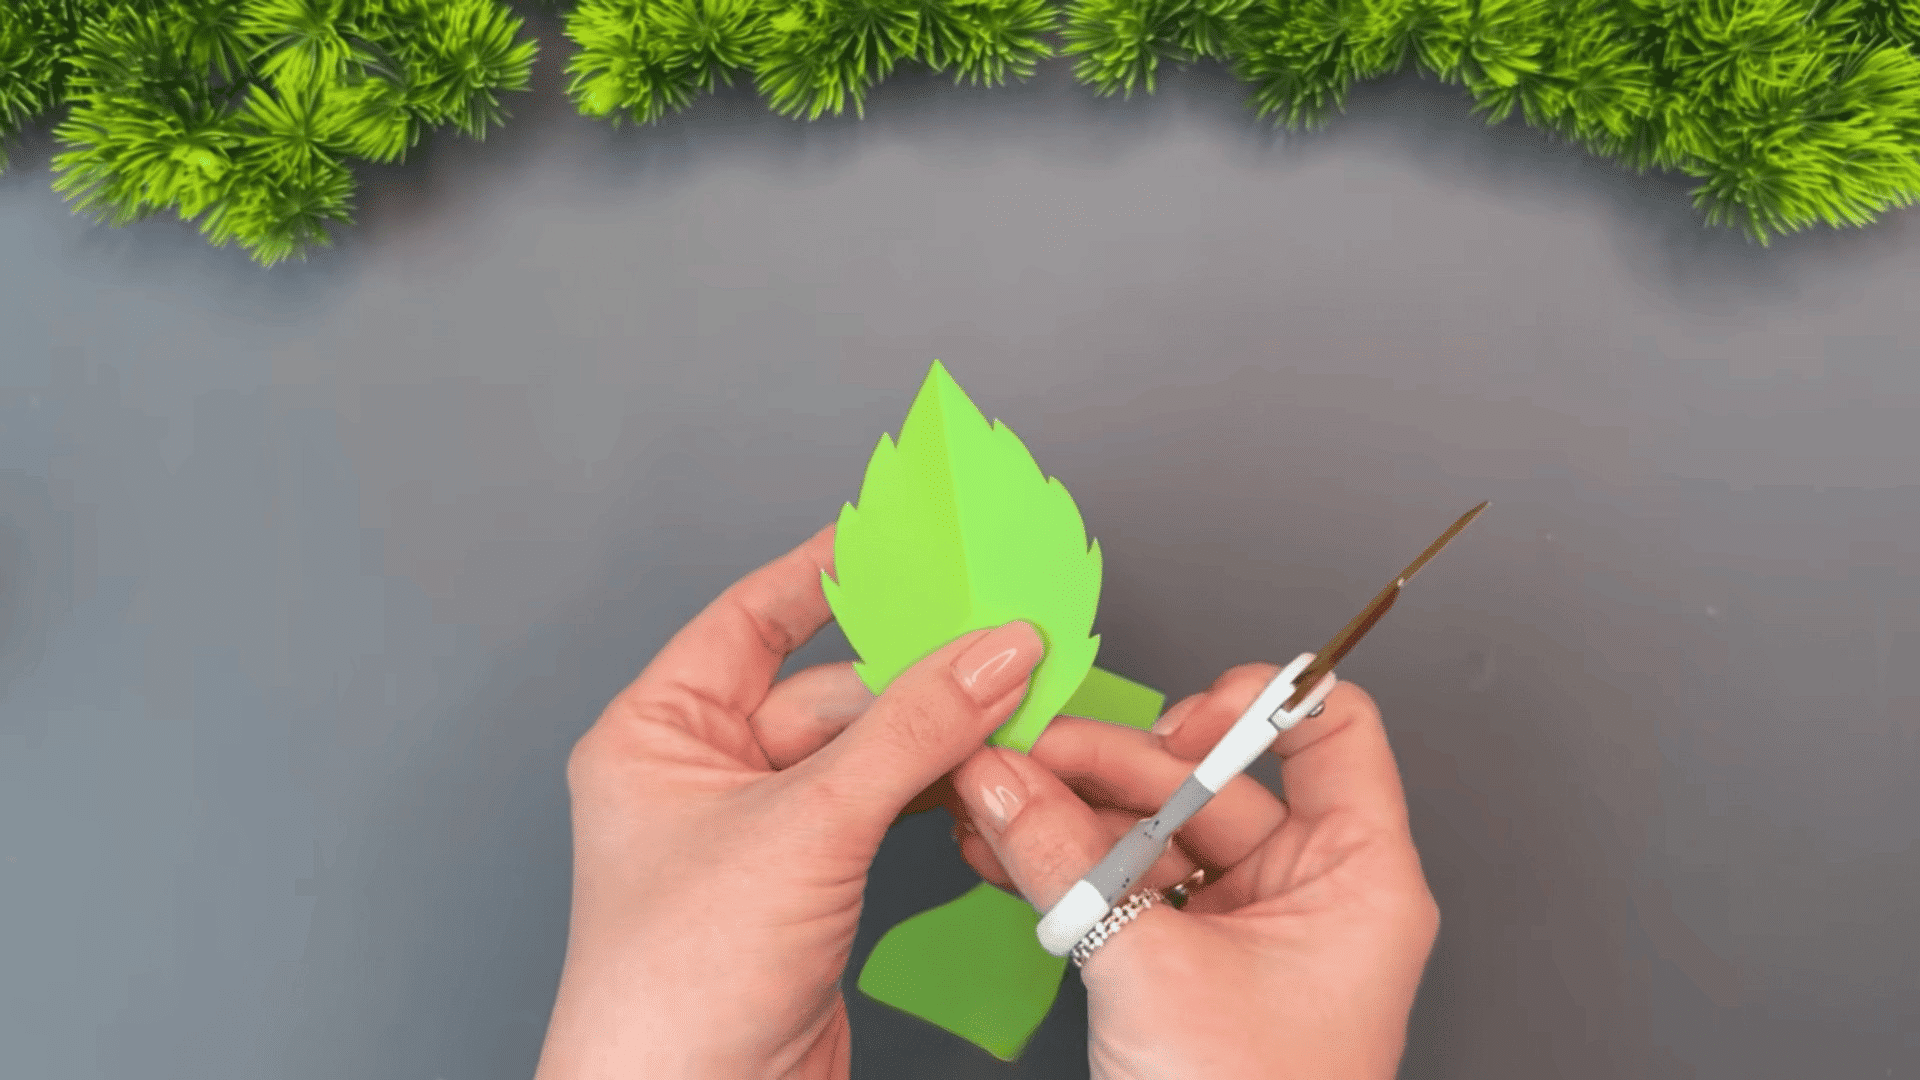
Fold the green paper lightly in half, then cut out a simple leaf shape with pointed edges. Small angled cuts along the sides can help the leaf look more detailed and natural.
Open the paper carefully after cutting to show the full leaf shape. Keeping the fold in the center can make the leaf look more realistic and easier to attach to the stem later.
You can also bend the center line slightly to give the leaf a little shape instead of leaving it completely flat.
Tip: Cutting both sides together while folded helps keep the leaf shape even.
Step 16: Prepare Multiple Flowers
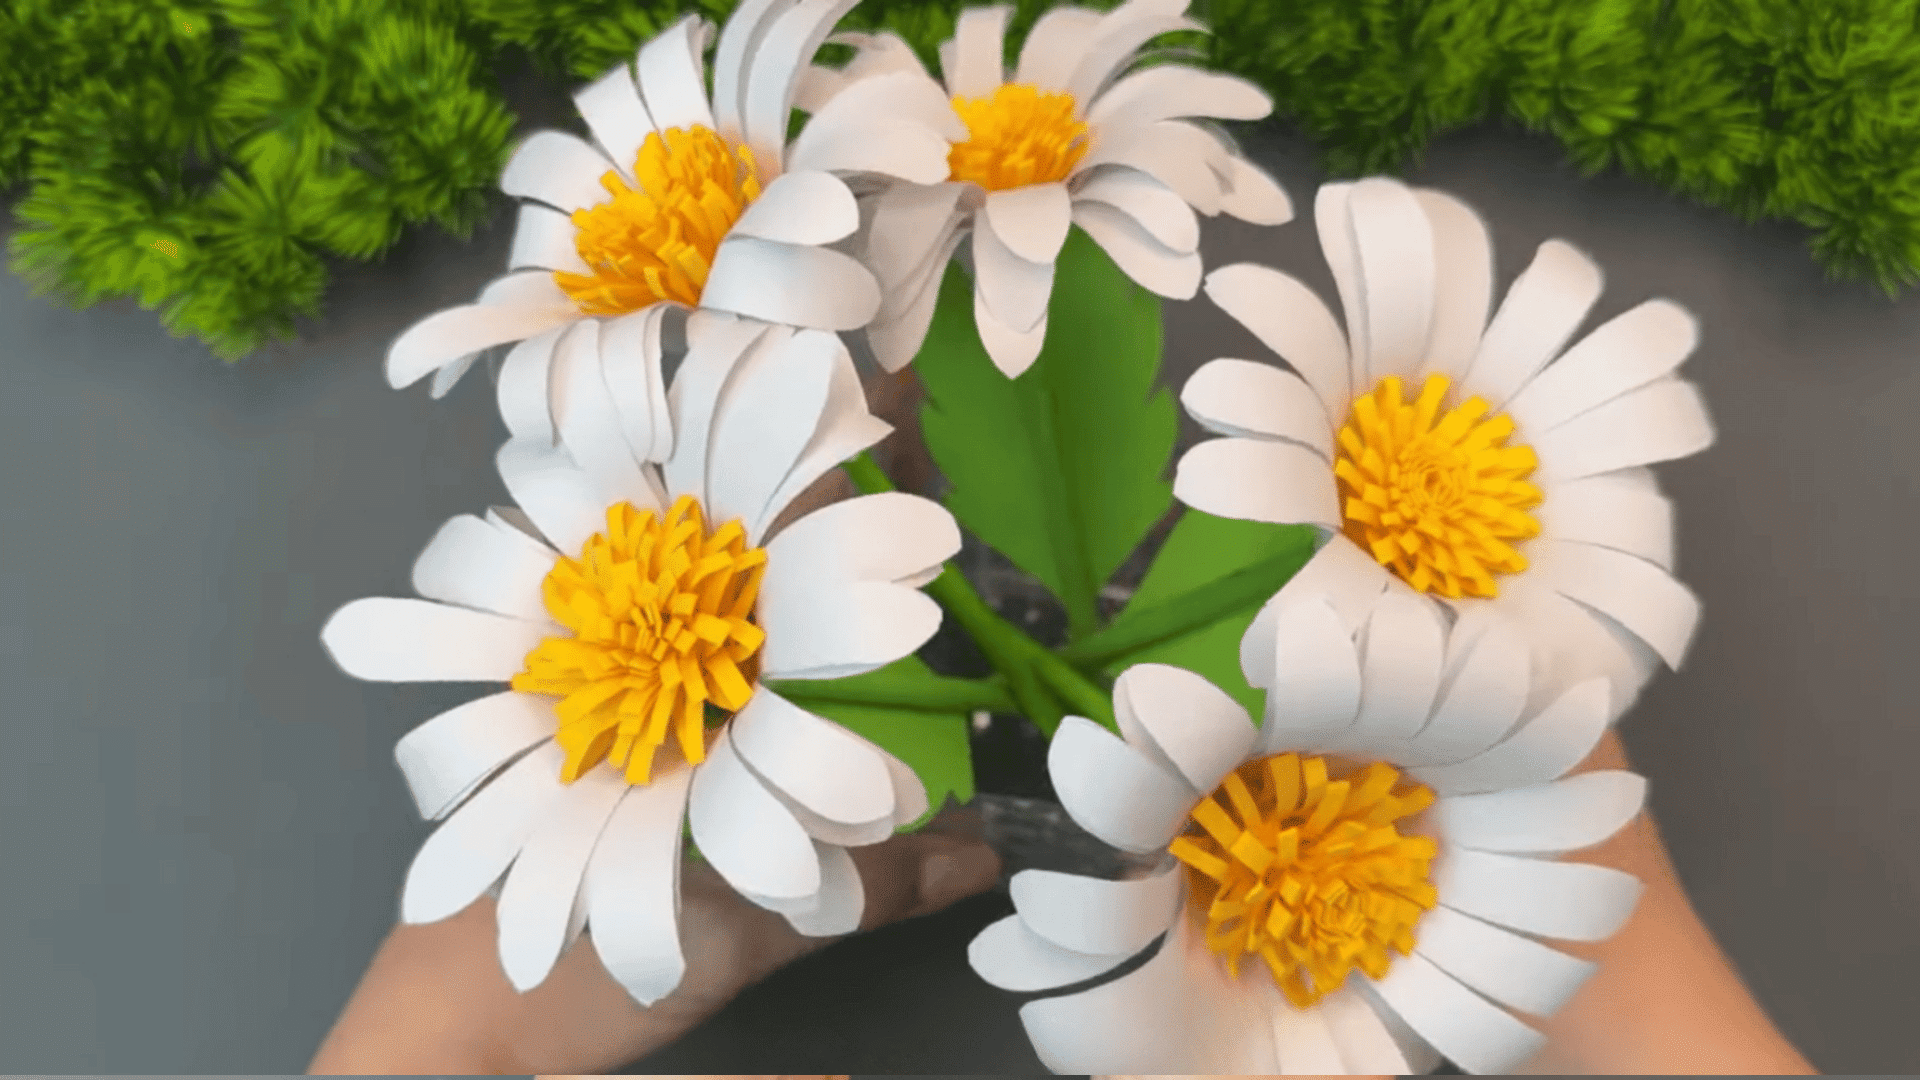
Repeat the same steps to create more paper flowers for a fuller bouquet or decoration. You can make flowers in different sizes or slightly change the petal shapes to give the arrangement more variety.
I like spacing the flowers at different heights because it helps the bouquet look more natural once placed together.
Making several flowers with small differences can help the final arrangement look less flat and more balanced.
After finishing, arrange the flowers and leaves until you are happy with the overall look and spacing.
Watch this simple YouTube tutorial by Viki Studio Origami to see the paper flower steps in action and follow along with the folding, cutting, and shaping process more easily.
Tips to Make Paper Flowers Look Real
Small details can help paper flowers look cleaner and more natural. These simple tips can improve the shape, texture, and overall finish of your flowers.
- Curl the Petals Gently: Soft curves help petals look more natural instead of flat. A pencil works well for shaping the edges.
- Use Different Shades of Color: Mixing light and dark shades can add more depth and detail to the flower.
- Avoid Using Too Much Glue: Too much glue can wrinkle the paper and leave messy marks. Small amounts usually work best.
- Layer the Petals Naturally: Slightly turning the petals can make the flower look fuller and more balanced.
- Shape the Flower Center Carefully: A neat flower center helps the whole flower look cleaner once finished.
- Add Leaves and Stems: Leaves and wrapped stems can make the arrangement look more complete and realistic.
- Use Thicker Paper for Large Flowers: Stronger paper helps bigger flowers hold their shape better.
- Trim Uneven Petals if Needed: Small cuts and adjustments can help the petals look more even and neat.
Common Mistakes to Avoid when Crafting
These are the common mistakes people make while making paper flowers and how you can fix them.
| Mistake | Solution |
| Using too much glue | Use a small amount of glue to keep the paper clean and smooth. |
| Cutting uneven petals | Cut slowly and follow the shape lines carefully for balanced petals. |
| Rushing the folding steps | Make neat folds and press the creases gently before moving on. |
| Using thin paper for large flowers | Choose thicker paper so the petals hold their shape better. |
| Skipping the petal shaping | Curl the petal edges slightly to make the flower look fuller. |
| Making deep cuts in the petals | Keep the cuts shallow so the flower stays strong and does not tear. |
| Not letting the glue dry properly | Wait a few seconds for the glue to set before handling the flower. |
| Forgetting to balance the flower | Adjust the petals and stem at the end for a cleaner final shape. |
Creative Ways to Use Paper Flowers at Home
Paper flowers are not just fun to make. They can also add simple decoration and color to different parts of your home without costing much money.
- Wall Decorations: I like attaching paper flowers to bedroom or living room walls to create simple, handmade decor. Different flower sizes can make the wall look more balanced.
- Table Centerpieces: Paper flowers work well as centerpieces for dining tables, coffee tables, or shelves.A small bouquet can make a space feel brighter without needing real flowers.
- Gift Wrapping Decorations: Adding a paper flower to a gift box or bag can make simple wrapping look more personal and creative.
- Party Decorations: You can use paper flowers for birthdays, baby showers, or small home events. They are lightweight and easy to match with different themes.
- Room Decor: Paper flowers look nice on mirrors, photo frames, or small corner shelves. They can add color without taking up much space.
- DIY Wreaths: I sometimes attach paper flowers to a simple wreath base for seasonal or holiday decorations around the house.
- Bookmarks and Cards: Smaller paper flowers can be added to greeting cards, bookmarks, or scrapbook pages for extra detail.
Conclusion
Making paper flowers is one of those simple crafts that can feel relaxing, creative, and rewarding at the same time.
You do not need expensive tools or perfect crafting skills to create something that looks colorful and handmade.
Small details like shaping the petals, choosing the right paper, and taking your time with each step can make a big difference in the final result.
I think paper flowers are a fun way to decorate your home, personalize gifts, or enjoy a simple creative project.
The best part is that every flower can look a little different, and that is completely okay.
Your own style is what makes handmade crafts feel special. If you try this tutorial, share your experience, favorite flower design, or crafting tips in the comments below.
Frequently Asked Questions
What Flowers Can Be Made with Paper?
You can make many flowers with paper, including roses, daisies, tulips, sunflowers, lilies, peonies, and cherry blossoms. Different paper types and petal shapes help create simple or realistic flower designs easily.
What Flowers are the Easiest to Make?
Daisies, tulips, and simple rolled roses are usually the easiest paper flowers for beginners. They need basic cuts, simple folds, and very few materials, making them great for first-time crafting projects.
What Paper Is Best for Paper Flowers?
Crepe paper, cardstock, tissue paper, and craft paper are popular choices for paper flowers. Crepe paper works best for realistic petals, while cardstock is stronger for larger decorative flower projects.