

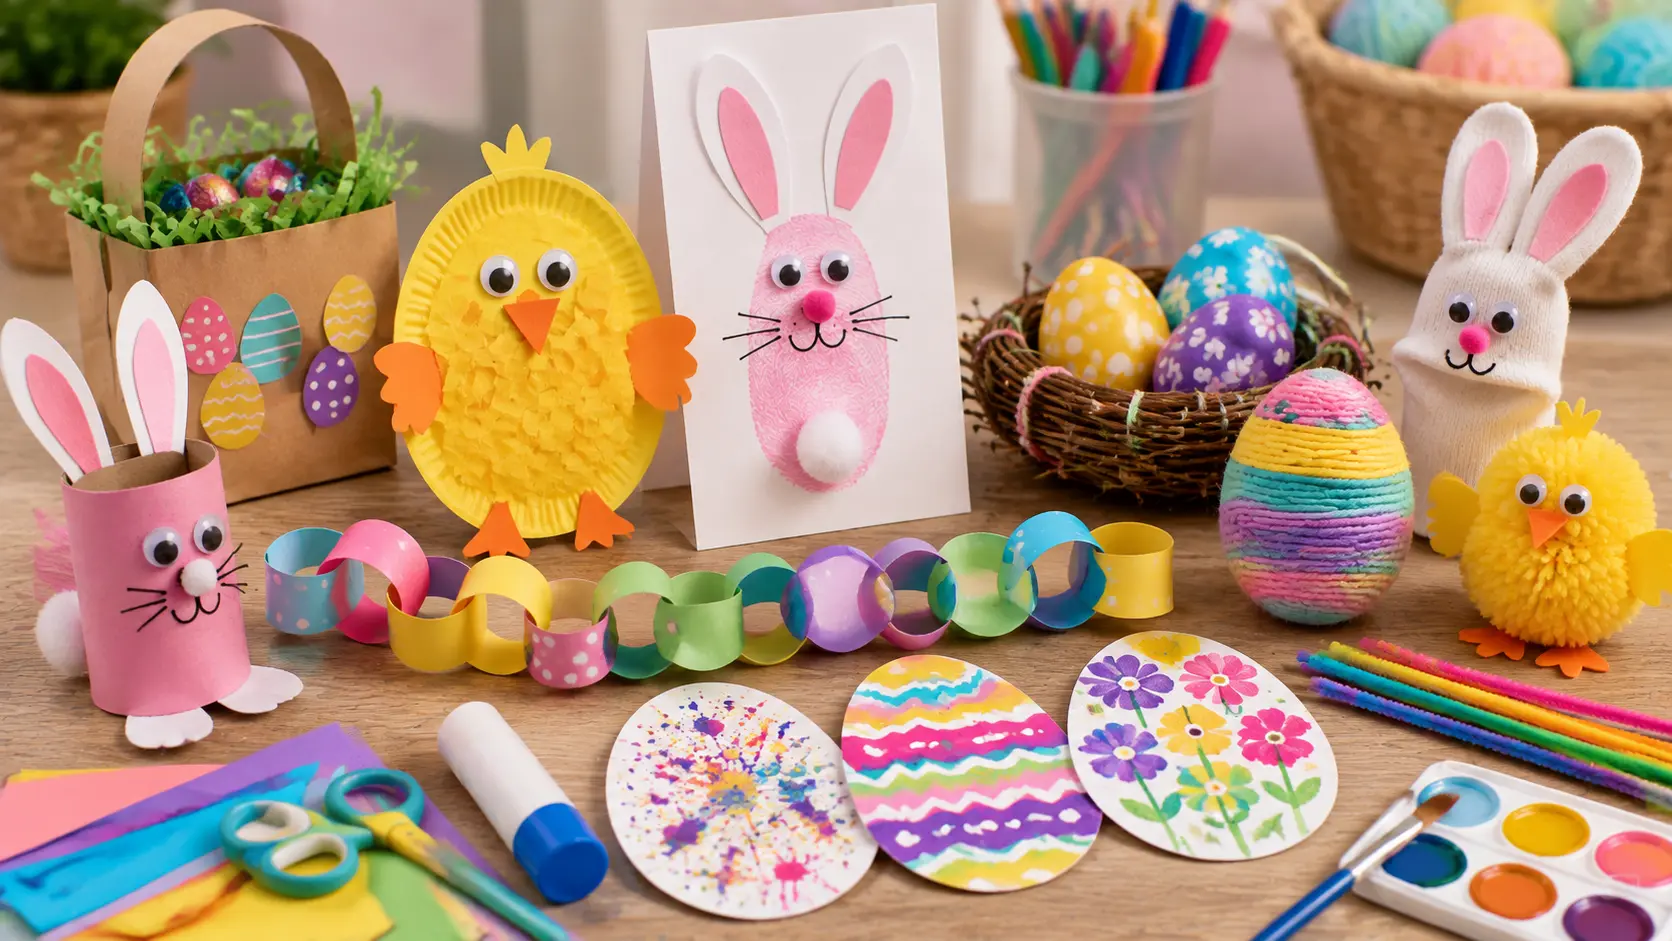
Easter craft time should feel fun, not like another project that takes an hour to prepare. If you want simple Easter crafts for kids, I know how helpful it is to have ideas that use familiar supplies and clear steps.
You can pick quick paper projects, painted keepsakes, outdoor crafts, wearable activities, or low-mess options based on your child’s age and patience.
I also like having a few practical tips nearby so small problems do not turn into wasted supplies or frustration.
These ideas give you plenty of choices for home or school, with simple materials, manageable steps, and room for kids to make each craft feel personal.
What to Look for in Kids’ Easter Crafts
Good kids’ Easter crafts should feel simple to start and easy to finish without needing a long list of supplies.
Familiar materials such as paper, cardboard, washable paint, glue, and crayons keep preparation manageable for parents and teachers. It also helps to choose projects with flexible designs, so children can pick their own colors, patterns, and small details instead of following one exact result.
Cutting, folding, and gluing should match the child’s age and comfort level, with adult help available when needed.
Crafts that work well at both home and school are especially useful because they can fit different group sizes, time limits, and available materials while still giving kids enough freedom to make something personal.
Paper and Cardboard Easter Crafts
Paper and cardboard crafts are a great place to start because they need only a few basic supplies. I like these ideas for quick activities since kids can cut, fold, and create without much mess.
1. Toilet Paper Roll Bunnies
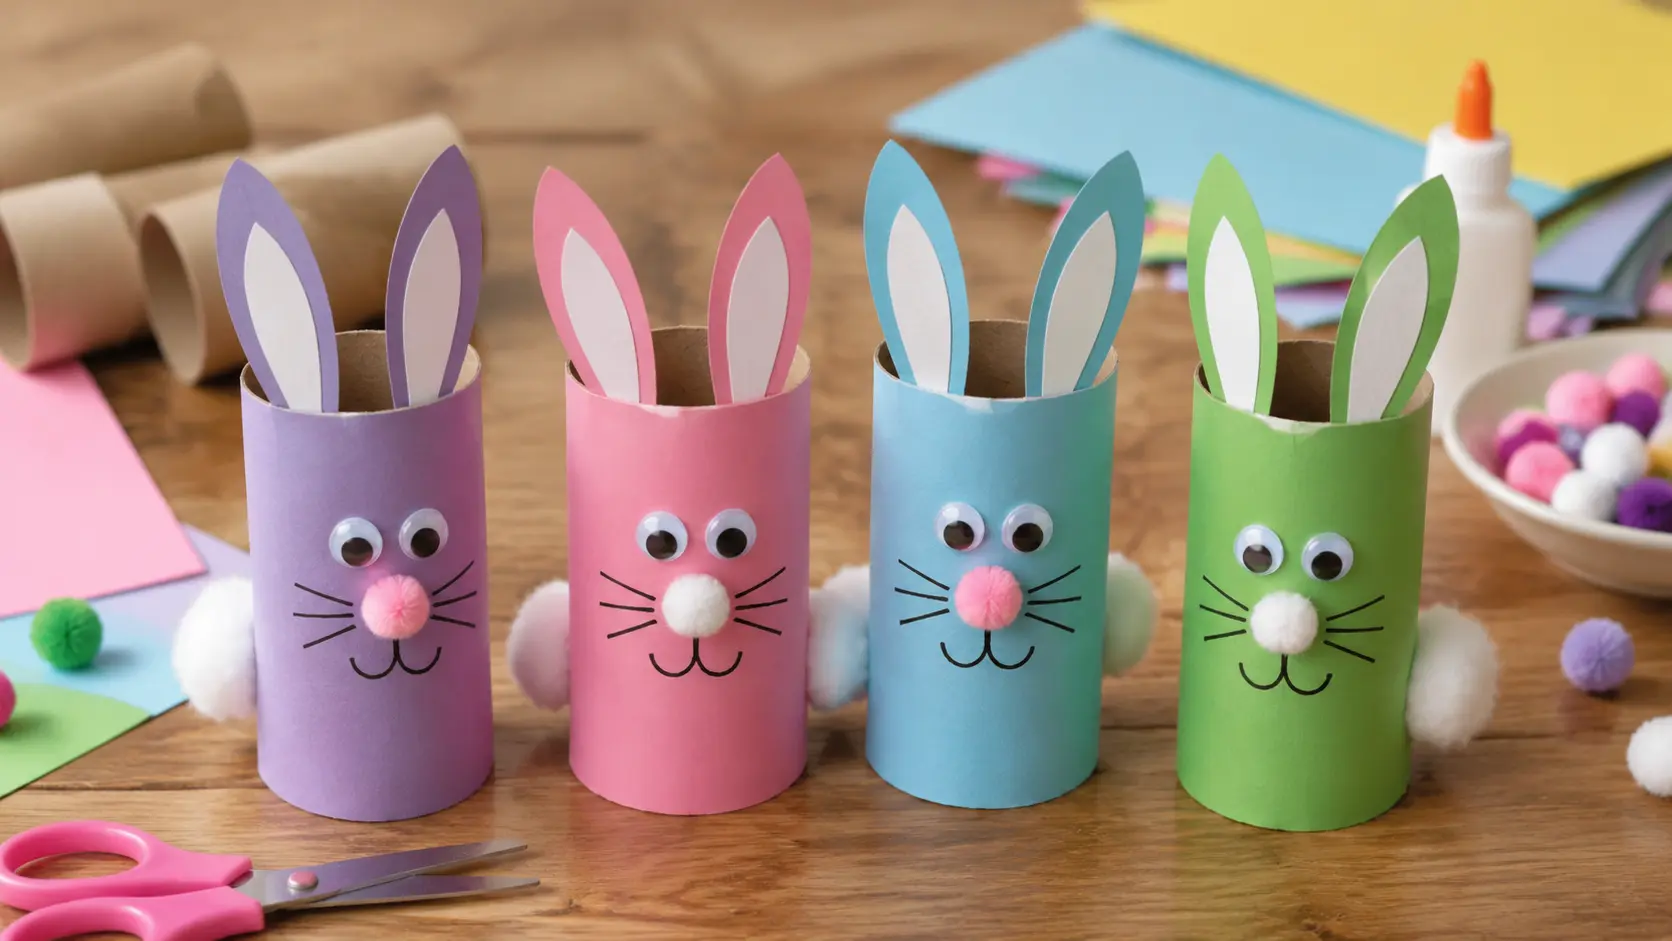
These little bunnies are one of my favorite easy Easter crafts because they use everyday household items. I like how kids can personalize each bunny with different colors and expressions.
Materials and Tools: Toilet paper rolls, colored paper, cardstock, glue, scissors, googly eyes, pom-pom, cotton balls.
How to Make It:
- Measure and cut a piece of colored paper that fits around the toilet paper roll.
- Wrap the paper around the roll and glue the edge to hold it in place.
- Cut two long bunny ears from cardstock and attach them inside the top opening.
- Glue googly eyes, a small pom-pom nose, and a cotton ball tail onto the roll.
- Place the bunny on a flat surface and wait until the glue dries completely.
2. Paper Plate Chick
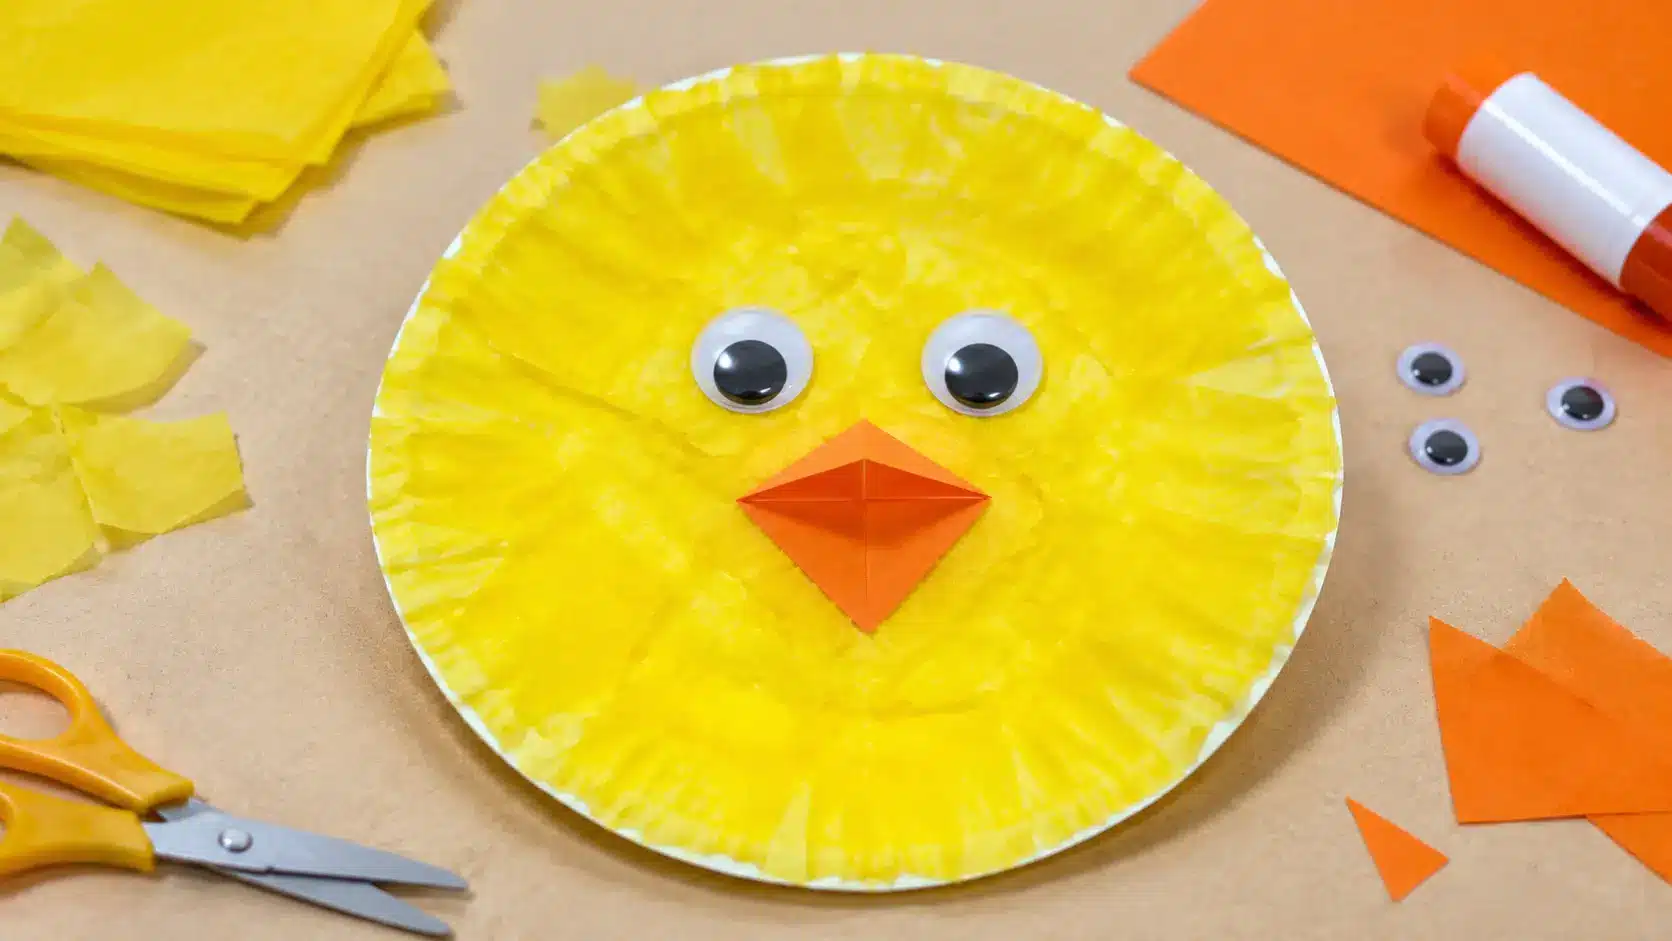
This cheerful chick is a simple craft for younger kids and works well with leftover supplies. I like making these because they are quick, colorful, and easy to display.
Materials and Tools: Paper plate, yellow tissue paper, glue, orange cardstock, scissors, googly eyes.
How to Make It:
- Tear yellow tissue paper into small pieces that are easy for little hands to manage.
- Apply a thin layer of glue across the paper plate and cover the surface with tissue pieces.
- Cut a small triangle from orange cardstock and fold it slightly to create a raised beak.
- Glue the beak and googly eyes onto the plate to make the chick’s face.
- Keep the plate flat until the glue dries and all pieces stay attached.
3. Woven Paper Basket
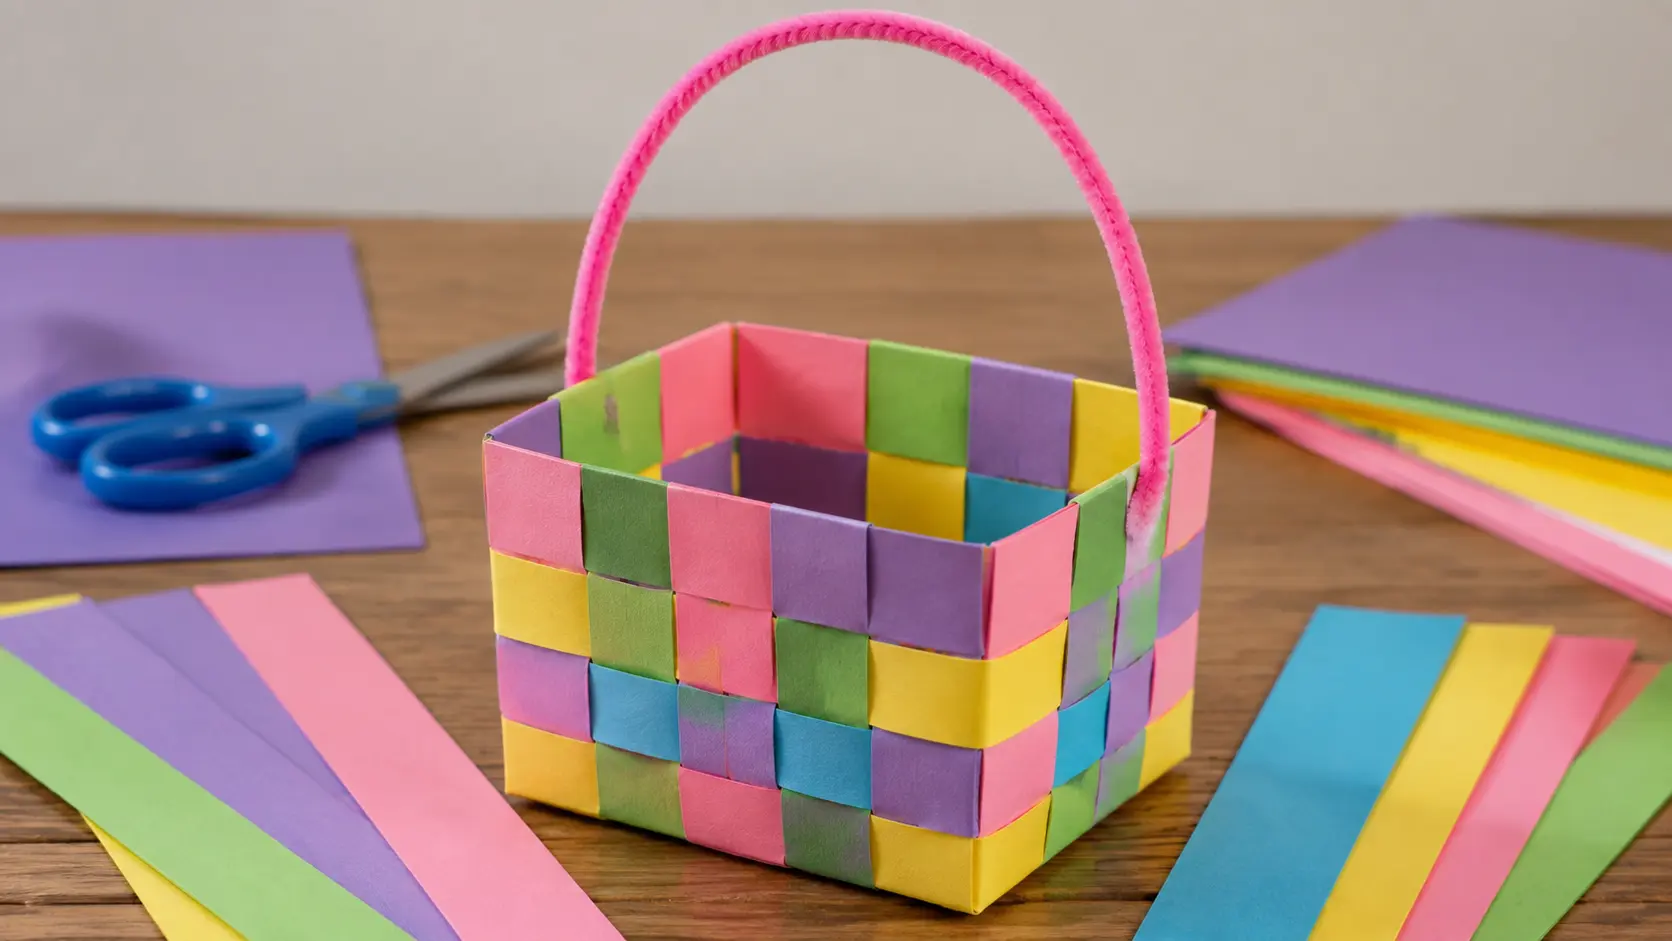
This basket needs a little patience, but the finished craft feels rewarding. I always use thicker cardstock because it creates a stronger shape that lasts longer.
Materials and Tools: Cardstock, colored paper strips, scissors, hole punch, pipe cleaner, glue.
How to Make It:
- Fold the cardstock in half to create the starting shape for your basket.
- Cut spaced slits evenly from the folded edge, stopping before reaching the opposite side.
- Cut colored paper strips and weave them over and under through the cardstock openings.
- Gently push each strip into place to keep the weave neat and secure.
- Punch holes near the top edges and thread a pipe cleaner through to create the handle.
4. Egg Carton Chicks
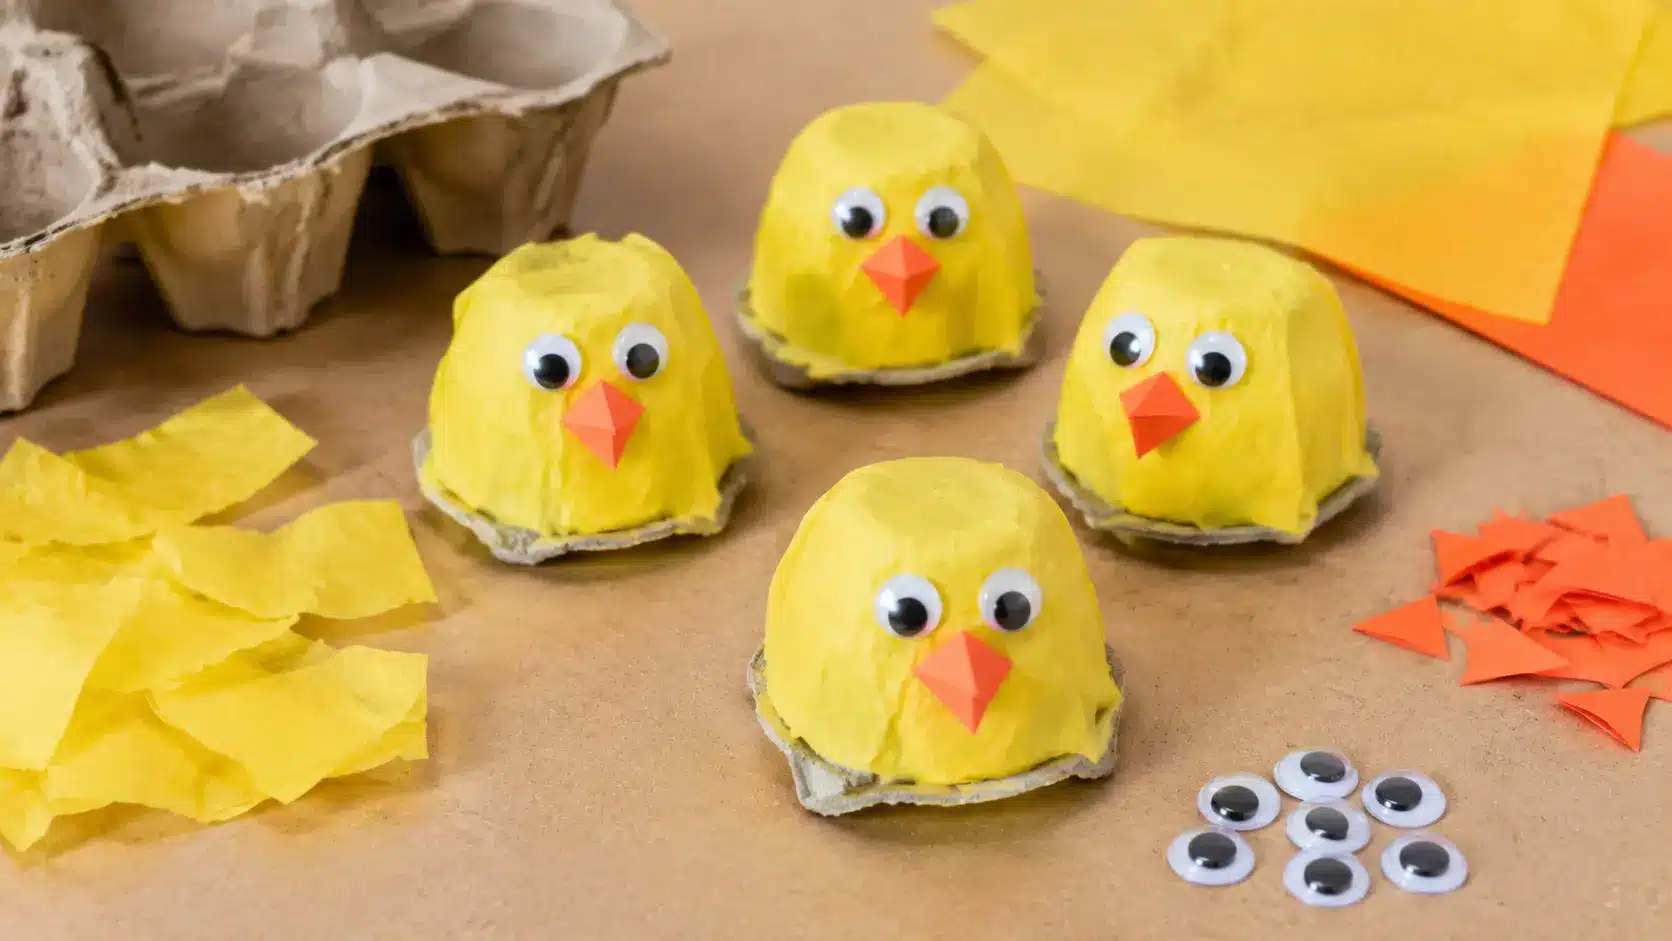
These tiny chicks are a fun way to reuse old egg cartons. I enjoy making several together because each one can have its own unique look.
Materials and Tools: Egg carton, yellow tissue paper or paint, orange paper, glue, scissors, googly eyes.
How to Make It:
- Cut individual cups from the egg carton and trim the edges so they look neat.
- Cover each cup with yellow tissue paper or paint the outside yellow.
- Cut small orange triangles from paper and glue them onto the front as beaks.
- Add googly eyes above the beaks to complete the chick’s face.
- Leave the chicks standing upright until all parts are dry and secure.
5. Paper Bag Basket
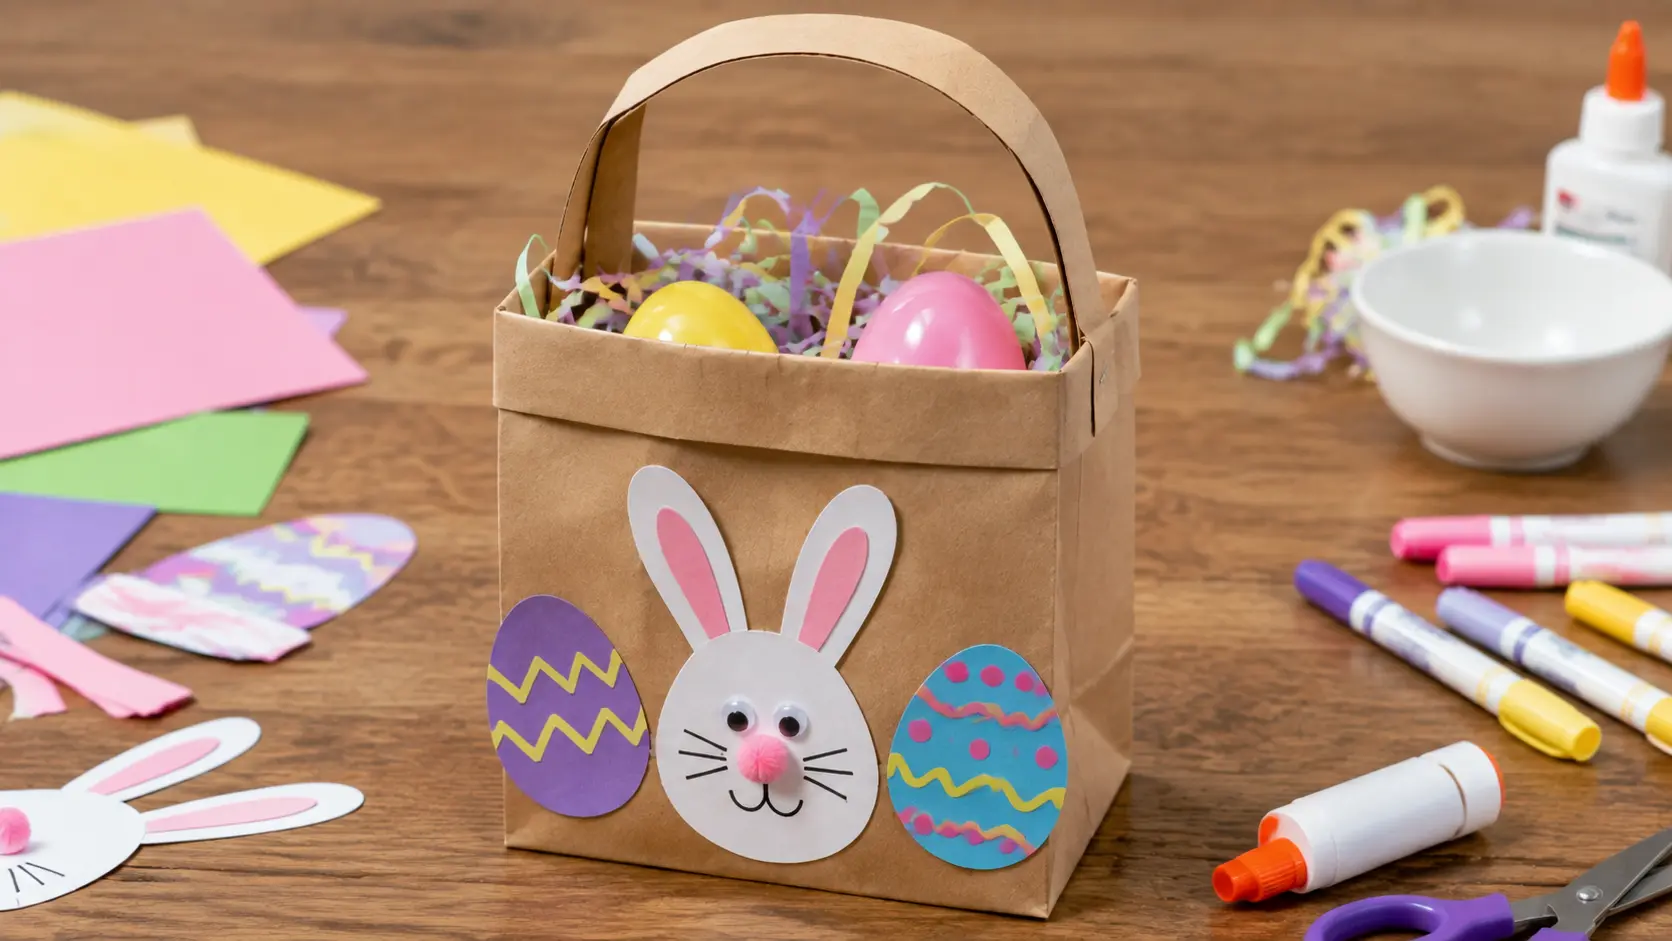
A paper bag basket is a practical Easter craft that kids can decorate easily. I like this option because it uses simple materials and holds small treats well.
Materials and Tools: Paper lunch bag, scissors, stapler, colored paper, glue, markers.
How to Make It:
- Fold the top part of the paper bag down two or three times to create a stronger rim.
- Cut a strip from the folded paper section to use as the handle.
- Attach the handle to opposite sides of the bag using a stapler.
- Decorate the front with paper eggs, bunny shapes, or drawings.
- Allow any decorations to dry before placing treats inside the basket.
6. Pipe Cleaner Antennae Headband
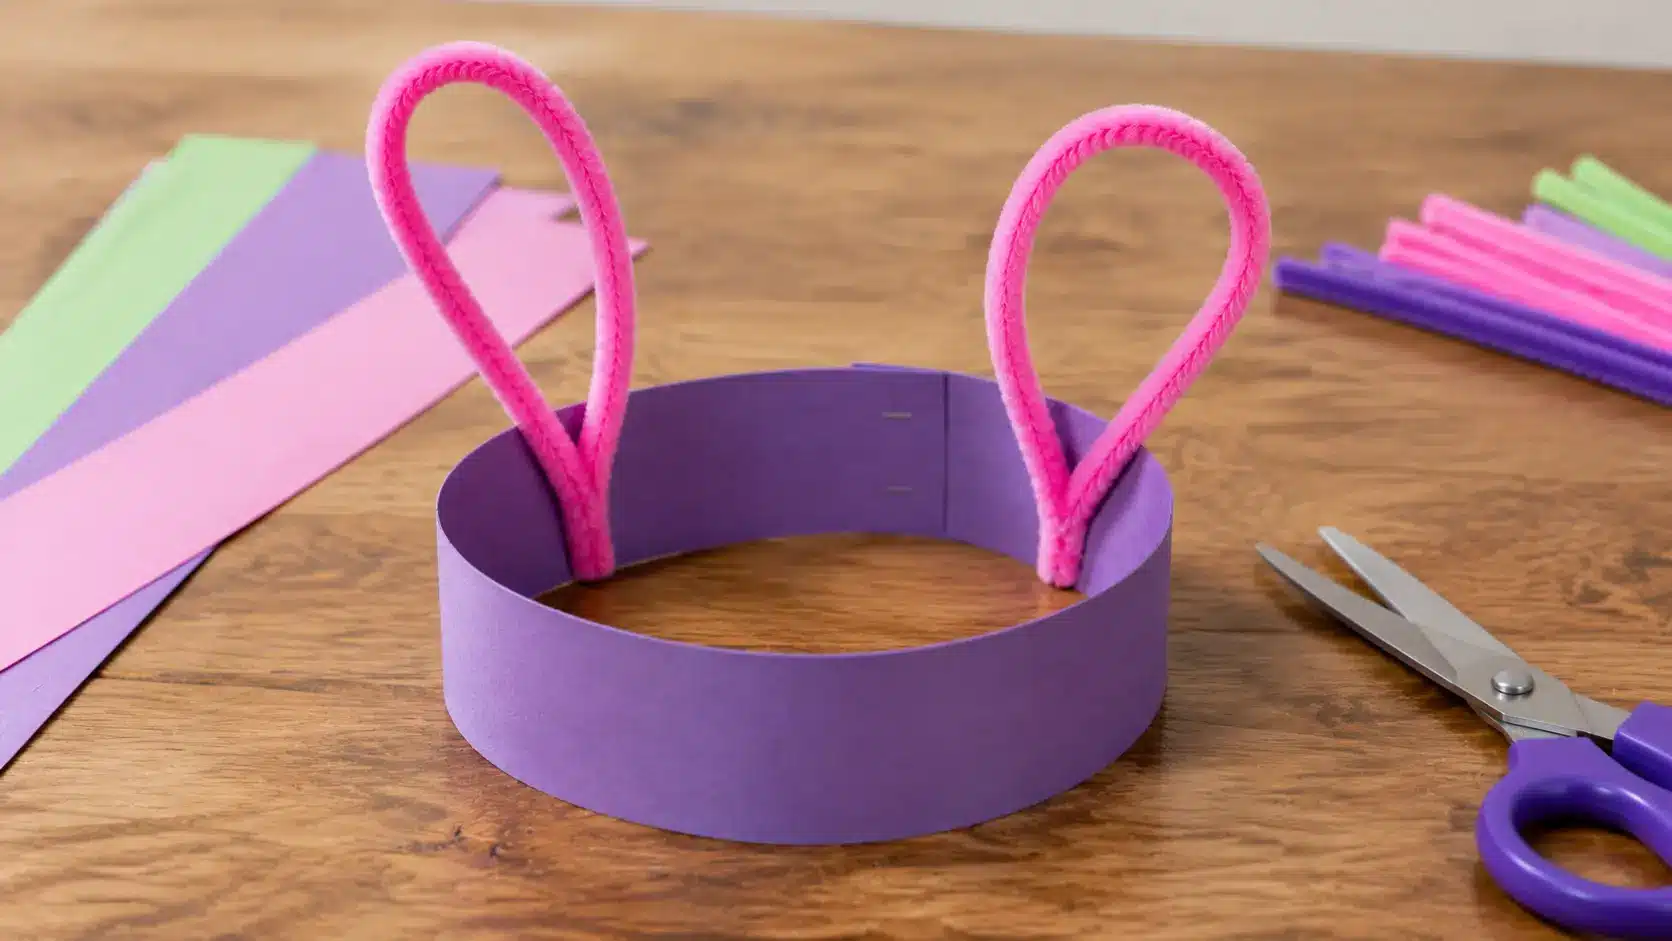
This headband is a fun choice for Easter dress-up and pretend play. I like this craft because kids can shape the pipe cleaners however they want.
Materials and Tools: Cardstock, pipe cleaners, scissors, stapler or tape.
How to Make It:
- Cut a strip of cardstock long enough to fit comfortably around your child’s head.
- Join the ends together using tape or staples to create the headband base.
- Twist two pipe cleaners into loops, ears, or antenna shapes.
- Attach the pipe cleaners to the inside of the headband so they stay upright.
- Adjust the placement until the headband fits comfortably.
7. Paper Chain Garland
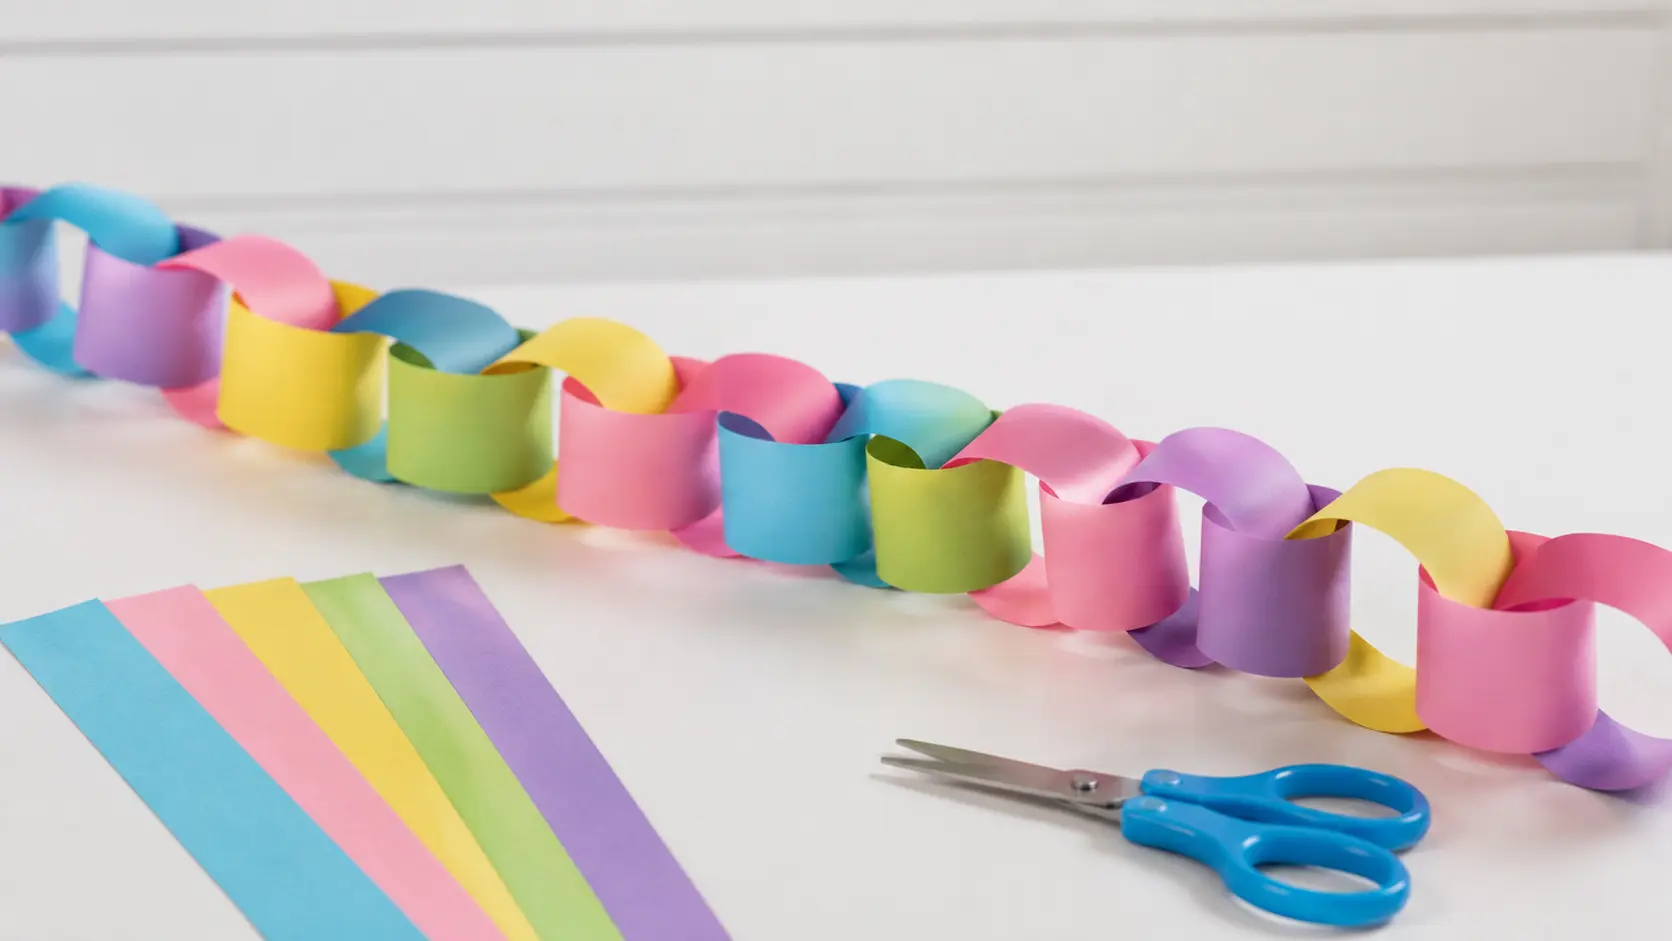
Paper chain garlands are simple decorations that keep kids busy with minimal supplies. I like this craft because children can choose colors and create different patterns.
Materials and Tools: Colored paper, scissors, glue, ruler.
How to Make It:
- Measure and cut colored paper into equal strips about one inch wide.
- Take one strip, form a circle, and glue the ends together.
- Thread the next strip through the first loop before joining its ends.
- Continue adding paper loops until the chain reaches your preferred length.
- Hang the finished garland around a room, doorway, or craft area.
8. Clothespin Bunnies
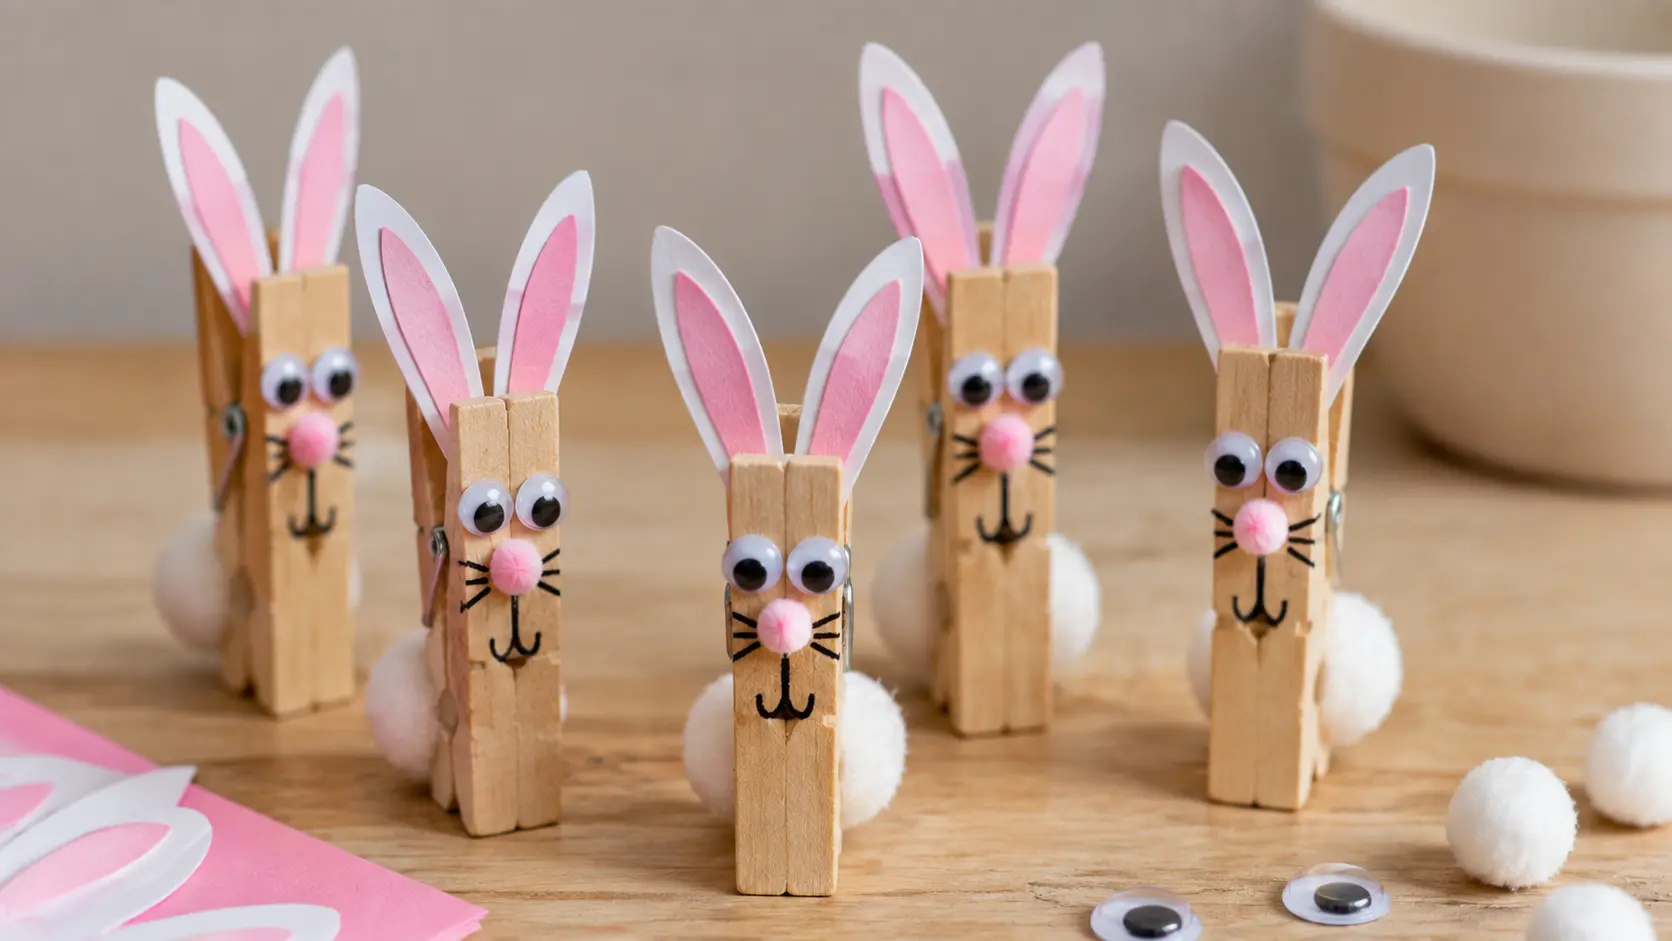
These small bunnies are perfect for decorating baskets, gifts, or shelves. I like leaving some clothespins unpainted because the natural wood gives them a simple look.
Materials and Tools: Wooden clothespins, paper or felt, glue, scissors, googly eyes, cotton balls.
How to Make It:
- Cut two small bunny ears from paper or felt.
- Apply glue to the bottom of the ears and attach them to the clothespin.
- Add googly eyes to the front and glue a cotton ball on the back as a tail.
- Wait until the glue dries completely before using the bunny decoration.
9. Cardboard Egg Stand-Up
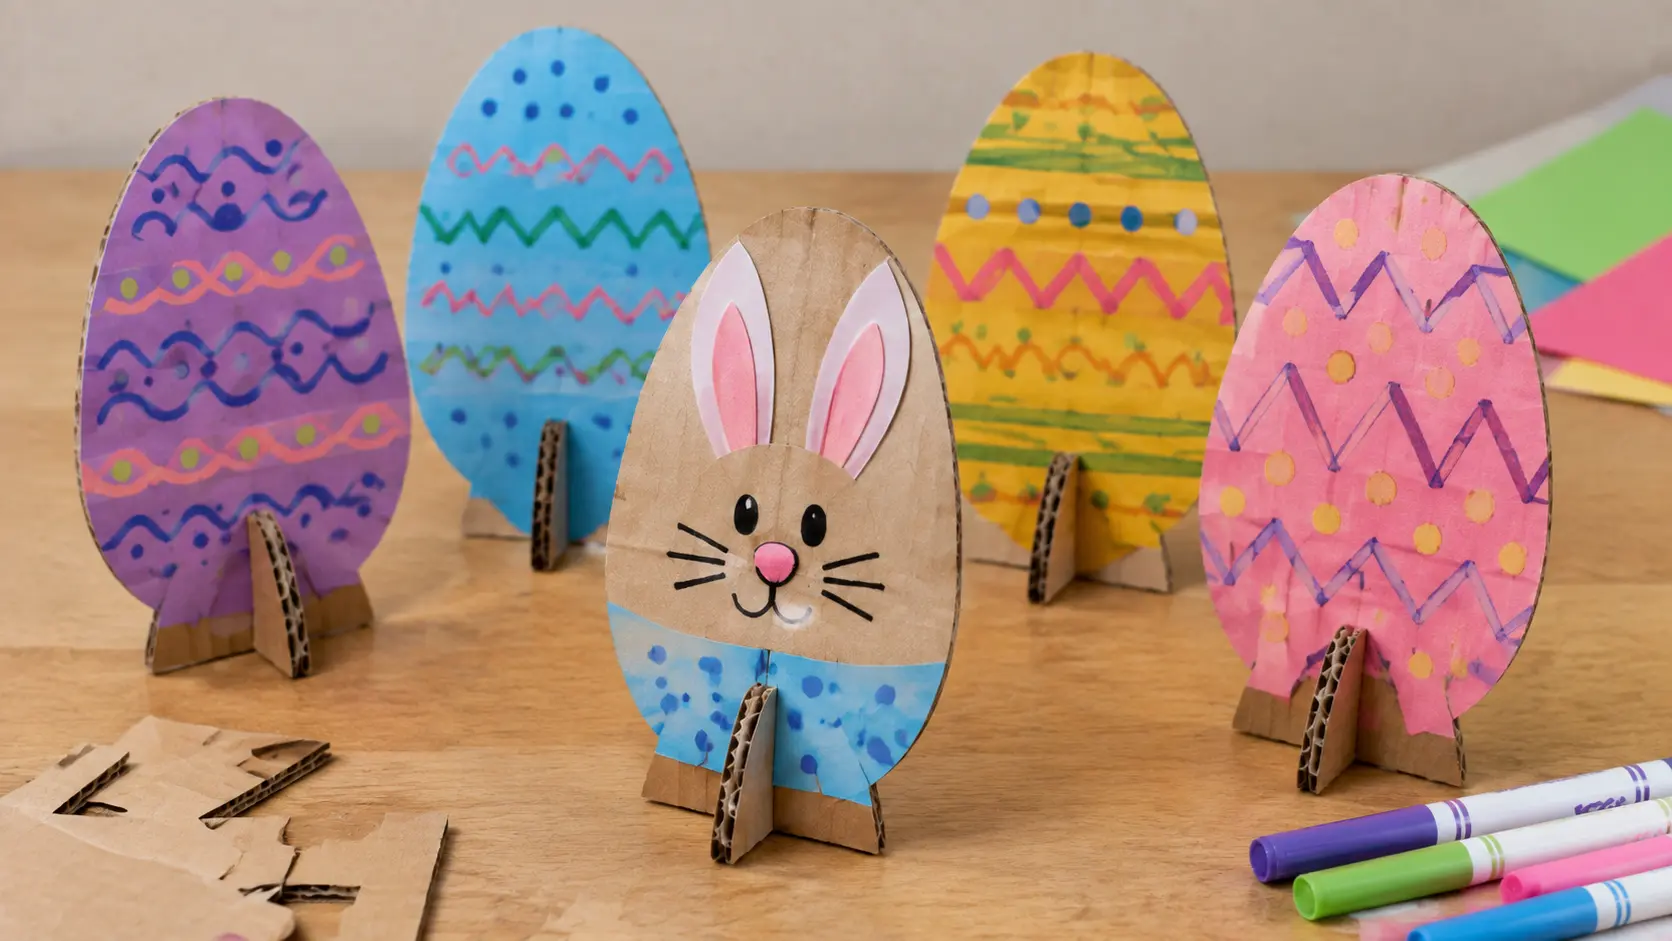
This standing egg decoration is easy to customize with different designs. I enjoy making these because they work well as simple Easter table decorations.
Materials and Tools: Cardboard, pencil, scissors, markers, paint or paper cutouts, glue.
How to Make It:
- Place a real egg or bowl on cardboard and trace around it to create the egg shape.
- Carefully cut out the cardboard egg using scissors.
- Fold a small tab at the bottom forward to create a stand.
- Decorate the front using markers, paint, or paper cutout designs.
- Wait until any wet decorations dry before placing the egg upright.
Painted and Keepsake Easter Crafts
These crafts take more time because paint and dough need drying, but I like them for keepsakes. The finished pieces are special because they capture small memories.
10. Handprint Bunnies
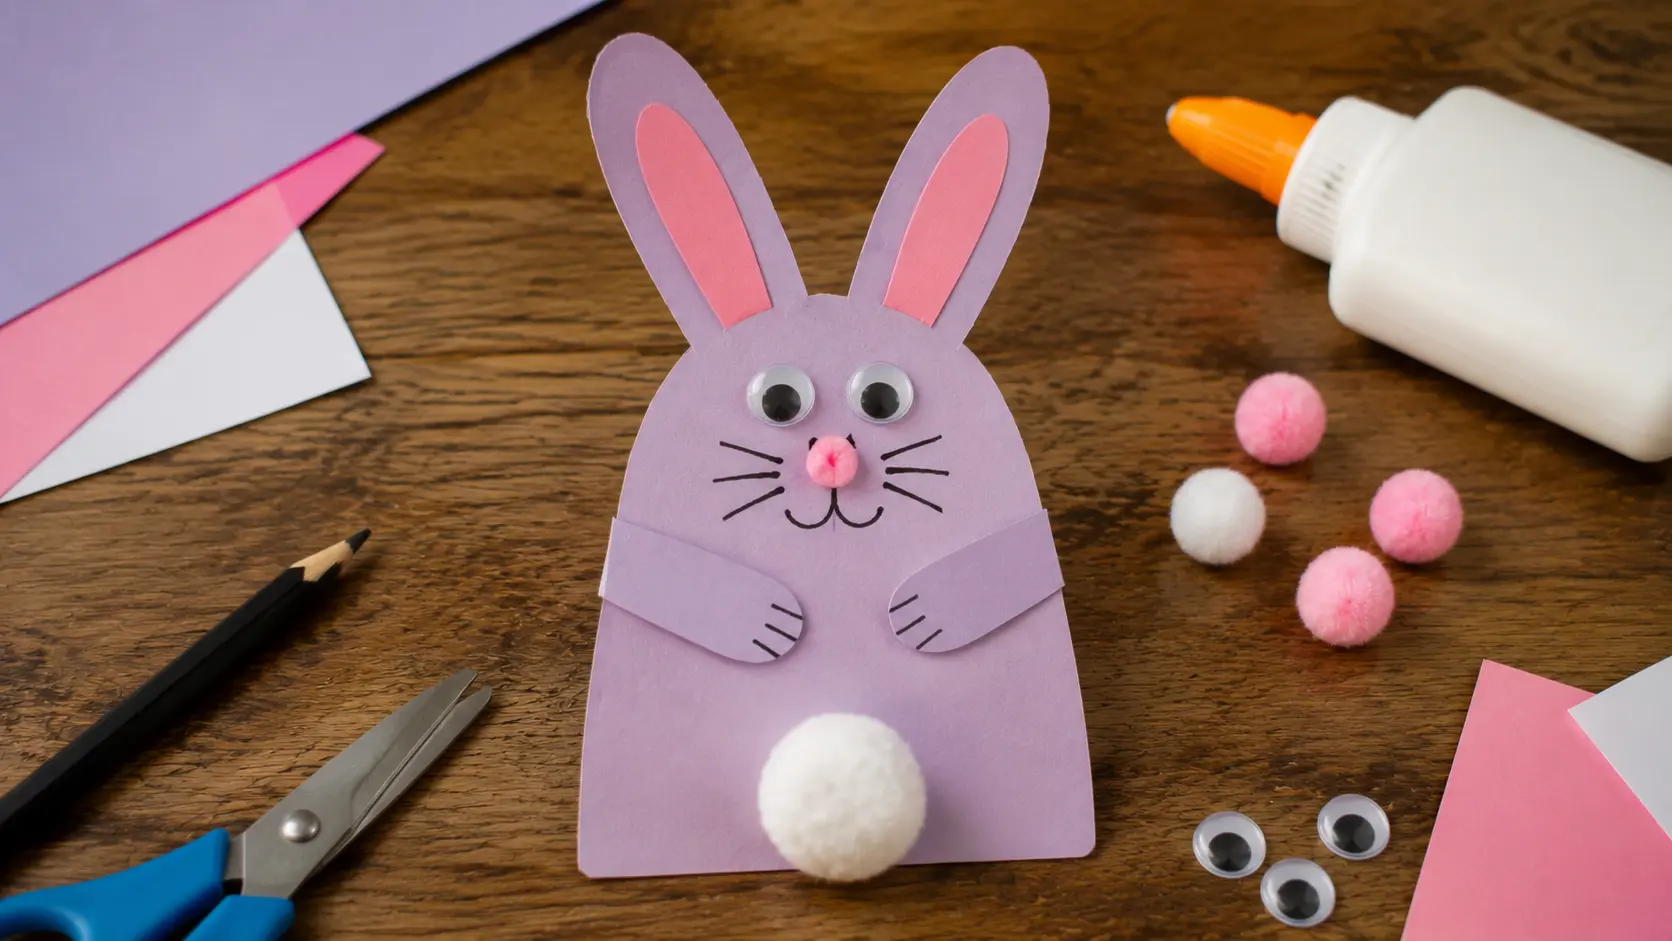
Handprint bunnies are a sweet keepsake craft because they preserve a child’s hand shape. I like making these with different colors because each one feels personal.
Materials and Tools: Cardstock, pencil, scissors, glue, markers, pom-pom, googly eyes.
How to Make It:
- Place your child’s hand flat on cardstock with fingers spread apart and trace around the entire shape.
- Fold the outer two fingers down to create the bunny’s arms.
- Trim the middle finger slightly so the two remaining fingers look like long bunny ears.
- Cut out the hand shape carefully and add eyes, a nose, and facial details.
- Glue a small pom-pom on the back as the bunny’s tail.
11. Potato Stamp Eggs
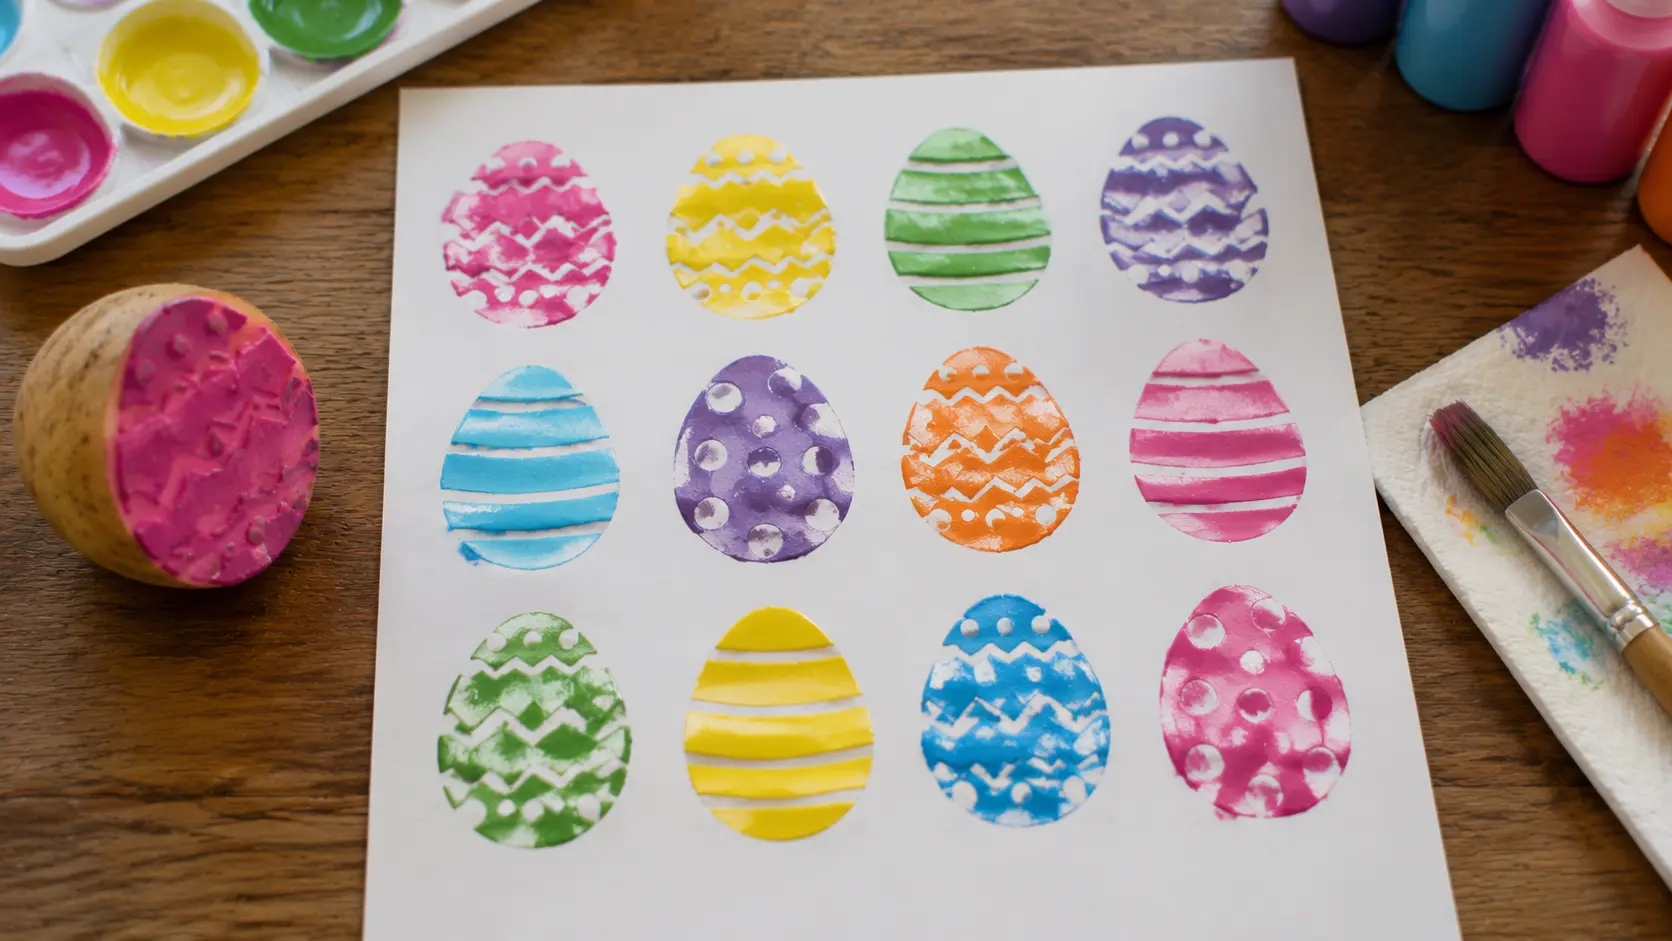
Potato stamp eggs are a fun way to create repeated patterns without complicated tools. I like this craft because kids can experiment with different colors easily.
Materials and Tools: Potato, knife, paint, paper, paint tray, paper towel.
How to Make It:
- Cut a potato in half to create a flat surface for stamping.
- Carve a simple egg shape into the cut side of the potato.
- Dip the potato stamp lightly into paint until the surface is covered evenly.
- Press the stamp onto paper to create egg patterns.
- Wipe away extra paint between stamps to keep each print clear.
12. Footprint Chicks
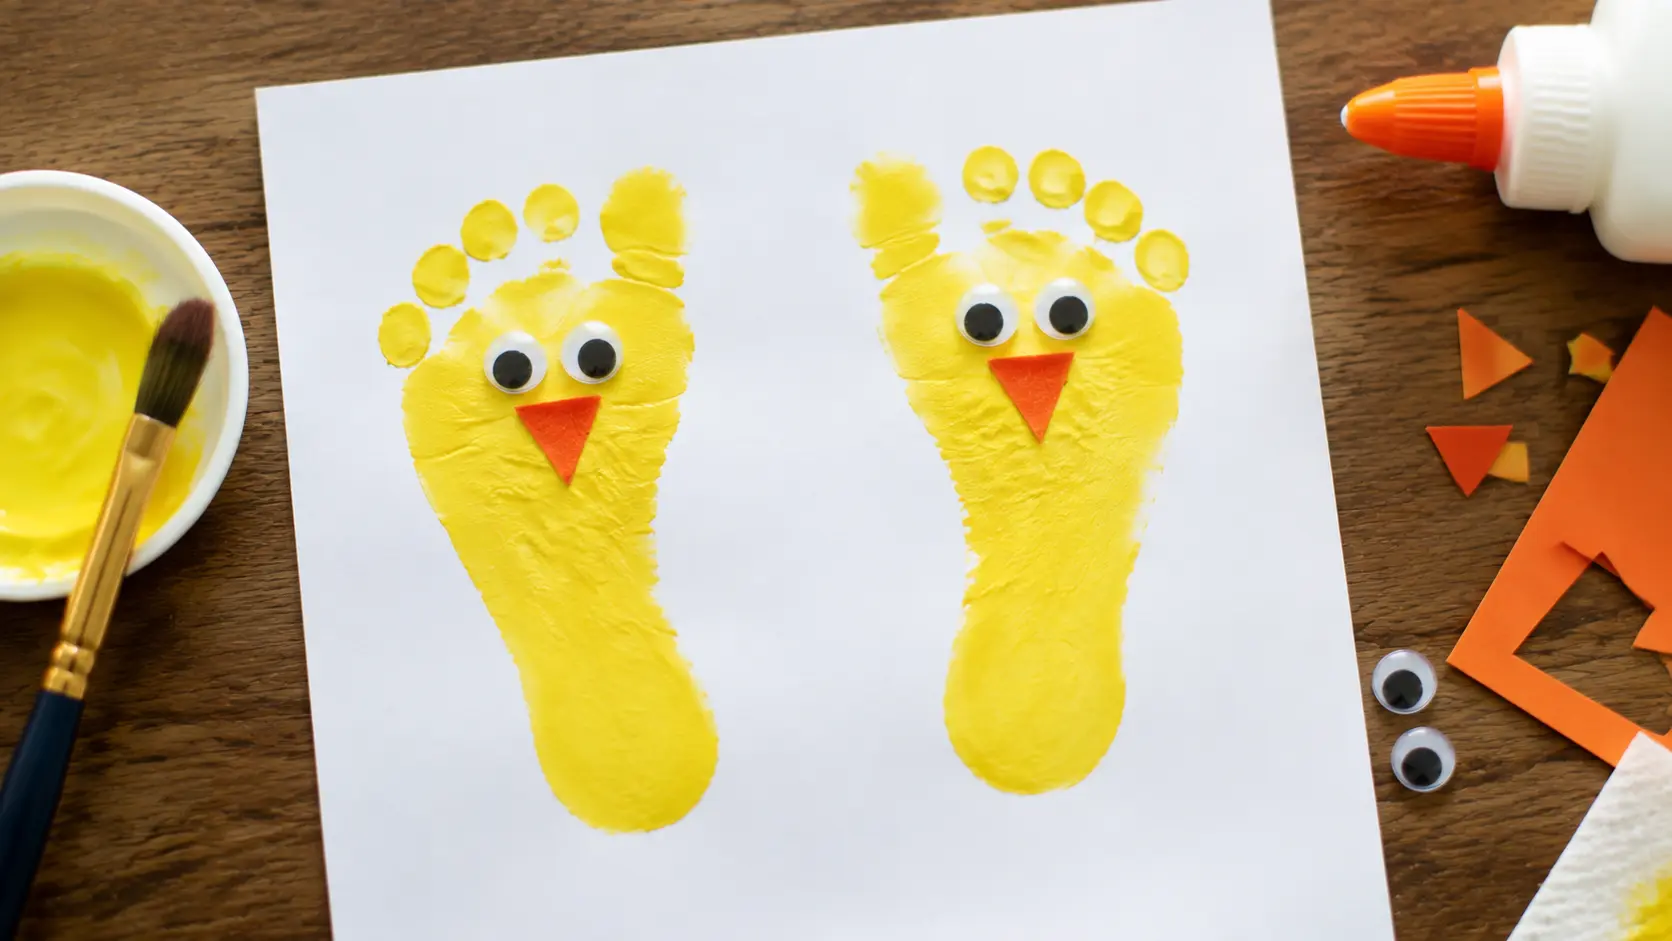
Footprint chicks make a memorable Easter keepsake because they capture a child’s tiny footprint. I like adding simple details after drying to keep the shape neat.
Materials and Tools: Yellow paint, paintbrush, paper, orange paper, googly eyes.
How to Make It:
- Apply yellow paint evenly across the sole of your child’s foot.
- Press the painted foot gently onto paper to create the chick shape.
- Lift the foot carefully and allow the print to dry completely.
- Cut a small orange triangle and glue it on as the beak.
- Add googly eyes to complete the chick’s face.
13. Marbled Eggs
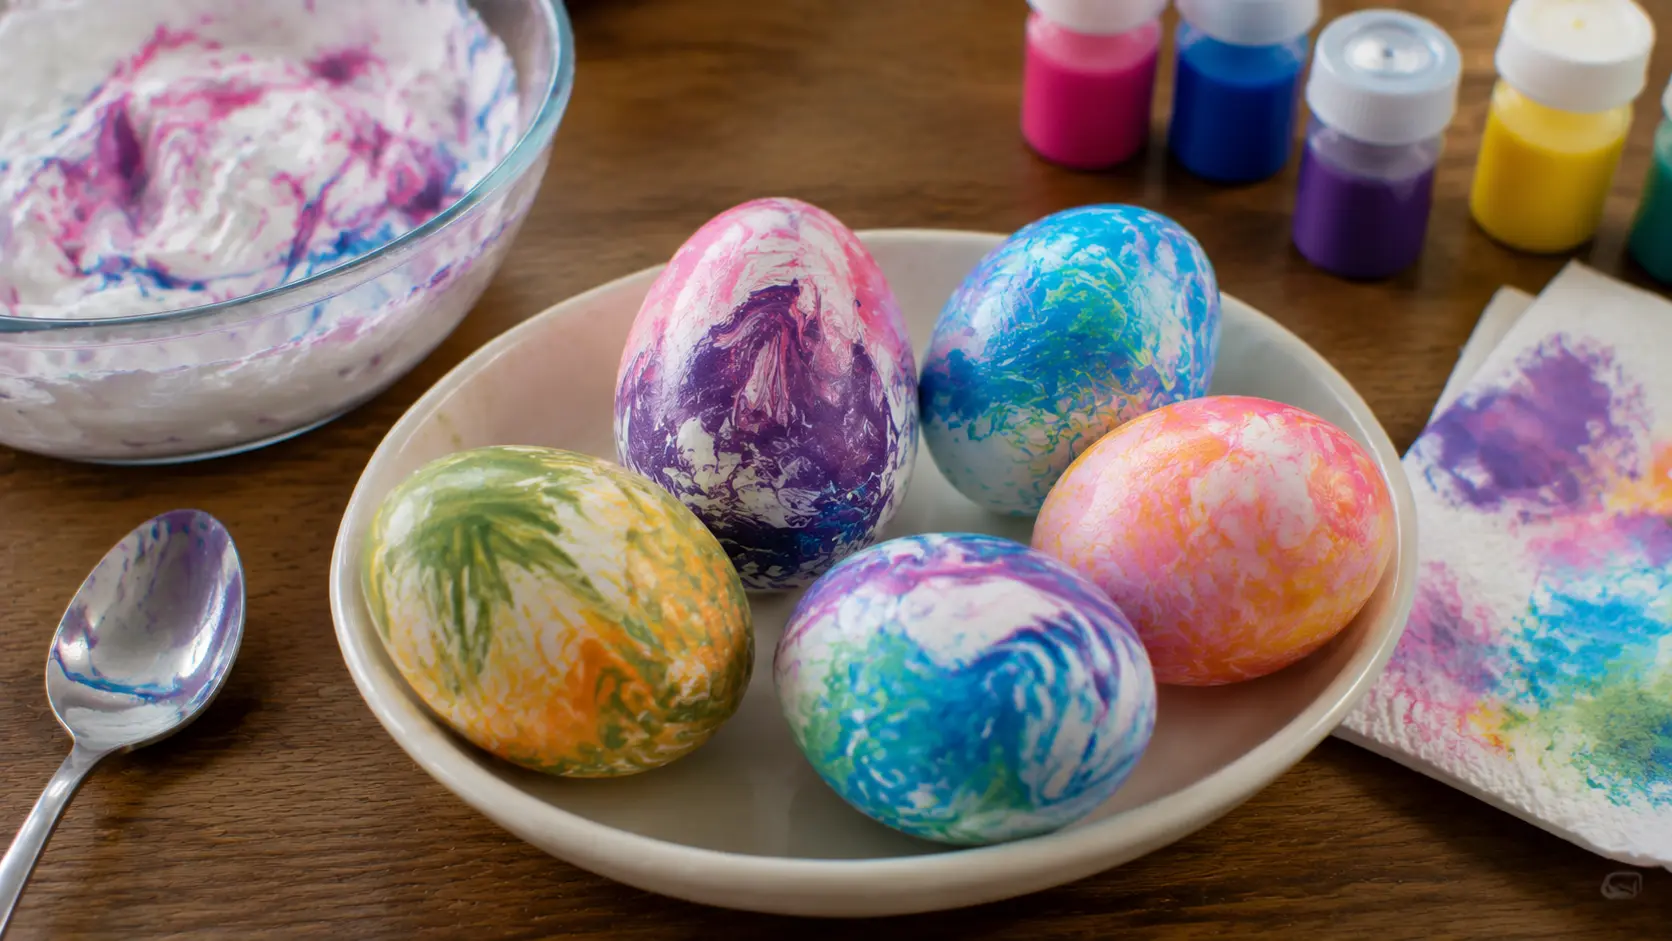
Marbled eggs create unique patterns that make each decoration look different. I enjoy this craft because no two eggs turn out exactly the same.
Materials and Tools: Hard-boiled eggs, shaving cream, food coloring or paint, cup, spoon, paper towel.
How to Make It:
- Fill a cup or container with shaving cream and smooth the surface.
- Add drops of food coloring or paint and gently swirl the colors together.
- Roll the hard-boiled egg through the mixture until the surface is covered.
- Let the egg sit for a few minutes so the color sets.
- Carefully wipe away the extra shaving cream to reveal the pattern.
14. Salt Dough Eggs
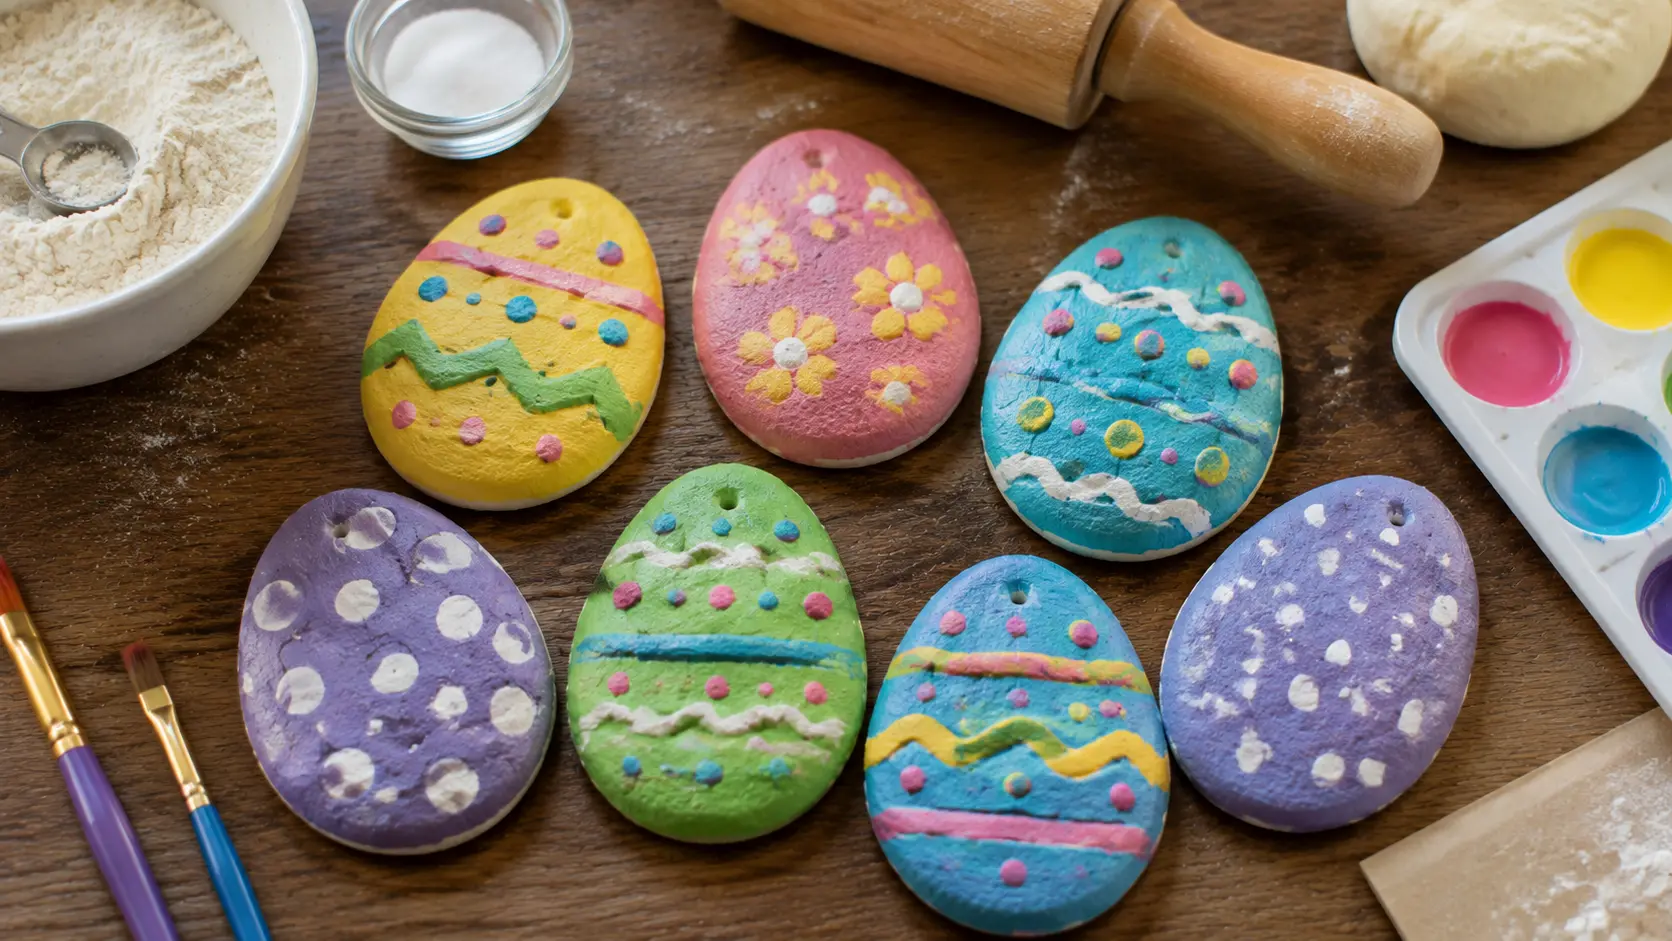
Salt dough eggs are a craft worth saving because they become sturdy decorations. I like making these because kids can shape and paint their own designs.
Materials and Tools: Flour, salt, water, mixing bowl, rolling pin, cookie cutter or knife, paint.
How to Make It:
- Mix flour, salt, and water together until a firm dough forms.
- Knead the dough until it becomes smooth and easy to shape.
- Shape the dough into small egg forms using your hands.
- Bake the eggs according to your dough recipe until they harden completely.
- Allow them to cool fully before painting and decorating.
15. Fingerprint Flowers
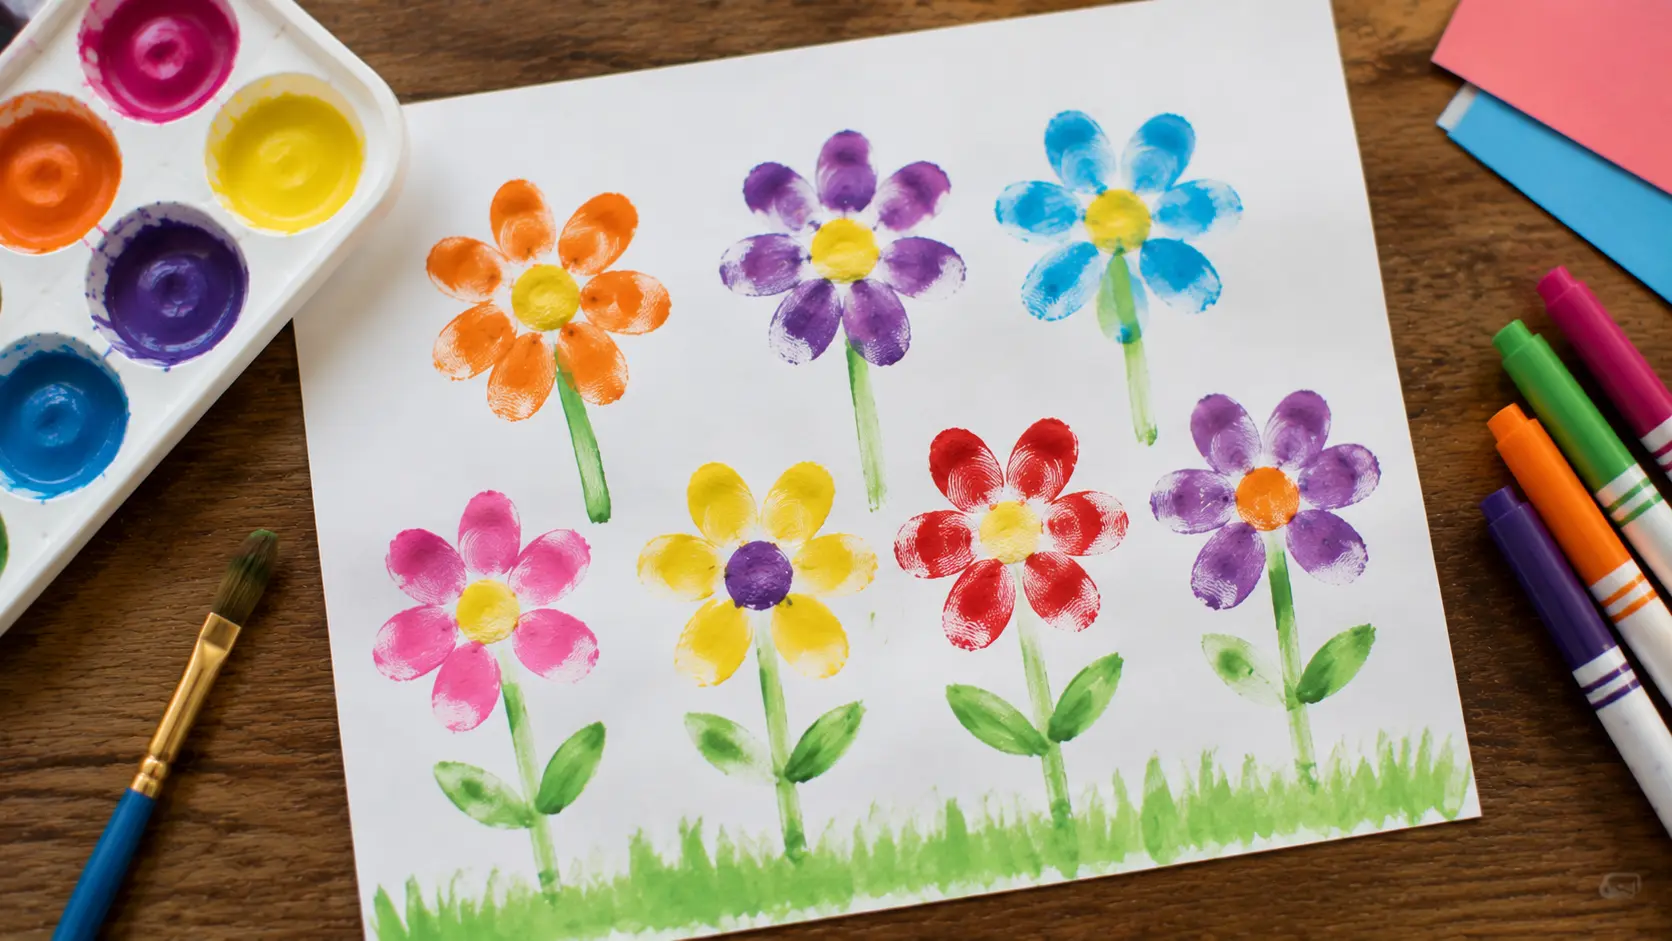
Fingerprint flowers are simple keepsakes that show a child’s creativity. I like this craft because small fingerprints turn into colorful flower designs.
Materials and Tools: Paint, paper, paint palette, markers, paintbrush.
How to Make It:
- Dip a fingertip into paint and press it onto paper to create flower petals.
- Add several fingerprints in a circle to complete the flower shape.
- Place another fingerprint in the center using a different color.
- Wait until the paint dries before adding stems and leaves.
- Draw stems and leaves with markers or paint to finish the design.
16. Yarn-Wrapped Eggs
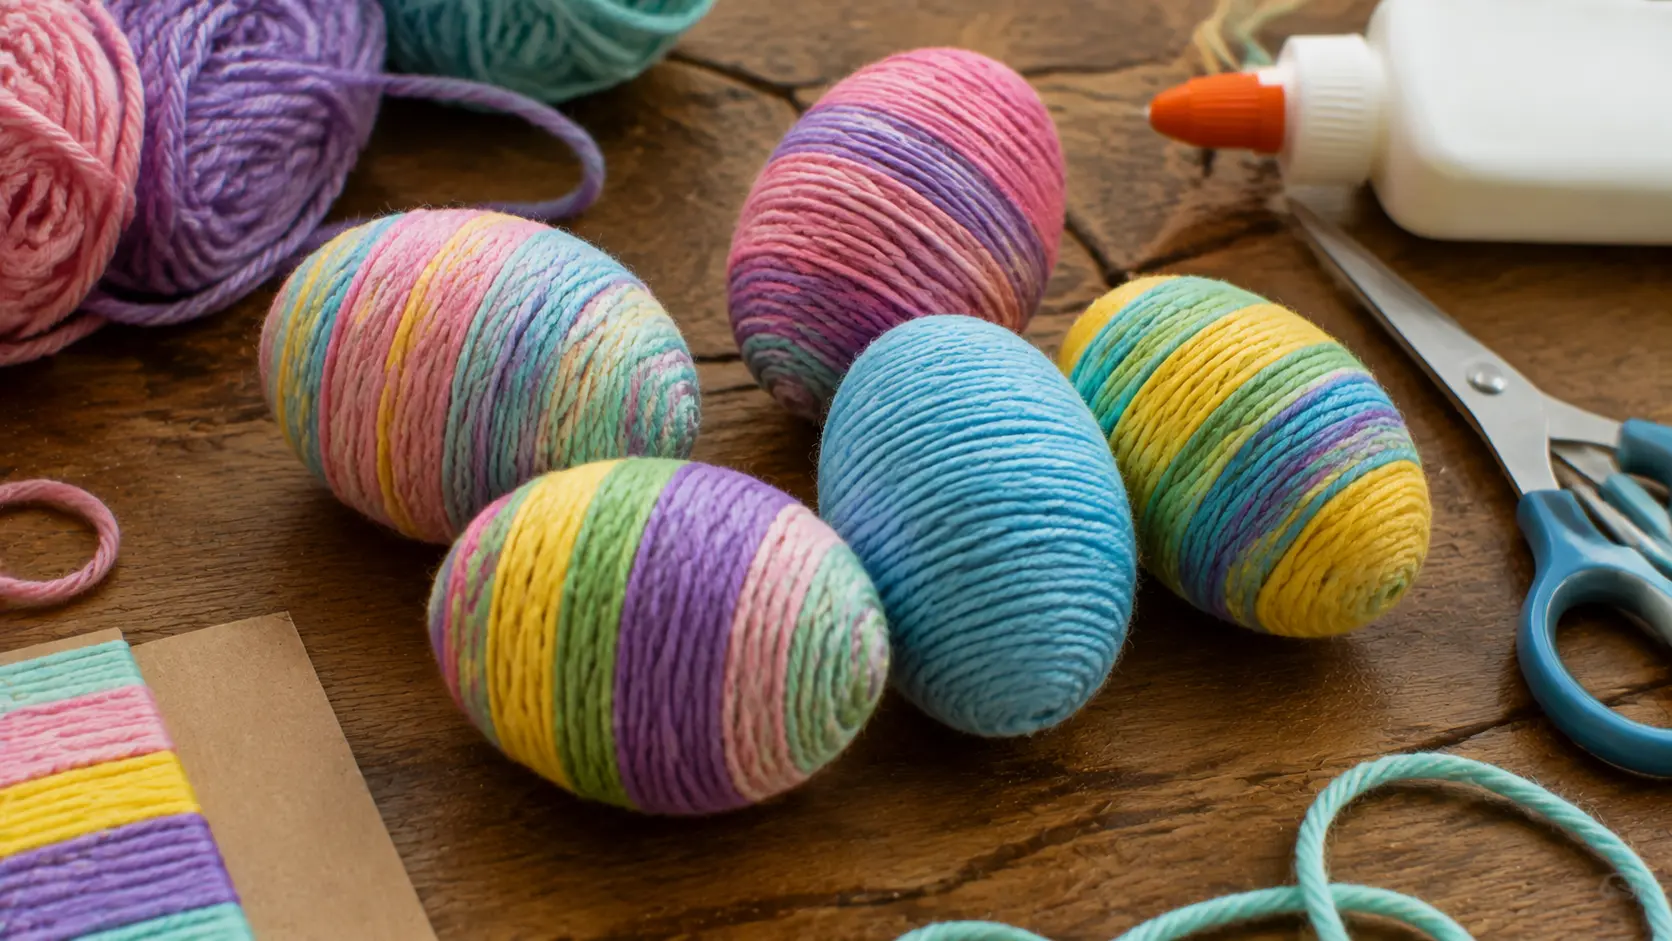
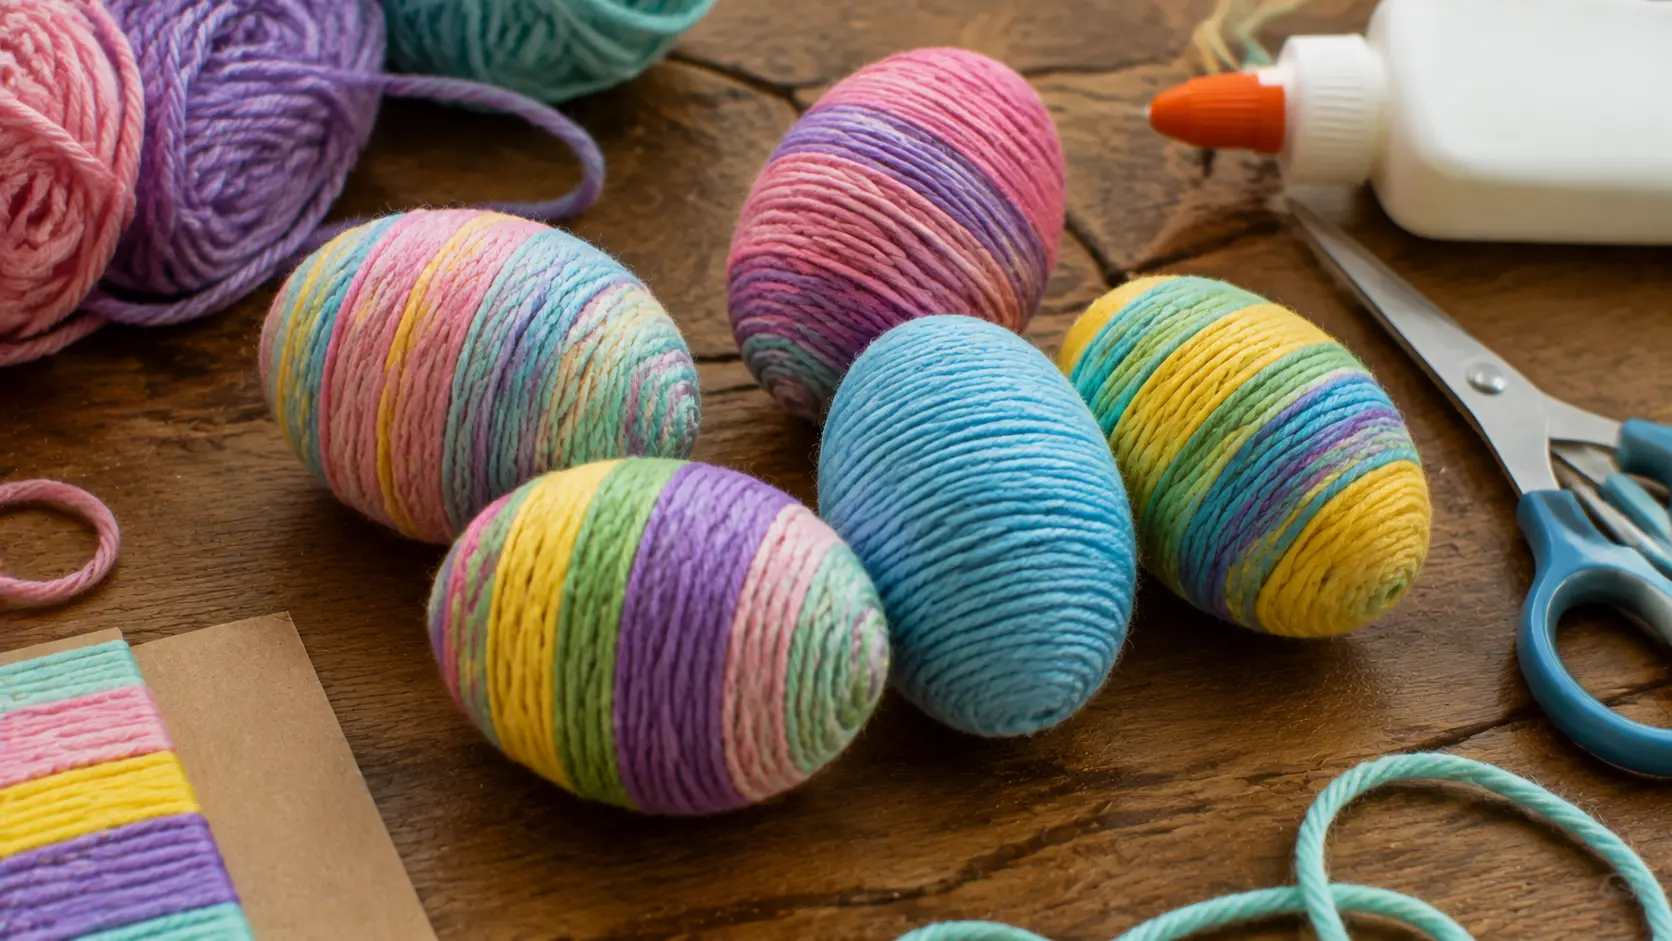
Yarn-wrapped eggs add texture and make simple decorations look more detailed. I like this craft because kids can choose different yarn colors.
Materials and Tools: Foam egg or hard-boiled egg, yarn, glue, scissors.
How to Make It:
- Apply a thin layer of glue to a small section of the egg surface.
- Start wrapping yarn around the egg, keeping each layer close together.
- Continue adding glue and wrapping yarn until the entire egg is covered.
- Tuck the loose yarn end under a wrapped section to secure it.
- Let the egg dry completely before displaying it.
17. Splatter Paint Eggs
Splatter paint eggs are messy in a fun way and create colorful designs. I like using this craft when kids want something creative without exact patterns.
Materials and Tools: Paper, pencil, scissors, paint, paintbrush, protective surface.
How to Make It:
- Draw and cut an egg shape from paper.
- Place the paper egg on a surface where paint splashes are easy to clean.
- Dip a brush into thin paint and flick it gently over the paper.
- Allow each paint color to dry slightly before adding another layer.
- Let the finished egg dry completely before displaying it.
18. Thumbprint Bunny Cards
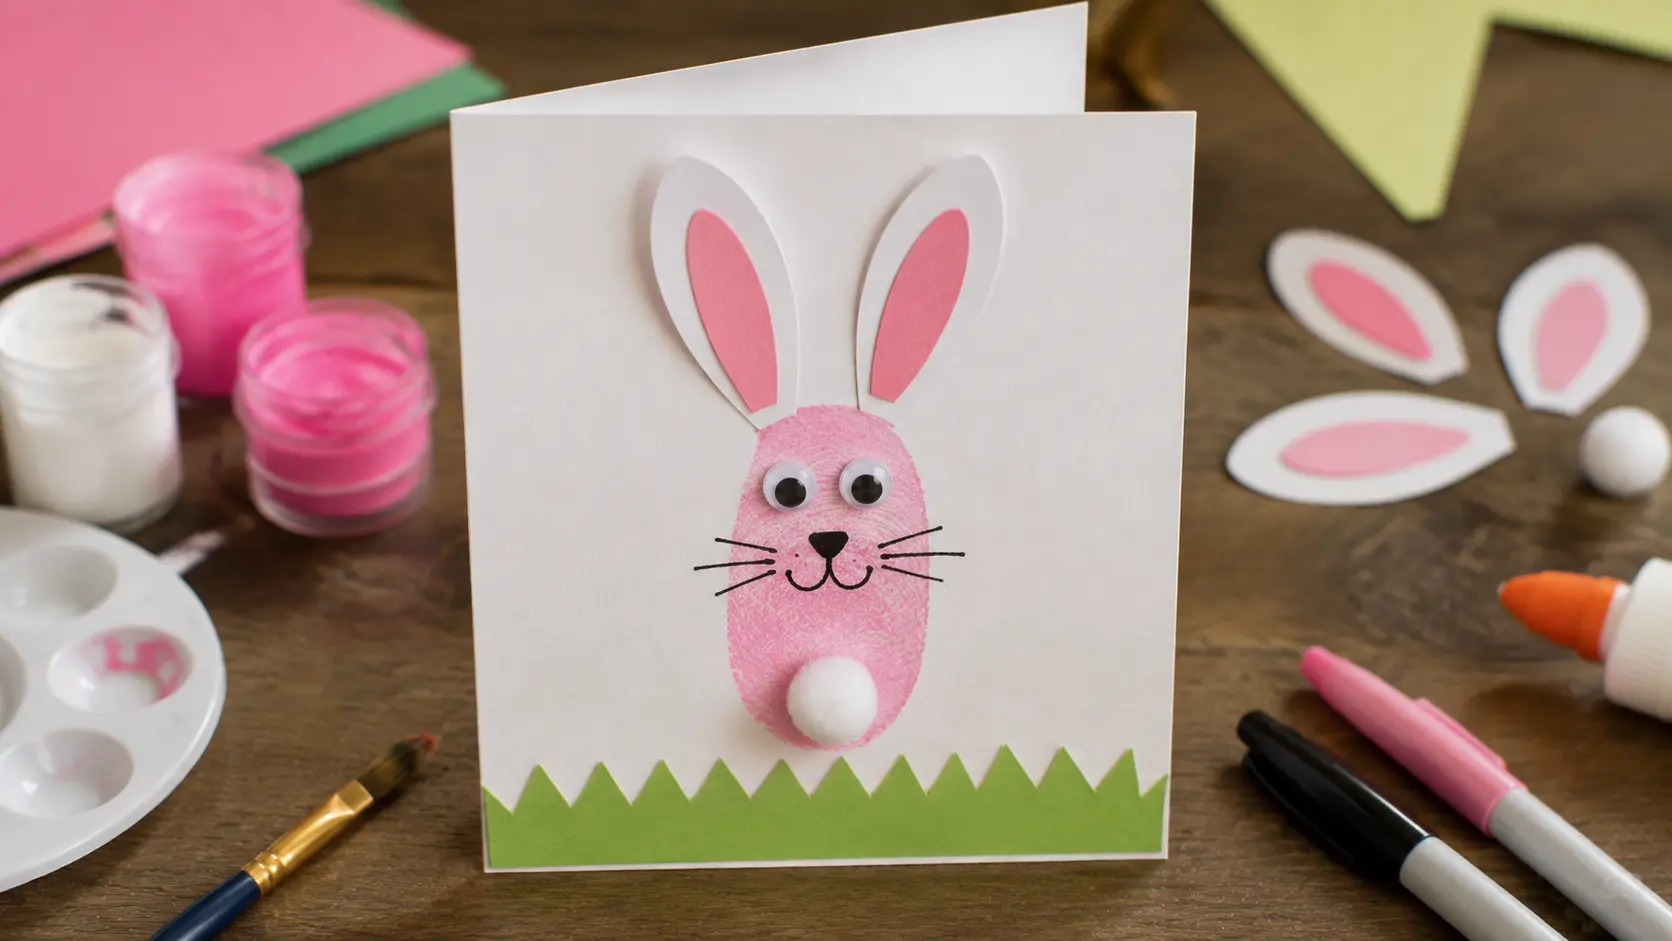
Thumbprint bunny cards make thoughtful handmade gifts because they include a child’s tiny fingerprint. I like saving these cards as simple holiday memories.
Materials and Tools: Cardstock, paint, paintbrush, markers, glue, paper cutouts.
How to Make It:
- Fold a piece of cardstock in half to create the card base.
- Dip a thumb into paint and press it onto the front of the card.
- Wait until the thumbprint dries completely before adding details.
- Draw or glue on bunny ears, eyes, and facial features.
- Add a small tail using paint or a paper cutout.
Nature and outdoor Easter crafts
19. Twig and Yarn Nests
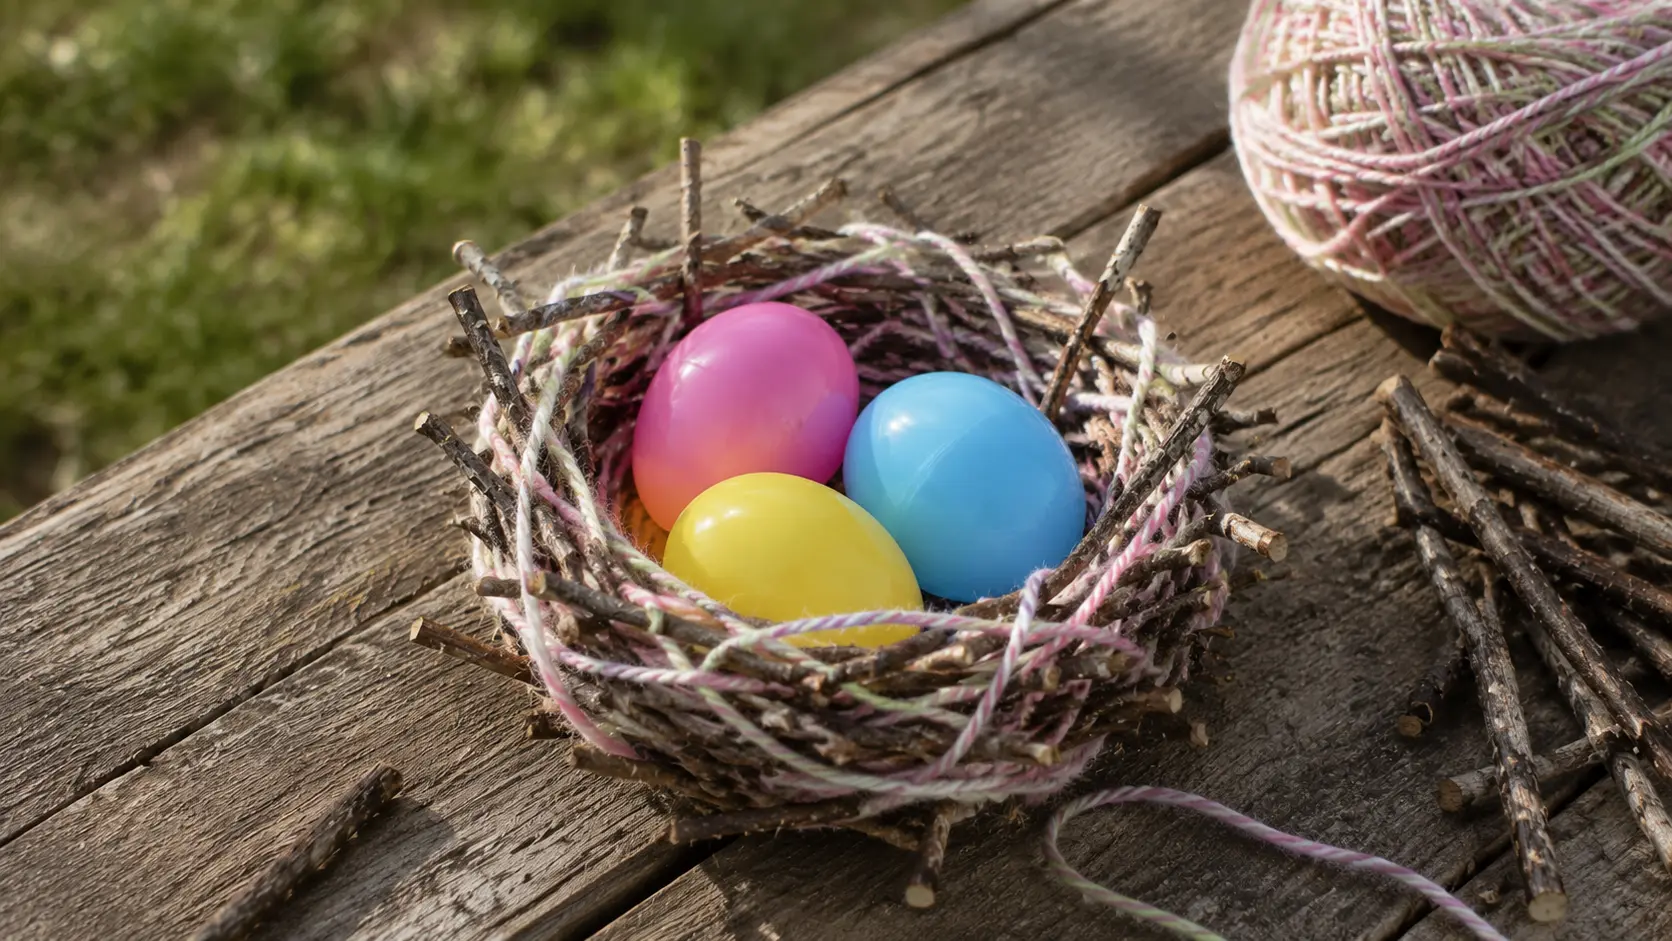
This craft turns a simple outdoor walk into a creative activity. I like collecting twigs with kids because finding the right pieces becomes part of the fun.
Materials and Tools: Small twigs, yarn, scissors, plastic or real eggs.
How to Make It:
- Collect small twigs from outside and arrange them into a loose circle to create the base of the nest.
- Hold the twigs together and wrap yarn around them in different directions to keep the shape secure.
- Tuck the loose yarn ends underneath wrapped sections, so they stay hidden and help hold the nest together.
- Place plastic or real eggs inside once the nest feels sturdy enough to display.
20. Leaf-Print Eggs
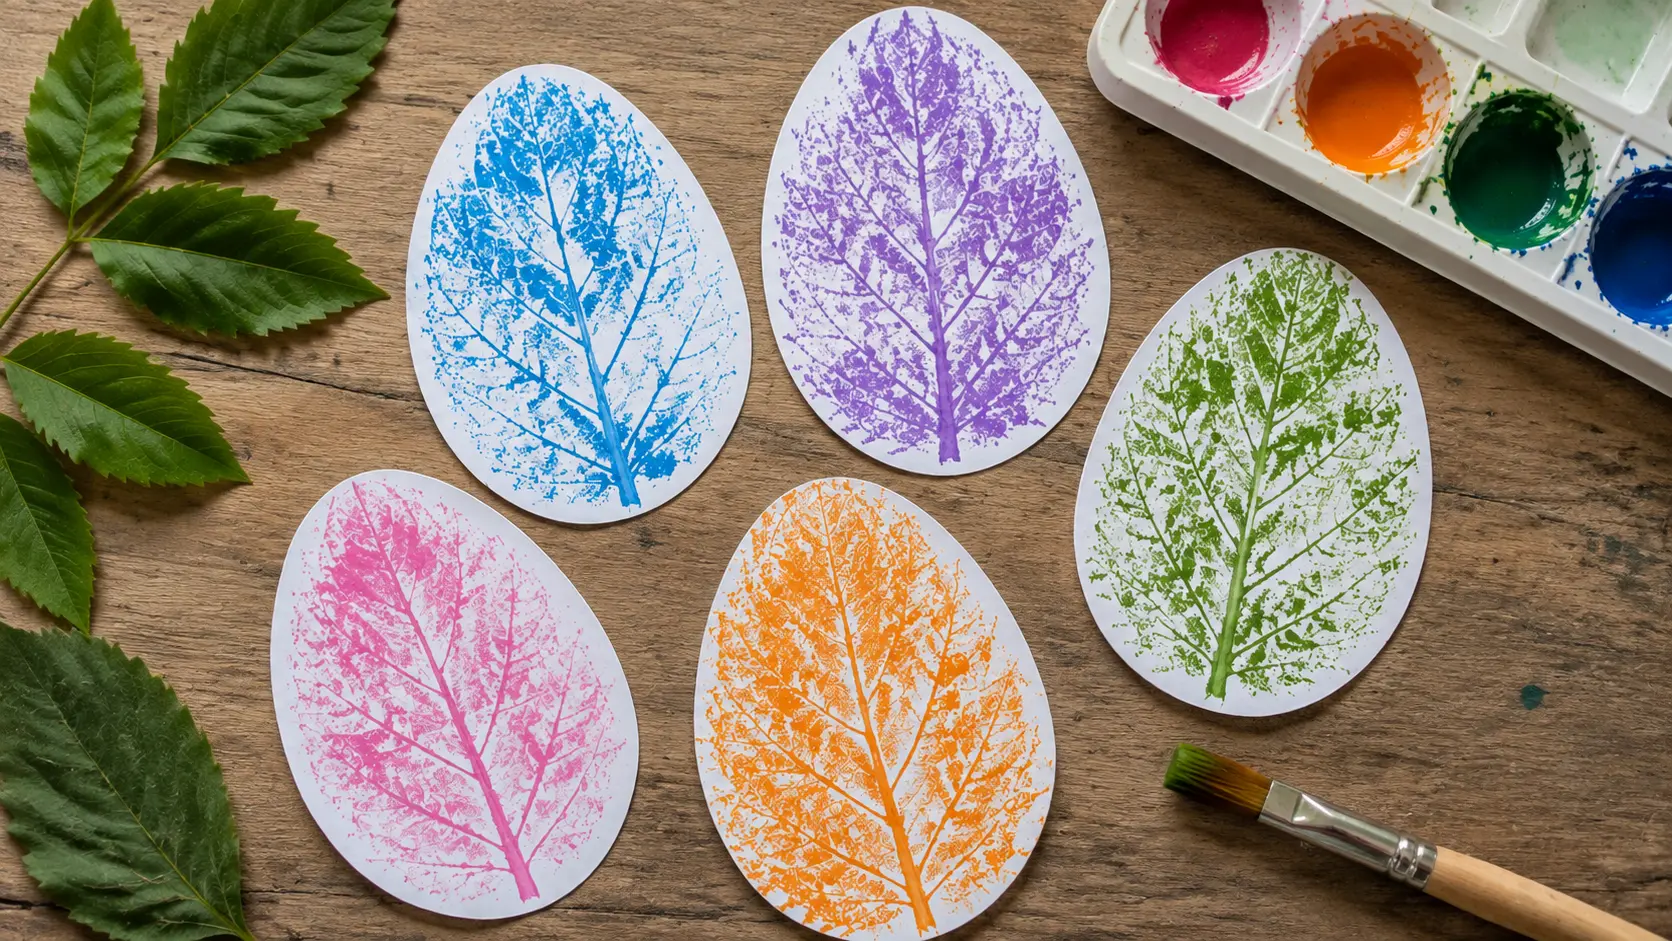
Leaf-print eggs are a nice way to bring outdoor finds into craft time. I enjoy using different leaves because each print creates a slightly different pattern.
Materials and Tools: Flat leaves, paint, paintbrush, egg-shaped paper cutouts, paper towel.
How to Make It:
- Collect flat leaves with clear vein patterns that will create visible prints.
- Apply a thin layer of paint evenly to one side of each leaf using a paintbrush.
- Press the painted side of the leaf onto the egg-shaped paper cutout.
- Carefully lift the leaf away to reveal the printed pattern.
- Repeat the process with different leaves and colors until the egg shape is filled.
21. Flower Crown
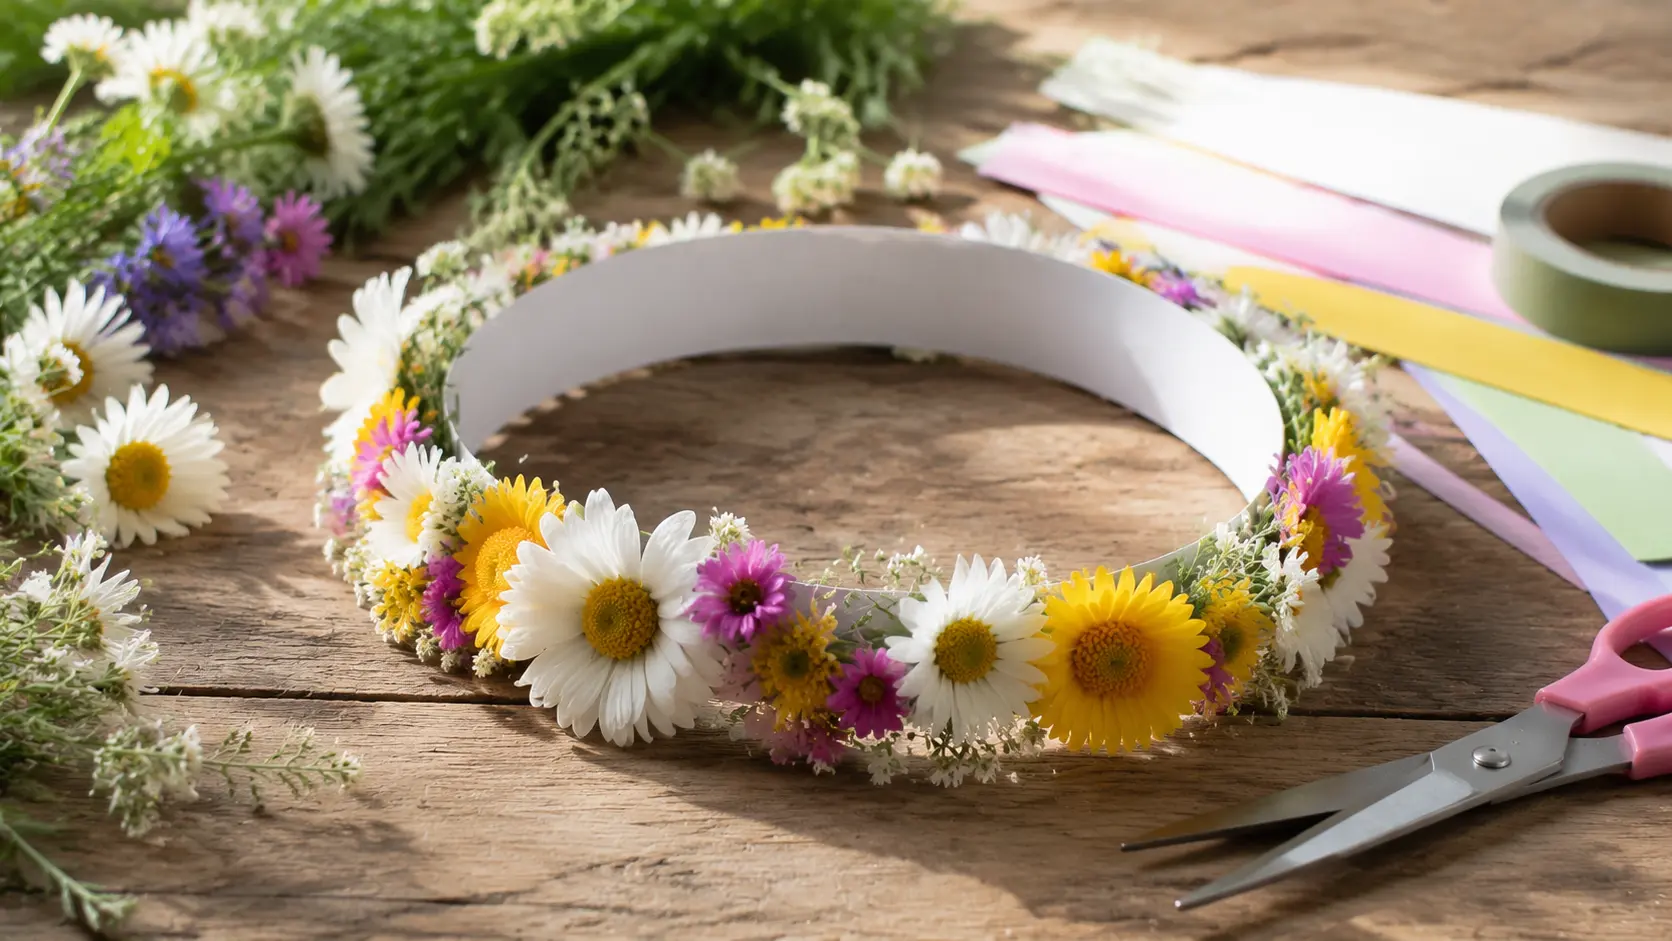
Flower crowns make a simple Easter activity that feels special for kids. I like using paper flowers when fresh ones are unavailable because the process stays easy.
Materials and Tools: Small flowers or paper flowers, tape, scissors, cardstock strip.
How to Make It:
- Cut a cardstock strip long enough to wrap comfortably around your child’s head.
- Place a strip of tape along the cardstock with the sticky side facing upward.
- Arrange flower stems or paper flowers in a row and press them firmly onto the tape.
- Place another strip of tape over the flowers to keep them secure.
- Wrap the finished crown around the head and secure the ends together.
22. Pinecone Chicks
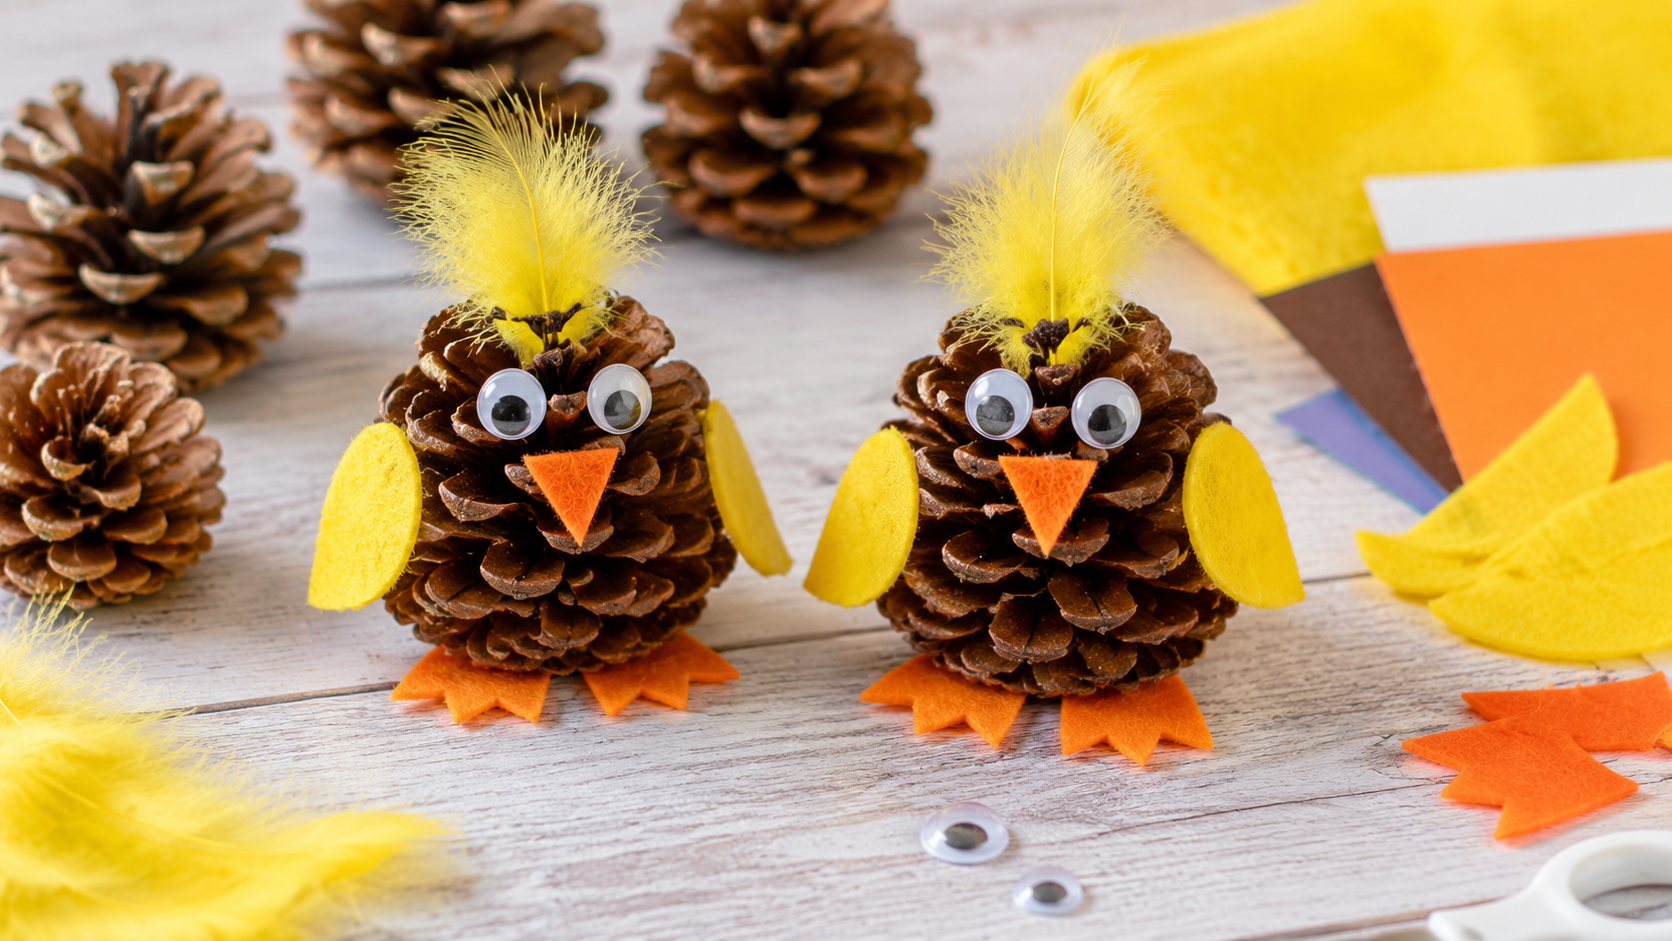
These little pinecone chicks are a fun way to reuse natural materials. I like making a few because each pinecone shape creates a different-looking chick.
Materials and Tools: Pinecone, orange paper, yellow felt, glue, scissors, googly eyes.
How to Make It:
- Choose a pinecone with a rounded, open shape that can work as the chick’s body.
- Cut a small triangle from orange paper and glue it onto the front as the beak.
- Attach googly eyes above the beak to create the chick’s face.
- Cut two small wings from yellow felt and glue them onto both sides.
- Leave the pinecone chick on a flat surface until the glue dries completely.
23. Rock Painting Garden Markers
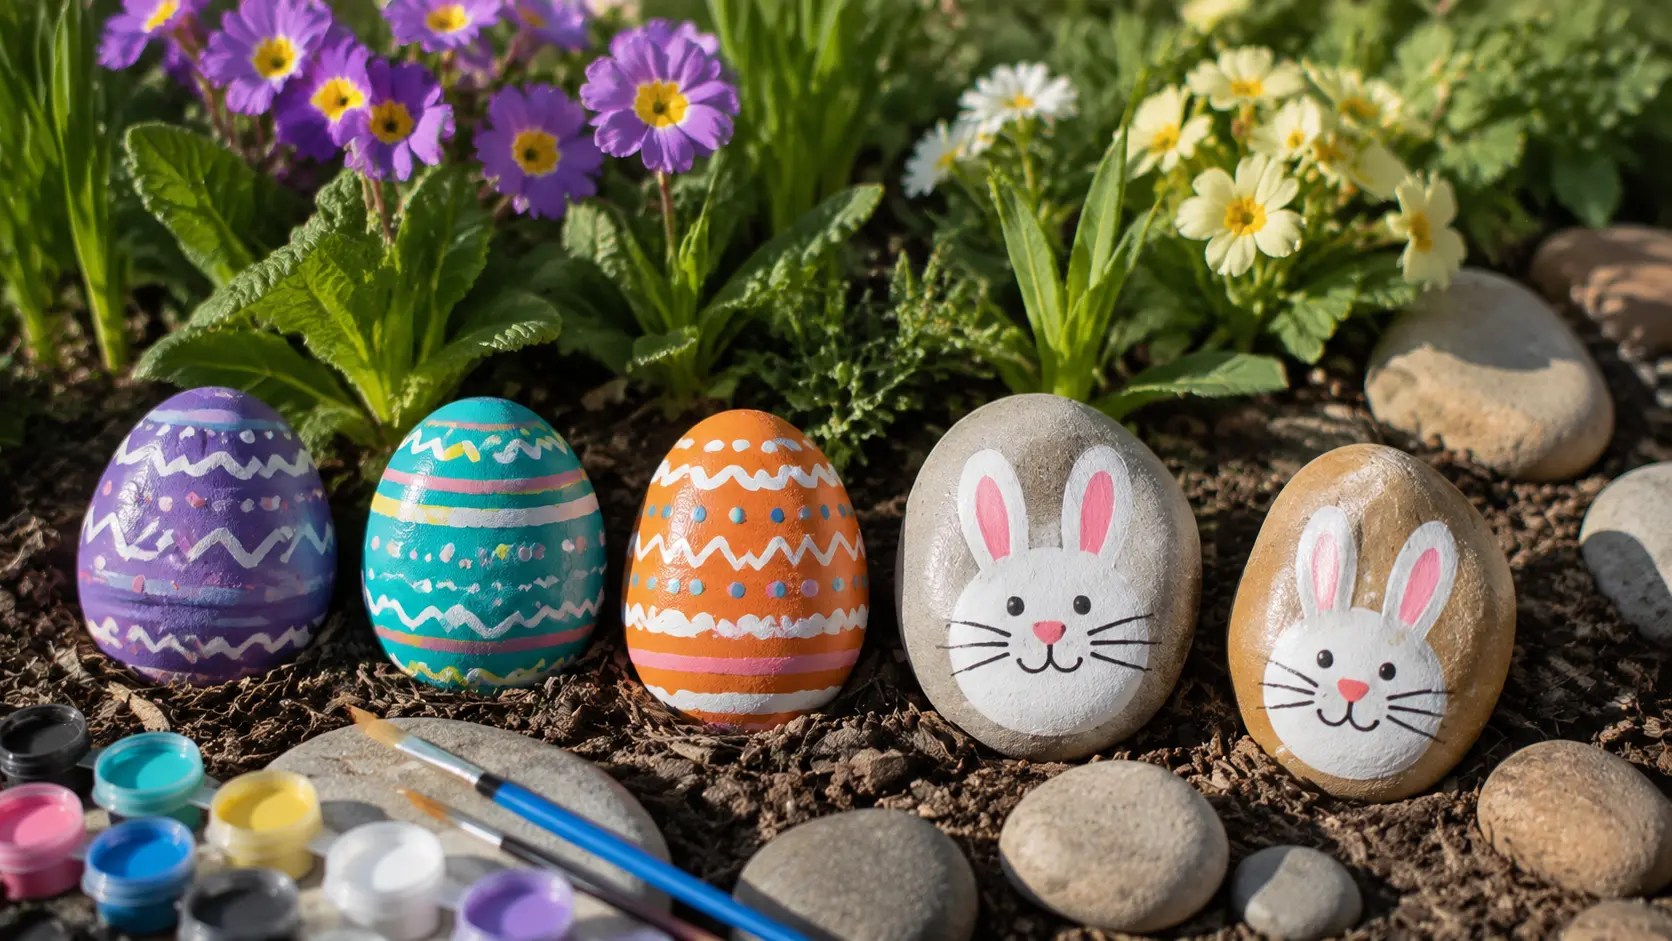
Rock painting is a simple outdoor craft that lasts longer than paper decorations. I like placing these around plants because they add a handmade touch.
Materials and Tools: Smooth rocks, paint, paintbrushes, markers, outdoor sealant (optional).
How to Make It:
- Collect smooth, flat stones and clean away any dirt before starting the craft.
- Paint each stone with an egg design, bunny face, or another Easter pattern.
- Allow the first paint layer to dry before adding smaller details or outlines.
- Let the finished stones dry completely so the designs stay neat.
- Place the painted rocks around flower beds, garden paths, or outdoor areas.
Wearable and pretend-play Easter crafts
24. Paper Plate Bunny Mask
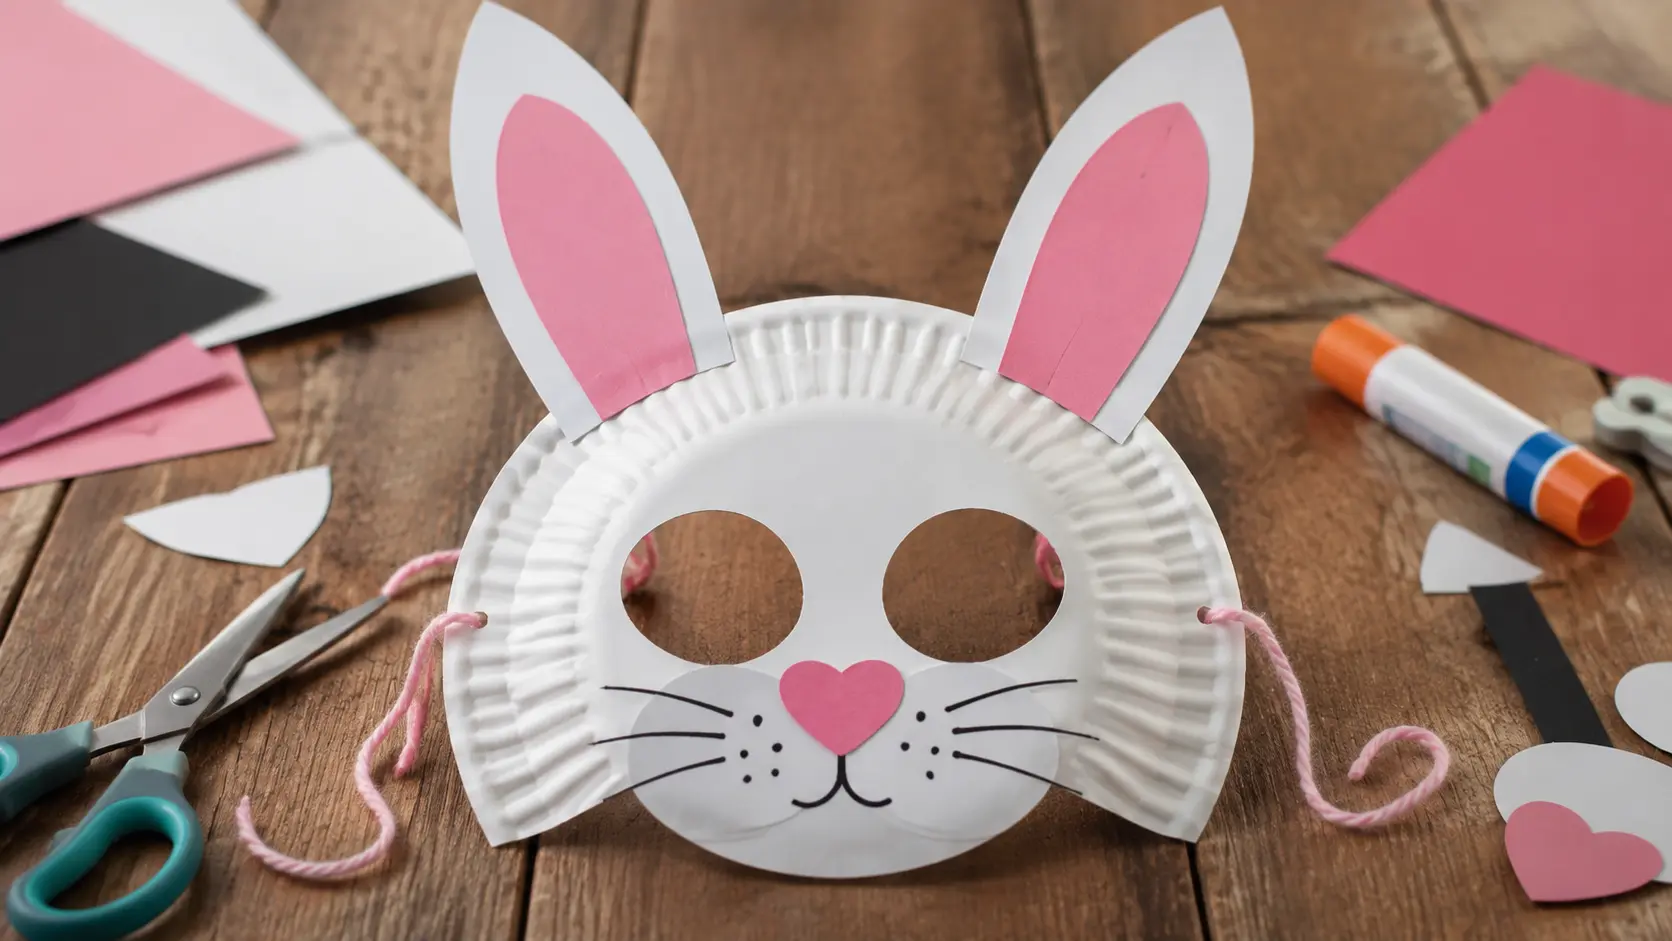
This bunny mask is great for pretend play because kids can wear their creation afterward. I like checking the eye spacing first so the mask feels comfortable.
Materials and Tools: Paper plate, cardstock, scissors, glue, markers, paper cutouts, hole punch, elastic or string.
How to Make It:
- Place the paper plate in front of your child’s face and mark where the eye holes should go.
- Cut two eye openings in the center of the plate, making sure they line up comfortably.
- Cut two long bunny ears from cardstock and glue them onto the top edge of the plate.
- Add whiskers and a nose using markers or small paper shapes.
- Punch holes on both sides of the plate and attach elastic or string for wearing the mask.
25. Sock Bunny Puppet
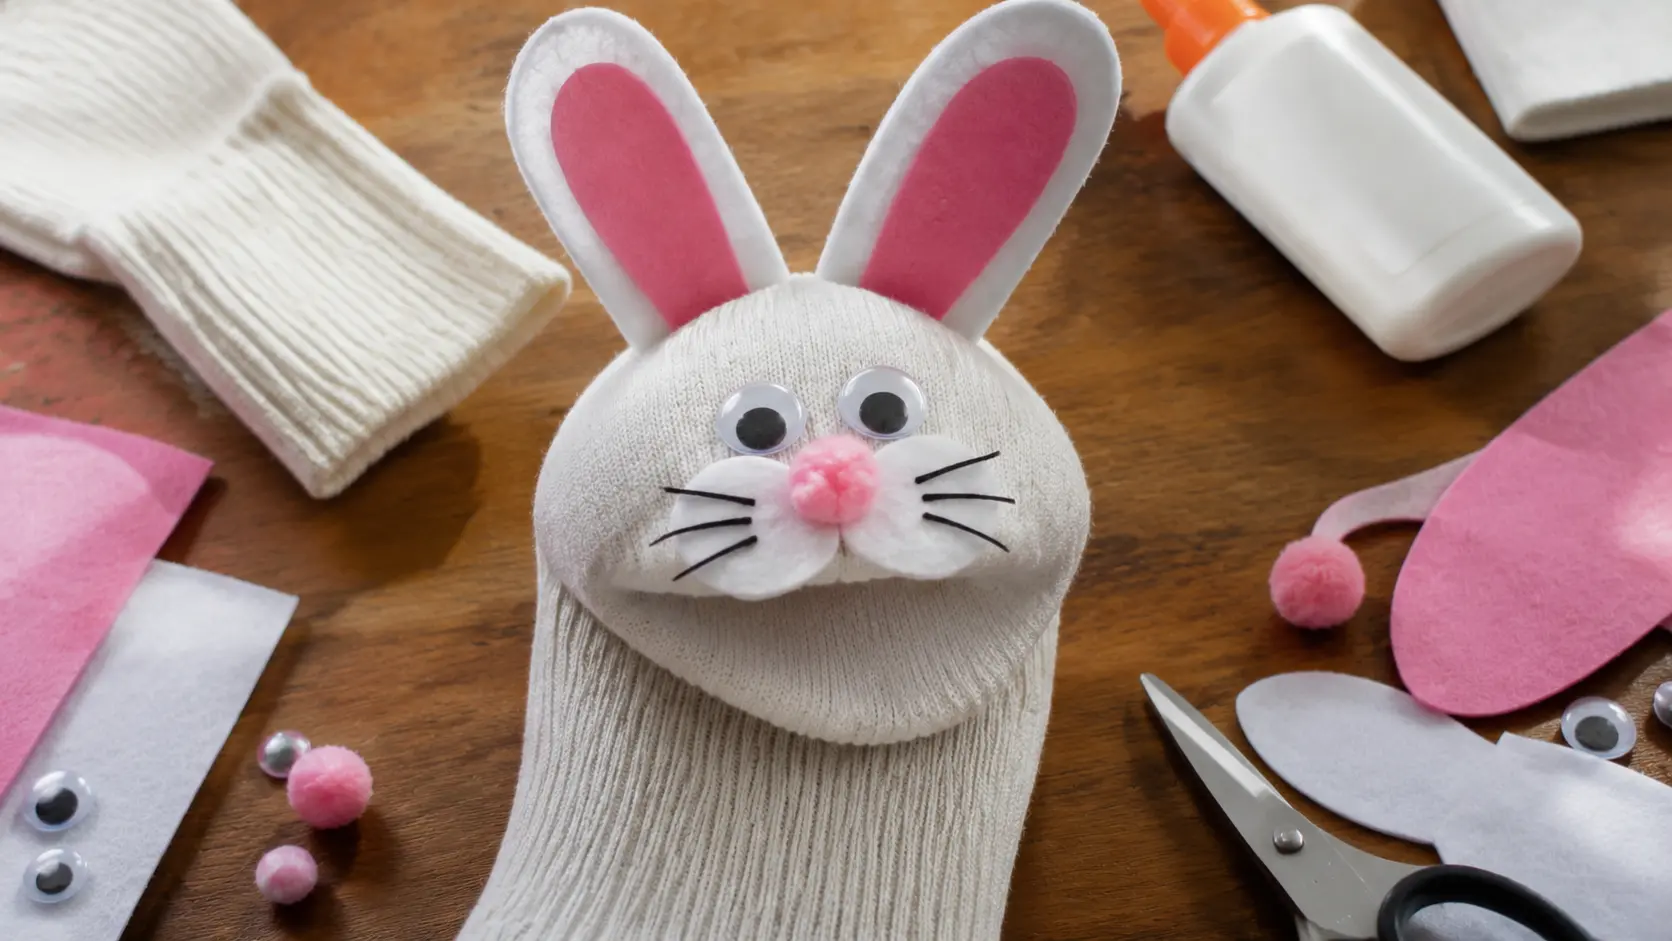
A sock bunny puppet gives kids a craft they can play with afterward. I like keeping the stuffing loose because small hands can move the puppet easily.
Materials and Tools: Clean sock, cotton balls or fabric scraps, felt, glue, googly eyes, pom-pom, scissors.
How to Make It:
- Place a small amount of cotton balls or fabric scraps inside the toe area of the sock.
- Shape the filled section into a soft bunny head without packing the stuffing too tightly.
- Cut bunny ears from felt and glue them onto the stuffed section.
- Attach googly eyes and a small pom-pom as the bunny’s nose.
- Slide your hand into the open end of the sock and move it like a puppet.
26. Egg Carton Treat Basket
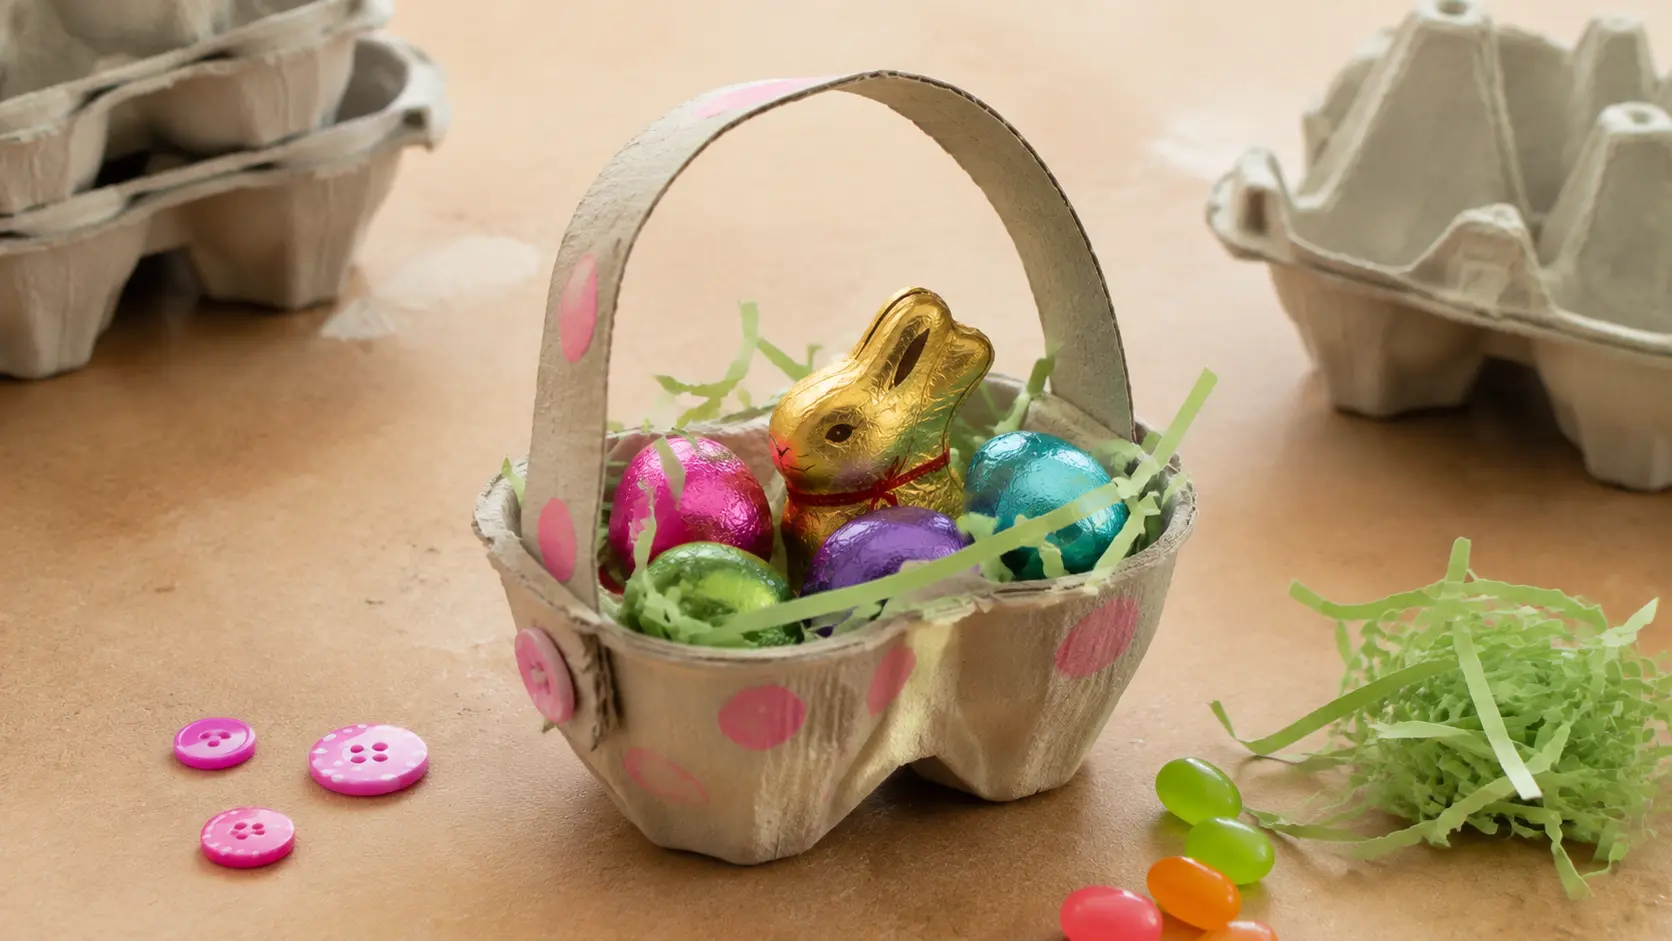
This tiny basket is a useful Easter craft because kids can carry small treats inside. I like using leftover cartons since they are easy to reshape.
Materials and Tools: Egg carton, scissors, cardboard strip, hole punch, string or glue, treats.
How to Make It:
- Cut out a two-cup section from the egg carton to create the basket base.
- Trim any uneven edges carefully so the basket looks neat and safe to handle.
- Cut a strip from the leftover carton or cardboard to use as the handle.
- Make small holes on both sides of the cup section and attach the handle securely.
- Allow the basket to hold its shape before filling it with small treats.
No-mess, quick Easter crafts
27. Cotton Ball Bunny Tail
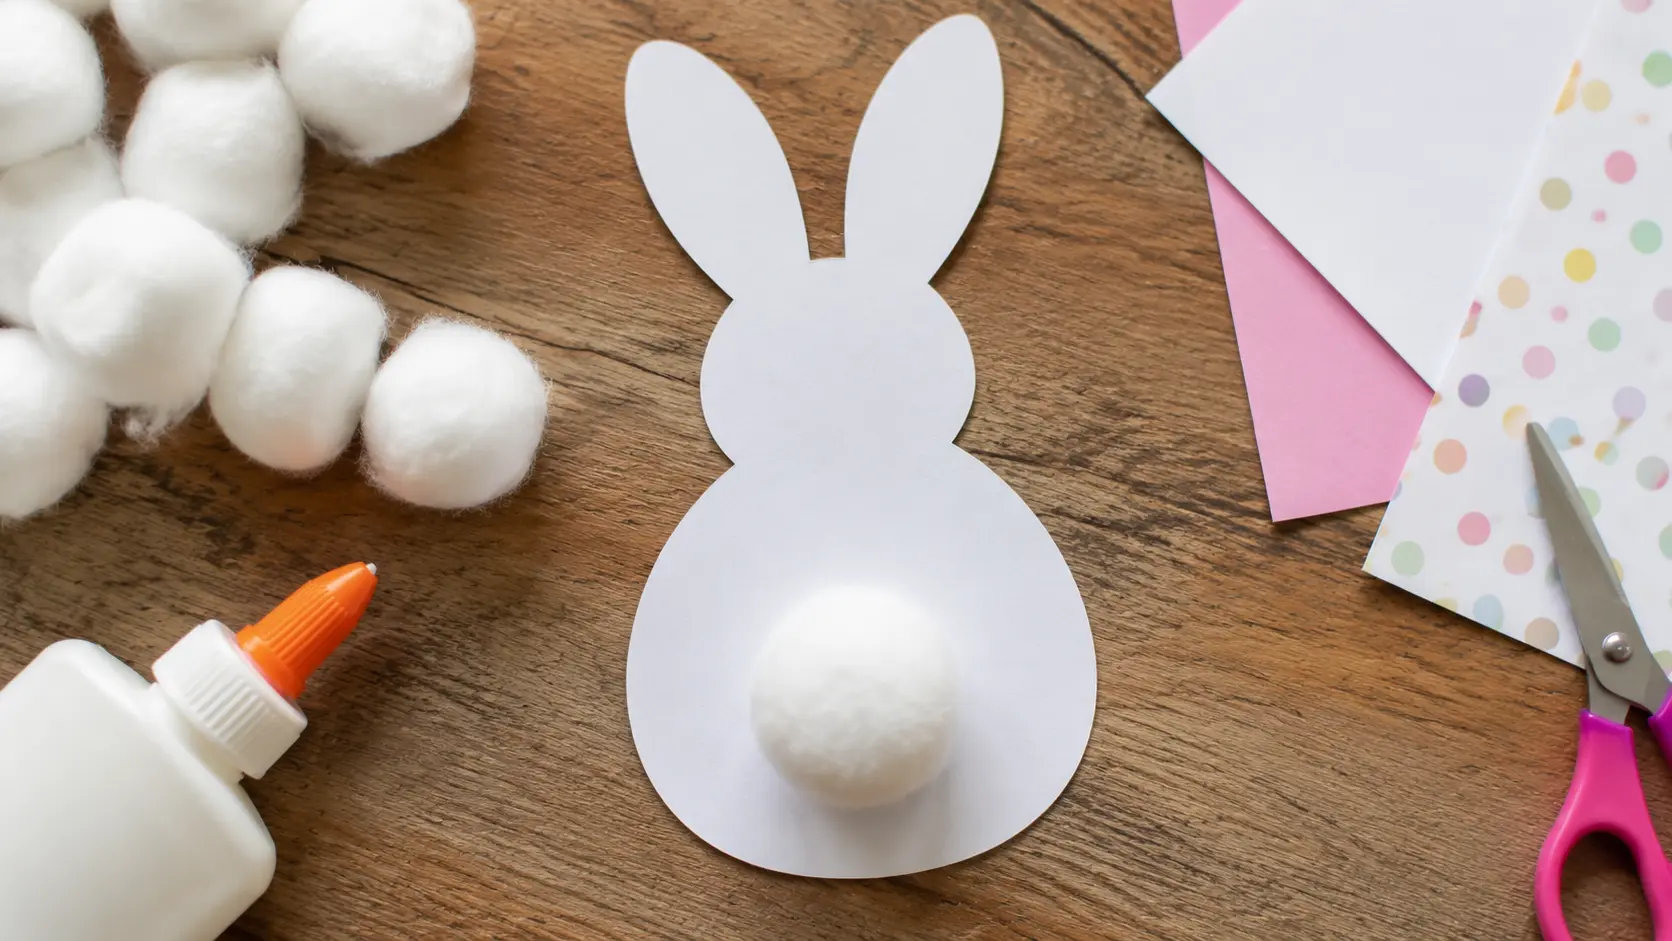
This bunny craft is perfect when you need something quick and simple. I like it for busy days because kids can finish it without waiting long.
Materials and Tools: Paper with bunny outline, pencil or printer, cotton ball, glue.
How to Make It:
- Draw a simple bunny outline on paper or print a ready-made bunny template.
- Leave the tail area blank so there is enough space for the cotton ball.
- Apply a small amount of glue to the empty tail section.
- Press one cotton ball onto the glued area and hold it gently for a few seconds.
- Leave the craft on a flat surface until the glue sets before displaying it.
28. Sticker Mosaic Eggs
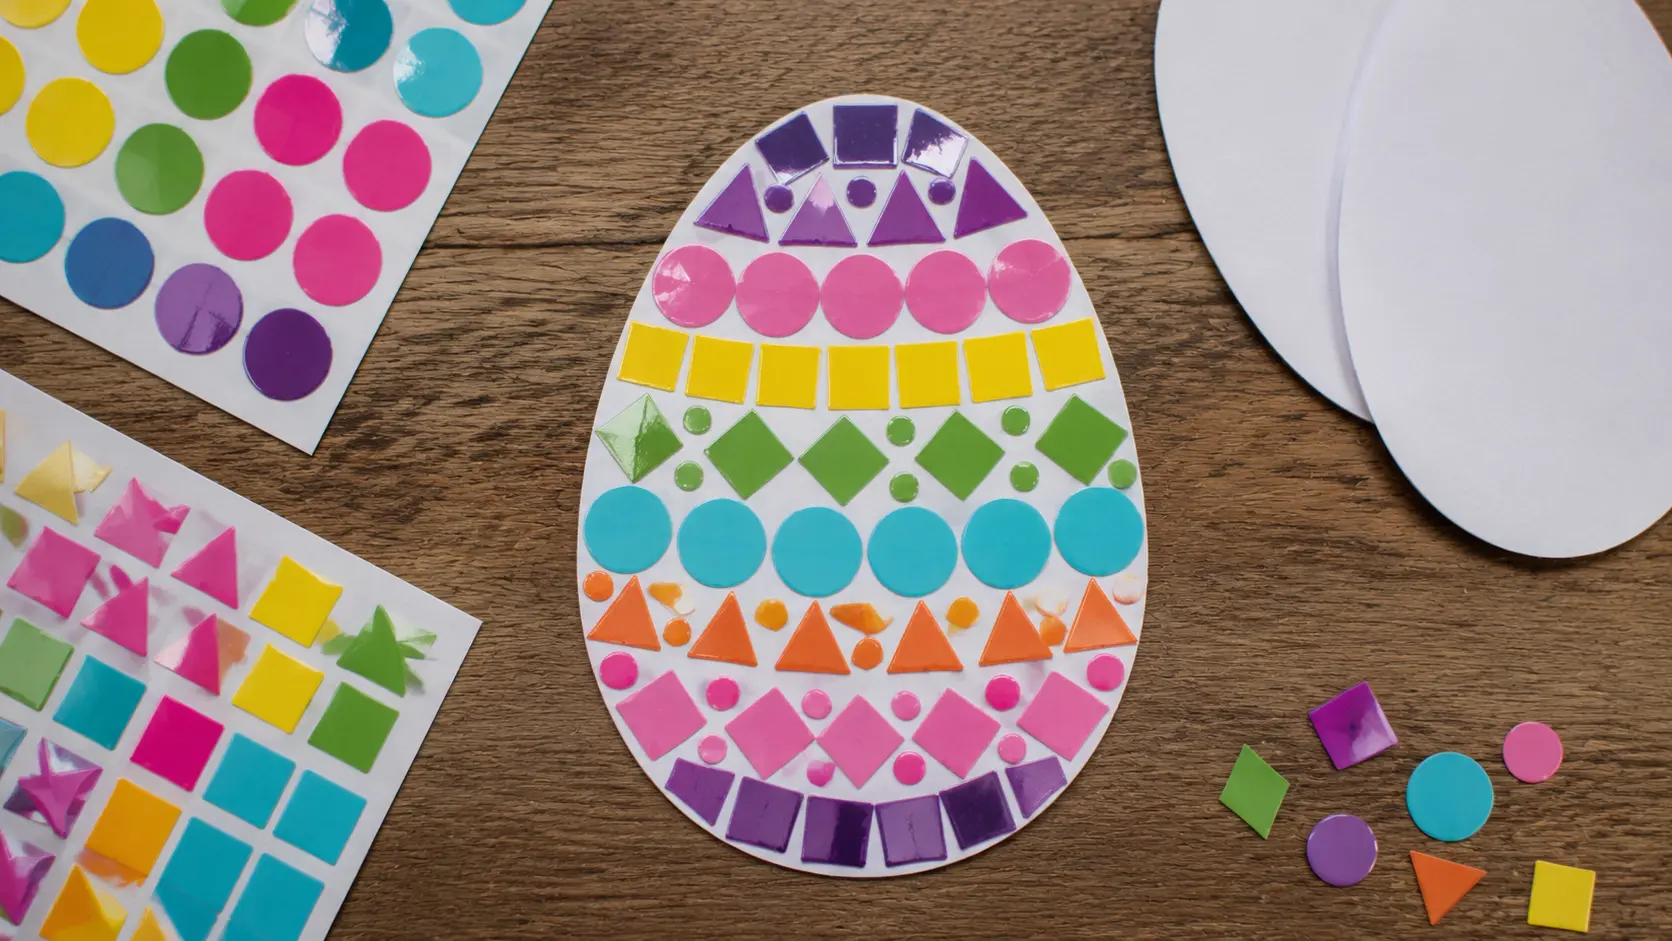
Sticker mosaic eggs are an easy activity for younger kids because there is no messy cleanup. I like this craft when children want freedom to create.
Materials and Tools: Paper, egg outline template, colorful stickers, pencil or printer.
How to Make It:
- Draw an egg shape on paper or print a blank egg outline.
- Choose a variety of colorful stickers for decorating the design.
- Place stickers inside the egg outline to create any pattern or arrangement.
- Press each sticker firmly so it stays attached to the paper.
- Display the finished sticker egg once the design is complete.
29. Pom-Pom Chicks
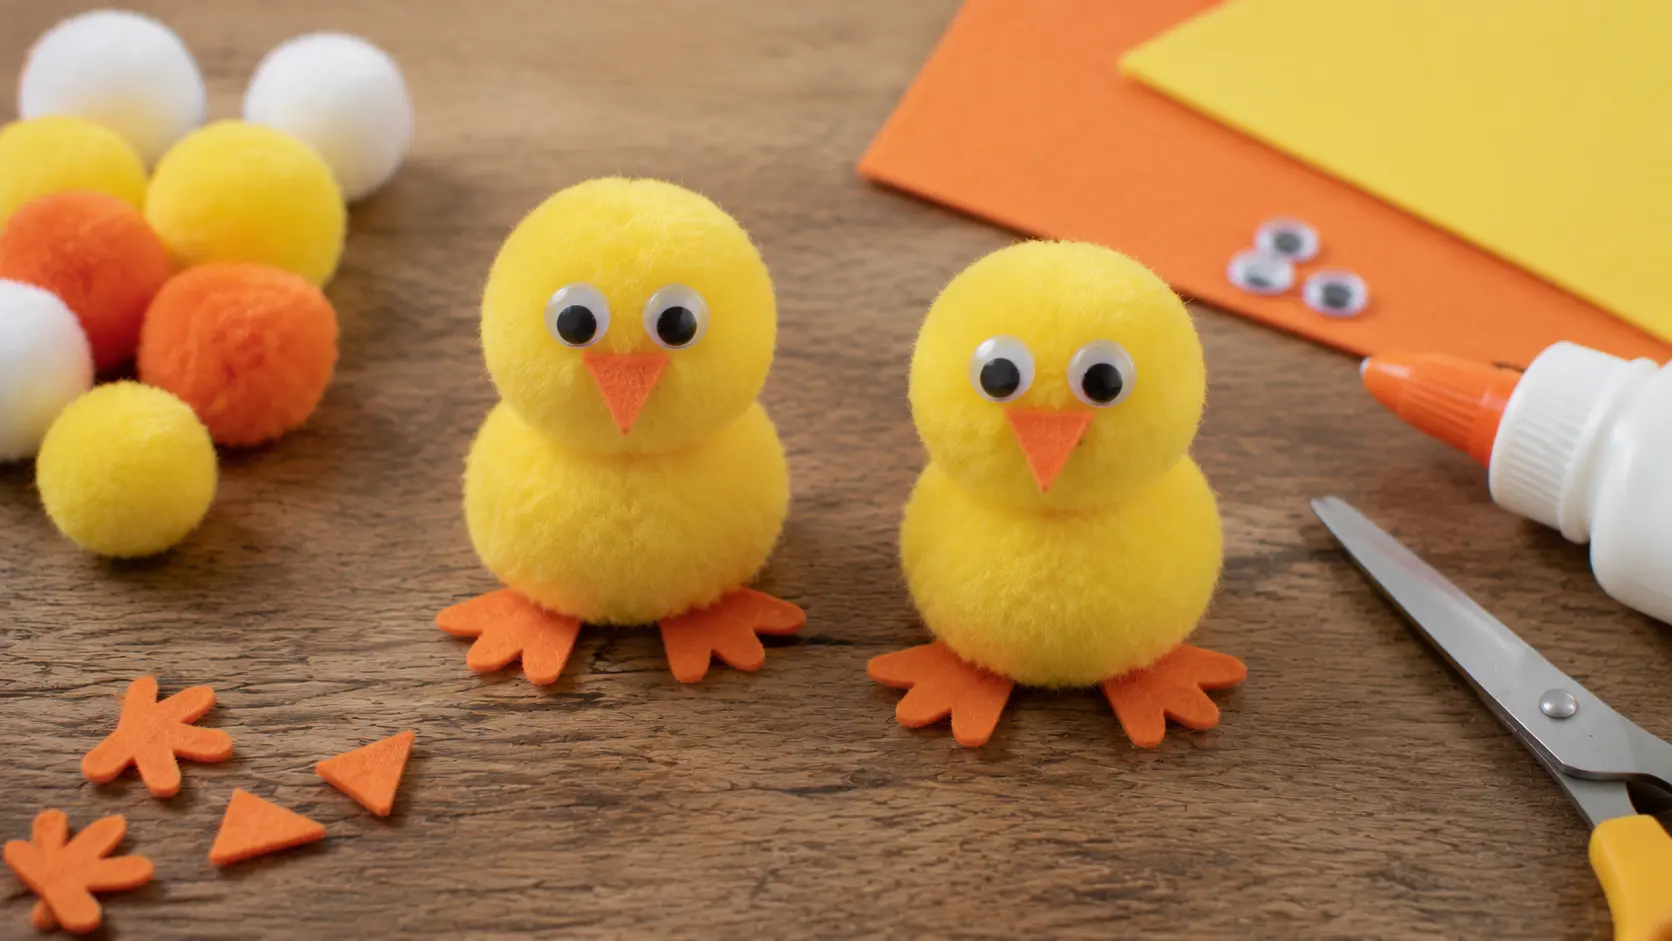
These tiny pom-pom chicks are quick to assemble and fun to decorate. I like making a few because kids can easily create different expressions.
Materials and Tools: Pom-poms, felt, paper, scissors, glue, googly eyes.
How to Make It:
- Choose one larger pom-pom for the body and one smaller pom-pom for the head.
- Apply glue and place the smaller pom-pom on top of the larger one.
- Cut small feet from felt and attach them underneath the body.
- Cut a small triangle from paper and glue it on as the beak.
- Add googly eyes and let the chick sit until the glue dries.
Common Mistakes to Avoid
Small mistakes can quickly change how an Easter craft turns out. These common problems are easy to avoid when you know what usually goes wrong and how to fix them.
| Craft Issue | Why It Happens | Quick Fix |
|---|---|---|
| Basket loses shape | Slits are too close, or strips are pushed too quickly | Test the slit spacing on scrap cardstock first and weave slowly |
| Paint patterns smear | Too much paint or too much pressure during stamping | Try one test stamp and remove extra paint before starting |
| Glue parts fall off | Moving to the next step before glue sets | Wait until each piece holds firmly before adding details |
| Finished craft needs redoing | Problems are not noticed early | Test small steps first to catch issues before the final craft |
A quick test before starting saves time, keeps the process stress-free, and helps kids enjoy making crafts without having to redo their hard work.
Tips for Making Easter Crafts With Kids
A little preparation can make craft time easier, cleaner, and more enjoyable for both you and your kids from the start.
- Prep Materials First: Cut difficult shapes and organize paint, glue, paper, and other supplies before kids begin the activity.
- Protect Surfaces: Cover tables with newspaper, washable mats, or scrap paper to make paint and glue cleanup much easier.
- Keep Steps Short: Break the activity into simple stages so younger kids can follow along without losing interest or feeling rushed.
- Allow Creative Choices: Let kids choose their own colors, patterns, faces, and decorations so each finished craft feels more personal.
- Watch Small Parts: Keep an eye on pom-poms, googly eyes, beads, and similar pieces when crafting with younger children.
Simple preparation and clear steps help kids stay focused, enjoy the process, and finish their Easter crafts with less frustration.
Conclusion
Simple craft time can leave you with more than a finished project. It can give kids a chance to create, play, and spend meaningful time with you using supplies already close at hand.
I like choosing Easter crafts for kids based on age, patience, mess level, and the kind of activity that fits the day. Paper crafts work well for quick sessions, while painted pieces, nature projects, and keepsakes can take a little more time.
The main goal is to keep each activity manageable and enjoyable, not chase perfect results. Pick a few ideas that match your child’s interests, gather the basic supplies, and start with the one that feels easiest today.