
Last spring, I was so excited to plant my garden that I labeled nothing, and paid the price.
Within weeks, I couldn’t tell lettuce from spinach or basil from oregano. That’s when I realized I needed garden markers that weren’t just practical; they had to be creative, sturdy, and uniquely mine.
I didn’t want plastic tags from the store; I wanted something fun, handmade, and reflective of the love I put into my garden.
Whether it’s painted rocks, old wooden spoons, or corks on skewers, I started experimenting with materials I already had at home.
Not only did it solve my plant-ID problems, but it also added beauty to my beds and containers.
If you’re constantly guessing which sprout is which or just love a good craft project, these DIY garden marker techniques and ideas are sure to inspire your green thumb.
Let’s get started!
What Are Garden Markers?
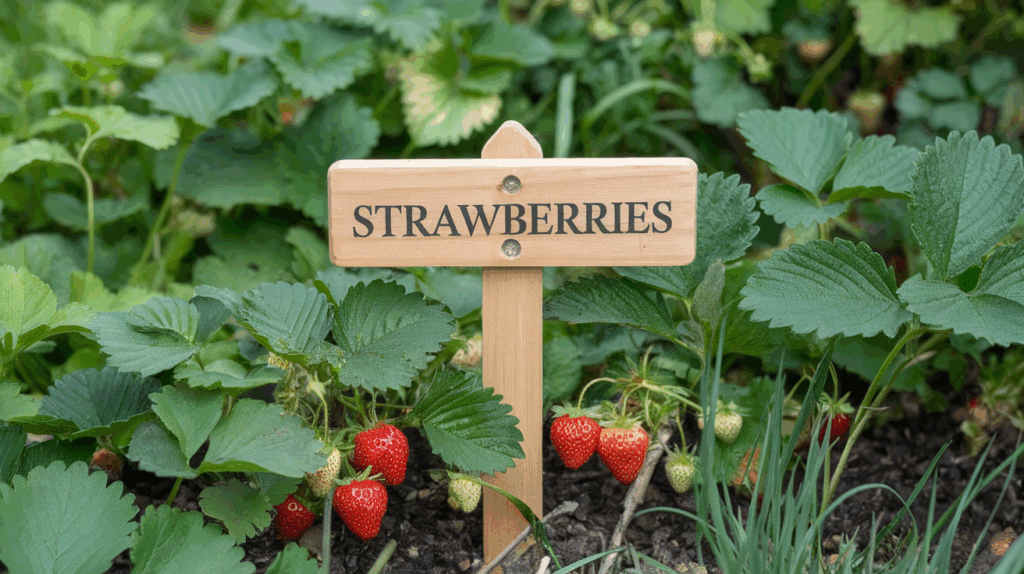
Garden markers are labels placed in gardens, planters, or raised beds to identify plants, especially when seeds or young sprouts look similar.
They’re a practical tool to help gardeners keep track of what’s been planted and where.
Garden markers can range from simple tags (like plastic stakes with a name written in marker) to creative, decorative labels made from rocks, wood, cork, metal, or other materials.
- Avoid confusion between similar-looking plants
- Track plant varieties (e.g., different types of tomatoes)
- Teach kids about gardening
- Add personality to garden beds
DIY garden markers are especially popular because they allow you to customize your garden’s look while using budget-friendly or upcycled materials.
Whether practical or artistic, garden markers are a small detail that makes a big difference in garden organization.
Step-By-Step Guide: DIY Plant Markers
Choosing the right plant markers can simplify garden organization and improve visibility throughout the growing season.
These steps will guide you to highlight durable, practical, and creative options for labeling everything from seedlings to perennials, helping you stay organized while adding a personal touch to your garden’s layout.
Materials Used
To create durable, weather-resistant garden markers, selecting the right materials is key. This project uses affordable, accessible supplies that are easy to find and simple to work with.
- Galvanized steel sign holders (13″ and 24″)
- Vinyl sign cards
- 2×3″ thermal printer labels (or address labels)
- Industrial permanent marker (black)
Step 1: Use Galvanized Steel Sign Holders for Durability
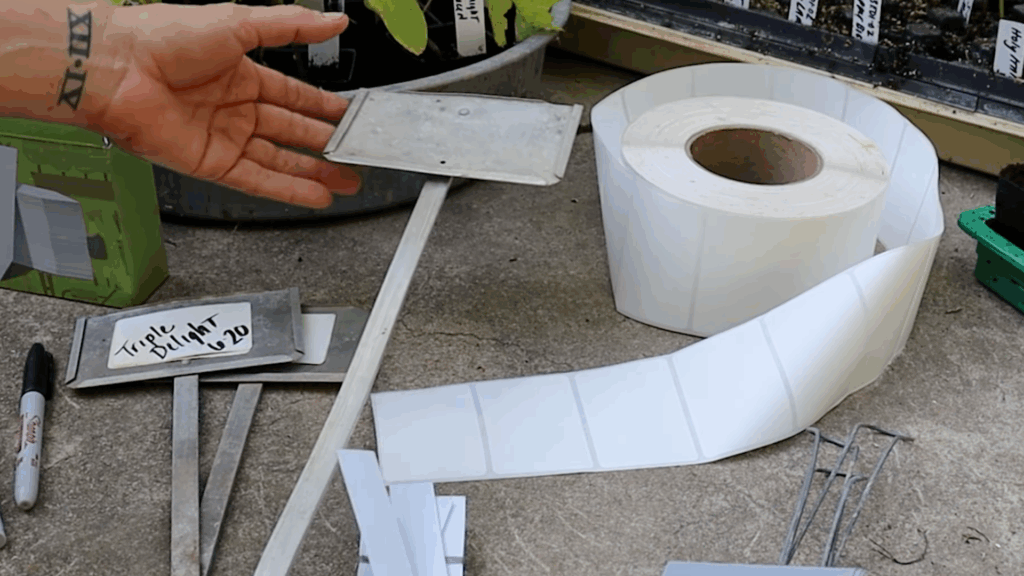
Galvanized steel sign holders are sturdy, weather-resistant, and last for years. They come in multiple heights and are easy to push into garden beds.
Each has a wide faceplate where thermal labels or handwritten tags can be applied, making them highly readable and reusable each season.
Step 2: Apply Thermal Labels or Vinyl Sign Cards

For labeling, use thermal printer labels or waterproof vinyl sign cards. Thermal labels are easy to handwrite or print and can be replaced seasonally.
For perennials, vinyl cards last longer. Always use an industrial permanent marker to prevent fading under the sun and rain.
Step 3: Place the Marker Securely in the Ground
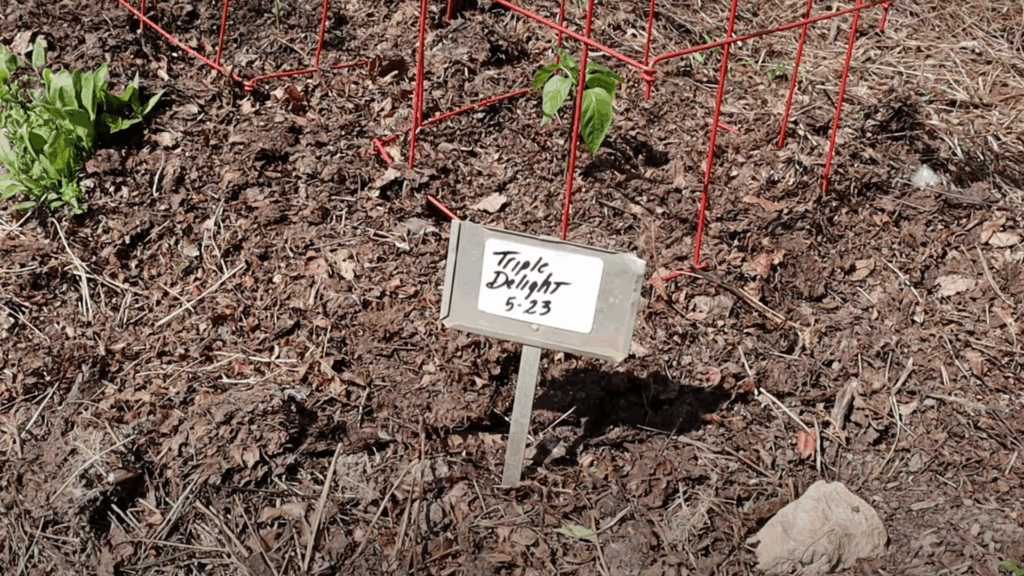
Once your label is attached to the faceplate, insert the stake end of the marker firmly into the soil near the base of the plant. Make sure it stands upright and is clearly visible.
Proper placement ensures durability, prevents tipping, and makes plant identification easy at a glance.
Recommended: Watch the video below by @GrowfullywithJenna to see the full test in action and learn exactly how to make long-lasting garden markers step by step.
Creative DIY Plant Marker Ideas to Try
Make your garden more organized and stylish with these clever DIY plant marker ideas.
Using simple, weather-resistant materials, each option adds beauty, clarity, and personality to your outdoor space while keeping your plants clearly labeled all season long.
1. Zinc Name Plate Markers
Zinc name plate markers offer a sleek and understated way to label plants. They’re rust-resistant, weather-friendly, and come in various stake lengths to suit different garden heights.
Their muted metal finish blends into natural surroundings. You can write directly on the plate with a permanent marker or apply weatherproof labels.
For long-term visibility, sealing with clear Flex Seal helps protect the ink from fading due to sun and rain exposure.
2. Plastic Stake Tags
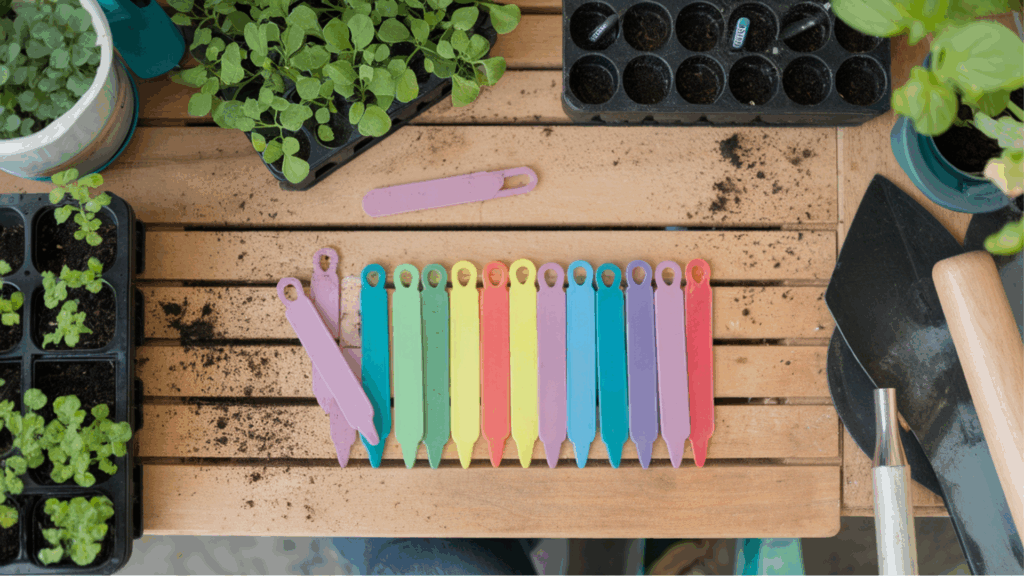
Plastic stake tags are versatile, affordable, and ideal for indoor seed starting and outdoor container gardening. Their slim profile fits snugly in trays, pots, or beds.
Use a permanent marker for labeling, and reuse by wiping or flipping the tag over.
Their bright, smooth surfaces offer great legibility, and some even come in multi-color packs to color-code plant types or growing phases in a fun, visual way.
3. Painted Rock Markers

Painted rocks are a unique and artistic way to mark garden plants. These make great additions to herb or flower beds and are a fun project for kids or group gardening activities.
Choose smooth, flat stones and decorate them with acrylic paint or waterproof paint pens. Add plant names in bold lettering, then seal them with clear outdoor spray for durability.
4. Wooden Paint Paddles
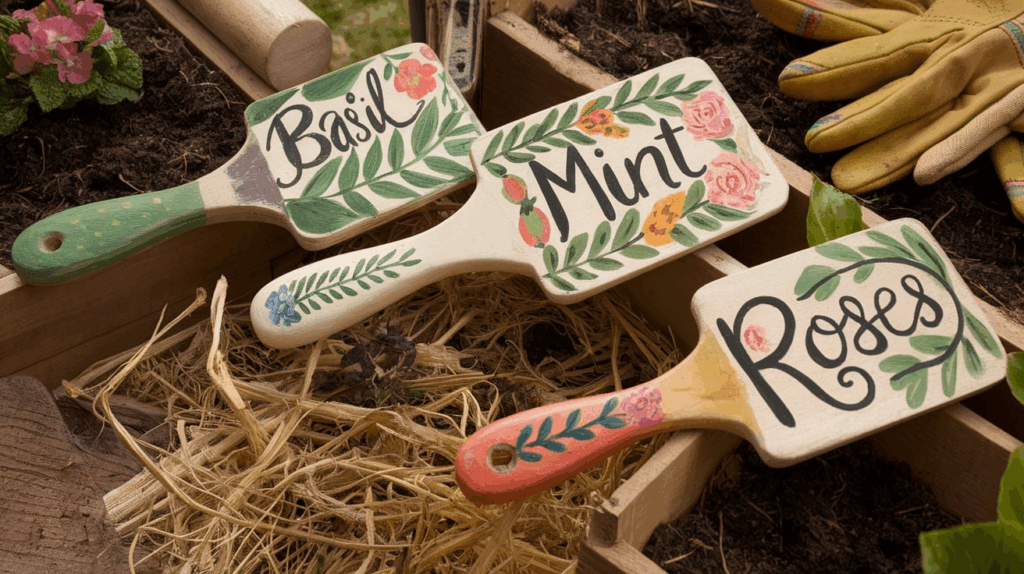
Wooden paint paddles or jumbo craft sticks are affordable and easy to personalize.
They offer a broad surface for writing or painting, and work well with oil-based paint markers to prevent fading. Use clear sealant for added protection.
Their natural look fits perfectly in rustic gardens, and they’re biodegradable too, making them an eco-conscious and pretty labeling option.
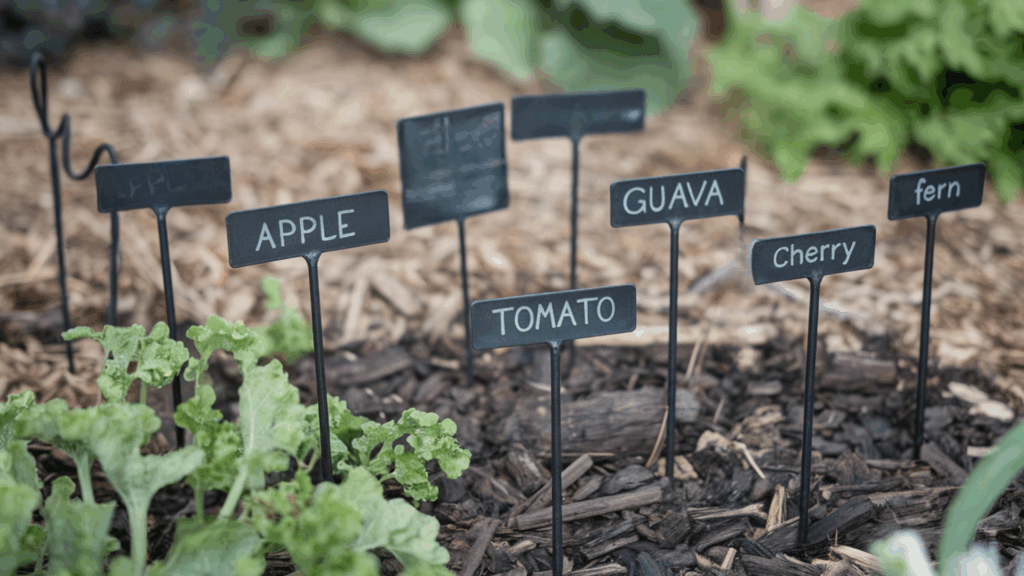
5. Chalkboard Garden Stakes
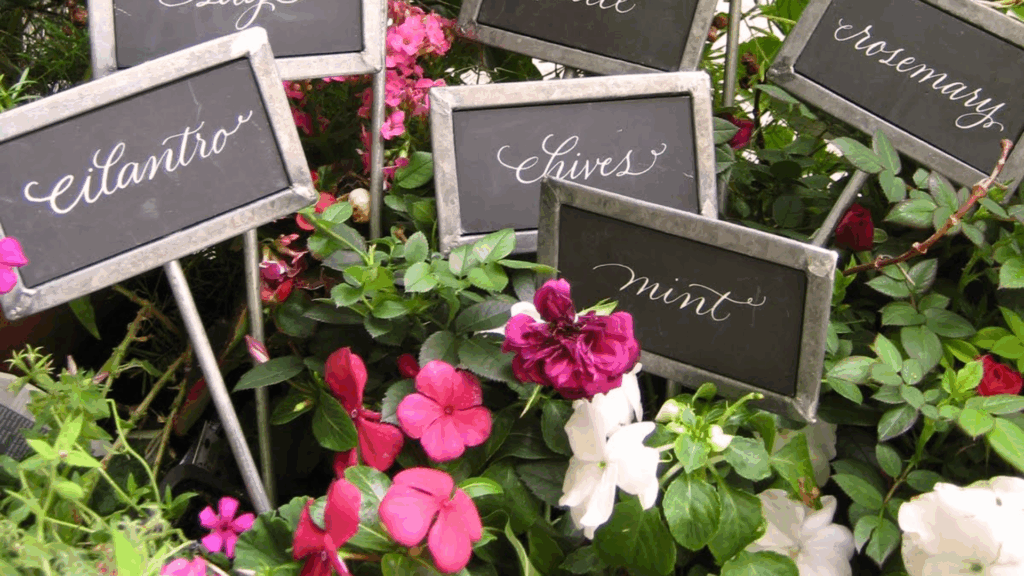
Chalkboard markers add a rustic touch and easy editability to your garden. Available as mini signs or stake-style boards, they can be written on with waterproof chalk pens.
They’re perfect for seasonal labeling and raised beds. With a quick wipe, you can reuse them year after year. Choose ones treated for outdoor use to resist moisture and sunlight and maintain legibility.
6. Wine Cork and Skewer Markers
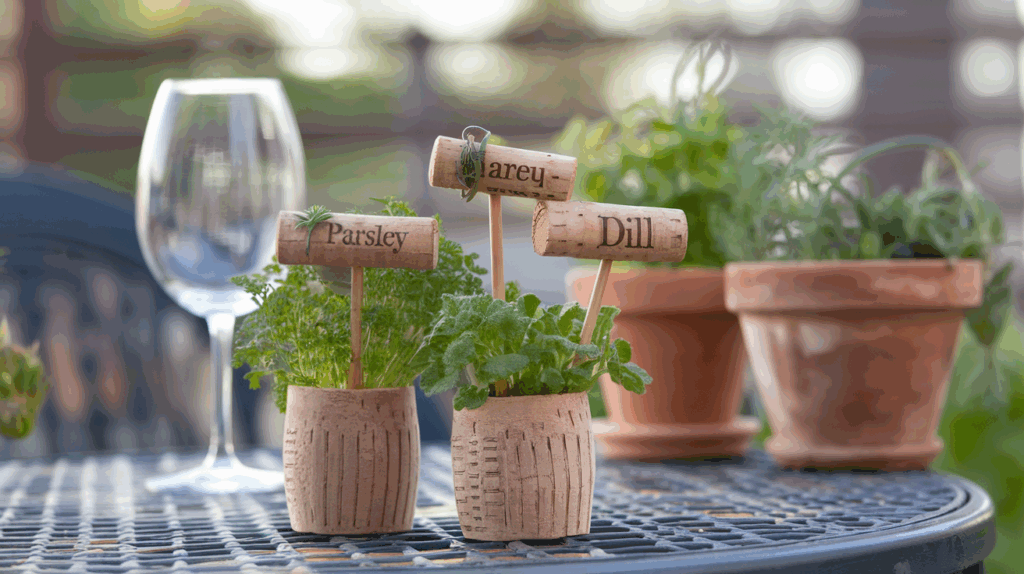
Repurpose wine corks into eco-friendly plant markers by writing the plant name on the side and skewering them with bamboo sticks.
They’re easy to insert into garden soil and perfect for container gardens or raised beds.
Compact and biodegradable, they’re also a great conversation starter, especially if you remember the wine paired with each plant’s planting day!
7. Ceramic or Tile Pieces
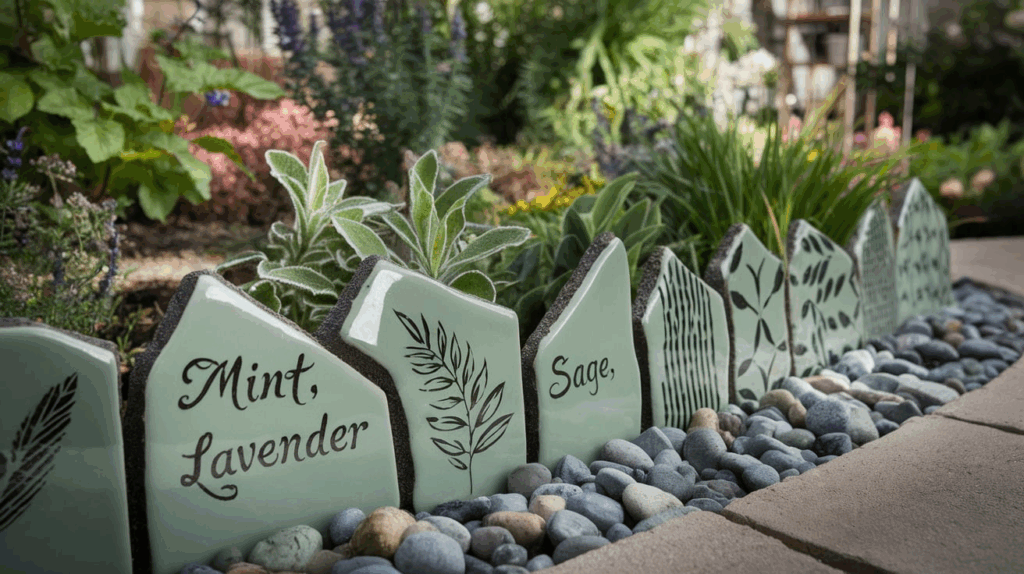
Broken ceramic tiles or leftover kitchen samples make stylish, long-lasting markers. Their glazed surface holds waterproof ink or vinyl lettering well, and they resist fading, cracking, and soaking.
They’re great for modern or ornamental gardens and can double as decorative touches along pathways or garden borders.
They are smooth, durable, and often upcycled, and blend beauty with practicality.
8. Beaded Wire Plant Tags
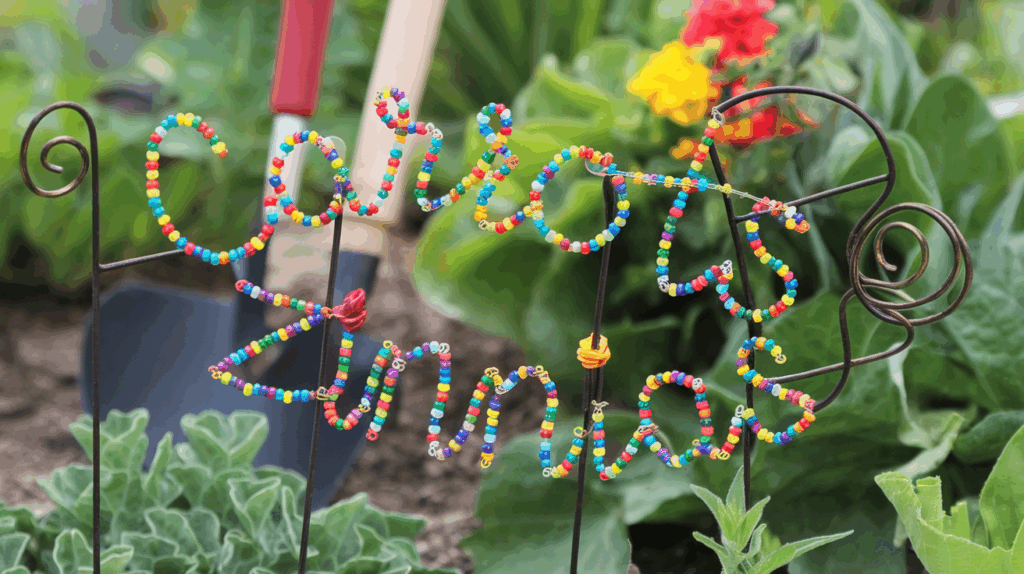
Beaded wire tags are fun, decorative, and waterproof. Use pliable garden wire and colorful alphabet beads to spell plant names, then twist into a loop or hang from a stake.
These are great for adding personality to beds or making gardening more engaging for kids. Lightweight and weather-tough, they work well in both flower and vegetable gardens.
9. Shell or Sea Glass Markers
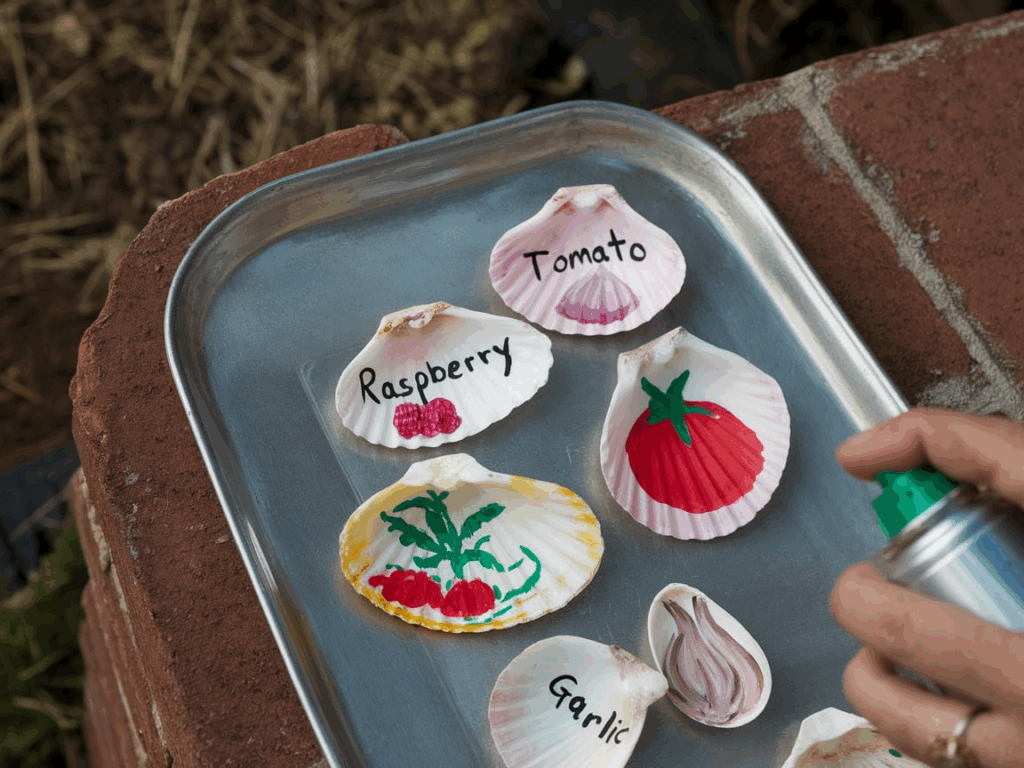
Turn beach finds into beautiful garden labels. Write plant names on large shells or sea glass using oil-based paint pens, then nestle them next to each plant.
These unique markers are especially suited for herb or potted gardens and bring a breezy, coastal vibe to any space. Seal them for extra durability against watering and outdoor wear.
Common Mistakes When DIYing Plant Markers
Creating your own markers is fun, but a few simple missteps can make them ineffective or short-lived. From using the wrong pens to placing markers poorly, these common mistakes can lead to fading, breakage, or confusion.
- Using non-weatherproof markers: Regular ink fades quickly in the sun and rain.
- Skipping sealant on porous surfaces: Paint and ink can bleed or wear off without a clear protective coat.
- Choosing flimsy or thin materials: Weak sticks or low-quality plastic can snap, bend, or blow away.
- Writing in small or unclear fonts: Fine text becomes unreadable from a distance or after weather exposure.
- Placing markers too close to plants: Labels can be buried by growth or damaged during watering or weeding.
- Forgetting to label at planting time: Waiting too long can cause confusion, especially with seedlings that look alike.
Tips for Better Plant Labeling
From choosing the right materials to placement and design tricks, these suggestions will help ensure your plant labels stay legible, weather-resistant, and organized all season long.
- Color-Code Your Markers: Use different colors for herbs, flowers, and vegetables for quick visual sorting.
- Keep a Garden Map or Chart: Pair your markers with a digital or notebook layout in case any tags go missing.
- Make it a Family Activity: Let kids help design and label, great for learning and memory.
- Use QR Codes for Advanced Gardeners: Print small QR labels linking to care instructions, plant histories, or seed sources.
Conclusion
Making garden markers became one of the most rewarding parts of the planting season. It’s a small project with a big payoff, bringing order, creativity, and a personal touch to your green space.
From painted rocks to stamped tin lids, each marker adds its own unique beauty and functionality. Plus, using recycled or budget-friendly materials makes it sustainable and satisfying.
Even if you’re a beginner planting your first herbs or a seasoned gardener growing rows of veggies, these DIY markers make the experience more meaningful.
They turn a simple label into a mini work of art, helping you stay organized while celebrating what you grow. Try out one style or mix and match for variety; you might be surprised by how much joy such a small detail can bring.
Grab your supplies, get creative, and let your garden reflect your personality!