
Doing a DIY shower remodel is a good way to update your bathroom without hiring a contractor.
I’ve gone through the process myself and learned how to get solid results on a small budget. In this post, I’ll walk you through each step I took to remodel my shower from start to finish.
You’ll learn how to:
- Plan your project and set a realistic budget
- Take out old materials safely
- Finish the job neatly without extra costs
I’ll keep things simple and practical, focusing only on what actually works. By following these steps, you can rebuild your shower with tools you already have or can easily rent.
This guide is meant to help you do the job right, save money, and get a clean, working shower you can rely on.
Why Consider a DIY Shower Remodel?
I chose a DIY shower remodel because it gave me control over the cost and design. When you do the work yourself, you save money by avoiding labor fees and can pick materials that fit your budget.
You also get to work at your own pace and learn new skills along the way. For me, it was about fixing what I needed without waiting for a contractor.
You can also make small changes, like replacing tiles or fixtures, that make a big difference. Doing it yourself helps you understand your bathroom better, so future repairs become easier.
It’s not just about saving money; it’s about building confidence and getting the result you want.
With a little planning and effort, you’ll see that a DIY shower remodel is a practical way to improve your space without overspending.
Gathering Affordable Tools and Materials
Getting the right tools and materials before you start your shower remodel saves time and money. Below is a list of budget-friendly items that will help you do the job right without overspending.
- Measuring tape: For checking wall and tile sizes accurately.
- Level: Keeps tiles and fixtures straight and even.
- Utility knife: Helps cut drywall, caulk, or sealant neatly.
- Drill and bits: Needed for installing screws, fixtures, and wall panels.
- Tile cutter or wet saw: Makes clean cuts on tiles for corners and edges.
- Trowel and grout float: Used to spread mortar and grout smoothly.
- Buckets and sponges: Handy for mixing materials and cleaning up.
- Caulk gun and waterproof sealant: Seals edges and prevents leaks.
- Protective gear: Gloves, goggles, and a mask keep you safe while working.
Step-By-Step DIY Shower Remodel Guide
Remodeling your shower can feel overwhelming, but breaking it into clear steps makes it simple. Follow these steps to get a clean, professional finish.
Step 1: Frame the Shower
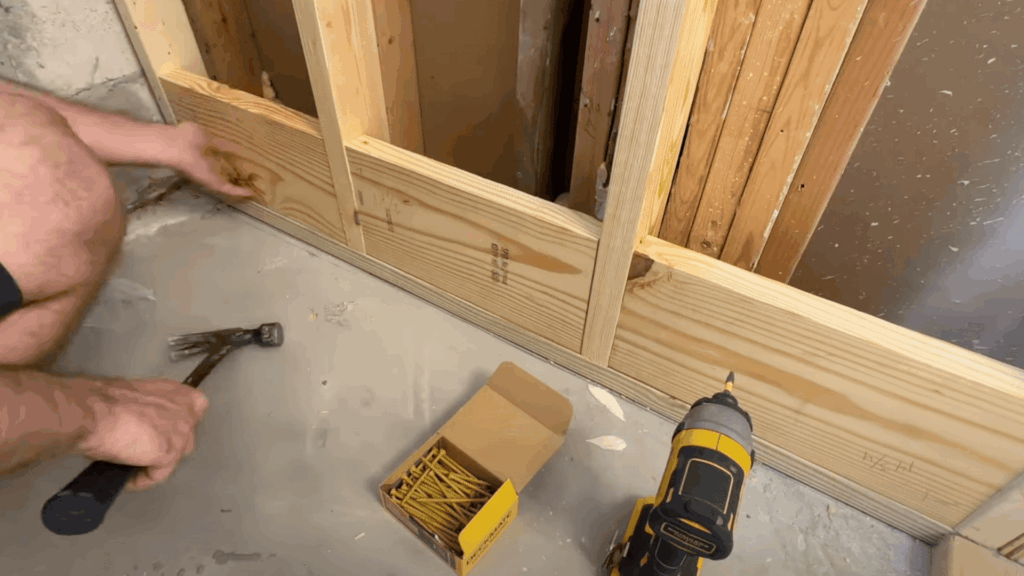
Start by framing the shower area with 4×4 studs to form the main structure.
Use a level to ensure everything is straight. Add 2×8 boards along the bottom edge to hold the PVC liner in place for waterproofing.
Next, install blocking between the studs to give extra strength and support. Drill holes and attach the frame securely to the CBS block wall using concrete screws.
Make sure all corners are square, and double-check that your layout matches the shower design before moving on.
Step 2: Rough-In Plumbing

Set up the shower valve body, handles, and fittings for your showerhead or hand wand.
Use PEX pipes with crimps for tight, leak-free connections. Mark a level line across the wall to guide your plumbing layout.
Before closing up the wall, check for leaks and test the water flow.
Make sure the valve height is comfortable and aligned with your planned tile pattern. It’s easier to fix mistakes now than later in the project.
Step 3: Pre-Slope and Install PVC Liner
Mix dry-pack mortar until it has a damp, sand-like texture. Spread it evenly to create a gentle slope toward the drain, which ensures proper drainage.
Once it sets, carefully lay down the PVC liner on top. Avoid puncturing it, especially near the drain area.
Remove extra silicone or debris, then fill the base with water for a leak test.
Let it sit overnight if possible. Proper waterproofing here keeps your shower safe from future leaks and water damage.
Step 4: Build Floor Pan and Wall Base
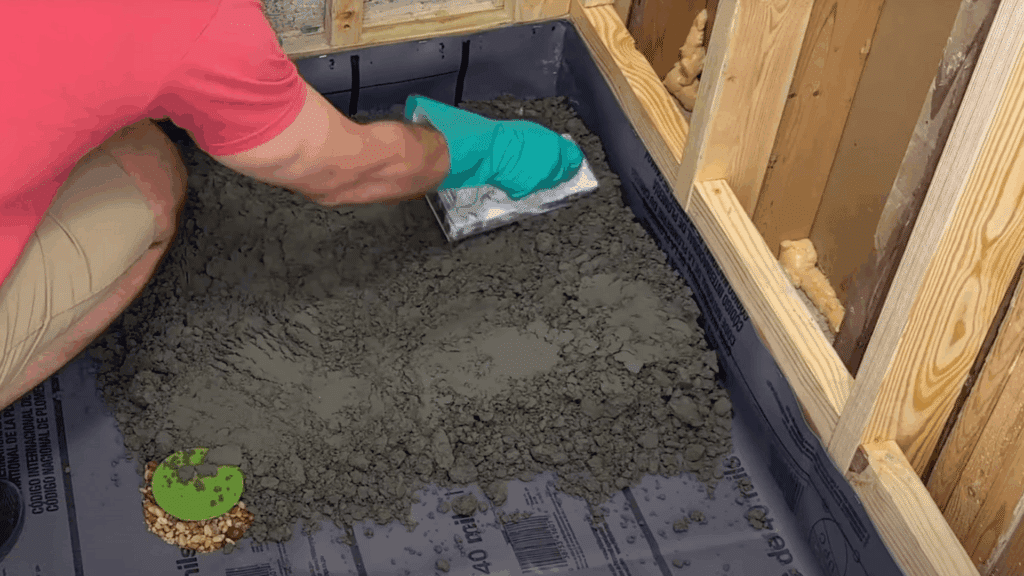
Add a second layer of dry-pack mortar over the liner, making sure to place gravel or spacers around the drain to protect the weep holes.
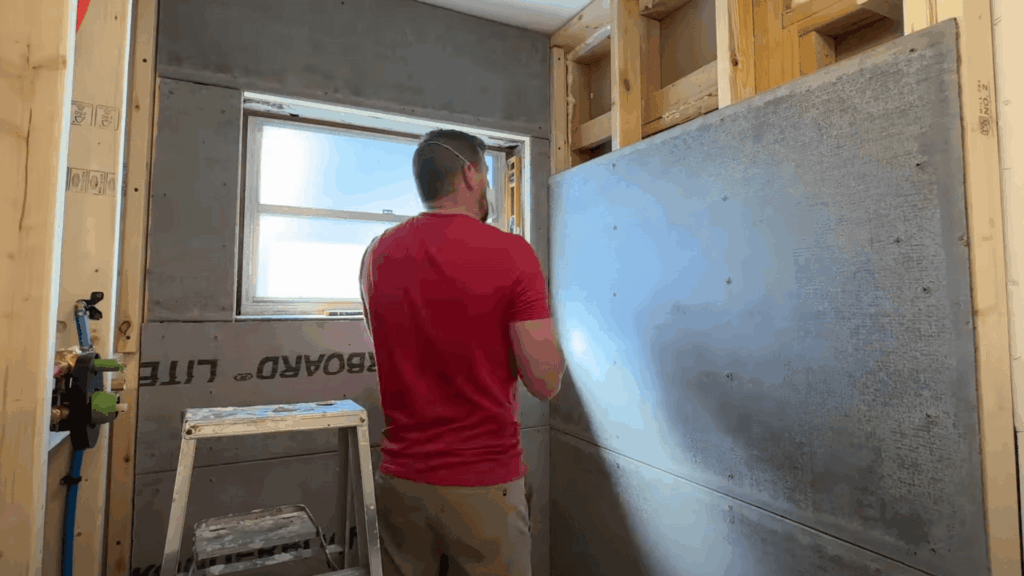
Next, waterproof the walls with a product like RedGard before installing Durock or concrete backer board.
Use corrosion-resistant screws to attach the panels.
Tape all seams with mesh tape and cover them with thinset mortar. This step locks out moisture and strengthens the structure of your shower.
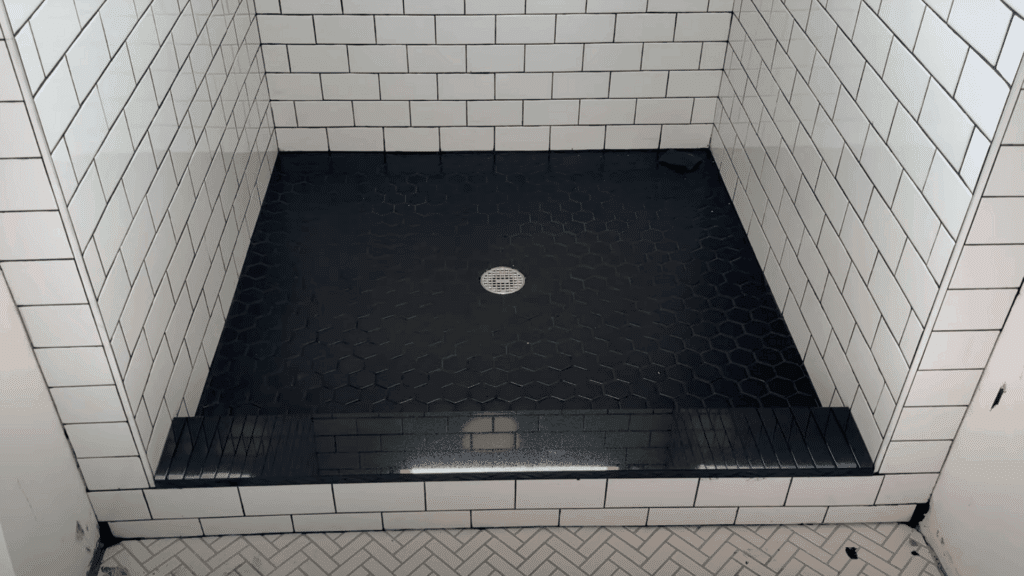
Step 5: Tile the Shower
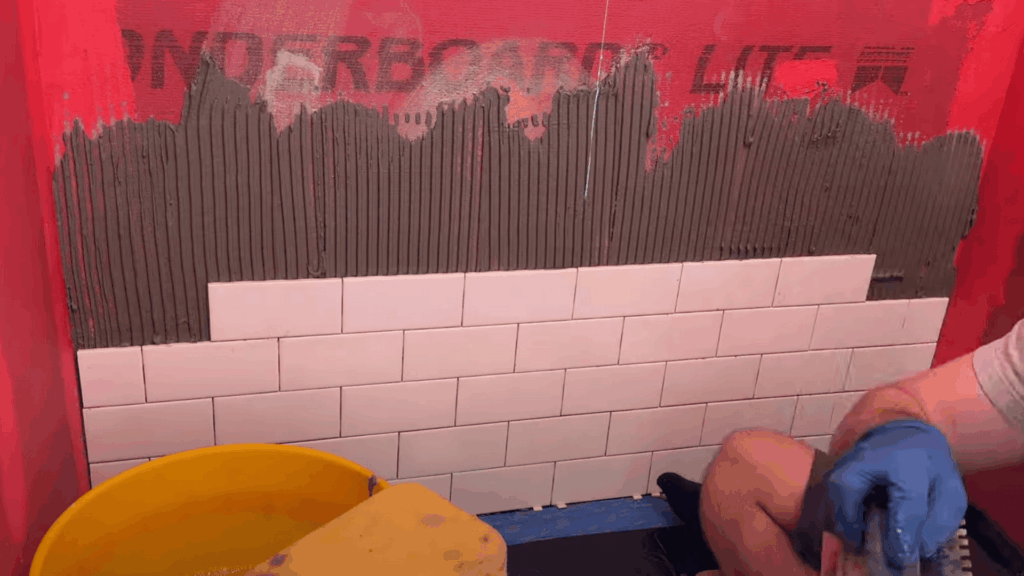
Start with the floor tiles, then move to the walls. This makes sure the wall tiles sit neatly on top of the floor edge.
Use spacers or wedges to keep everything level and aligned. Once the tiles are set, apply a waterproof grout, preferably pool-grade with glass beads for extra strength.
Work in small areas to prevent them from drying out too fast.
Wipe off excess grout with a damp sponge. When adding shelves, fixtures, or handles, drill carefully and secure them into studs or anchors for a sturdy fit.
Step 6: Finish and Seal
Finish your shower by installing features like the shower door, trim, and accessories. Apply flexible caulk along corners, joints, and edges to seal everything tightly. Wipe away extra grout or silicone once it’s dry.
Check for leaks, turn on the water, and test the flow to make sure everything works correctly.
A careful finish makes a big difference; it gives your shower a clean, solid look and helps prevent future issues.
With steady effort and attention to each detail, you’ll end up with a shower that’s functional, durable, and built entirely by you.
This guide is based on a detailed video tutorial by The Build Society.
I want to thank the creator for explaining each step so clearly.
You can find the original video on their YouTube channel or watch it right below to follow along with this step-by-step shower remodel guide.
Tips for a Successful Budget-Friendly DIY Shower Remodel
Taking on a DIY shower remodel is easier when you plan ahead and stay organized. These simple tips will help you save money, avoid mistakes, and get a solid finish that lasts.
- Plan your budget first: List every cost, including materials, tools, and small extras.
- Measure twice, cut once: Accurate measurements prevent wasted tiles and materials.
- Use quality waterproofing: Don’t skip this step; it protects your shower from leaks and mold.
- Work in sections: Focus on one part at a time to avoid rushing and uneven results.
- Let everything dry fully: Give grout, caulk, and sealant enough time to set before using the shower.
- Keep tools organized: Having everything ready saves time and reduces stress.
- Watch tutorials: Videos can help you understand the steps before starting each phase.
Common Mistakes to Avoid
Even experienced DIYers can run into issues during a shower remodel. Knowing the common mistakes ahead of time and how to fix them can save you time, money, and frustration.
| Common Mistake | Solution |
|---|---|
| Not waterproof enough | Apply waterproof membranes and sealants generously and thoroughly. |
| Uneven tiles or slopes | Use a level and reference lines to keep floors and walls straight. |
| Skipping leveling checks | Regularly check levels during installation to maintain proper slope. |
| Rushing curing times | Allow grout, mortar, and caulk to fully set and cure before use. |
By being aware of these pitfalls and taking preventative measures, you can ensure a durable, leak-free, and professional-looking shower remodel.
Conclusion
Remodeling my shower on a budget taught me that you don’t need fancy tools or pro skills to get great results. What matters most is planning, patience, and sticking to each step.
I hope this step-by-step guide helps you feel ready to start your own project with confidence.
Take your time, measure carefully, and don’t rush the details. You’ll be surprised at how much you can do yourself.
When you finish, you’ll have a clean, solid shower that you built from the ground up. Remember, every small step counts, and every mistake teaches you something useful.
If I can do it, you can too. Keep learning, stay patient, and enjoy seeing your work come together; it’s worth the effort in the end.