
Propagating pothos plants in water is one of the easiest ways to grow new plants at home.
And I’ll show you how to do it the right way, using simple steps that are easy to follow. Pothos is a low-care houseplant, which makes it great for beginners.
Water propagation works well because roots grow fast, and you can see progress each day.
You also reduce the risk of early problems like overwatering or stem rot. In this article, I shared everything you need to know from start to finish.
You’ll learn how to choose the right cutting, where to place it, and how long rooting takes. I also explained light needs, water changes, and when it’s time to move your cutting into soil.
By the end, you’ll know exactly what to do to grow healthy pothos plants at home successfully.
What Is a Node and Why Does It Matter?
A node is the small bump found along a pothos stem, usually where a leaf grows out. This spot may look simple, but it plays a big role in propagation. Roots grow only from nodes, not from smooth parts of the stem.
If a cutting does not include a node, it will not root in water or soil.
When you cut a node below and place the stem in the right conditions, the plant responds by growing new roots from that point.
Nodes also help the plant grow new leaves over time. Every healthy cutting must have at least one node to succeed.
Taking a moment to spot the node before cutting saves time and prevents failed attempts. Understanding this step makes propagation easier and more reliable.
What You Need to Propagate Pothos in Water?
Having the right supplies prevents early mistakes and makes the propagation process easier and more successful from the start.
- Sharp, clean scissors or pruning shears: Use a clean cutting tool to prevent damage and reduce the risk of infection.
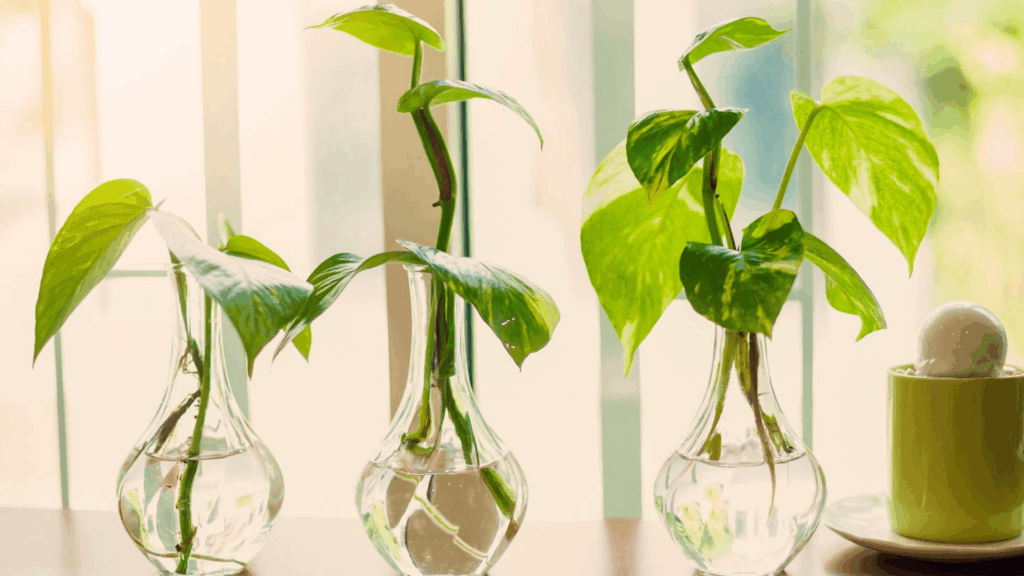
- Clear glass or jar: A clear container lets you watch root growth and spot problems early.
- Clean, room-temperature water: Fresh water supports healthy root growth and lowers stress on the cutting.
- Healthy pothos parent plant: Cuttings from strong plants root faster and are less likely to fail.
- Paper towel or cloth: Use this to dry tools or handle cuttings without bruising the stem.
How to Propagate Pothos Plant in Water?
Water propagation is a simple method that lets you watch roots grow as they form. It works well for beginners and requires very little setup.
Step 1: Check if Your Pothos Is Ready to Be Trimmed
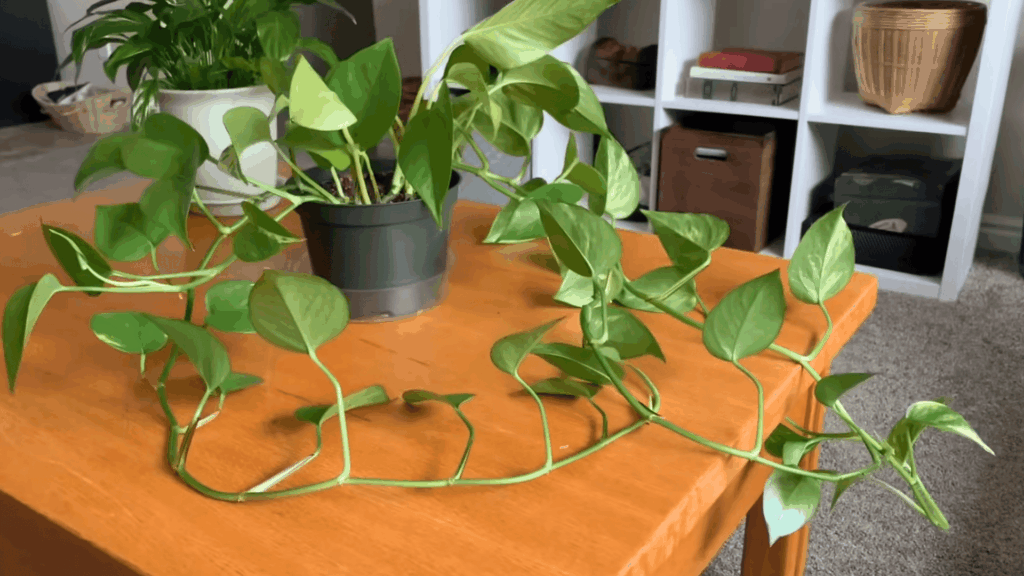
Look at your pothos plant and check if the vines are long, thin, or uneven. This is a good sign; it’s ready for trimming.
Cutting back leggy growth helps the plant grow fuller and healthier over time. It also gives you strong cuttings that are more likely to root well in water.
Trimming does not harm pothos plants. New growth will appear near the cut points after a short time.
Starting with a healthy, overgrown vine makes propagation easier and more successful.
Step 2: Find the Nodes on the Stem

Look closely along the pothos vine and find the small brown bumps on the stem. These are called nodes, and they are where new roots will grow from.
Every cutting must include at least one node, or it will not root in water.
Leaves alone cannot grow roots. Nodes are usually found where a leaf meets the stem. Take your time to identify them clearly before cutting.
Choosing a stem section with a visible node gives your cutting the best chance to grow healthy roots.
Step 3: Cut the Pothos Stem Correctly
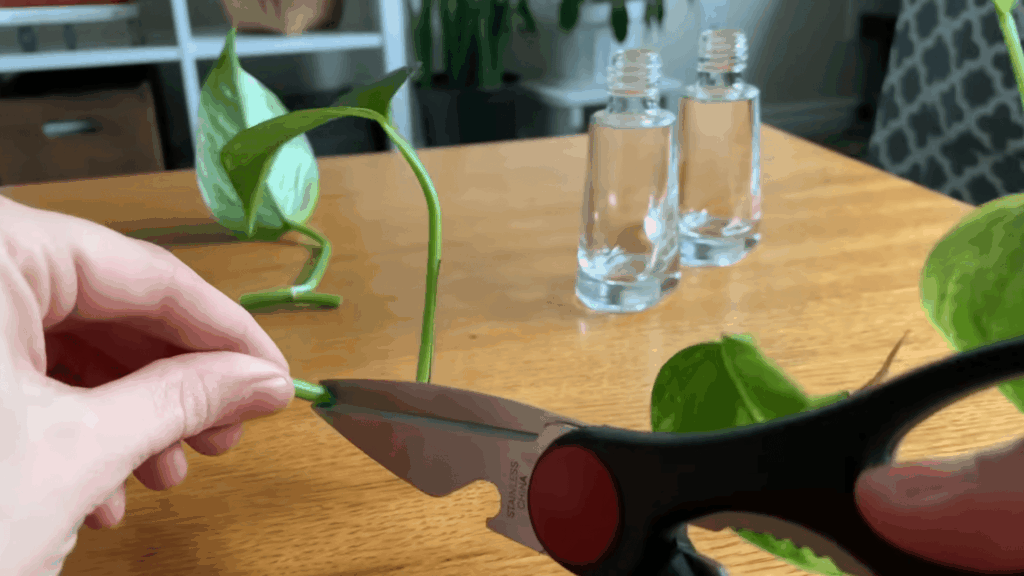
Cut the stem just below a node using clean, sharp scissors. Each cutting should include one to three healthy leaves.
Remove any leaves that would sit under the water, since they can rot over time. Make a clean, straight cut instead of crushing the stem.
This helps the cutting stay strong and begin rooting more easily.
Keep each cutting short and tidy for better results. Careful cutting plays an important role in how quickly and successfully a pothos roots in water.
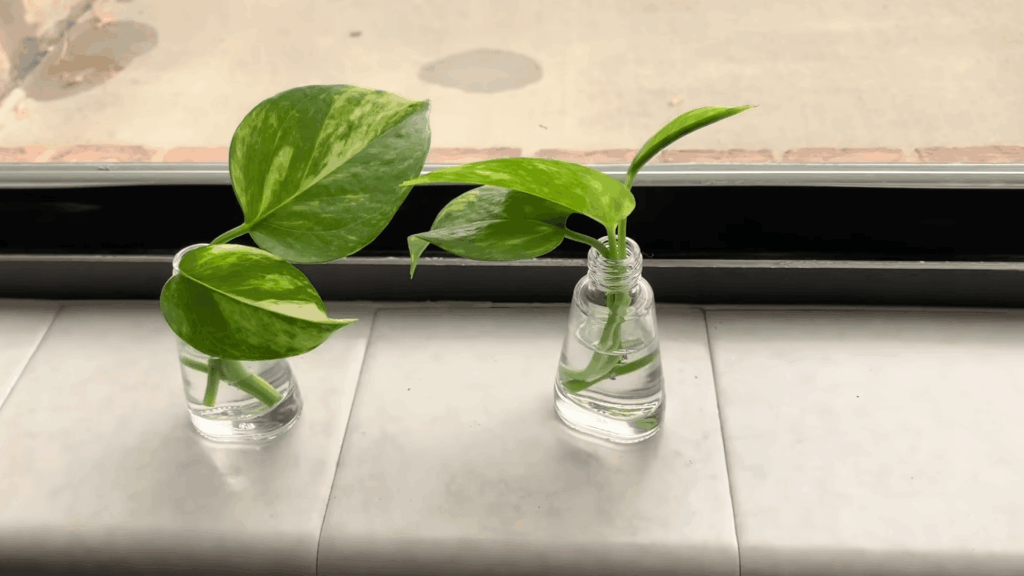
Step 4: Place the Cuttings in Water

Place each pothos cutting into a container filled with clean, room-temperature water. Make sure the node stays fully under the water, since roots grow from this point.
Keep all leaves above the water line to prevent rot. Choose a container that supports the cutting upright so it does not tip or sink.
Clear containers make it easier to watch root growth and spot issues early.
Once the cuttings are placed, avoid moving them often. Keeping the container steady helps the cutting focus its energy on growing roots.
Step 5: Set the Cuttings in Bright and Indirect Light
Place the container in a spot with bright, indirect light so the cutting can root properly.
Direct sunlight can stress the cutting and warm the water too much, while low light may slow root growth. A bright room with filtered light works well.
Keep the container away from cold drafts, air vents, or heaters. Steady warmth helps roots grow at a healthy pace.
Try not to move the container often. When light and temperature stay consistent, pothos cuttings tend to root faster and with fewer problems.
Step 6: Wait for Roots to Develop
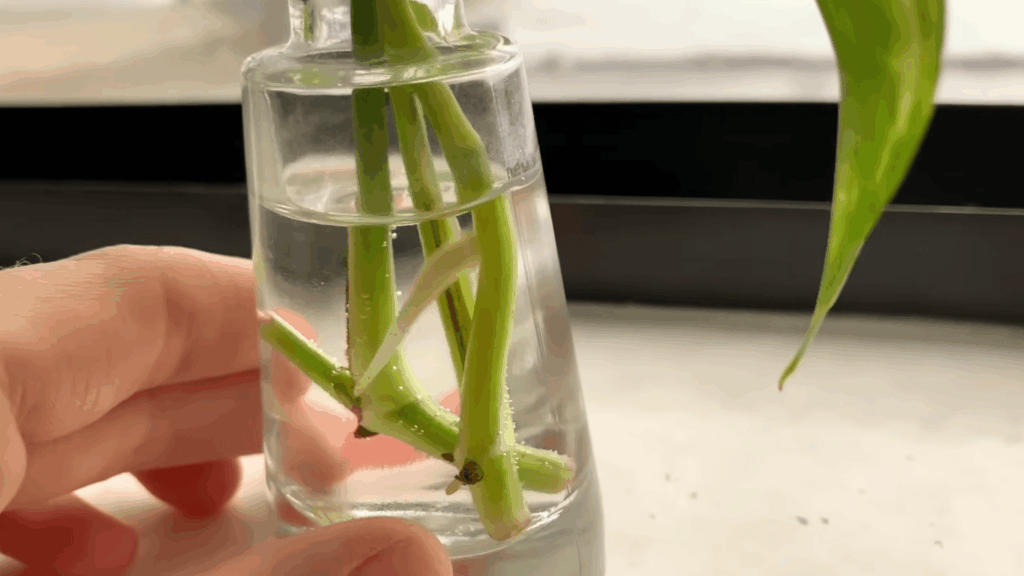
Roots usually start to appear within 7 to 14 days, though cooler temperatures can slow the process. Small white roots form first near the node and continue to grow over time.
Some cuttings develop roots faster than others, which is normal and not a cause for concern.
As long as the leaves stay firm and green, the cutting is doing well. Avoid lifting the cutting out of the water too often to check progress.
Let it rest and grow. Once the roots reach about one inch long, the cutting is ready to move into the soil.
This tutorial is based on a helpful video by Tenney Plants. You can check out the original video on their YouTube channel here or watch it below.
Best Conditions for Root Growth
Healthy roots form when a few basic conditions stay steady. Paying attention to light, water, and timing helps your pothos cutting grow strong roots without stress.
1. Light Requirements
Pothos cuttings grow roots best in bright, indirect light. I usually place the jar near a window with filtered sunlight, not direct sun.
Strong sunlight can heat the water and stress the cutting, while low light can slow down root growth.
A bright room works well for most homes. You do not need special lights to succeed.
If leaves start turning yellow or drooping, the light may be too strong. Move the jar slightly and give the cutting a few days to adjust before making more changes.
2. Ideal Water Temperature
Room-temperature water is ideal for pothos propagation. Cold water can shock the stem and slow root growth, while warm water can increase the risk of rot.
I let tap water sit out for a few hours before using it so it feels neutral.
This also helps reduce strong chemicals. Keep the jar away from heaters, vents, or cold windows.
Stable water temperature helps the cutting focus on growing roots instead of reacting to sudden changes in its environment.
Signs Your Pothos Cutting Is Healthy
These signs help you know things are going well as roots develop. Checking them early can prevent problems and guide small adjustments.
- Firm, green stems: The stem should feel solid, not soft or mushy, which shows good water balance.
- White or light tan roots: Healthy roots look clean and pale. Dark or slimy roots can signal rot.
- Leaves staying upright: Leaves that hold their shape show the cutting is not stressed.
- No yellowing or black spots: Clean leaves suggest the cutting is getting the right light and moisture.
- New root growth over time: Even slow progress is a good sign when roots keep extending.
- No foul smell in water or moss: Fresh conditions support steady root growth and overall health.
How to Propagate Pothos Plant in Soil?
Soil propagation allows pothos cuttings to root directly where they will continue growing. This method works well if you prefer planting right away instead of starting in water.
1. Choose a Healthy Stem Cutting
Select a pothos vine with strong, green leaves and no yellowing or damage. Look closely for a stem section that has at least one clear node, since roots will grow from this spot.
Cut the stem just below the node using clean, sharp scissors to avoid crushing the stem.
Each cutting should include one to three leaves.
Avoid very thin or weak stems. Starting with a healthy cutting improves rooting success and helps the plant adjust better once planted.
2. Prepare the Pot and Soil
Choose a small pot with drainage holes to prevent water from collecting at the bottom.
Fill it with basic, well-draining potting mix. Lightly moisten the soil before planting, but do not make it soggy. Soil that holds too much water can cause the cutting to rot.
Gently loosen the top layer so roots can grow more easily.
Preparing the pot ahead of time makes planting smoother and reduces stress on the cutting.
3. Plant the Cutting Correctly
Place the cutting into the soil so the node is fully buried. Press the soil gently around the stem to keep it upright, but avoid packing it tightly.
Roots need airflow to grow properly. Make sure all leaves stay above the soil surface.
Water lightly after planting to help the soil settle around the cutting. Proper planting helps the cutting stay stable and gives the roots the space they need to form.
4. Care for the Cutting While It Roots
Set the pot in bright, indirect light and keep it in a warm area. Avoid direct sunlight, which can dry the soil too fast and stress the cutting.
Water only when the top inch of soil feels dry to the touch. Overwatering is a common issue at this stage.
Within a few weeks, you should see new leaf growth. This is a sign that roots have formed, and the plant is settling in well.
How to Propagate Pothos in Sphagnum Moss?
Propagating pothos in sphagnum moss is a simple option if you want more control over moisture. Start by soaking dry moss in water, then squeeze out extra moisture so it feels damp, not wet.
Take a healthy cutting with at least one node and place the node into the moss.
Press the moss gently around the stem to hold it in place. Keep the moss lightly damp at all times, but never soggy.
Set the container in bright, indirect light and keep it warm. Check the moss every few days and mist if it starts to dry. Roots usually form slowly but grow strong this way.
Once the roots are a few inches long, you can move the cutting to the soil. This method works well and helps reduce shock during transplanting.
How to Care for Pothos After Propagation?
After propagation, your pothos needs steady care to keep growing well. Start by moving the cutting to soil once roots are at least two inches long.
Use a small pot with drainage and a well-draining potting mix to avoid soggy soil.
Water lightly after planting, then wait until the top inch of soil feels dry before watering again. Place the plant in bright, indirect light so it can adjust without stress.
Avoid direct sun at first, as it can damage new growth. Keep the room warm and away from drafts.
Do not add fertilizer right away. I wait about four weeks before feeding, once the plant shows new leaves. Watch the leaves closely.
If they stay firm and green, your pothos is settling in well.
Common Mistakes to Avoid when Propagating Pothos
Small mistakes can slow rooting or cause cuttings to fail. Knowing what to avoid helps keep the process smooth and stress-free.
- Cutting without nodes: Roots grow from nodes, not plain stems. Always include at least one visible node on each cutting.
- Using dirty tools or water: Unclean scissors or old water can introduce bacteria and lead to rot.
- Too much or too little light: Direct sun can stress the cutting, while low light can slow root growth.
- Rushing the transfer to soil: Moving cuttings too soon can damage young roots. Wait until the roots are strong and long enough.
Conclusion
Now you know where to cut pothos and how to propagate it, including water, soil, and sphagnum moss. Each method works, but water propagation is often the easiest place to start.
It lets you see root growth, catch problems early, and learn how your cutting responds day by day.
If you are new to plant care, this method gives you a clear and simple path forward.
The most important part is patience. Give your cutting time, keep the conditions steady, and avoid rushing the process. Even small steps can lead to strong, healthy plants over time.
If you try propagating pothos after reading this guide, I’d love to hear how it goes.
Share your experience, tips, or questions in the comments below so others can learn from you, too.