
I have seen stucco on many homes, but I did not always know how it worked or why builders use it.
If you are planning a new build or updating an exterior wall, understanding what stucco is can help you make better choices for your home.
In this guide, I will explain what stucco is, how stucco works, and why it is such a common exterior finish.
You will learn what materials are used to make it, the main types of stucco systems used on homes today, and the basic tools needed during installation.
I also shared the step-by-step process builders follow when applying stucco to a wall.
By the end of this article, you will have a clear idea of how stucco is installed, how long it takes to cure, and what homeowners should know before choosing it for their property.
What Is Stucco and Why Is It Used on Homes?
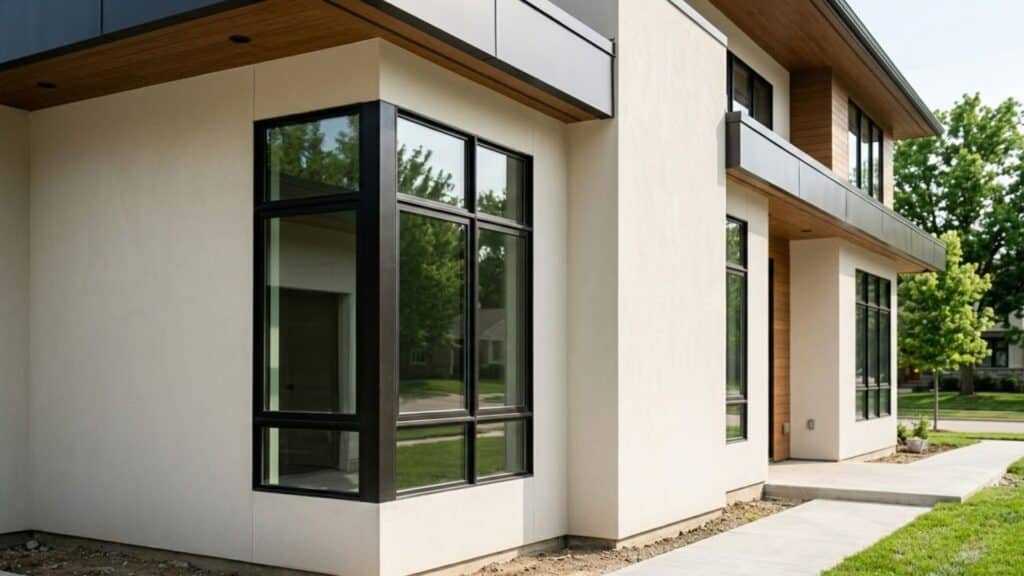
Stucco is a type of plaster used as a finish on the outside of buildings. Builders apply it to walls while it is wet, and it dries into a hard surface that protects the structure underneath.
The material is usually made from cement, sand, lime, and water mixed into a thick paste.
Once it cures, it forms a durable layer that can handle rain, sun, and wind. Homeowners often choose stucco because it is strong and lasts many years with basic care.
It also works on different wall surfaces, such as brick, concrete, or wood framing with metal lath.
Another reason people use it is the appearance. Stucco can be finished with different textures, which gives homes a clean and finished look.
The main reason stucco is used on homes is that it protects exterior walls while also improving the look of the building.
What Materials Are Used in Stucco?
Stucco is made from a mixture of simple building materials that work together to create a strong exterior coating. When these ingredients are combined with water, they form a thick paste that can be spread onto walls.
- Cement: Provides the main strength and structure of the stucco mixture. It helps the coating harden and bond to the wall surface.
- Sand: Adds texture and thickness to the mixture, making it easier to spread and helping the stucco stay stable after it dries.
- Lime: Improves flexibility and workability, which can help reduce cracking as the stucco cures.
- Water: Combines all the materials together and activates the cement so the mixture can harden.
When these materials are mixed in the right proportions, they create a durable exterior finish that can protect walls from weather and wear for many years.
Types of Stucco Systems Used in Modern Homes
Modern homes use different stucco systems depending on the building design and installation needs. Some systems use multiple layers for strength, while others focus on faster installation or better insulation.
- Traditional Three-Coat Stucco: This is the most common and durable system. It uses three layers called the scratch coat, brown coat, and finish coat to create a thick and strong exterior wall surface.
- One-Coat Stucco: This system is designed for faster installation. It uses a thicker base layer and a finish coat, which reduces labor time while still providing a solid exterior finish.
- Synthetic Stucco (EIFS): EIFS stands for Exterior Insulation and Finish System. It uses an acrylic-based coating placed over insulation boards to improve energy efficiency and exterior protection.
Tools and Materials Needed for Stucco Installation
Stucco installation needs basic tools and materials that help the mix stick to the wall. They assist with mixing, applying, and smoothing layers for a durable finish.
| Common Tools | Installation Materials |
| Hawk and trowel | Stucco mix |
| Mixing bucket | Metal lath |
| Float tools | Moisture barrier |
| Sprayer or brush | Fasteners |
How to Apply Stucco on a Wall?
Stucco creates a durable, weather-resistant exterior wall finish. By preparing the surface correctly and applying each coat carefully, you can build a long-lasting stucco wall.
Step 1: Prepare the Surface and Install Proper Wire Lath
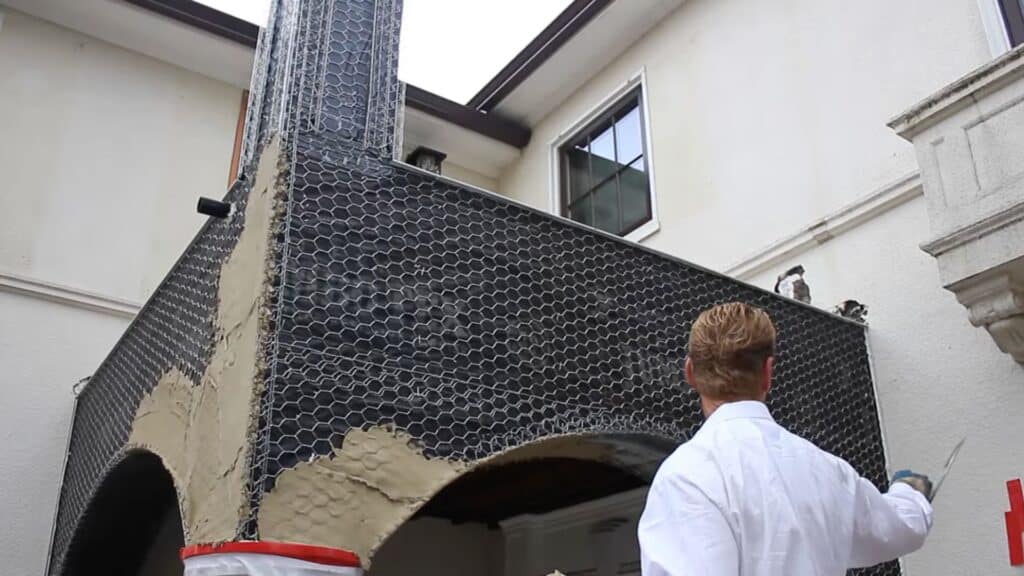
Start by preparing the surface so the stucco can properly bond. A key part of preparation is installing self-furred wire lath, which helps hold the stucco in place and prevents it from slipping through gaps.
This step is especially important when working on ceilings or soffits where gravity can cause material to fall.
Spread the first layer of stucco across the lath to create support before filling any larger openings.
Properly secured lath provides a strong base for the stucco system and improves adhesion for all the layers that follow.
Step 2: Apply and Scratch the Base Coat
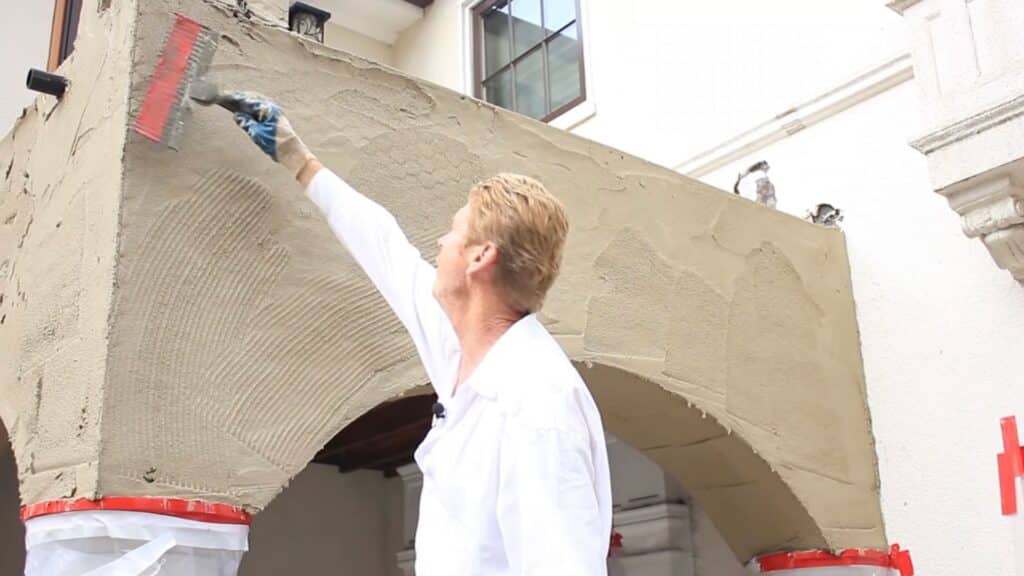
Once the base coat of stucco is applied, it needs to be scratched to help the next coat bond properly. Use a scratching tool to create grooves across the surface.
The scratches should be made in one direction first and then crossed in the opposite direction.
This crisscross pattern forms a rough texture that improves adhesion between layers.
The grooves help the next coat grip the surface. A scratched surface also helps layers stick better and lowers the risk of cracks.
Step 3: Apply the Brown Coat and Level the Surface
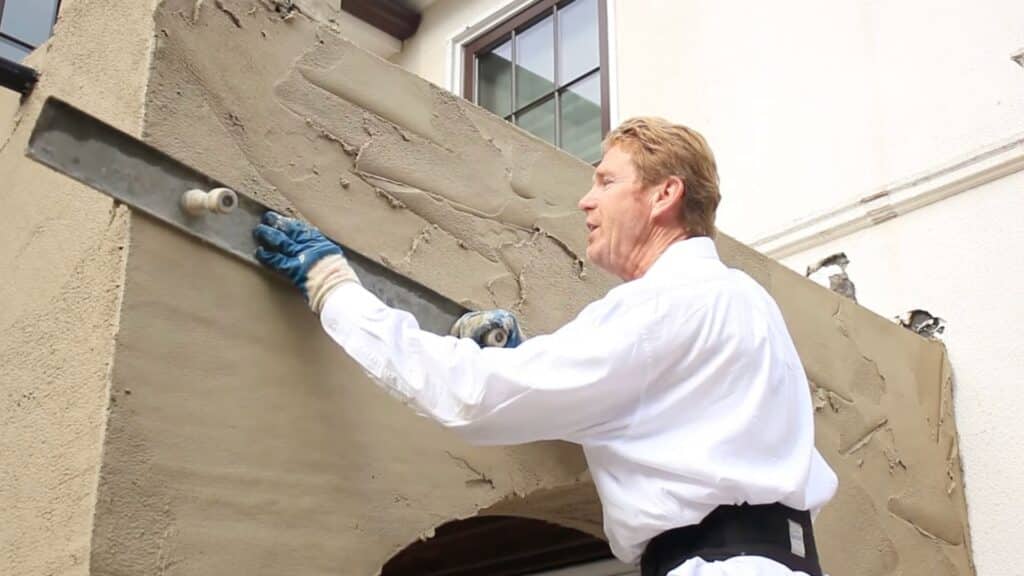
The brown coat levels and straightens the wall. Apply enough stucco so the surface can be shaped properly.
A straightedge tool, commonly called a darby, is used to smooth and level the material. Moving the tool across the surface removes excess stucco while helping create a straight and even wall.
This step ensures the surface is true and plumb before adding texture.
A well-leveled base coat is essential because any uneven areas will become more noticeable once the dash finish is applied.
Step 4: Let the Stucco Set Before Floating

After leveling the brown coat, allow the stucco to sit briefly so it can firm up. This short waiting period helps the material hold its shape before the next finishing steps begin.
If the surface is worked too soon, the stucco may shift or become uneven.
Waiting just long enough allows the material to become stable while still remaining workable.
Proper timing during this stage makes it easier to smooth, compact, and refine the surface in the next steps without damaging the base layer.
Step 5: Compact the Surface with a Hard Rubber Float
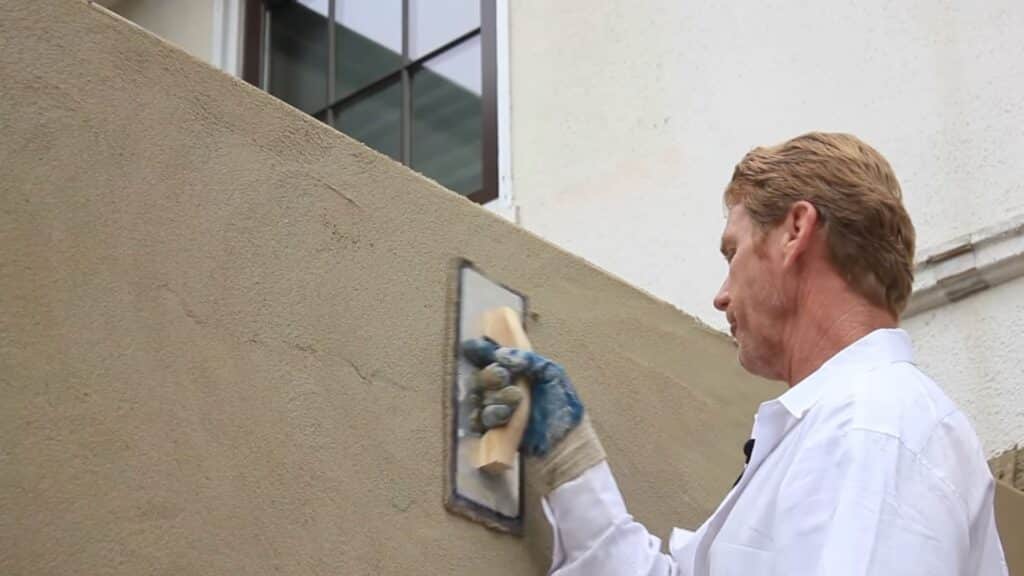
Once the stucco begins to set, a hard rubber float is used to compress the surface. Floating helps embed the stucco firmly into the wire lath and strengthens the bond between coats.
The float is moved across the wall with steady pressure to compact the material and correct small irregularities.
This step also helps maintain a straight surface while improving durability.
Proper compression ensures the base layers remain solid and stable before the final texture is applied, which is important for achieving a long-lasting finish.
Step 6: Sponge Float to Bring Out the Aggregate
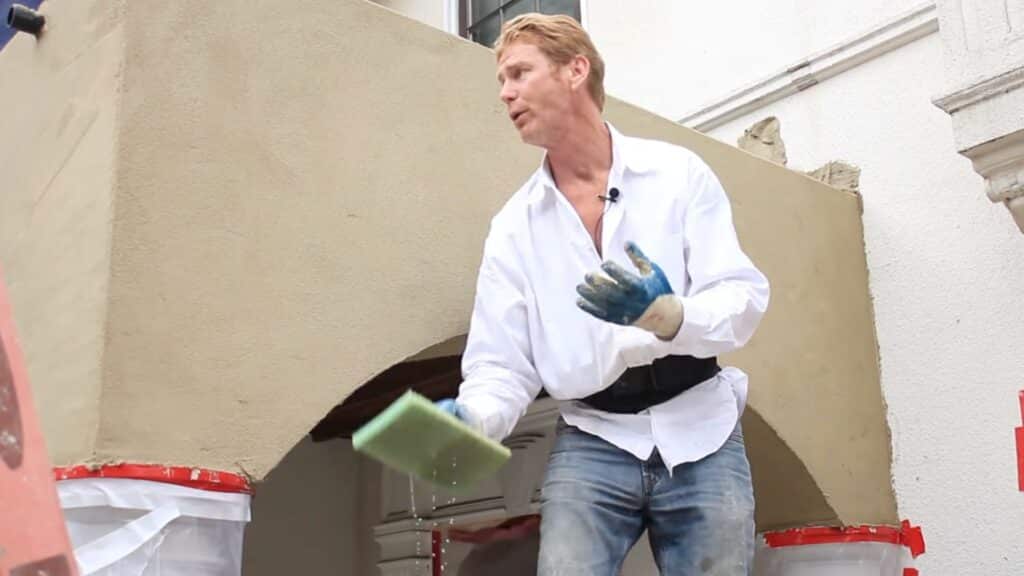
After compacting the surface, a sponge float is used along with water to bring the sand and aggregate to the surface.
Wetting the stucco allows the grains within the mixture to rise slightly as the sponge float moves across the wall. This process helps expose the aggregate and prepares the surface for the dash finish.
Bringing out the sand also helps create a texture that blends better with existing stucco finishes.
Adequate moisture is important in this step because it helps the aggregate appear evenly across the surface.
Step 7: Correct Imperfections and Shape Corners
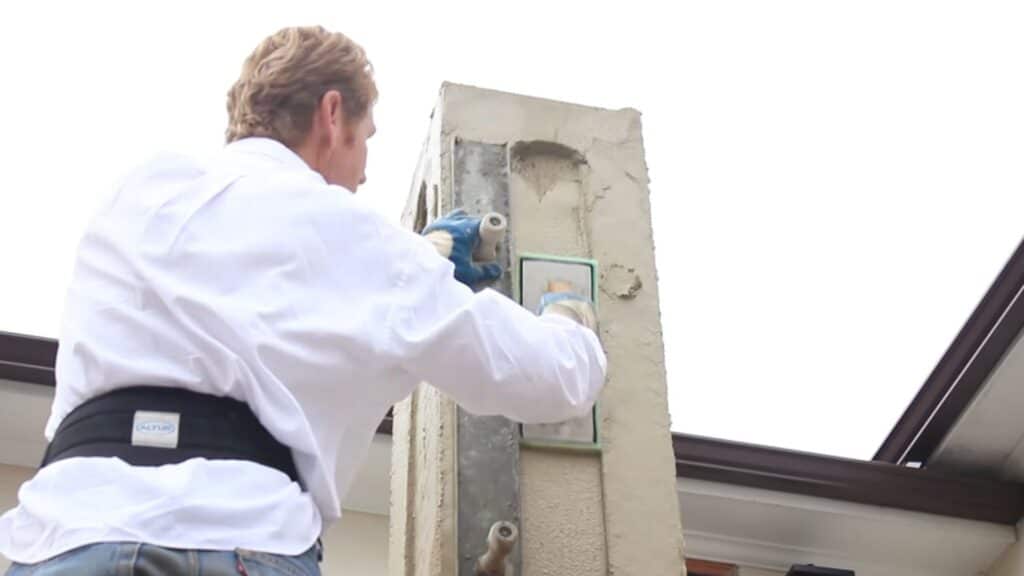
Before applying the final texture, inspect the wall for dents, uneven areas, or poorly shaped corners. Fix imperfections first since the dash finish can highlight flaws.
If a corner or edge appears slightly indented, apply a small amount of fresh stucco to build the area out.
Then use a straight-edge tool or darby to shape and smooth the corner.
Moving the tool upward helps form a straight, clean line. Allow the repaired section to firm up and hold its shape before continuing with the dash application.
Step 8: Prepare the Hopper Gun and Dash Mixture
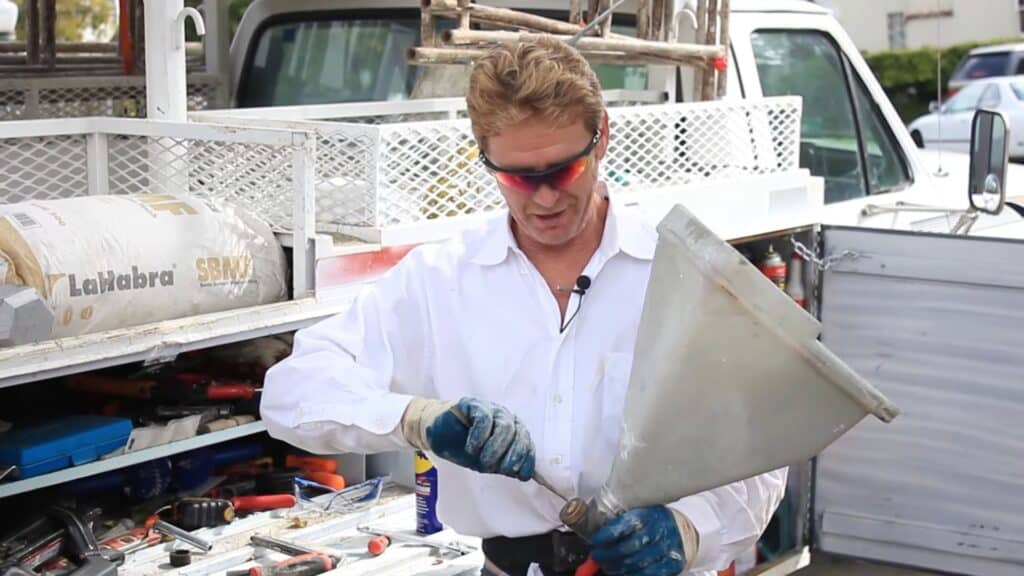
A hopper gun sprays the dash finish evenly on the wall. Before spraying, make sure the nozzle opening is large enough so the sand mixture flows smoothly.
Dash often uses coarser plaster sand, which creates the heavier texture seen on traditional stucco surfaces.
The stucco mixture should also be thinner than standard stucco so it flows easily through the hopper gun.
A wetter mix allows the sand and cement to scatter evenly, helping create the rough dash texture while ensuring smooth spraying and consistent coverage across the surface.
Step 9: Spray the Dash Finish onto the Wall
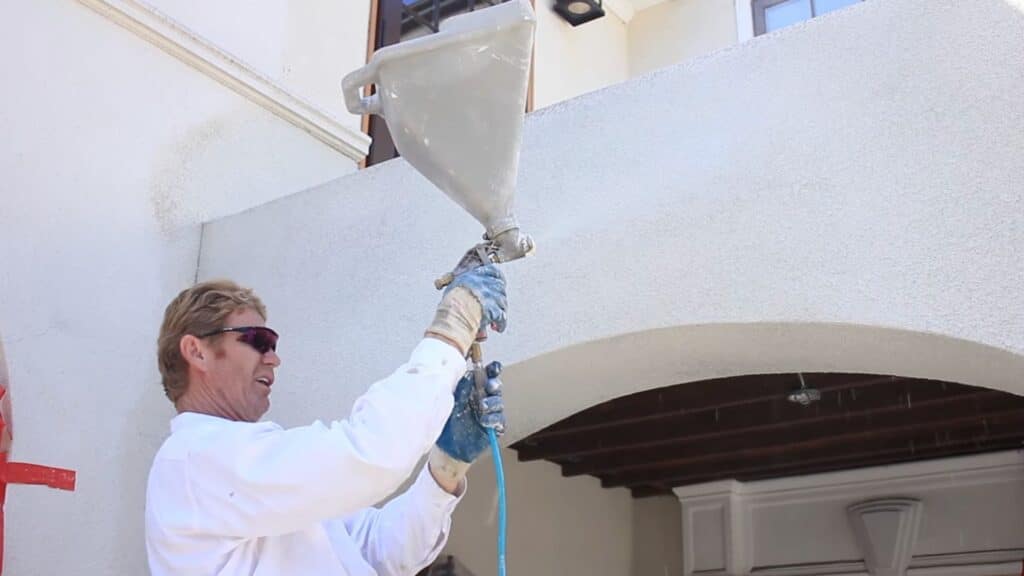
Once the hopper gun is ready and the mixture is properly prepared, the dash finish can be sprayed onto the wall.
Pulling the trigger pushes the stucco mixture through the nozzle, scattering sand and cement across the surface.
Move the hopper steadily and maintain a consistent distance from the wall to keep the texture even. The sprayed material sticks as it lands, forming a rough, pebbled appearance.
This scattered application creates the classic dash pattern often seen on traditional stucco exteriors and helps give the wall a durable finish.
Step 10: Allow the Stucco to Cure Before Painting
After the dash finish is applied, the stucco needs enough time to cure before any paint or additional coatings are added.
Proper curing usually takes about 28 to 30 days, depending on weather conditions and moisture levels.
During this period, the stucco gradually hardens and gains strength as it dries. Painting too soon can trap moisture inside the wall, leading to peeling or an uneven finish later.
Letting the surface cure fully improves durability, strengthens bonding, and helps paint apply more smoothly.
This tutorial is based on a helpful video by Kirk Giordano Plastering. You can check out the original video on their YouTube channel here or watch it below.
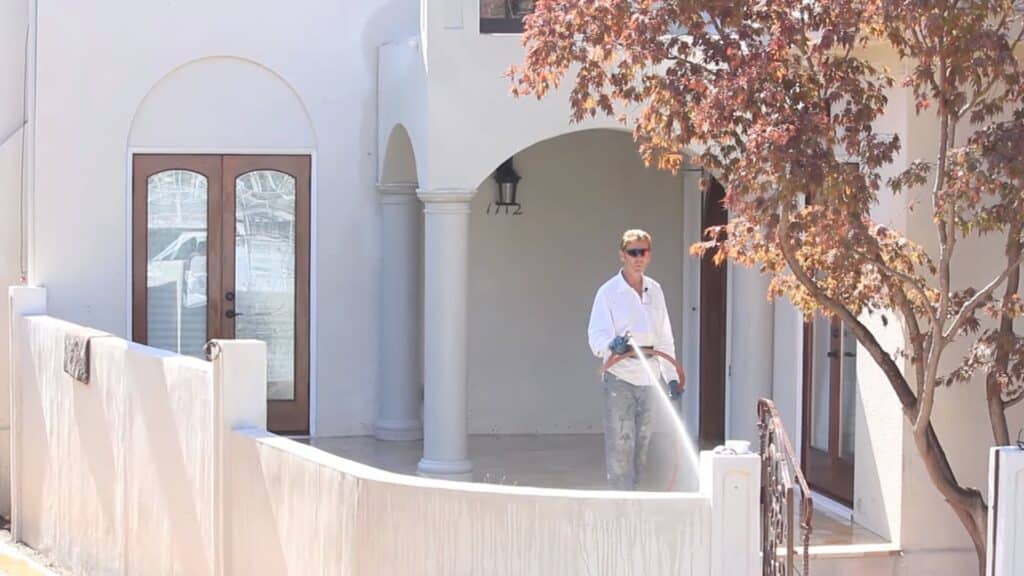
Preparing the Wall Surface Before Applying Stucco
Proper wall preparation is an important part of stucco installation. A clean and stable surface helps the stucco stick properly and prevents problems like cracking or peeling later.
Before applying any layers, builders inspect the wall to ensure it is ready for the installation process.
The wall must be cleaned to remove dust, dirt, grease, or loose paint that could affect adhesion.
Builders often use brushes or pressure washing to prepare the surface. Next, cracks or damaged areas are repaired so the wall becomes smooth and even.
Finally, the structural support of the wall is checked to ensure the framing and sheathing are secure.
Proper preparation helps the stucco bond evenly and creates a strong, long-lasting exterior finish.
How Long Does Stucco Take to Dry and Cure?
Stucco does not dry immediately after application. Each layer needs enough time to set and cure before the next layer is added.
The first layer, known as the scratch coat, usually takes about 24 to 48 hours to dry.
Builders sometimes lightly mist it with water to cure it slowly and evenly. After that, the brown coat is applied, and this layer often needs at least 48 hours to cure properly, so the surface becomes strong and smooth.
The final finish coat normally takes 24 to 36 hours to set, although full curing may take longer depending on weather conditions.
Allowing enough curing time is very important because if stucco dries too quickly, it can shrink and develop cracks.
Proper curing helps the material harden evenly and ensures the exterior wall remains durable and long-lasting.
Popular Stucco Textures for Exterior Walls
The texture is created during the final coat using special tools and techniques. Each style gives the home a unique look and can match different architectural designs.
- Smooth Finish: This texture creates a clean and flat surface with very little pattern. It gives homes a modern and polished appearance, often used in contemporary designs.
- Dash Finish: This style has a rough and slightly raised texture created by throwing or spraying stucco onto the wall. It gives homes a bold and textured look.
- Sand Finish: This texture has a fine, grainy surface created by adding sand to the mixture. It provides a balanced look that is both decorative and subtle.
- Skip Trowel: This finish creates a slightly rough pattern with soft curves and lines. It gives the wall a natural, handcrafted appearance often seen in Mediterranean-style homes.
Pros and Cons of Stucco Exterior Walls
Stucco is a durable exterior wall finish with a distinctive look. Like any building material, it has benefits and limitations that homeowners should understand before choosing it.
| Pros | Cons |
| Stucco forms a hard outer layer that can last for many years when installed and maintained properly. | Small cracks can appear if the building shifts or if the installation is not done correctly. |
| Because it is cement-based, stucco does not burn easily and adds an extra layer of fire protection. | Areas with frequent freezing and thawing cycles can cause the material to weaken over time. |
| Stucco adds a layer that helps regulate indoor temperatures and may lower heating and cooling costs. | Fixing damaged stucco can sometimes require professional work to restore the surface properly. |
Stucco Maintenance Tips for Long-Lasting Walls
Regular care can help stucco stay strong and attractive for many years. By following a few simple maintenance steps, homeowners can prevent damage and keep exterior walls in good condition.
- Inspect walls yearly: Check the stucco surface at least once a year for cracks, chips, or water stains. Early inspection helps identify small problems before they grow into larger repairs.
- Repair cracks early: Small cracks should be sealed or repaired as soon as they appear. Fixing them quickly prevents moisture from entering the wall and causing further damage.
- Clean the surface: Dirt and dust can build up on stucco over time. Washing the walls gently with water or a mild cleaner helps maintain the appearance of the finish.
- Repaint or reseal when needed: Over time, the surface may need repainting or sealing to maintain protection and improve the look of the exterior. Regular updates can extend the life of the stucco finish.
Conclusion
Stucco is a durable exterior wall finish made from cement, sand, lime, and water that protects and improves the appearance of homes.
The stucco installation process includes several steps, such as surface preparation, installing a moisture barrier and metal lath, and applying three layers known as the scratch coat, brown coat, and finish coat.
Each stage helps create a strong and long-lasting exterior surface.
Proper installation is important because it helps prevent issues like cracks or moisture damage.
Homeowners should understand how stucco works and what the installation process involves before starting a project or hiring a contractor.
Have questions or experiences with stucco? Share your thoughts or tips in the comments below!