
Your front door is the first thing visitors see when they approach your home, so why not make it a statement piece?
If you’ve been thinking about giving your entryway a modern, fresh look, painting your front door black is one of the easiest ways to achieve that sleek, timeless appeal.
If you’re looking to add bold contrast to your home’s exterior or simply update the look, black is a versatile color that complements virtually any style.
Don’t worry about it being too much; black offers a refined, clean aesthetic that can elevate the curb appeal without being overpowering.
In this guide, we will walk through the steps to painting your front door black, so you can enjoy a chic, modern entryway that makes a lasting impression. Let’s get started.
Choosing the Perfect Black Shade for Your Front Door
When choosing the perfect black shade for your front door, it’s important to consider the overall style of your home.
Lighter black shades, like charcoal or slate, can create a softer, more understated look, while deep, true black offers a bold, dramatic effect that adds sophistication.
A matte finish provides a modern, minimalist vibe, while glossy black paint gives a shiny, polished appearance that stands out. Think about the surrounding colors and materials, too.
Black pairs beautifully with whites, grays, and natural wood tones. Consider the climate as well, as certain finishes may show dirt or weather wear more than others.
Ultimately, choose a shade that reflects your personality and complements your home’s exterior.
Preparing Your Front Door for a Fresh Coat of Paint
Before painting your front door, preparation is key to achieving a smooth, long-lasting finish. Start by removing the door from its hinges, if possible, and removing any hardware, such as doorknobs or locks.
Clean the door thoroughly with soapy water to remove dirt, dust, and grease, ensuring a clean surface for paint adhesion.
Once dry, lightly sand the door to create a smooth, even surface and help the paint adhere better. Fill any cracks or holes with wood filler, then sand smooth once dry.
If the door has been previously painted, lightly sand the surface to remove any glossy finish. Finally, apply a coat of primer to ensure the paint goes on evenly and lasts longer.
Selecting the Right Paint for Your Front Door
When selecting the right paint for your front door, consider both the door material and exterior conditions.
| Recommendation | Why It Matters |
|---|---|
| Wood: Acrylic latex paint | Flexible, dries fast, resists cracking |
| Metal: Oil-based paint | Strong, glossy finish helps prevent rust |
| Choose exterior-grade paint | Handles rain, sun, and changing weather |
| Satin or semi-gloss | Easy to clean, resists stains and moisture |
| Use UV-resistant paint | Helps keep color from fading over time |
Painting Your Front Door Black: Step-by-Step
Give your front door a bold black finish with these simple steps. Proper prep, sanding, and the right tools help create a smooth, long-lasting, and professional-looking result.
Tools and Materials Used
Step 1: Remove Decorations from the Door
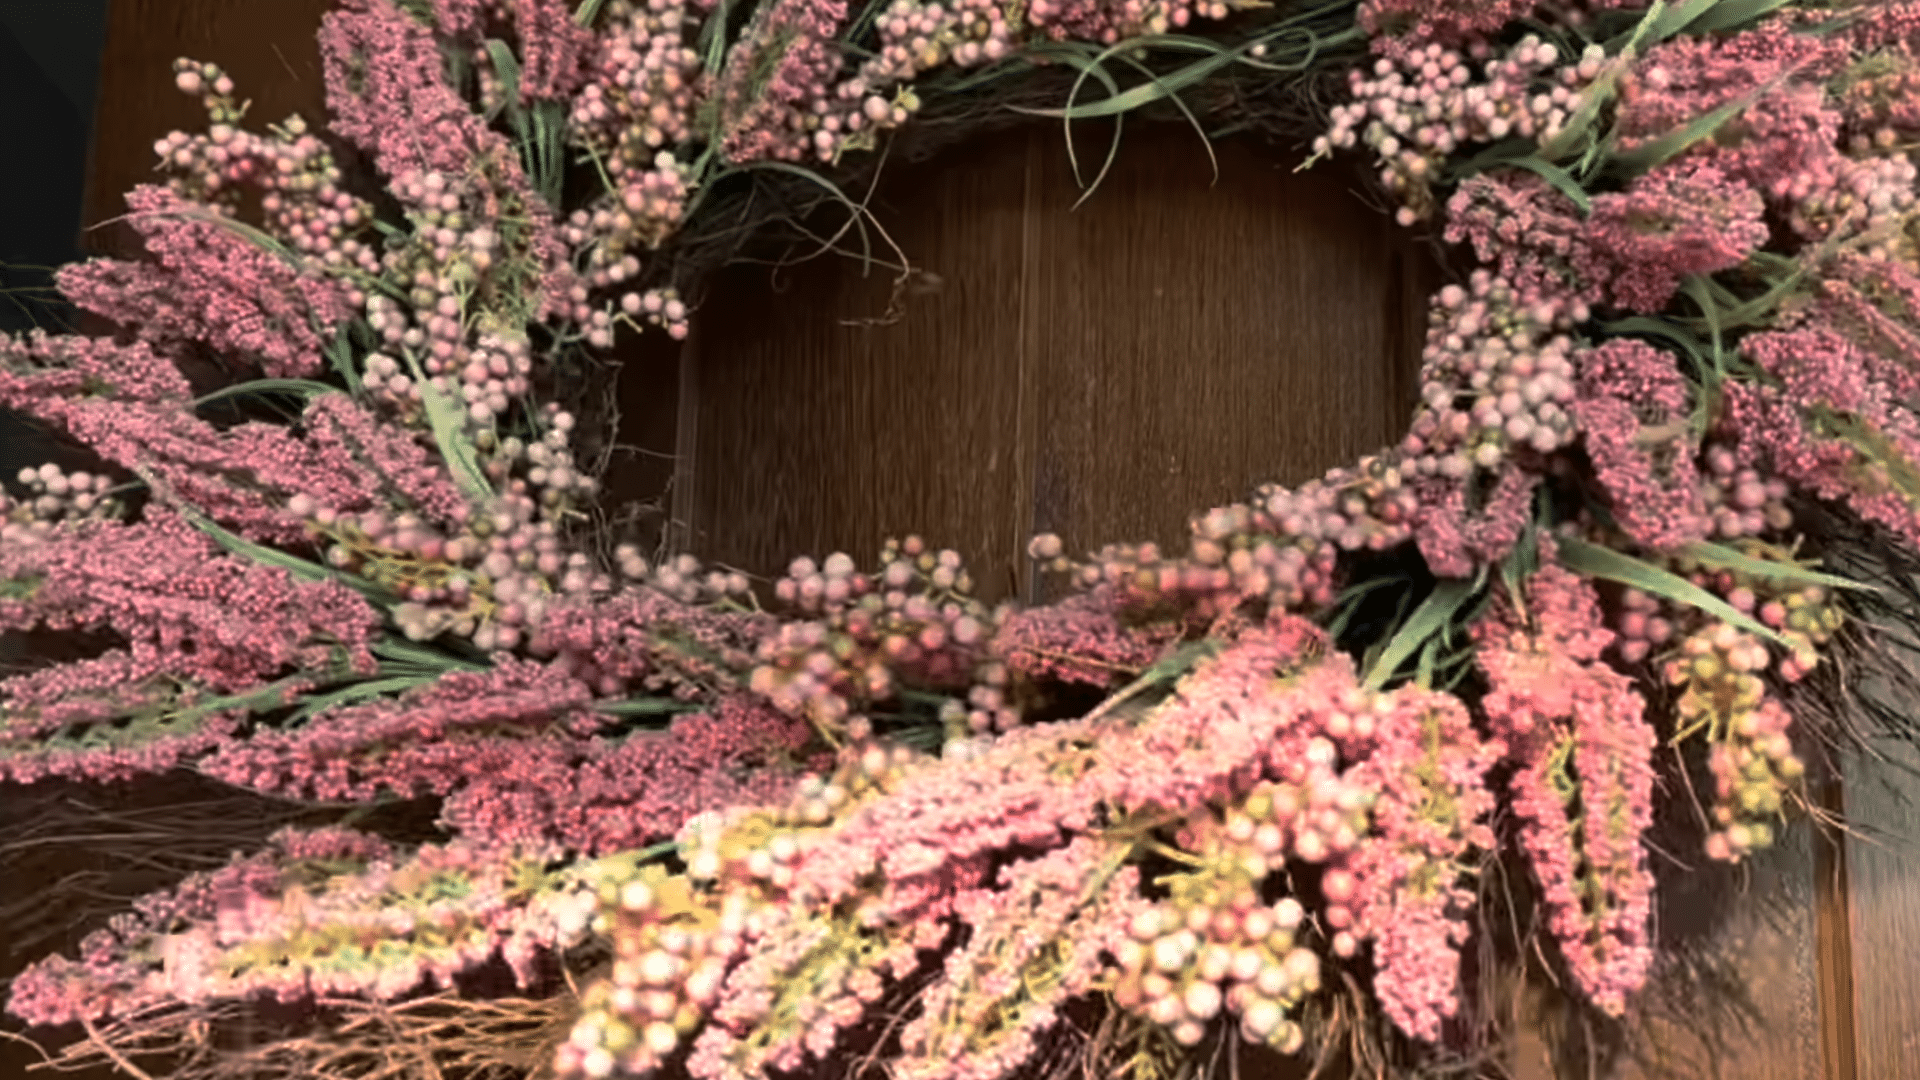
Start by removing anything attached to the door. In the video, the wreath and wreath hanger are taken down first.
Clearing the door makes the prep work easier and prevents dust or paint from getting on decorations.
Small items left on the door can also get in the way while sanding. Taking everything off allows you to work across the entire surface without interruption.
This step only takes a minute, but it helps you keep the process organized and prevents unnecessary cleanup later.
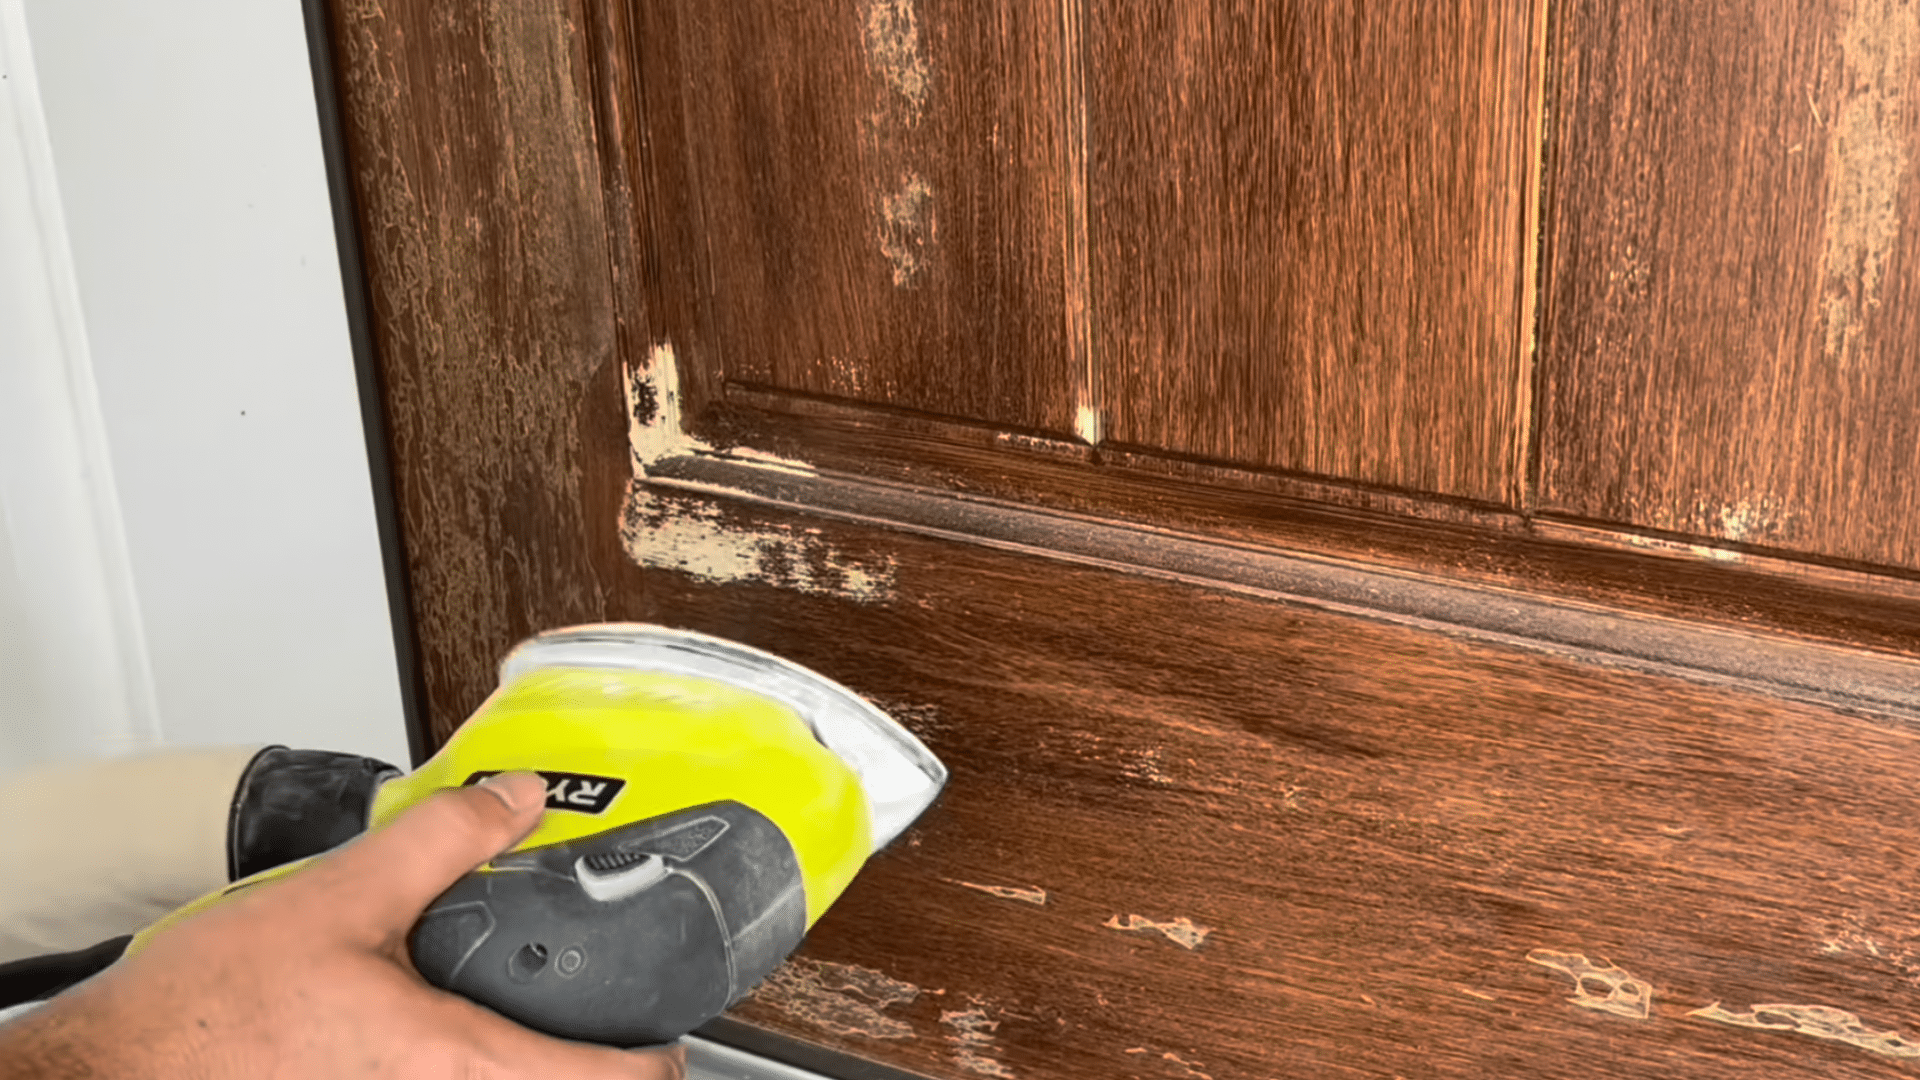
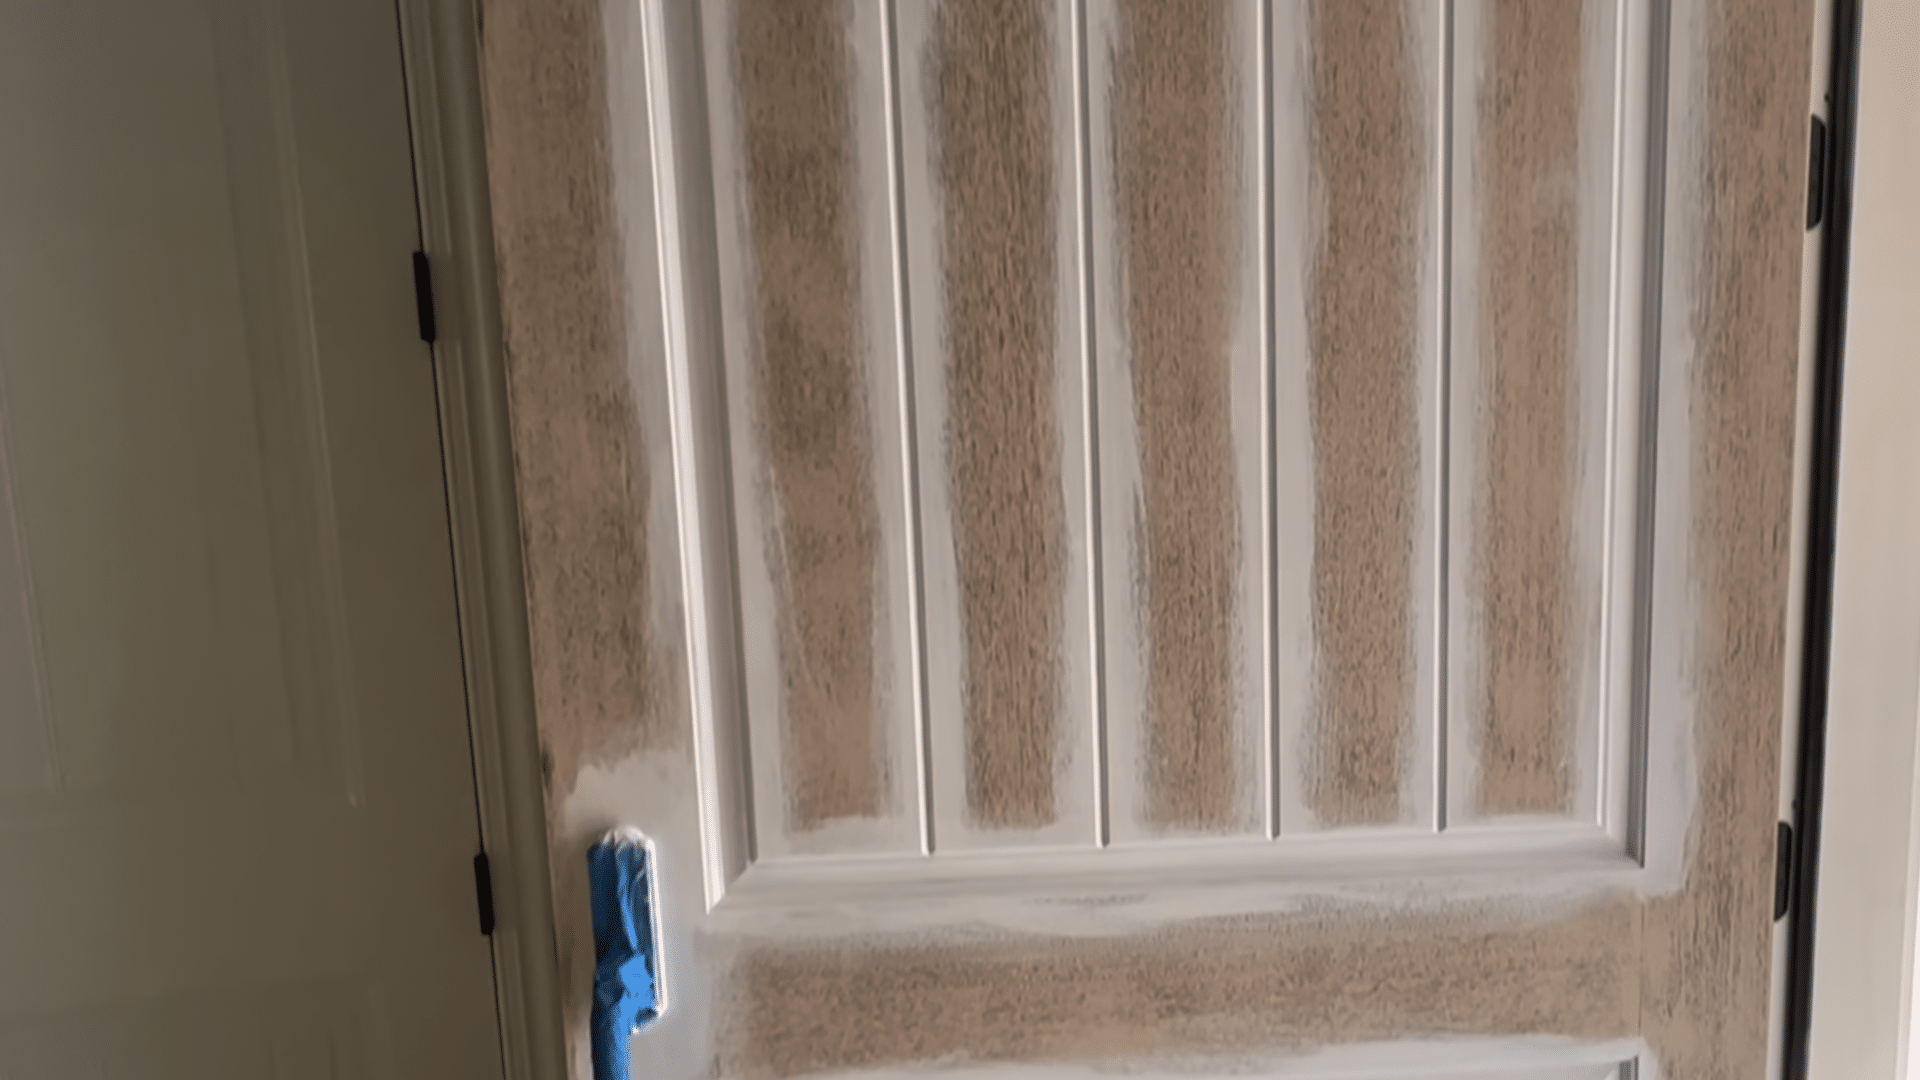
Step 2: Begin Sanding the Door Surface

Prep work is the most important part of painting a door. The video shows the use of a flexible sanding sponge to begin smoothing the surface.
These sponges often have two different grit levels, which helps when working on doors with stain or polyurethane.
In this case, 80-grit is used because the door finish is starting to peel. The sanding sponge is also helpful for reaching detailed areas and corners.
The goal is to remove rough spots and prepare the surface so the primer will stick properly.
Step 3: Pay Extra Attention to the Bottom Section
The bottom of a front door often gets the most sun. Because of this, the finish in that area usually wears down faster than the rest of the door.
In the video, 120-grit sandpaper removes the damaged coating quickly in this section. The upper area of the door takes longer because it has less sun damage.
Adjusting the grit helps keep sanding efficient. Continue sanding until the surface feels smooth and the peeling polyurethane is completely removed.
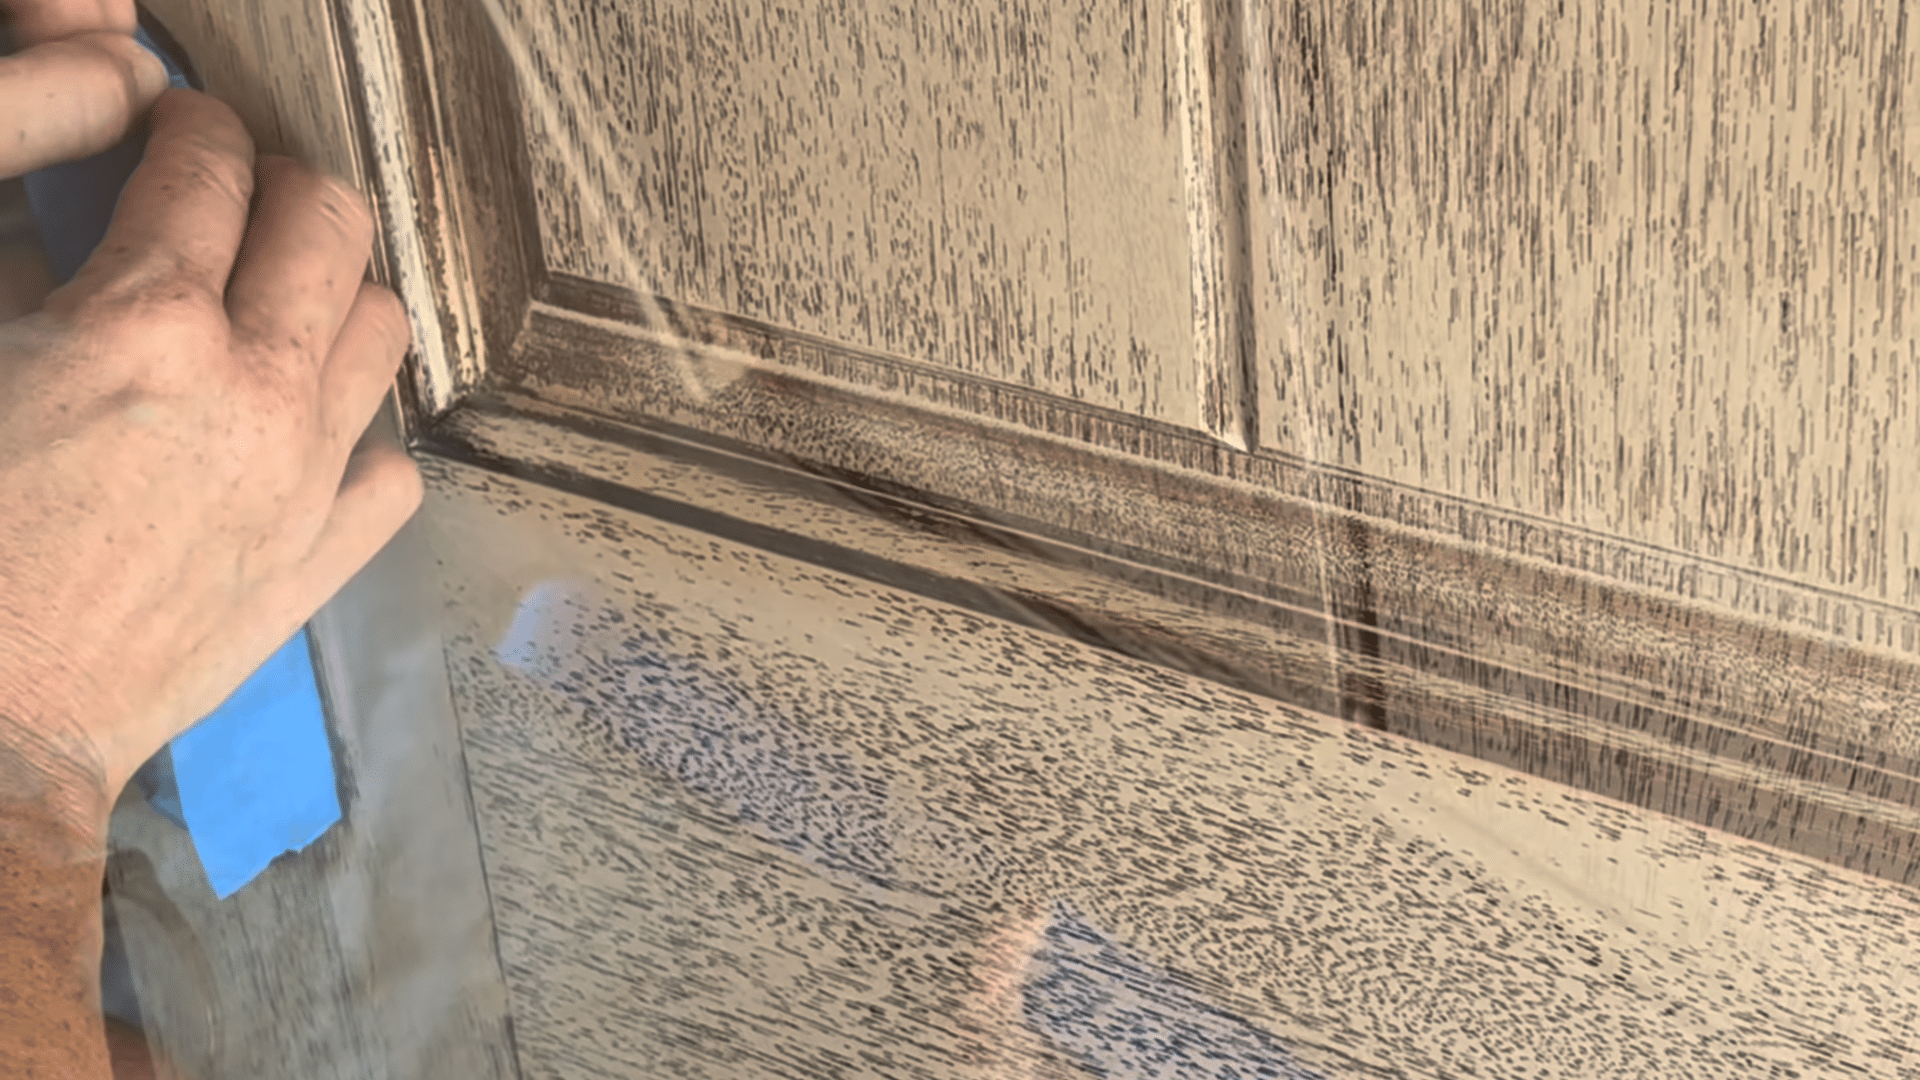
Step 4: Sand Detailed Areas by Hand
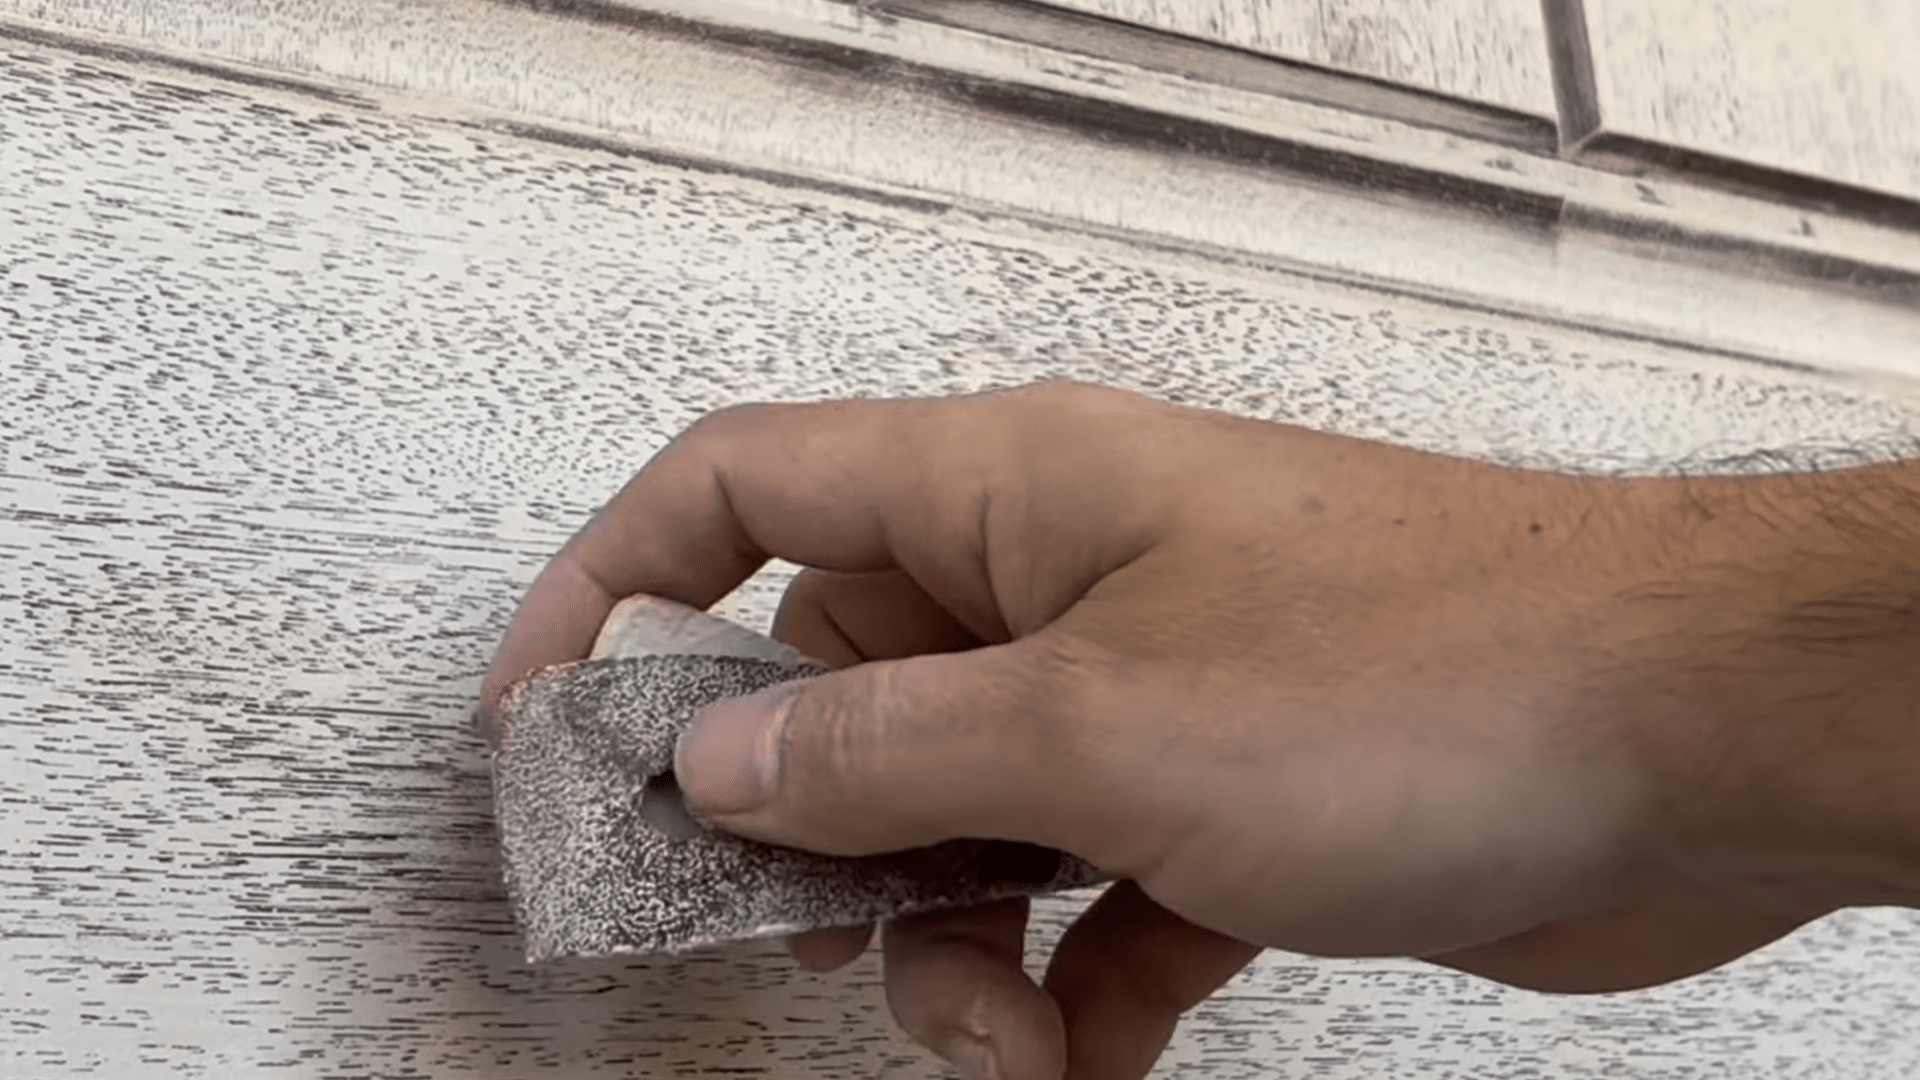
Some parts of the door require extra attention. For detailed trim or grooves, the video shows folding a sheet of 80-grit sandpaper in half.
This method provides more control and allows you to reach narrow spaces. Hand sanding also removes stubborn finishes that a sponge might miss.
It may require a little extra effort, but it helps create a clean surface for painting.
Continue working through the detailed sections until the old coating is gone and the wood surface looks evenly sanded.
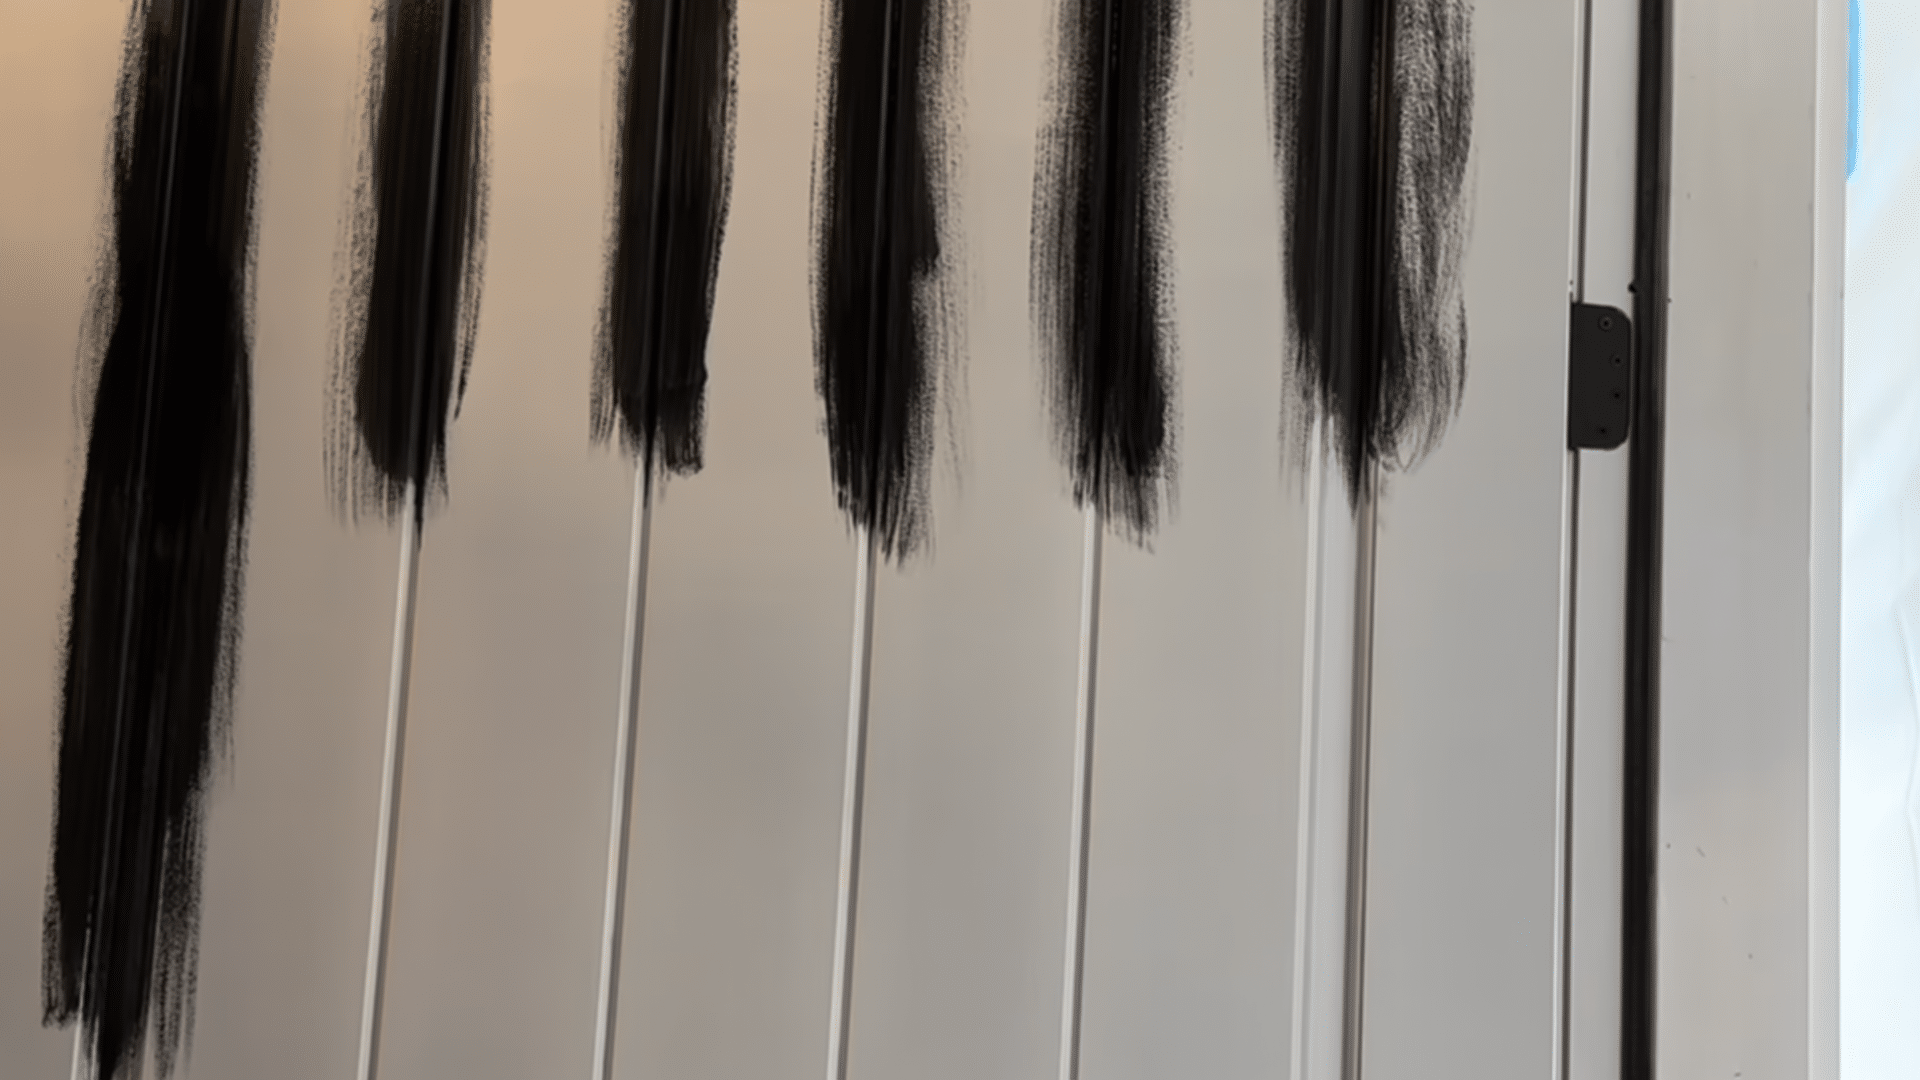
Step 5: Remove Dust from the Door
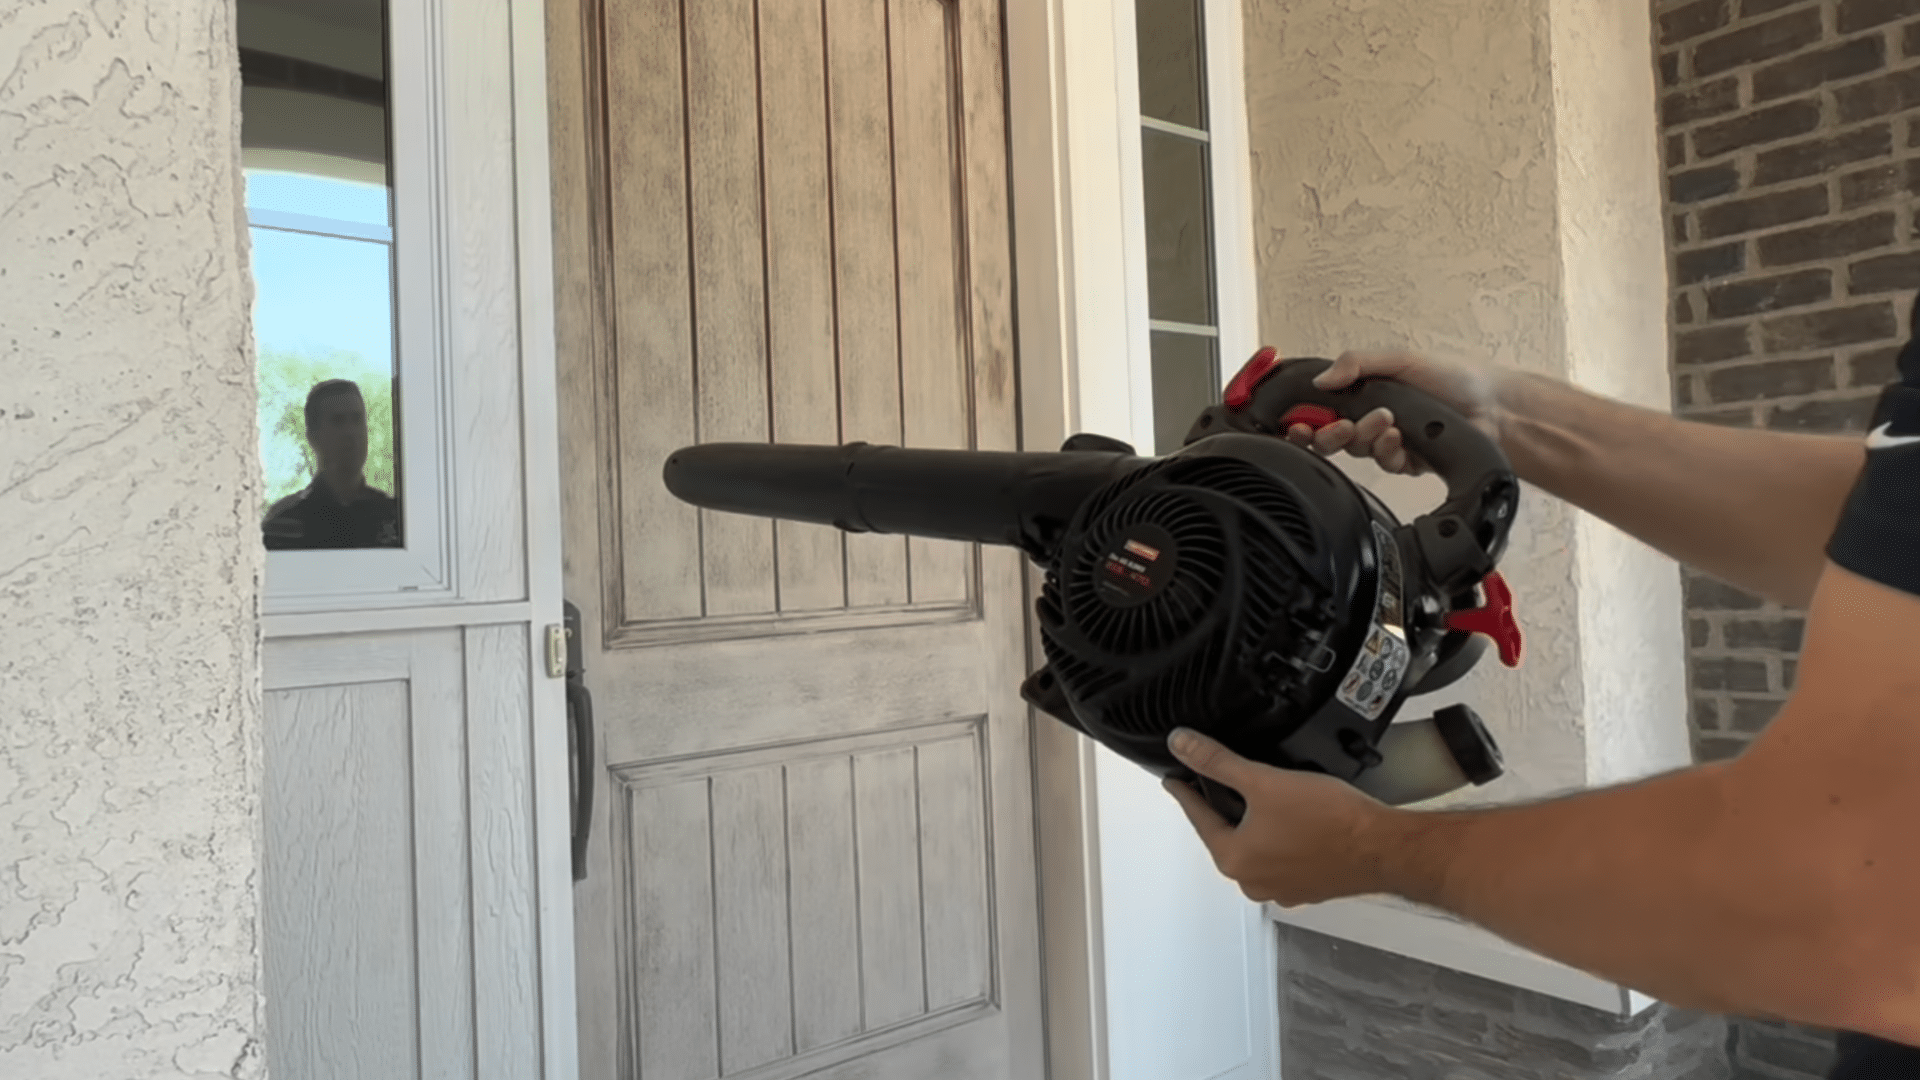
Once sanding is finished, the next step is removing all dust. Dust on the surface can prevent primer from adhering properly.
In the video, a leaf blower is used outside to quickly clear most of the sanding dust. A shop vacuum with a brush attachment can also work well for this task.
The goal is to remove as much dust as possible before bringing the project indoors. Carefully cleaning the surface helps ensure the primer and paint go on smoothly.
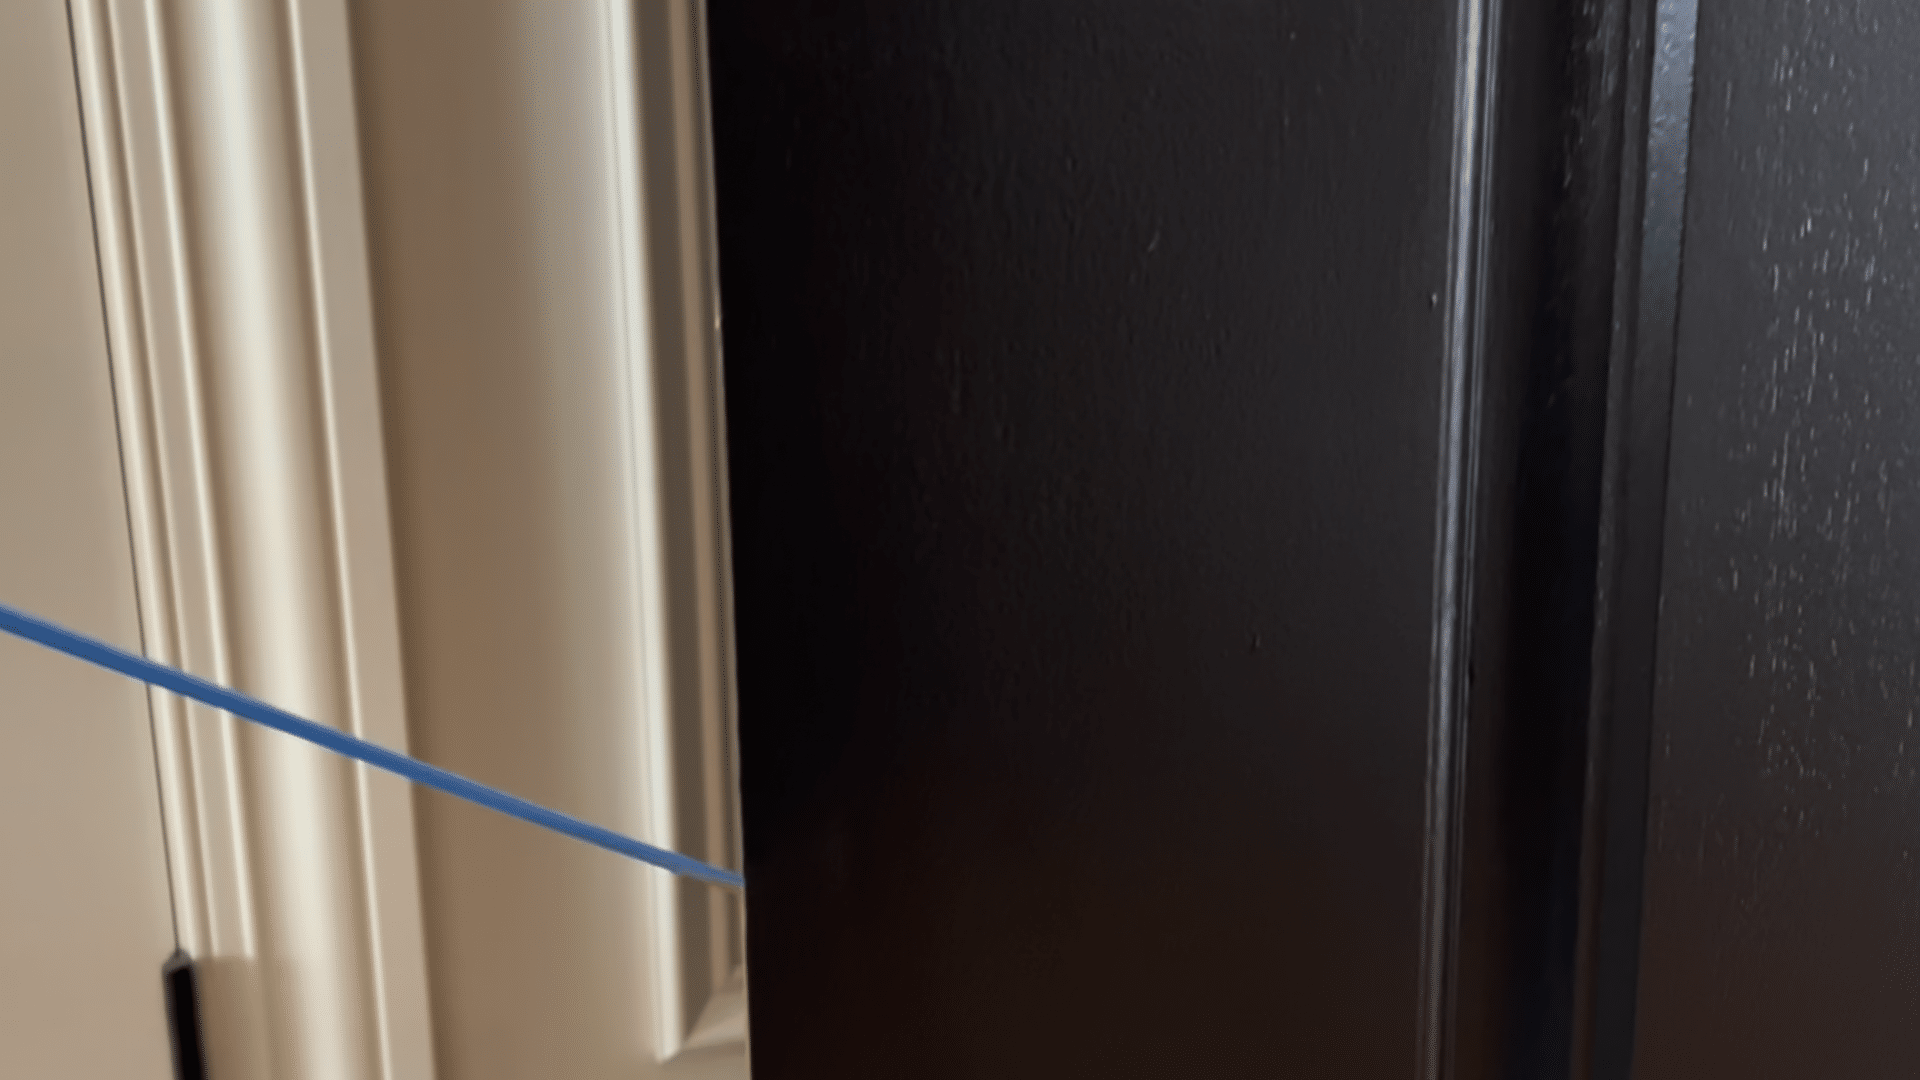
Step 6: Protect the Door Frame and Surroundings
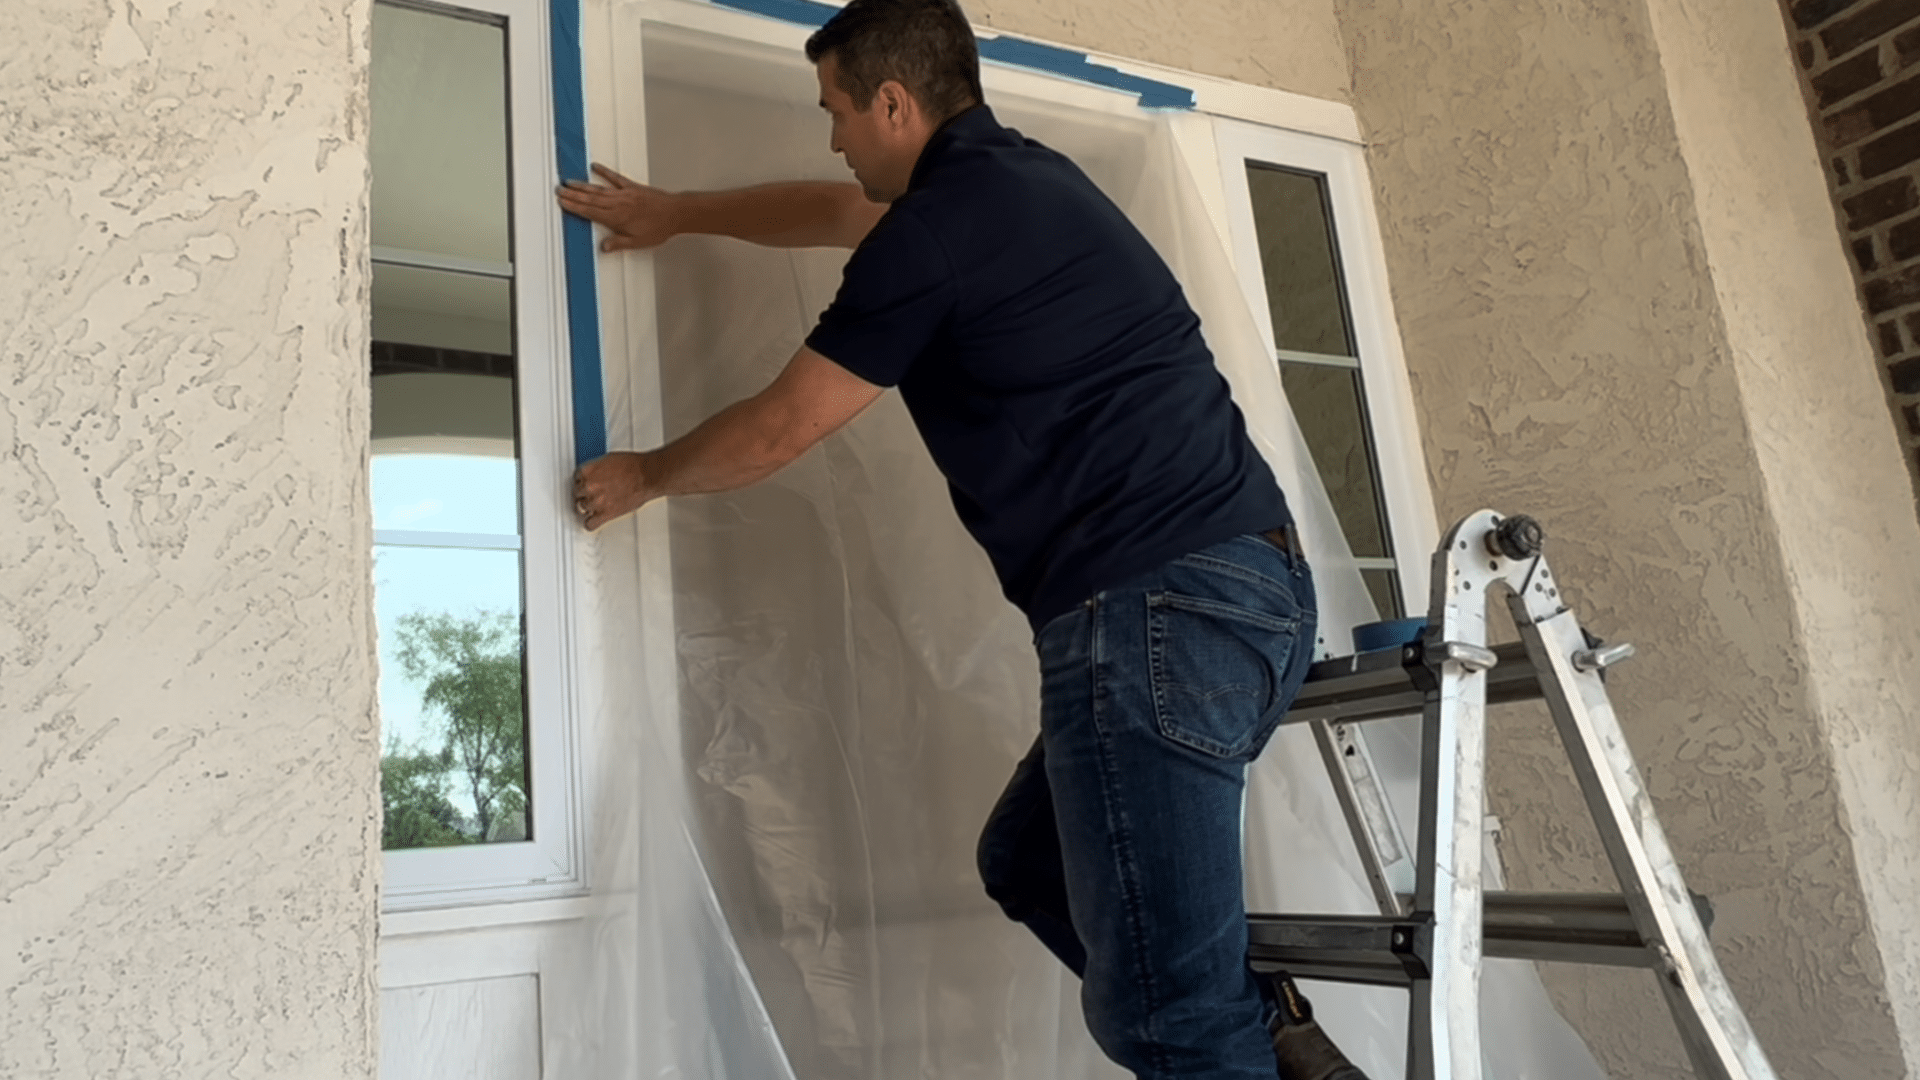
Before moving inside for painting, protect the trim and surrounding areas.
The video shows plastic sheeting being placed around the door frame and secured with painter’s tape. First, measure the space from the ground to the trim above the door.
Then cut the plastic to that length. Attach it carefully so it covers nearby surfaces. If the plastic hangs unevenly, trim the bottom with scissors.
This step prevents paint splatters from reaching walls, trim, or flooring.
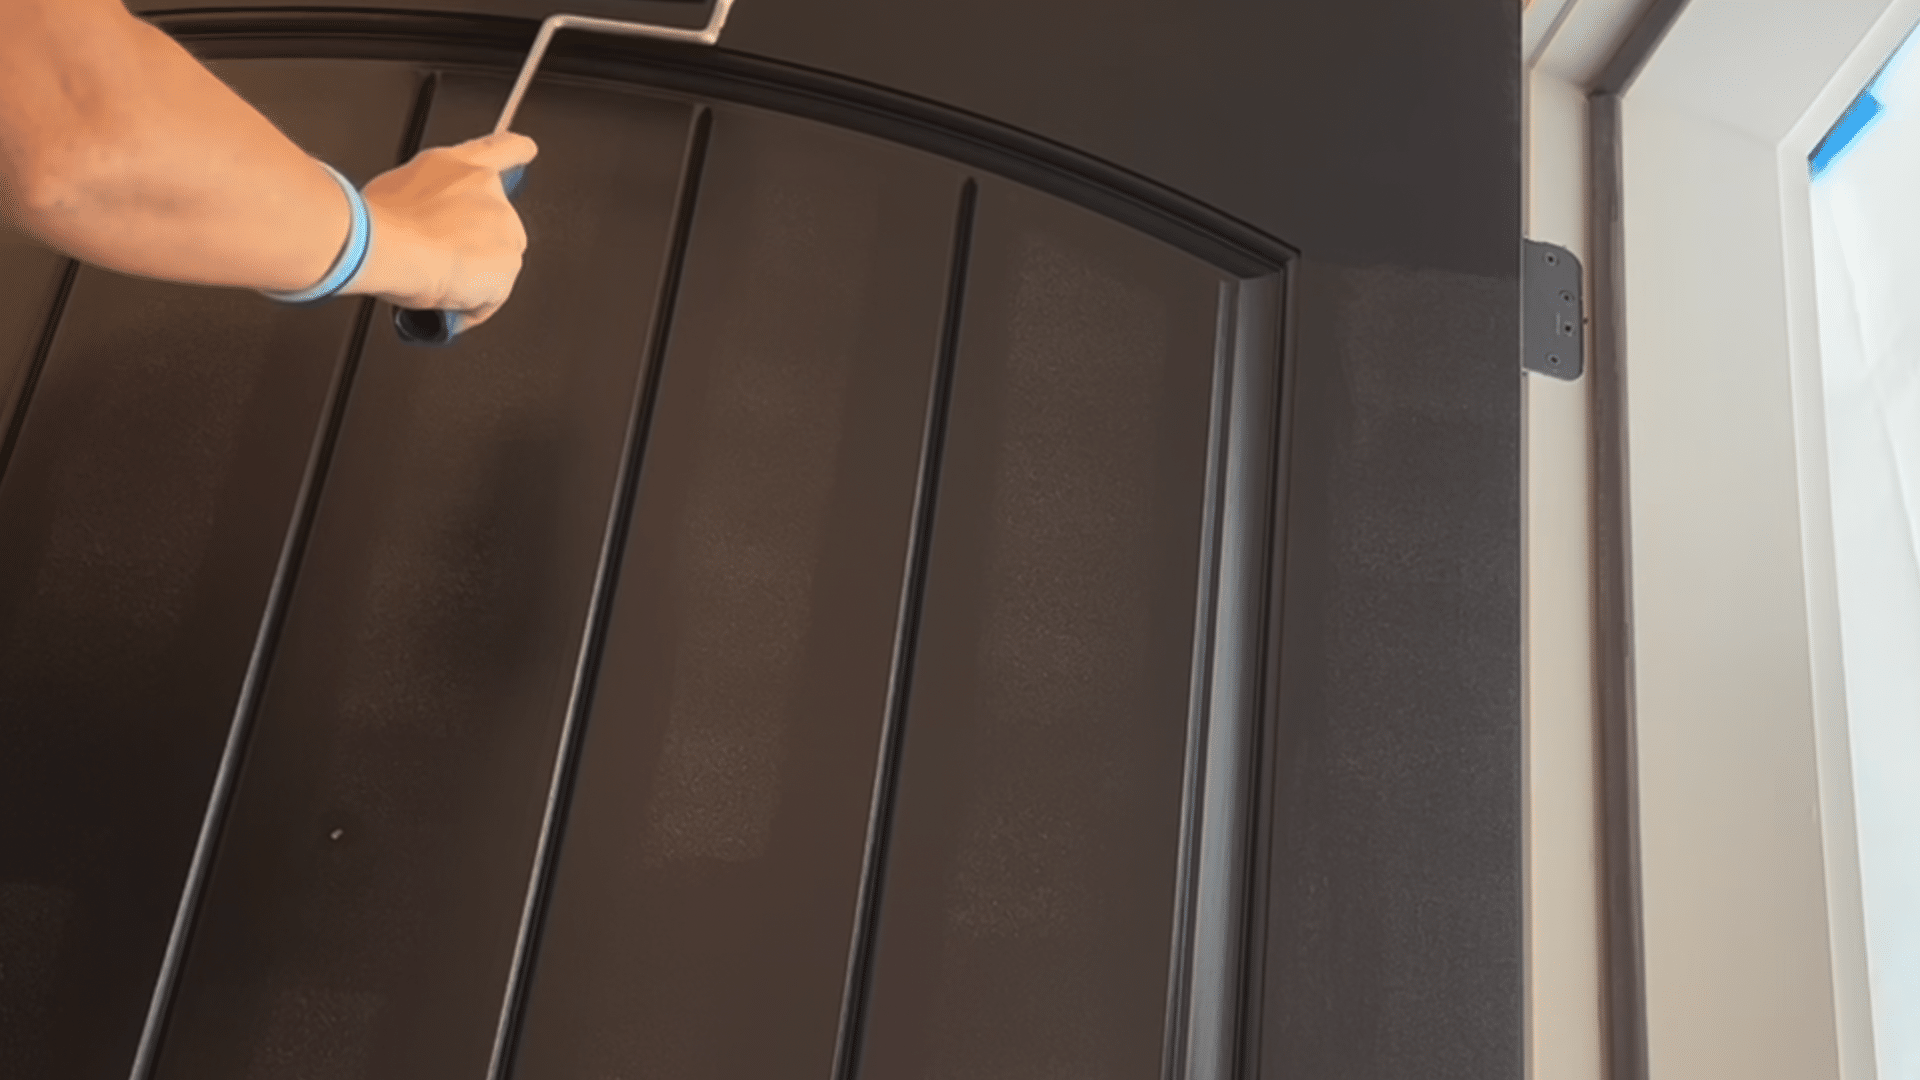
Step 7: Tape Hardware and Prepare Painting Supplies
While the door dries, prepare the painting area. Use painter’s tape to cover hardware and the bottom door sill.
This protects metal parts from paint. The video also shows the paint supplies needed for the job.
A recommended primer is Stix, which works well on many surfaces. For paint, Benjamin Moore Aura Exterior Satin Finish is used.
Having brushes, rollers, and a drop cloth ready makes the painting process smoother.
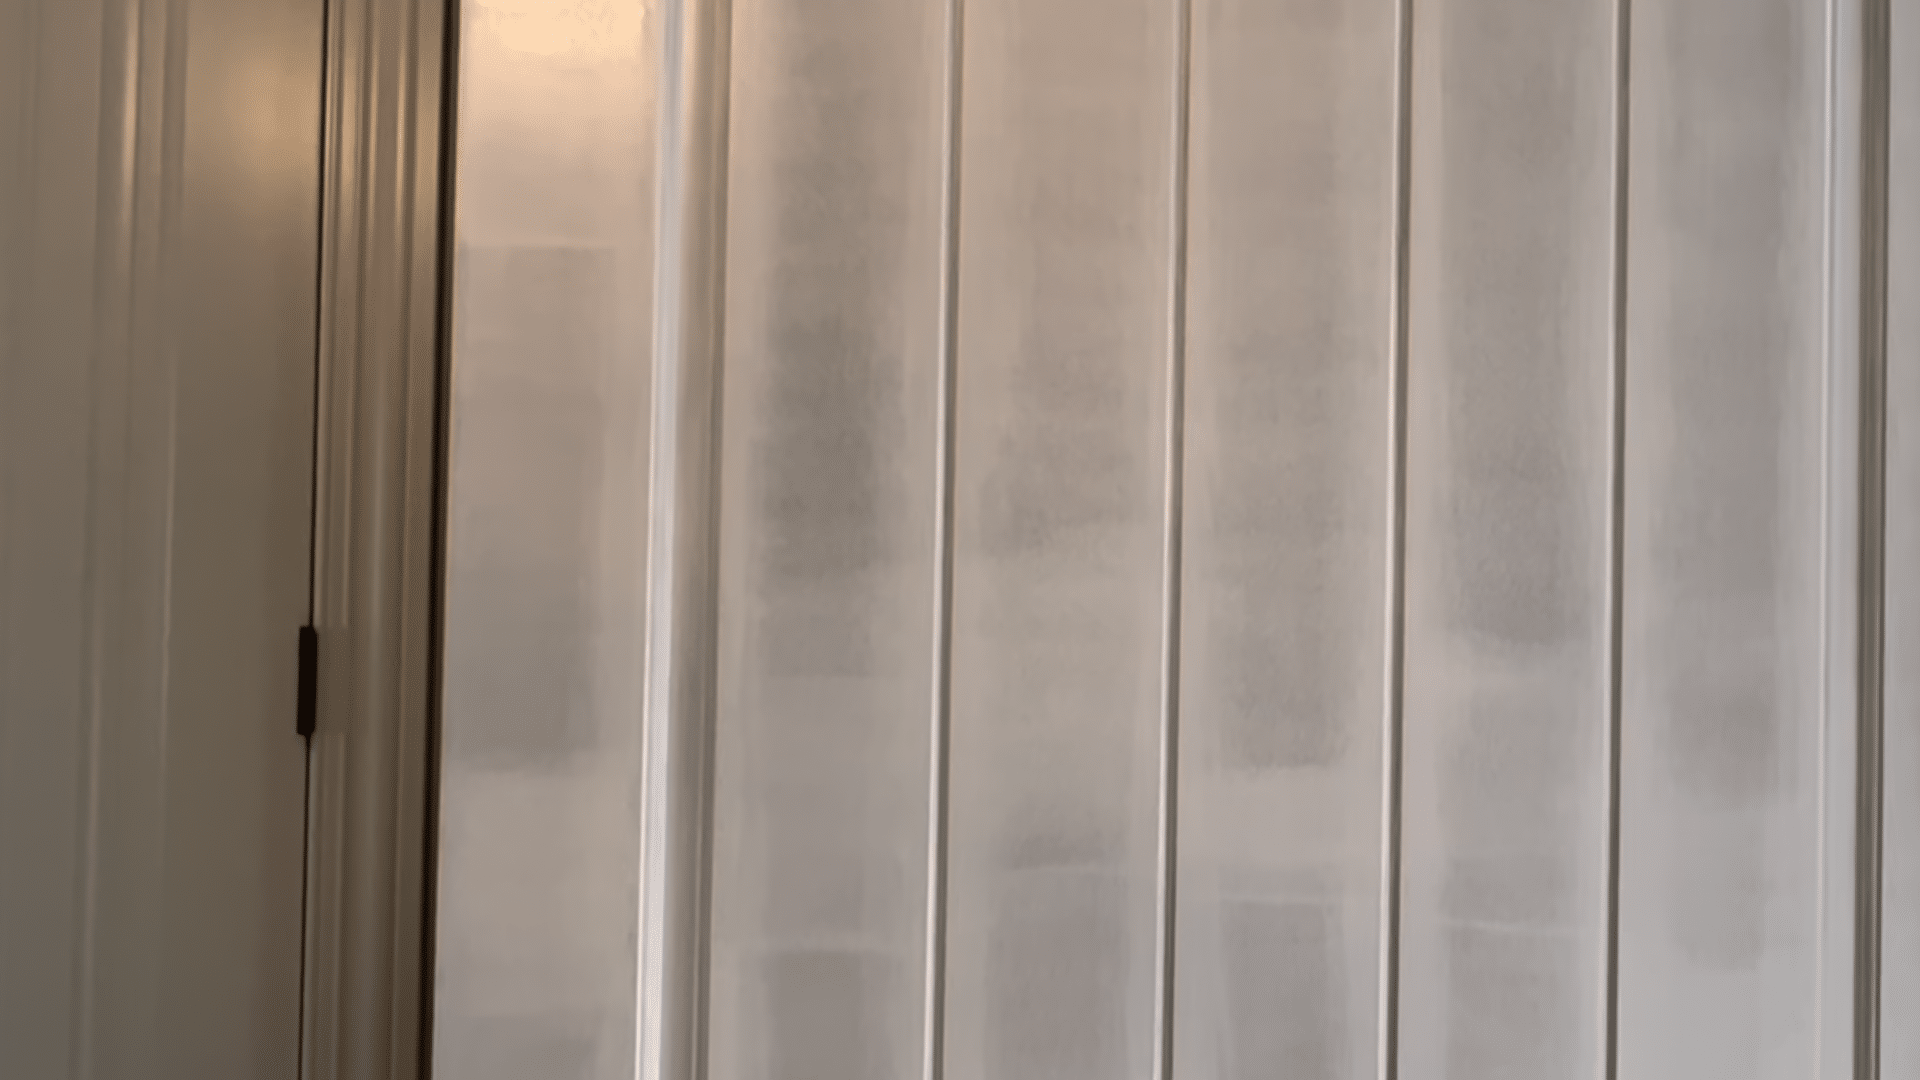
Step 8: Apply the First Coat of Primer
Start applying primer using a two-and-a-half-inch angled brush. Begin with the detailed areas of the door first.
This allows you to smooth out drips when rolling the larger sections later. After the details are covered, use a six-inch roller with a woven nap to coat the flat surfaces.
Just like sanding, move the brush and roller in the direction of the wood grain. This technique helps the primer spread evenly and prevents visible streaks in the final finish.
Step 9: Apply the Second Coat of Primer
Once the first coat of primer is complete, allow enough drying time before adding another coat. The video recommends waiting about four hours between coats.
Even if the primer feels dry earlier, giving it extra time helps it cure properly. Apply the second coat using the same brush and roller technique.
Two coats create a stronger base for the paint and improve coverage. After the second coat dries, the door is ready for the final painting stage.
Step 10: Apply the First Coat of Paint
On the third day, the paint is applied using the same process used for the primer. Start by painting the detailed areas with an angled brush.
Then use a roller to cover the flat sections of the door. This method keeps the finish even and reduces visible brush marks.
In the video, the primer was not tinted, so the first coat of paint does not fully cover it. Applying paint carefully and evenly helps achieve a clean and smooth appearance.
Step 11: Apply the Second Coat of Paint
After the first coat dries, apply a second coat. This step improves color coverage and gives the door a more even finish.
The video shows that two coats of primer and two coats of paint are enough for most front doors. Only a quart of primer and a quart of paint were needed for the entire project.
A small amount of paint remained. Applying two coats ensures the color looks consistent across the whole surface.
Step 12: Remove Tape and Finish Touch-Ups
The final step is to remove the painter’s tape and check for any small imperfections. Carefully peel the tape away from the trim and hardware.
Look closely at the edges of the door and around details for any areas that need minor touch-ups. If needed, use a small brush to correct them.
Once everything dries completely, the door is finished. The result is a refreshed front door that improves the overall look of the home without removing the door.
By following these steps, you’ll achieve a professionally painted black front door without removing it from its hinges.
You can check out this video by Inspiring Builds for a more in-depth step-by-step visual:
Tips for a Smooth and Professional-Looking Finish
Achieving a flawless, professional look requires attention to detail. These helpful tips will guide you through the process for the best results.
- Use Quality Brushes or Rollers: High-quality brushes and rollers provide smoother coverage, reduce streaks and brush marks, and ensure an even paint application.
- Work in Sections: Painting in small, manageable sections prevents the paint from drying too quickly, resulting in smooth, even coverage.
- Apply Thin Coats: Applying multiple thin coats of paint rather than a single thick coat ensures a smoother finish and prevents drips and uneven areas.
- Keep the Door Level: When painting, ensure the door is level to avoid uneven paint distribution, especially when using a roller.
- Allow Adequate Drying Time: Let each coat of paint dry completely before applying the next to prevent smudging or streaking and ensure a clean, smooth finish.
- Sand Between Coats: Lightly sanding between coats removes imperfections and promotes better adhesion of the next layer of paint.
- Paint During Dry Weather: Avoid painting on humid or rainy days, as moisture can affect the paint’s drying process and lead to a less smooth finish.
Maintaining Your Black Front Door Over Time
Maintaining your black front door is key to keeping it looking fresh and beautiful for years.
Regular cleaning is essential to remove dust, dirt, and fingerprints, which can accumulate on dark surfaces.
Use a soft cloth or sponge with mild soapy water to gently clean the door, avoiding harsh chemicals that can damage the paint.
Inspect the door periodically for chips, scratches, or weather-related wear. Touch up these areas with matching black paint to maintain a seamless appearance.
Additionally, make sure the door’s hardware is in good condition, and tighten screws or lubricate hinges as needed.
Finally, consider applying a fresh coat of paint every few years to keep the door vibrant and protected from the elements.
Bottom Line
And there you have it, your front door, now a stunning modern entryway with a bold black finish. Not only will this update add look and feel, but it will also give your home a fresh, welcoming vibe that stands out in the best way.
It’s amazing how something as simple as a new coat of paint can make such a big difference. I hope this guide made the process easy and enjoyable for you. Now it’s your turn. How did your front door turn out?
Was there a step you found especially helpful, or maybe you added your personal twist to the project? I’d love to hear all about your experience.
Drop a comment below and share your thoughts. I’m excited to see how your doors shine.