
I like using a diy clothes rack because it solves a few real problems at once. It helps me save space, spend less money, and still get a look that fits my room.
Store-bought racks can feel too big or too plain, and sometimes they cost more than expected.
When I build my own, I can choose the size, height, and style that works best for me. It’s also a great option for small rooms, rentals, or even a simple laundry setup.
In this guide, I’ll walk you through creative diy clothes rack ideas you can try at home. We will cover the basic materials needed, easy step-by-step methods, and a few tips I’ve learned from experience.
By the end, you’ll have a clear idea of how to build a rack that fits your space, looks good, and stays within your budget.
What Is a DIY Clothes Rack?
A diy clothes rack is a simple storage setup you build yourself using basic materials like wood or pipes. It helps you hang clothes in a way that fits your space and style without buying expensive furniture.
- A diy clothes rack is a handmade stand or frame used to hang clothes neatly. You can design it based on your space, height, and storage needs.
- People choose diy clothing rack options to save money and get a custom look. It also gives more control over size, design, and materials.
- You can use a diy clothes rack in bedrooms, entryways, or small apartments. It also works well in laundry areas or as extra hanging space.
DIY Clothes Rack Ideas You Can Try
These ideas help you build a diy clothes rack that fits your space, budget, and style. Each option is simple to make and works for different room sizes and needs.
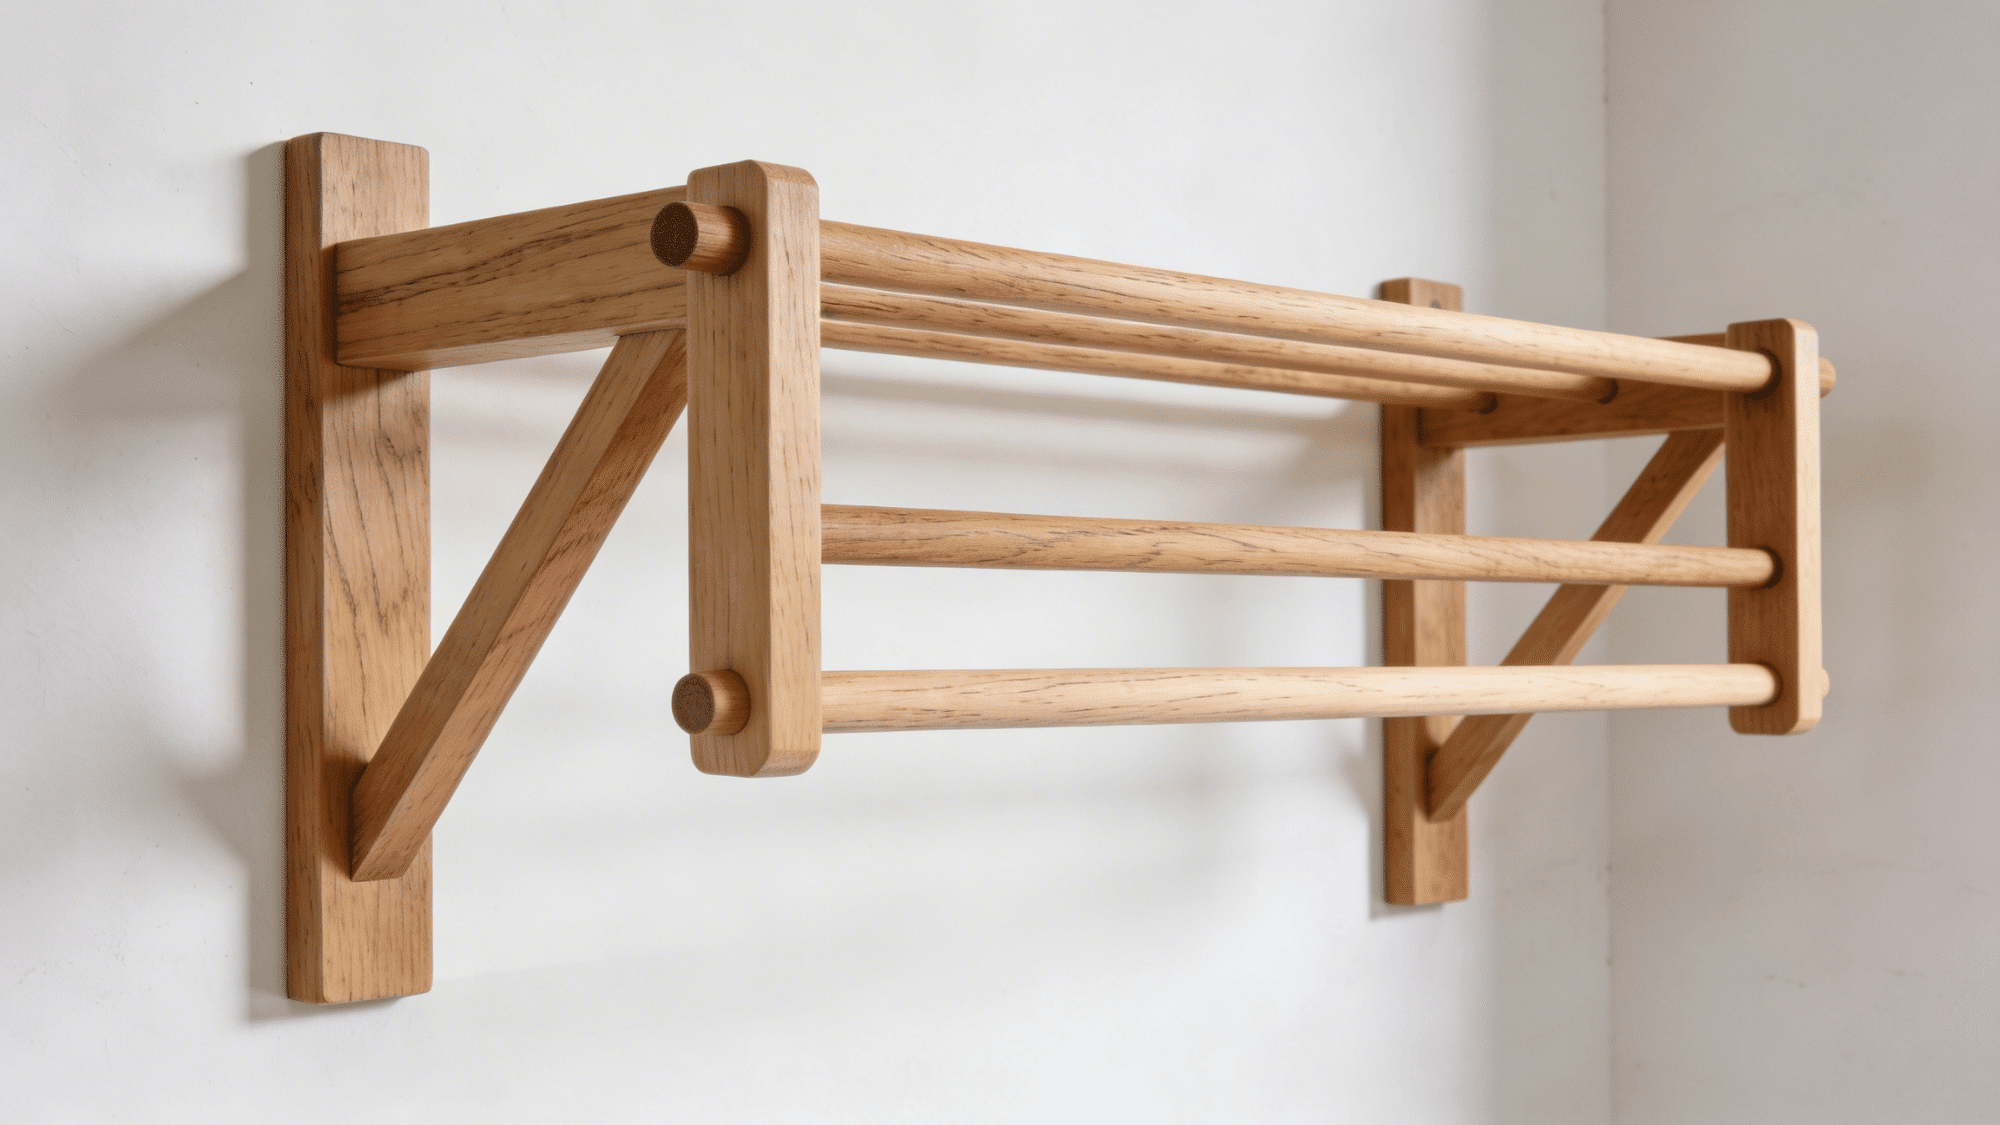
1. Wooden Ladder Rack

A wooden ladder rack is a simple leaning structure that rests against the wall. It uses ladder steps to hang clothes, making it easy to organize daily outfits.
This diy clothes rack is low-cost and quick to build using basic wood and tools. It works best for light clothing and adds an open look to the room.
The design also saves space while keeping everything visible and easy to access. It fits well in small spaces and keeps rooms neat.
2. Pipe Clothing Rack
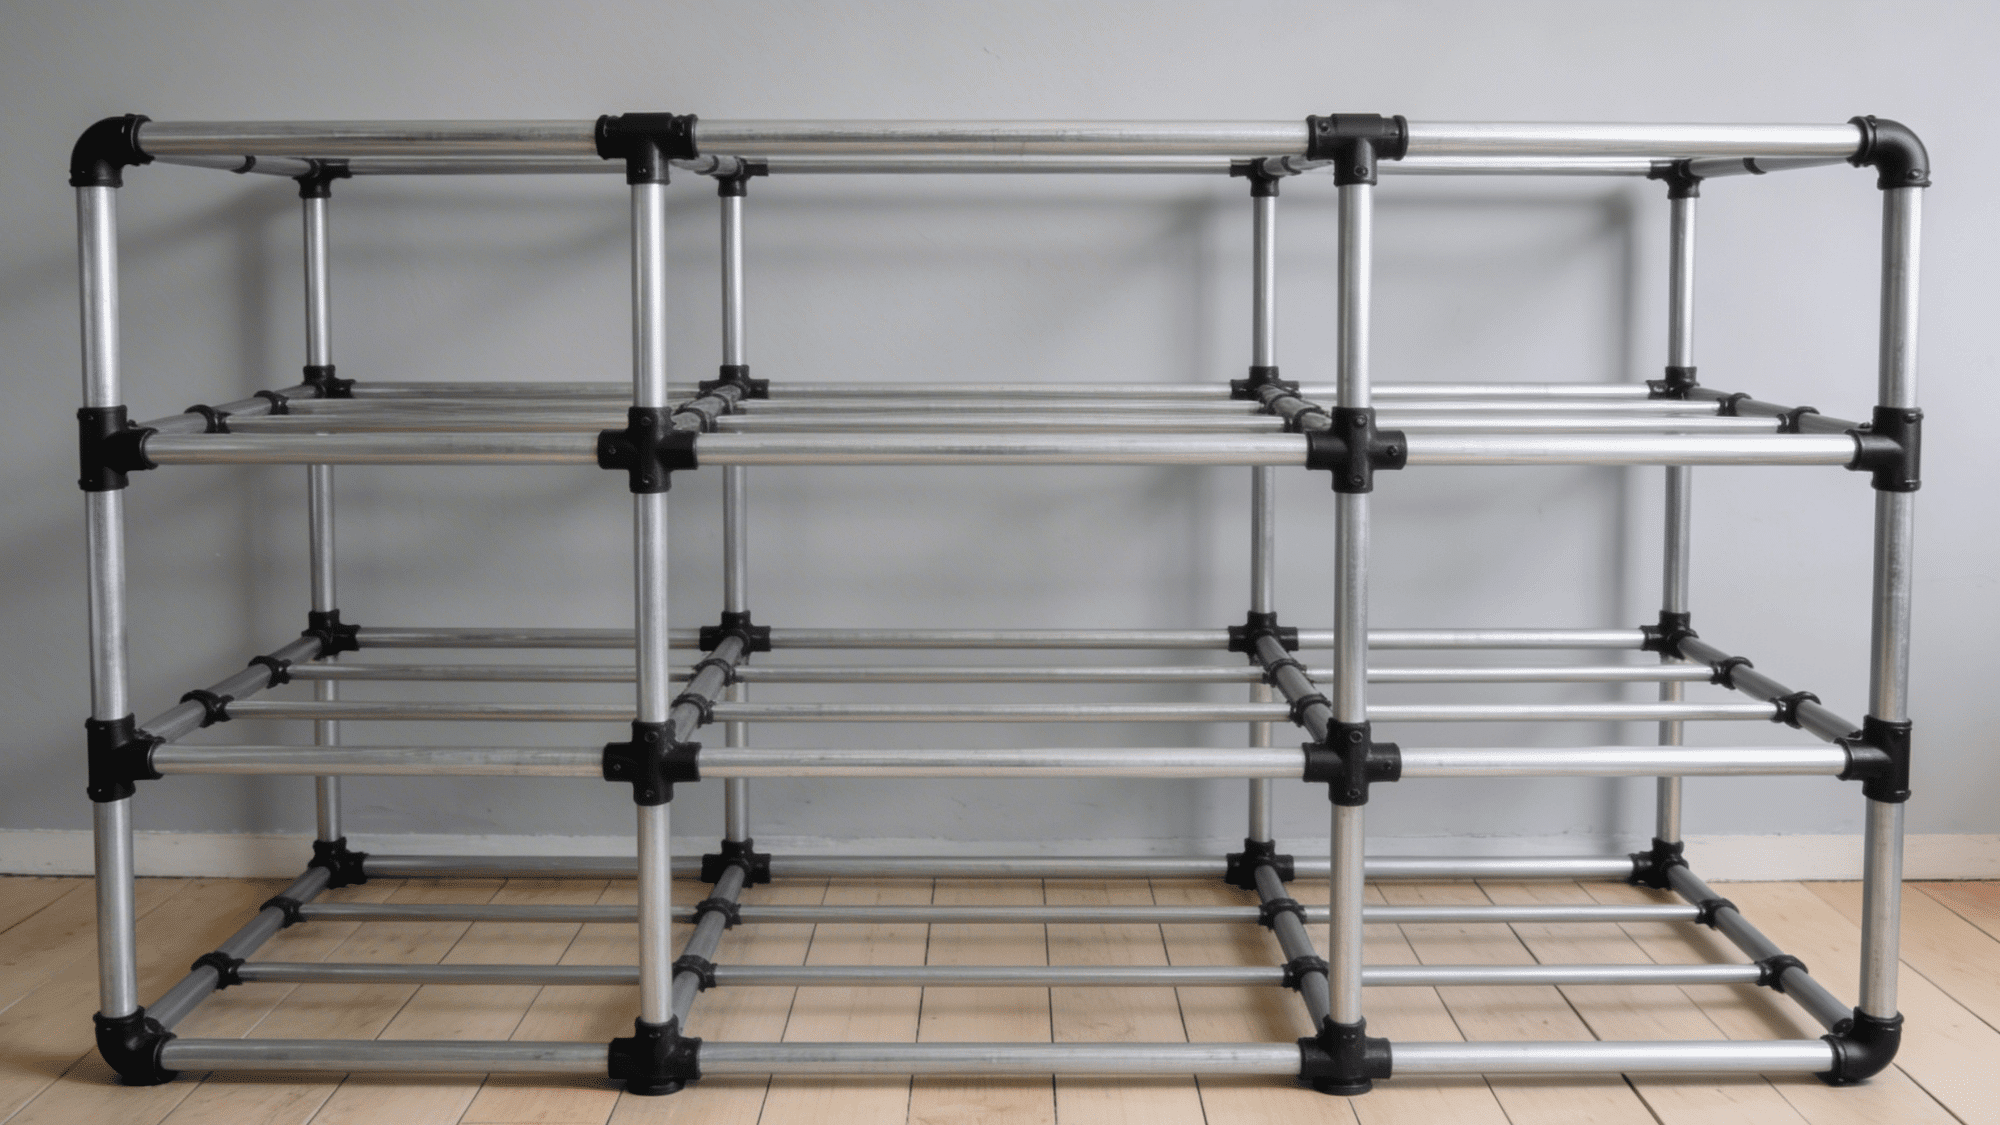
A pipe clothing rack is made using metal pipes and connectors for a strong frame. This diy clothing rack can hold heavier clothes like jackets and jeans without bending.
It gives a clean and modern look that fits well in simple interiors. The materials are easy to find and assemble, making it a practical option.
Once built, it stays stable and works well for long-term daily use. It also supports shelves or hooks for extra storage space in your room
3. Wall-Mounted Rack
A wall-mounted rack is fixed directly to the wall, helping save floor space. This diy clothes rack is a great choice for small rooms or tight areas.
It keeps clothes organized without taking up walking space. The design stays simple and clean, making the room look less crowded.
It works well for everyday clothes and can be placed at any height based on your needs. It also allows easy access and helps keep your space neat and well-arranged daily.
4. Rolling Clothing Rack
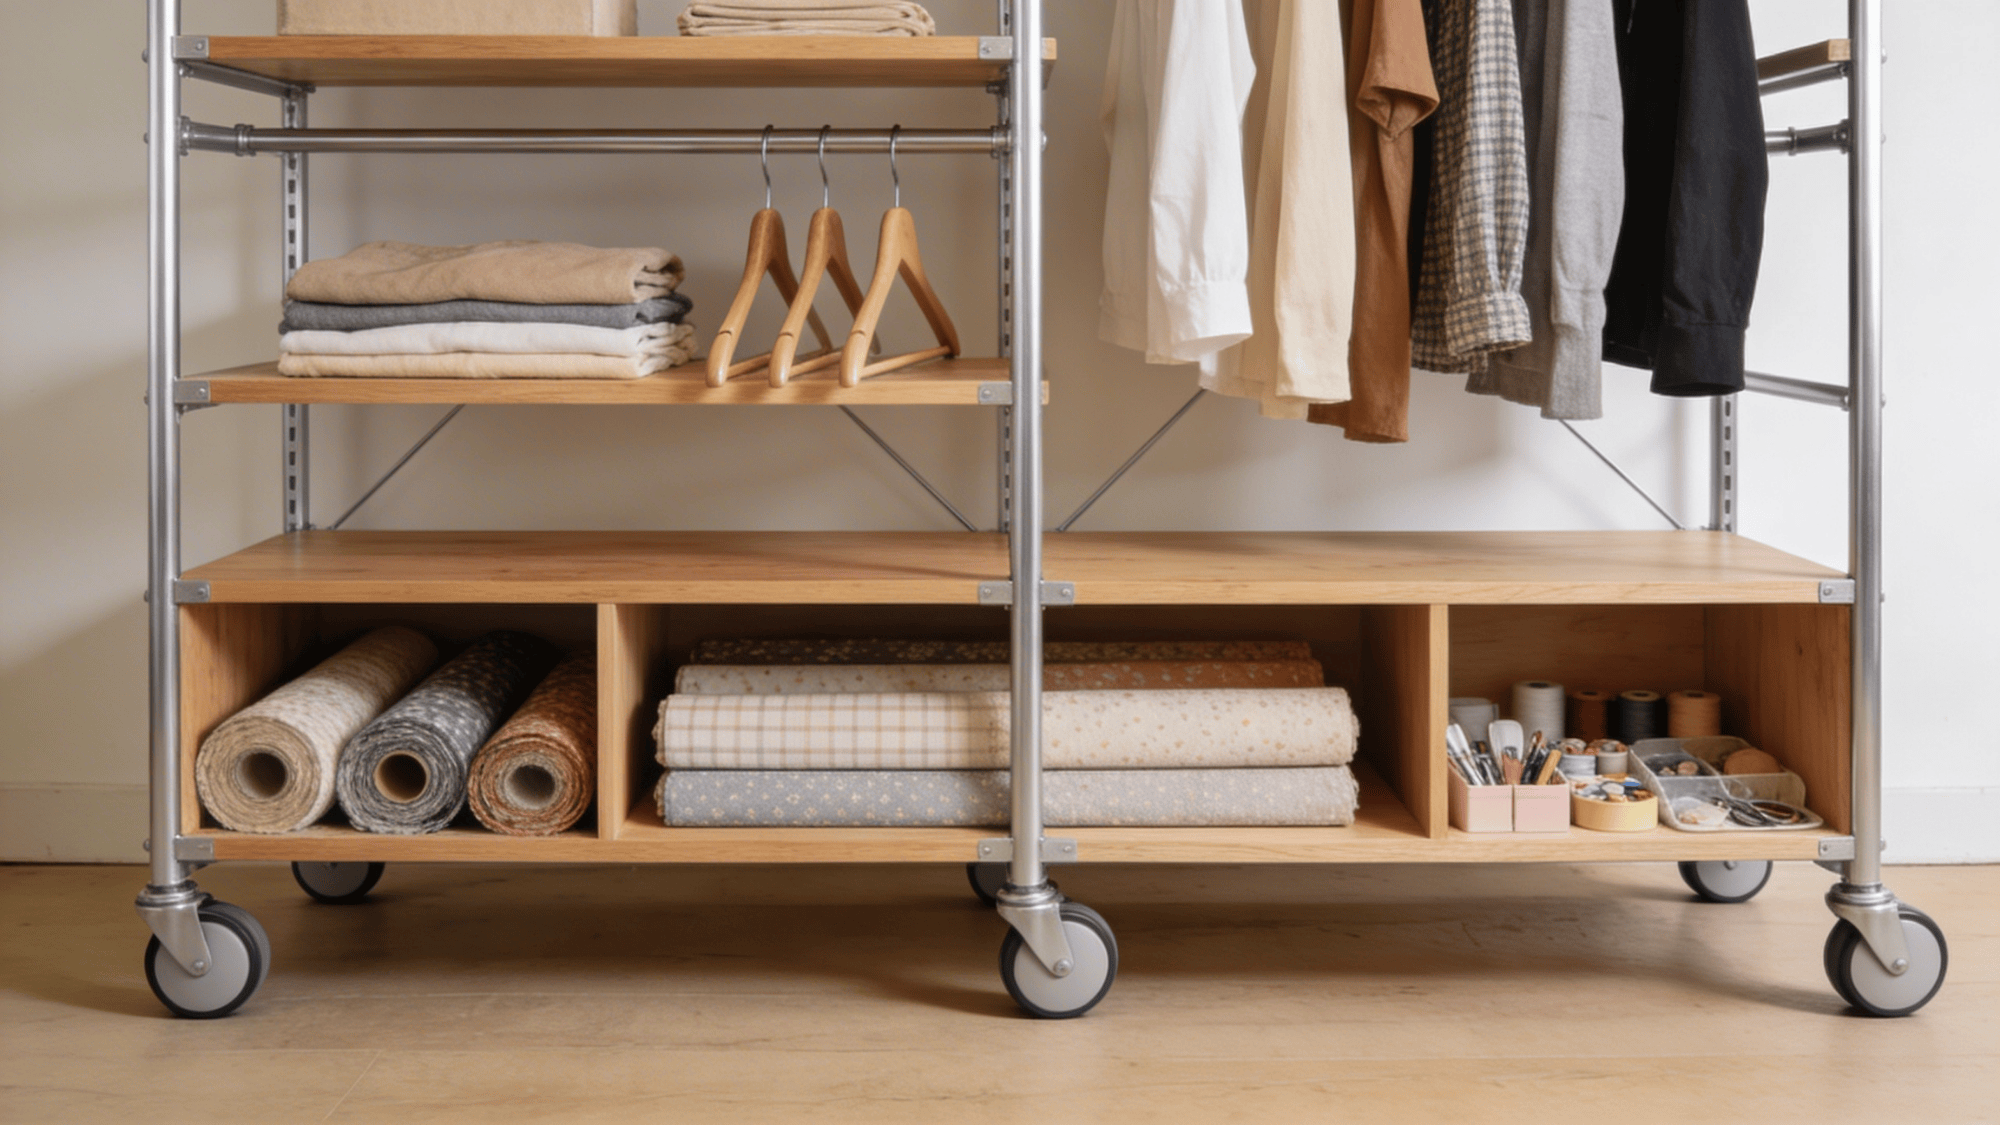
A rolling clothing rack includes wheels at the base, making it easy to move around. This diy clothes rack is useful when you need flexibility in your space.
It works well in bedrooms, dressing areas, or shared spaces. The wheels allow quick movement, and the locks can keep it steady when needed.
It is a practical option for people who like to change layouts or need portable storage. It also fits small spaces and supports daily use without much effort.
5. Minimal Hanging Rod Rack
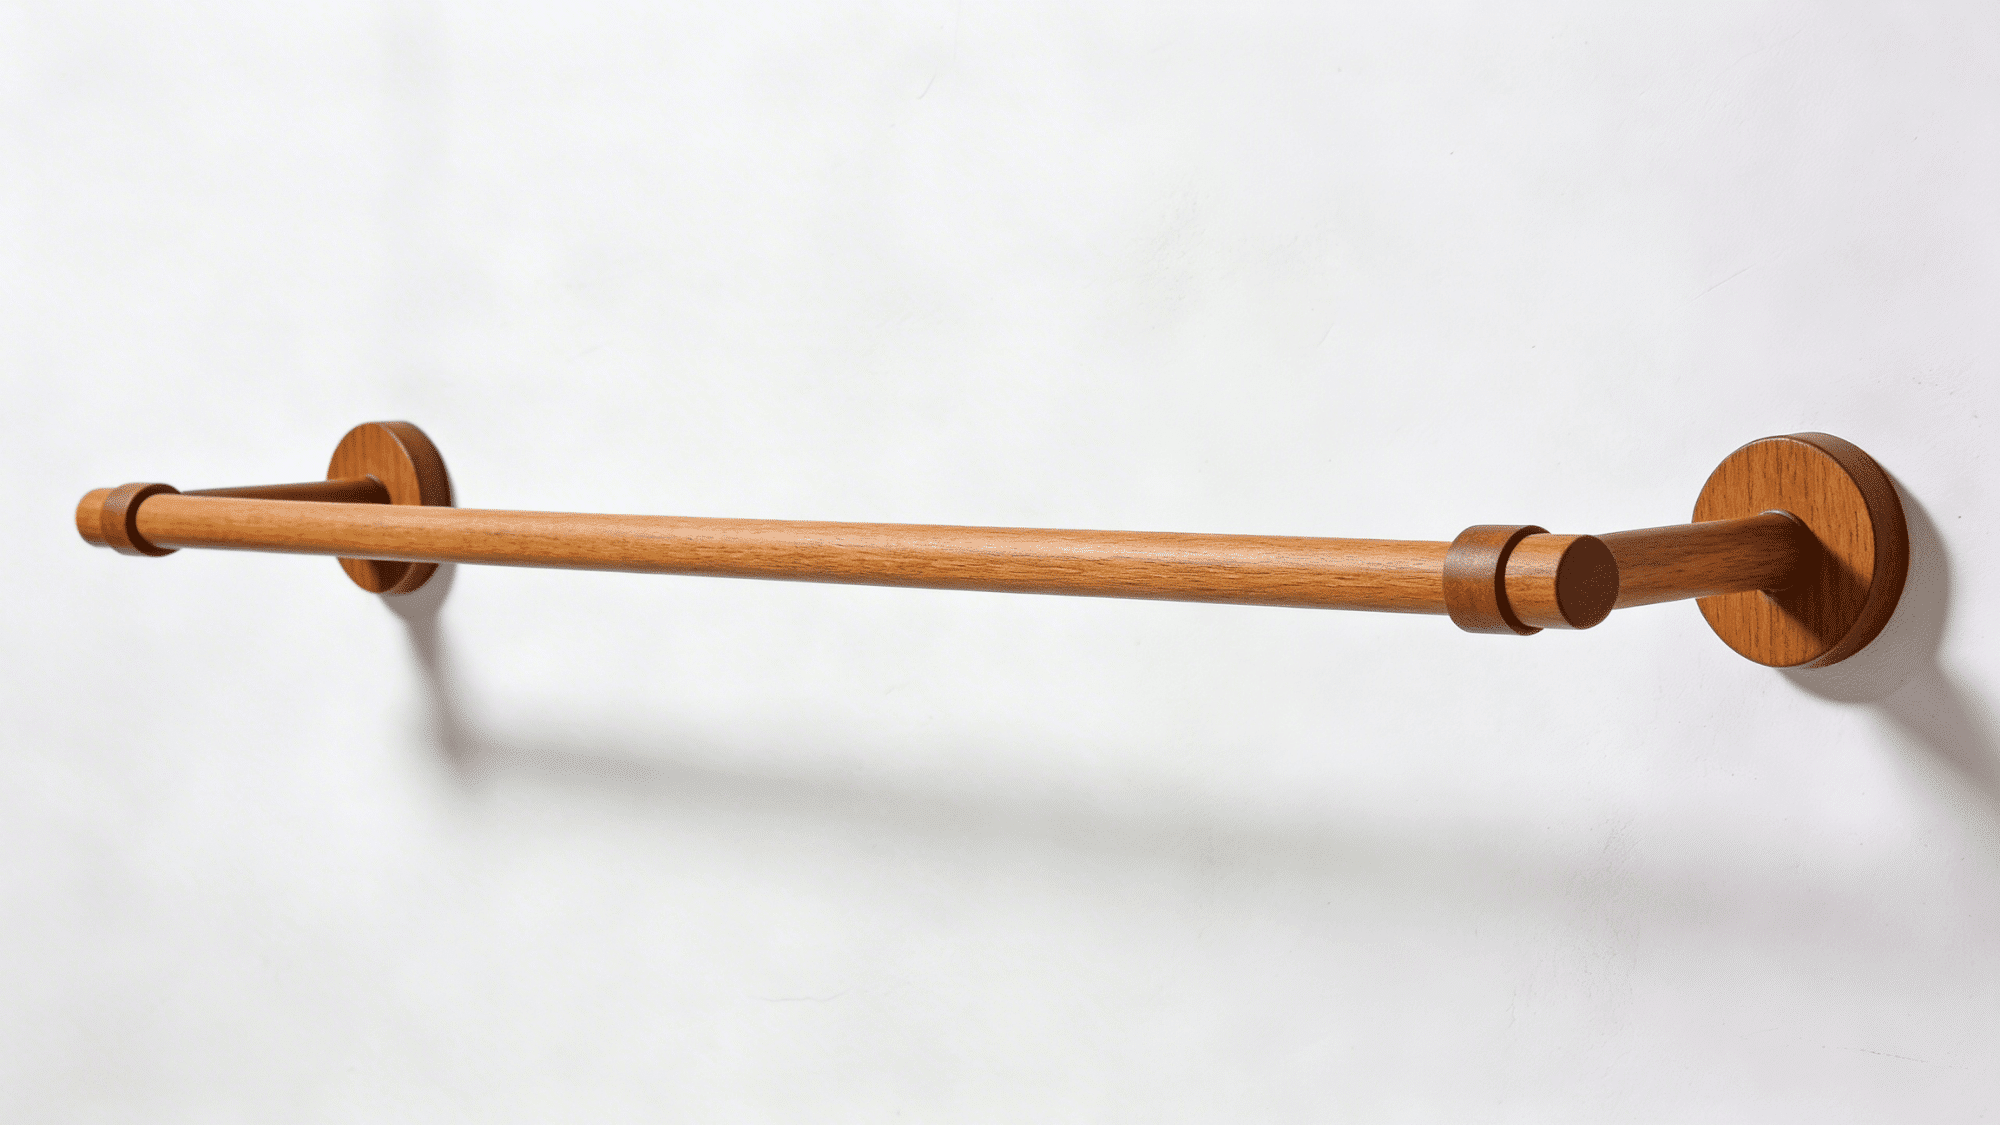
A minimal hanging rod rack uses a simple frame with one rod for hanging clothes. This diy clothing rack focuses on a clean and basic design.
It is easy to build and requires fewer materials, making it budget-friendly. The setup works best for a small number of clothes and keeps everything easy to reach.
It fits well in small spaces and maintains a neat and simple look. It also helps keep your room organized without adding extra bulk or clutter.
How to Build a Simple Rack?
Follow these simple steps to build your own clothes rack at home using basic tools and wood pieces. Each step is easy to follow and helps you create a strong, clean, and useful rack for daily use.
Materials and Tools Needed
Here are all the materials and tools you need before you start building your clothes rack. Having everything ready will make the process smooth and help you avoid delays during the build.
- 1×4 maple wood boards
- Threaded inserts
- Furniture bolts
- Nuts and washers
- Floating tenons
- Clear finish or sealant
- Masking tape
- Measuring tape
- Drill
- Drill bits
- Jig (for straight drilling)
- Speed square
- Router with round over bit
- Sandpaper or power sander
- Wrench or screwdriver
Step 1: Plan the Design
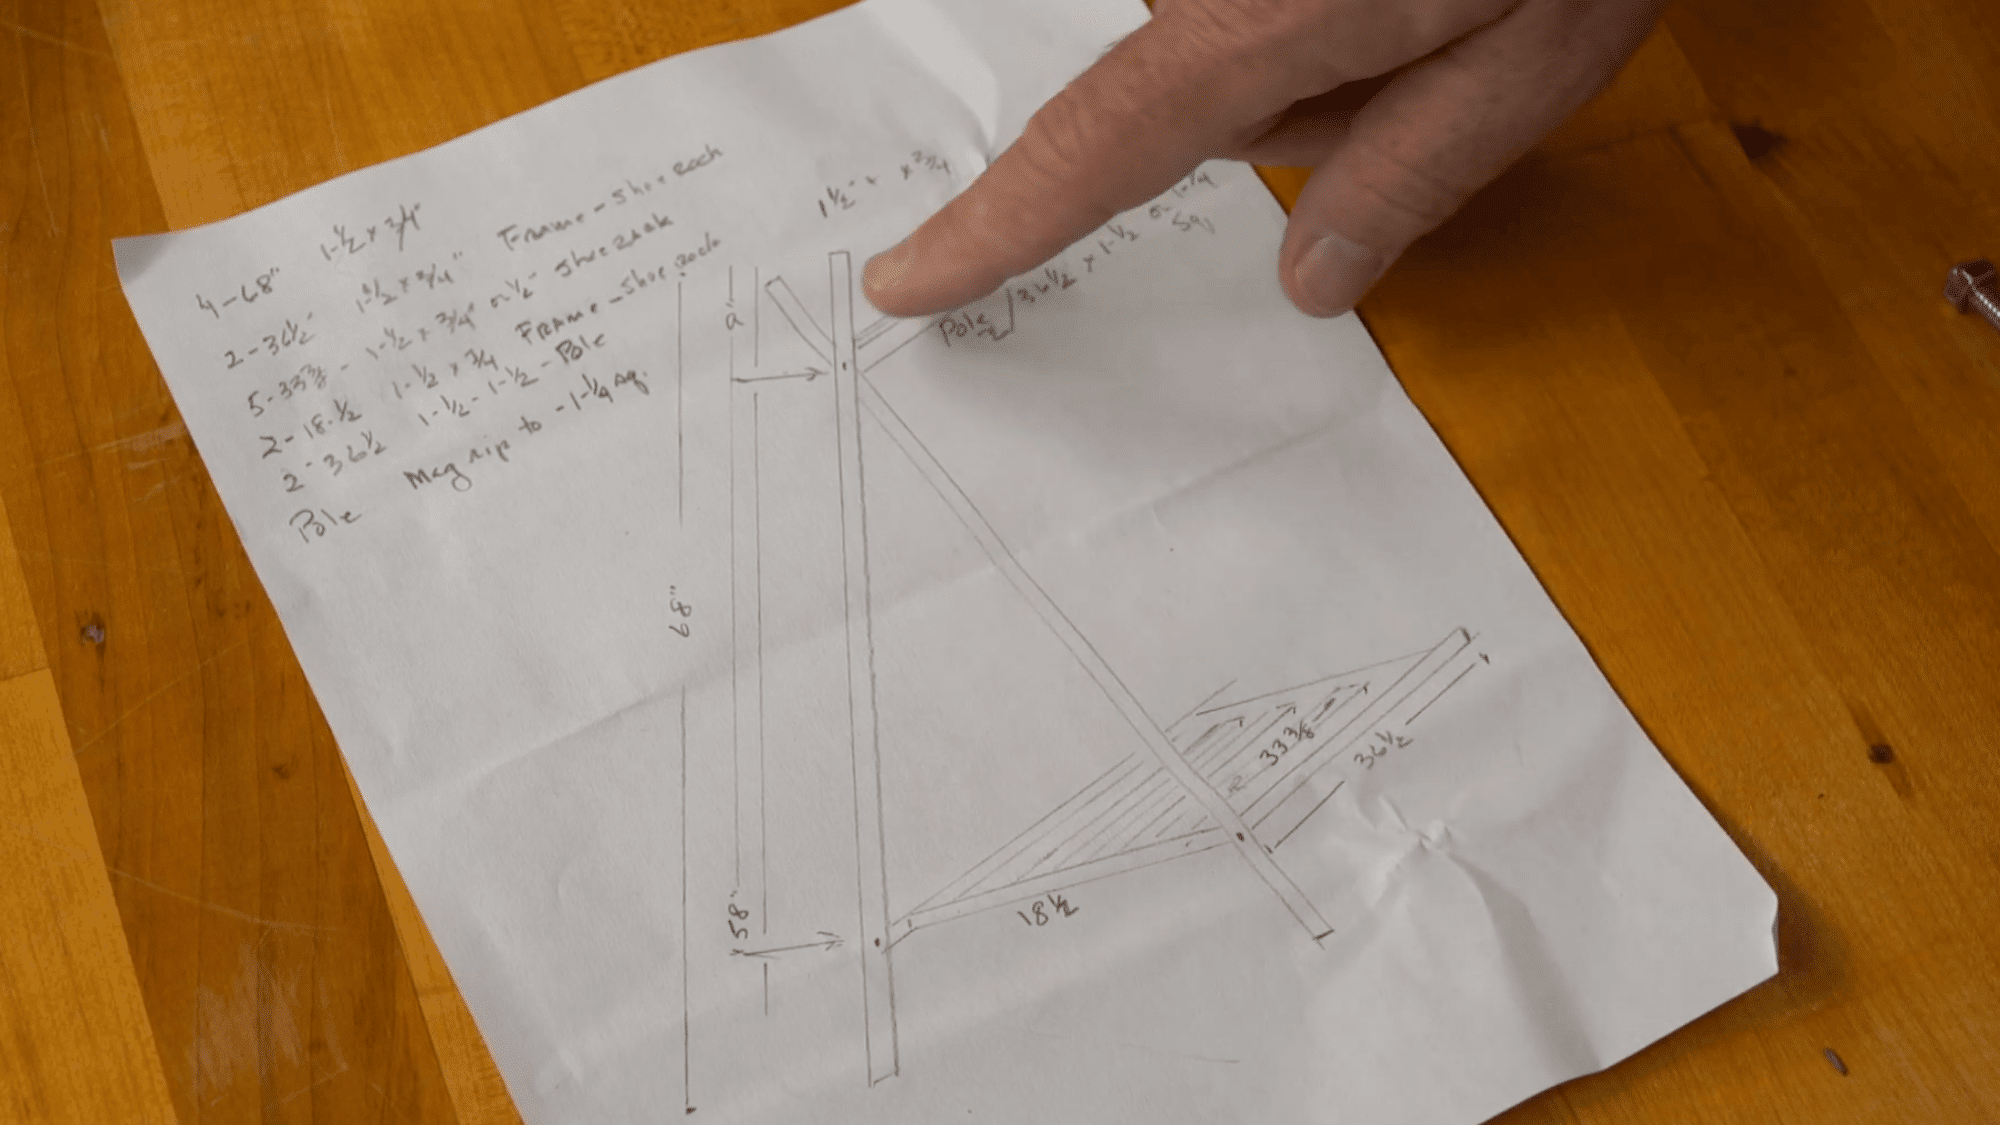
Start by planning the rack layout. This design uses two A-frame sides, a top hanging pole, and a bottom shelf for shoes.
Think about size based on your space and how many clothes you want to hang. Keep the structure simple, so it is easy to build and take apart later.
Make sure all parts fit well before you begin cutting wood pieces. Also, check the height so clothes do not touch the floor, and leave enough space for shoes below.
Step 2: Choose the Wood
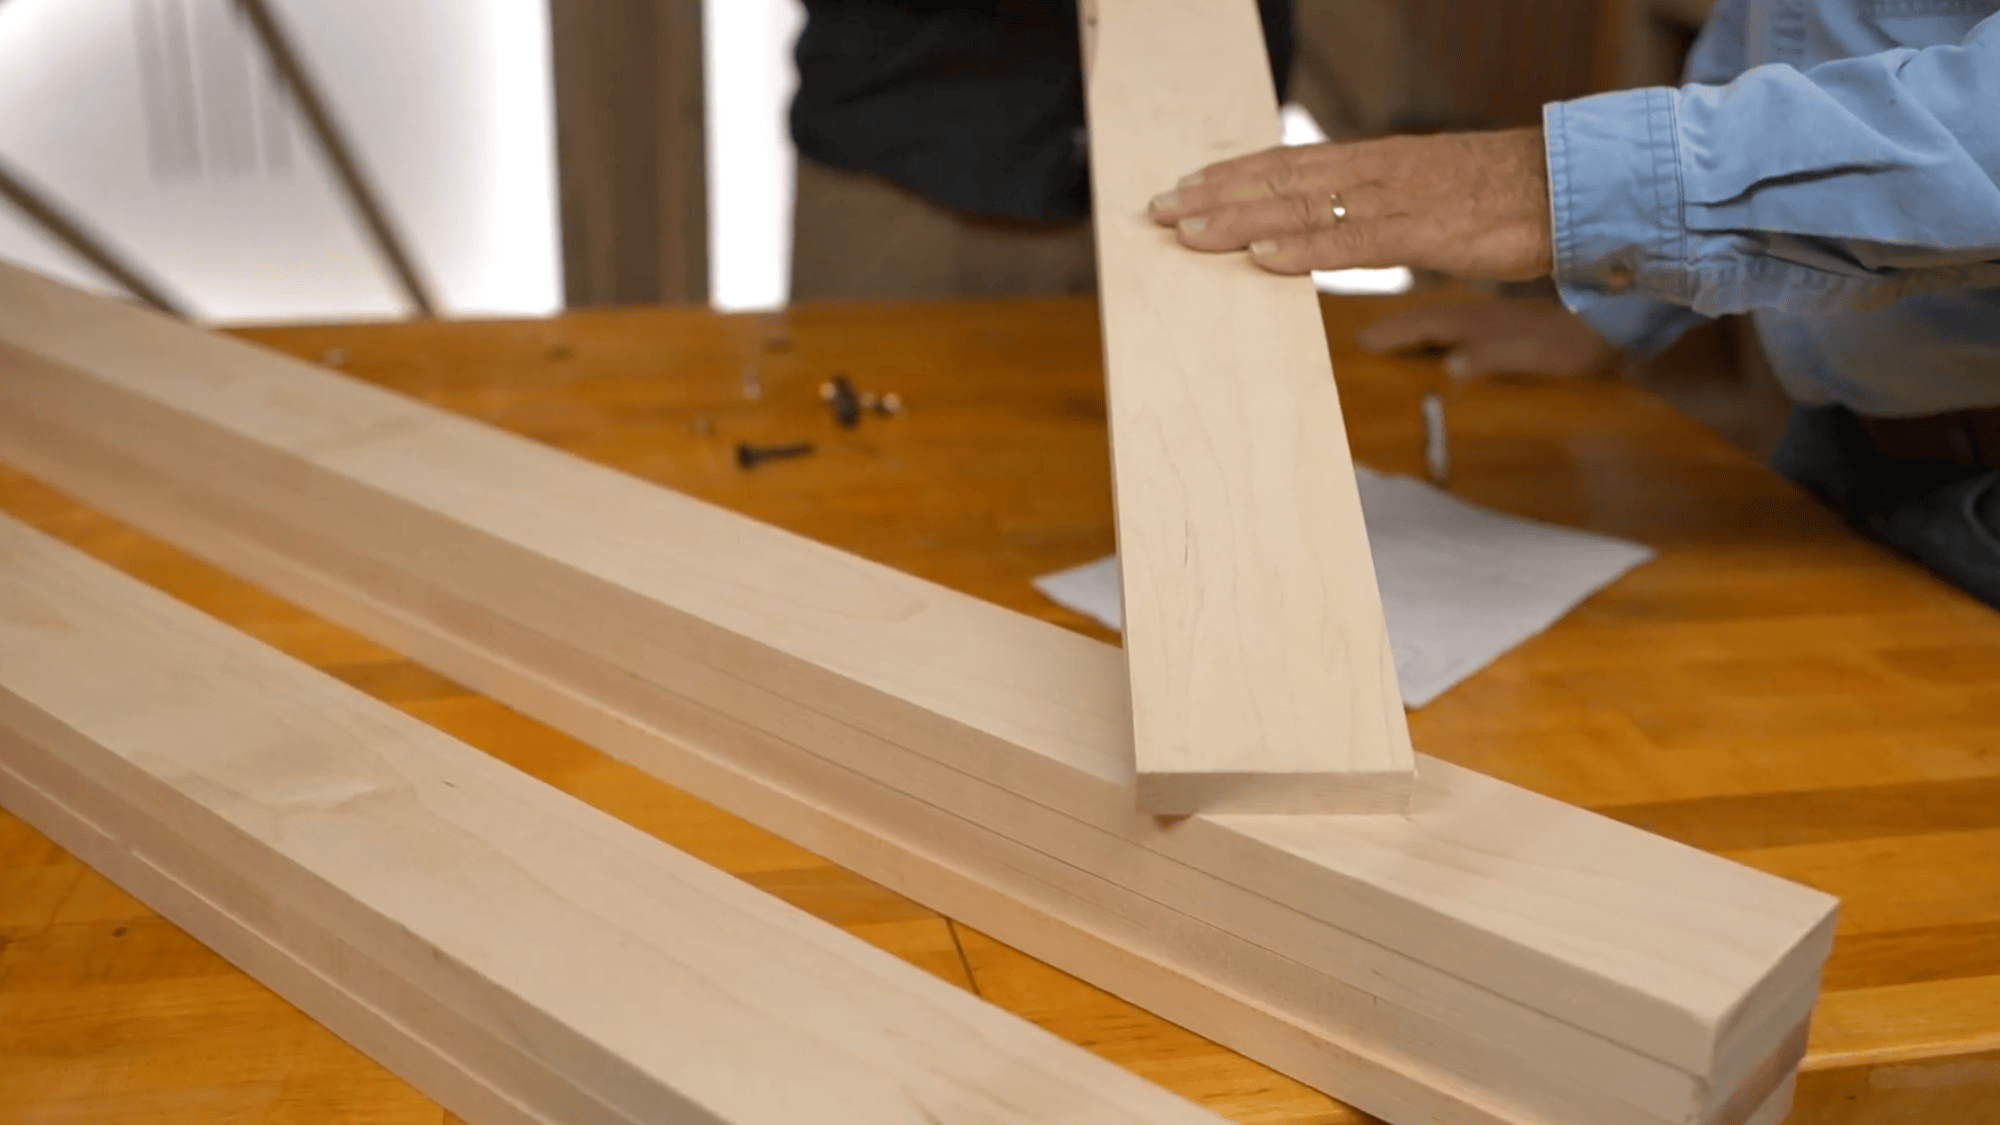
Use 1×4 maple wood for a strong build. It is a good choice because it is hard and can handle daily use without bending or breaking easily.
Maple also has a smooth surface, which makes it simple to cut and shape during the project. If you plan to paint your clothes rack, maple works very well and gives a clean finish.
Make sure the wood pieces are straight and free from cracks before you start building the rack.
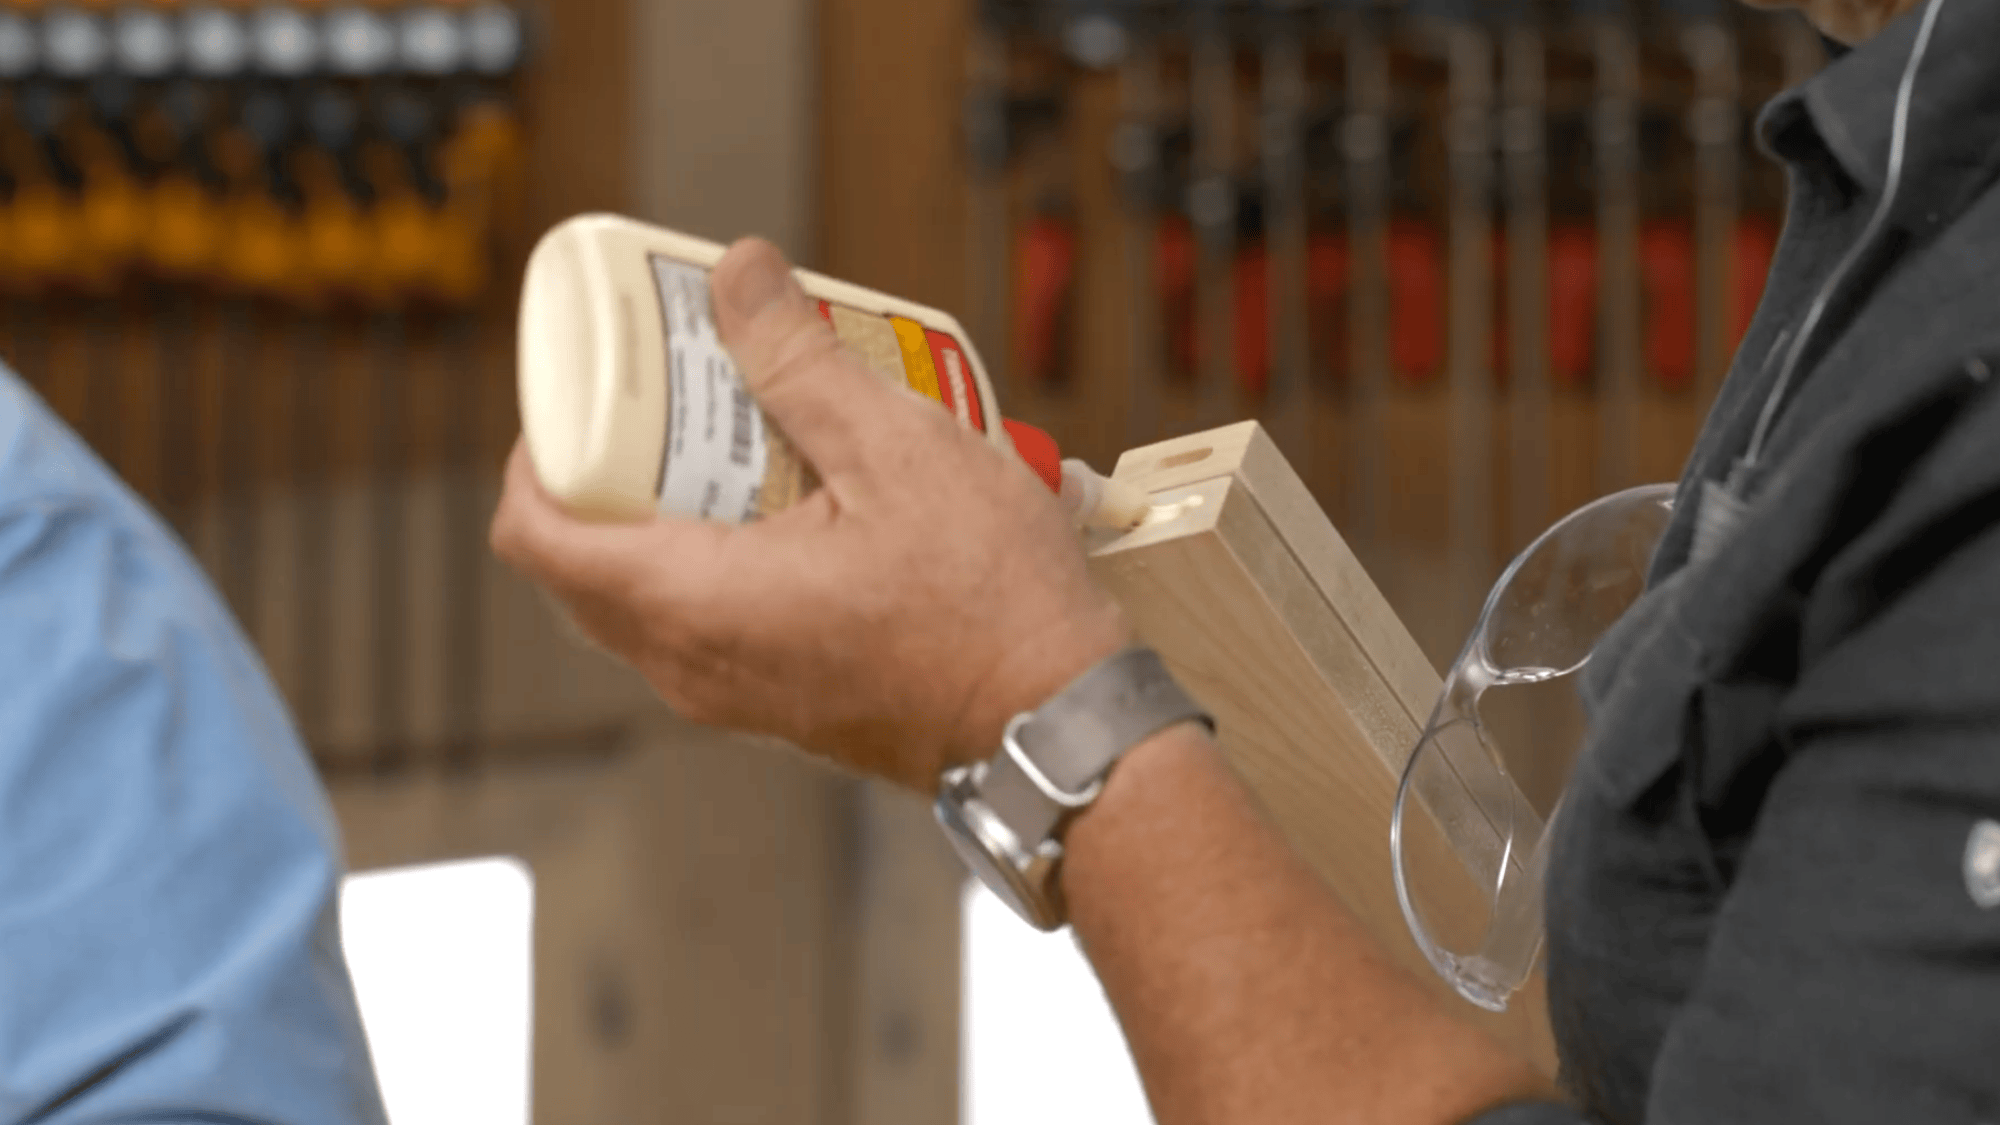
Step 3: Use Threaded Inserts
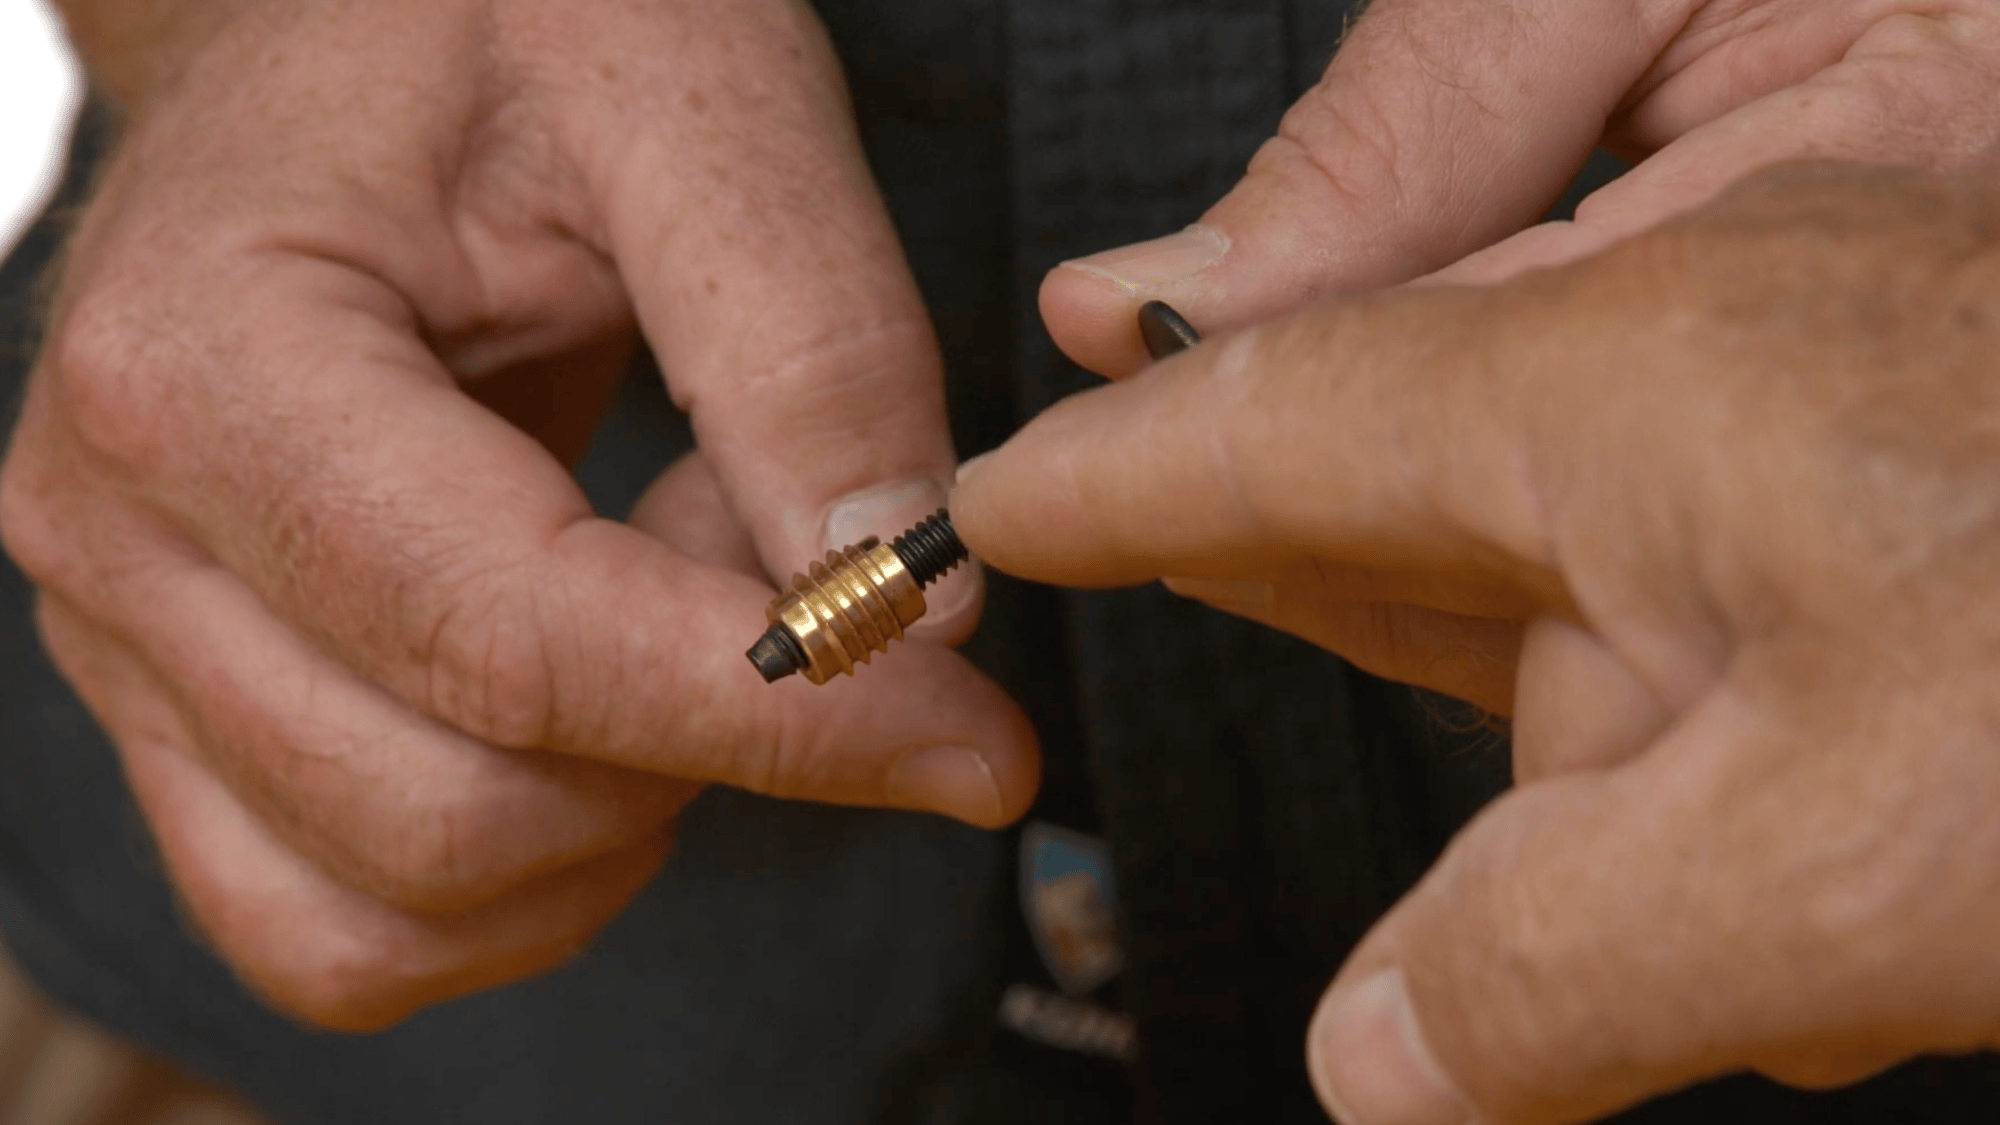
Use threaded inserts and furniture bolts instead of regular screws for this project. These inserts go into the wood and create a strong threaded space for bolts to fit securely.
This method helps avoid damage that can happen with normal screws over time.
You can easily remove and tighten the bolts whenever needed. It makes the rack easy to take apart, move, and rebuild without weakening the joints, which is perfect if you plan to use it again later.
Step 4: Prepare the Cut List
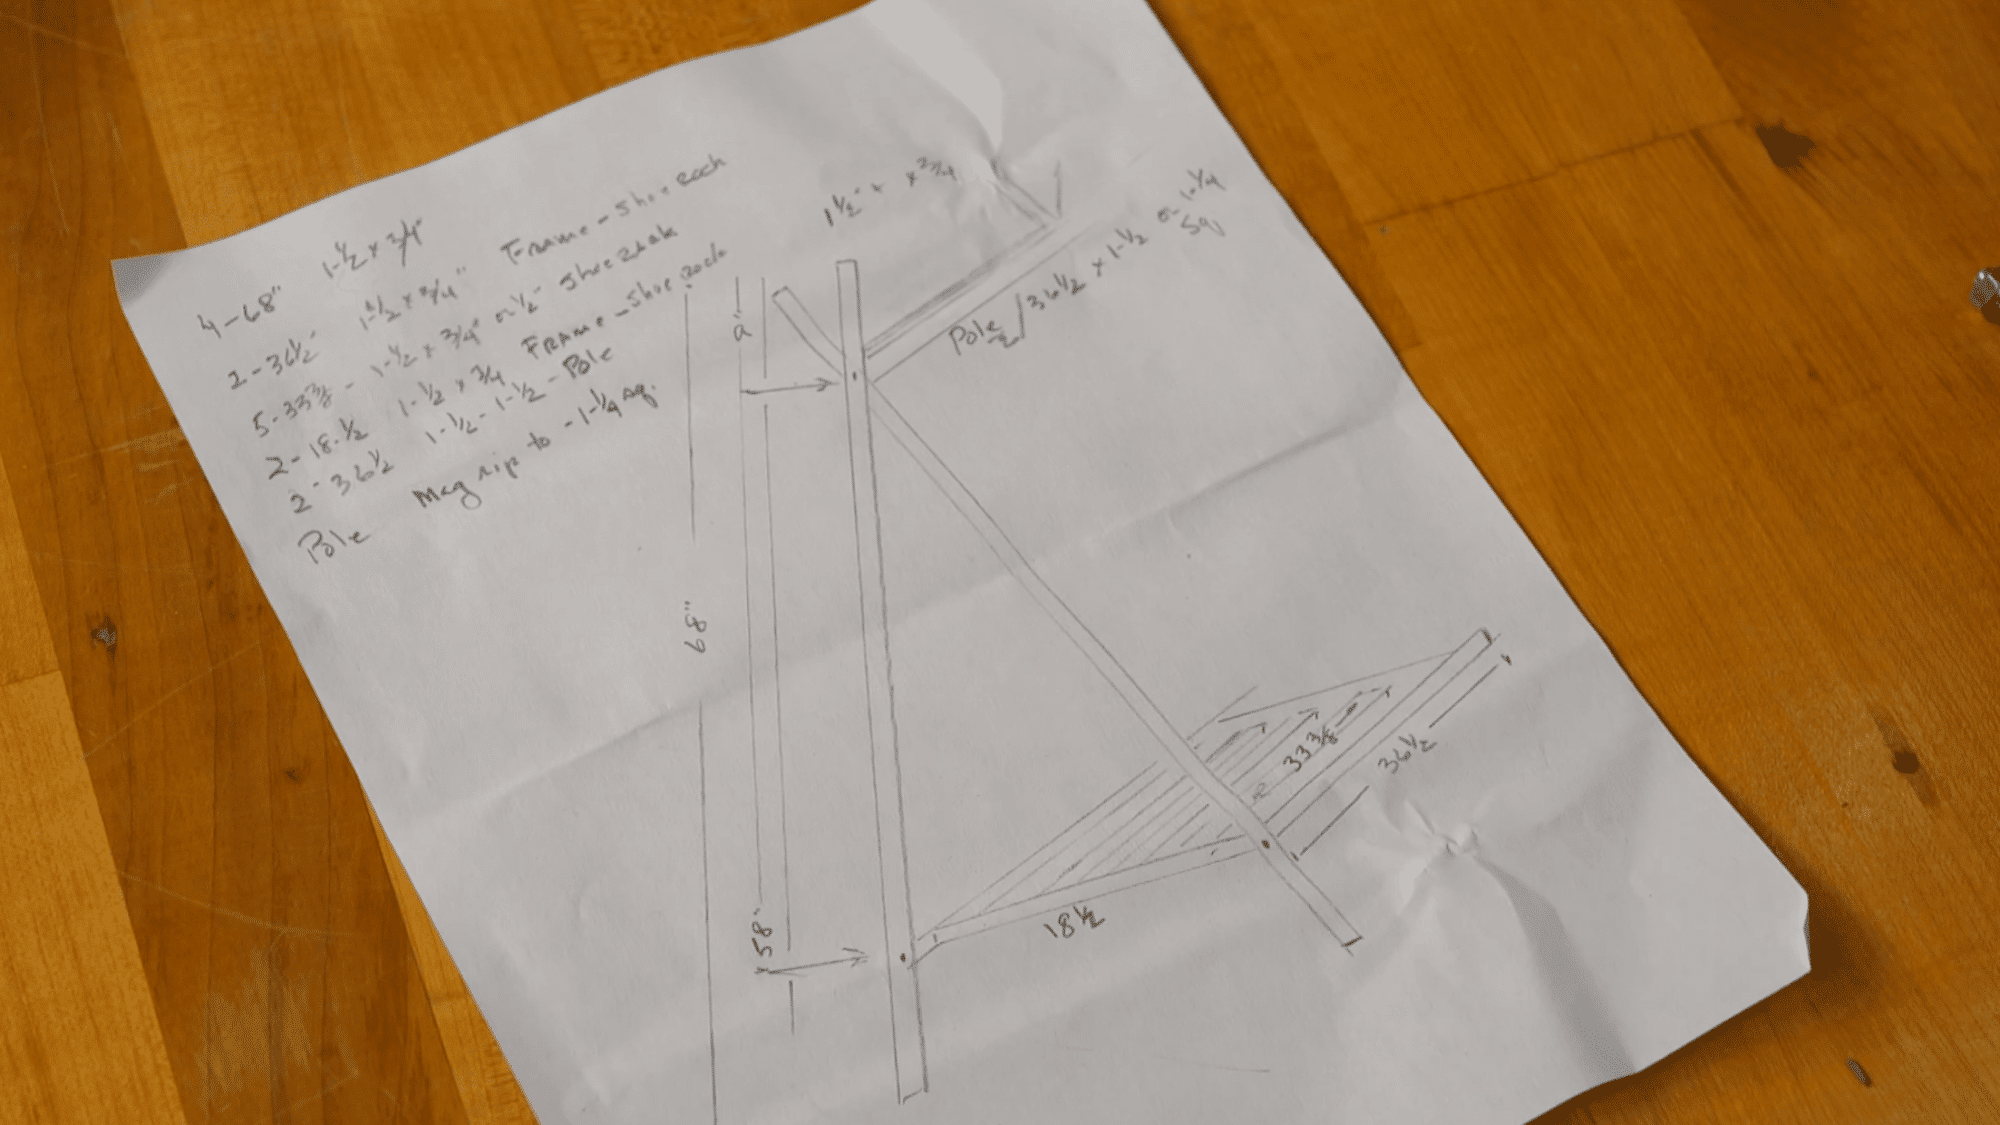
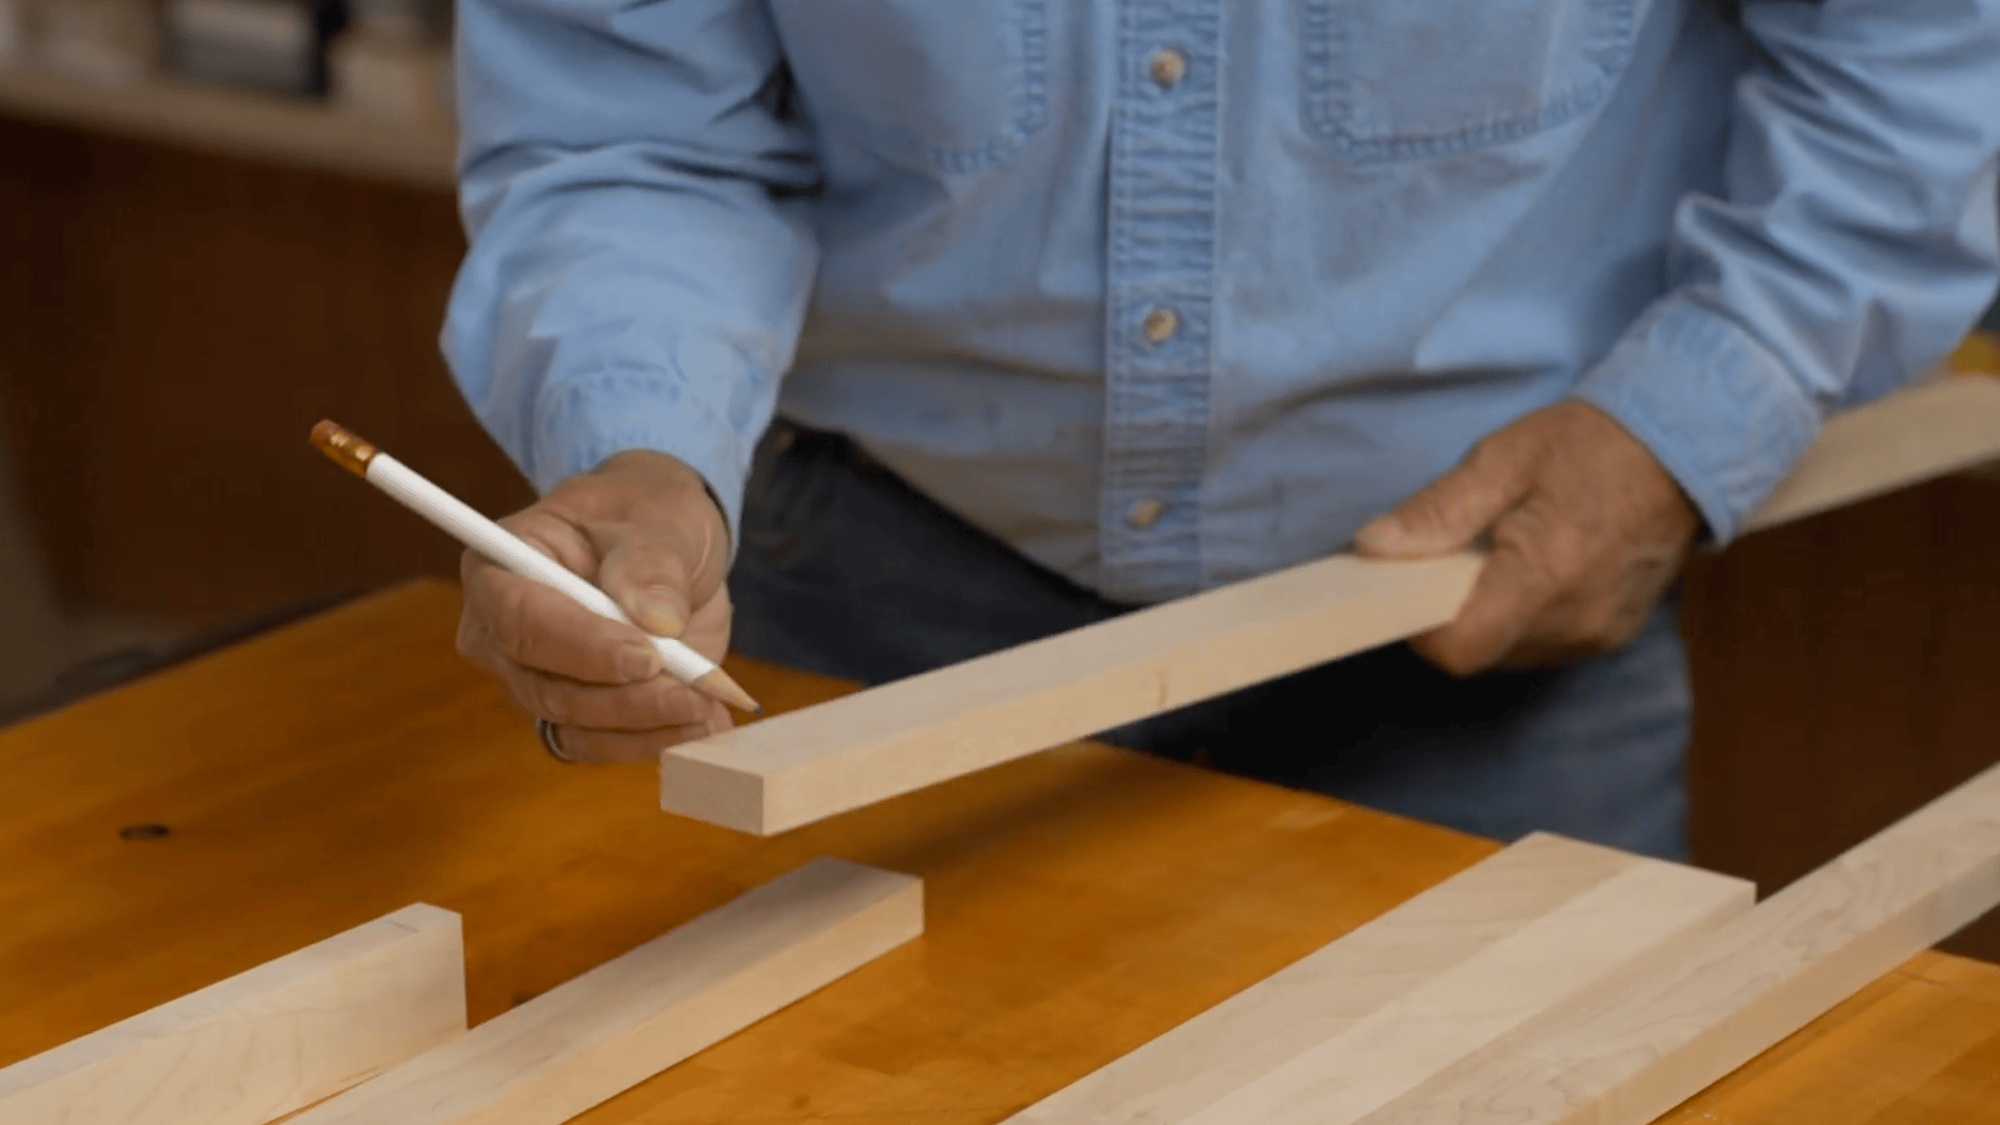
Make a cut list with all sizes before starting the build. Write down the length and number of each wood piece you need for the rack.
This step helps you stay organized and avoid mistakes while cutting. Once your list is ready, cut all the wood pieces according to the measurements.
Double-check each cut for accuracy. Having everything prepared in advance will make the assembly process faster, smoother, and easier without stopping in between steps.
Step 5: Drill Holes in Legs
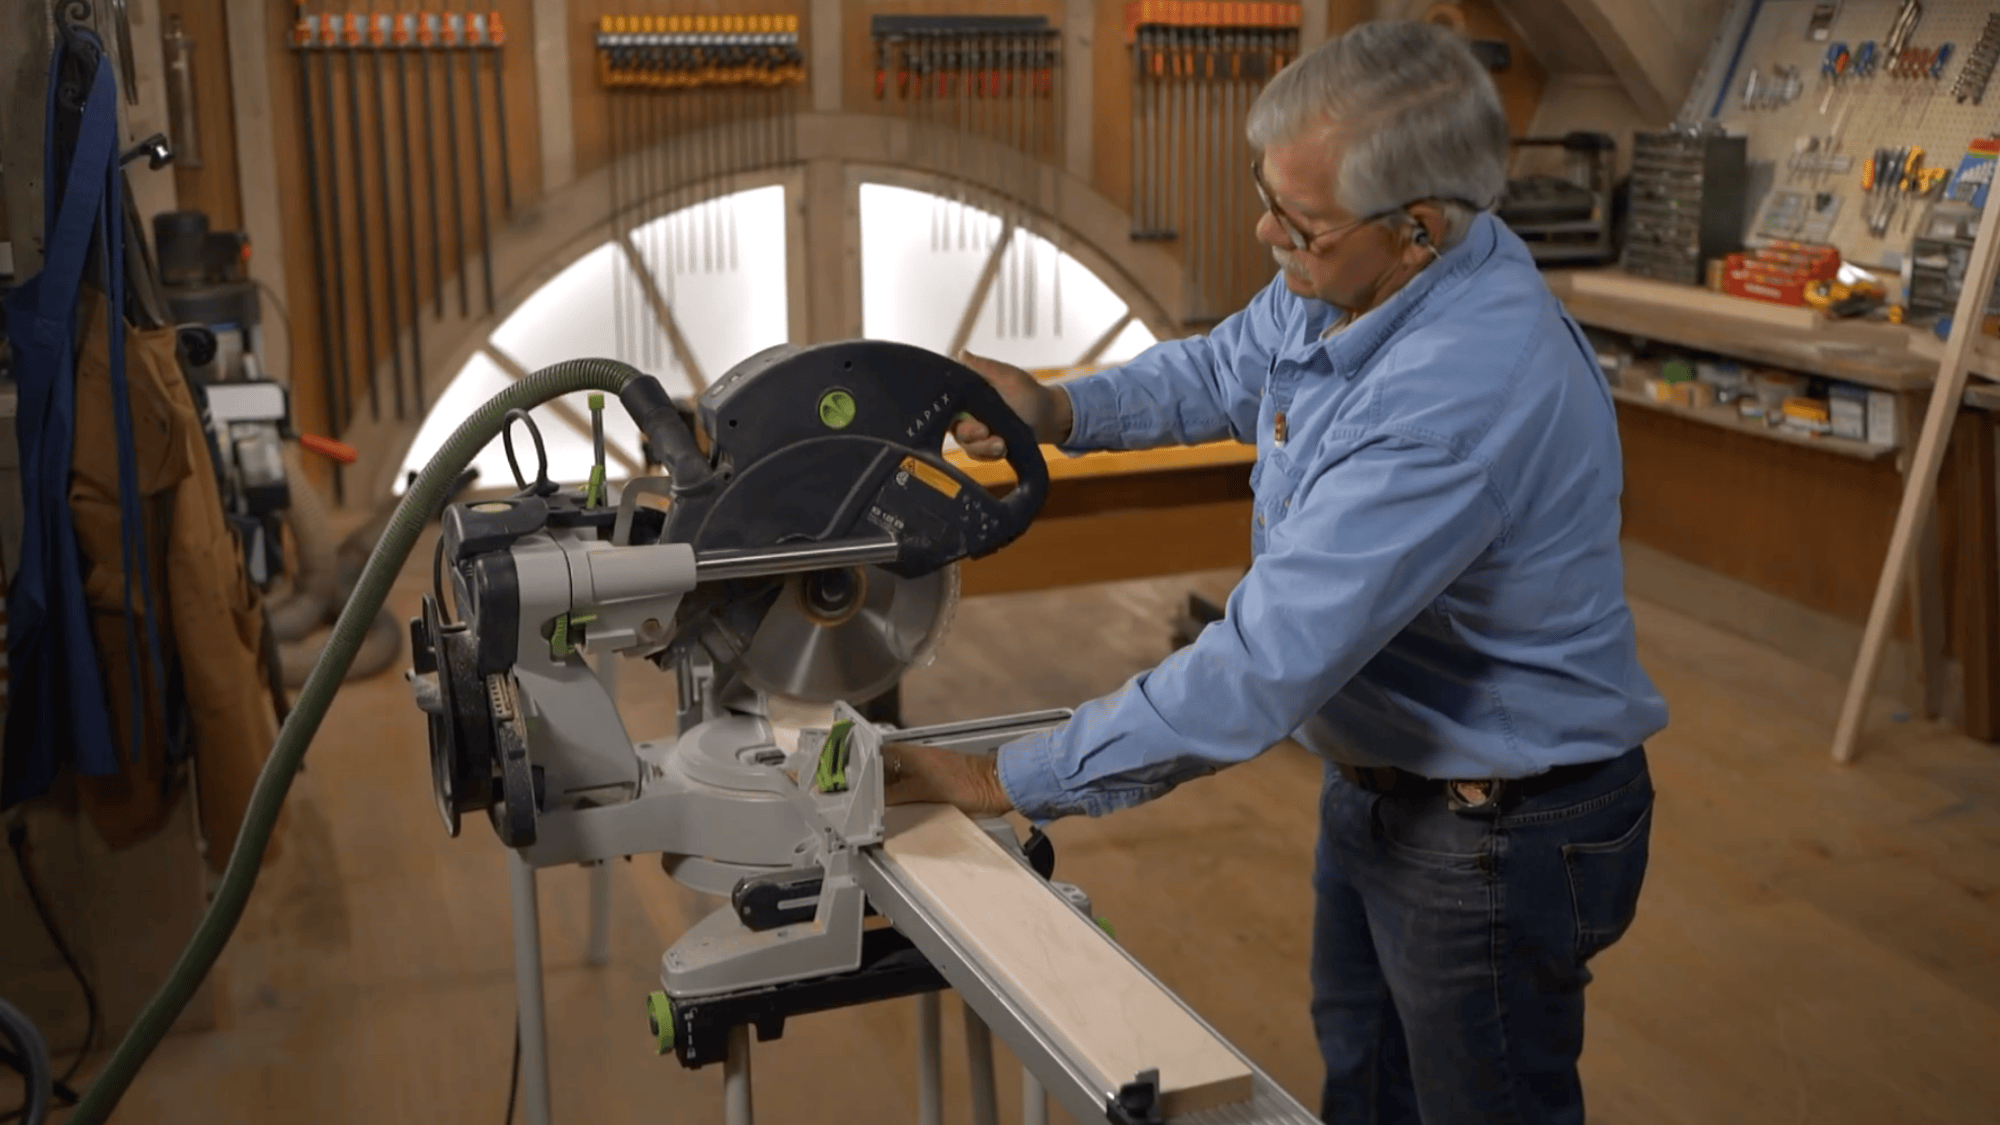
Tape the four legs together so they stay aligned while you work. This helps you drill matching holes in all pieces at once.
Mark the positions for the top and bottom holes carefully before drilling. Use a jig to keep the drill straight and steady during the process.
Drill one hole near the top and one near the bottom. Take your time to ensure clean and accurate holes, as this will help the rack fit together properly later.
Step 6: Find the Leg Angle
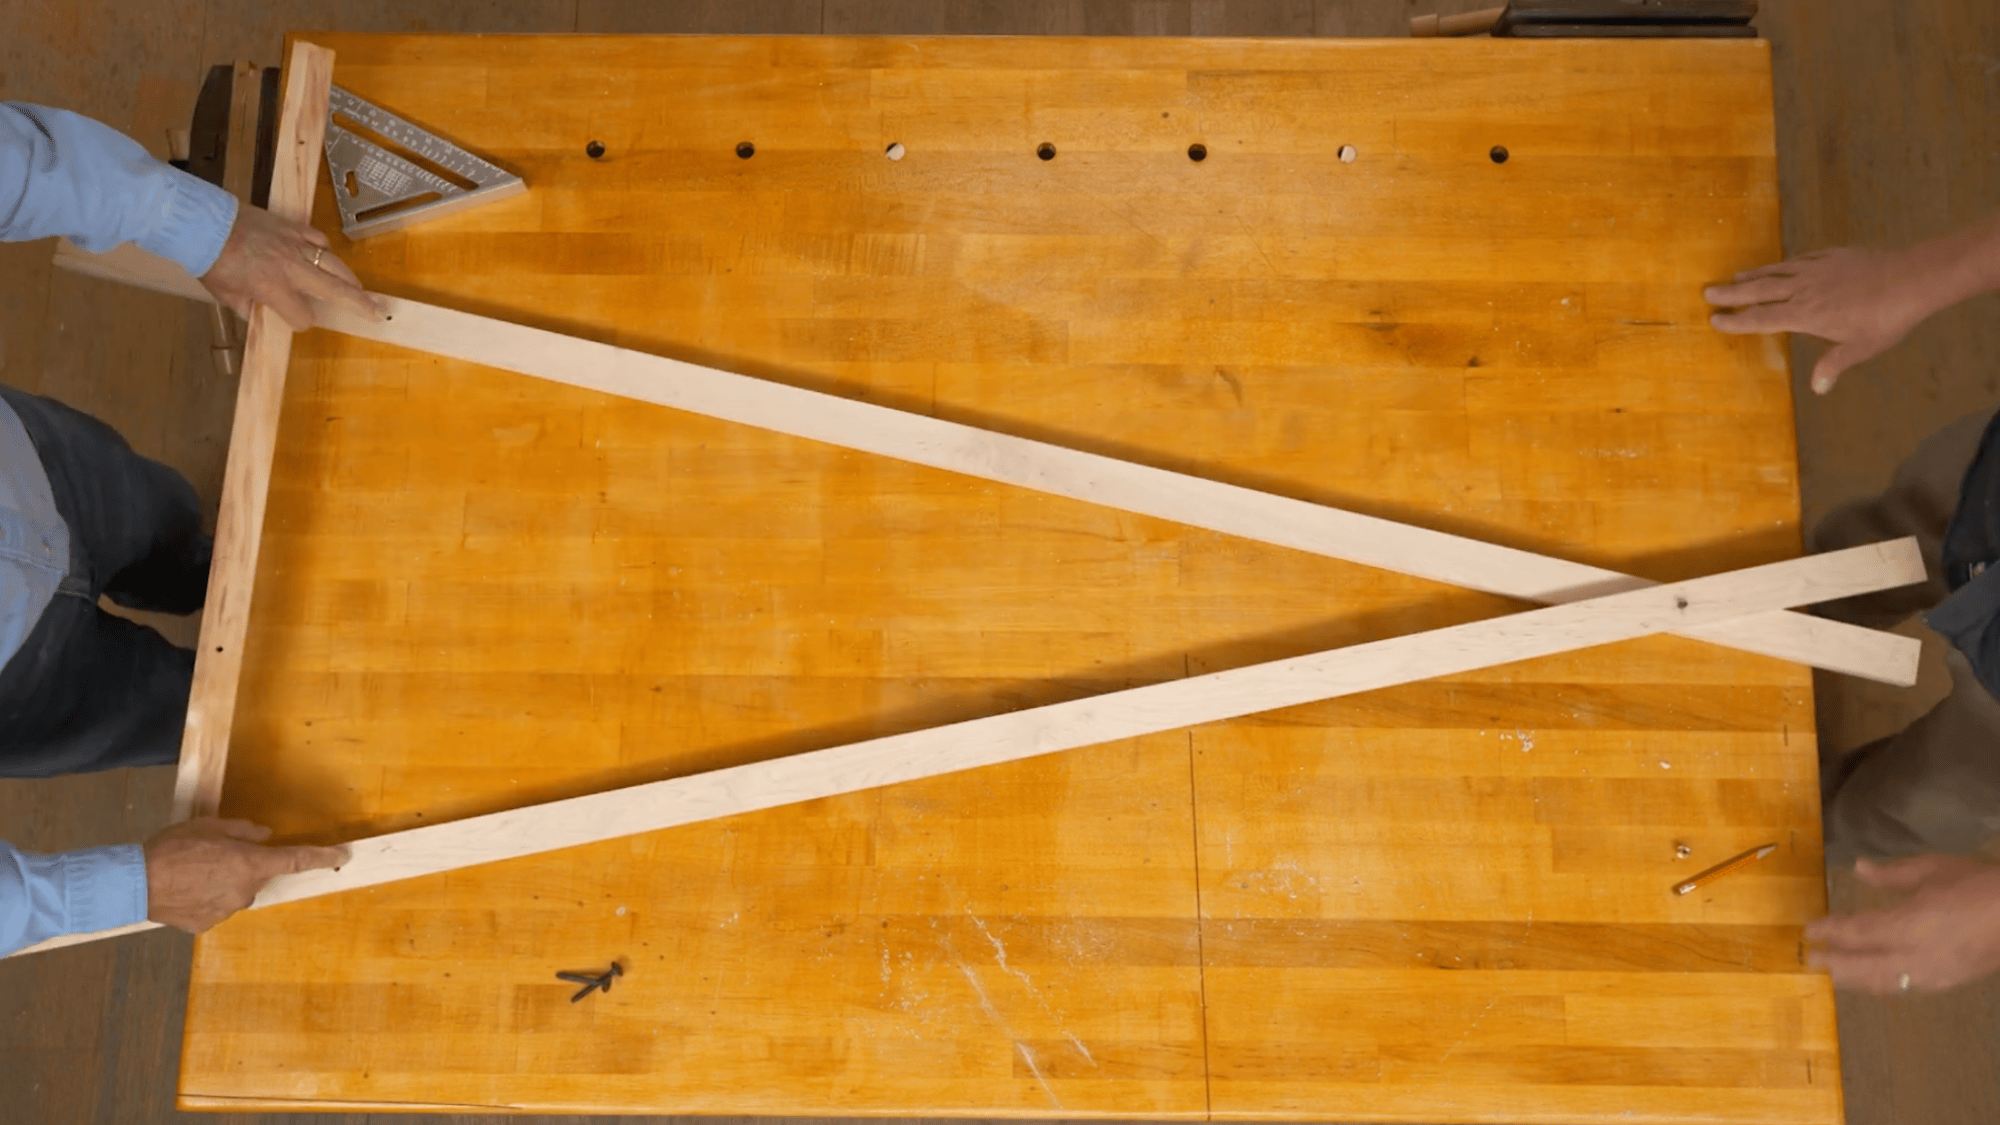
Attach the top of the legs using a bolt to create a pivot point. Gently spread the legs apart until the frame starts to take shape.
Place a scrap piece of wood where the bottom shelf will sit to guide the position. Use a speed square to measure the angle between the legs and the floor.
Adjust until you get the correct angle for stability. This step ensures the rack stands flat and balanced when placed on the floor.
Step 7: Cut the Leg Angles
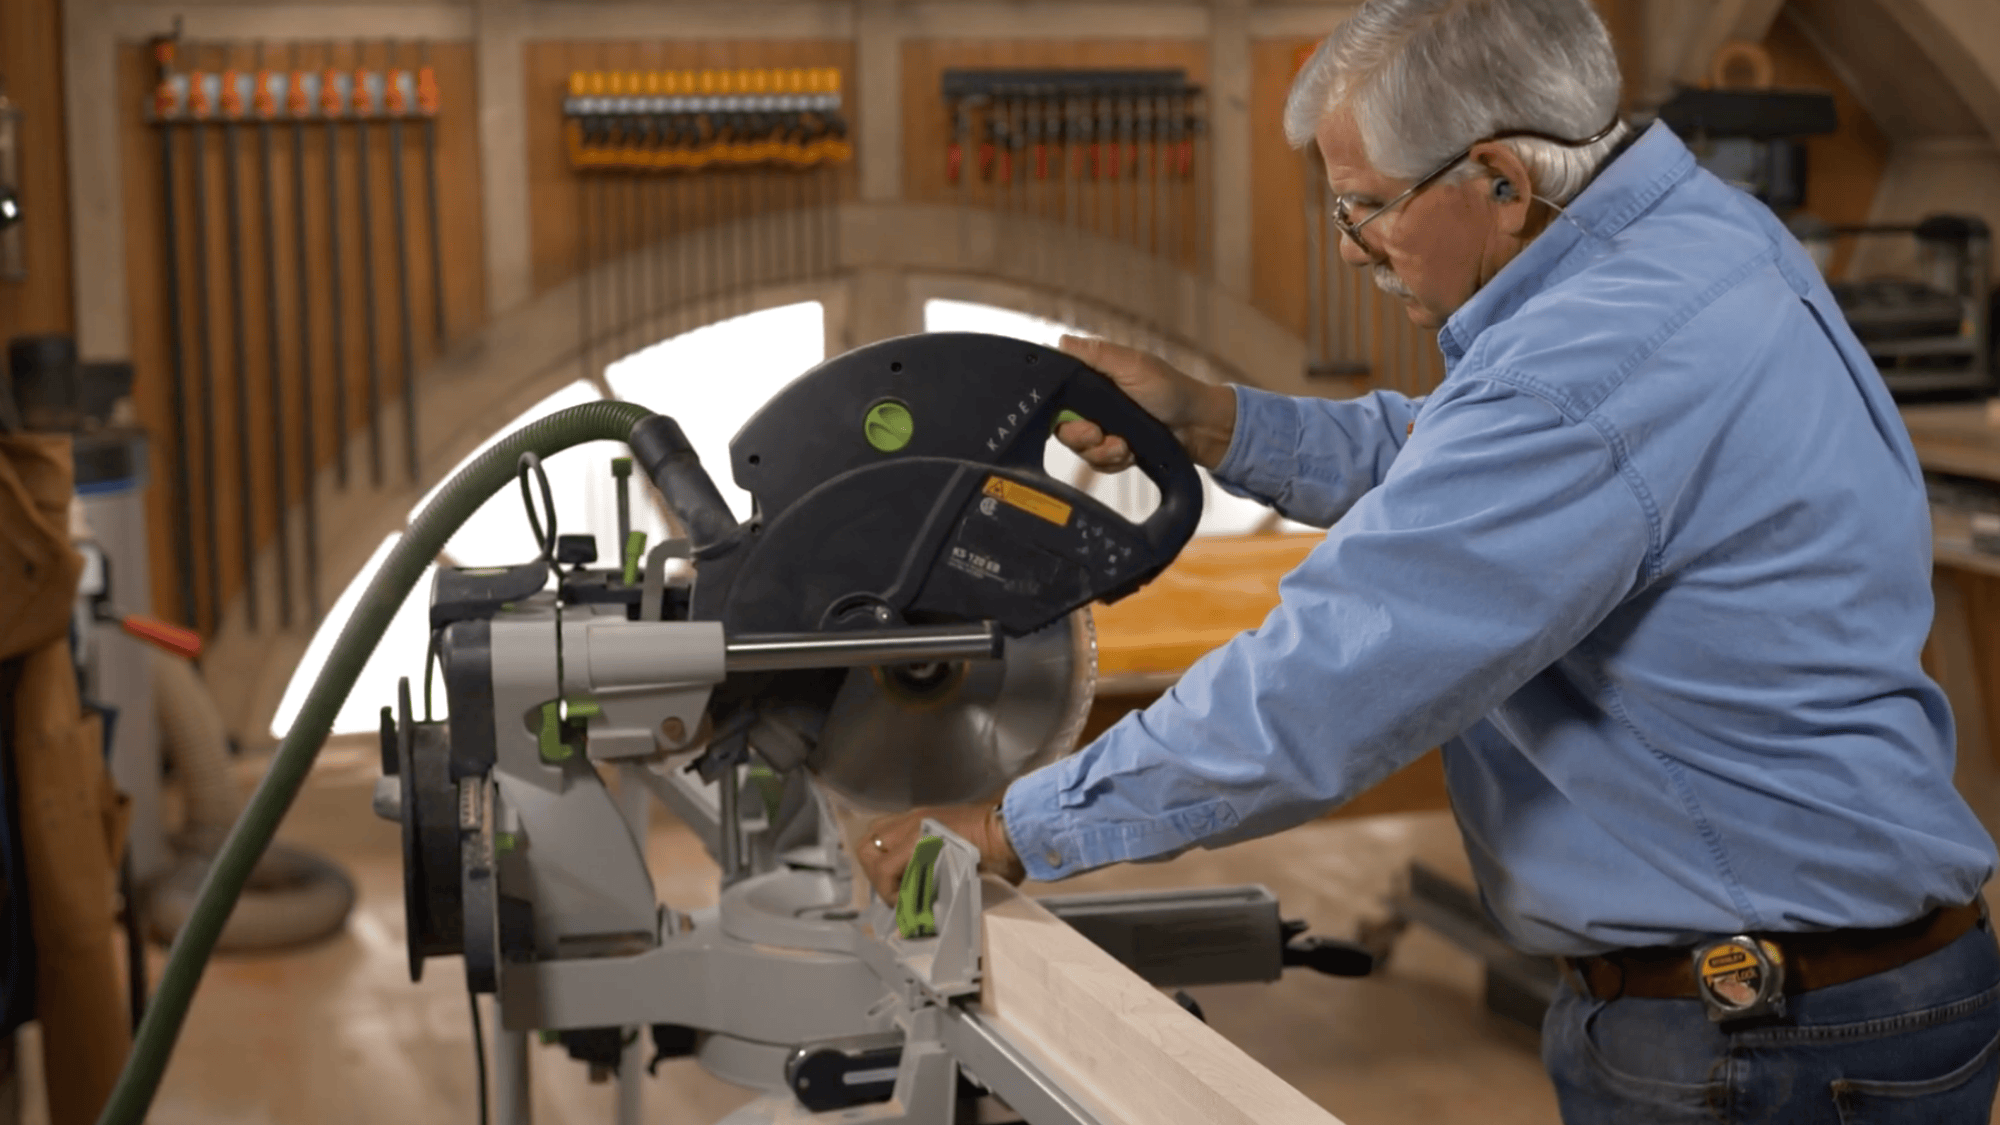
Mark the angle on each leg carefully using the measurement you found earlier. Make sure the markings are clear and consistent on all pieces so the cuts match.
Use a saw to cut along the marked lines slowly and accurately. These cuts will help the legs sit flat on the floor without wobbling.
After cutting, check each leg on a flat surface to confirm stability. If needed, lightly sand the edges to smooth them and improve the fit.
Step 8: Build the Bottom Shelf Layout
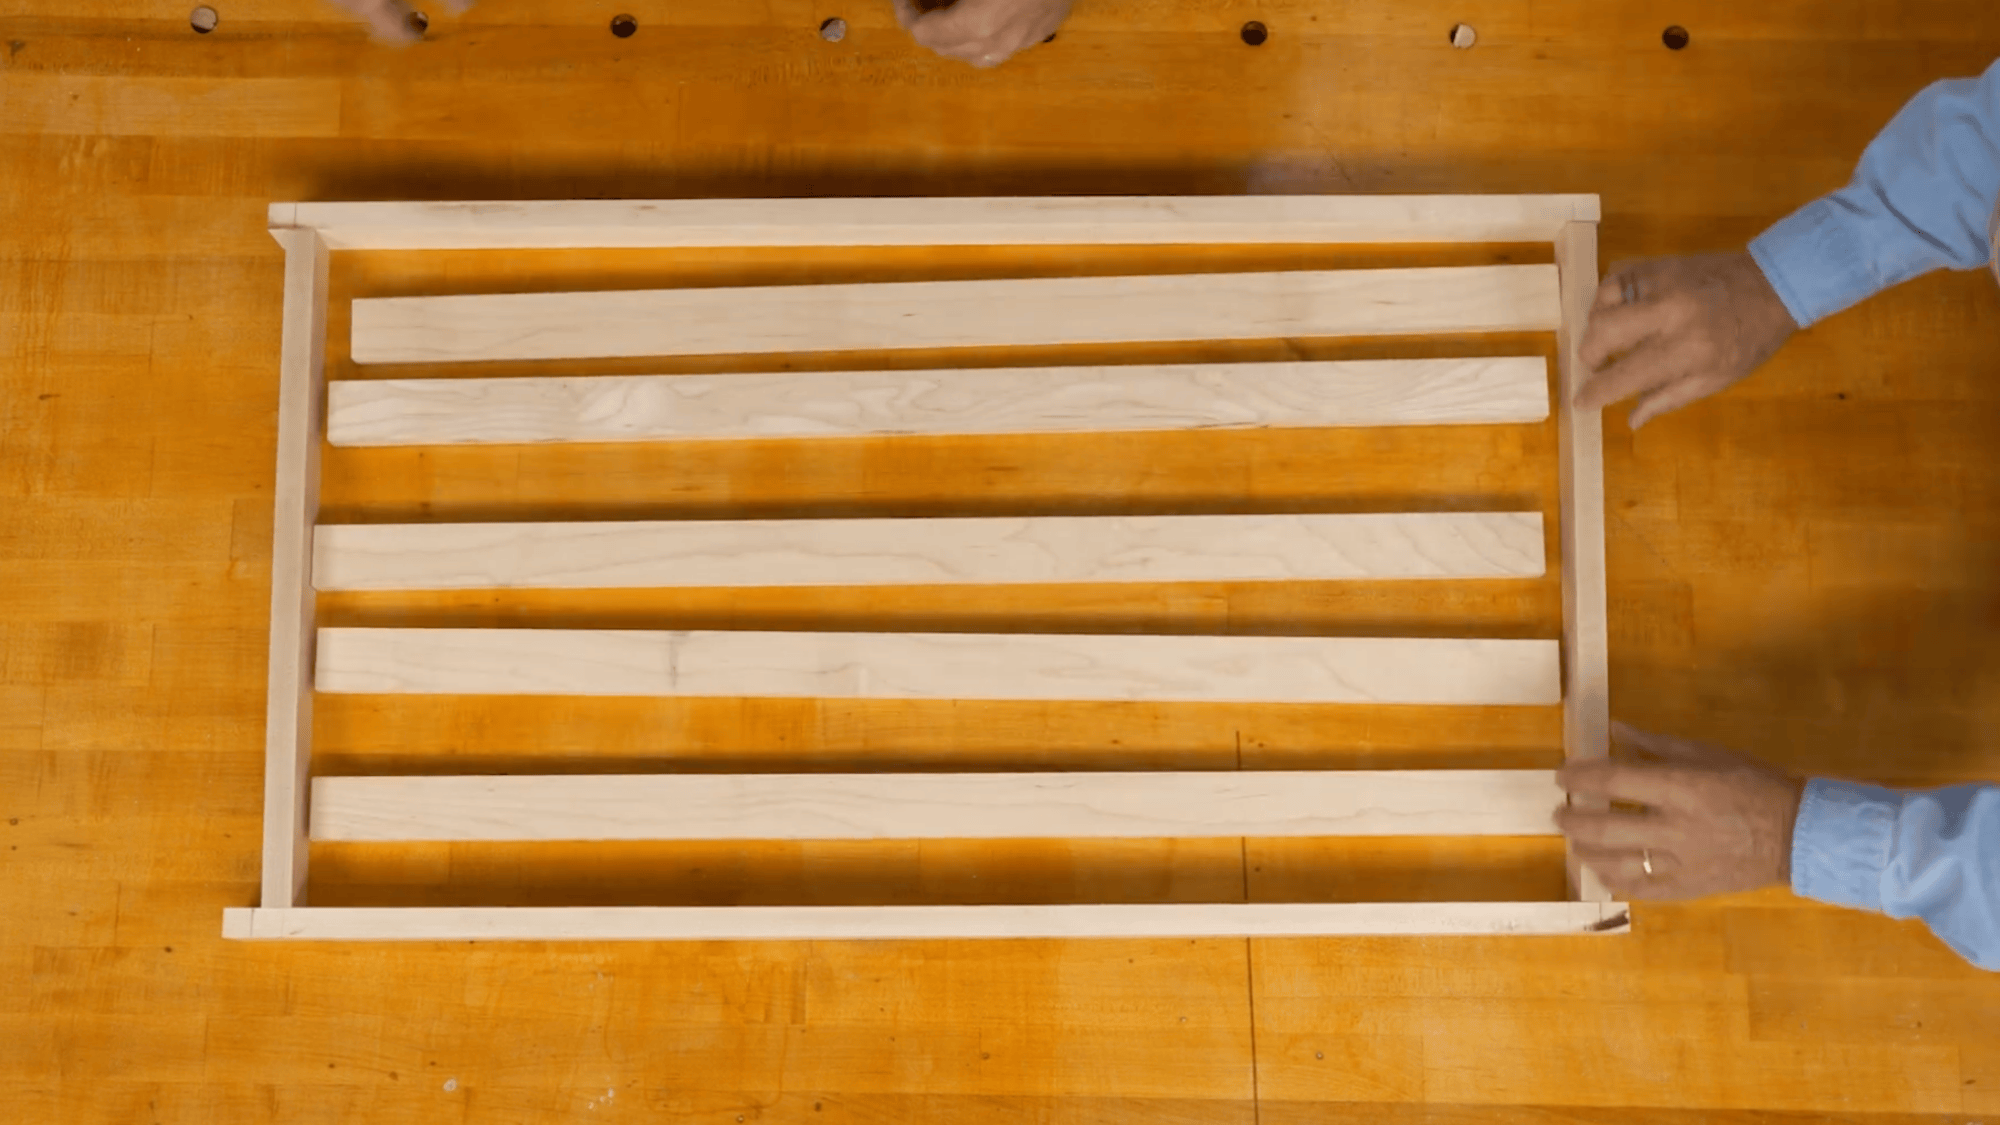
Arrange the long and short wood pieces to build the bottom shelf frame. Place the longer pieces on the outer sides and fit the shorter ones evenly between them.
This creates a simple and strong base for shoes or storage. Take time to adjust the spacing so everything looks balanced.
Use a pencil to mark center lines on each piece. These marks will guide you during assembly and help keep all parts straight, even, and properly lined up when joining together.
Step 9: Assemble the Shelf
Apply glue to the joints where the wood pieces will connect. Spread it evenly so each joint gets full coverage for a strong hold.
Insert the floating tenons into the slots and carefully join the pieces together. Make sure everything lines up with your markings before pressing them firmly in place.
Wipe off any extra glue that squeezes out. Allow the shelf frame to sit undisturbed for some time so the joints can set properly and create a solid and stable structure.
Step 10: Make the Hanging Pole
Glue two wooden pieces together to form a strong and thick pole for hanging clothes. Apply glue evenly along the edges and press the pieces tightly together.
Use clamps to hold them in place while the glue dries. Once dry, remove the clamps and check that the bond is solid. Next, use a router to round the edges of the pole.
This step smooths sharp corners and gives a clean shape, making it safer and better for hanging clothes.
Step 11: Cut and Sand the Pole
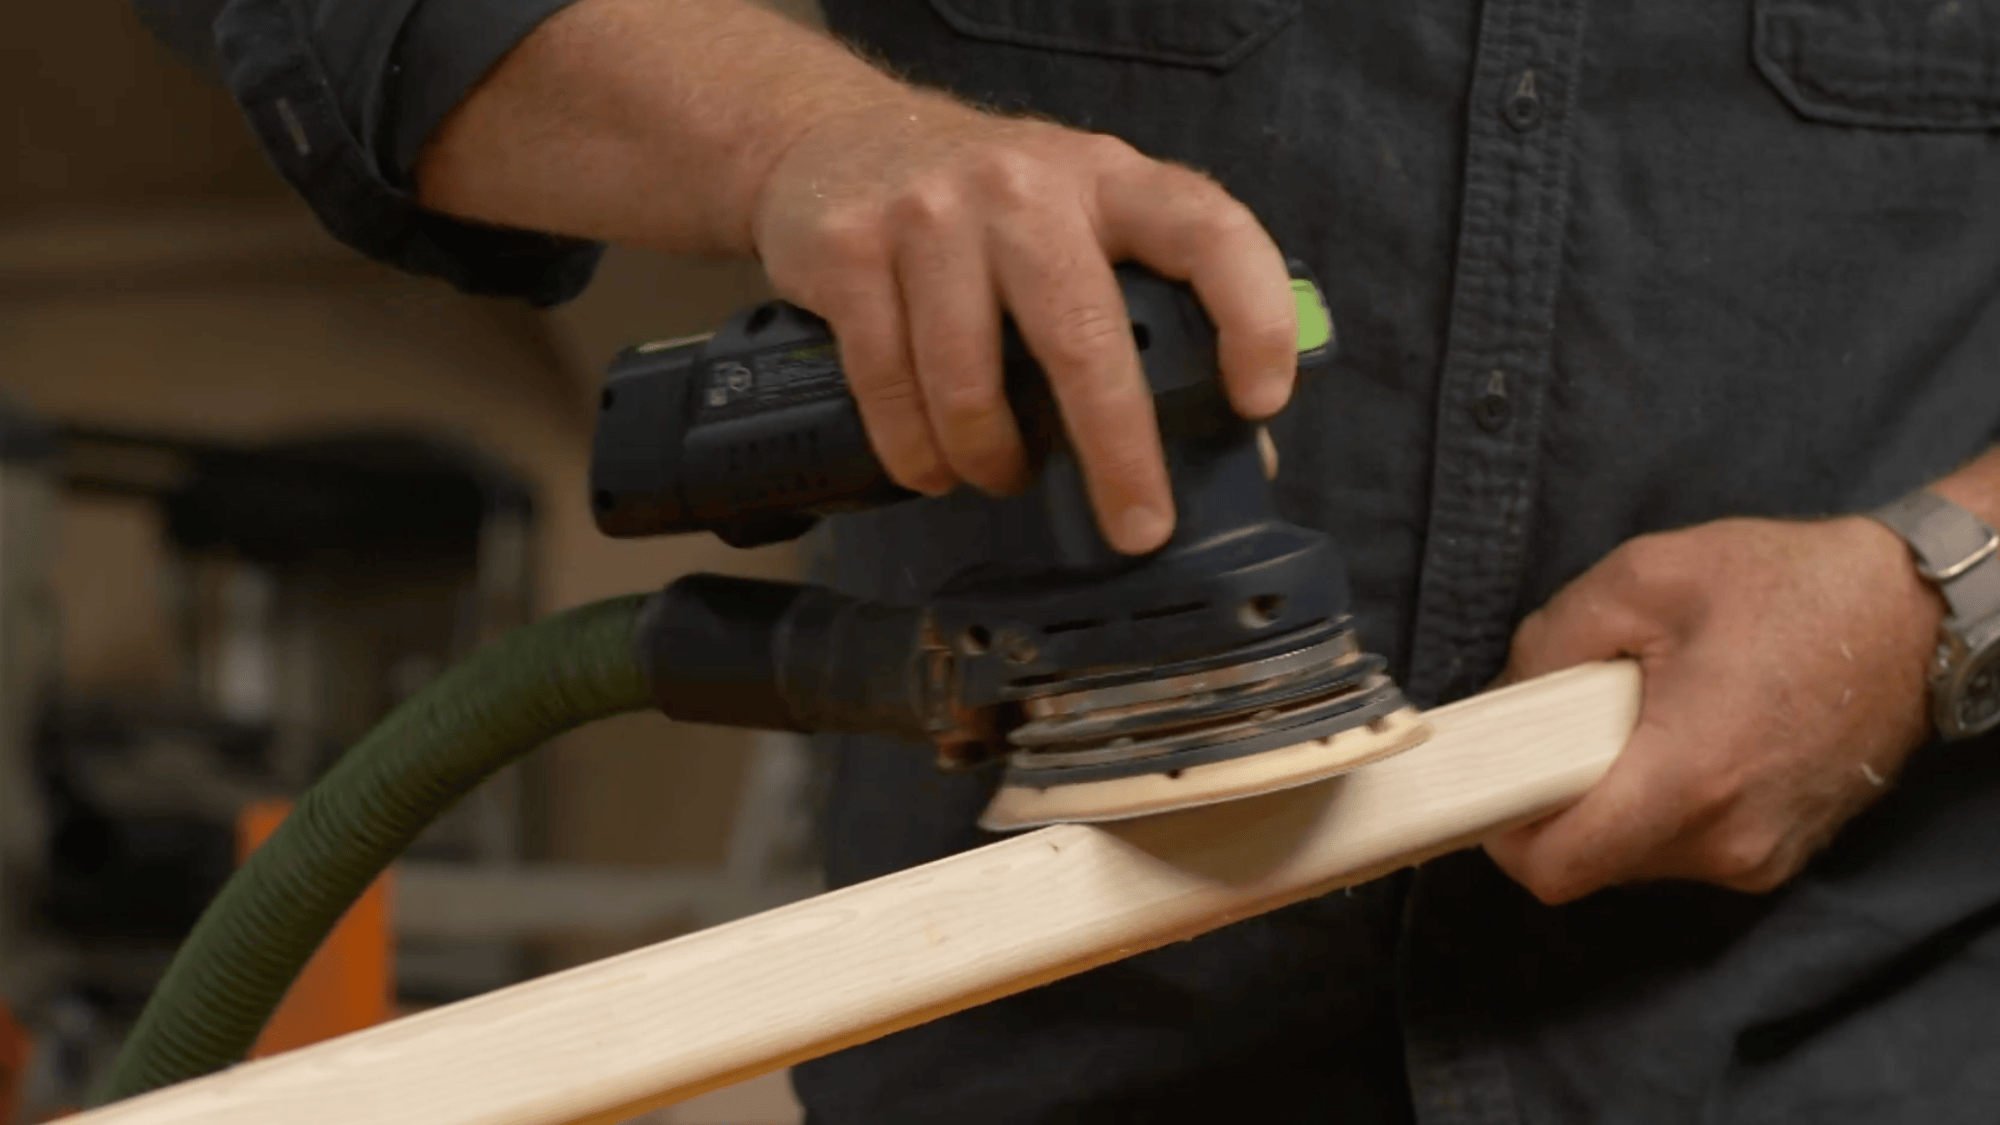
Trim the pole to the correct size based on your rack measurements. Use a saw to make a clean and straight cut at both ends. Double-check the length before cutting to avoid mistakes.
Once trimmed, use sandpaper to smooth the entire surface of the pole. Focus on the edges and any rough spots that could catch on clothes.
A smooth finish will help protect fabrics and give the pole a clean look, making it ready for final assembly.
Step 12: Install Threaded Inserts
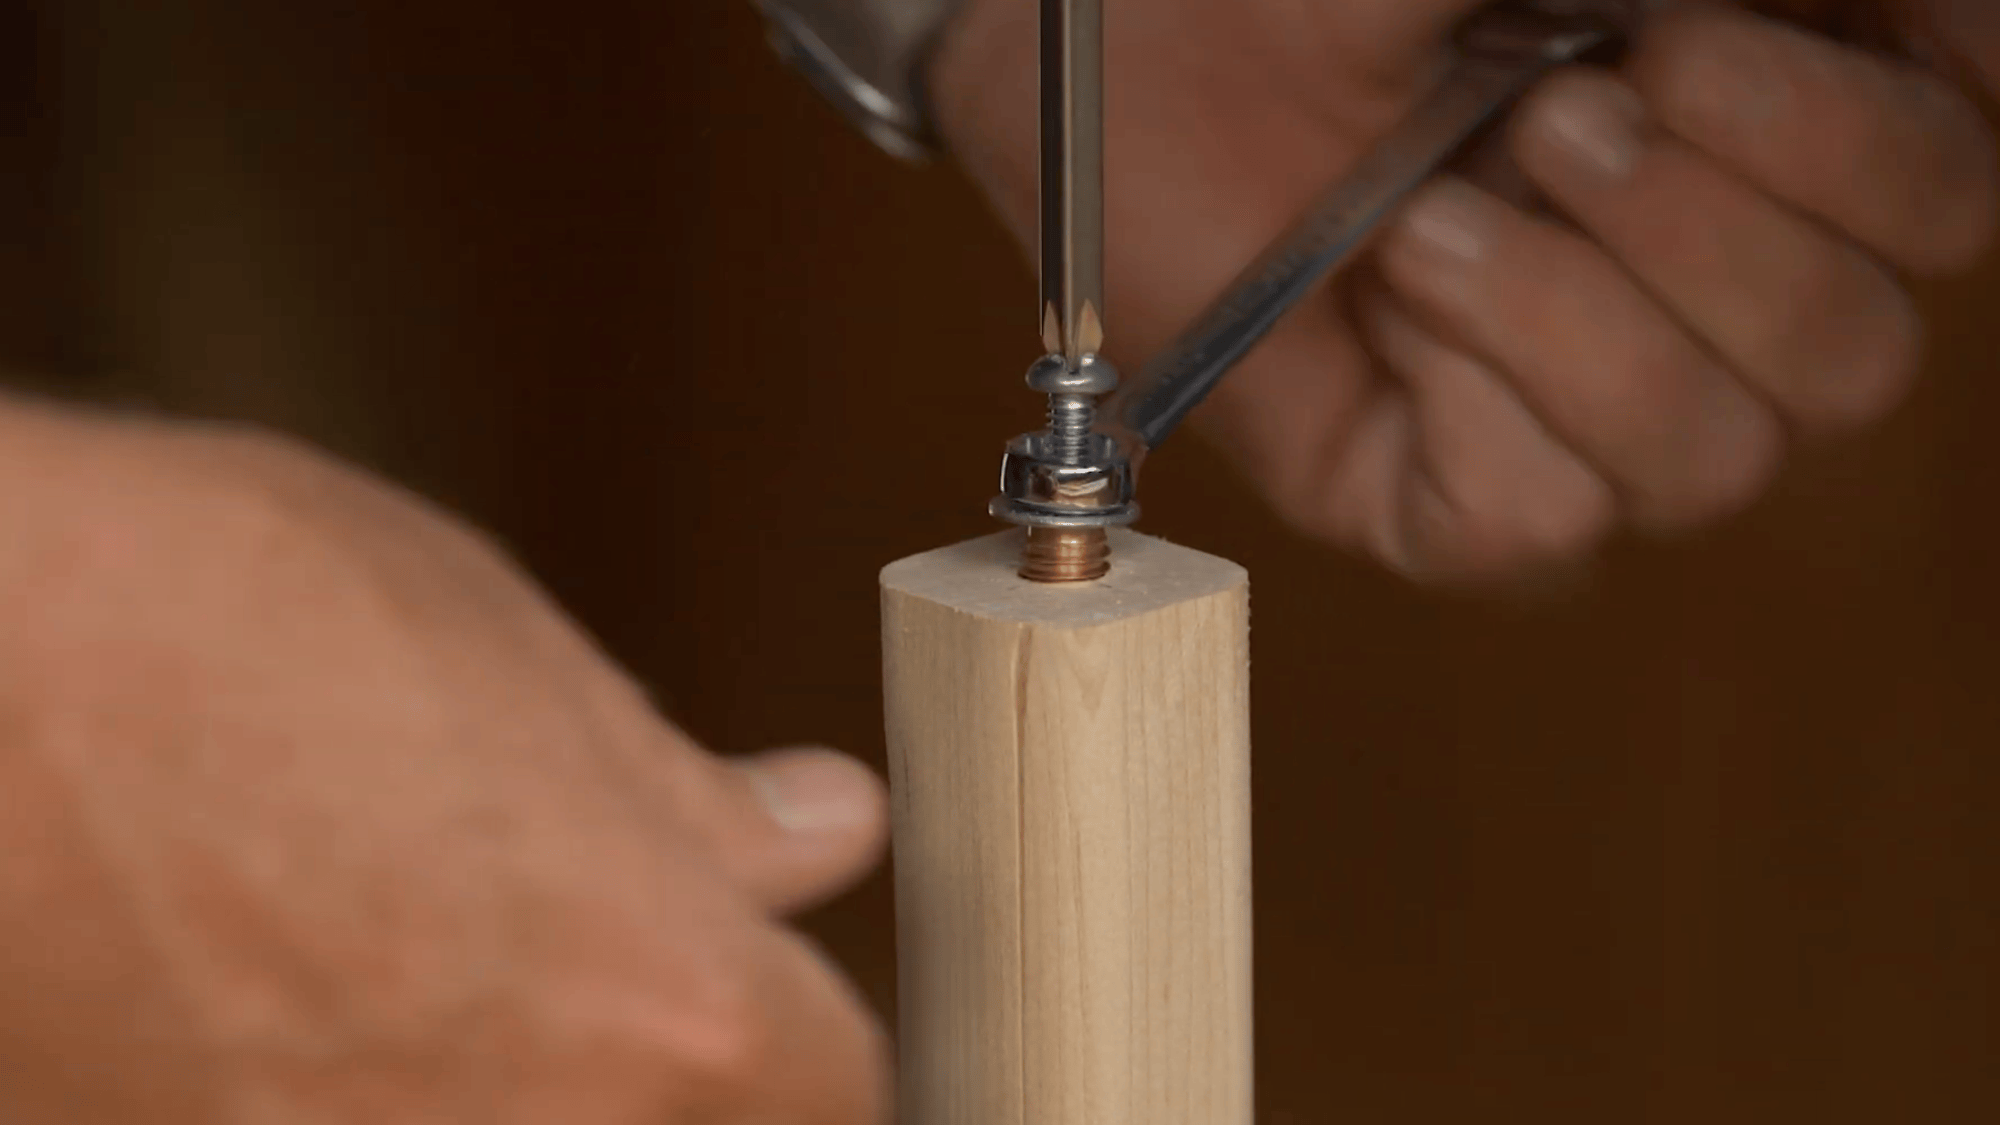
Install threaded inserts in the pole and shelf at the marked hole positions. Make sure the holes are drilled to the correct size before placing the inserts.
Start threading them into the wood slowly, using the proper tool or bolt. Keep the insert straight as you turn it to avoid misalignment.
Apply steady pressure and do not force it in too fast. Tighten until it sits flush with the surface. This step ensures strong connections for repeated assembly and disassembly later.
Step 13: Final Assembly and Finish
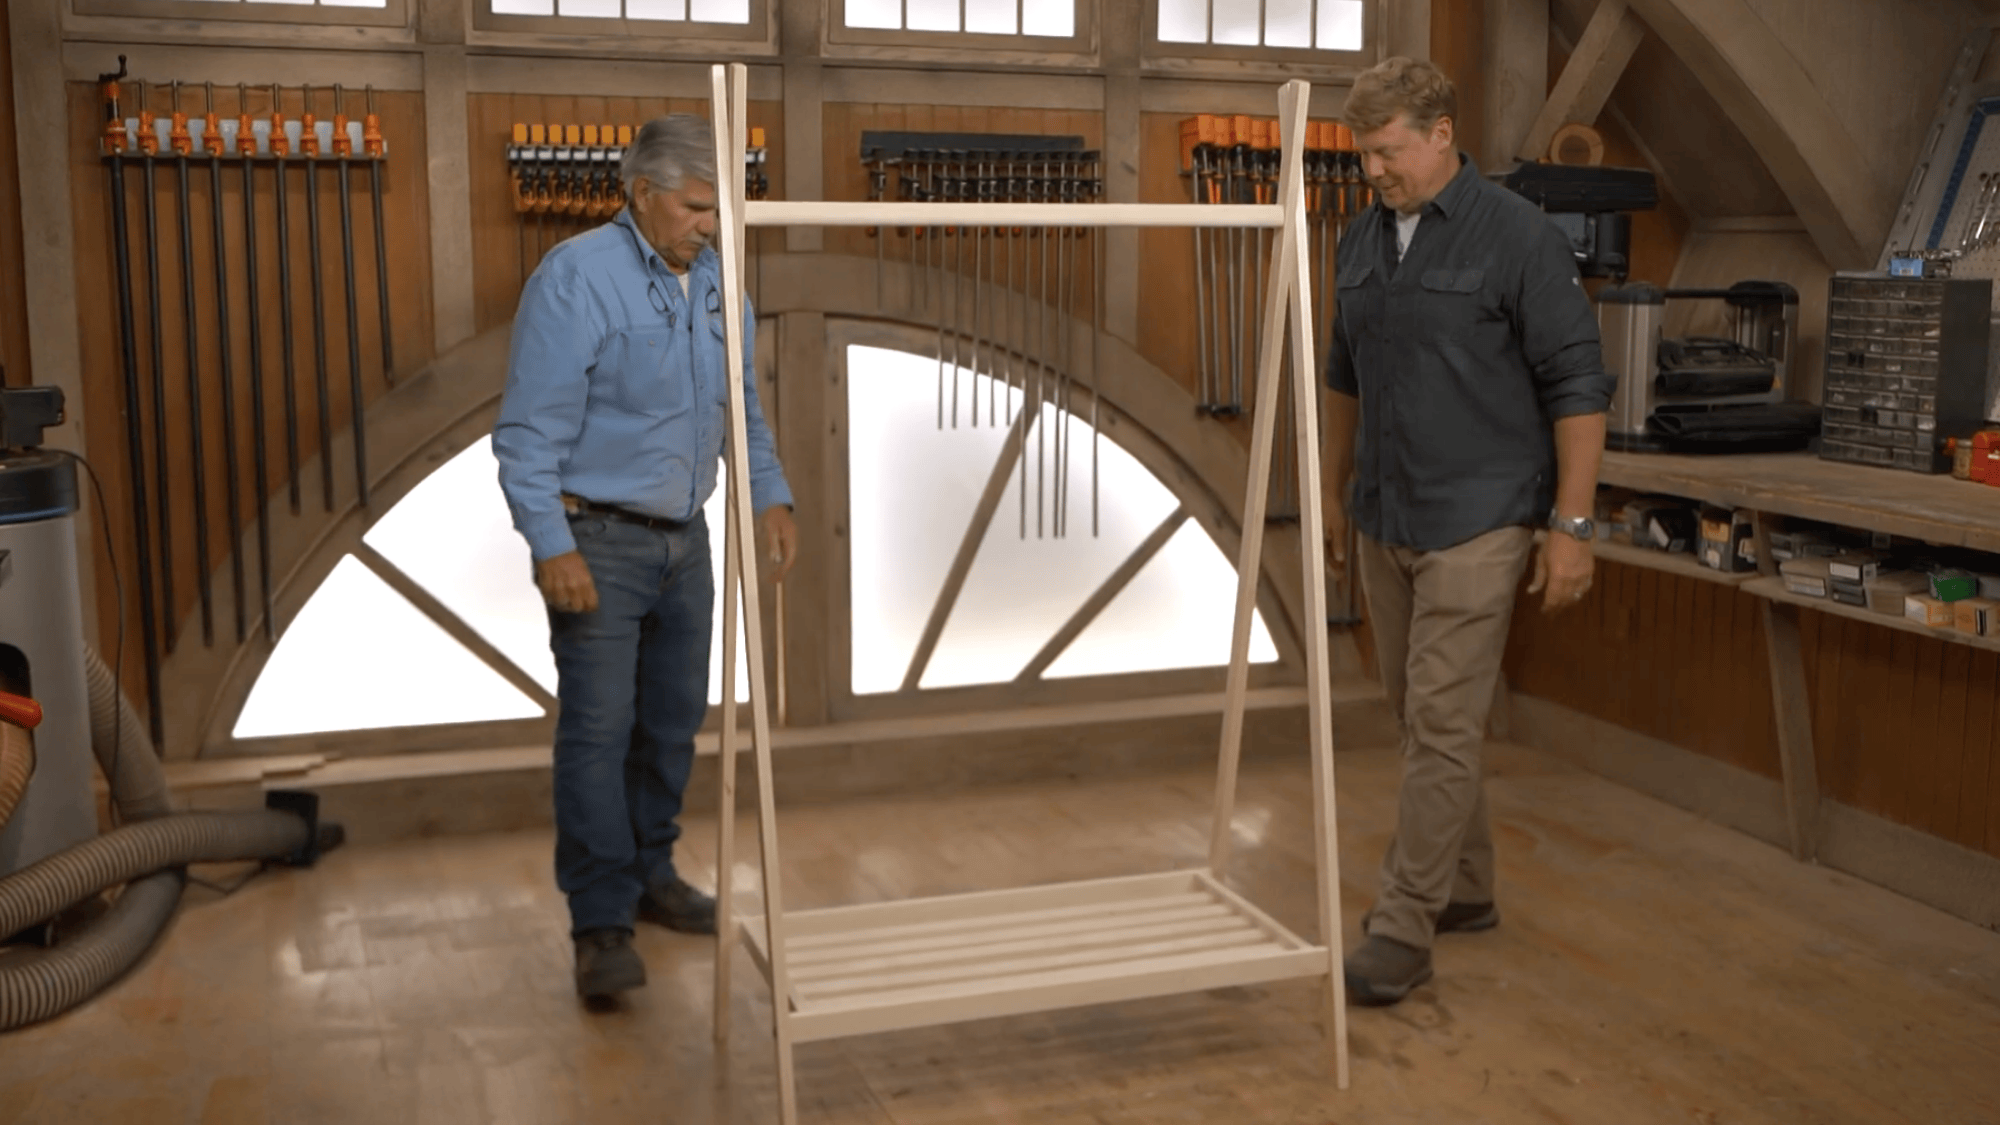
Attach the legs, shelf, and pole using furniture bolts to bring the rack together. Insert the bolts through the holes and tighten them carefully so all parts stay secure.
Check that the frame stands straight and does not wobble. Once assembled, choose a finish based on your preference.
You can paint for a clean look or stain to show the wood grain. Apply the finish evenly and let it dry fully before using the rack for clothes and shoes.
This tutorial is based on a helpful video by This Old House. You can check out the original video on their YouTube channel here or watch it below.
DIY Clothes Rack Design Tips
These simple tips help you build a diy clothes rack that looks good and works well. They also make sure your rack stays strong, easy to use, and fits your space.
- Keep Height Comfortable: Set the rack height so you can hang and grab clothes easily. Avoid placing it too high or too low for daily use.
- Balance Strength and Weight: Use strong materials that can hold the weight of your clothes. Make sure joints and supports stay firm and stable.
- Match with Room Style: Choose a design that fits your room’s look and setup. Keep colors and materials simple for a clean feel.
DIY Clothes Rack vs Store-Bought
This table gives a clear side-by-side view to help you choose what works best. It compares cost, design freedom, and effort in a simple way.
| Feature | DIY Clothes Rack | Store-Bought Rack |
|---|---|---|
| Cost | Low cost, depending on the materials used | Higher price, fixed cost |
| Design | Fully custom based on your space and need | Limited styles and sizes |
| Effort | Requires time and basic tools | No effort, ready to use |
| Flexibility | Can adjust size and structure anytime | Fixed design, hard to modify |
| Satisfaction | More personal and creative results | Standard look, less personal touch |
Where to Use a DIY Clothes Rack?
A diy clothes rack works well in different parts of the home and helps keep clothes easy to manage.
In the bedroom, it gives quick access to daily outfits and reduces the need for large wardrobes or extra storage units.
In the entryway, it creates a simple spot to hang jackets, bags, or clothes you use often, helping keep the area neat and ready.
It is also very useful in laundry or drying spaces, where you can hang clothes to air dry without clutter.
From experience, using a diy clothes rack in the right places makes daily tasks easier and keeps rooms clean without adding heavy or bulky furniture.
Common Mistakes to Avoid
These mistakes can affect how strong and useful your diy clothes rack turns out. Avoiding them will help you build a rack that lasts longer and works better.
- Weak Joints: Loose or weak joints can make the rack unstable and unsafe. Use proper screws and fittings to keep the structure strong.
- Wrong Measurements: Incorrect measurements can lead to a poor fit and an uneven design. Always measure your space and materials before building.
- Overloading the Rack: Adding too many clothes can bend or damage the rack. Keep the weight within limits to maintain stability.
- Poor Material Choice: Using low-quality wood or pipes can reduce durability. Choose strong materials that can handle daily use.
- Ignoring Stability: A rack without proper balance may tip over easily. Make sure the base is firm and evenly supported.
Wrapping Up
When I started making my own clothes rack, I didn’t expect how useful it would be in daily life. It’s not just about saving money, it’s about creating something that actually fits your space and routine.
A simple rack can make getting dressed easier, keep your room tidy, and give your space a clean, open feel.
What I like most is that you can keep it as basic or as detailed as you want. Even a small setup can make a big difference when used in the right spot.
If you take your time with planning and building, your rack can last a long time and stay strong.
I’d suggest starting small and trying one idea from this guide. Once you build your first rack, you’ll feel more confident to try new styles. Go ahead, pick your design and start building today!