
A dull concrete patio feels like something you either live with forever or replace at huge cost, but neither option is actually necessary.
Staining is the overlooked third choice. It transforms the slab you already have for a fraction of the cost, no demolition required.
The catch is that stain works nothing like paint, and that surprises first-timers. It soaks in and reacts, so the method matters.
Below, you’ll get the full step-by-step process of staining concrete from surface prep to sealing, followed by stain types, costs, and fixes for common beginner mistakes.
Acid vs. Water-Based Stain: What to Choose?
The choice comes down to how much control you want versus how much character you want in the final finish. Acid stain reacts with the concrete for a natural, unpredictable look, while water-based stain gives you more control and color options.
Here’s how they compare side by side:
| Feature | Acid Stain | Water-Based Stain |
|---|---|---|
| Color Range | Earth tones like browns, tans, soft greens | Wide range including bold colors like blues and blacks |
| Finish Look | Marbled and naturally varied | Smooth and uniform |
| Application Control | Lower control, reacts with concrete | Higher control, applies evenly |
| Fumes | Strong chemical odor | Low odor, beginner-friendly |
| Neutralizing Step | Required after application | Not required |
| Durability | Permanent bond with slab | Long-lasting surface tint |
| Best Use | Natural, organic stone-like look | Consistent color and modern finishes |
Acid stain leans into unpredictability, which is why no two slabs ever look identical. Water-based stain is more forgiving and easier to control, especially for first-time projects.
Both options upgrade plain concrete significantly. The right choice depends on whether you prefer natural variation or predictable results.
How to Stain Concrete Step by Step
Staining concrete looks intimidating, but it breaks down into seven clear steps. Most DIYers knock the whole thing out in a single weekend.
Tools & Supplies You’ll Need
- Pressure washer or stiff-bristle scrub brush
- Concrete degreaser
- Plastic sheeting
- Painter’s tape
- Acid or water-based concrete stain
- Pump sprayer
- Paint roller or wide brush
- Rubber gloves
- Safety glasses
- Acid-resistant boots
- Concrete sealer (penetrating or topical)
- Roller or sprayer for applying sealer
- Clean rags
Step 1: Clean and Prep the Slab
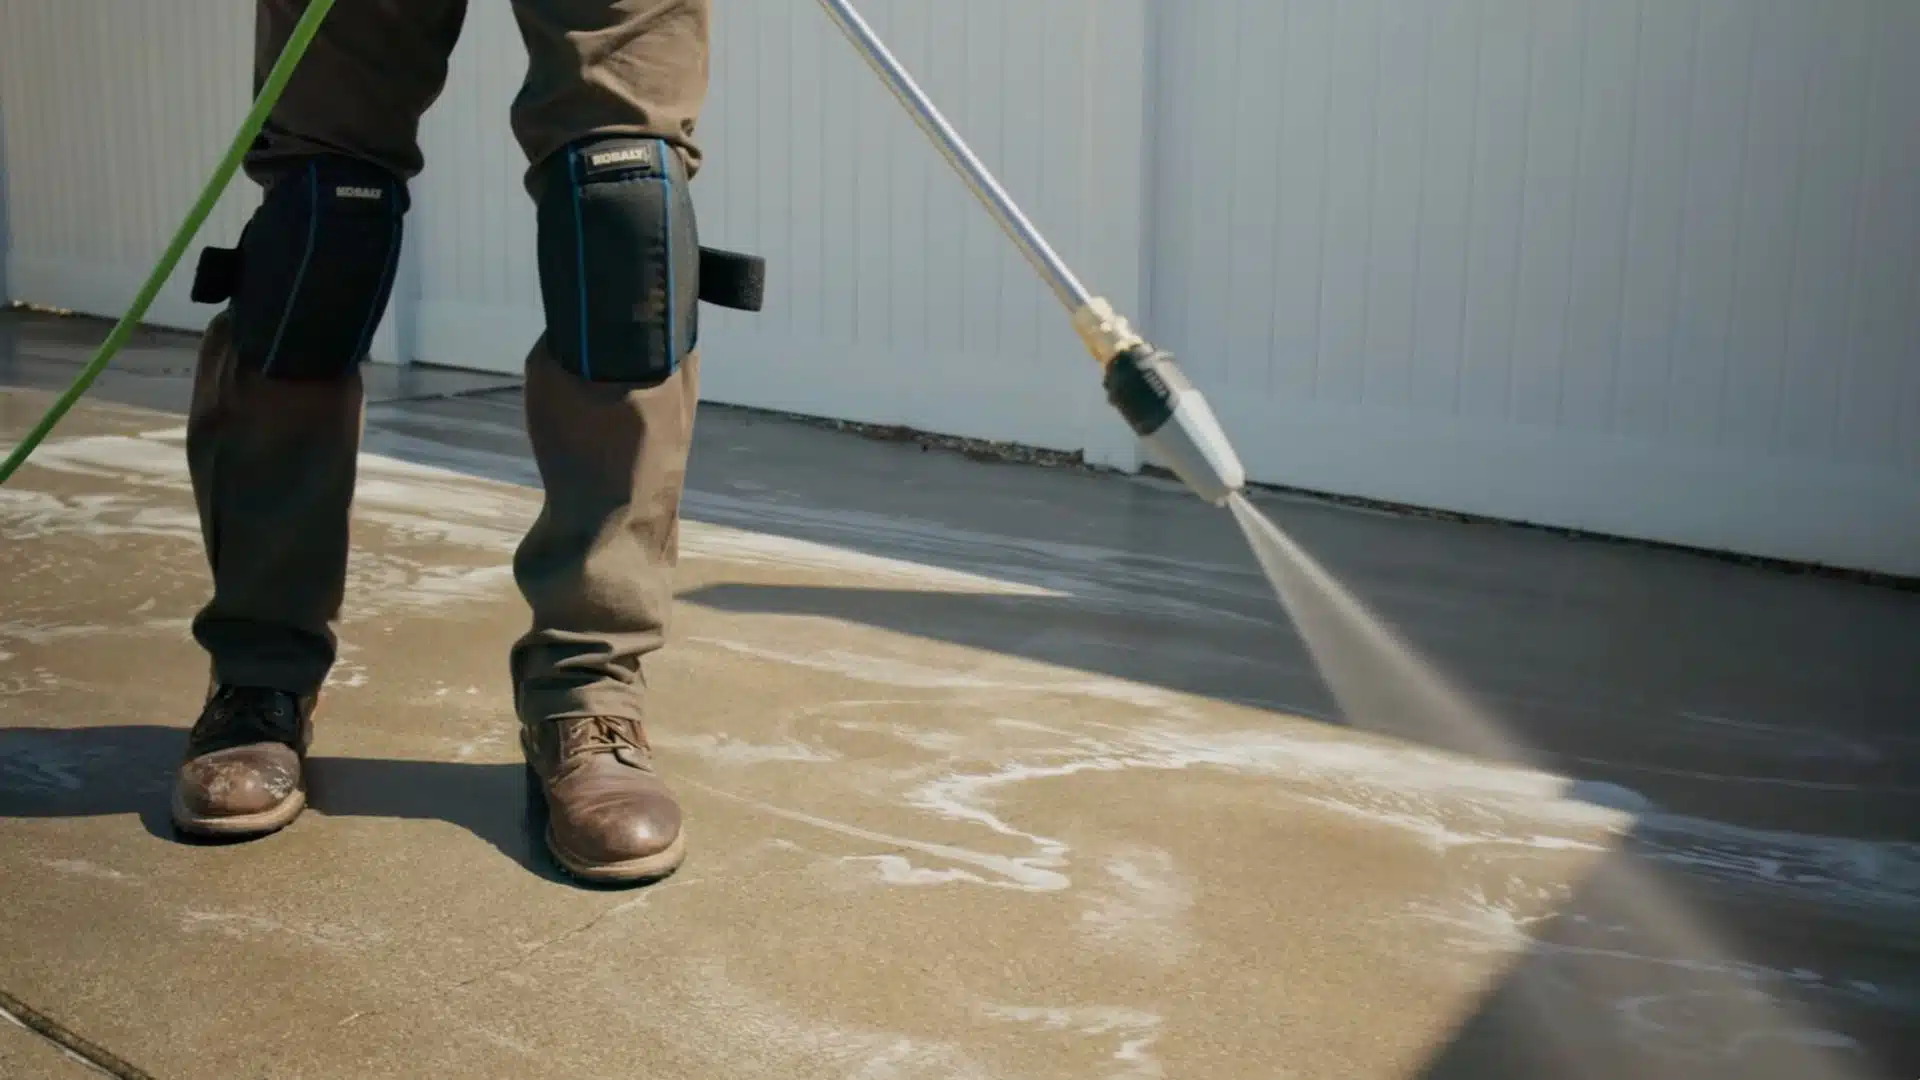
Concrete only absorbs stain properly when the surface is completely open and clean. Any coating, oil, or dirt will block penetration and create uneven color.
Pressure wash the slab, scrub grease with a degreaser, and remove any old sealer or paint. Let it dry fully before applying stain.
Step 2: Mask Off Everything Nearby
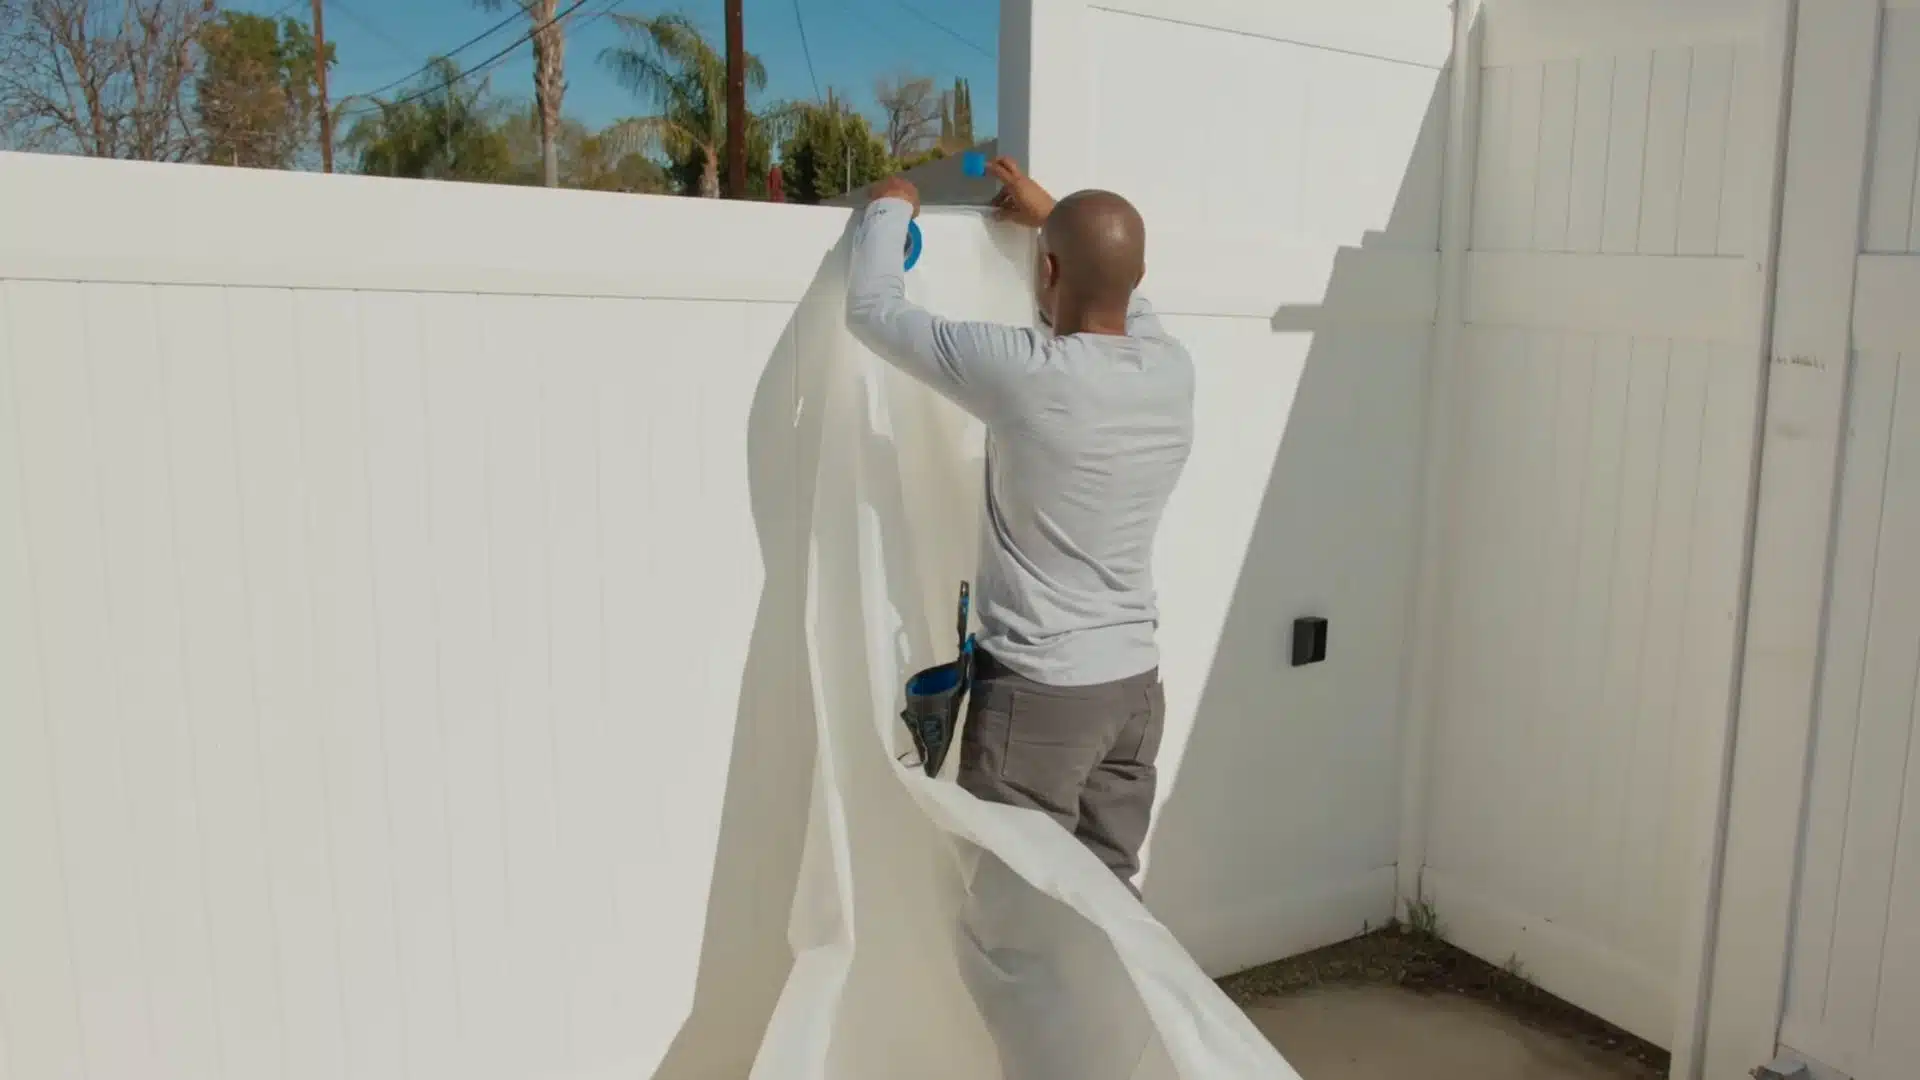
Stain spreads easily and can permanently mark nearby surfaces if not controlled. Protection is needed because overspray cannot always be removed.
Cover surrounding areas with plastic or paper and secure all edges with tape. Block off plants, siding, and trim before starting.
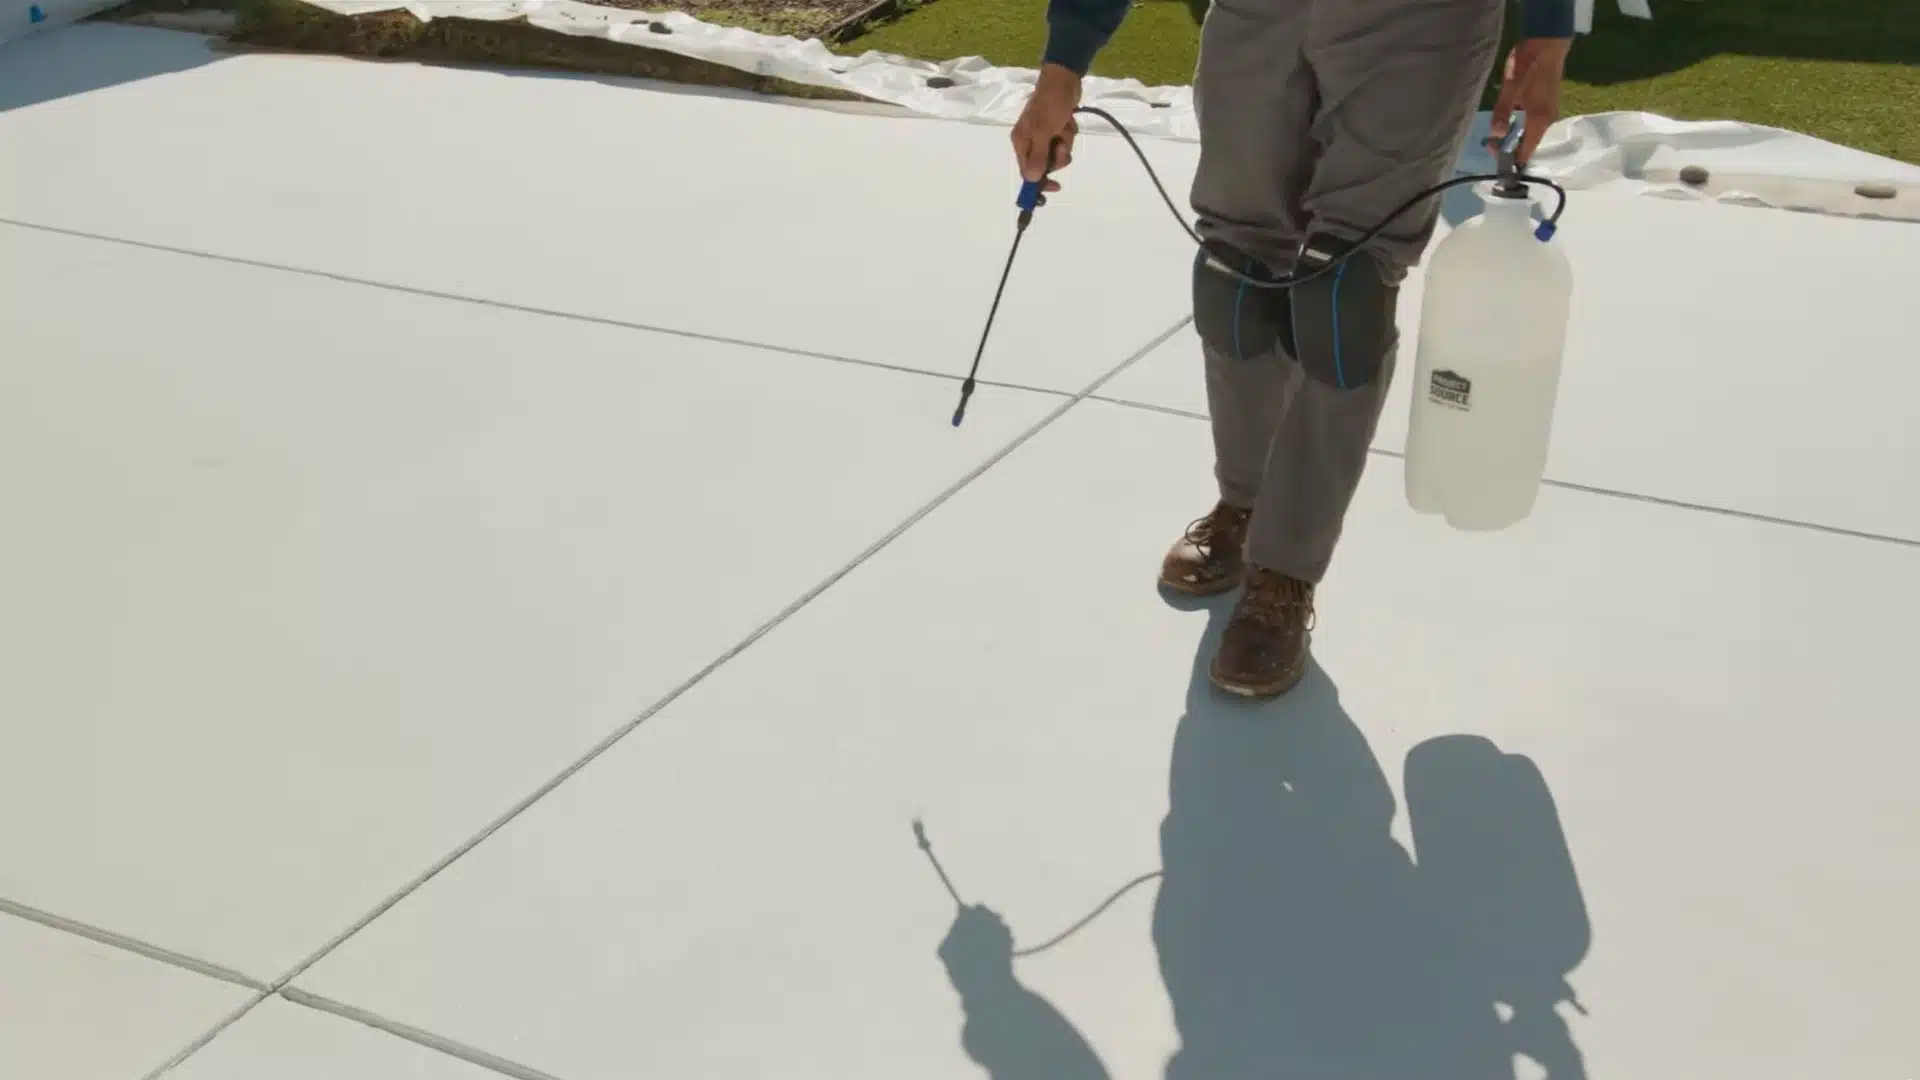
Step 3: Apply the Stain

Application technique controls how even or natural the final surface looks. Poor application leads to streaks and dark patches that are hard to fix.
Apply stain in light, even passes using a sprayer, brush, or roller while keeping a wet edge. Work in overlapping motions without stopping mid-section.
Step 4: Seal the Surface
After the slab dries fully, apply a concrete sealer evenly using a roller or sprayer. Let it cure before use. Stain dries in 15–20 minutes, full cure takes 24 hours.
Sealing protects the stain from wear, moisture, and fading over time, helping the surface keep its strength and finish. Without it, durability drops and appearance fades faster.
For an in-depth look at the whole process, check out the complete video tutorial below:
What Concrete Staining Actually Does
Here’s the part that trips up first-timers: stain is nothing like paint. Paint sits on top as a solid coat, but stain soaks in and becomes part of the slab.
That difference is everything. Stain is translucent, so it works with the concrete’s natural texture instead of hiding it, giving that rich, mottled, stone-like depth.
It also means the existing surface shows through. Cracks, patches, and trowel marks still peek out, which is part of the charm, not a flaw.
Knowing this upfront resets your expectations. You’re not painting a flat color onto concrete; you’re tinting and enhancing what’s already there.
Can You Stain Concrete Without a Sprayer?
Short answer: yes, and plenty of people prefer it. A sprayer gives the most even coat, but you have three solid alternatives when you don’t own one.
Each tool lays down color a little differently:
- Paint roller: Fast and easy for big, open slabs. Lays heavier color, so work in thin layers to avoid streaks.
- Brush: Best for edges, corners, and detail work a roller can’t reach.
- Sponge or rag: Great for blending and a soft, mottled look, especially with acid stain.
Whatever you grab, keep a wet edge and work in small sections so the color blends instead of drying into hard lines. Rolling actually gives many beginners more control than spraying.
What It Costs and How Long It Takes
The best thing about staining concrete is how little it asks of your wallet or your weekend. Most of the work is prep and waiting, not hands-on labor.
Project Timeline
A typical slab takes about two days start to finish. The applying goes fast, but drying time runs the schedule. Here’s how a two-day project breaks down:
| Phase | Time Needed | What Happens |
|---|---|---|
| Prep and cleaning | 2 to 4 hours | Wash, degrease, and prep the surface |
| Staining | 1 to 3 hours | Apply stain evenly across the slab |
| Neutralizing (acid only) | 1 to 2 hours | Stop the reaction and rinse |
| Drying | 12 to 24 hours | Let it fully cure before sealing |
| Sealing | 1 to 2 hours | Roll or spray on the finish |
Most of that timeline is hands-off, so plan your two days around the drying, not the work.
Real Cost Breakdown
The price is where staining really wins. Most DIY jobs come in under $1 per square foot, with a small patio landing around $50 to $150 total depending on size and product.
Your main costs are the stain, the sealer, and a few basic tools. Borrow a pressure washer instead of buying one, and the total drops even further with zero hit to your results.
Why Your Stain Job Goes Wrong and How to Fix It
Even a careful job can hit a snag. The good part is that the three most common problems all trace back to one fixable cause: prep.
Here are the usual culprits and how to set each one right:
- Stain beads up instead of soaking in: Your concrete is too dense or still sealed, so the color can’t penetrate. Lightly sand or etch the surface, and it will finally absorb.
- Blotchy or uneven color: Leftover dirt, grease, or a skipped test patch is to blame. Clean again, then build color in thin layers and blend with a sponge for an even finish.
- Sealer peeling weeks later: Trapped acid residue is pushing the sealer off. Neutralize fully and rinse two or three times before sealing, so nothing gets stuck underneath.
Getting the prep right fixes most of these issues before they even start, and it’s what separates a clean finish from a frustrating redo.
Maintenance Tips for Keep Stained Concrete
A stained slab is built to last, but simple care keeps it looking fresh for years. The color is locked into the concrete, so it does not fade easily.
- Sealer care: The sealer layer wears down over time, so reseal every 2–5 years, especially on outdoor or high-traffic areas exposed to sun and constant use.
- Regular cleaning: Sweep often and mop using a mild, pH-neutral cleaner to avoid dulling or damaging the finish.
- Surface protection: Avoid harsh chemicals, since they can strip or weaken the protective layer and reduce shine over time.
Treat the surface with steady maintenance, and it stays rich and strong for many years.
Conclusion
Staining concrete is one of the rare upgrades that looks high-end yet costs next to nothing. For under a dollar a square foot and a free weekend, a dull gray slab becomes something you’re proud to show off.
The whole job comes down to a few fundamentals. Pick your stain, prep the surface like your results depend on it, because they do, and always test a hidden patch before committing.
From there, apply in thin layers, neutralize if you used acid, and seal to lock it all in.
So grab a small bottle of stain and test a corner this weekend. Once you see how to stain concrete with your own two hands, that contractor quote will look a little silly.
Frequently Asked Questions
Can you stain existing concrete?
Yes, you can stain existing concrete as long as it is clean, bare, and free of old sealer or paint. Stain needs to penetrate the surface, so a thorough power-wash or degreasing comes first. Old, sealed, or heavily damaged slabs may need stripping or repair before the stain will take evenly.
What are the disadvantages of staining concrete?
The main drawbacks are unpredictable color, since stain reacts with each slab differently, and uneven results on patched or contaminated areas. Acid stains are permanent and hard to undo, and any stained surface needs resealing every few years to keep its color and protection intact.
Can you stain concrete without a sprayer?
Yes, a paint roller or brush works, though a sprayer gives the most even, natural finish. Rolling can leave heavier, more solid color and visible lines, so keep a wet edge and work in small sections. Many DIYers prefer rolling for better control on small areas.
How long does stained concrete last?
Stained concrete can last decades, since the color is part of the slab rather than a coating. The stain itself rarely fades, but the protective sealer wears down and needs reapplying every two to five years, more often on high-traffic or outdoor surfaces exposed to weather.