")
Canless LED wafer lights have made the physical part a lot simpler, but they’ve also shifted the real challenge somewhere less obvious.
What really matters is how well the basic planning is done before anything starts. Once the ceiling is opened up, even small decisions about where power is coming from and how the circuit is laid out can lock you into choices that are hard to change later.
This guide is about that part people usually miss, what needs to be ready before you even start cutting, and how the whole process actually flows in real use.
What You Need Before You Start Cutting Any Holes
IC-rated is a fire safety requirement. A non-IC fixture sitting against insulation can overheat. If your ceiling has insulation above it, IC-rated fixtures are mandatory.
This project is realistic for anyone comfortable turning off a circuit breaker, handling basic household wiring, and cutting a clean hole in drywall. That’s genuinely the baseline. The wiring itself is usually straightforward.
That said, it’s important to know where the DIY line ends. Stop and call an electrician if you open the wall and find ungrounded wiring, knob-and-tube wiring, or you’re not completely sure which breaker controls the circuit you’re tapping into. Those situations can introduce risks that aren’t worth guessing through.
If none of those apply, you’re ready to plan your layout.
Tools and Materials
- Recessed LED wafer lights (IC-rated, canless style preferred)
- Electrical wire (14/2 or 12/2 Romex depending on breaker size)
- Wire connectors (push-in or lever nuts like WAGO 221)
- Dimmer switch compatible with LED lighting
- Voltage tester (non-contact)
- Drill and drill bits
- Hole saw kit (typically 6–6¼ inch for recessed lights)
- Stud/joist drill bit (long auger bit for wiring runs)
- Fish tape or pull tools for wire routing
- Borescope inspection camera (for checking ceiling cavities)
- Laser level or chalk line
- Measuring tape
- Screwdrivers and wire strippers
- Electrical tape
- Protective gloves and a dust mask
Step 1: Check Existing Switch Setup and Power Source
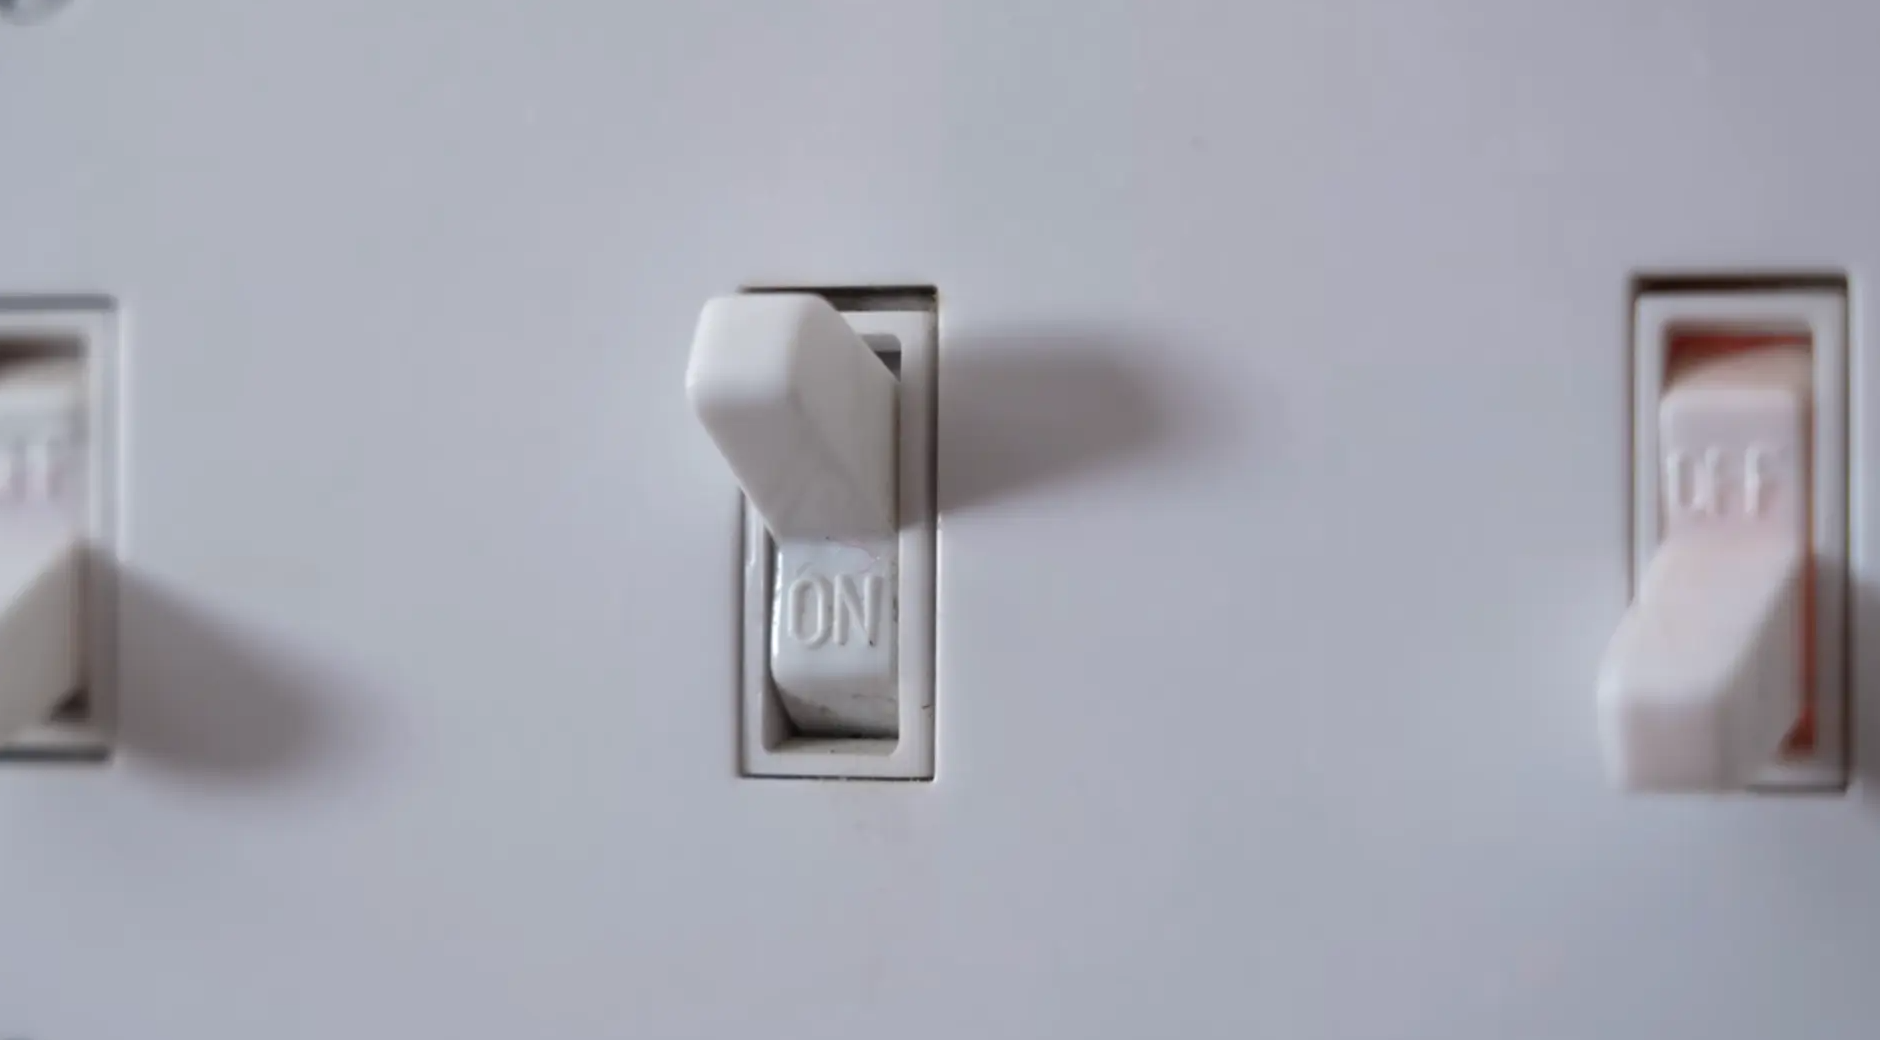
Identify how lighting is currently controlled. A standard on/off switch or a multi-location switch setup indicates how wiring is routed.
Confirm whether the switch controls a ceiling fixture, fan, or outlet. A ceiling-fed circuit is the simplest path for adding recessed lighting. If the switch controls an outlet, expect additional wiring work to reach the ceiling.
Step 2: Inspect Ceiling Structure and Access Points
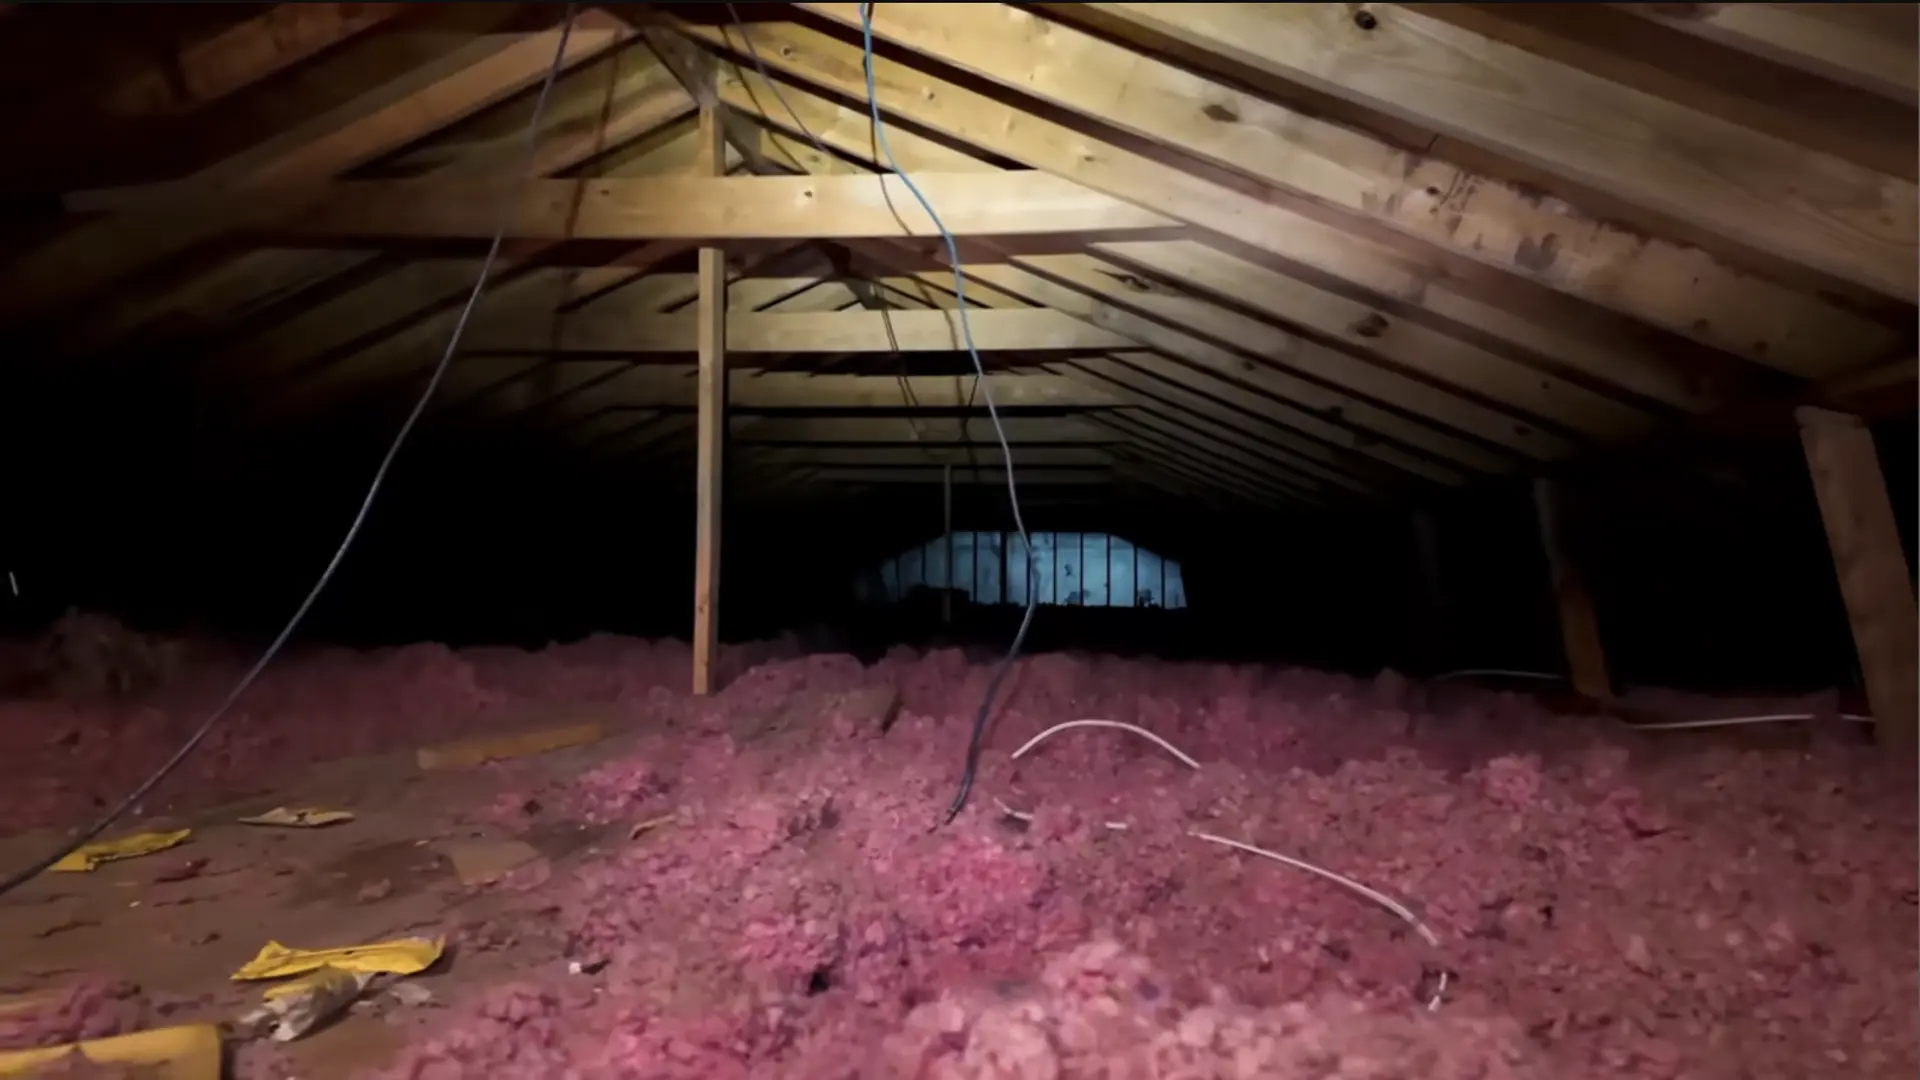
Determine what exists above the room. An attic space allows easier wire routing and visual inspection. A finished upper floor requires locating joists and planning around them.
Use a small inspection hole or a borescope camera to confirm joist direction, spacing, and obstructions like insulation or blocking.
Step 3: Plan Light Quantity and Layout
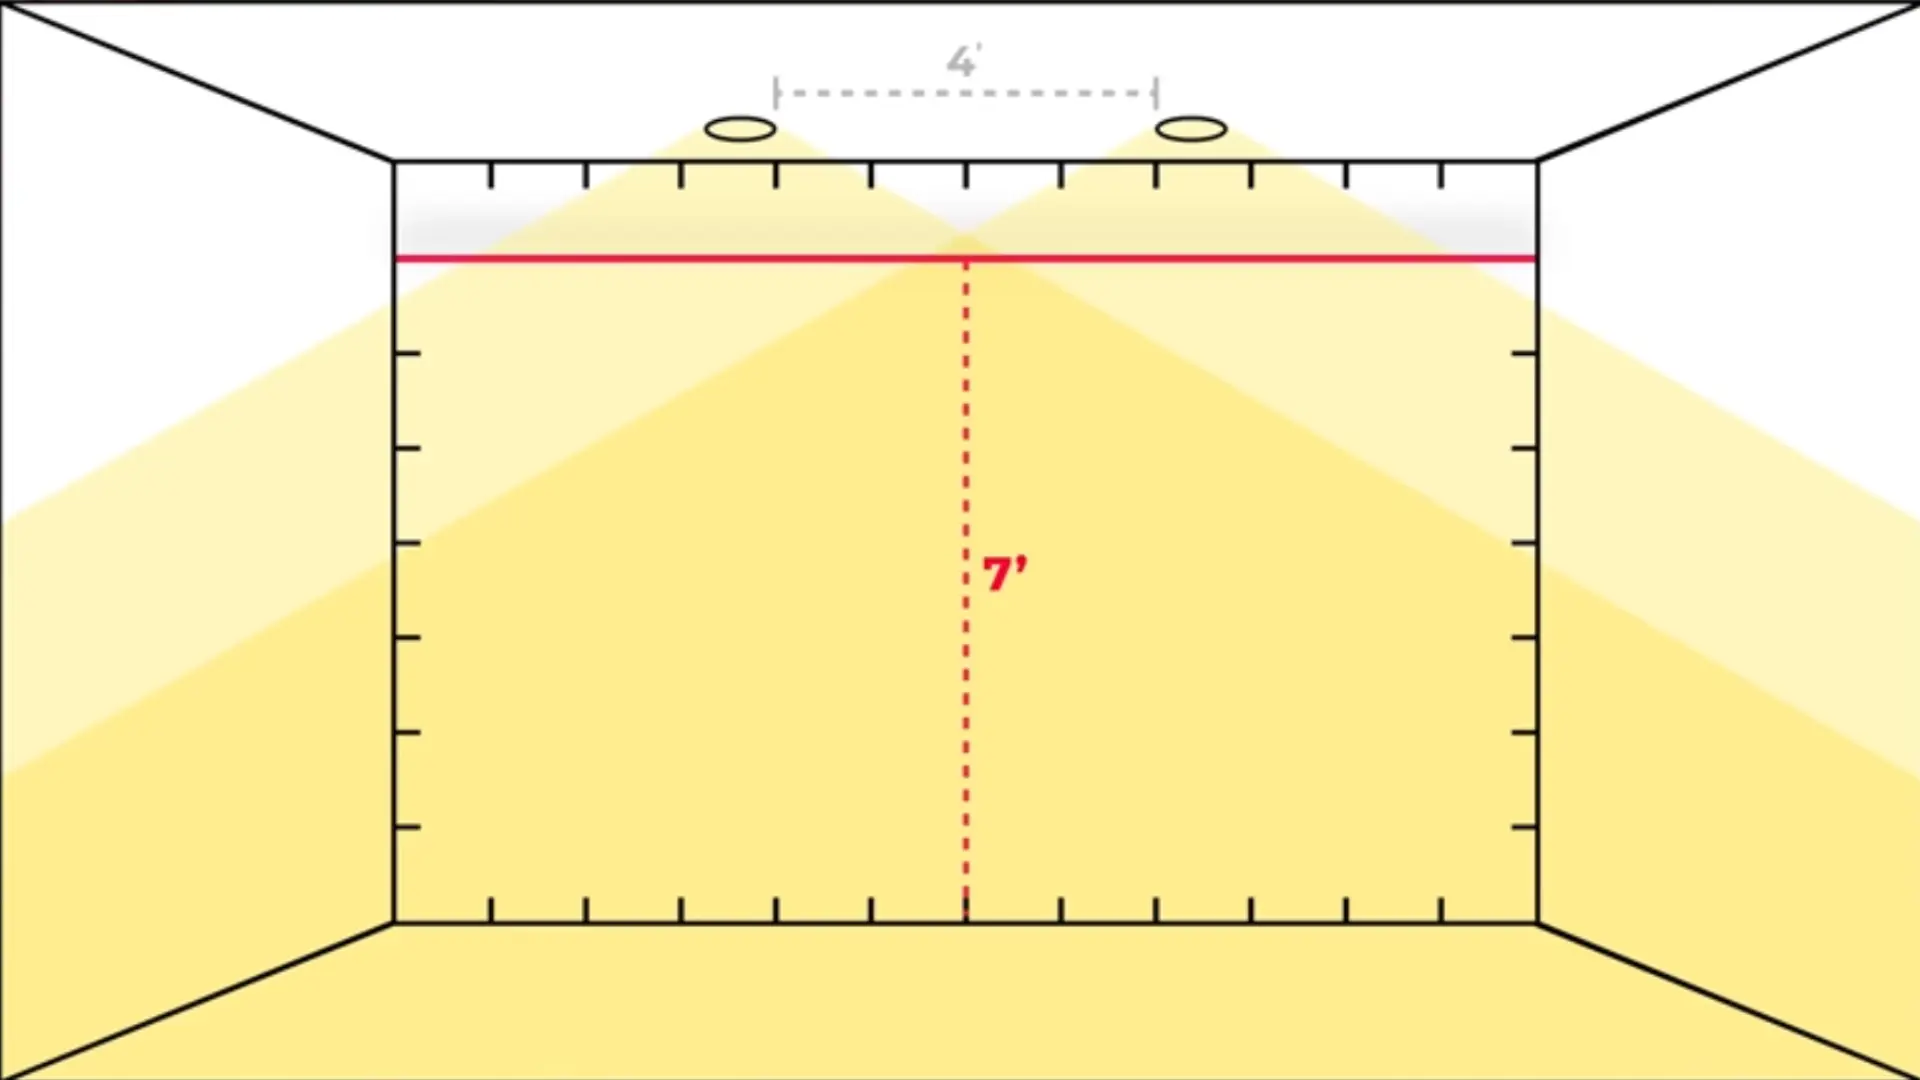
Calculate required brightness based on room size and use. Estimate total lumens needed, then divide by the lumen output of each fixture to determine quantity.
Most canless LED wafer lights let you choose between warm white (2700–3000K), neutral white (3500–4000K), and daylight (5000K+).
Mark fixture positions to distribute light evenly across the room. Maintain balanced spacing between walls and fixtures, adjusting slightly to avoid crowding edges or uneven coverage.
Set this before installation is finalized. Brightness adjustment, if available, sits on the same driver, so both settings need to be decided while the driver is still accessible.
Step 4: Mark and Cut Ceiling Openings

Transfer the planned layout onto the ceiling using a laser level or tape measurements. Mark each cut location clearly.
Use a hole saw sized for the selected recessed lights. A dust-control attachment helps reduce mess during cutting. Confirm there are no obstructions, such as joists, before fully cutting each opening.
Step 5: Run Wiring Between Fixtures
Shut off the power before any electrical work. Run electrical cable from the switch or power source to the first fixture location, then continue daisy-chaining between all lights.
In attic-access setups, route cables over joists. In finished-ceiling setups, drill through joists as needed using a long auger bit. Secure all connections with approved wire connectors and ensure proper grounding.
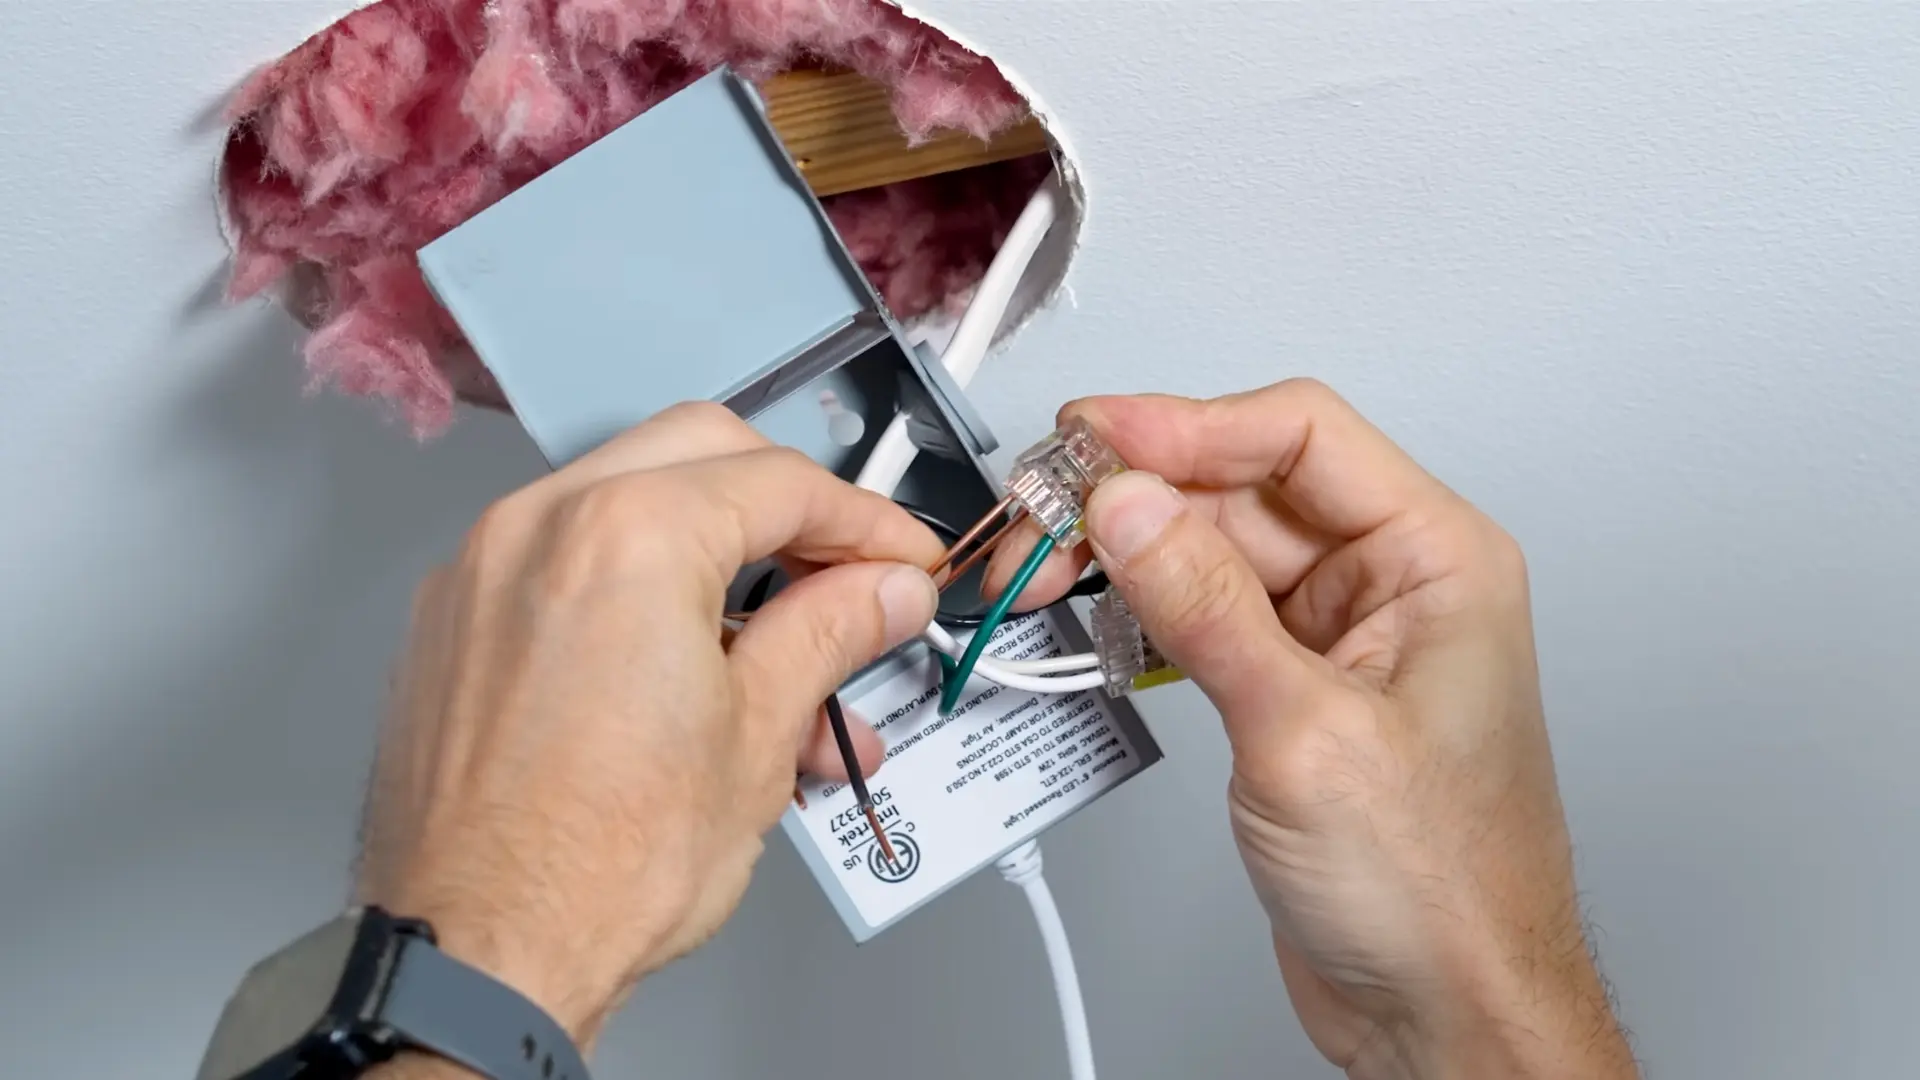
Step 6: Connect Fixtures, Install Switch, and Test
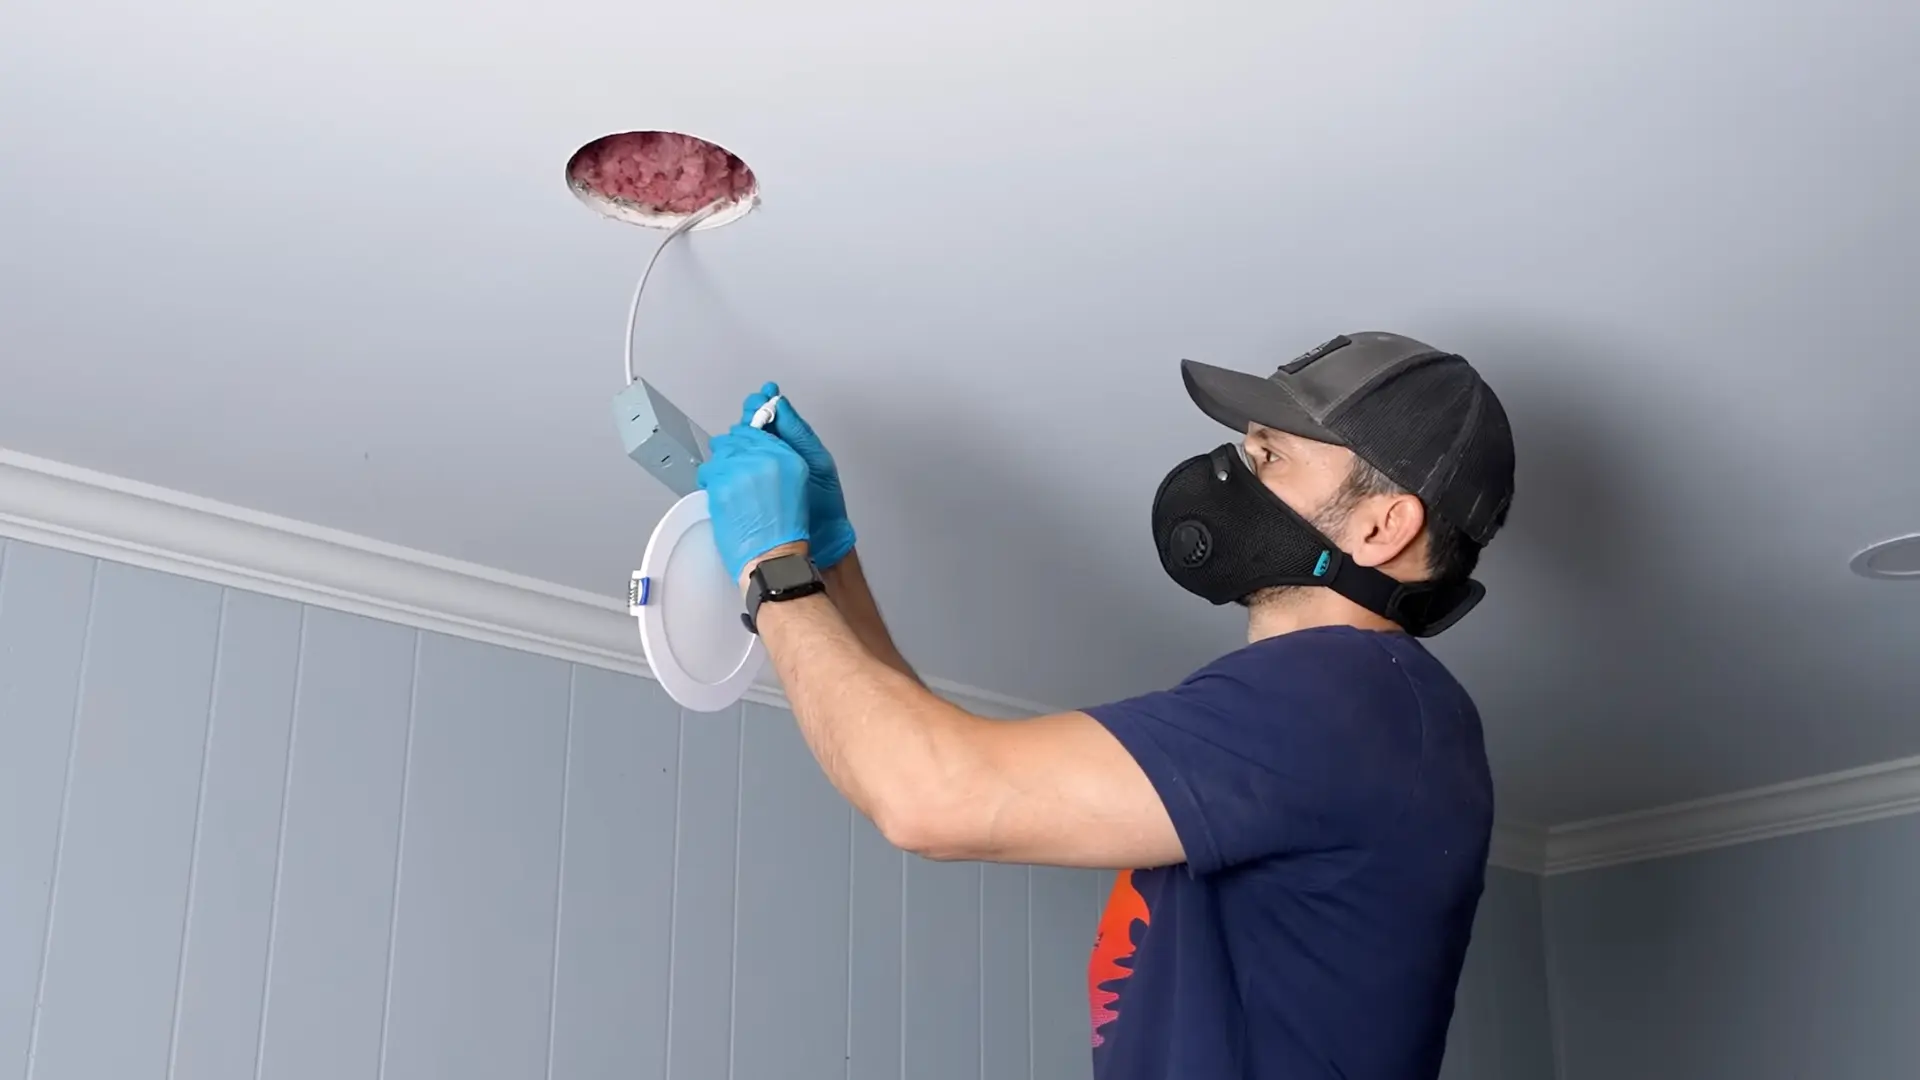
Connect each light using push-in terminals or junction boxes provided with fixtures. Match hot, neutral, and ground wires correctly.
Secure all wiring inside boxes with strain relief. Install a compatible LED dimmer switch if needed. Restore power and test each light. Adjust spacing or connections if any fixture fails to operate correctly.
For a complete walkthrough of the process, check out the video tutorial below:
Light Not Working? Check Breaker and Wiring
Restoring power at the breaker and testing the switch is the final step to confirm the circuit is working.
If the light does not turn on, the first thing to check is the breaker panel. A small wiring error or loose connection can trip the breaker during first power-up, cutting power to the circuit even if everything looks correct.
If the breaker is fine, switch power off again and lower the fixture. Tug-test each push connector to confirm every wire is fully seated. One loose wire is enough to leave the circuit open and stop the light from working.
Fixing either a tripped breaker or a loose connection usually restores power and brings the light on.
Conclusion
Recessed lighting seems like a straightforward ceiling install, but most issues actually come from what happens before any cutting starts.
Once drywall is open, wiring mistakes are hard to deal with without reopening sections and doing repairs.
Even with canless LED wafer lights that simplify the install, bad load planning or messy wiring can still lead to flickering lights, uneven performance, or breakers tripping under normal use.
When the electrical layout is planned properly, the install stays smooth and predictable. When it isn’t, small mistakes turn into repeated fixes.
So the key takeaway is simple. Take time with circuit mapping and wiring before starting. That step decides how reliable the system will be later.
Frequently Asked Questions
Do you need an electrician to install recessed lighting?
Not necessarily. If your home has modern grounded wiring and you’re tapping an existing circuit at a switch or junction box, most homeowners with basic electrical comfort can install canless LED recessed lights safely. You should hire an electrician if you’re unsure of your circuit capacity, if your home has knob-and-tube wiring, or if you need to run a new circuit from the panel.
Do you install recessed lighting before or after drywall?
In a remodel, after canless LED wafer lights are designed specifically for finished ceilings; they mount through a hole cut in existing drywall and hold with spring clips, requiring no housing box installed before the ceiling is closed. New construction uses a different fixture type (can housing) installed before drywall goes up.
How much does it typically cost to install recessed lighting?
DIY material costs run roughly $15–$40 per canless LED fixture, plus wire and connectors. Hiring an electrician typically costs $100–$200 per light for the labor, depending on ceiling access and local rates a six-light job commonly runs $600–$1,200 in labor alone, which is the core financial case for DIY.
How do I install recessed lighting without attic access?
Use fish tape to route the wire through ceiling cavities between holes, working from hole to hole. You may need to drill through the top plate of a wall to get wire from a switch to the first ceiling opening. Leave 12–18 inches of slack at each hole before cutting to length, and verify there are no obstructions before committing to the full hole-saw cut.