

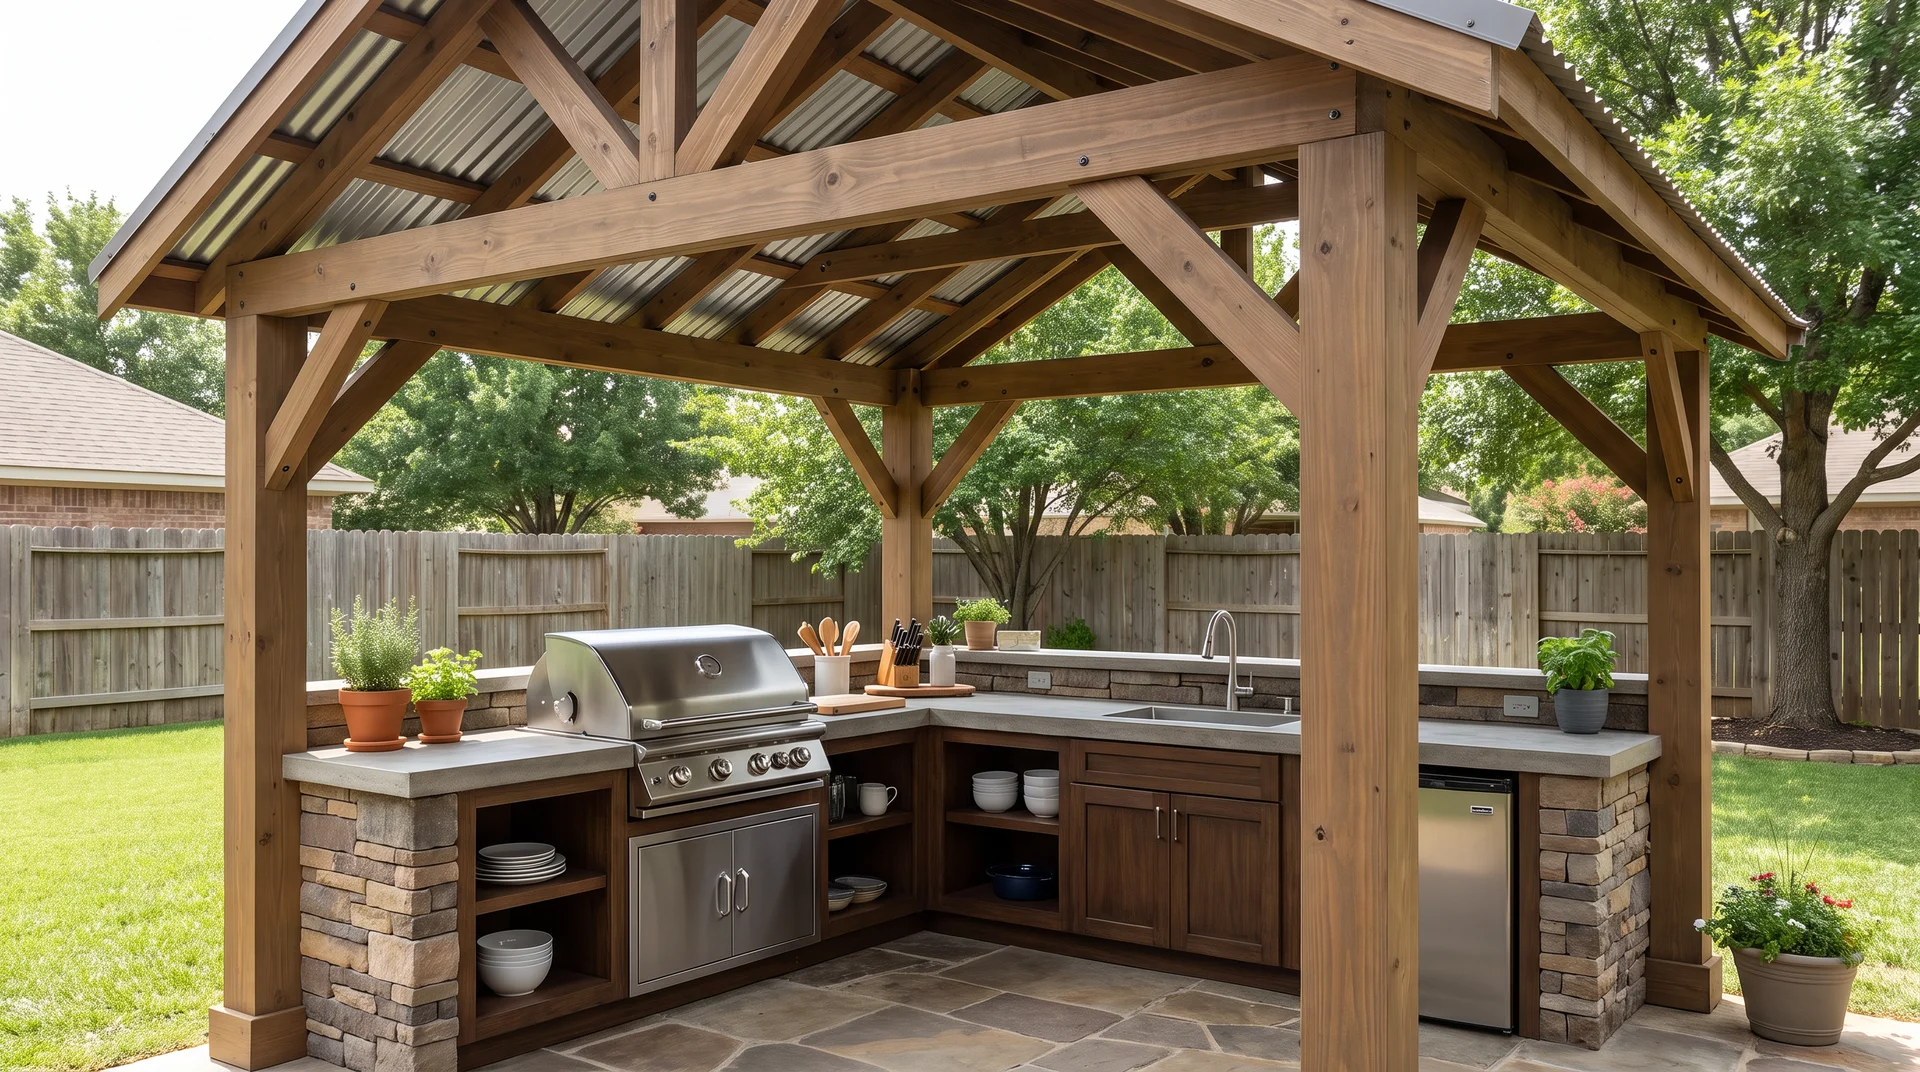
Have you ever pictured cooking outside on a warm evening but stopped after seeing the price of a finished outdoor setup? I have found that building your own cooking space can be more affordable when you choose the right materials, layout, and features.
A DIY outdoor kitchen does not have to mean a complicated construction project. The best designs match your backyard size, cooking habits, budget, and skill level.
I’ll share practical DIY outdoor kitchen ideas, build methods, space-saving layouts, added features, and tips to help you create a setup that fits your home.
DIY Outdoor Kitchen Planning Basics
A successful DIY outdoor kitchen starts with careful planning, not choosing appliances first. Measure the available space, decide how often you will cook outside, and identify the features you truly need.
Your plan should include the kitchen frame, countertop, storage, grill placement, utility connections, drainage, and weather protection.
Choose materials that can handle rain, heat, humidity, and temperature changes without warping, rusting, or cracking. Your budget and skill level should also guide the build method.
A portable cart or simple grill station may suit beginners, while steel framing or masonry works better for permanent setups. If your yard is on the smaller side, browsing a few small backyard designs first can help you settle on a layout that still feels open once the kitchen is in.
Planning these details early helps prevent costly changes, improves safety, and creates an outdoor kitchen that fits your backyard and cooking habits more comfortably.
How to Choose an Outdoor Kitchen Design That Fits Your Space
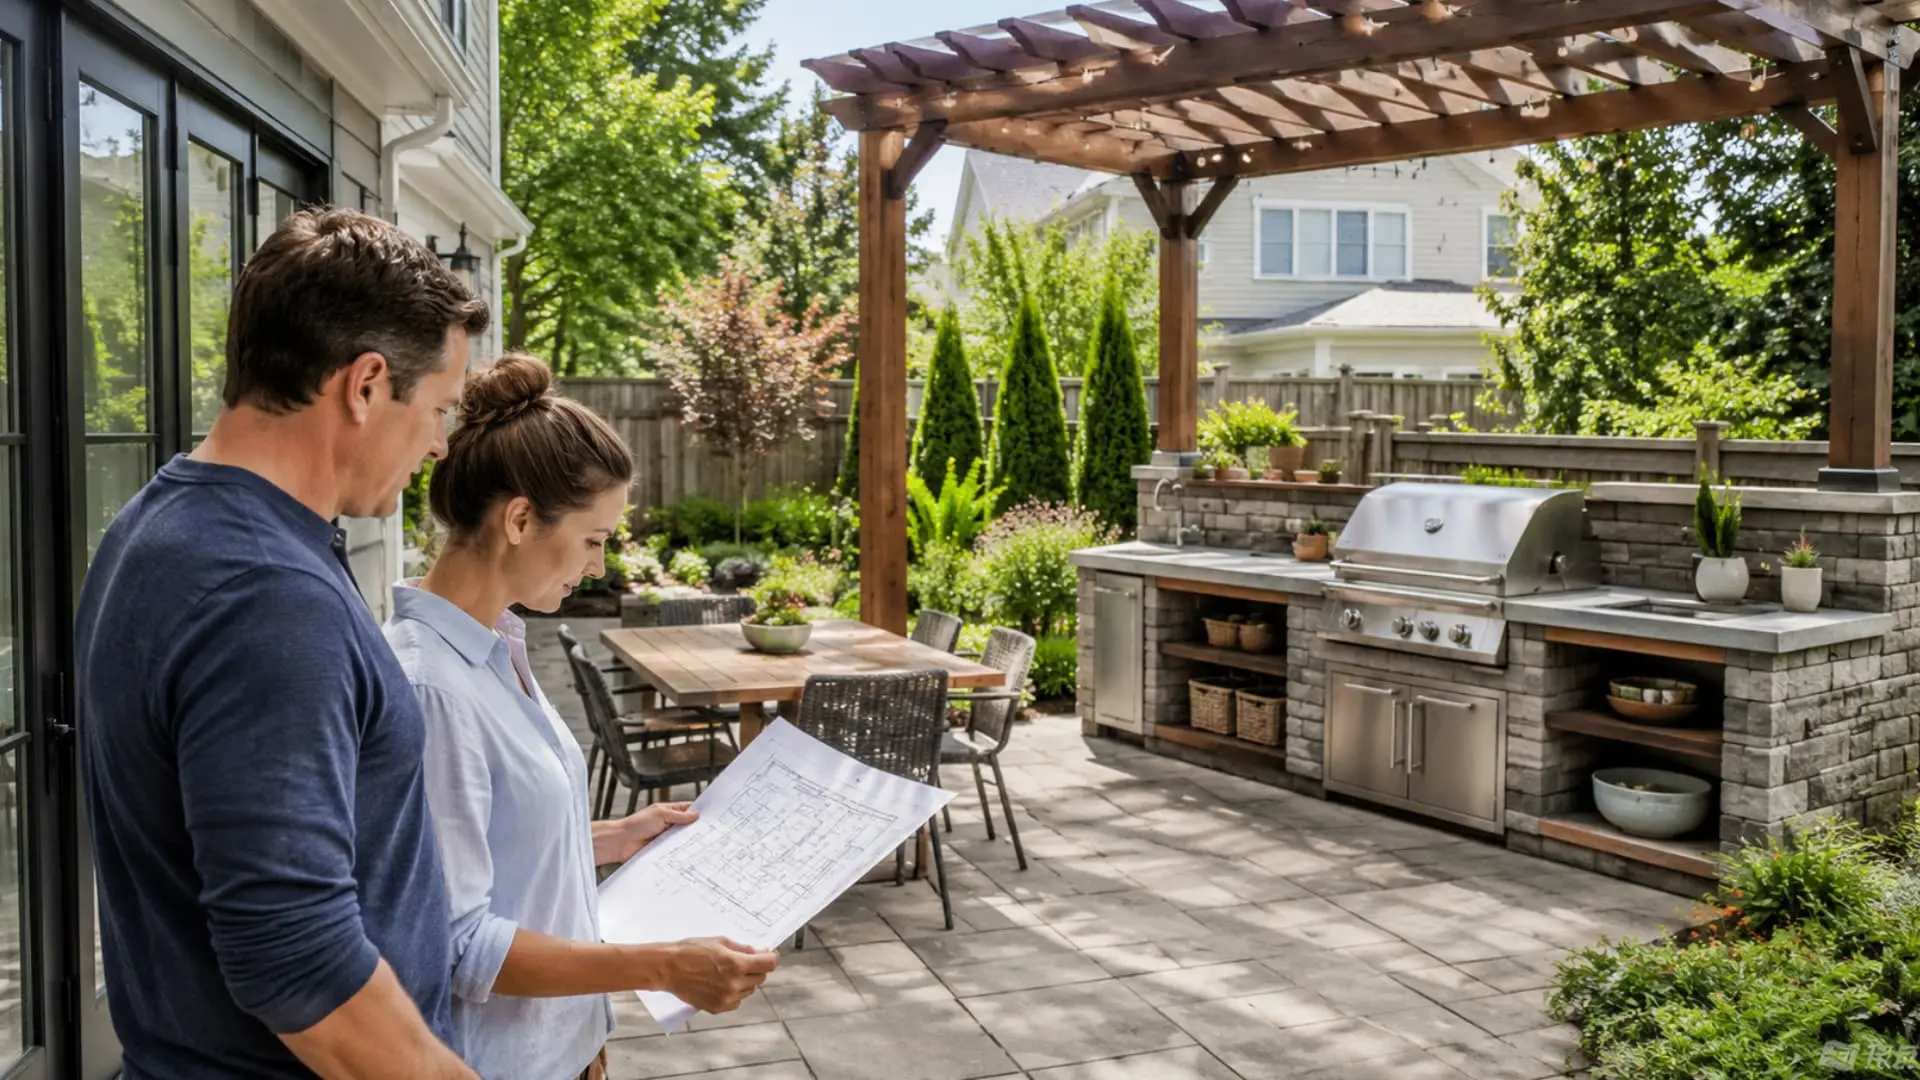
Before picking an outdoor kitchen idea, think about how you plan to use the space. The right design depends on your backyard size, cooking habits, budget, and the features you actually need.
Think about these key factors before choosing a design:
- Available space: Your backyard size affects the type of kitchen you can build. A small patio may need a compact cart or one-wall setup, while a larger area can support an island or full cooking zone.
- Cooking style: Think about what you actually cook outdoors. A basic grill setup may be enough for simple meals, while pizza ovens, smokers, or side burners need extra space and planning.
- Storage needs: Good storage keeps tools, fuel, dishes, and cooking supplies organized. Adding shelves, cabinets, or hooks can make the kitchen easier to use.
- Weather conditions: Your climate affects the materials and protection your kitchen needs. Rain, heat, humidity, and freezing temperatures can damage the wrong materials over time.
- Budget and skill level: Choose a project that matches your tools, experience, and available budget. A simple cart or framed setup may be better than a complex masonry build if you are new to DIY projects.
Once you know what your cooking area needs to do, the ideas below can help you choose a layout and build style that fits your space.
Simple DIY Outdoor Kitchen Ideas
These beginner-friendly projects focus on practical cooking spaces that you can build without taking on a complicated project. They are affordable, easy to adjust, and work well for different backyard layouts.
1. Build a DIY Grill Station
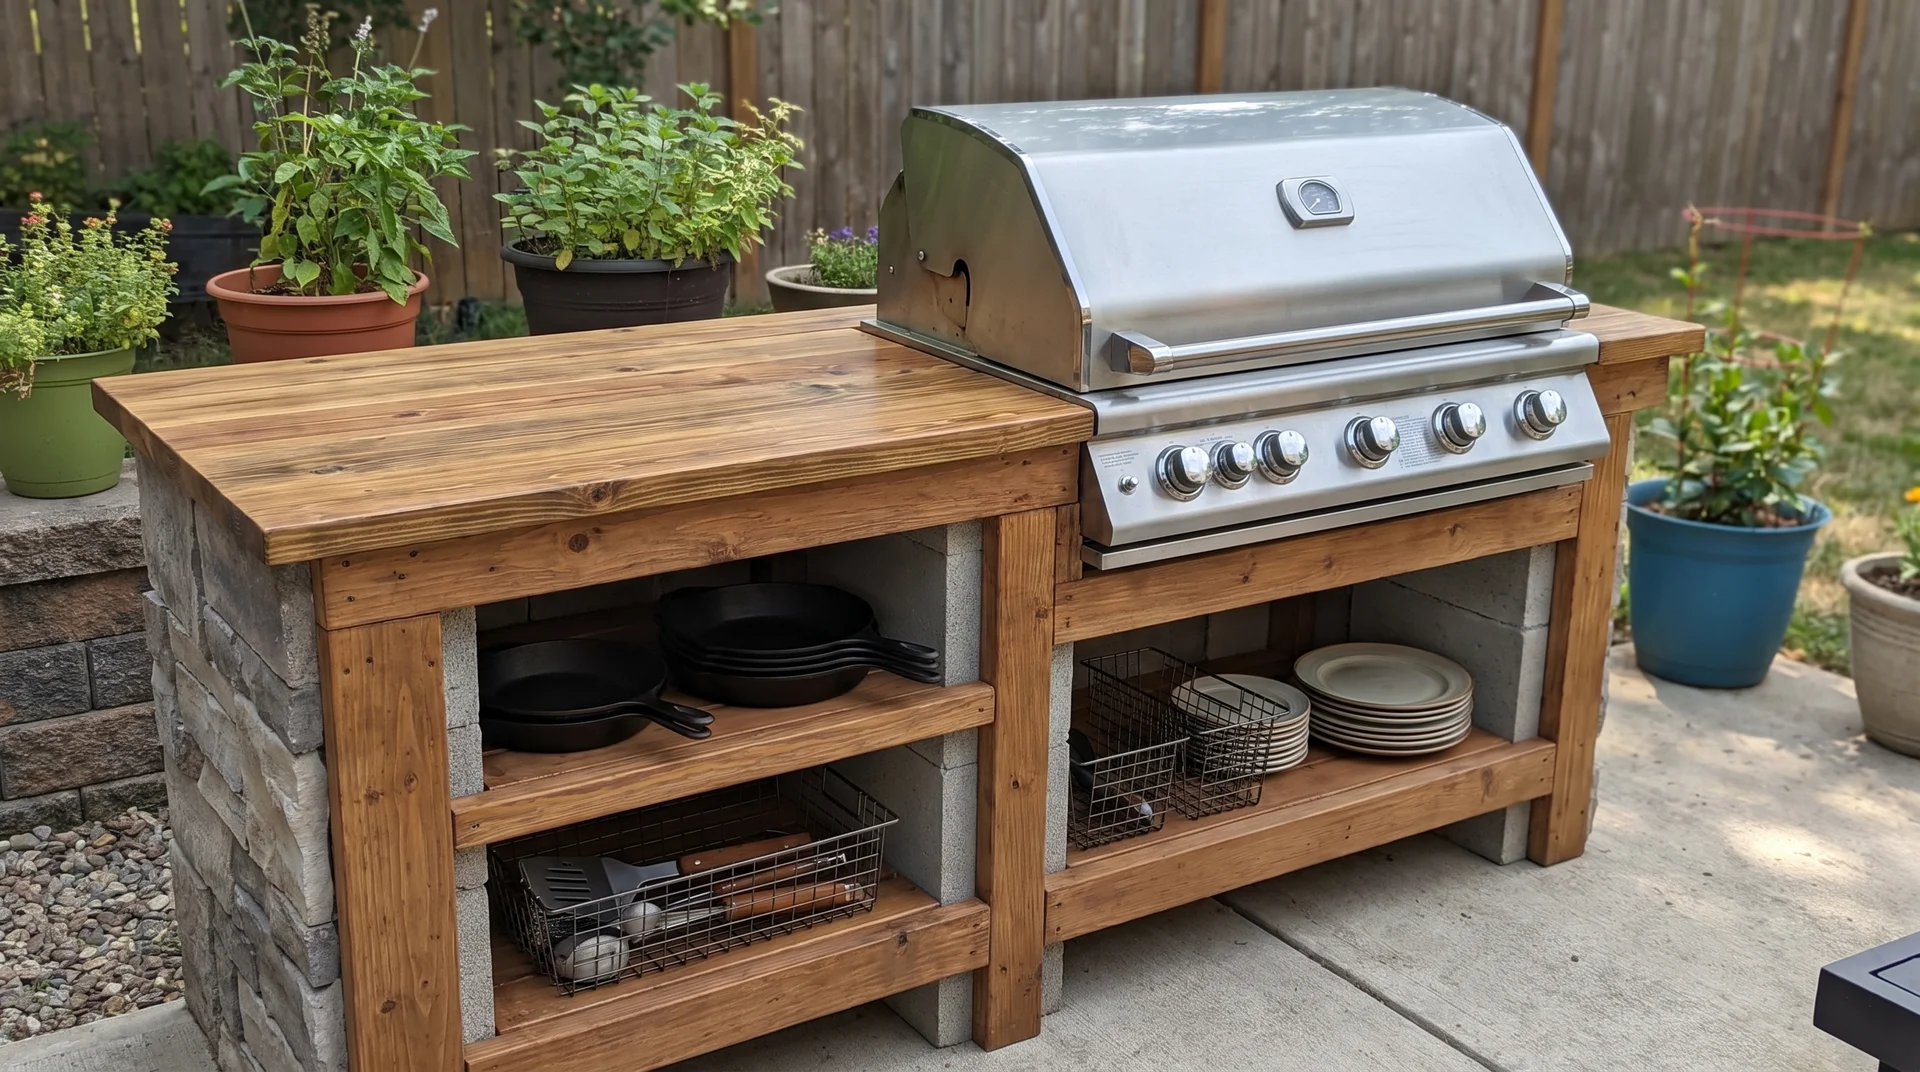
A DIY grill station gives you a dedicated spot to cook instead of carrying food and tools back and forth. Start by measuring your grill and adding a sturdy counter beside it for food prep and serving.
You can build the base with concrete blocks, steel studs, or outdoor cabinets depending on your budget and skill level. Add shelves or drawers underneath to keep grilling tools, spices, and supplies close while you cook. If you want more inspiration before you start, these built-in grill a range of layouts worth considering.
Place your grill station where you have enough room to move safely around it. A simple setup with the right storage can make outdoor cooking feel much easier.
2. Make a Portable Kitchen Cart
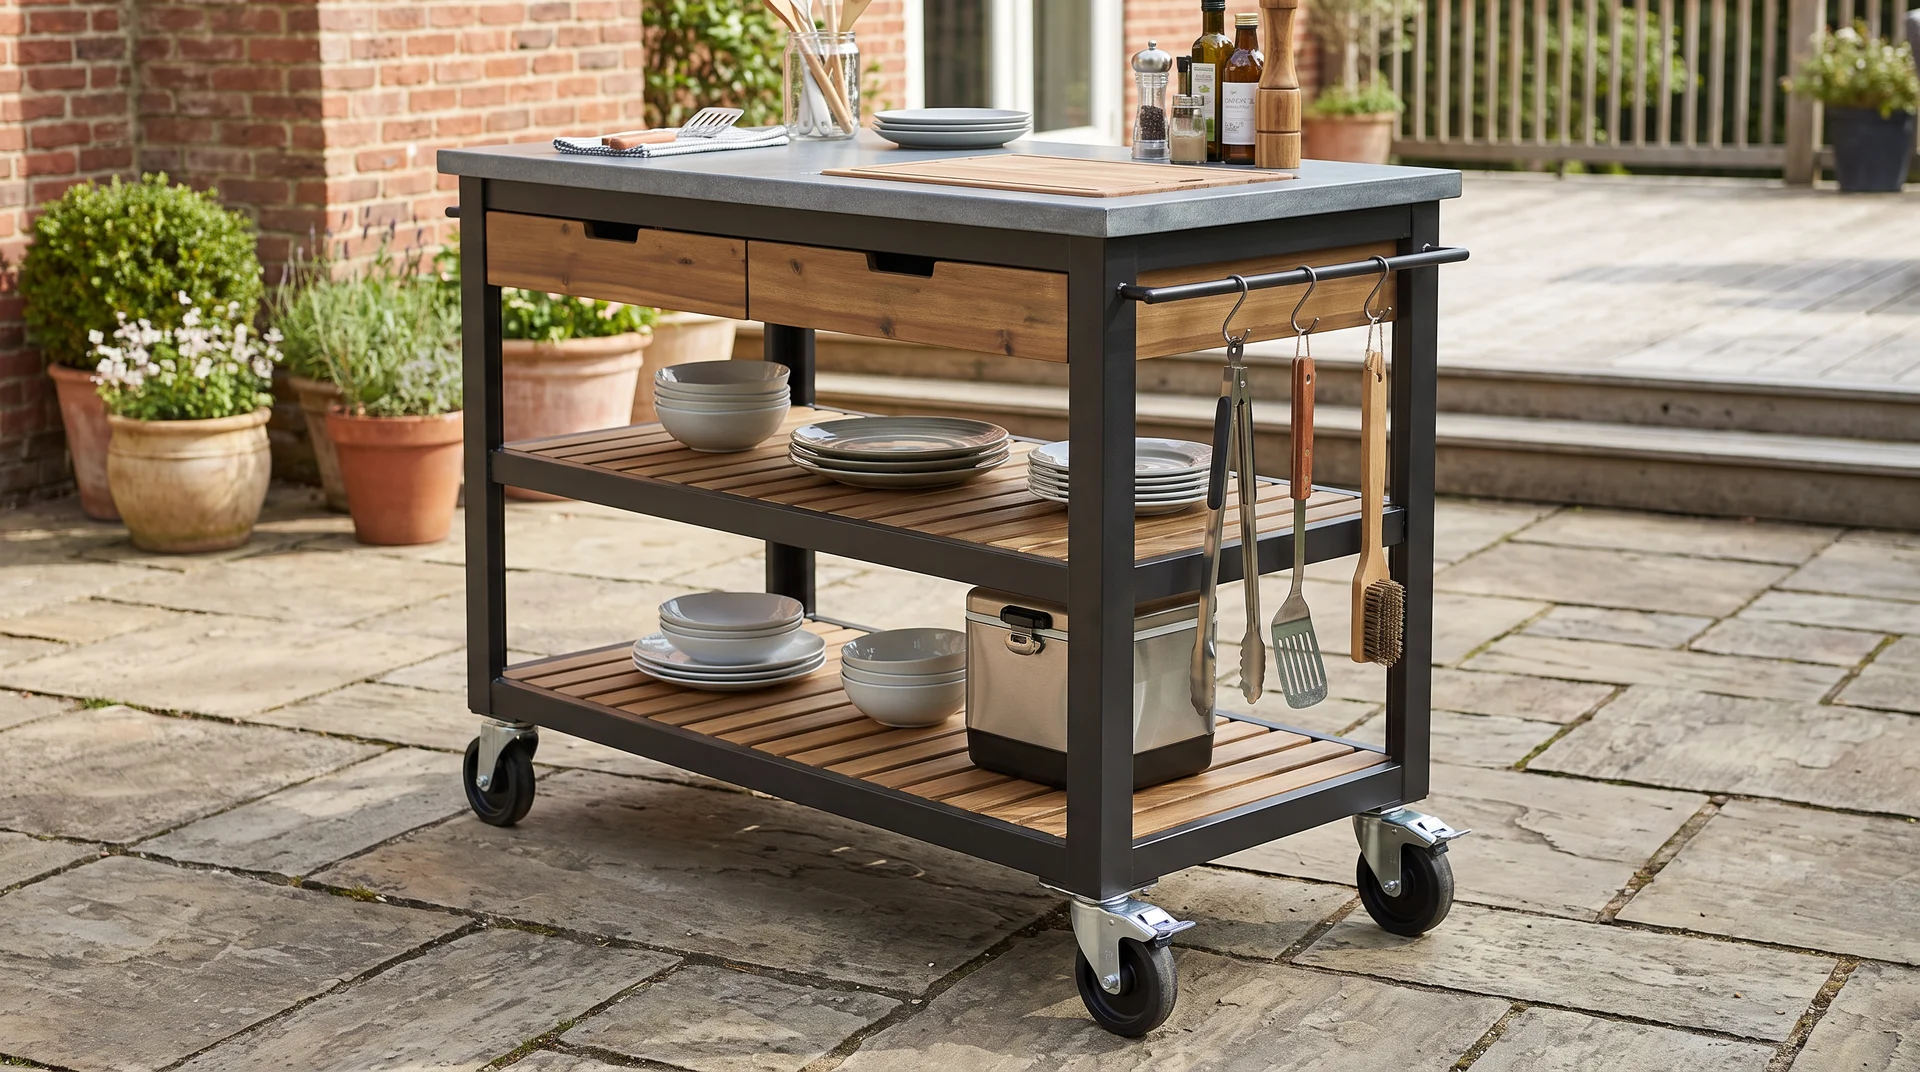
A portable outdoor kitchen cart works well if you need extra prep space without building a permanent setup. I’ve found that this is one of the easiest options for people who want more outdoor cooking space without committing to a full build.
Choose a sturdy cart with wheels, a weather-resistant surface, and storage space underneath. Add hooks, shelves, or small drawers to hold grilling tools, plates, and cooking supplies. Make sure the wheels lock firmly so the cart stays steady while you are preparing food.
This option is great for small patios, decks, or rental homes where you cannot make major changes. You can move it around when needed or store it away during harsh weather
3. Build an Outdoor Kitchen Island
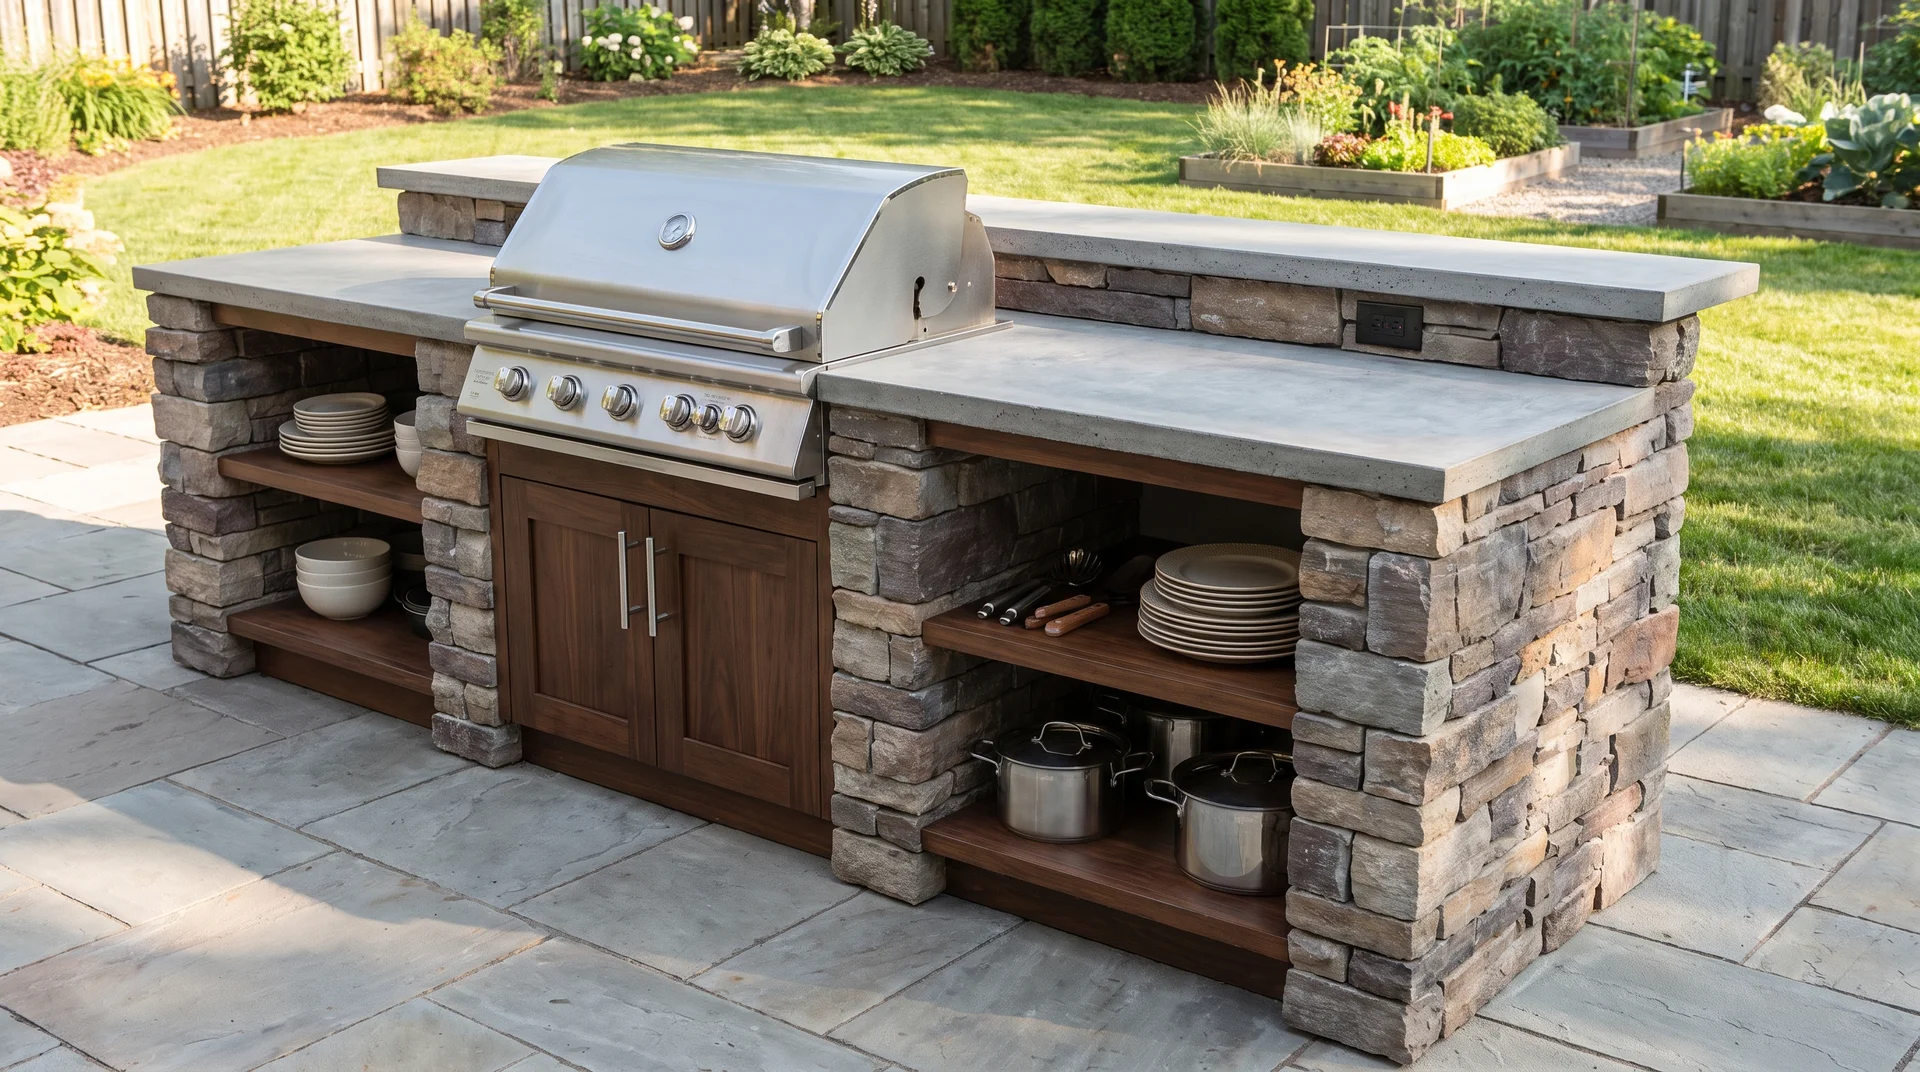
An outdoor kitchen island gives you one central area for grilling, preparing food, and serving guests. Start with a layout that leaves enough space around the island for easy movement.
Add features like a grill, countertop, cabinets, or open shelves based on how you plan to use the space. Choose materials that can handle outdoor conditions like rain, heat, and temperature changes.
Keep frequently used items within easy reach so cooking feels less messy. A well-planned island can turn an unused backyard area into a practical cooking space.
4. Create a DIY BBQ Cabinet Setup
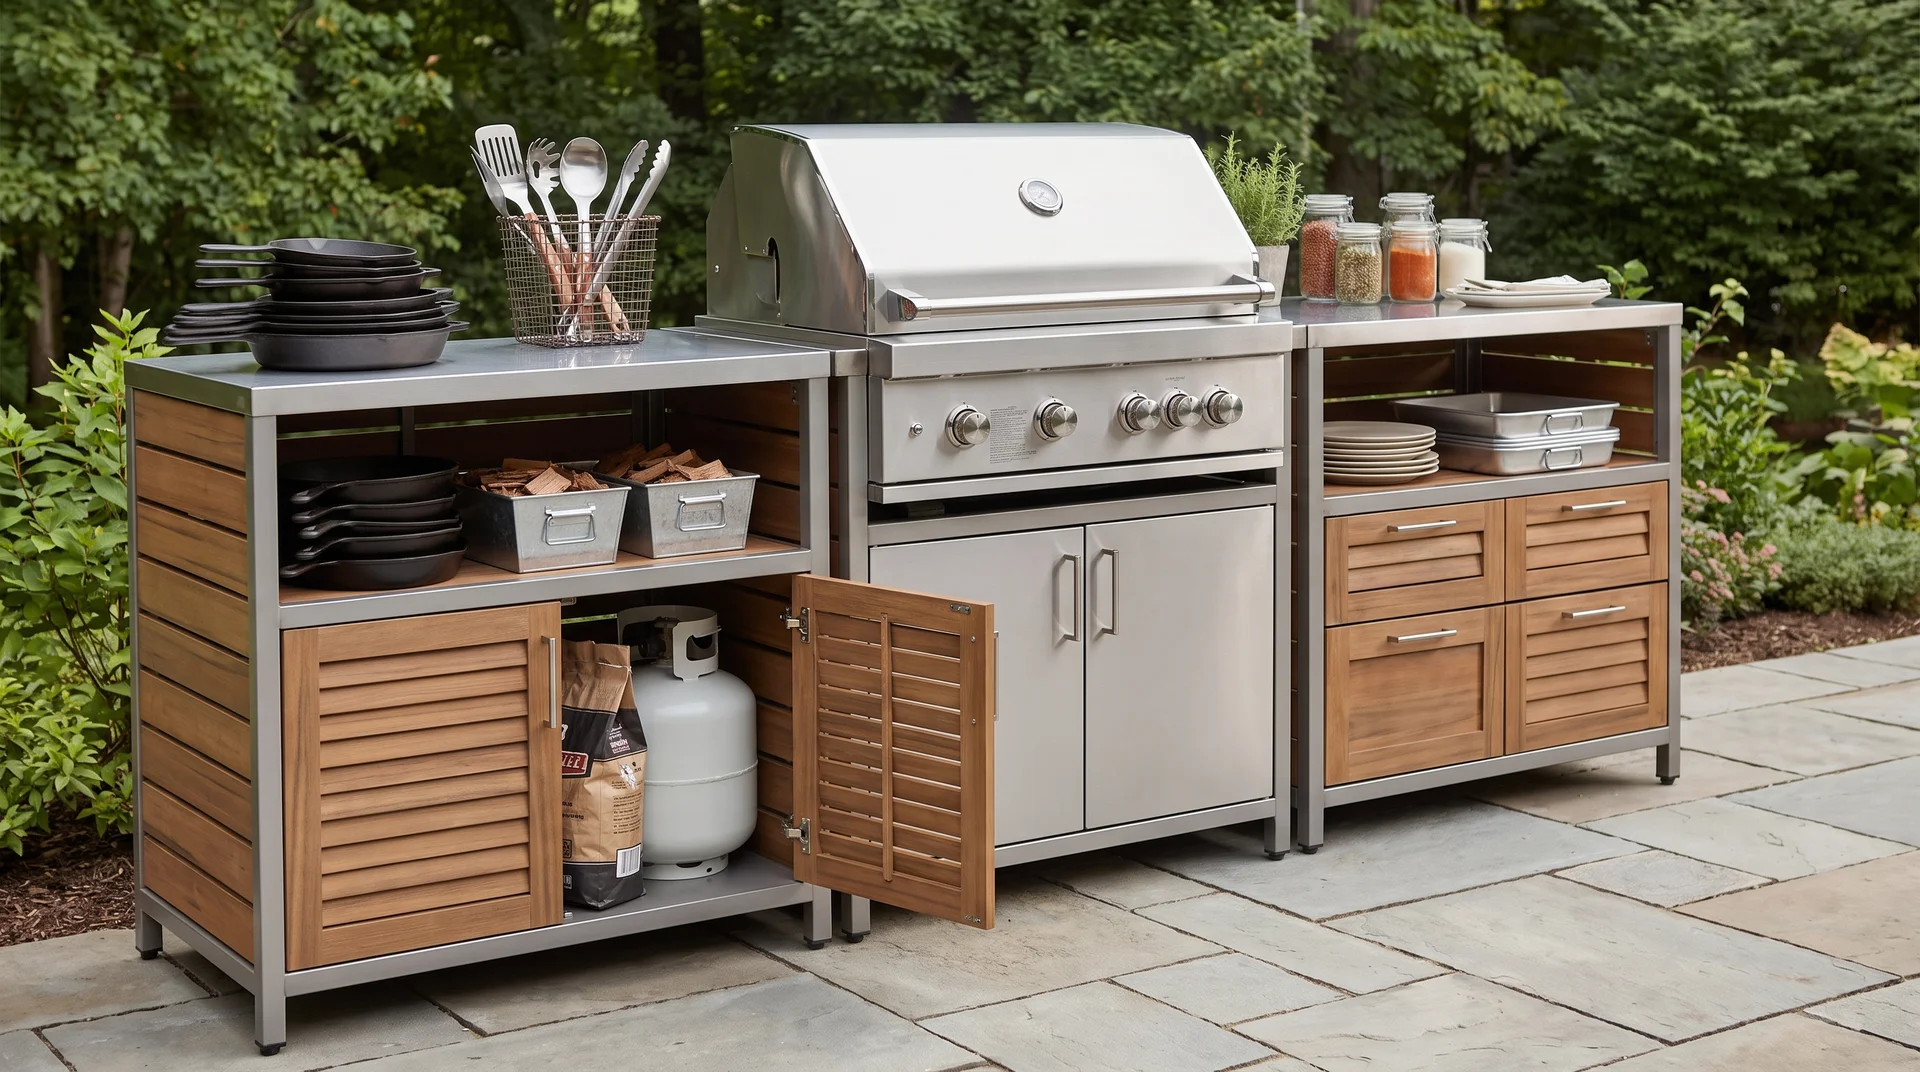
A DIY BBQ cabinet setup helps you organize your outdoor cooking area and keep supplies nearby. Build storage around your grill for items like cooking tools, fuel, plates, and serving dishes.
Use outdoor-rated cabinets or protect your chosen materials with proper sealing before placing them outside. Add shelves or dividers so smaller items do not get lost inside.
Keep the cabinet layout simple and place it close to your grill and prep area. Good storage makes your cooking area easier to use and maintain.
5. Convert a Shipping Pallet Into a Prep Station
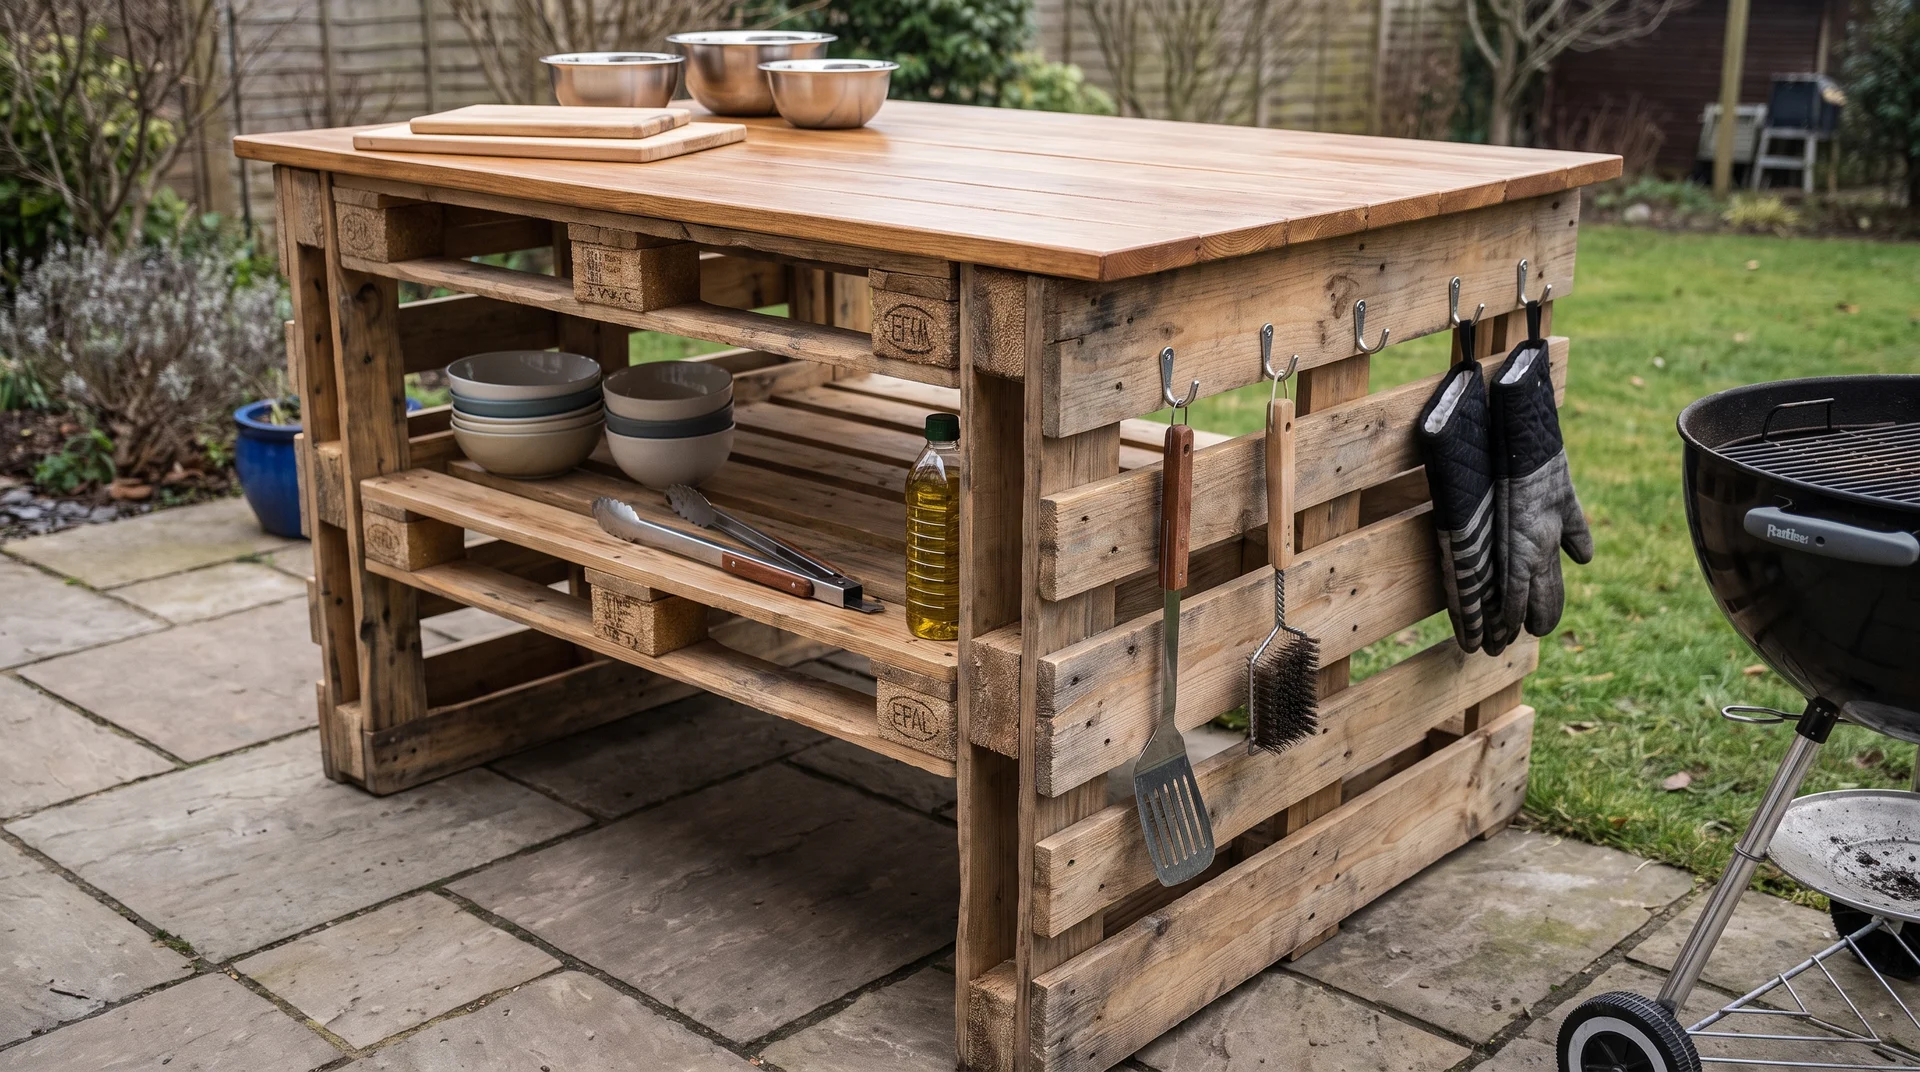
A shipping pallet can become a low-cost outdoor prep station with a few simple changes. Pick a strong pallet, add a flat top surface, and smooth the wood before using it.
Seal the pallet with an outdoor finish to protect it from moisture and weather damage. Add lower shelves or hooks to store bowls, tools, and other cooking supplies.
Place the prep station near your grill so everything you need stays within reach. It is a beginner-friendly project that adds useful workspace without a large budget.
Affordable DIY Outdoor Kitchen Ideas on a Budget
These low-cost outdoor cooking ideas use affordable materials and simple methods to create a functional setup. I’ve found budget builds work best when you focus on essentials first, like a reliable cooking surface, prep area, and storage, before adding extras.
6. Use Concrete Blocks for the Kitchen Base
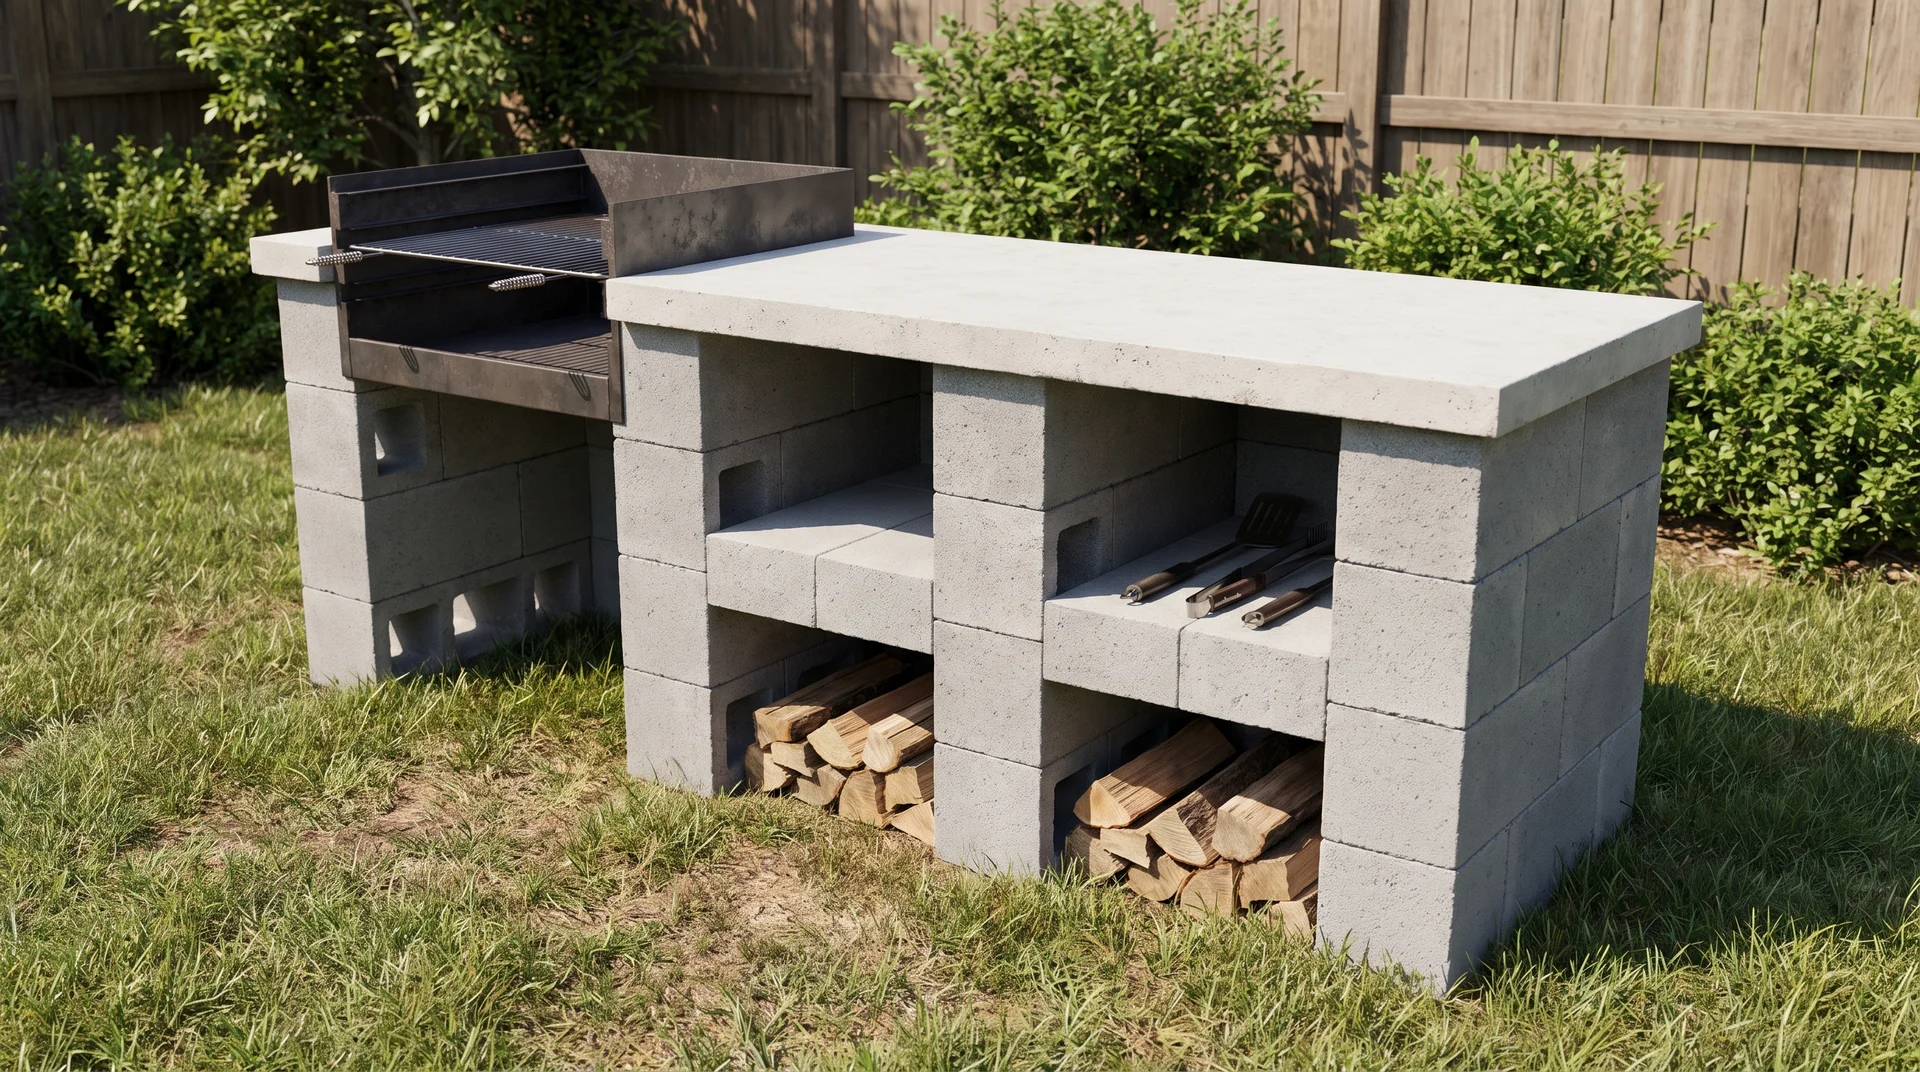
Concrete blocks are a simple way to build a strong outdoor kitchen base without spending too much. Start by creating a level foundation and stack the blocks carefully to form the shape of your kitchen.
Use mortar or construction adhesive to keep the blocks secure and add support where needed. You can cover the outside with stone, tile, or another finish to match your backyard style. Concrete blocks are also handy for other low-cost backyard builds, including some of these budget fire pit projects if you want a matching gathering spot nearby.
Make sure the base is stable before adding countertops, grills, or cabinets on top. A well-built block frame can handle outdoor conditions and last for years.
7. Build With Steel Studs and Cement Board
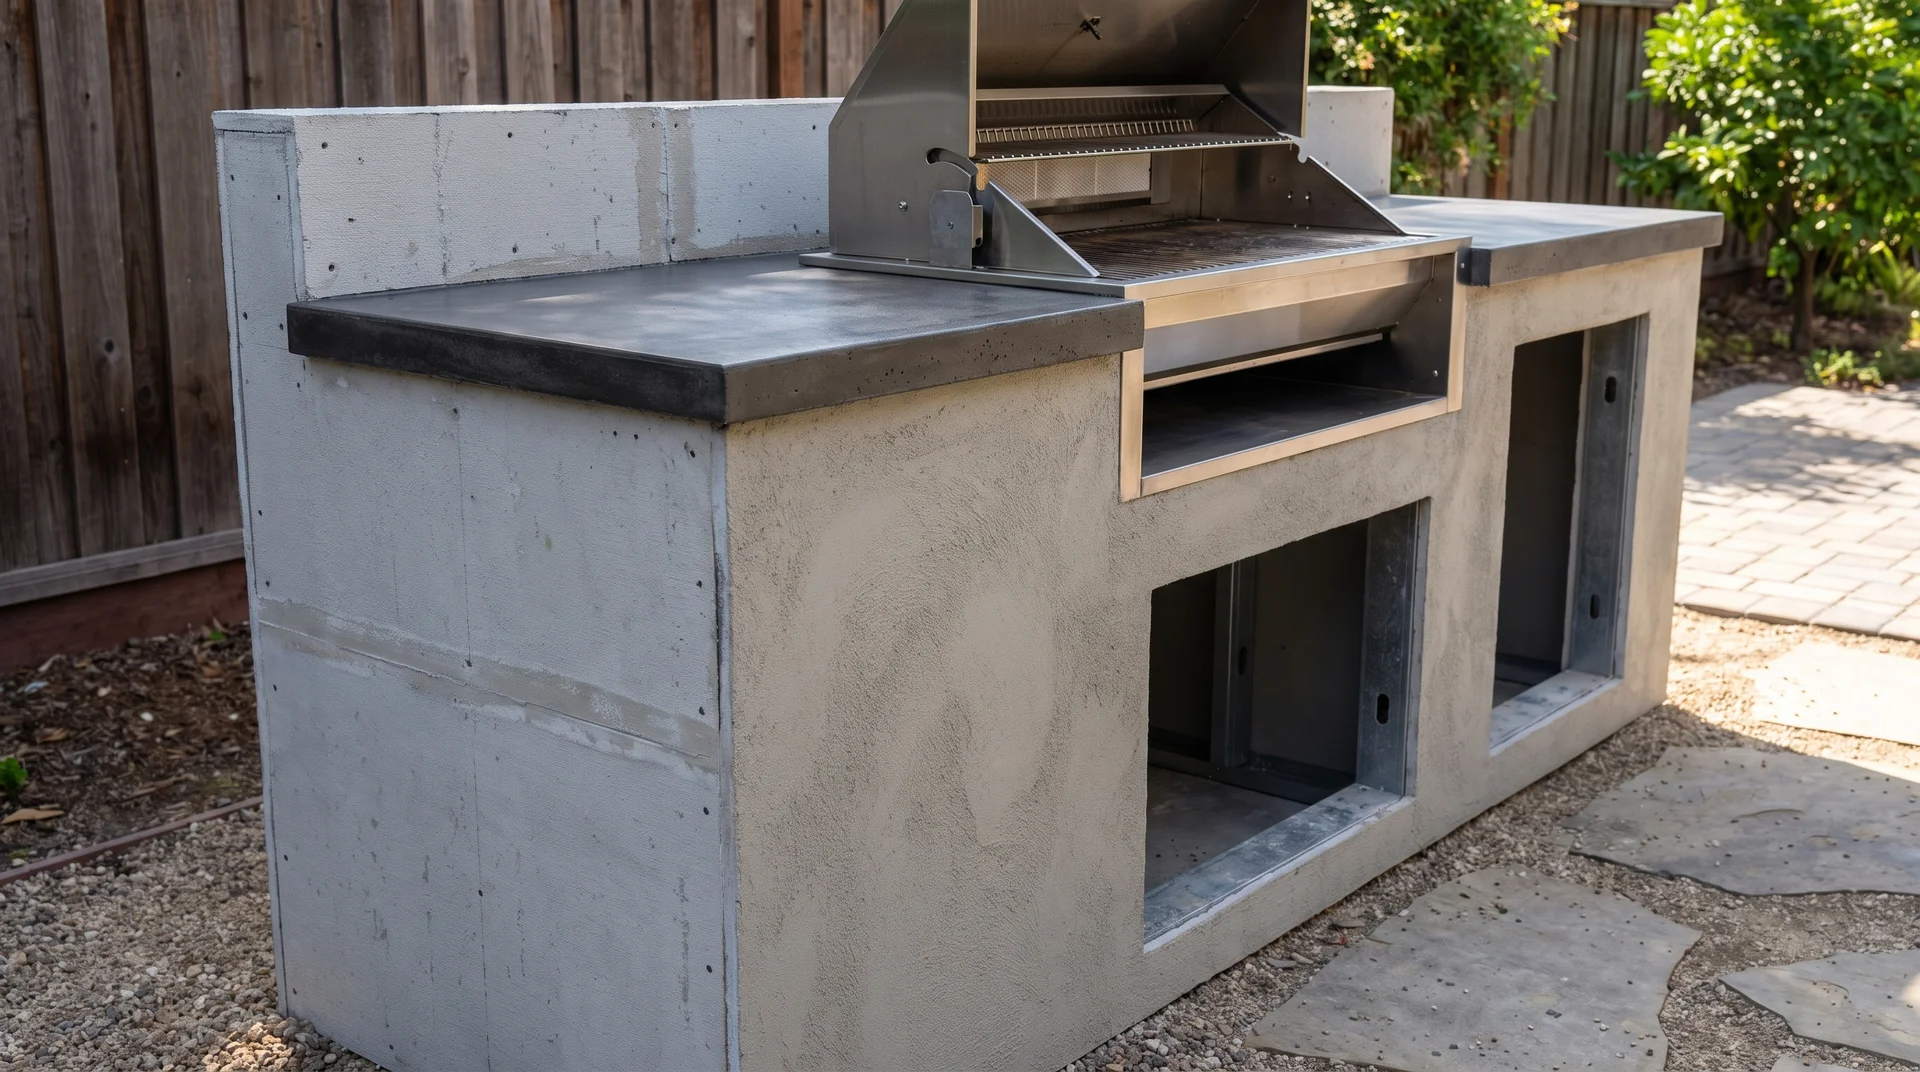
Steel studs and cement board create a strong frame that can handle moisture better than regular wood. One thing I always point out with this type of build is that the frame matters as much as the finish, because a strong base helps prevent problems after the kitchen is exposed to outdoor conditions.
Start by building the frame to match your grill and cabinet layout, then attach cement board around the structure. Use outdoor-rated screws and seal the edges to protect the materials from water.
This method gives you a solid surface for adding finishes like tile, stone, or stucco. It is a good choice if you want a clean, custom-looking kitchen without heavy masonry work.
8. Install a DIY Concrete Countertop
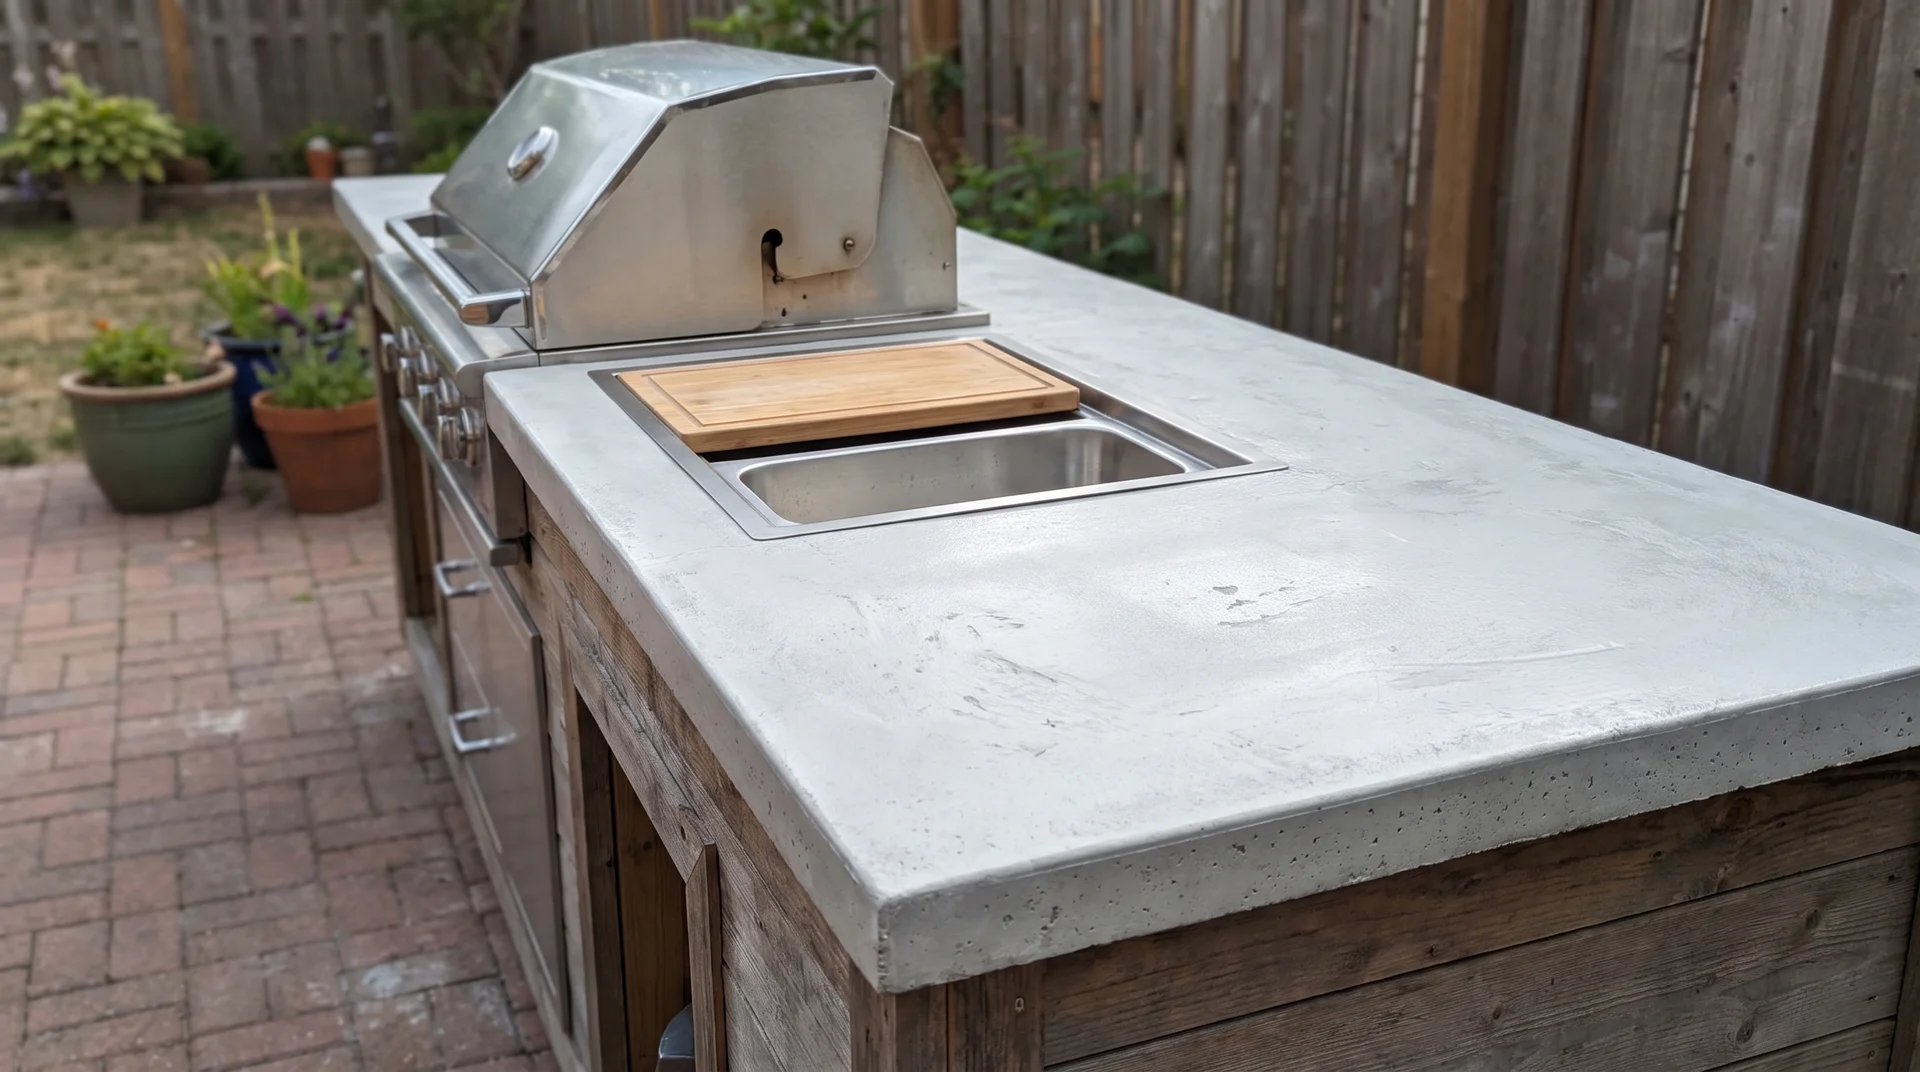
A DIY concrete countertop lets you create a custom surface that fits your grill, sink, or prep area. Measure your space carefully and build a mold that matches the size you need before pouring the concrete.
Add reinforcement inside the slab to reduce the chance of cracks as it cures. Once the surface is ready, seal it to protect against stains, moisture, and outdoor use.
Concrete countertops can add a custom feel without the cost of some stone options. Take your time during the mixing and curing process for a smoother finish.
9. Use Gravel Instead of a Full Patio Foundation
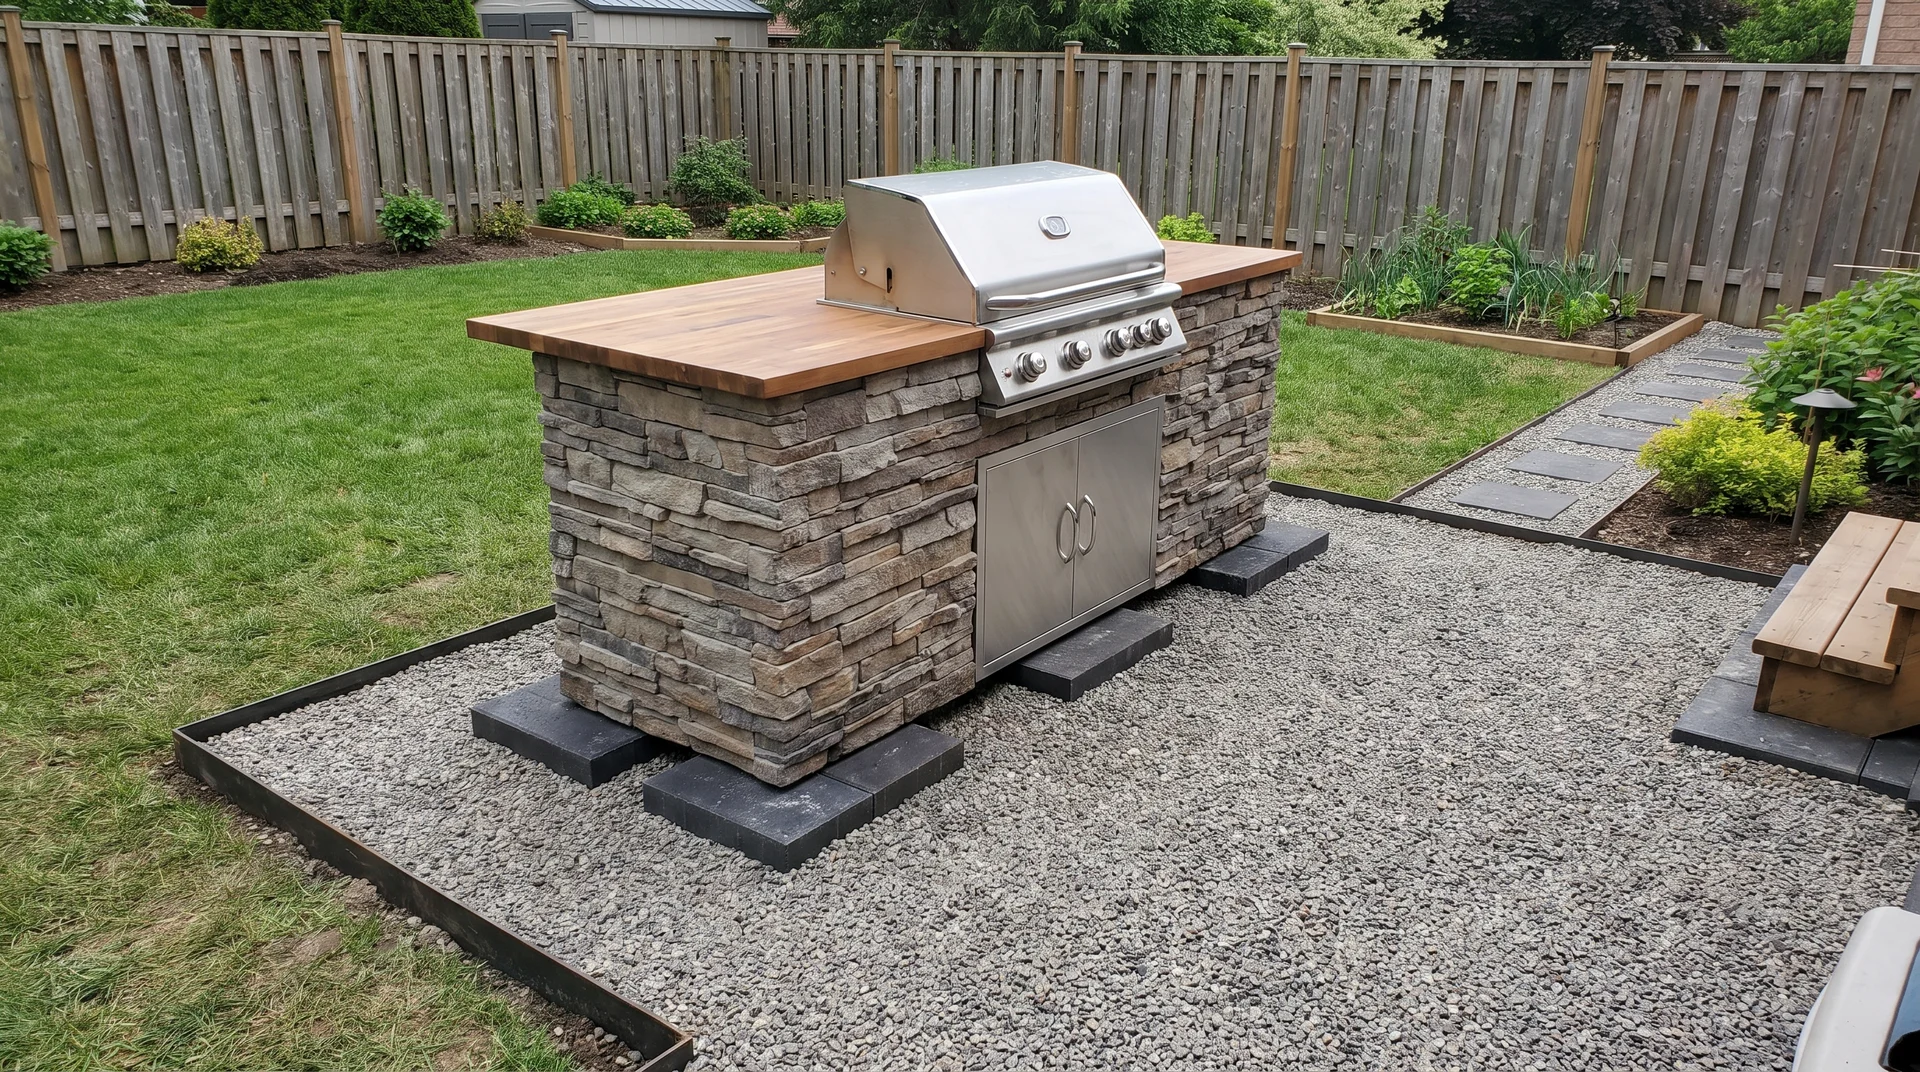
A gravel base can be a budget-friendly option when you do not want to pour a full concrete patio. Start by clearing the area, leveling the ground, and adding a compacted gravel layer.
Use edging around the space to keep the gravel from spreading over time. Place your frame on stable pavers or a solid base so it stays level.
This setup works well for simple outdoor kitchens, grill stations, and seating areas. It also improves drainage and helps prevent water from collecting around your cooking space.
10. Repurpose an Old Outdoor Furniture Piece
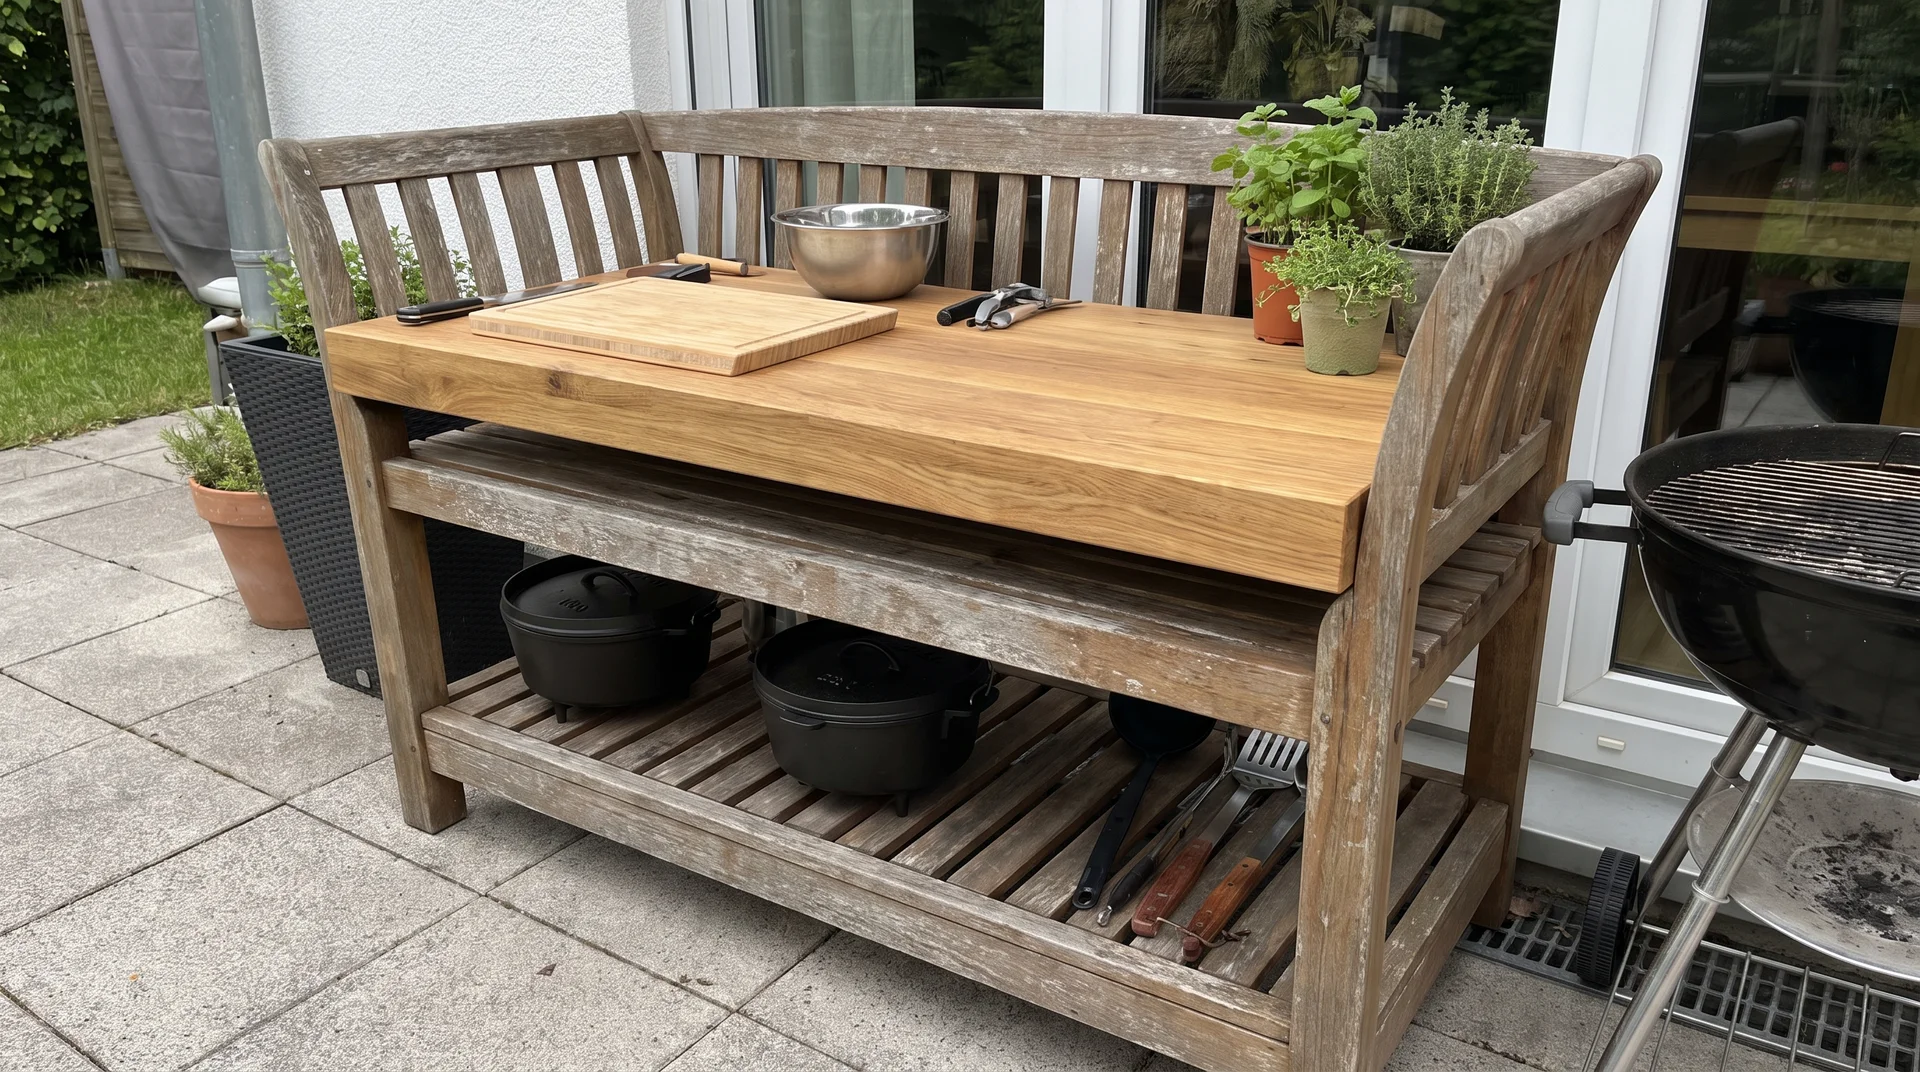
Old furniture can become a useful part of your DIY instead of going to waste. Turn a sturdy table, bench, or cabinet into a prep surface, storage area, or serving station. I’ve used an old bench as a serving station, and it added a practical spot for placing food without needing a new build.
Clean and repair the piece before using it outside, then add a weather-resistant finish for extra protection. Replace weak hardware and make sure the structure can handle outdoor use.
This is the simplest outdoor kitchen idea that adds function without building everything from scratch. With a few small changes, an unused piece can become a helpful kitchen addition.
Outdoor Kitchen Ideas When You Have Limited Space
These compact outdoor cooking ideas help you create a useful setup without taking up too much space. They work well for smaller patios, decks, and backyards where every bit of room matters.
11. Create a One-Wall Outdoor Kitchen
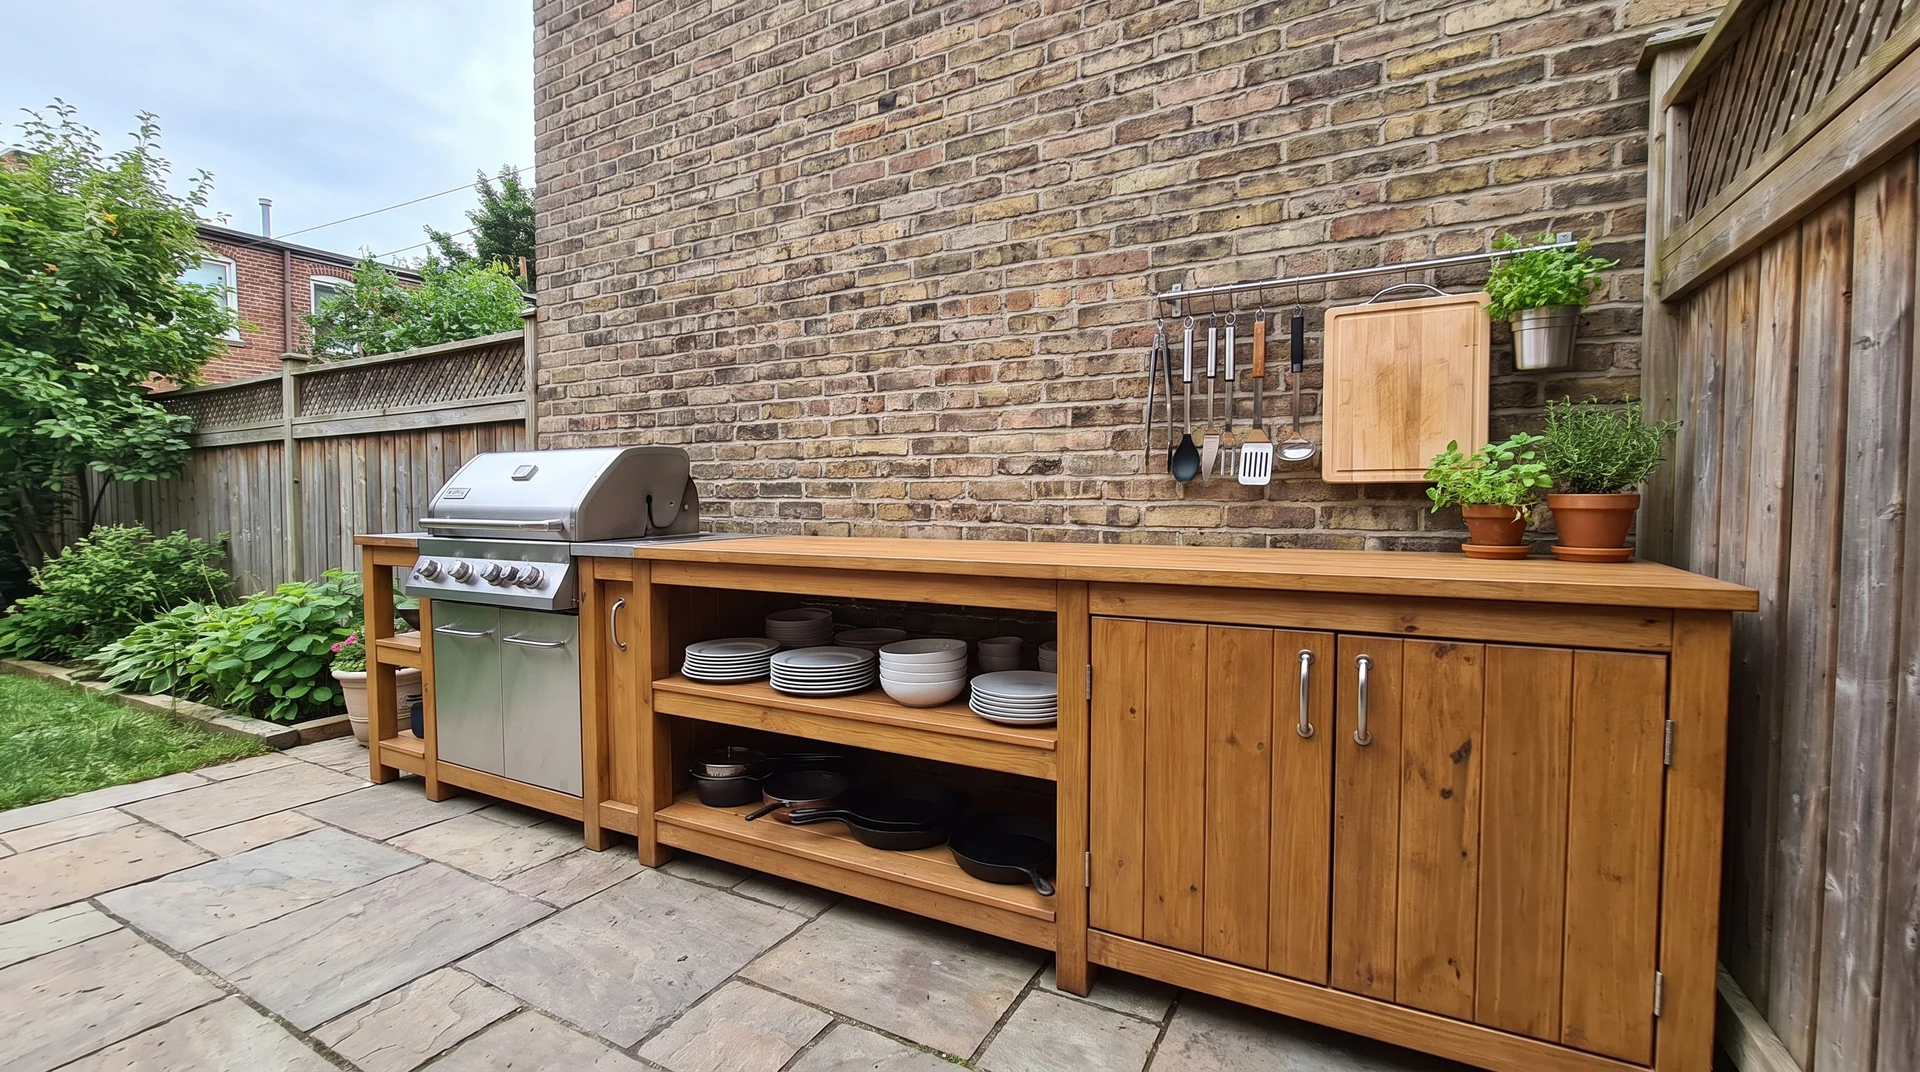
A one-wall kitchen is a smart choice when you have limited backyard space. Place your grill, countertop, storage, and cooking tools along one side to keep the layout simple and easy to use.
Start by measuring the wall area and planning where each item will go before building. Keep the grill in a convenient spot and leave enough counter space for preparing food.
This layout works well for narrow patios, small decks, and compact yards. You get a complete cooking area without taking up the whole outdoor space.
12. Build an Outdoor Corner Garden Kitchen
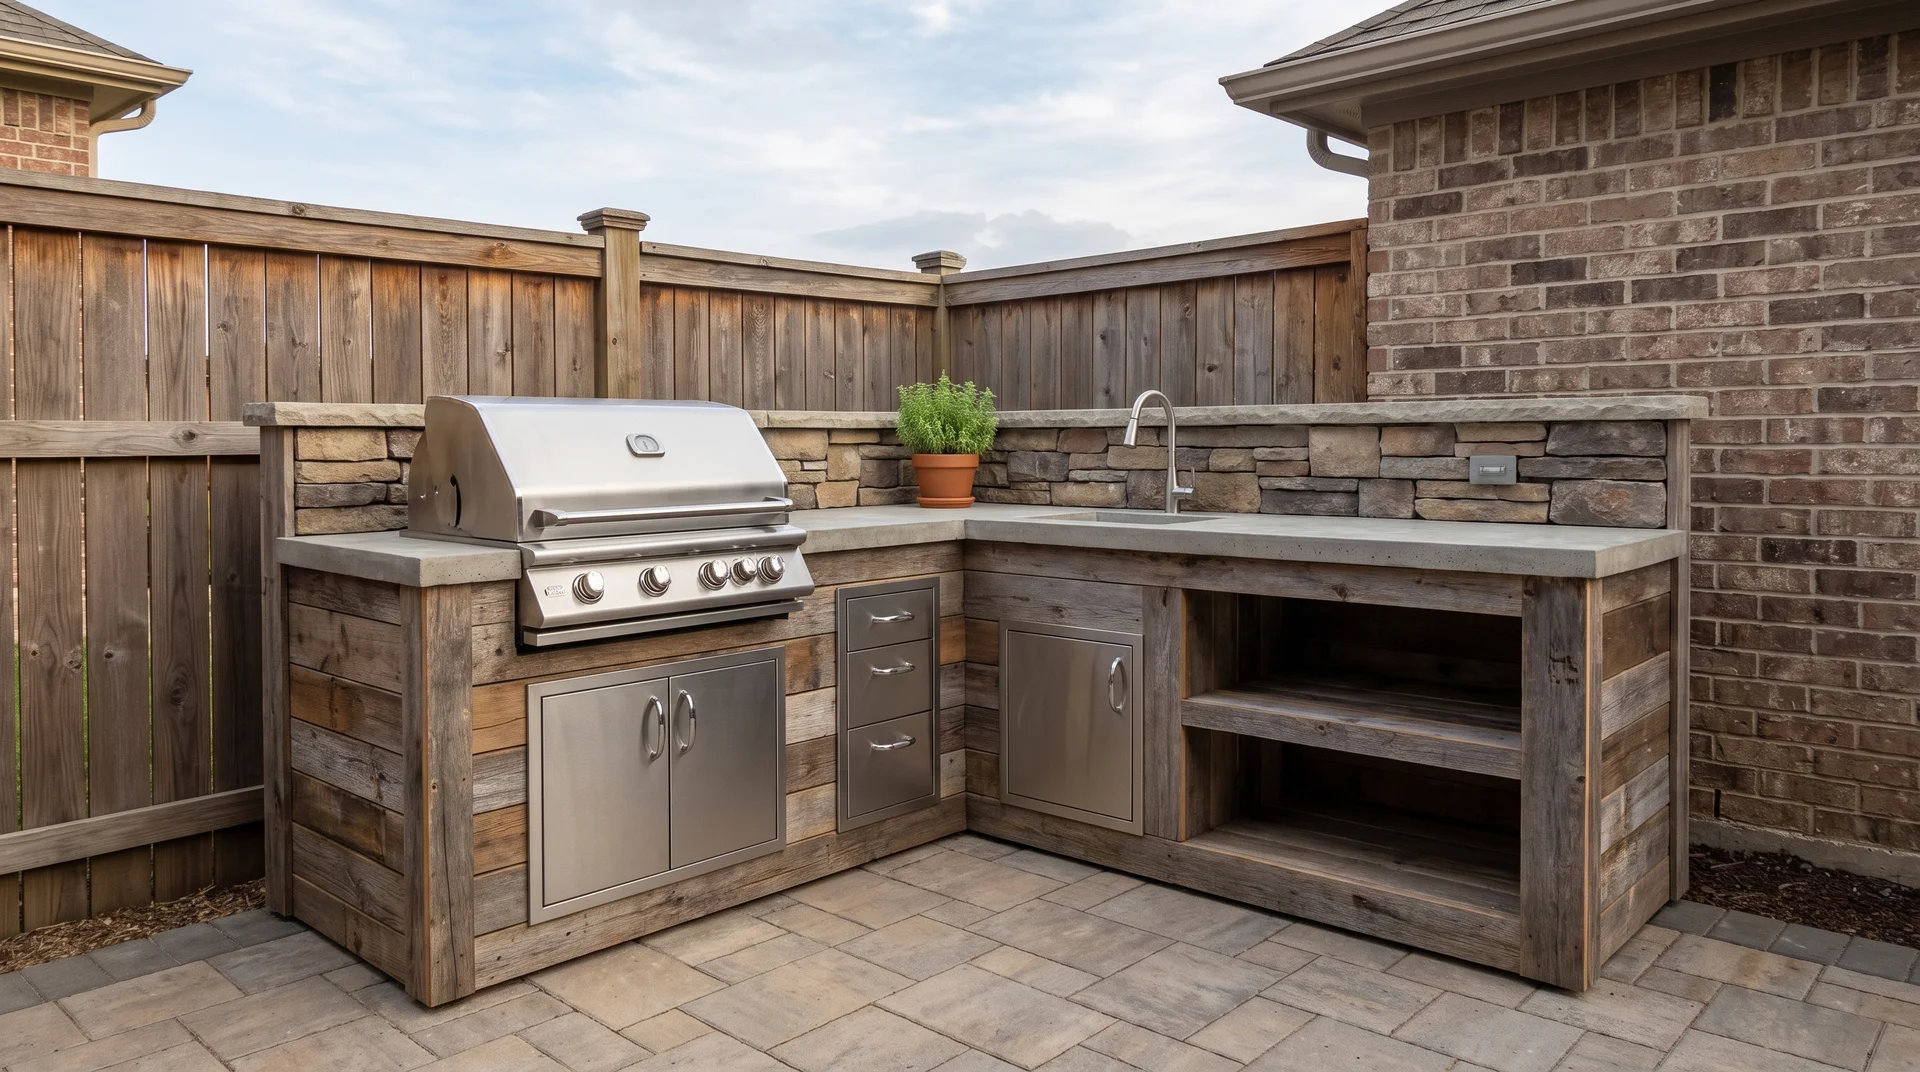
A corner kitchen helps you use space that often gets ignored. Place the grill, counters, and storage along two connected sides to create a practical cooking area.
Measure the corner carefully before adding cabinets or building the frame. Keep the most-used items close so you do not have to move around while cooking.
This setup gives you more workspace without needing a large backyard. It is a good option for patios where every bit of space matters.
13. Add a Narrow Kitchen Bar
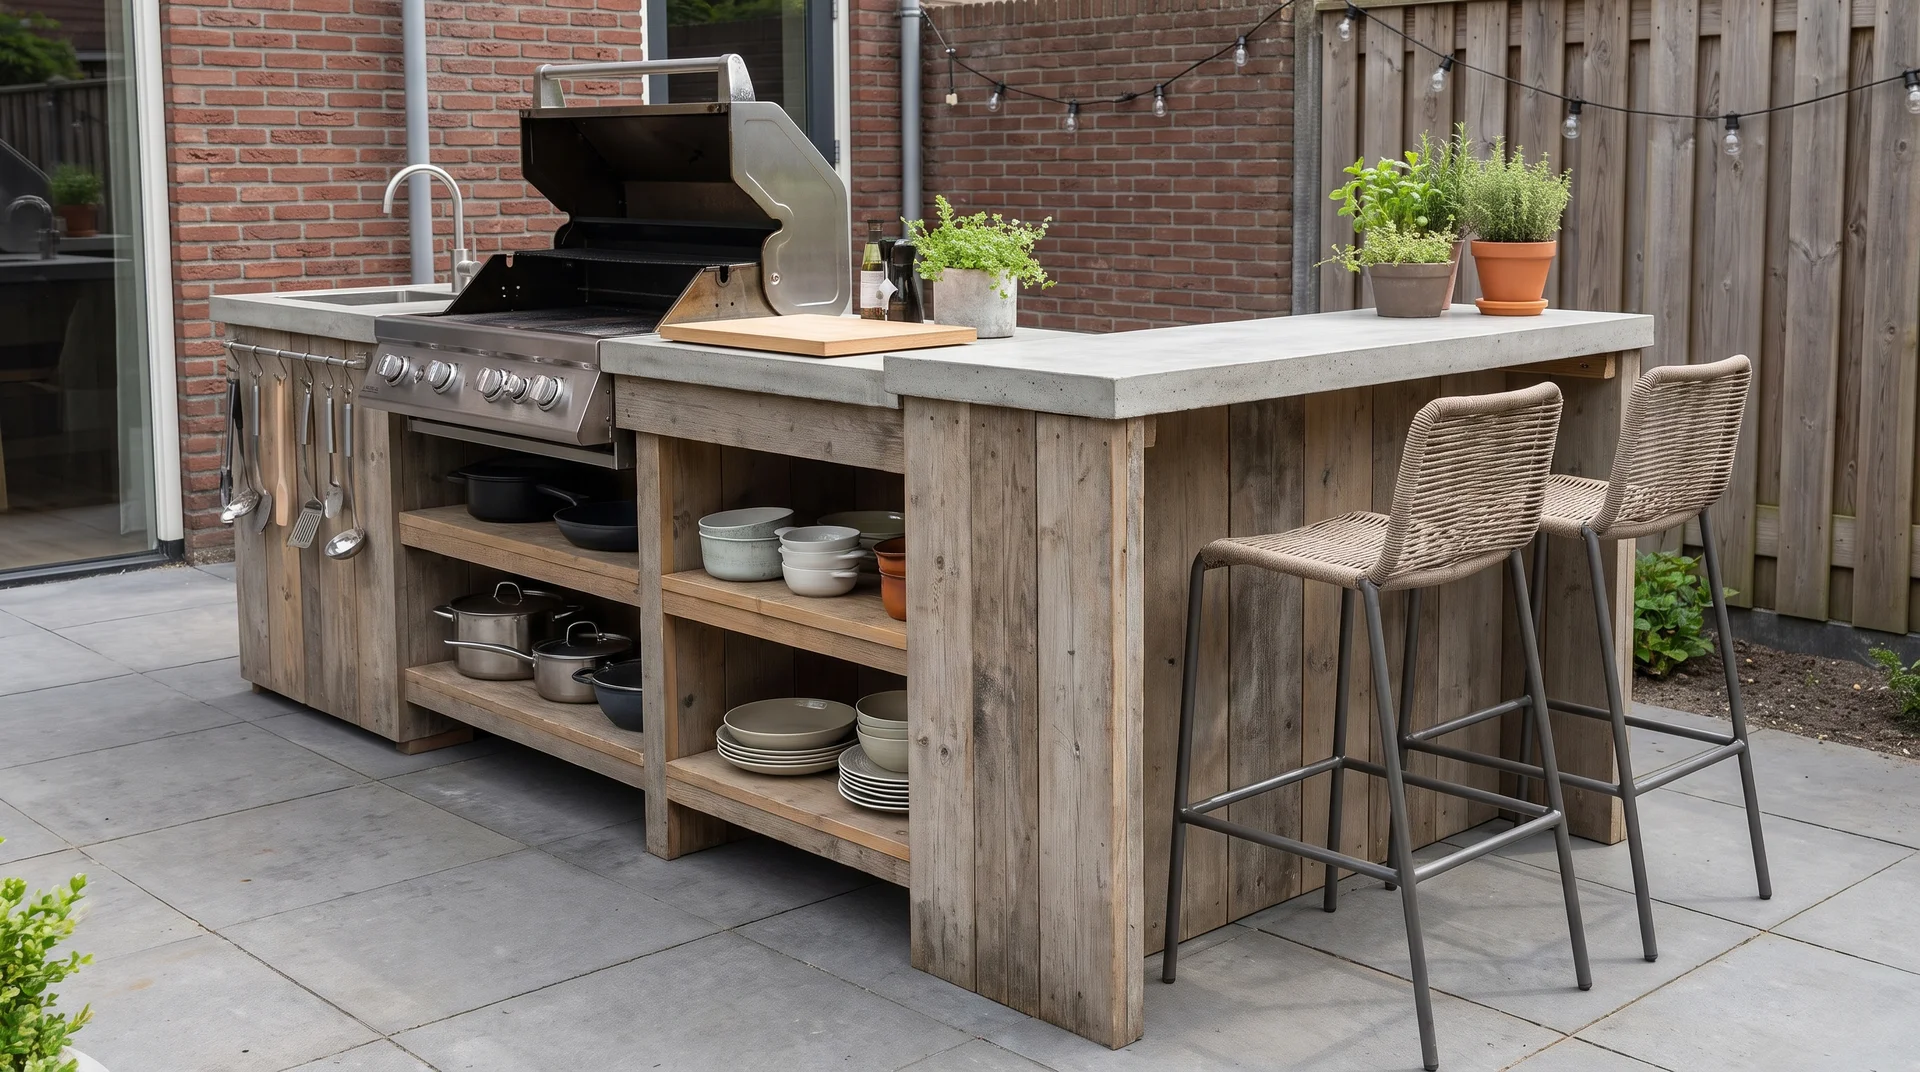
A narrow kitchen bar combines cooking space with a place for guests to sit. Build a slim counter with enough room for food prep on one side and seating on the other.
Choose a bar depth that fits your space while still leaving room to move around comfortably. Add stools, storage shelves, or hooks to make the area more useful.
This idea works well for small patios where you want both a kitchen and entertaining space. It creates a casual spot for serving meals without adding extra furniture.
14. Create a Fold-Down Kitchen Station
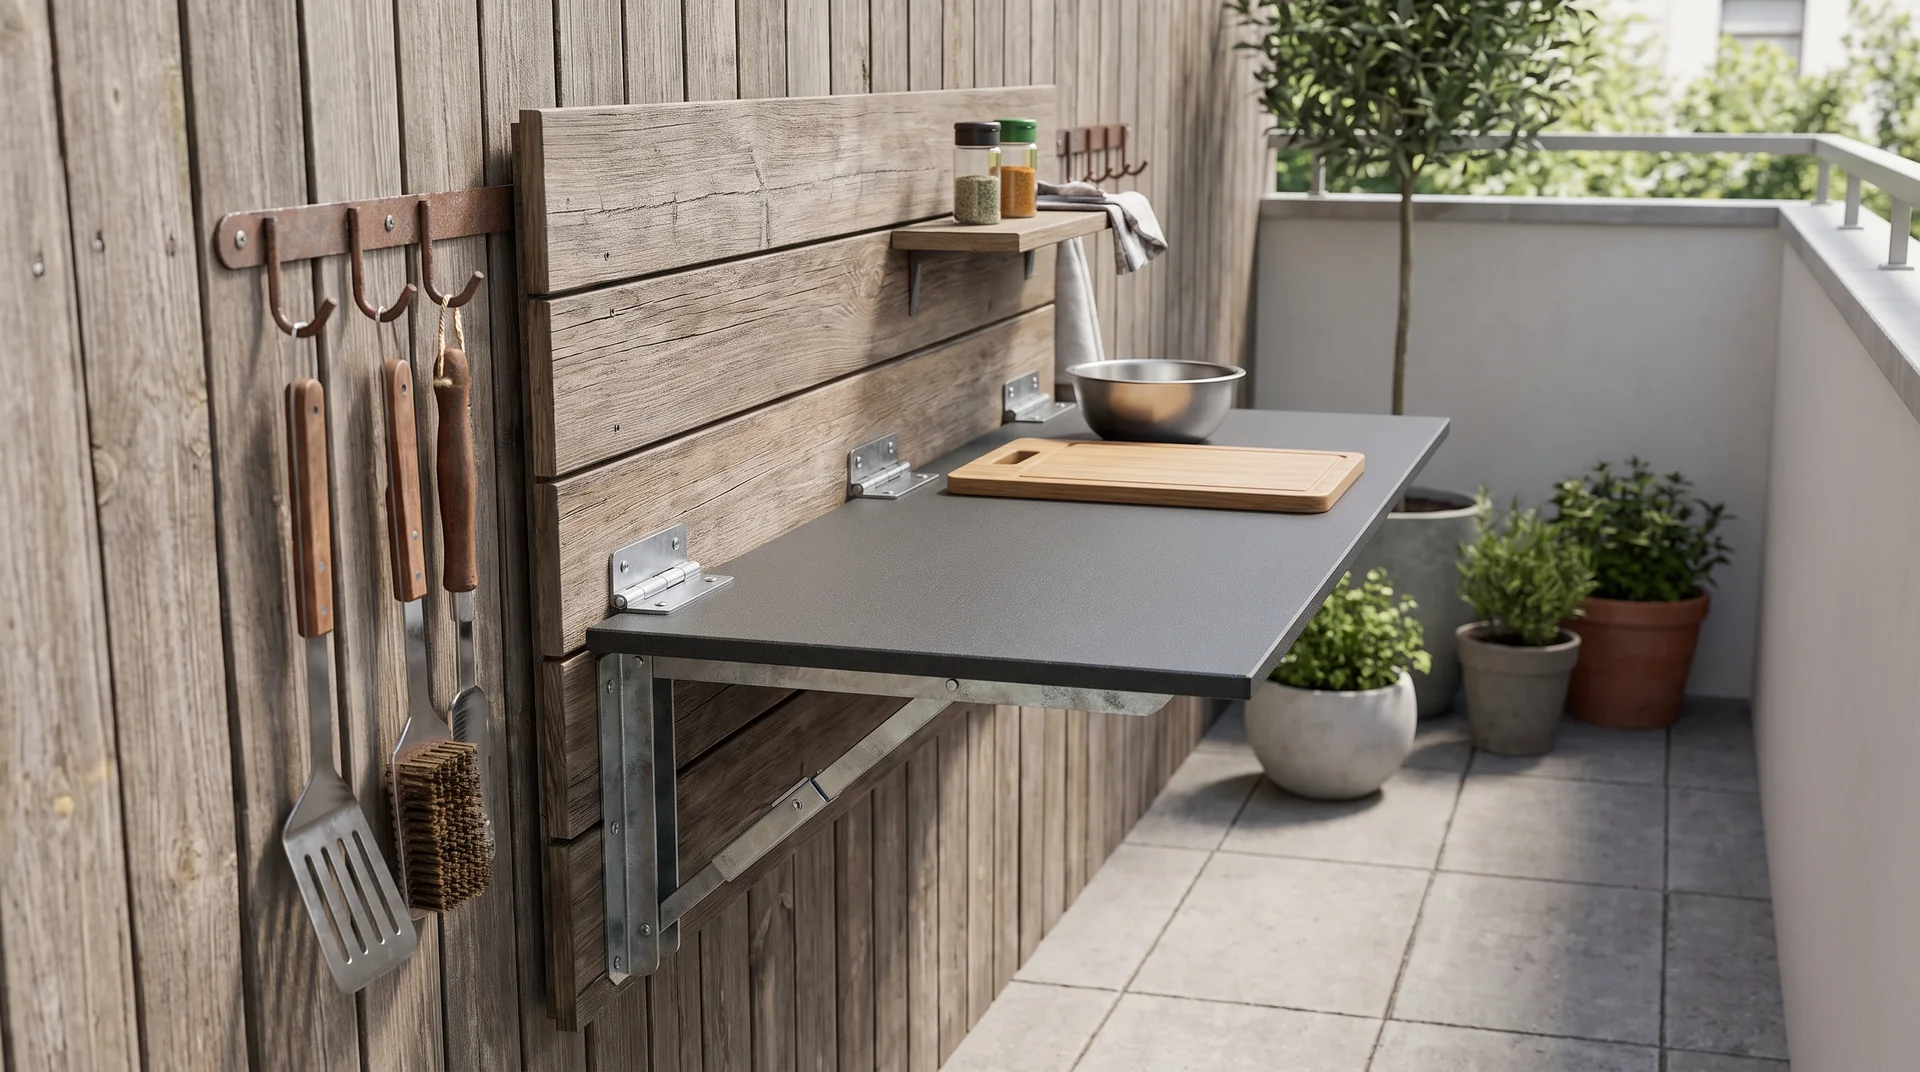
A fold-down kitchen station gives you a workspace that does not take up space all the time. I like this option for smaller areas because it solves a common problem: having enough prep space without letting a cooking setup take over the entire area.
Mount a strong tabletop to a wall or fence and fold it away when you are finished. Use weather-resistant materials and strong hinges to support the weight of cooking items. Add hooks or small shelves nearby to keep tools and supplies organized.
This setup is helpful for very small yards, balconies, or compact outdoor areas. You get a useful prep space without giving up your entire patio.
15. Build a Mobile Grill and Prep Station
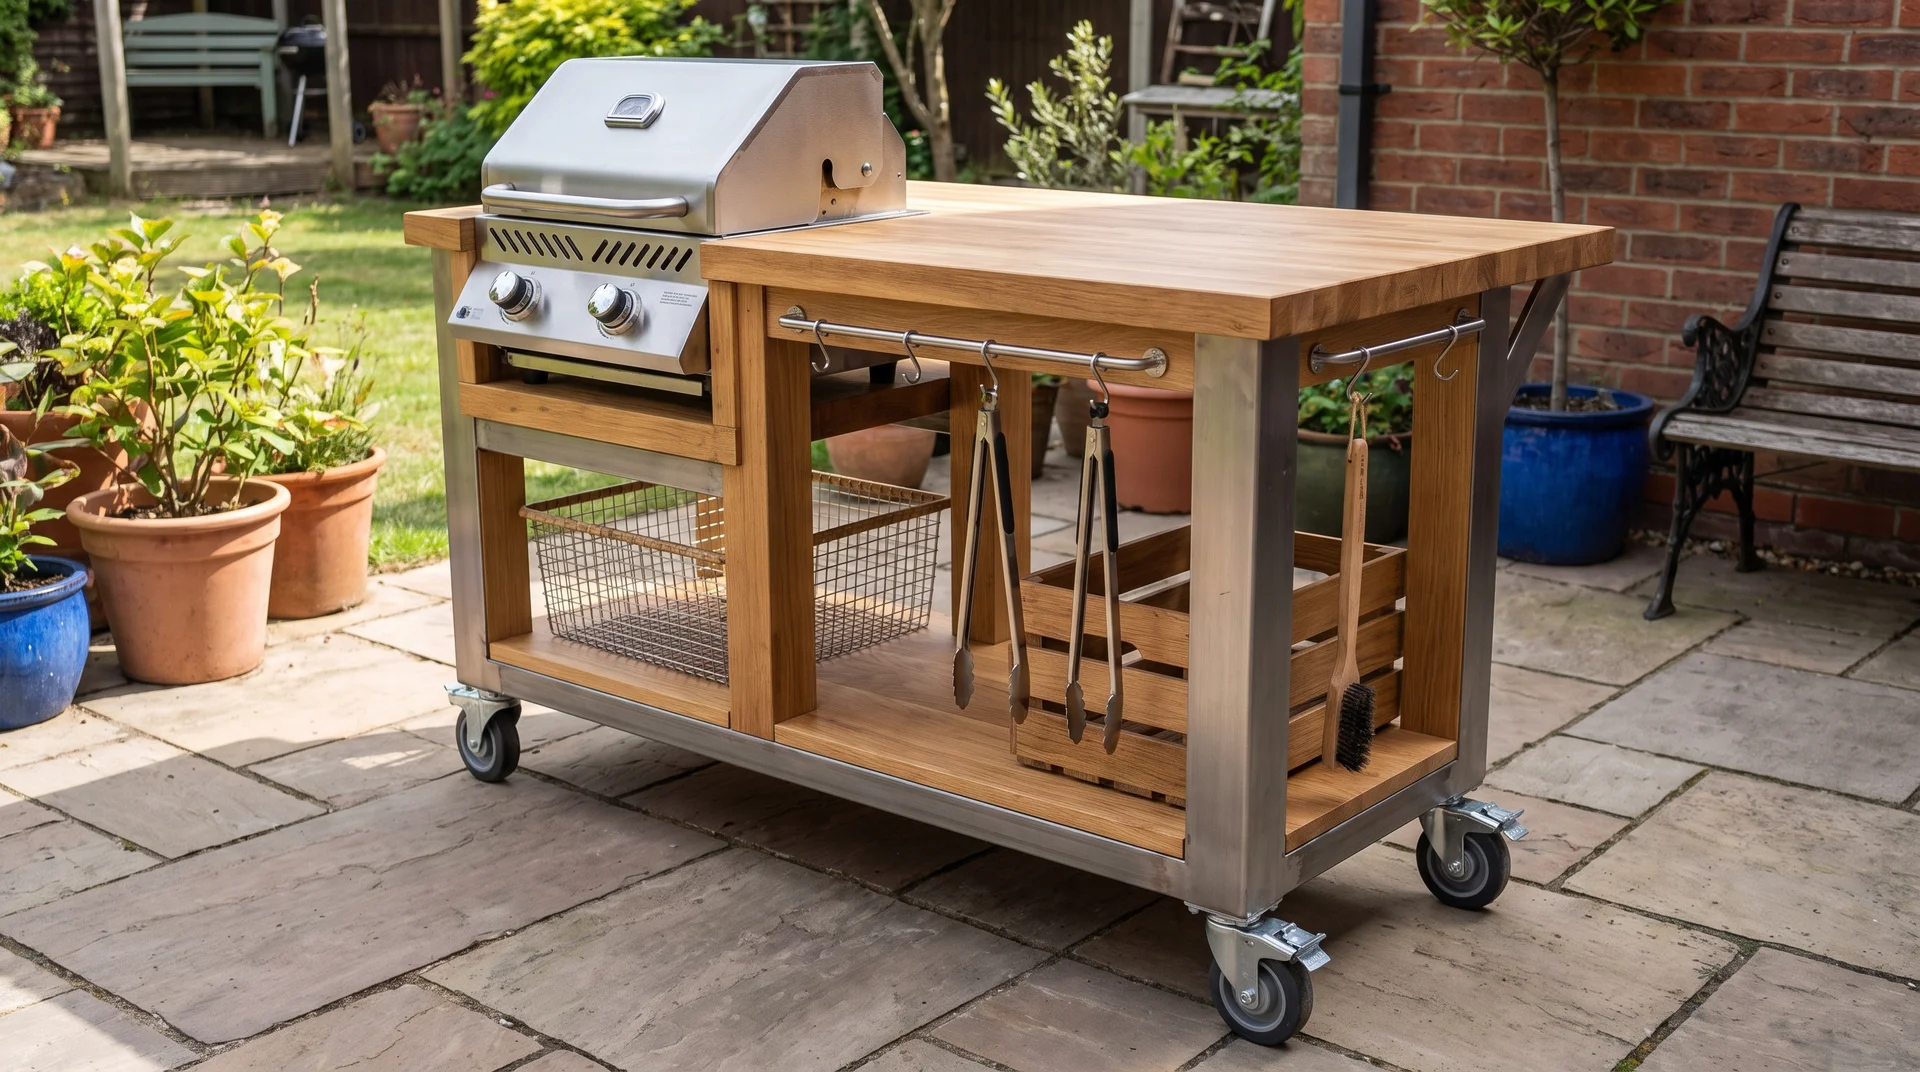
A mobile grill and prep station lets you move your cooking setup wherever you need it. Add wheels to a sturdy base and include a worktop, storage, and space for grilling tools.
Choose materials that can handle outdoor weather and make sure the wheels can lock in place. Keep the design simple so you can move it easily without making it too heavy.
This option works well for renters, small patios, and flexible outdoor spaces. You can move it closer to seating areas or store it away when not in use.
Outdoor Kitchen Ideas With Extra Features and Upgrades
Add practical features like pizza ovens, side burners, smoker areas, and beverage stations to make your outdoor cooking space more useful and easier to customize for the way you cook.
16. Add a Built-In Pizza Oven Area
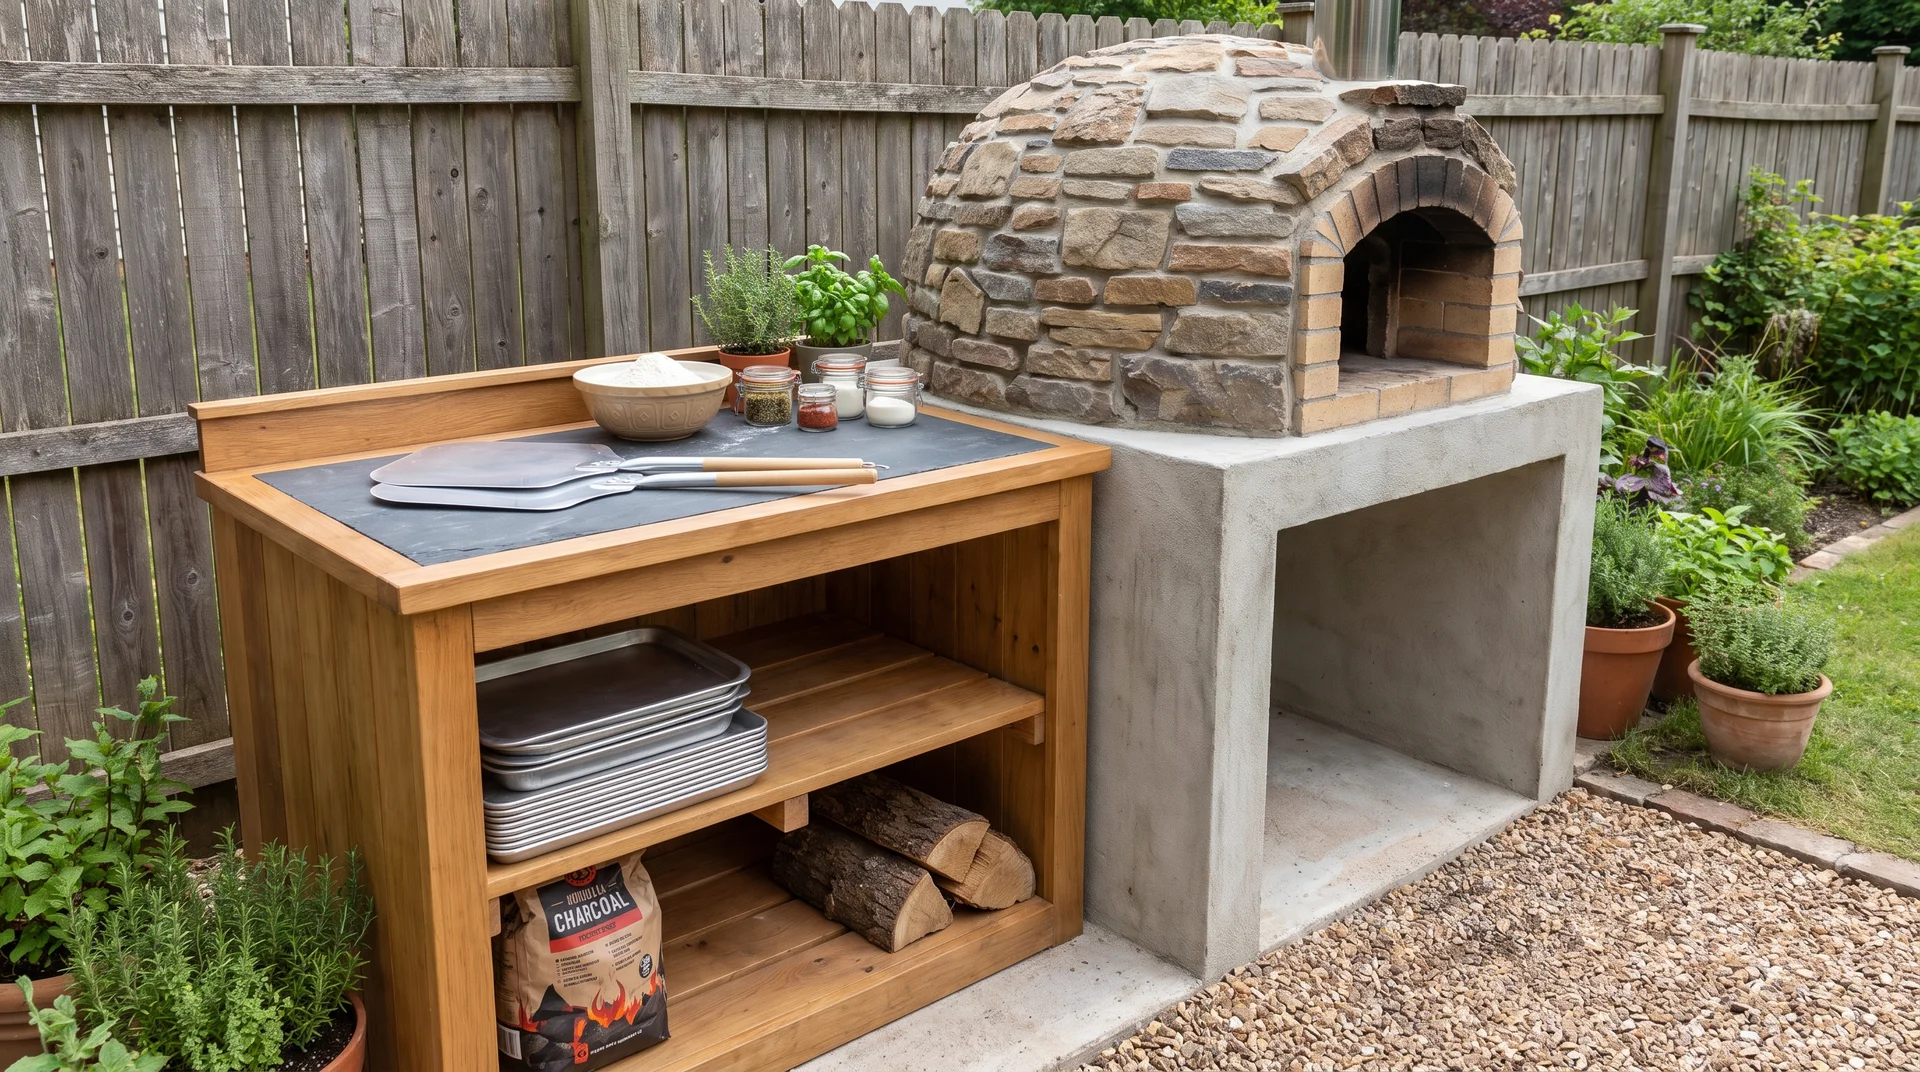
A built-in pizza oven area gives you a dedicated spot for making pizzas and other high-heat meals outdoors. Choose a safe location with enough space around the oven for preparing dough, placing tools, and serving food.
Build the base with heat-resistant materials that can handle high temperatures over time. Add a nearby counter or shelf so you can keep toppings, trays, and cooking supplies within reach.
Think about ventilation and clearance before installing the oven. A well-planned pizza station can become a fun cooking feature for family meals and gatherings.
17. Install a Side Burner Station
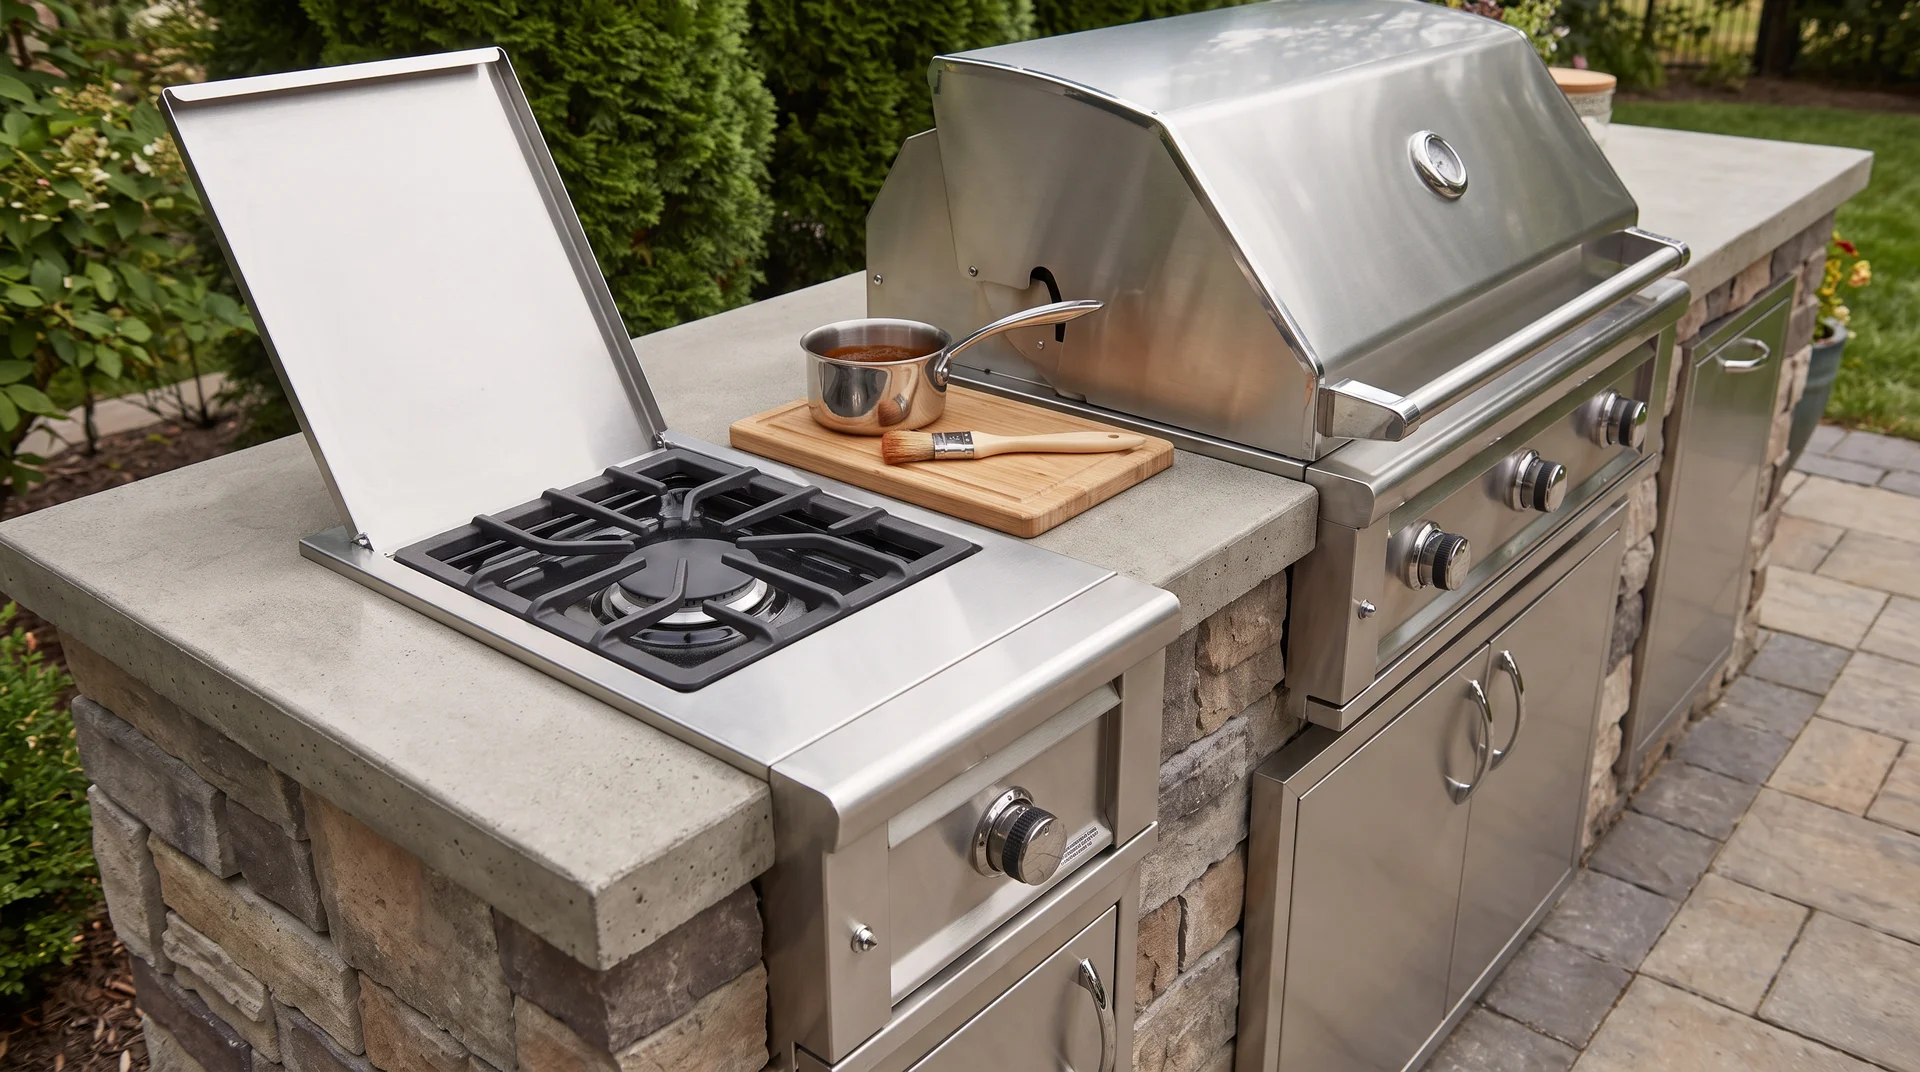
A side burner station adds extra cooking space when your grill is already busy. Use it to heat sauces, cook side dishes, or prepare meals that need a separate heat source.
Place the burner close to your main grill so you can move between cooking areas easily. Make sure the surface around it can handle heat and outdoor conditions.
This small addition can make outdoor cooking more convenient. You can prepare an entire meal outside without running back and forth to the indoor kitchen.
18. Create a Dedicated Smoker Station
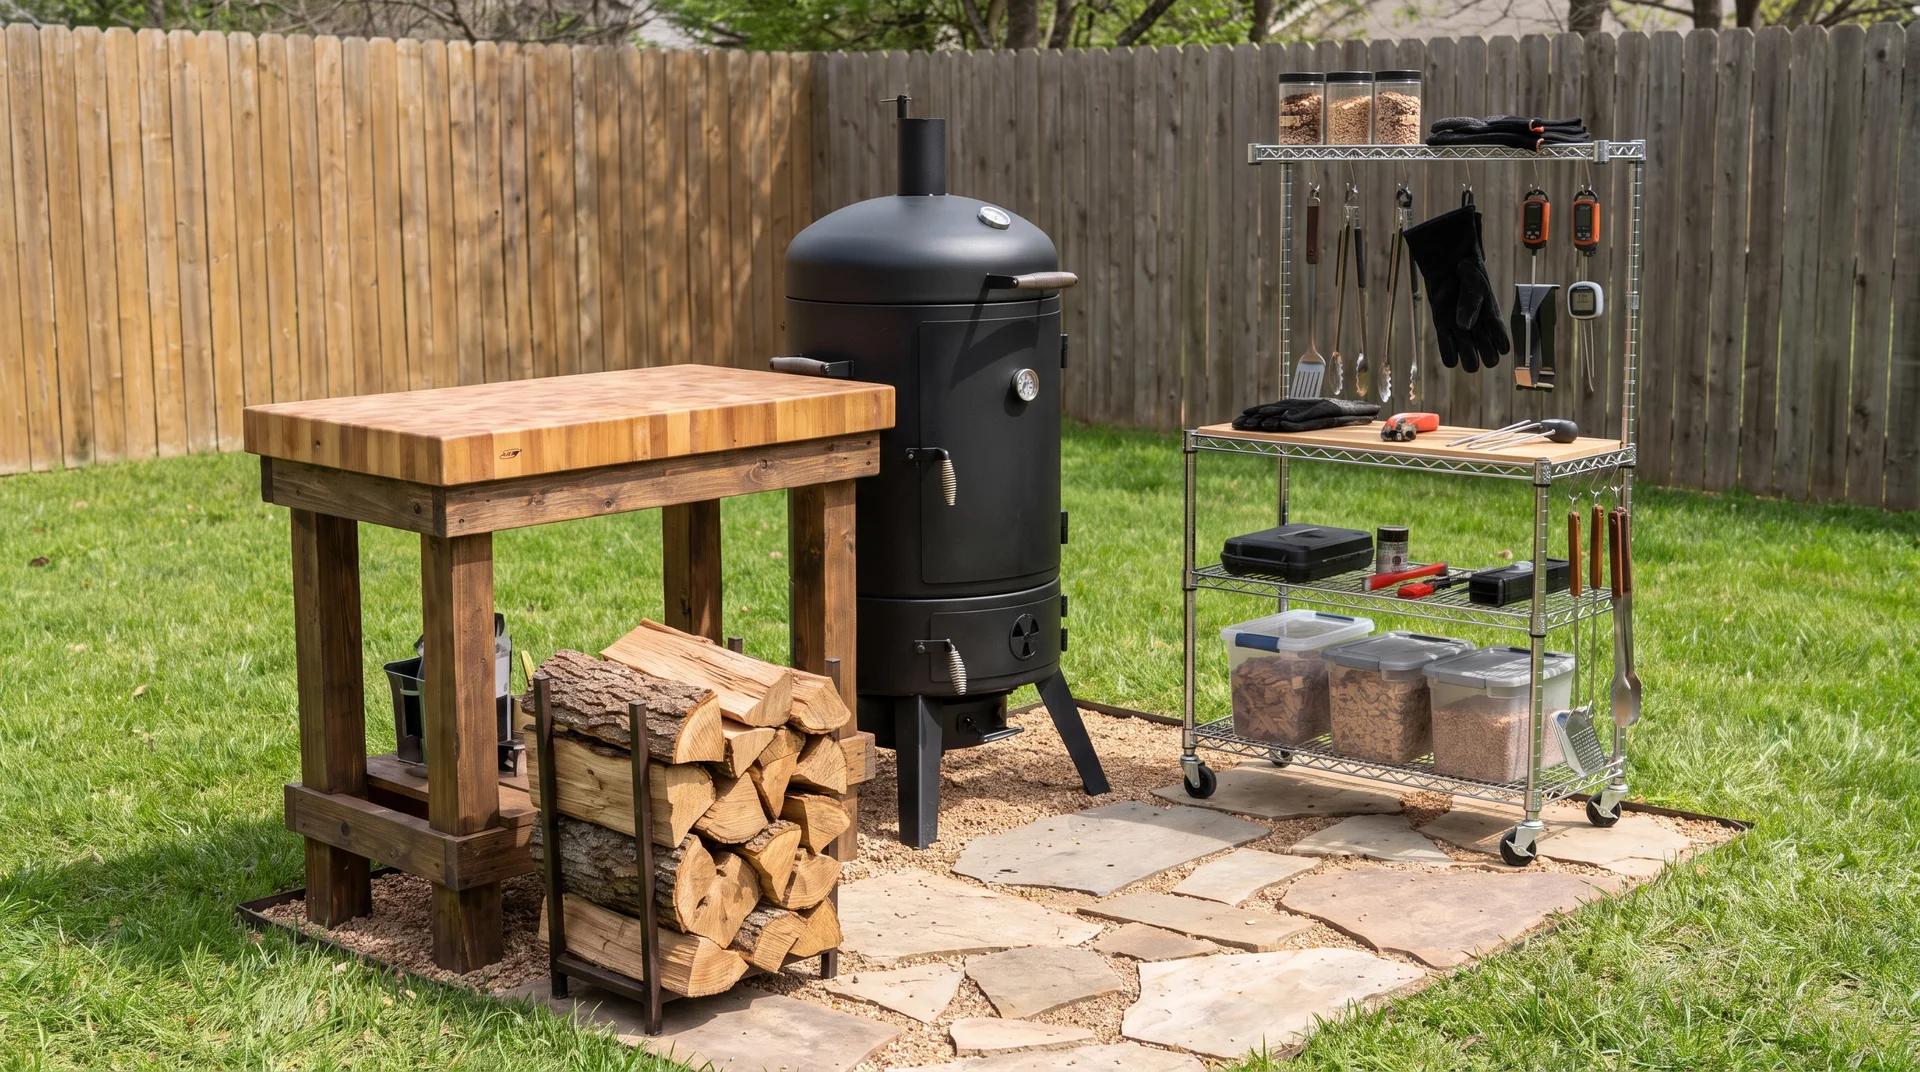
A smoker station gives you a separate area for slow cooking meats and barbecue meals. Plan space for the smoker, wood storage, preparation, and a nearby surface for handling food.
Add shelves or cabinets to keep smoking tools, thermometers, and supplies organized. Choose materials that can handle heat, smoke, and changing outdoor weather.
Keep the smoker away from walls, low branches, and covered areas unless they are designed for safe ventilation. A dedicated setup makes smoking easier and keeps your cooking area organized.
19. Add an Outdoor Beverage Station
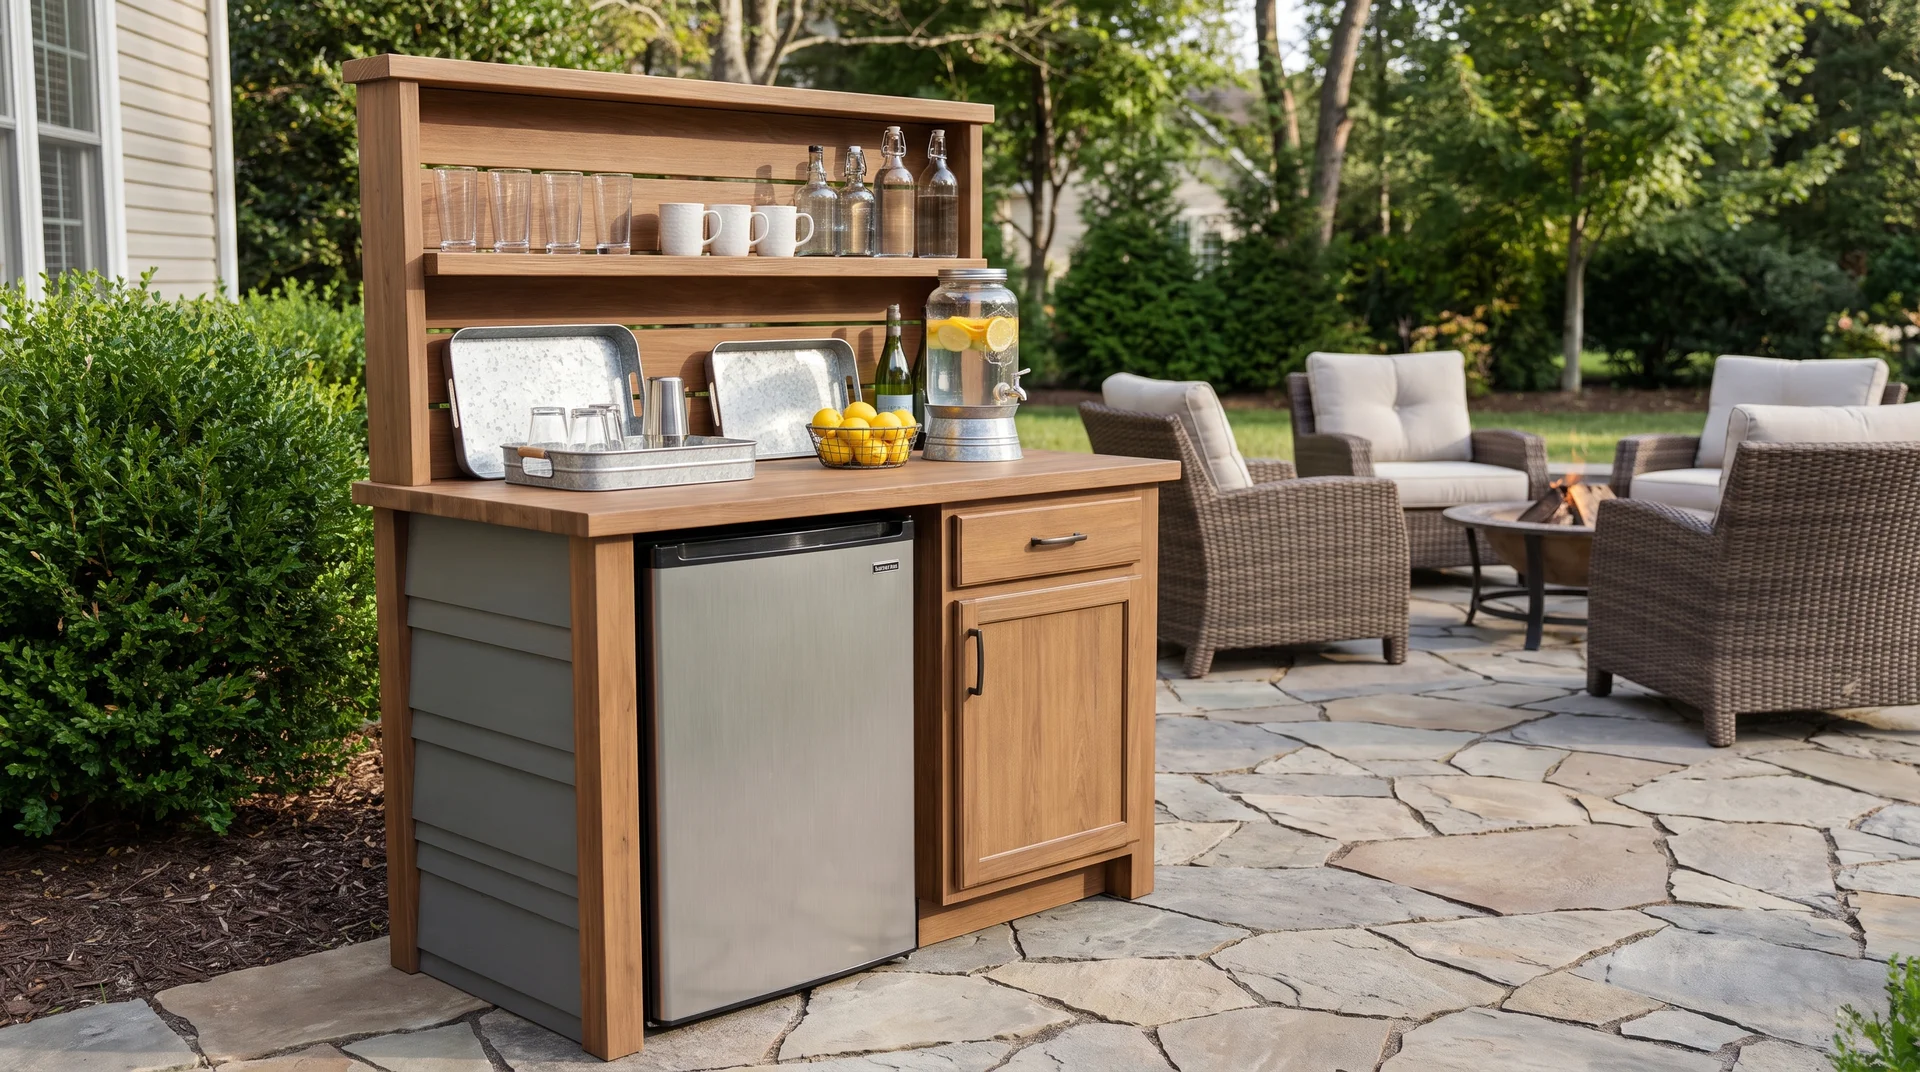
An outdoor beverage station keeps drinks and serving items close while you cook or entertain. Add a small counter, cooler, refrigerator, or storage area based on the space you have.
Include shelves or cabinets for cups, bottles, and serving trays so everything stays organized. Choose weather-resistant materials to protect the station from rain and moisture.
Place it near your seating area so guests can grab drinks easily. It is a simple feature that makes outdoor gatherings more comfortable.
20. Build a Wood-Fired Cooking Area
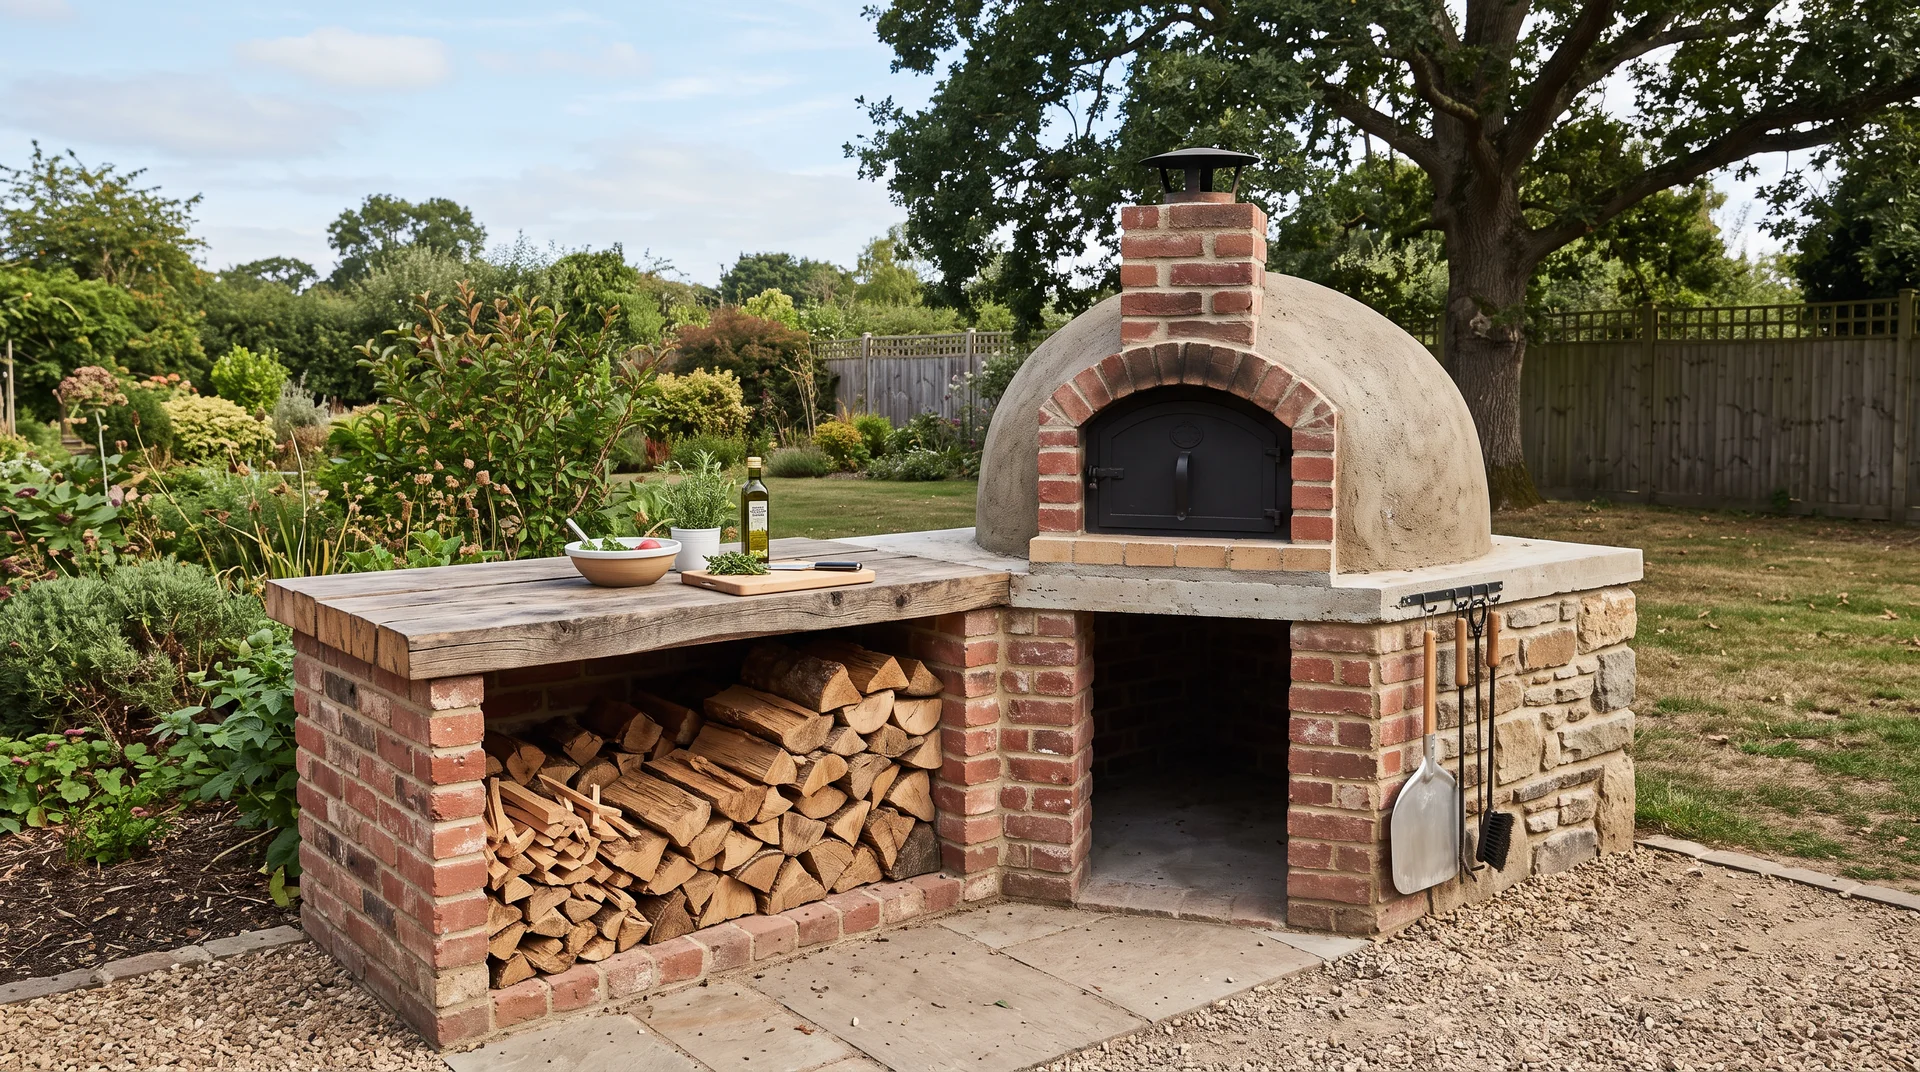
A wood-fired cooking area adds a traditional feel to your outdoor kitchen and works well for roasting, baking, and grilling. Choose a safe location and use fire-resistant materials around the cooking area.
Build a strong base with materials like brick, stone, or concrete that can handle high heat. Keep firewood stored nearby but protected from moisture.
Plan enough space for preparing food and managing the fire safely. This setup creates a unique outdoor cooking experience while adding a rustic touch to your backyard.
Backyard Comfort Features and Design Ideas
Add shade, storage, serving areas, and connected dining spaces to make your outdoor cooking area more comfortable. These features create a space that works for food prep, hosting guests, and spending time outdoors.
21. Add a Pergola Over the Kitchen
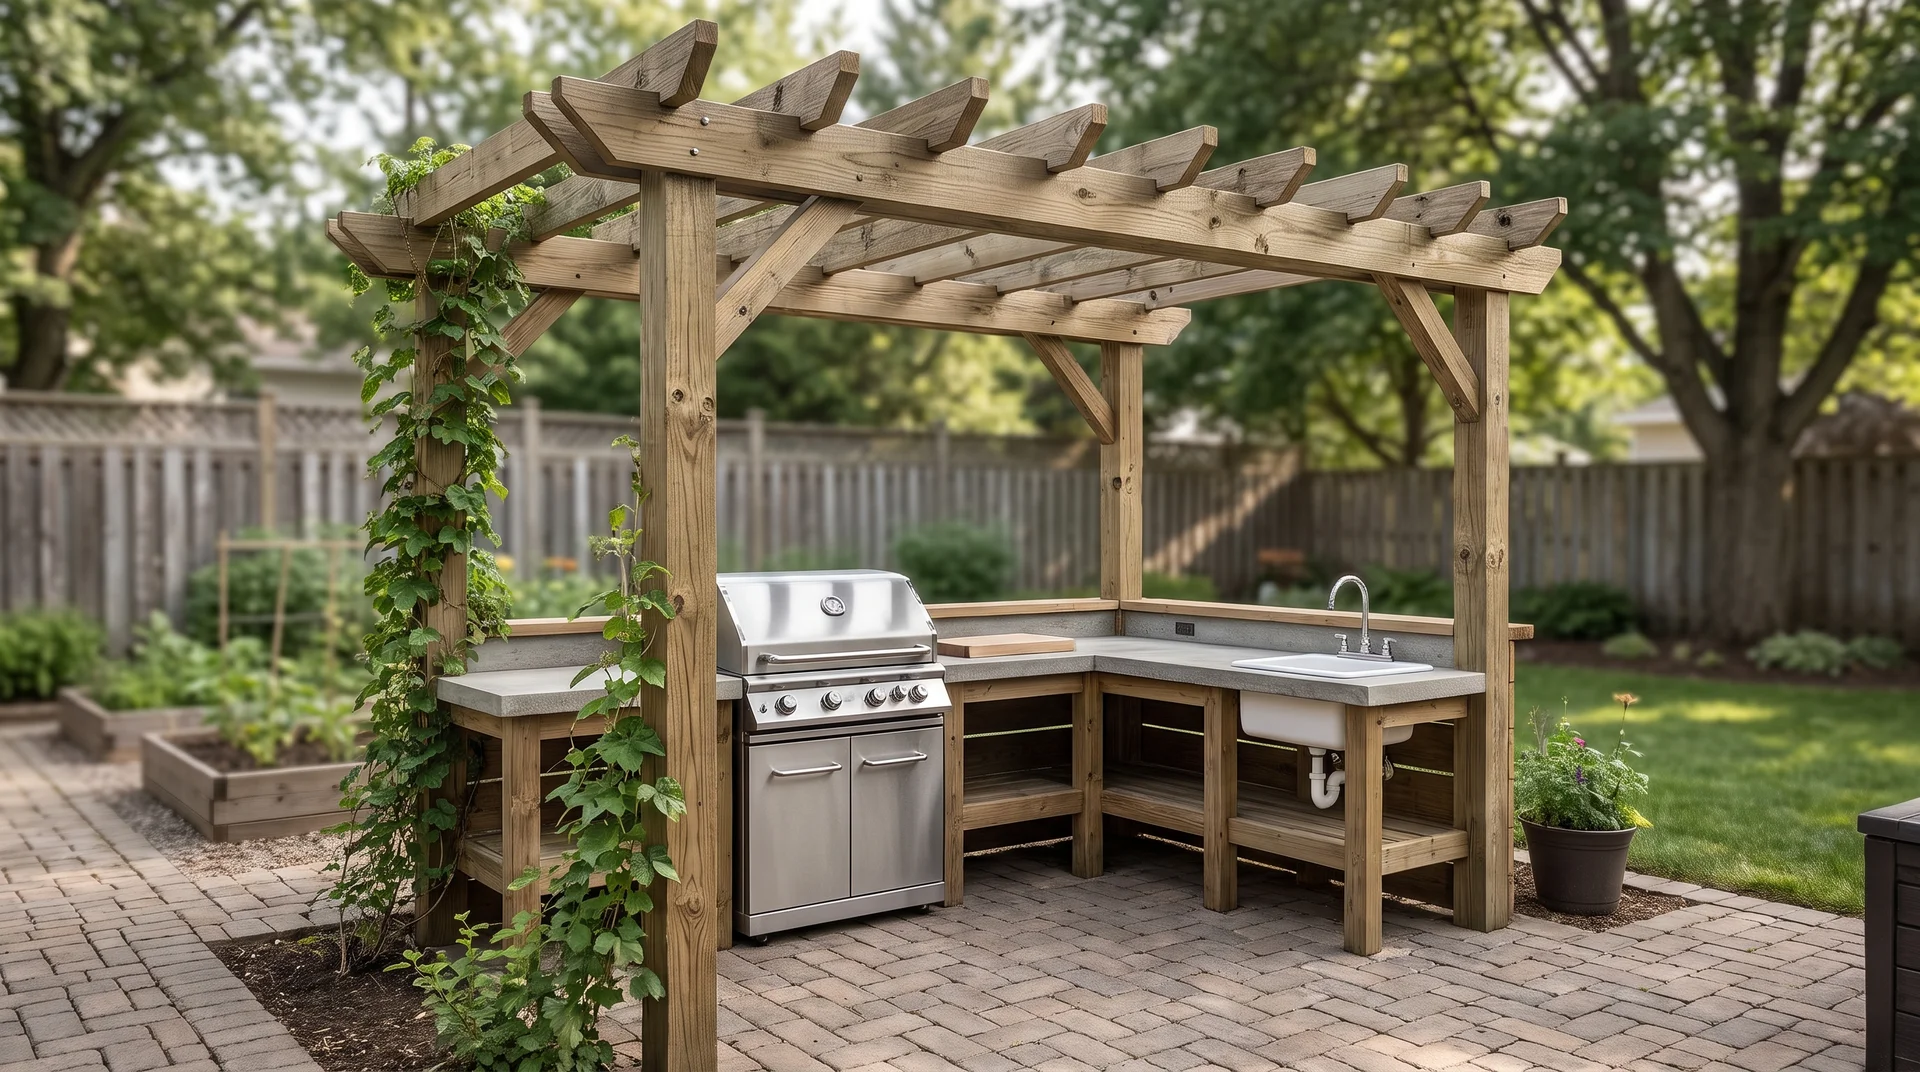
A pergola over your outdoor kitchen adds shade and makes the space more comfortable during sunny days. Choose a design that gives enough coverage without blocking airflow around grills and cooking areas.
Use weather-resistant materials like treated wood, aluminum, or composite boards to handle outdoor conditions. Add climbing plants or shade panels if you want extra protection from the sun.
Make sure the pergola height works with your grill, smoker, or other cooking equipment. A well-planned cover can make your outdoor kitchen more enjoyable throughout the year.
22. Build a Covered Outdoor Kitchen
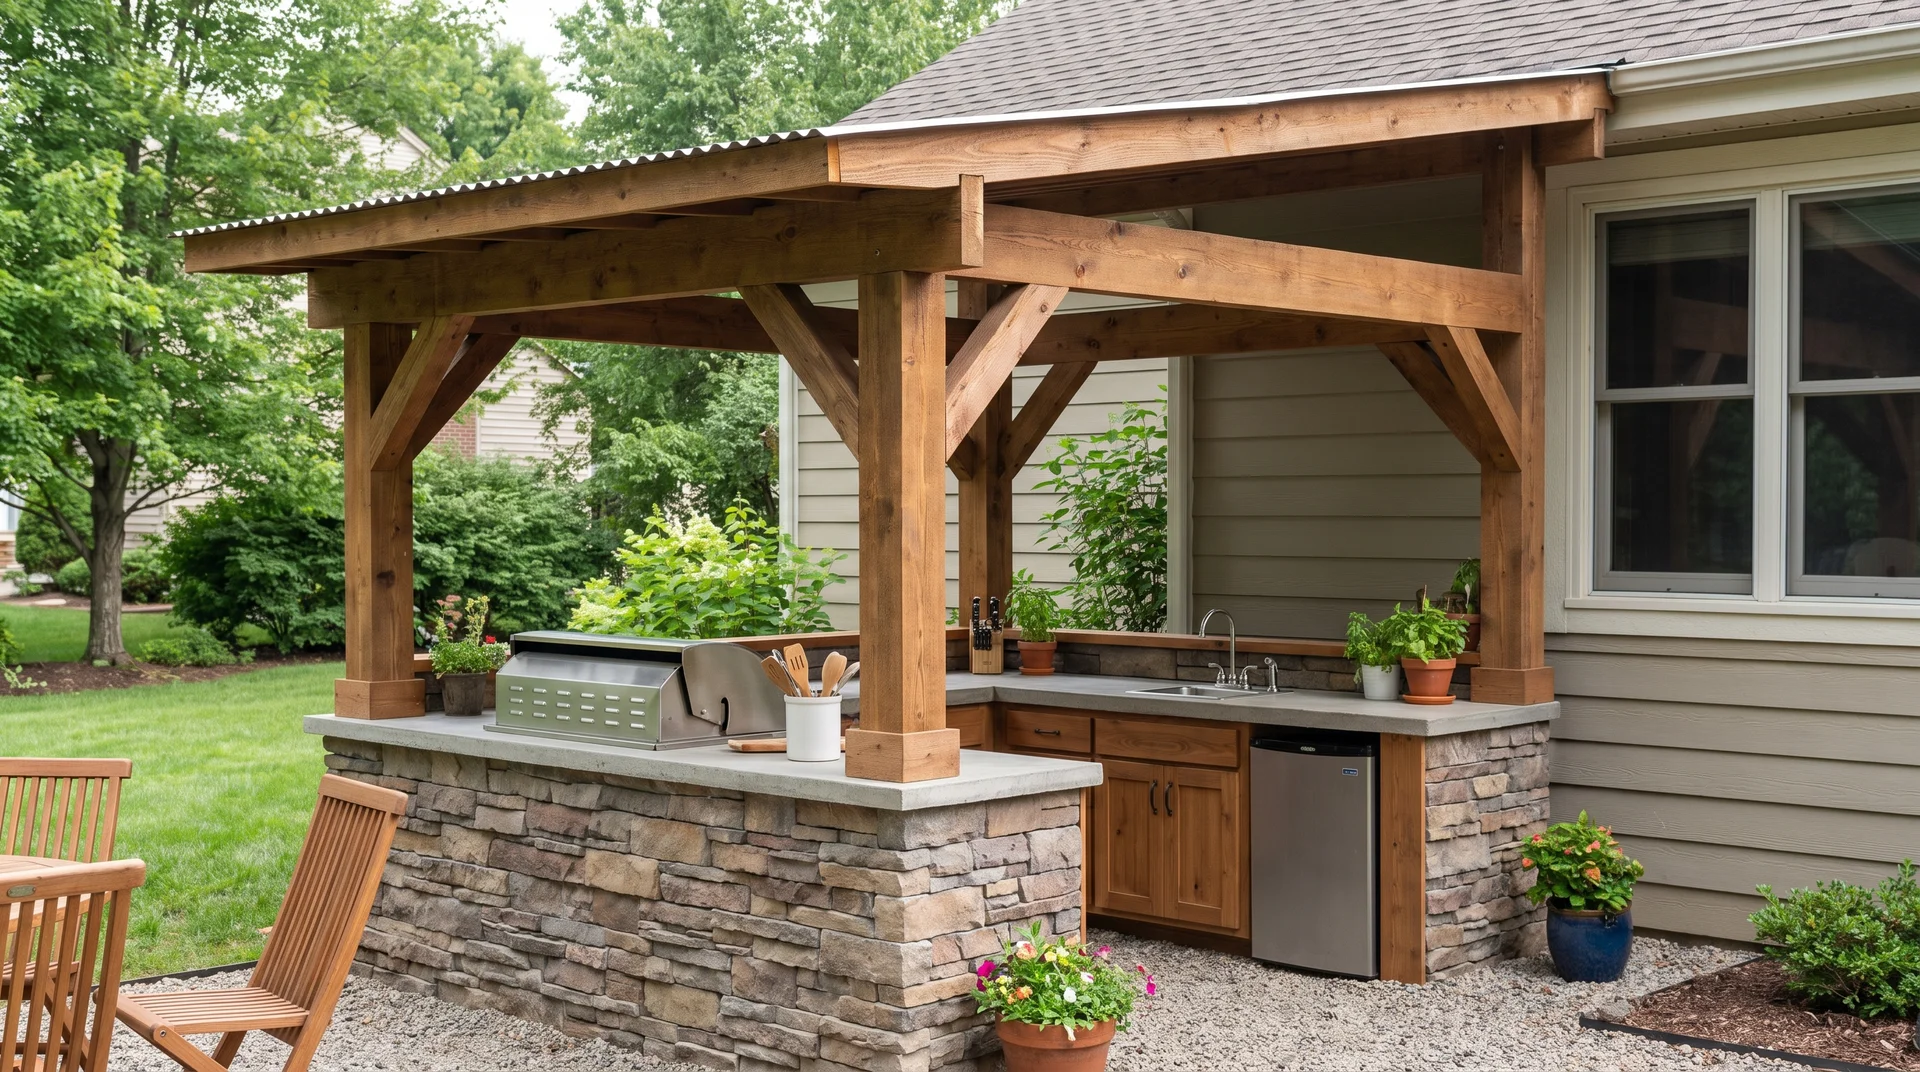
A covered outdoor kitchen protects your cooking area from rain, sun, and changing weather. I’ve found that choosing the right structure, like a roof extension, pavilion, or enclosed shelter, makes the space more practical for your backyard.
Plan the cover around your grill and appliances to maintain proper ventilation and safety. Use durable roofing materials that handle outdoor exposure and keep water away from your cooking setup.
A covered kitchen lets you spend more time outdoors across different seasons. It also helps protect your counters, cabinets, and equipment from weather damage, reducing maintenance over time.
23. Add Outdoor Kitchen Storage Walls
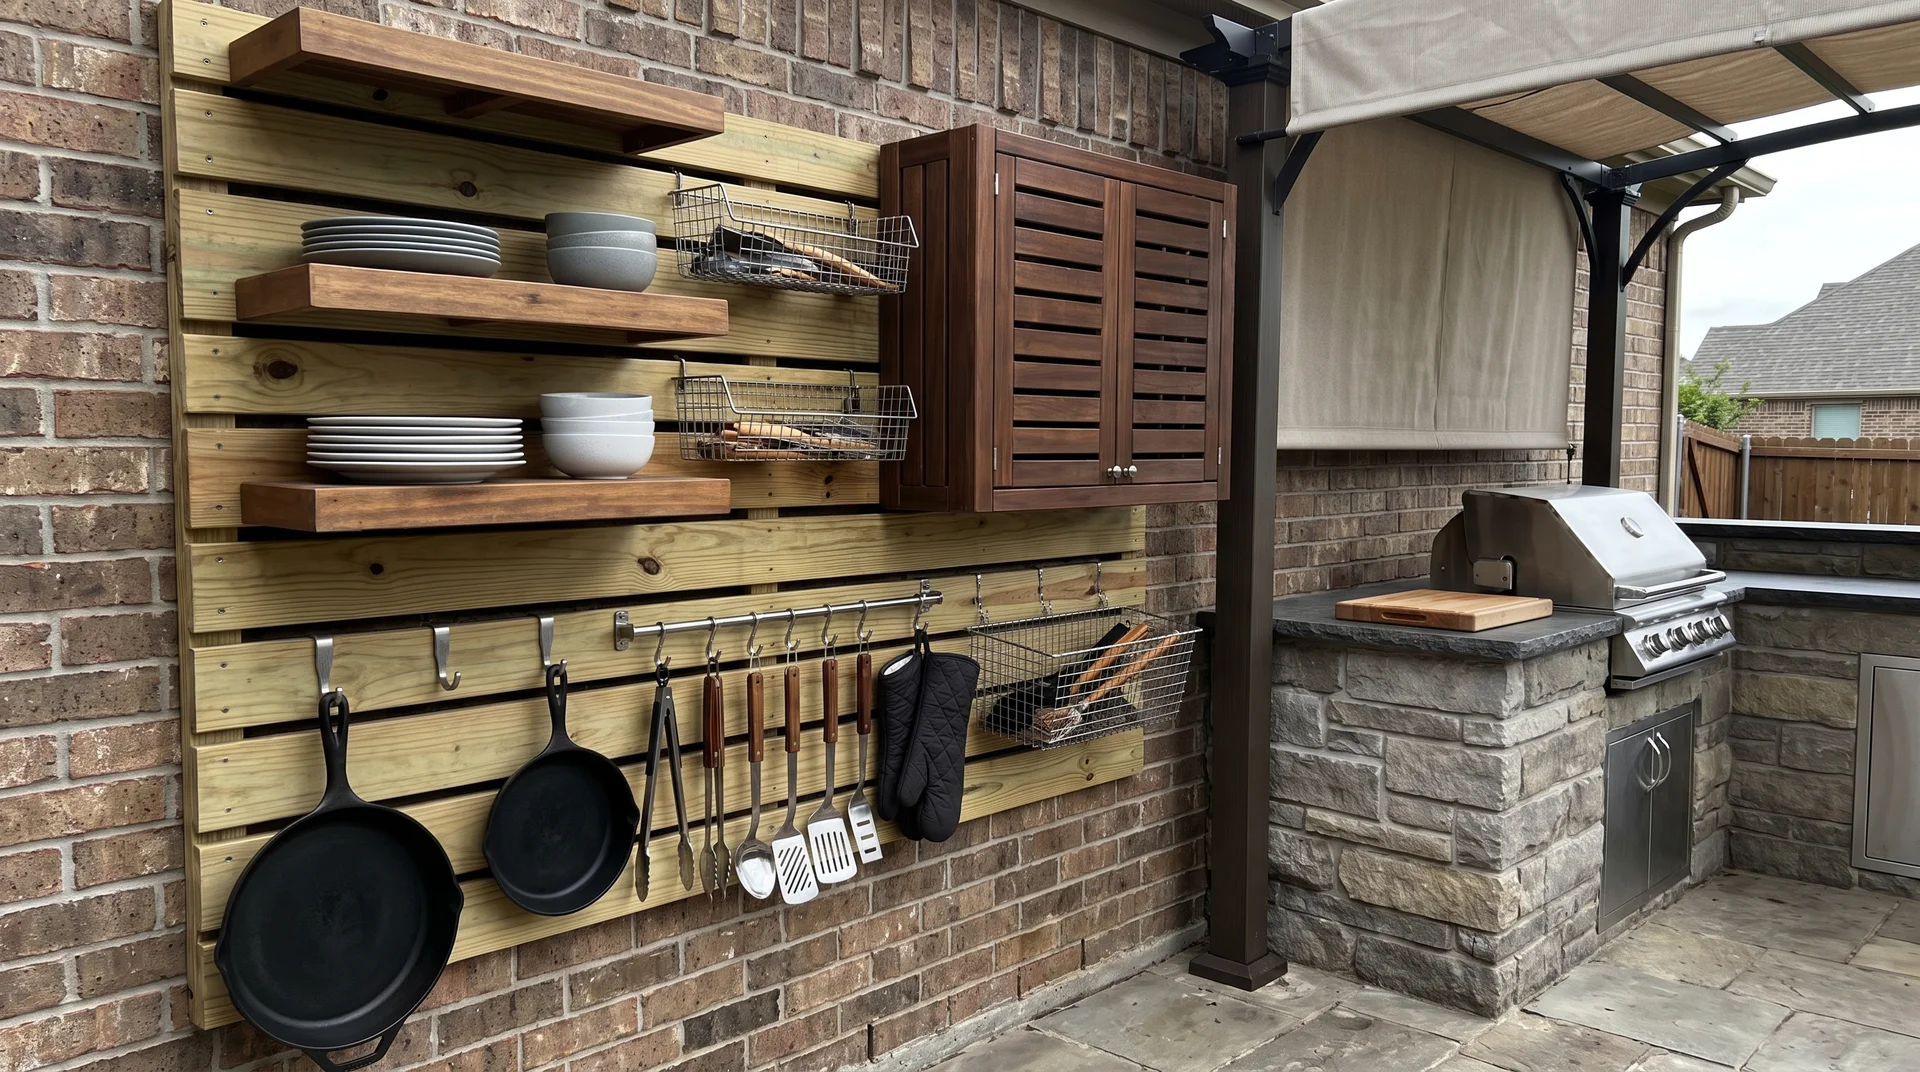
A storage wall helps you keep your outdoor kitchen tools organized and easy to reach. Add shelves, hooks, cabinets, or hanging racks to store cookware, utensils, and grilling supplies.
Use materials that can handle moisture and outdoor conditions without warping or rusting. Place frequently used items at eye level so you can grab them quickly while cooking.
This idea works well when you have limited floor space. Using your walls for storage keeps the outdoor cooking area cleaner and more functional.
24. Create a Kitchen With a Serving Counter
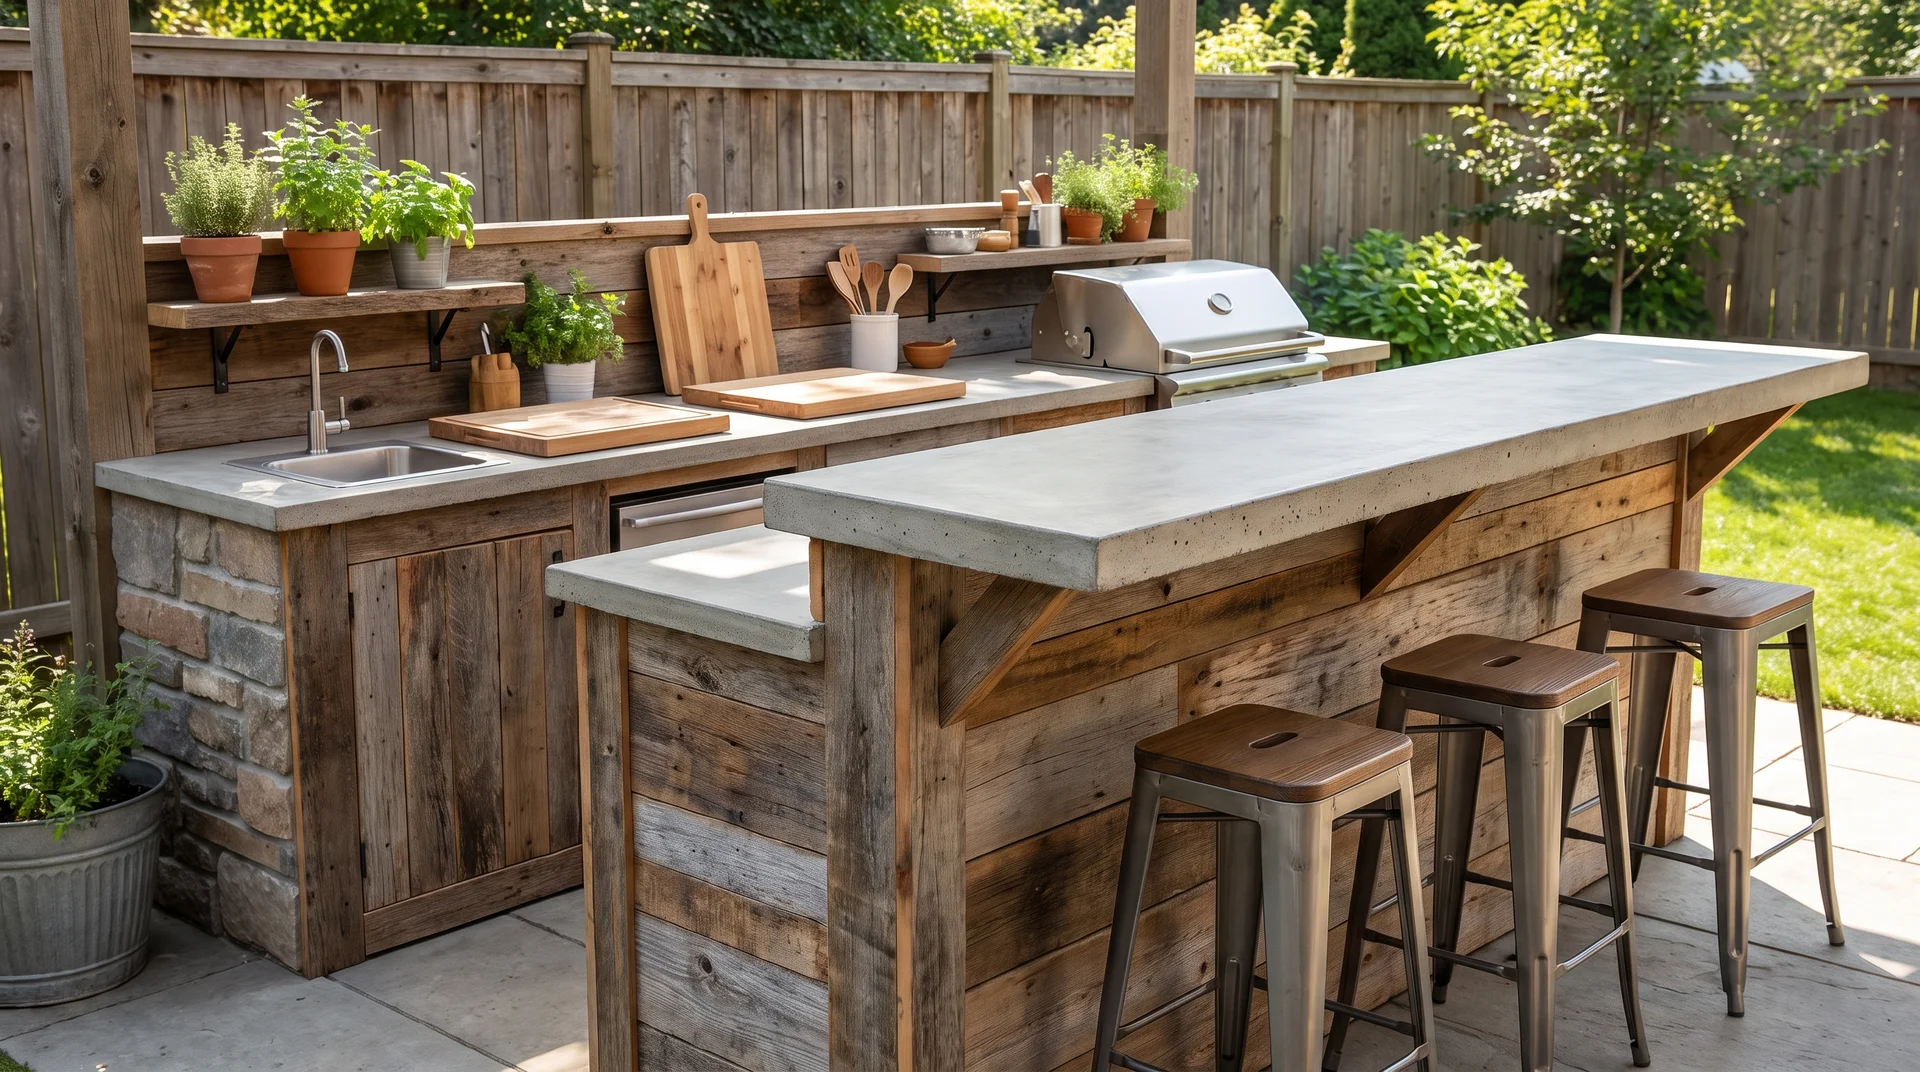
A serving counter gives you extra space for placing food and creates a spot where guests can sit. Build an overhang on the countertop if you want to add bar stools.
Choose a counter height that feels comfortable for both serving and seating. Keep enough room behind the counter so you can prepare food without feeling crowded.
This feature helps connect cooking and entertaining areas. Guests can stay nearby while you prepare meals and serve everything in one place.
25. Connect the Kitchen With an Outdoor Dining Area
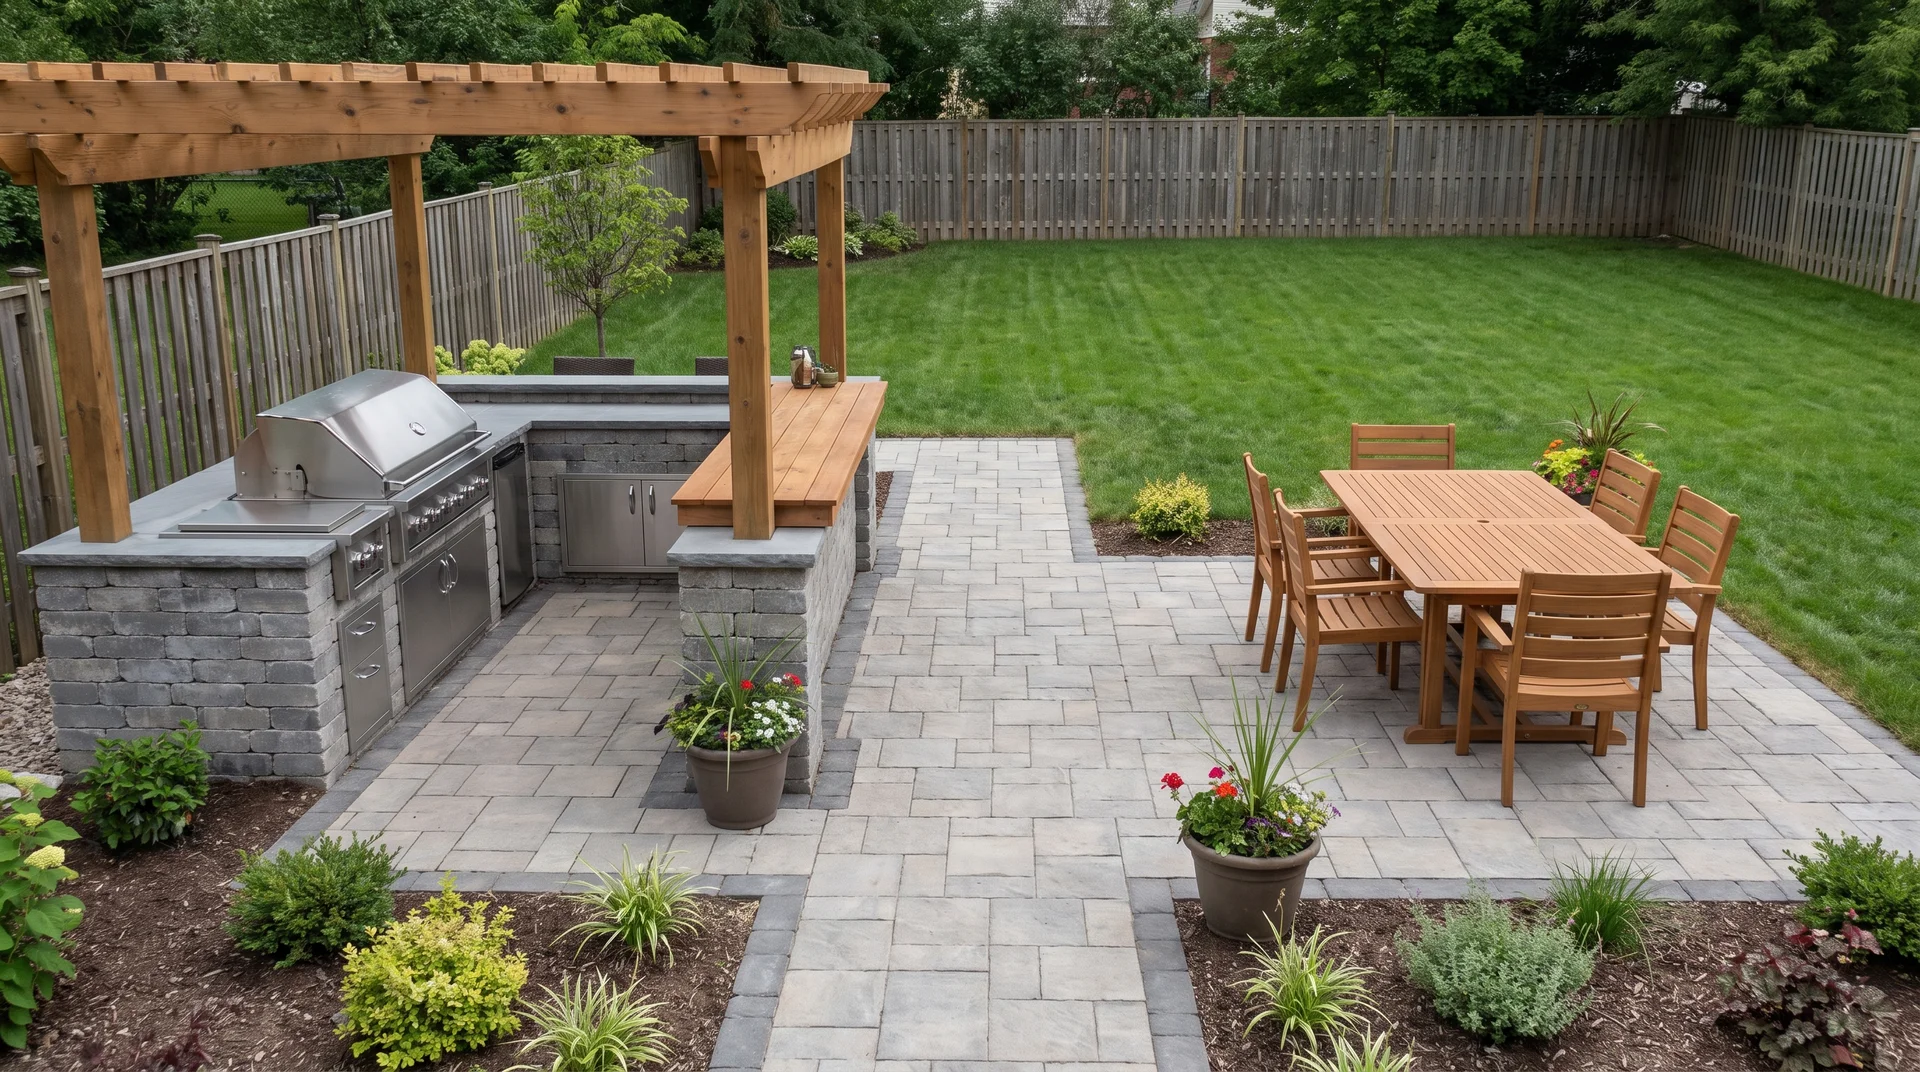
Connecting your outdoor kitchen with a dining area creates a smoother space for cooking and relaxing. Plan the layout so guests can move easily between the grill, serving area, and table.
Keep walking paths clear and avoid placing seating too close to heat sources. Use matching materials or design elements to make both areas feel connected.
A well-planned layout makes outdoor meals easier to manage. You can cook, serve, and spend time with guests without feeling separated from the gathering.
Choosing Your Build Method: Kits, Framed, Masonry, or Repurposed
The method you choose affects three things: cost, build difficulty, and lifespan. So match the method to your budget, your skill, and your weather. Below are the four that actually work.
| Build Method | Best For | Pros | Limitations |
|---|---|---|---|
| Prefab frame kits | Beginners who want a faster build | Pre-cut panels make assembly quicker and easier than building from scratch. | Less flexible because you follow the kit’s design. Costs more than raw materials. |
| Steel-stud and cement board frame | DIYers wanting durability and flexibility | Steel studs resist rot and warping, while cement board handles moisture. It allows custom layouts at a reasonable cost. | Requires proper installation. Use corrosion-rated screws to prevent rust issues. |
| Masonry and block builds | Permanent, long-lasting kitchens | Brick and concrete block create a strong structure that can last for years. | Harder for beginners. Needs proper footings, drainage, and masonry skills to avoid cracks. |
| Repurposed and portable builds | Budget projects and flexible setups | Old carts or cabinets can become affordable prep stations with little work. | Most pieces are not outdoor-rated and need sealing or protection to prevent damage. |
A cheap, easy method rarely lasts the longest. A method that lasts forever is rarely cheap or easy. You’re choosing where to sit between those three.
Utilities: What’s DIY and What Needs a Licensed Contractor
| Safety Note: Gas and electrical connections for an outdoor kitchen require a licensed contractor in most jurisdictions. Check your local permit requirements before running any line. |
Not every utility hookup belongs on your own to-do list. Here’s how I split it on real jobs:
- Electricity (contractor): outdoor kitchens need weather-resistant outlets on a GFCI circuit. Under NEC 210.8(A)(3), outdoor receptacles require GFCI protection, and that’s not a corner worth cutting yourself unless you’re a licensed electrician.
- Gas supply (contractor): gas lines need a properly sized run and an accessible shut-off valve. A bad gas connection is a fire risk, not a DIY learning opportunity.
- Water access (DIY-friendly with limits): a garden-hose hookup with a simple bar sink is reasonable to install yourself. Real plumbed drainage with a sewer tie-in is a licensed job.
- Roof or shade cover (DIY-friendly): a pergola or awning is one of the more approachable parts of the build for an experienced DIYer, provided you get post footings deep enough for your frost line.
- Drainage slope (DIY-friendly): sloping the base away from cabinets and appliances is a planning decision, not a licensed trade, but get it wrong and you’ll be dealing with standing water for years.
That split, DIY where the risk is low and licensed where it isn’t, is what actually keeps a weekend project from turning into an insurance claim.
Common DIY Outdoor Cooking Space Mistakes to Avoid
Most costly outdoor kitchen problems begin with poor planning, unsuitable materials, or rushed construction. Identifying these mistakes early helps prevent repairs and rebuilding.
| Common mistake | Why it causes problems | How to avoid it |
|---|---|---|
| Using unsuitable materials | Untreated wood may warp or rot, while non-frost-rated tiles and unsealed concrete can crack during changing weather conditions. | Select weather-resistant materials suited to local temperatures, rainfall, humidity, and freeze-thaw conditions. |
| Creating an undersized layout | Limited preparation space and poor appliance placement can make cooking uncomfortable and create safety issues near seating areas. | Leave enough counter space, maintain safe grill clearances, and plan comfortable movement between cooking zones. |
| Overbuilding a small yard | Adding too many cooking, storage, and dining features can make the area feel crowded and difficult to use. | Prioritize essential features and maintain clear pathways around appliances, counters, and seating. |
| Planning utilities too late | Installing water, drainage, gas, or electrical connections after cladding may require removing walls and counters. | Finalize utility locations before building the frame or installing exterior finishes. |
| Cutting structural corners | Weak framing, poor foundations, and rushed construction can cause movement, cracking, moisture damage, and complete rebuilding. | Use a stable foundation, moisture protection, suitable framing materials, and qualified professionals for electrical or gas work. |
Careful material selection, practical spacing, early utility planning, and strong construction create a safer outdoor cooking space that remains functional through changing weather.
Conclusion
Building a DIY outdoor kitchen comes down to choosing the right build method, planning the layout, and adding features that match how you use the space.
I have found that simple choices, like picking the right materials and avoiding unnecessary features, can make a big difference in the final result.
If you were wondering how to create an outdoor cooking area without overspending, the key is starting with a design that fits your space, skills, and budget.
Start by measuring your available space and choosing a build style that works best for your backyard.
Frequently Asked Questions
What is the cheapest way to build an outdoor kitchen?
The cheapest route is a repurposed or steel-stud base clad in cement board, paired with poured concrete or tile counters instead of stone. Building on an existing patio removes the slab cost, and using a grill you already own removes the largest appliance expense the two biggest line items in most builds.
Is it cheaper to build or buy an outdoor kitchen?
Building is usually cheaper when you supply the labor and choose a framed or kit base, since professional installs and prefab luxury units carry steep markups. Buying makes sense if you lack tools, time, or want warranties. For most budget-minded DIYers, a self-built or kit kitchen costs meaningfully less.
What is the cheapest way to cover an outdoor kitchen?
The most affordable cover is a simple pergola or a lean-to roof attached to an existing wall, built from pressure-treated lumber with metal or polycarbonate panels. A shade sail costs even less but only blocks sun, offering no rain protection or long-term weatherproofing for your appliances.
Do you need special outlets for an outdoor kitchen?
Yes. Outdoor kitchens need weather-resistant (WR) outlets protected by a GFCI breaker to guard against moisture and shock, and appliance wiring should be rated for outdoor use. Most areas require this by code, so confirm local rules and consider a licensed electrician for any permanent connections.