
Giving your chandelier a new look doesn’t have to cost much. A simple DIY makeover using paint, parts, or simple design changes can bring life back to an old fixture.
Many people have chandeliers that feel dated or don’t match the room. Instead of buying a new one, updating what you already have can save money and feel more personal.
Lighting is one of the first things people notice in a room. A chandelier can help set the mood, brighten the space, and bring everything together.
By choosing a hands-on project, you can match your style, control your costs, and make your light fixture feel fresh again. This guide will show you how, step by step.
Chandelier Before and After: A Visual Transformation
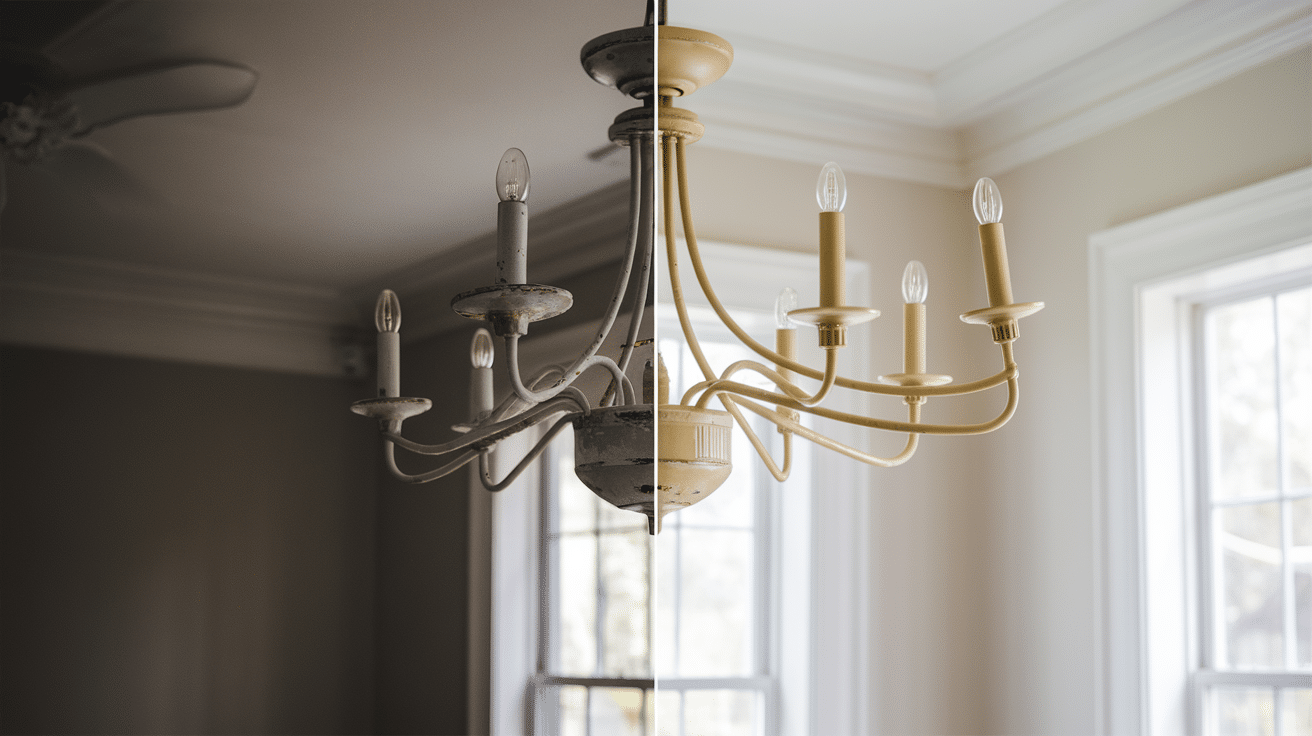
A chandelier makeover can bring a big change with just a few small updates. Seeing the difference side by side makes the results feel even more exciting and real. Let’s look at how the updates can change not just the light but the whole room.
1. Showcasing the Makeover
Before the makeover, many chandeliers may look worn, too shiny, or out of place. They might not match the rest of the room or feel too old for your style. This is why showing the “before” matters—it highlights how much you can change.
Once updated, the chandelier will look fresh and more suited to the space. With paint, new bulbs, or added accents, it becomes a key part of the room again. The “after” view helps others see the value of this small project.
Photos side by side help tell the full story. You see the old look fade and the new one take over. It’s a powerful way to show what DIY can do.
Sharing your results with others also helps them feel inspired. If you can do it, so can they—and that’s part of what makes it all feel worth it.
2. Immediate Impact on Space
A chandelier isn’t just a light—it’s a main feature. When it’s updated, it can pull the whole room together and make the space feel fresh without the need for major changes.
After a makeover, the light often feels softer, warmer, or more balanced. It may also match the walls, furniture, or overall style much better. This one change can improve the whole room’s feel.
Guests will notice the difference right away. They might not even realize what changed—they’ll feel that the room looks better. That’s the power of light in any space.
A simple fix can bring new life to your room, adding beauty and purpose. That’s why this project can be so rewarding.
Planning Your Chandelier Makeover

Before you get started, take time to plan your chandelier project. A little thought upfront can save time and money later.
1. Assessing Your Current Chandelier
Start by taking a close look at your chandelier. Is it working well? Are there broken or missing parts?
Think about the shape, size, and color. Ask yourself if it fits your room’s style. If not, think about what you’d like to change.
It helps to take a few photos from different angles. This gives you a clear view of what needs attention. Keep the pictures for reference as you plan.
You don’t have to change everything. Sometimes, just a fresh color or updated bulbs are enough. The goal is to make it feel right for your space.
2. Setting a Budget and Timeline
Knowing how much you want to spend makes planning easier. It keeps you from buying too much or going off track. Set a number and try to stick to it.
Write down what you need—paint, tape, bulbs, tools. Then, look at local stores or online prices to get an idea. This will help you plan smarter.
Then, think about how long the project will take. Will you work on it in one day or spread it out over a weekend? Block out time when you won’t be rushed.
Planning this way keeps things clear, helps you enjoy the process without stress, and gives you the best chance for a smooth result.
Materials and Tools Needed
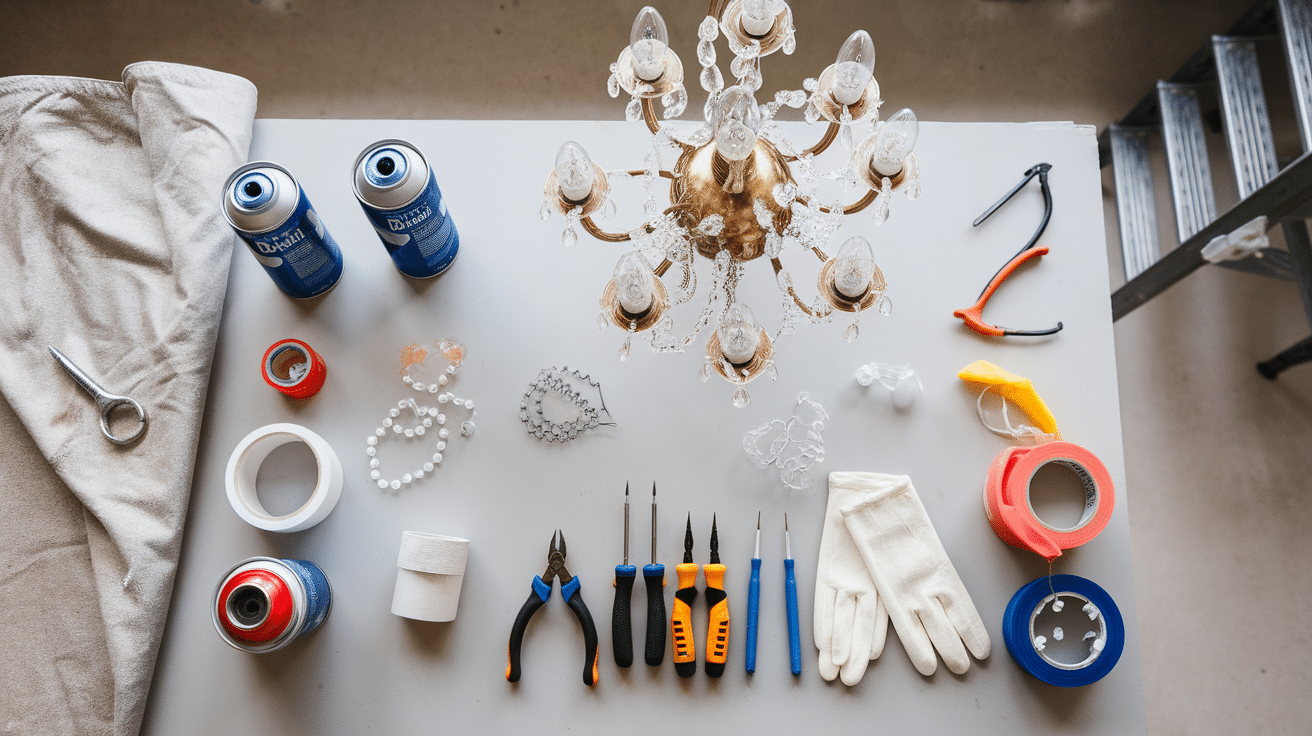
Before you start your chandelier makeover, it’s helpful to gather everything you need. Having the right supplies and tools ready will make the process faster and easier.
-
Screwdrivers (flathead and Phillips)
-
Pliers (needle-nose are best)
-
Wire cutters
-
Drop cloth or old sheet (to protect the floor)
-
Painter’s tape (to cover parts you don’t want to paint)
-
Safety gloves
-
Safety glasses
-
Step stool or ladder
-
Paint: spray paint or metal-safe paint works best.
- Small decorations like beads, faux crystals, or new bulb covers
Always turn off the power before working with any wires or bulbs. Use gloves when handling sharp or metal parts. Keep all tools in one spot so you don’t waste time looking for them.
These tools help you finish the job with less stress. They also help you stay safe while working overhead or with wires. A little prep goes a long way.
Step-by-Step Makeover Process
This section walks you through each part of the chandelier makeover. Taking your time with every step will help you get the best results and keep things safe.
1. Preparation and Safety Measures
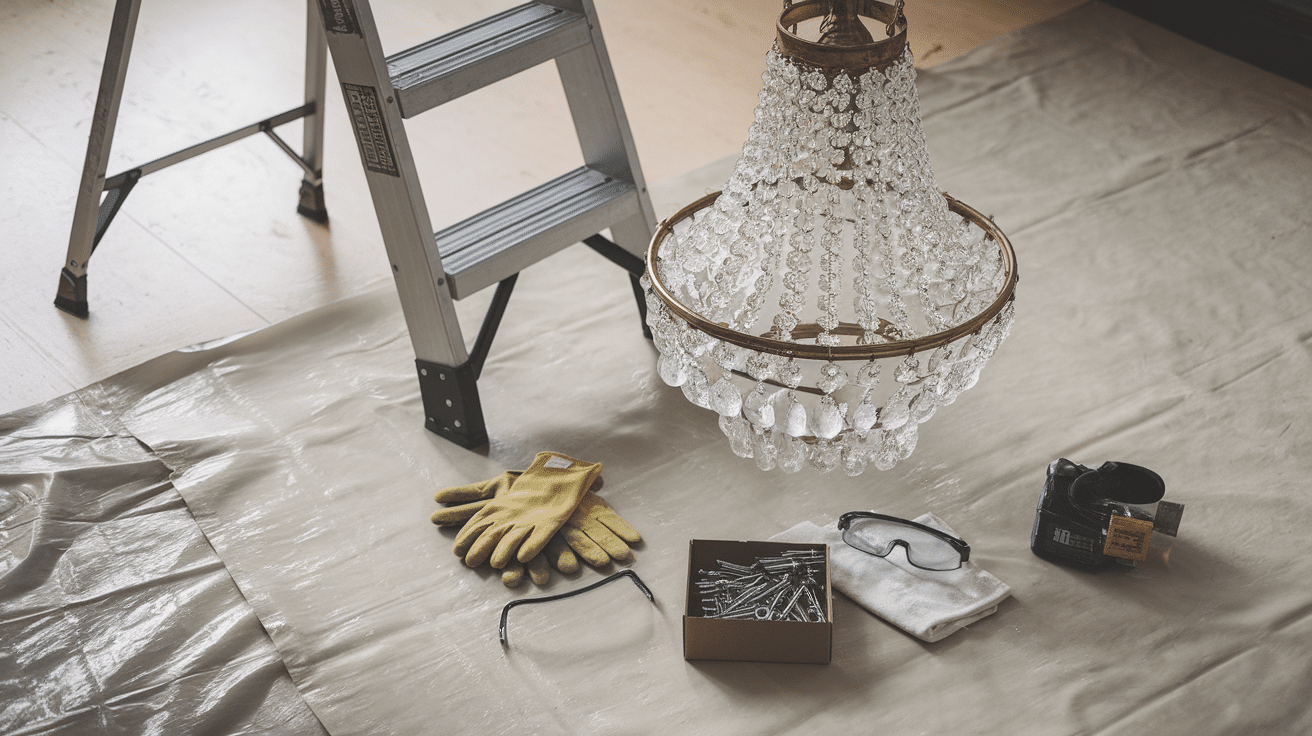
Before you begin, make sure the power to the chandelier is turned off at the breaker. This will keep you safe from electrical shock. After turning off the power, double-check by flipping the light switch.
Use a sturdy ladder to reach the fixture. Wear gloves to protect your hands from sharp edges or wires. Safety glasses are also helpful if you’re working above eye level.
Lay a drop cloth under the chandelier to catch any dust or parts. Keep a box or tray nearby to hold screws and small pieces. This keeps your space clean and organized.
Good safety habits make the whole project smoother. Don’t rush this step. A few minutes of care now can prevent accidents later.
2. Disassembly and Cleaning
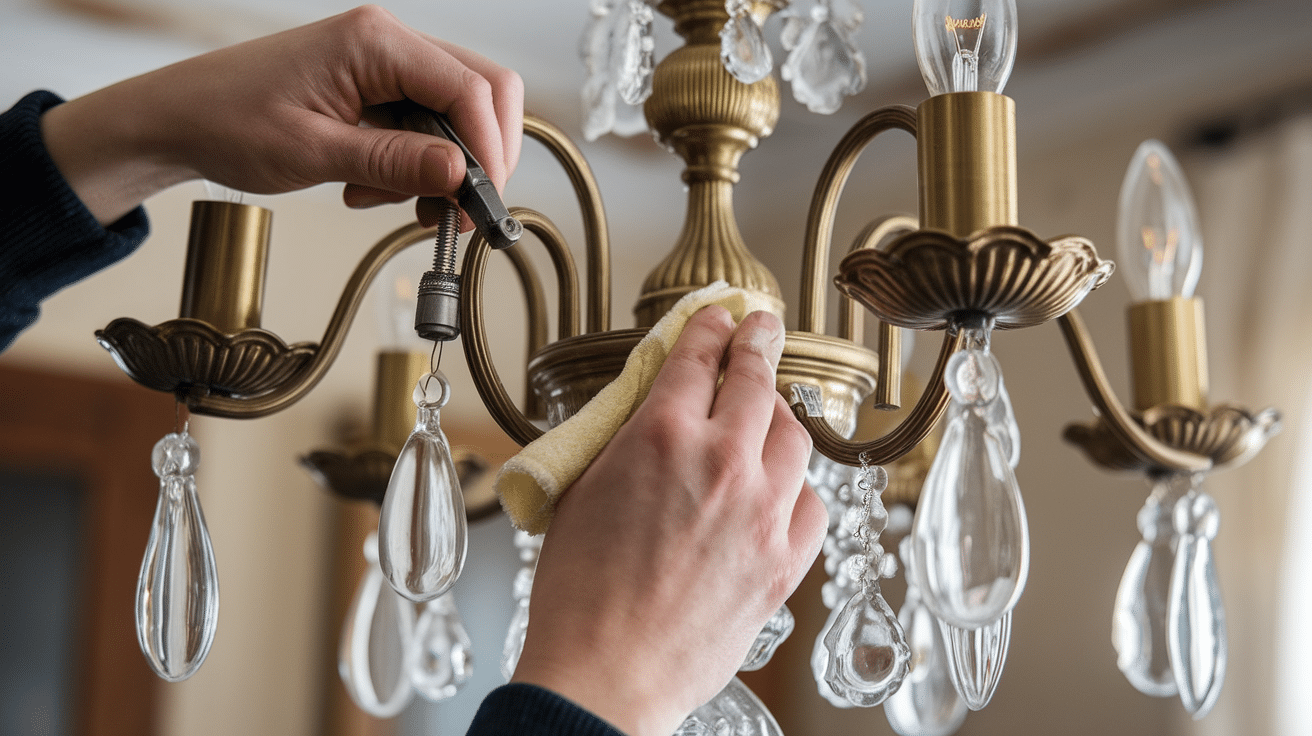
Start by removing the bulbs and setting them aside in a safe place. Gently unscrew each part, using the right tools to avoid damage. Group all parts together to keep track of them.
Wipe down every surface with a damp cloth or mild cleaner. If the chandelier is dusty or greasy, warm water and dish soap work well. Let all parts dry fully before moving on.
Avoid harsh chemicals that could damage finishes or wires. A toothbrush or soft brush helps get into small spaces. Cleaning now helps the new paint stick better later.
Disassembling and cleaning take time but are worth the effort. You want a clean base before making any changes. It helps your makeover last longer and look neater.
3. Painting and Finishing Techniques
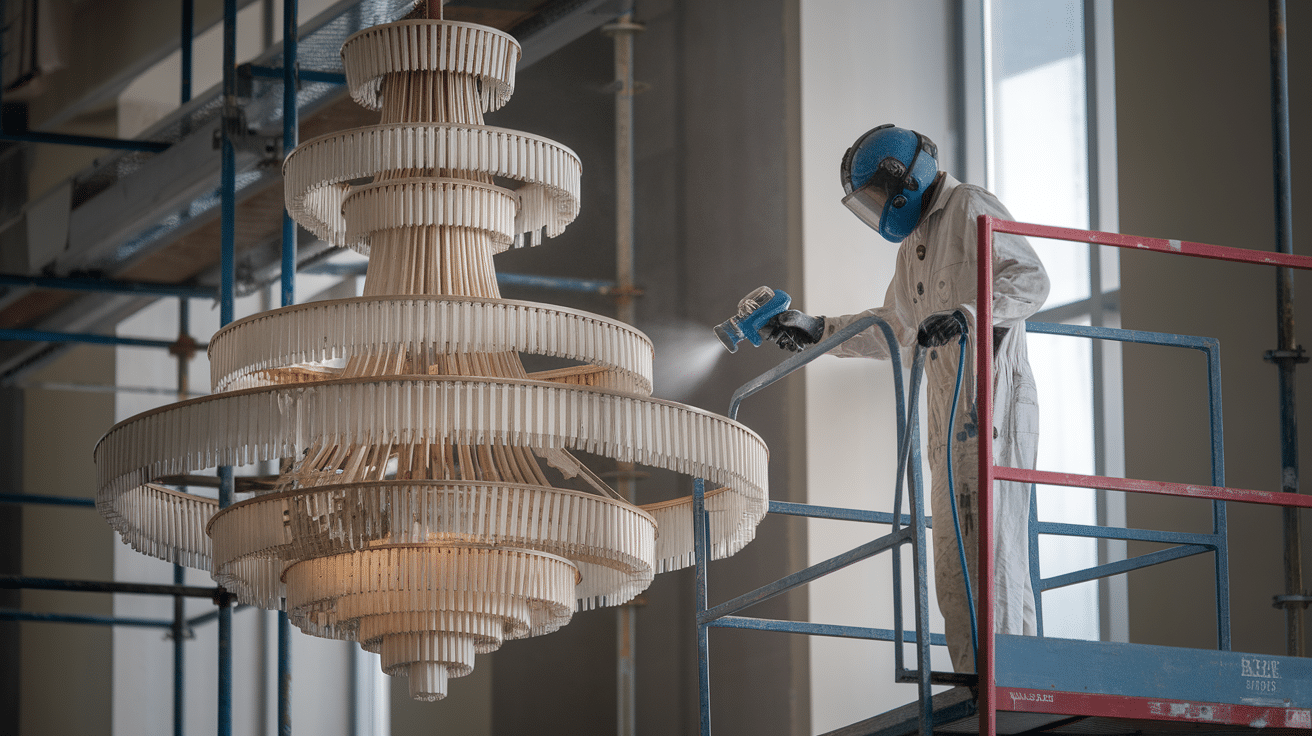
Depending on your chandelier, choose a paint that works on metal or glass. Spray paint is quick and even, while brush-on paint gives more control. Please read the label to make sure it’s safe for light fixtures.
Apply paint in thin layers, letting each coat dry fully before adding another. This keeps it from dripping or peeling later. Use painter’s tape to cover areas you want to keep unpainted.
If you want a smooth finish, sand lightly between coats with fine-grit sandpaper. For a brushed look, use a sponge brush or dab gently with a cloth. Be creative, but keep it simple.
Let the painted parts dry for at least 24 hours before reassembly. Don’t rush this step—dry paint will last longer and look better. Patience makes a big difference.
4. Reassembly and Installation
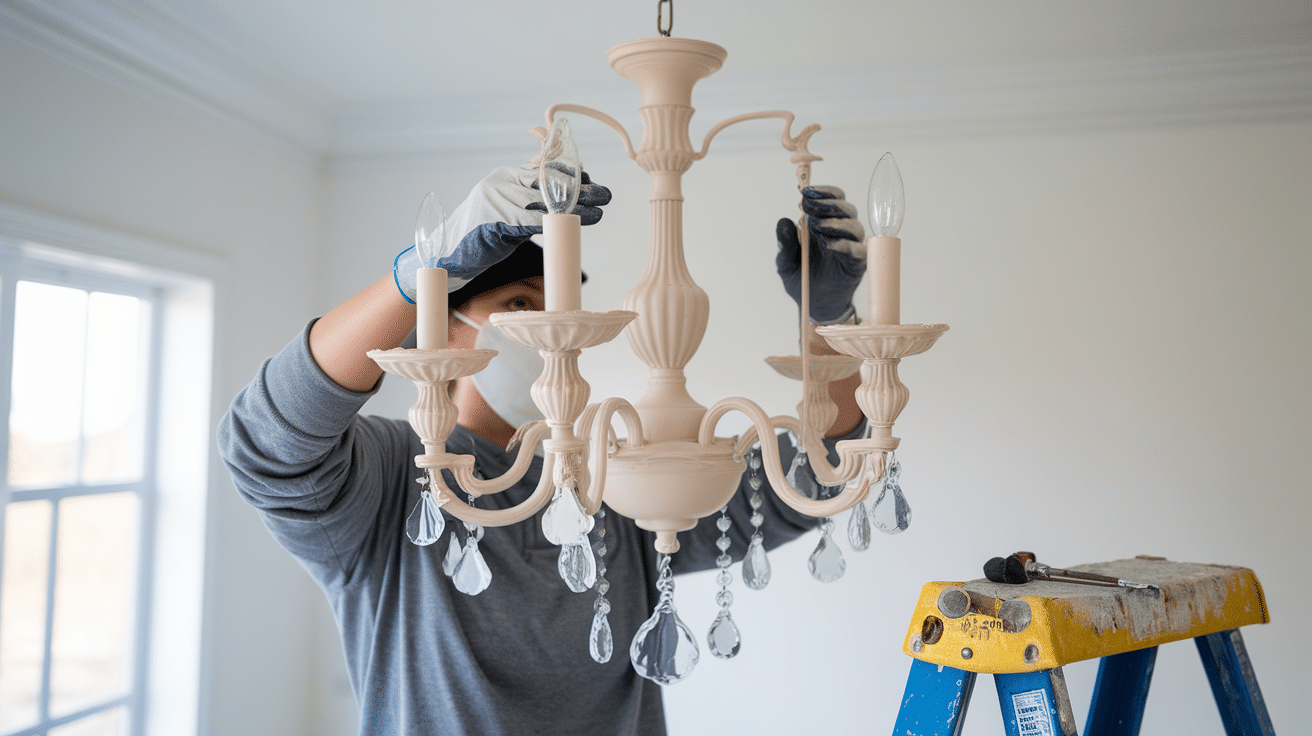
Once everything is dry, start putting the chandelier back together. Begin with the frame, then add arms, screws, and decorative parts. Use your saved screws and notes to guide the process.
Be gentle when handling freshly painted surfaces. Use gloves to avoid fingerprints or smudges. Make sure each part is tightly secured.
When finished, install the chandelier back into its mount. Connect the wires carefully, or ask someone with experience if you’re unsure. Turn the power back on only after checking everything twice.
Stand back and take a look—you’ve just finished your makeover. The new look should feel fresh, clean, and just right for your space. Enjoy the glow of your hard work.
Styling and Integration into Your Space
Now that your chandelier has a new look, it’s time to fit it into your room. Small styling choices can help the fixture blend in and shine at the same time.
1. Coordinating with Existing Décor
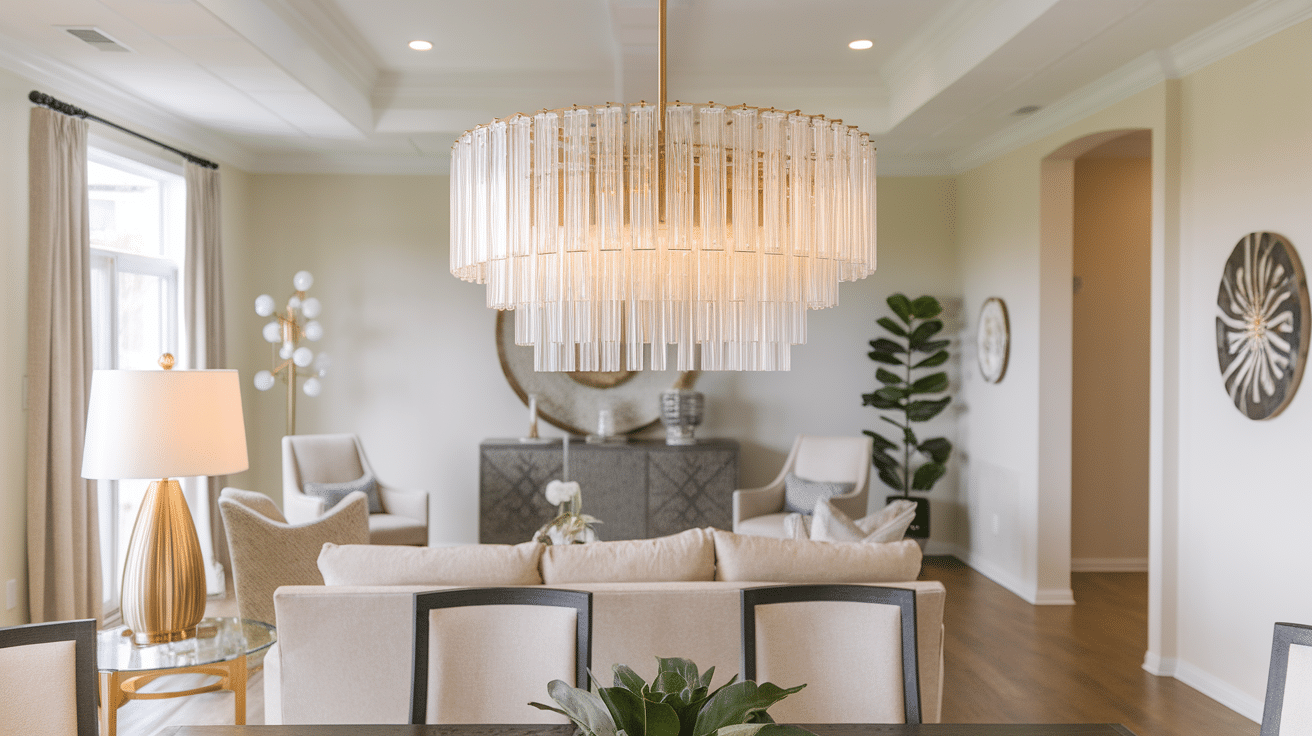
Look at the colors, textures, and shapes already in your room. Match the chandelier’s finish or design to what you already have. This helps everything feel like it belongs together.
If your room has warm tones, a gold or bronze chandelier may fit best. For cooler tones, silver or black can work well. Neutral finishes like white or cream go with almost anything.
You can also add small accents that match the chandelier, like pillows, frames, or table items. This ties the room together without making big changes. A few touches go a long way.
A well-matched chandelier adds balance to the space. It brings focus without feeling out of place, which is the key to a clean, finished look.
2. Enhancing Ambiance with Lighting
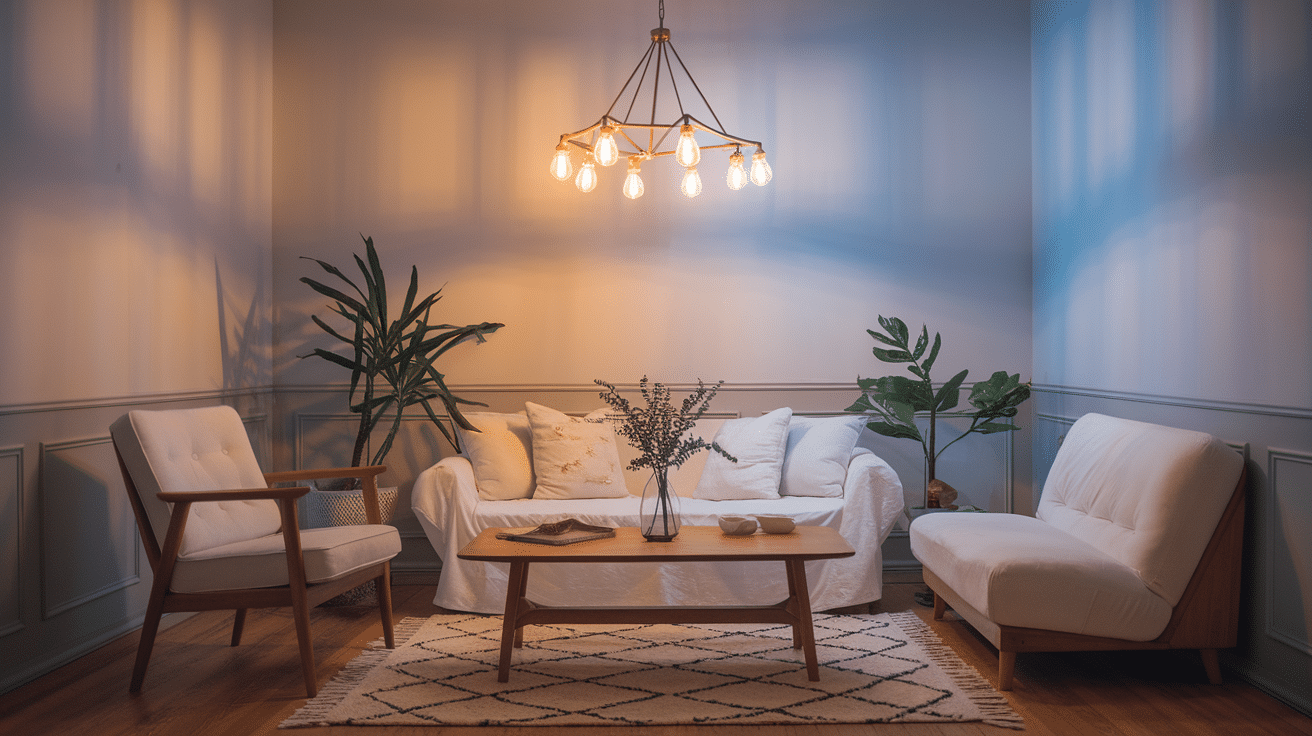
Lighting affects how a room feels. A chandelier can create soft light that makes the space feel calm and welcoming. Use bulbs that fit the mood you want—warm for cozy, white for bright and clear.
If your chandelier has dimmable lights, adjust them based on time or activity. Lower light feels calm for dinners or rest, while brighter settings work better for reading or hosting.
Light placement also matters. Make sure the chandelier hangs at the right height so the room feels open and balanced. It should light the area without feeling too low or too high.
When styled right, your chandelier sets the mood every day. It adds beauty, comfort, and purpose—all in one place. That’s the true value of good lighting.
Maintenance and Care
Keeping your chandelier clean and in good shape will help it last longer and look nice over time. With simple care, you can keep it shining without much effort.
1. Routine Cleaning Tips
Dust and dirt can build up quickly, especially on light fixtures. Regular cleaning helps your chandelier stay bright and safe to use.
Here are some easy tips to follow:
-
Turn off the power before cleaning.
-
Use a dry microfiber cloth or soft brush to dust the surface.
-
For deeper cleaning, dampen a cloth with water and wipe gently.
-
Clean glass parts with a mix of water and mild dish soap.
-
Avoid spraying anything directly on the fixture.
-
Dry all parts fully before turning the light back on.
Cleaning every few weeks makes the job easier. It keeps the light looking clear and helps it work better, too.
2. Addressing Wear and Tear
Over time, parts of the chandelier may get loose or worn. Keeping an eye out for small problems helps prevent bigger ones later.
If screws or arms feel loose, tighten them gently with the right tool. Replace missing crystals or covers as needed. Touch up chipped paint with a matching color.
If a bulb flickers or doesn’t work, check the wiring or swap it for a new one. For safety, be sure to use the correct bulb type. If the issue continues, ask for help from someone with experience.
Taking small steps like these keeps your chandelier strong, helping you enjoy the makeover for years to come.
Conclusion
Taking on a chandelier makeover at home is a smart and simple way to improve your space. You don’t need to spend much to make a big difference.
DIY projects like this can be rewarding. You get to create something with your own hands, which makes the final result even more meaningful.
Don’t be afraid to try it yourself. Start small, follow the steps, and enjoy the process. You might be surprised at what you can do.
If you’ve completed your own makeover, share it with others. Before-and-after photos help inspire new ideas, and your story could give someone else the push they need to get started.
DIY is all about learning, doing, and creating something that feels just right.
Frequently Asked Questions
How much does a DIY chandelier makeover usually cost?
Most makeovers cost $20 to $100, depending on the materials used. Using items you already have can lower the cost. Simple changes like painting or new bulbs keep it budget-friendly.
Do I need to take the chandelier down to paint it?
It’s safer and easier to take it down, especially if painting the whole fixture. If that’s not possible, turn off the power and cover nearby surfaces before painting in place.
What kind of paint should I use on a chandelier?
Spray paint made for metal works best. Choose one with a smooth finish and made to handle heat. Always read the label before use.
Can I update a chandelier without using paint?
Yes, you can add new bulbs, covers, or decorations. Swapping out crystals or adding small touches can give it a fresh look. Cleaning alone also makes a big difference.
How do I know if my chandelier is safe to work on?
Check for loose ends, cracked parts, or rust. If the fixture feels unstable, ask someone with electrical experience before starting. Always turn off the power before handling it.