
I needed something practical and stylish for hanging blankets and towels, but store-bought ladders were pricey.
So, I built my own! It turned out better than I expected and added instant charm to my space.
Whether you’re going for a rustic farmhouse look, a sleek modern design, or just need functional storage, making your own ladder is totally doable. You don’t need fancy tools or a huge budget – just a little time and creativity.
In this blog, I’ll walk you through design ideas, helpful tips, and everything I learned along the way.
Want to personalize your space without spending a fortune? Grab your tools, pick your favorite style, and start building today.
You’ll be surprised at how much a simple DIY ladder can transform your home.
Let’s get started, your perfect ladder project awaits!
Why DIY a ladder?
DIY ladders are affordable, customizable, and surprisingly easy to make.
Whether you want extra storage or a stylish accent, building your own lets you choose the size, finish, and function, perfect for adding charm and practicality to any space.
- Save Money: Building your own ladder is significantly cheaper than buying one from a store. You can use affordable lumber or even scrap wood, making it a great budget-friendly home upgrade.
- Customize to Fit Your Space: DIY lets you control the height, width, and finish to suit your specific space. Whether you need a slim ladder for a narrow wall or a tall one for ceilings, it’s tailored.
- Match Your Decor Style: Choose your own materials, stains, or paint to match your room’s look. From farmhouse rustic to sleek minimalist, DIY ladders adapt beautifully to any home décor style.
- Add Functional Storage: Ladders aren’t just decorative – they’re smart storage solutions. Hang blankets, towels, or even small baskets to reduce clutter while adding character to bedrooms, bathrooms, or living rooms.
- Satisfy Creative Urges: It’s a rewarding DIY project that boosts creativity. Designing and assembling your ladder offers hands-on satisfaction and is simple enough for a weekend hobby.
- Reuses and Upcycles Materials: Old wood, leftover paint, or reclaimed lumber can all be used – great for the planet and your wallet. Upcycling adds charm and reduces waste in creative ways.
- Makes a Great Beginner DIY Project: No complicated cuts or joinery required. With basic tools and materials, you can complete a ladder quickly, gaining confidence in woodworking with a project that’s both practical and stylish.
DIY Ladder: Step-By-Step Guide
This step-by-step guide walks you through the entire process of building a DIY ladder – from preparing your materials and making precise cuts to assembling and finishing your piece.
Materials Used
Everything you need for this project is easy to find and budget-friendly, making it perfect for beginners looking to create something useful and stylish without overspending.
- Two 2x3s (8 feet long): For the side rails of the ladder
- 1¼-inch round wood dowels (6½ feet): Cut into rungs
- Wood glue: For securing dowels in holes
- Painter’s or masking tape: To guide drill depth
- 1¼-inch spade drill bit: For drilling round holes
- Miter saw: To cut the wood to size and angles
- Hammer or mallet: To gently tap dowels into holes
- Square & measuring tape: For accurate hole alignment and spacing
- Sandpaper (optional): To smooth wood before finishing
Step 1: Cut the Lumber
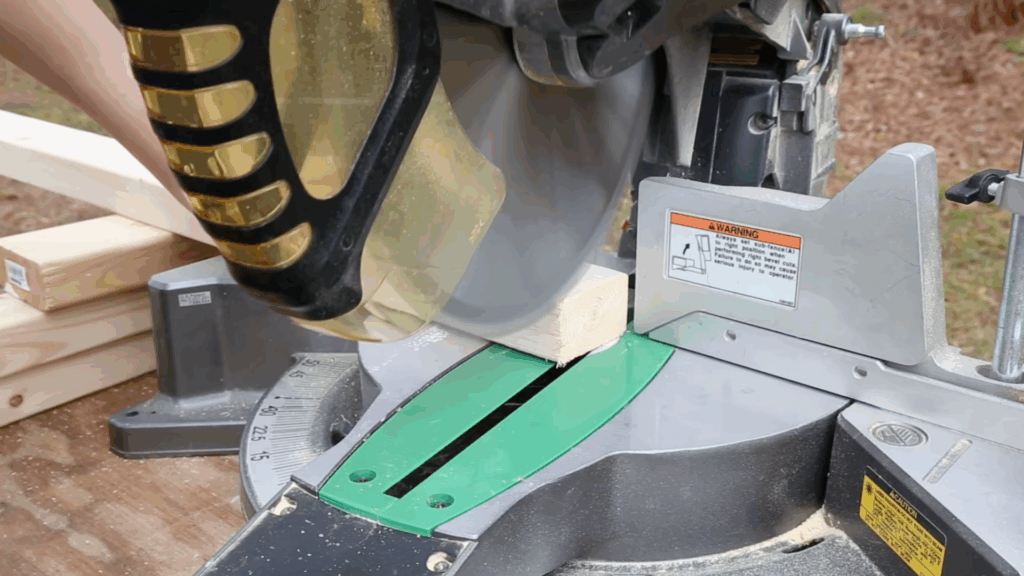
Start by cutting two 2×3 boards to 76 inches long. For better wall support, cut the bottom of each board at a 10° angle.
Next, take your 1¼-inch round wood dowels and cut four pieces, each 18½ inches long.
These will serve as the ladder rungs. Ensure your cuts are smooth and even to achieve a snug and professional-looking fit in the next steps.
Step 2: Mark the Drill Holes
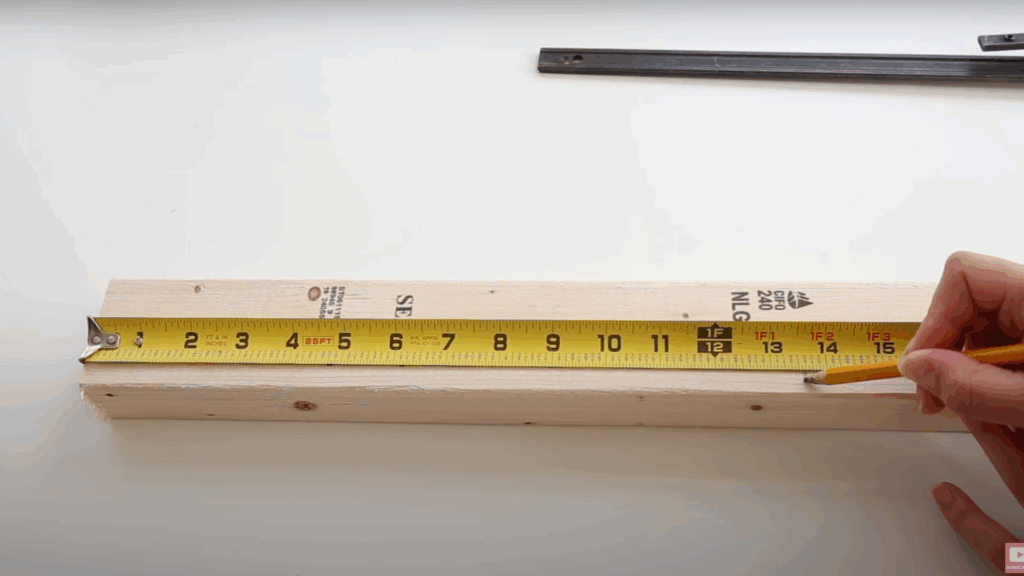
Measure 13⅝ inches down from the top of one side rail and mark a line.
Then, measure 1¼ inches in from the side edge to find the hole’s center.
From this mark, measure down 14¼ inches to mark the next hole, repeating until four holes are evenly spaced.
Use a square for accuracy. Repeat this process on the second 2×3 to mirror the first piece.
Step 3: Drill the Holes
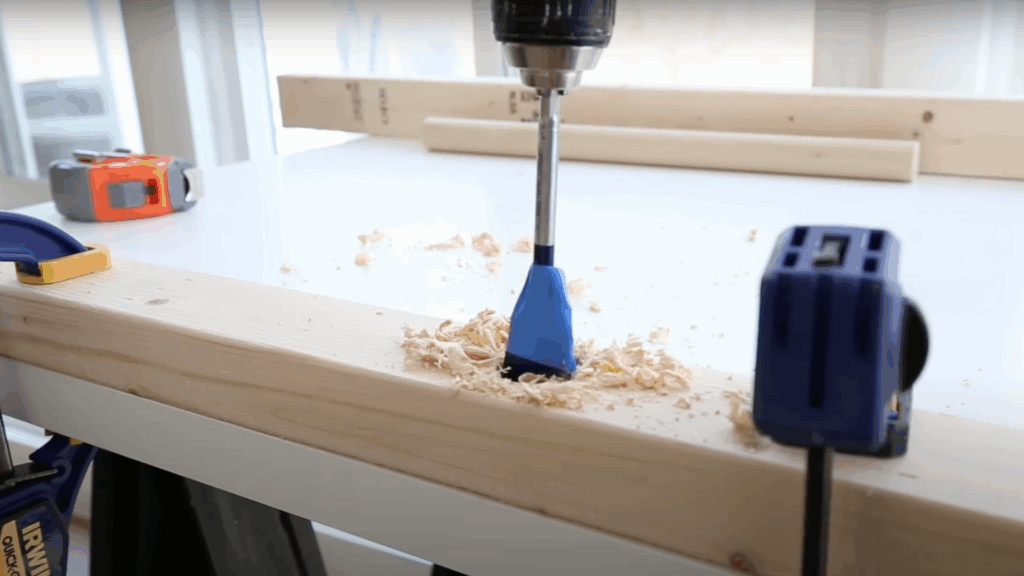
Wrap painter’s tape ¾ inch from the tip of your 1¼-inch spade drill bit to guide depth.
Clamp the wood to prevent slipping, align the bit with your center marks, and drill down until you reach the tape. This ensures consistent, shallow holes that tightly grip the dowels.
If you’re new to spade bits, try practicing on a scrap board first before working on your actual ladder pieces.
Step 4: Attach the Dowels
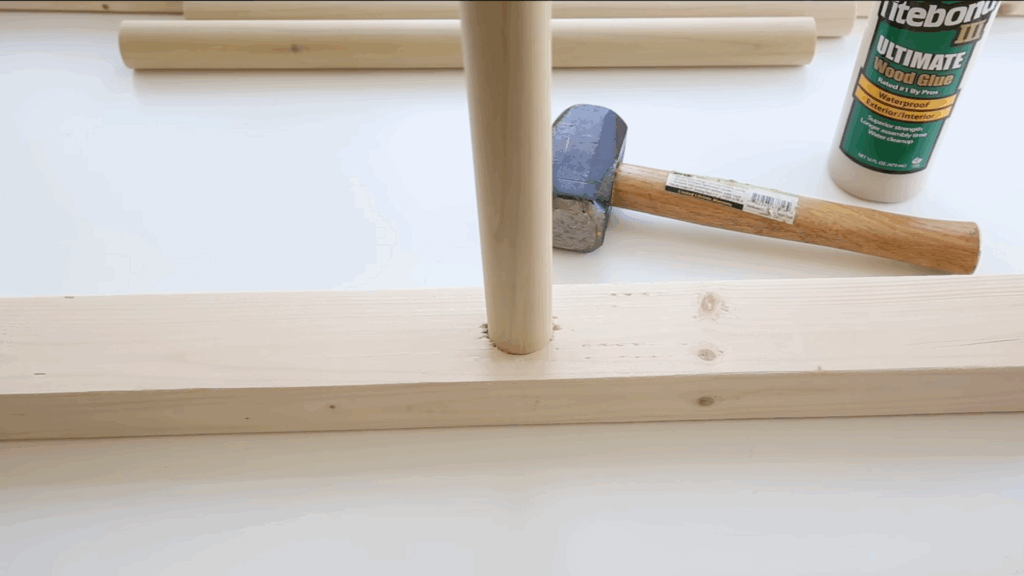
Apply wood glue inside each hole on one side piece and to the ends of your dowels.
Insert the dowels one by one, gently tapping them with a mallet to seat them snugly.
Once all four are in, repeat the gluing and tapping process with the second side piece.
Make sure everything lines up evenly before the glue sets, and wipe off any excess for a clean finish.
Step 5: Finish and Customize
Once the glue is dry, sand the wood for a smooth, splinter-free surface. Apply your desired finish – paint, stain, or a weathered effect like Angela’s “burnt gray” look.
Let it fully dry before using. This step adds charm and helps the ladder blend with your home decor.
Customize it further with hooks or embellishments, or leave it simple for a clean, minimal design.
Recommended: Watch the step-by-step video tutorial on YouTube by @AngelaMarieMade for a clearer view of each process. It’s perfect if you prefer to follow along visually – just hit play and build with confidence!
Stylish Ladder Ideas for Every Home
I love how DIY ladders can add both style and storage. From rustic charm to modern looks, these creative ideas fit any room and show off your taste while staying practical.
1. Rustic Ladder for a Farmhouse Vibe
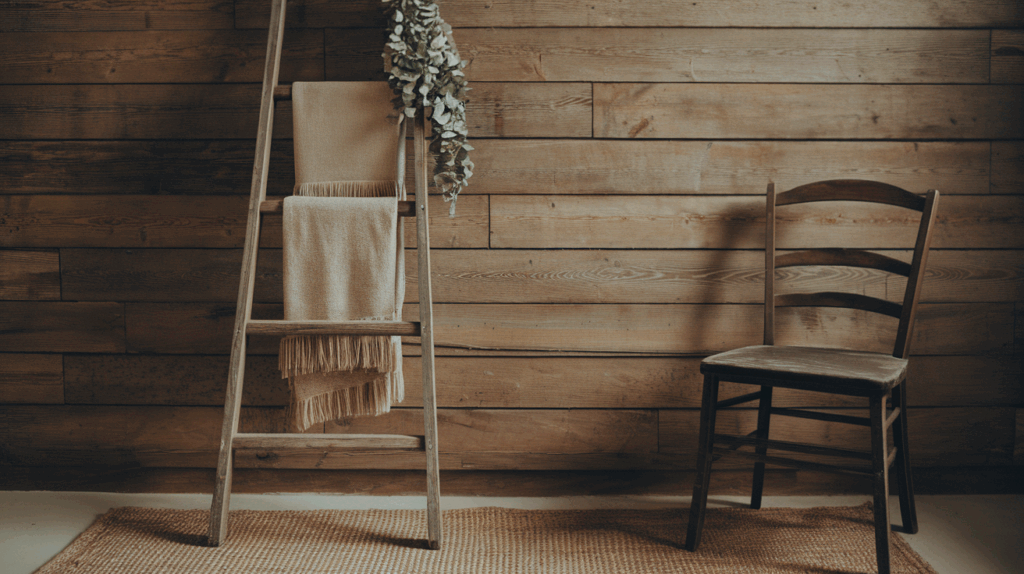
Create a cozy, country-inspired accent with a rustic ladder made from distressed wood. Use sanding, staining, or dry brushing to achieve a timeworn finish.
This style blends beautifully with farmhouse or neutral decor. Hang throws, wreaths, or dried herbs to complete the look. It’s a charming way to bring warmth and texture into your space.
2. Modern Minimalist Ladder
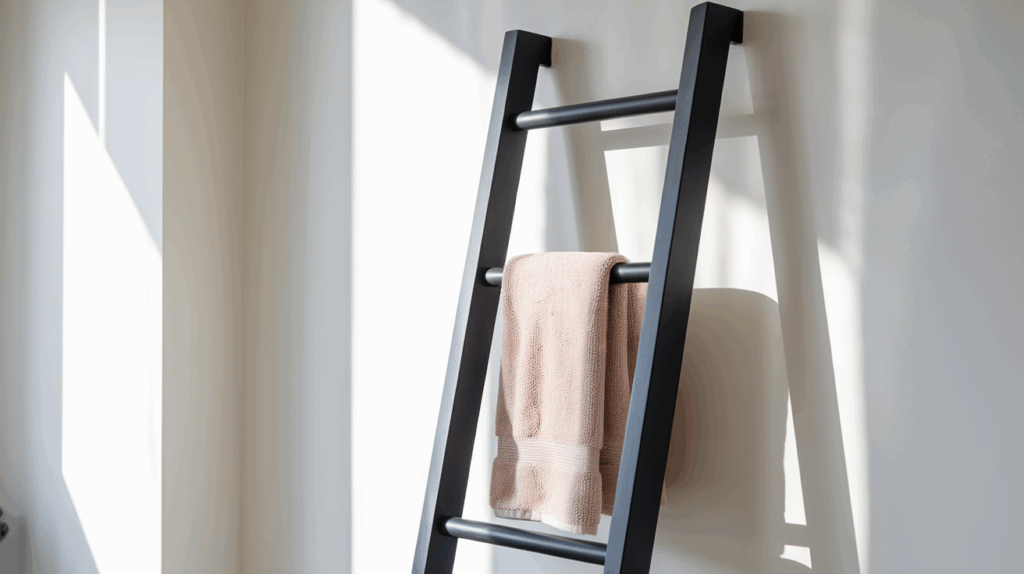
For a sleek, uncluttered vibe, build a minimalist ladder using slim, sanded wood and a smooth, neutral finish – think black, white, or natural clear coat.
Perfect for contemporary spaces, it doubles as a towel rack or art display. The simplicity of this design makes it versatile, space-saving, and an elegant visual feature in any modern room.
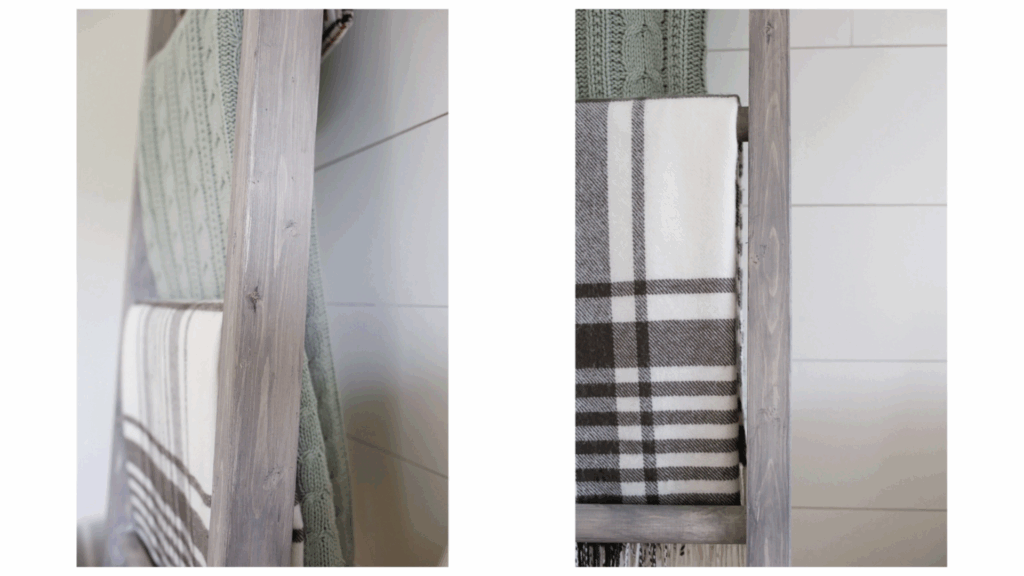
3. Blanket Ladder for Cozy Storage
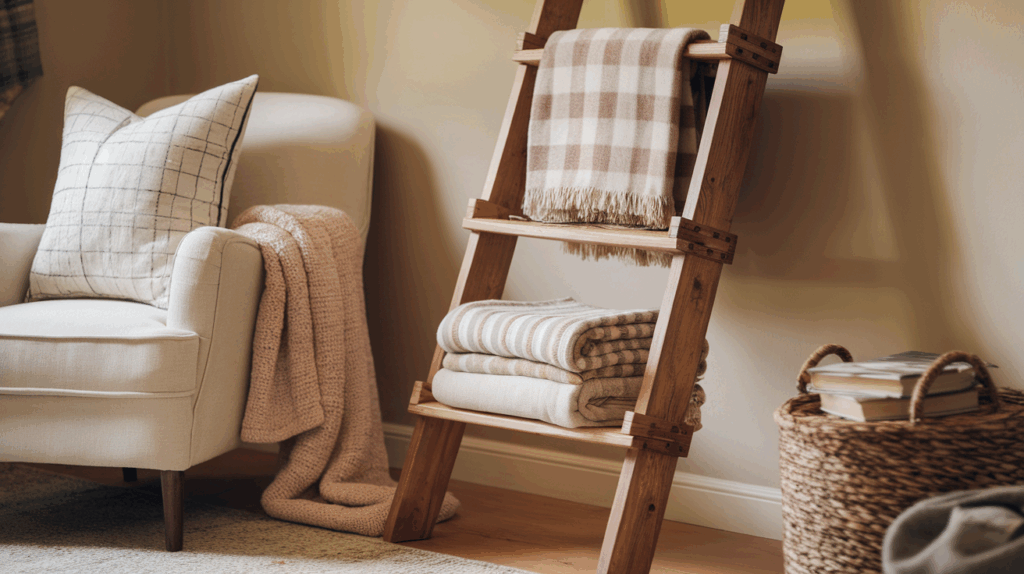
Keep your throws neatly stored and stylishly displayed with a DIY blanket ladder. Customize its height and rung spacing to suit your wall and blanket sizes.
Whether leaned against a wall or placed in a corner, it offers cozy, practical storage while adding a decorative layer to bedrooms, reading nooks, or living areas. Functional never looked so inviting.
Common Issues While Making a DIY Ladder
- Wobbly Ladder: Check leg lengths and level them. Tighten all joints and consider adding brackets or glue for added structural support.
- Misaligned Rungs: Measure spacing carefully from both sides. Use a level before screwing the rungs in place to ensure even alignment.
- Loose Joints: Apply wood glue and reinsert longer screws. Clamp joints while drying to increase strength and prevent shifting over time.
- Gaps in Joints: Fill small gaps with wood filler. For larger spaces, insert wood shims or add brackets for extra reinforcement.
- Splitting Wood: Always drill pilot holes first. Avoid screwing near edges. Replace cracked boards or reposition screws to avoid damage.
- Crooked Frame: Lay the ladder flat. Measure diagonal corners and adjust parts until the frame is square and evenly balanced.
- Unstable Structure: Add a diagonal brace or center crossbar. Choose durable wood that can handle weight if the ladder will be used actively.
Conclusion
My DIY ladder is now one of my favorite pieces in the house – simple, stylish, and incredibly useful. It holds blankets, adds vertical interest, and costs way less than store-bought versions.
The best part? I built it exactly how I wanted. Whether you lean toward rustic vibes or clean modern lines, a DIY ladder lets you blend storage and style effortlessly.
It’s a project that doesn’t take much time, but delivers long-lasting results. You can stain it, paint it, or even repurpose it down the road.
So if you’ve been eyeing that empty wall or messy pile of throws, now’s the time.
Grab your materials and give it a go. You’ll be surprised at how satisfying it feels to build something both beautiful and functional.
Try it this weekend – and don’t forget to share your creation!