Are you still using the mousetraps just for catching mice? Will you be surprised to know that a mousetrap can also be used for powering a car? Yes, you read that right – a mousetrap car.
Mousetrap cars are the perfect experiment that combines engineering and physics at their best. Additionally, it is great fun actually to build a mousetrap car using everyday items.
Though the mousetrap car won’t travel a long distance and neither very fast, they are a wonderful way to convert potential energy into kinetic energy. So, are you excited to make your very own mousetrap car?
Fortunately, it is not difficult to build a mousetrap car as it is quite a simple process to do so. Let us explore the detailed guide talking about the required material, procedure, and some interesting DIY to make your own mousetrap car.
How to Build Mousetrap Car with a Simple Plan
Required Materials
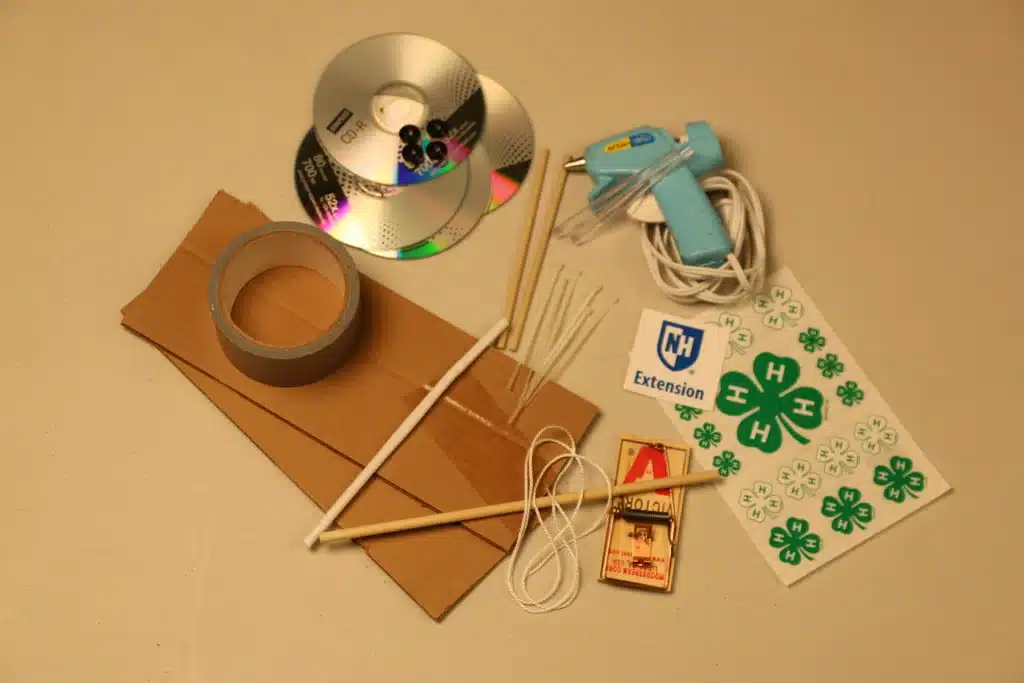
To successfully design a mousetrap car, you will need some important materials, which are as follow:
- 2 cardboard pieces measuring 4″ X 10″ (you can also use any larger dimension if you have a prior idea)
- 4 DVDs (it is suggested to use the old used ones as they work the best. You can also use the new black ones if you don’t have the old ones)
- 4 beveled faucet washers, each measuring 1/4L (these washers can easily be found in the plumbing hardware stores)
- 2 dowels 3/16″ – 6″ long (you might have longer dowels if you are using wider cardboard pieces)
- 1 dowel ¼” – 10″ long
- 2 straws
- Masking or duct tape
- Zip ties
- Strings
- Hot glue
After you have all the required material, it is time to explore the detailed procedure of making the mousetrap car. Are you excited?
Procedure
1. Work on The Car Body
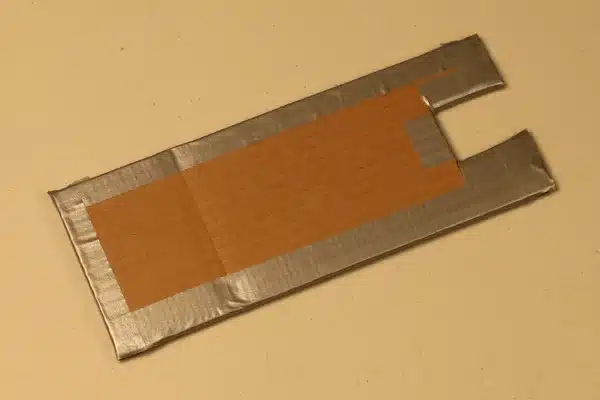
To begin with the process of building a mousetrap car, first, you need to design the car body. Luckily, it is quite simple to make an extremely stable and functional car body within no time. Here is what you have to do to make the car body:
- Cut a 1″ X 2″ rectangular notch in the center of the short side of each of the 2 pieces of cardboard.
- Be very specific that both the notches overlap one another.
- Now, place the 2 cardboard pieces on top of one another and neatly tape them as one to get a double-thick piece of cardboard.
- Be very careful to line the notches without any complications.
2. Attach the Straws
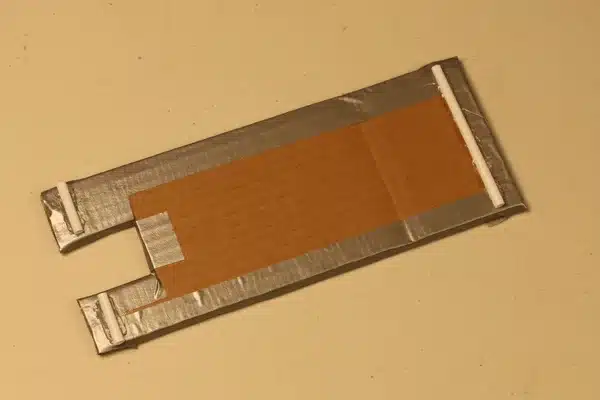
In the next step, you need to work with the straws and attach them to the car body made in the above step. Here is what you have to do:
- Cut 3 different sections of straws to fit gently on the car body.
- Use hot glue to stick them at the respective position.
- These straws will be on the underside of the car; thus, make sure that they are parallel to one another. Also, be very sure that the straws are glued together so they don’t get detached from the car body when used.
3. Working with the Mousetrap
Now, it is your turn to work with the mousetrap to make your mousetrap car.
These are the steps you need to follow.
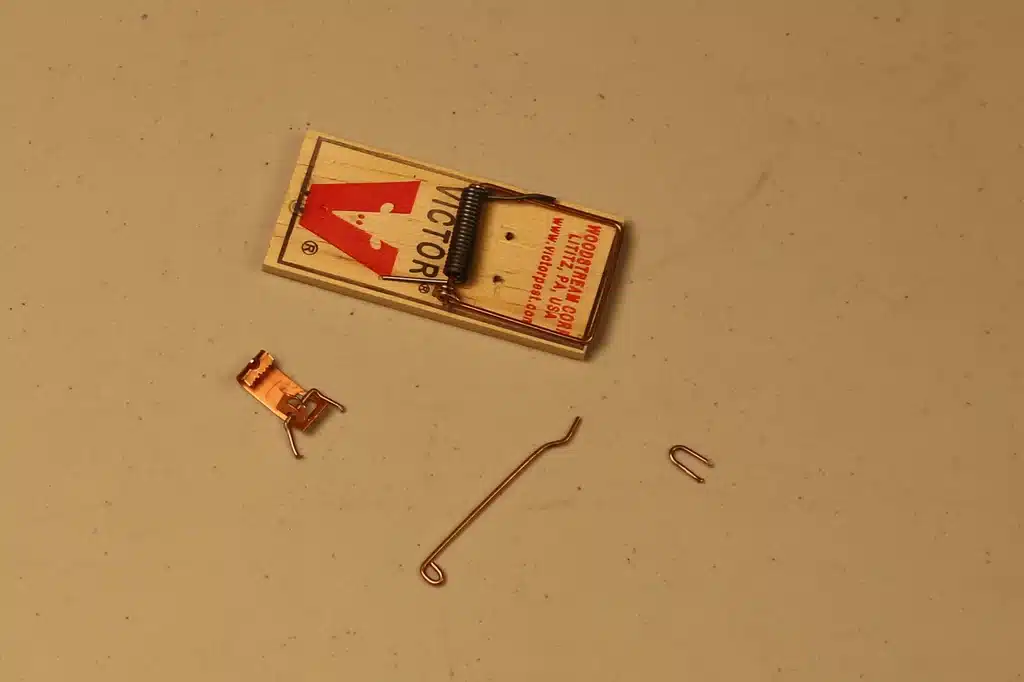
- Now, use two-three 4″ zip ties to secure the ¼” dowel on the snap arm effectively. Make sure to reinforce it using duct tape or glue.
- Place the mousetrap to the front on the top side of the car body and secure its position using the hot glue. Be sure that the dowel is pointing away from the notch on the cardboard, and when pulled back, it perfectly lines up with the center of the notch.
- Now, attach the string pieces at the end of the ¼” dowel using a zip tie. Ensure that the string should reach slightly longer than the rear axle hook.
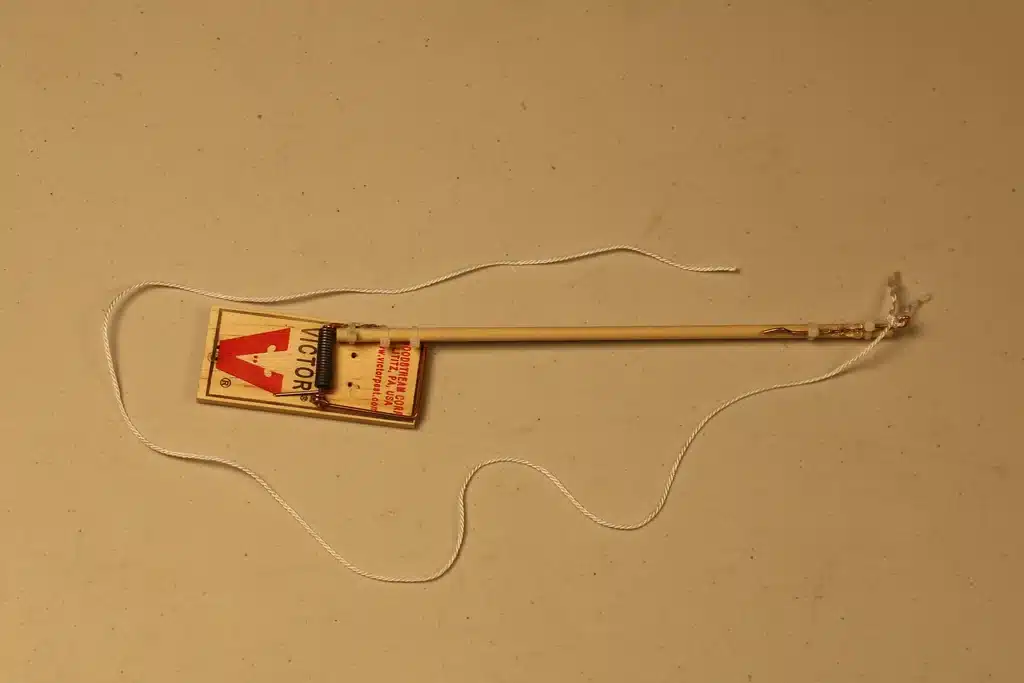
- Also, attach a tiny loop on the end. The loop should only reach the rear axle hook.
4. Preparing the Wheels
Once all the work with the mousetrap is done, it is time to prepare the wheel for the mousetrap car. It is quite obvious that the mousetrap car would need wheels for running; thus, you should be very careful while preparing the wheels.
These are the steps that you should follow.
- Cover the hole in the DVD’s center with duct tape.
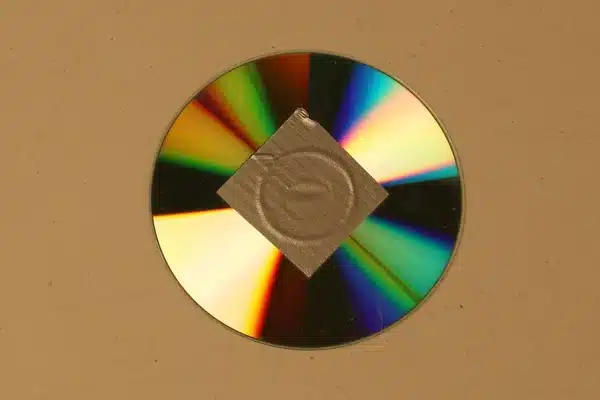
- Now, turn the DVD on the other side and put the faucet washer in its center. Make sure to adhere it to the tape.
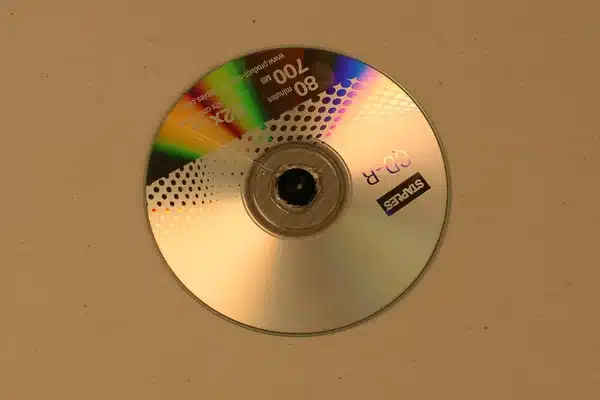
- Use enough glue to secure its position so it sticks generously without losing its grip. Don’t hold back with the use of a good amount of glue if you want your mousetrap car to run smoothly.
- Repeat the same process for all the other wheels of your mousetrap car.
5. Combining the Axles and Wheels
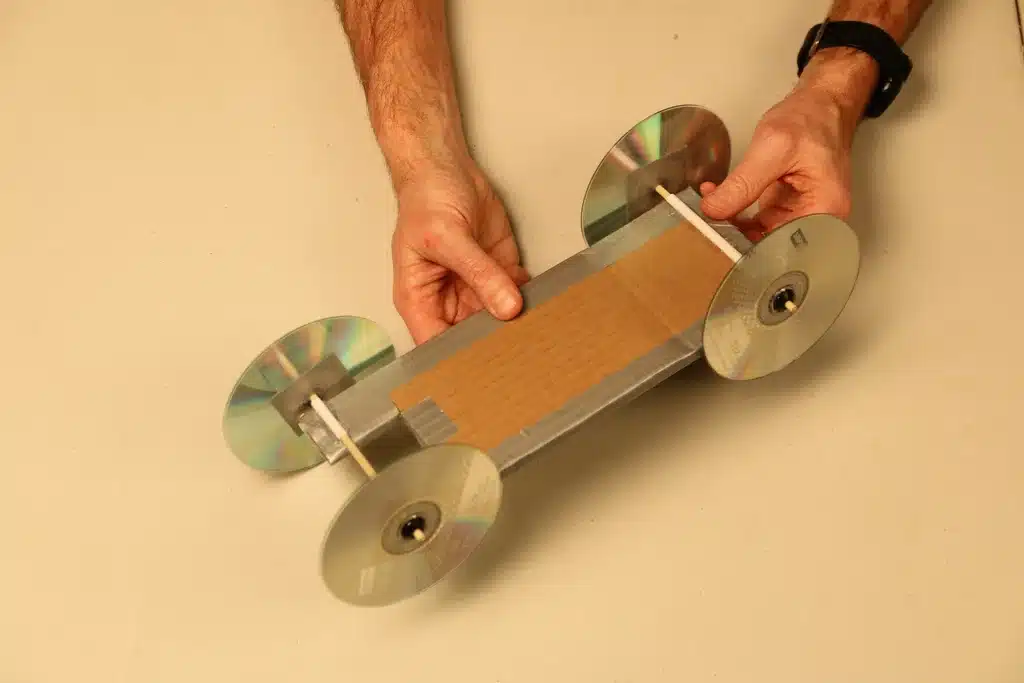
The step is to combine the wheel and axles to make your mousetrap car run at the ultimate speed. Again, you should be careful with this step, as even a slight mistake will hinder the proper functioning of the mousetrap car.
These are the steps to follow:
- Attach the wheels on each end of the straw using the 3/16″ dowels. It may sometimes be challenging to press the hubs on the dowel; however, slightly rounding or sharpening the ends can bring the required ease.
- Now, you should test your mousetrap car to see if it is running and rolling straight. If you see anything wrong, make sure to rearrange and adjust the positioning of the straws to fix the issue.
6. Attaching Hook to the Rear Axle
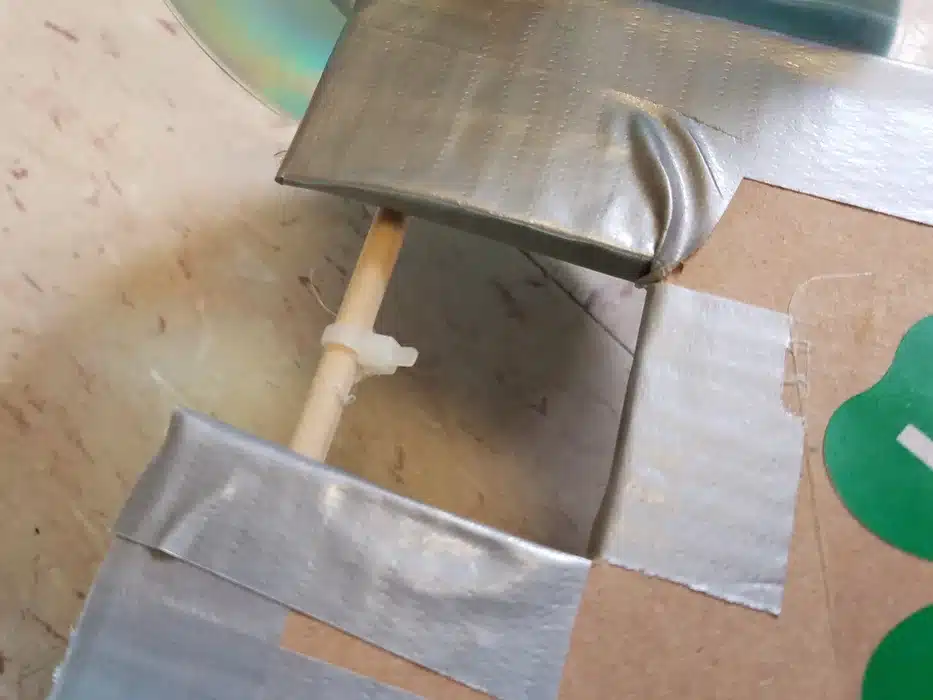
Once your mousetrap car is rolling perfectly, it is now time to attach the hook to the rear axle. This is one of the last few steps in building your mousetrap car, which can be completed by following these steps:
- Use a 4″ long zip tie and carefully fasten it to the center of the axle. It can be done easily as the axle’s center will be visible through the notch on the cardboard.
- It can be used as a string’s hook.
- Use enough glue to ensure it sticks to its respective place for the smooth functioning of the mousetrap car.
7. The Final Outlook
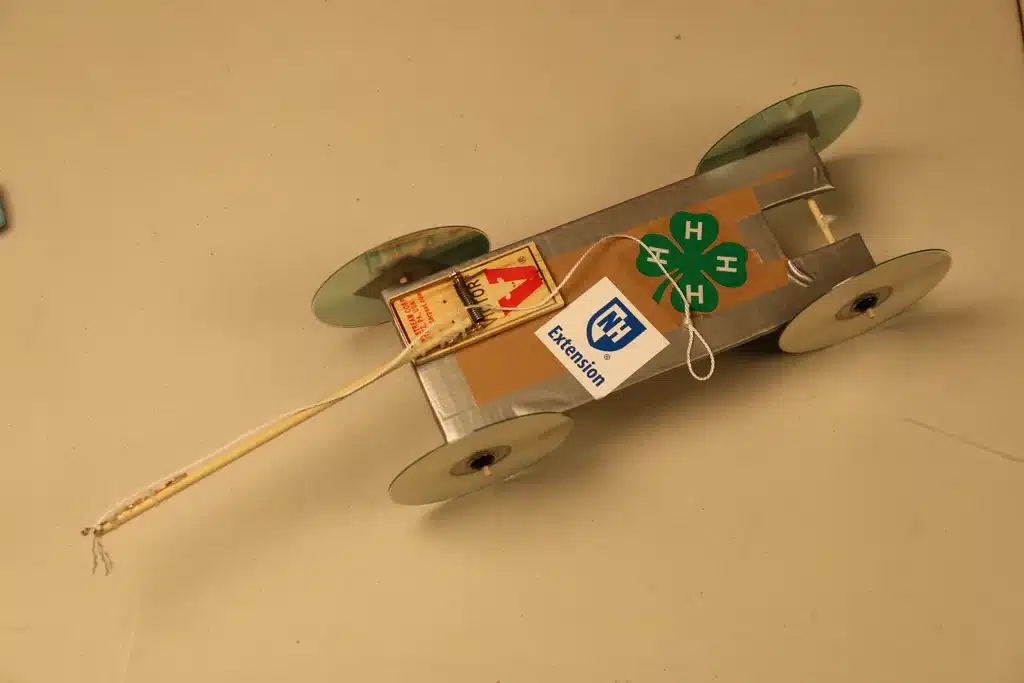
Once you have completed all the above-mentioned steps, you will have your final mousetrap car ready with you. Simply wind the strings backward after attaching them to the hook. Gently put the mousetrap car on the ground and see it working as expected.
Quick Tip: it is suggested to invest some time to understand the working mechanism of your car to enjoy it’s running and rolling without any hassles. It may take some time to get familiar with the right way of using the mousetrap car.
Lastly, use the mousetrap car a couple of times to confirm its smooth working. Make sure to keep a closer eye on its performance to identify any hindrances that might be affecting its performance.
As you get familiar with the working of the mousetrap car, you can build as many cars as you want by using different materials for wheels, axles, and the car body.
Some DIY to Design Mousetrap Cars
Besides this detailed process of making a mousetrap car, there are some interesting DIY methods as well. These methods ensure adding more creativity and innovation to the process to double the enjoyment and excitement.
Are you interested in exploring some simple DIY methods of building a mousetrap car? Here are some.
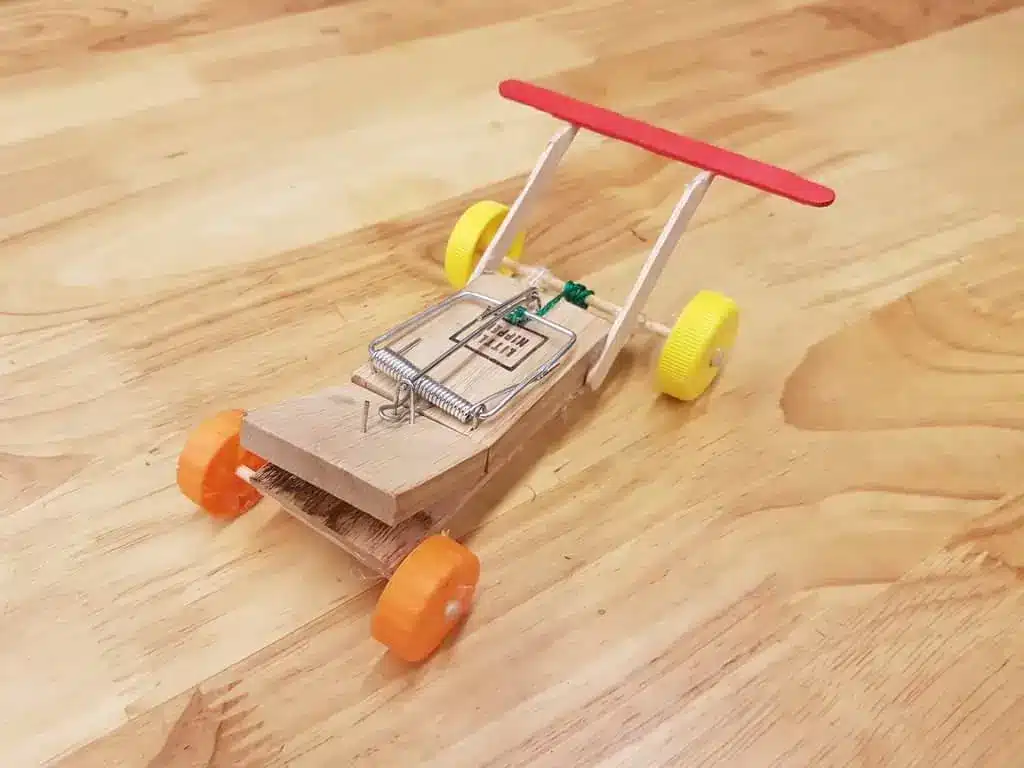
- One of the simplest DIY that you can try with your mousetrap car is using a rope string for connecting the wheelsand axle to the mousetrap. However, you should be sure to use a flexible string that allows smooth motion of the trigger, which, when pulled, will ensure smooth running of the mousetrap car.
- You can also experiment with the cardboard used in making the mousetrap cars. You can use any type of cardboard by cutting it into a rectangular shape. However, it is best suggested to use corrugated cardboard as it is more rigid and also has more strength to ensure a longer, smooth performance of the car. You can follow the same process for every other part while designing the mousetrap car.
- Another amazing DIY of making a mousetrap car is by using a high-quality elastic band that connects the mousetrap on the rear axle to the front axle. The elastic band is gently hooked to the car’s back and then pulled back to set the car in motion. When released, the engine powers up and pushes the car to move forward.
- You can use the materials available with you to build a mousetrap car. Use any solid material that can be cut into a rectangular shape. For making the axle, you should use a sturdy material like a pencil or dowel rod. Lastly, a good quality rubber band can be attached to every axle’s end, which, when released, can propel the mousetrap car further.
- Last but not least, you can design a mousetrap car using Fischertechnik. You can use them as the wheel of your mousetrap car as their stability and sturdiness will ensure that the mousetrap car performs brilliantly without any hassles. Moreover, it also ensures that the mousetrap car lasts really long with the strength and rigidness of the Fischer Technik.
Final Thoughts
It is not challenging to build a mousetrap car on your own; you just need to understand the right procedure to follow. Once you are familiar with the right procedure and have all the desired materials, you can always master the art of making mousetrap cars.
You can also experiment with the used materials to enhance the performance of the mousetrap car. However, you should be sure that the used material is similar to the mentioned ones and serves similar needs.
If you still have any other concerning thoughts about making your own mousetrap car, you can write to us in the comment section.
Frequently Asked Questions
What are the Best Ways to Make the Mousetrap Car Versatile?
Fortunately, it is quite simple to experiment with the versatility of the mousetrap car. However, experimenting with the car is only suggested when you have understood its components, working, and the used materials. You can bring a major difference in the car by modifying the mouse trap used.
How to Increase the Speed of Your Mousetrap Car?
It is possible to increase the speed of your mousetrap car by making a few modifications to its design. Generally, it is the lever arm length that brings the advantage of high speed to the mousetrap car. A little increase in the lever arm length can make the mousetrap car more stable, whereas reducing the lever arm length can boost the speed of your mousetrap car.
Which is Better – a Mousetrap Car with 3 or 4 Wheels?
On comparing a mousetrap car with 3 wheels and another one with 4 wheels, having an equal number of bearing points, then the mousetrap car with 3 wheels will travel far more than the other one. However, 4 wheels will bring better stability, especially when building the car for the first time.
How to Ensure that The Mousetrap Car Travels the Maximum Distance?
If you want your mousetrap car to travel the maximum distance, you should be a little attentive to its design. Avoid designing lighter cars as they can easily flip; you need weight to keep your car running for longer distances. Additionally, design a longer car with a good length of the lever to enjoy its smooth working. Lastly, you should avoid using bottle caps wheels as they usually don’t work properly.

