
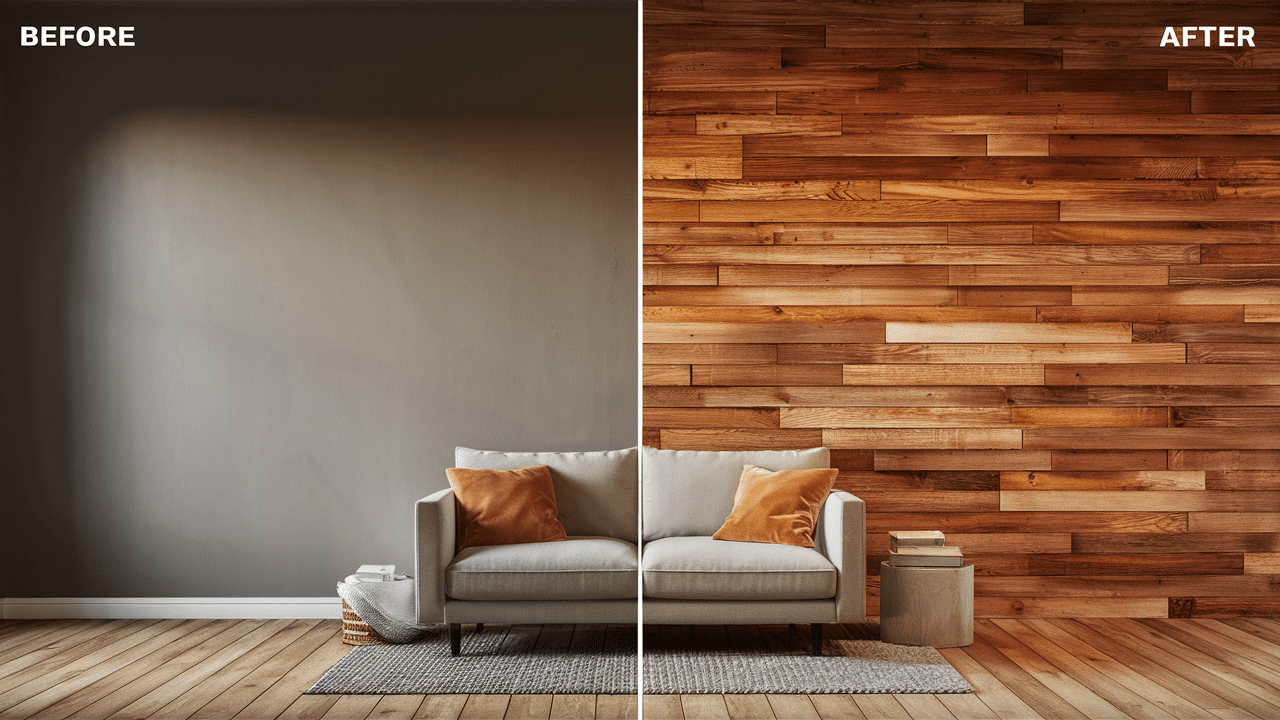
If you’re looking for a way to update your walls without spending too much, plywood shiplap might be the perfect choice. It’s affordable, easy to install, and adds a lot of character to any room. I was surprised by how much it transformed my space.
Plywood shiplap has a unique look that can give your home a modern farmhouse feel or a more rustic vibe. It’s a great option for walls, ceilings, and even accent areas. Plus, it’s versatile enough to fit almost any style.
In this blog, I’ll explain why plywood shiplap is such a great choice. It can improve the look of your walls, is easy to work with, and is a cost-effective option for a home makeover.
What is Plywood Shiplap?
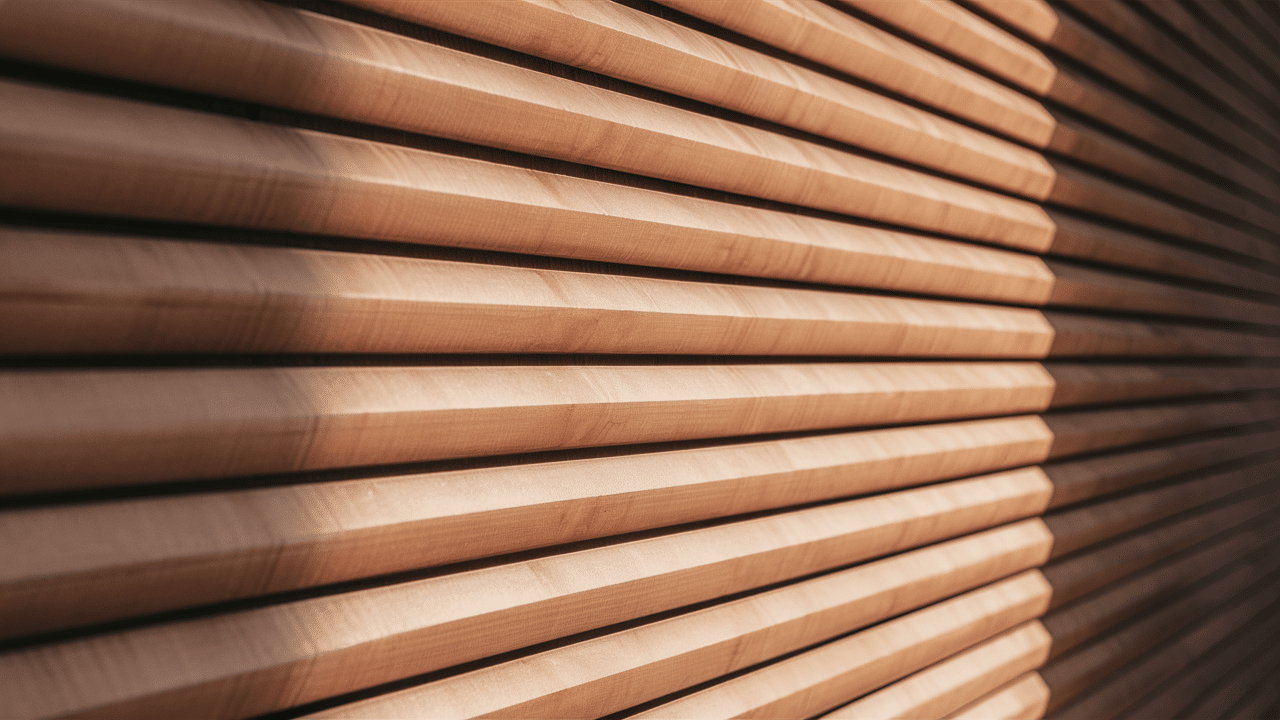
Shiplap is a type of wooden board that has grooves on the edges, allowing them to overlap when installed. This overlapping design creates a neat and clean look with visible lines between the boards.
Plywood shiplap uses plywood panels that are cut to look like traditional shiplap boards. The boards may not always have the same thickness, but they are made to mimic the look of shiplap, giving you that sought-after aesthetic. The beauty of plywood shiplap is that it is versatile, easy to install, and affordable.
Why Choose Plywood Shiplap?
There are many reasons why plywood shiplap is a great choice for your walls. Let’s break it down into the key benefits.
1. Affordable Option for a Shiplap Look
One of the main reasons people choose plywood shiplap is that it’s much more affordable than traditional shiplap. Traditional shiplap boards are often made from solid wood, which can be expensive, especially if you’re covering large wall areas.
Plywood is a cost-effective alternative. It provides the same look and feel of real shiplap at a fraction of the cost. With plywood, you can easily transform a room without breaking the bank.
2. Easy to Install
Another reason to love plywood shiplap is that it’s easy to install, even for beginners. Traditional shiplap can require more effort, especially when working with solid wood, which is harder to cut and install. But plywood shiplap is typically lighter and easier to handle, making it simpler to cut to size.
You can install plywood shiplap directly onto the wall with nails or screws. Some people even use adhesive, depending on the weight of the plywood. This simple installation process makes it a great DIY project for homeowners looking to update their space without needing professional help.
3. Versatile Design Choices
Plywood shiplap is incredibly versatile. It can fit any room in your home, from the living room to the bathroom. You can choose different types of plywood, from smooth finishes to textured or reclaimed wood looks. There are also many ways to paint or stain plywood shiplap to match your home’s décor.
For a rustic, farmhouse-style look, you can leave the plywood natural or stain it in warm tones. If you want something more modern, you can paint the plywood white or a soft color. The ability to customize the look to suit your style is another reason plywood shiplap is so appealing.
4. Adds Warmth and Texture
One of the biggest appeals of plywood shiplap is how it adds warmth and texture to a room. The vertical or horizontal boards bring a sense of coziness and depth. It’s a great way to break up a plain wall or add a feature that draws attention without being too overwhelming.
Plywood shiplap creates visual interest by adding lines and patterns to your walls. It can be used as an accent wall or cover an entire room to give it a unique and inviting atmosphere. The texture of the wood also helps to create a more relaxed, comfortable feel in any room.
Where Can You Use Plywood Shiplap?
Plywood shiplap is not limited to one area of your home. Here are some places where it can work well:
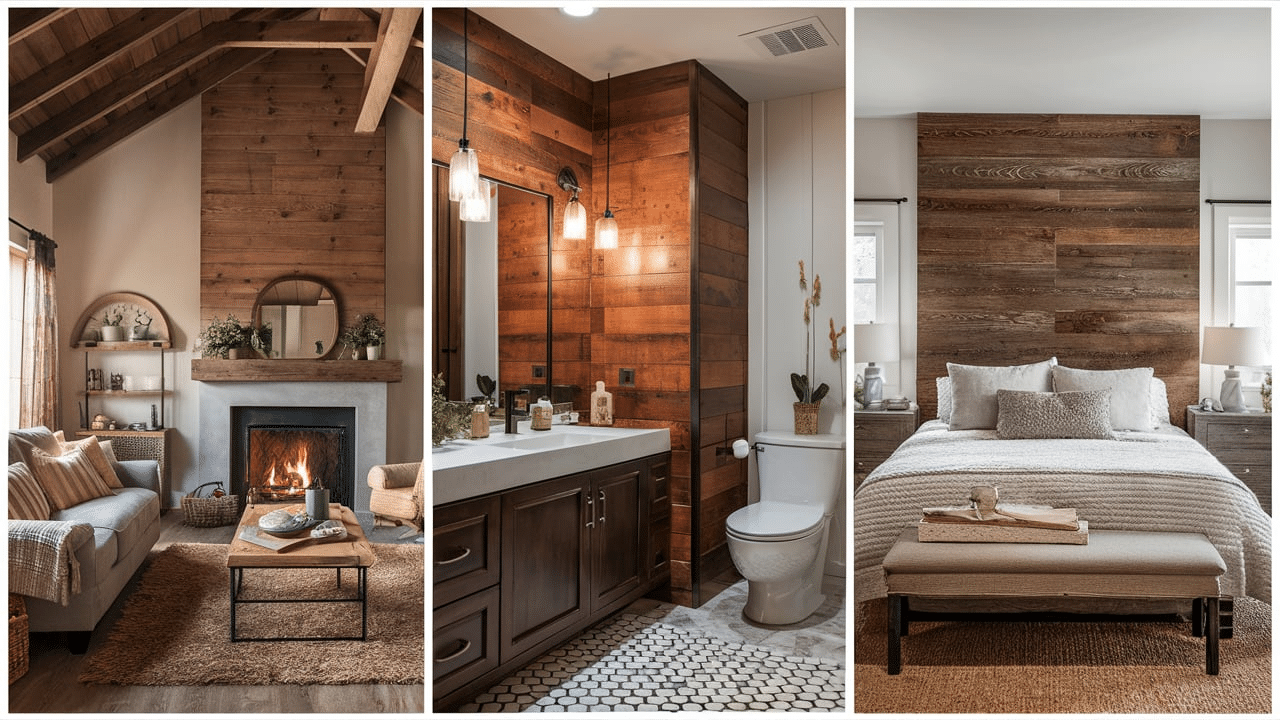
1. Living Rooms
Using plywood shiplap in the living room can create a beautiful focal point. You can install it behind your couch, or on an entire wall, to make the room feel more inviting. A light-colored plywood shiplap can brighten up the space, while darker tones can make the room feel cozier.
You can also use plywood shiplap to highlight architectural features, such as a fireplace or TV area, to make them stand out.
2. Bedrooms
Plywood shiplap is perfect for creating a warm, relaxing atmosphere in the bedroom. Consider using it as an accent wall behind the bed to add texture and interest. You can go for a subtle, soft-colored plywood to complement your bedding and décor, or a darker, rustic shade for a more dramatic effect.
This design element can instantly transform your bedroom into a comfortable and stylish retreat.
3. Bathrooms
Plywood shiplap can also work wonders in bathrooms. It adds a spa-like quality to the space, making it feel more inviting and stylish. You can use plywood shiplap around the vanity, the bathtub, or on the entire wall for a rustic look.
Because plywood shiplap is relatively easy to clean and maintain, it’s also a practical choice for a high-moisture environment like a bathroom.
4. Kitchens and Dining Rooms
Plywood shiplap can bring a country or coastal feel to your kitchen or dining room. Whether you use it as a backsplash or on an accent wall, plywood shiplap can make the space feel homey and welcoming.
It can also pair well with farmhouse or industrial-style kitchens, giving it a timeless appeal that’s both functional and beautiful.
How to Install Plywood Shiplap
Installing plywood shiplap is a simple process, but it does require some preparation:
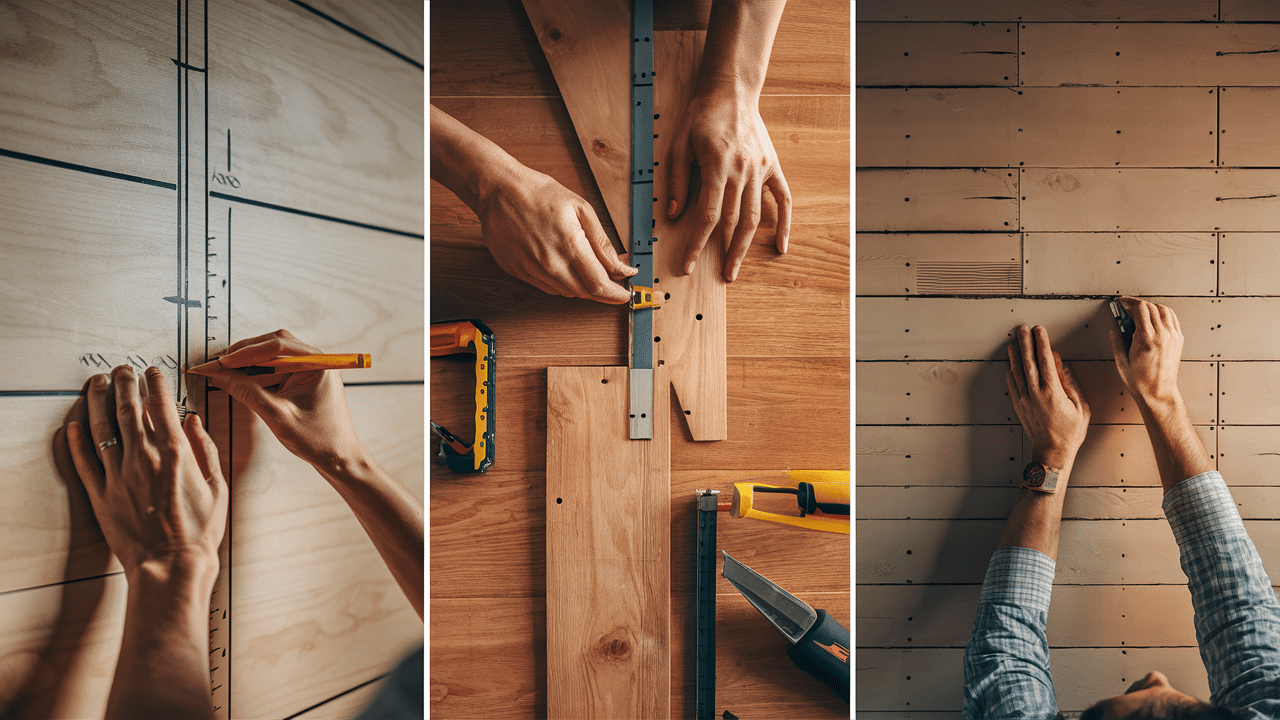
1. Measure and Plan
Start by measuring the wall where you want to install the plywood shiplap. Decide if you wish to install it horizontally or vertically. Planning ahead will help you cut the plywood to the right size and avoid mistakes during installation.
2. Cut the Plywood
Next, you’ll need to cut the plywood into strips that will mimic the shiplap look. You can use a circular saw to cut the plywood into the desired width. Most shiplap boards are around 6 to 8 inches wide, but you can adjust this to fit your style.
3. Install the Plywood
Once the plywood is cut, begin installing it on the wall. Start at the bottom of the wall and work your way up. Make sure each piece is level as you go. You can attach the plywood to the wall using nails or screws, or use construction adhesive.
Leave a small gap between each board to create the signature shiplap look.
4. Finishing Touches
After the plywood shiplap is installed, you can sand the edges for a smoother finish. Then, stain or paint the shiplap to match your style. Allow the paint or stain to dry fully before adding any other decorative touches.
Maintenance and Care for Plywood Shiplap
One of the benefits of plywood shiplap is that it’s easy to maintain. However, to keep it looking its best:
-
Dust regularly: Use a soft cloth to wipe down the surface and keep dust from building up in the grooves.
-
Clean with a damp cloth: If the wall gets dirty, gently clean the surface with a damp cloth. Avoid using harsh chemicals that could damage the wood.
-
Repaint or restain when needed: Over time, you may want to refresh the color or stain of your plywood shiplap. Lightly sand the surface and apply a fresh coat of paint or stain.
Conclusion
Plywood shiplap is an affordable and stylish way to enhance any room in your home. It provides the same beautiful look as traditional shiplap but at a fraction of the cost.
With its easy installation process, even beginners can add a modern or rustic touch to their walls in no time. You can customize plywood shiplap with different colors and finishes to match your style.
The versatility of plywood shiplap makes it perfect for every room, from living rooms to kitchens and bathrooms. It adds texture, warmth, and visual interest, making your space feel more inviting and cozy.
Plus, its durability and low maintenance make it a practical choice for homeowners looking to improve their home without the high cost or hassle.