
Brussels sprouts are small green veggies that grow on tall stalks. They look like tiny cabbages and belong to the same plant family.
Many gardeners enjoy growing them because they taste better when picked fresh. These cool-season plants take time and care, but the reward is worth it.
Watching them grow from seed into firm little sprouts is fun and satisfying. With the right steps, they can grow well in home gardens or raised beds.
This guide covers everything you need to grow Brussels sprouts from start to finish. It’s written in a simple way, so even first-time gardeners can follow along and grow a strong, healthy crop.
Is it a Good Idea to Grow Brussels Sprouts?
Growing Brussels sprouts at home is a great way to enjoy fresh, healthy vegetables straight from the garden.
These small green sprouts taste better when picked fresh, especially after a light frost, which brings out their natural sweetness. Homegrown Brussels sprouts are also free from unwanted chemicals or pesticides, giving you more control over how your food is grown.
They are rich in vitamins like C and K, making them a healthy addition to meals. Growing your own food can save money over time and reduce the number of grocery trips.
Plus, watching the tall stalks grow and produce rows of sprouts can be fun and rewarding, even for beginner gardeners.
Best Time to Plant Brussels Sprouts
Here’s a simple table to help you determine the best time to plant Brussels sprouts for your growing season. This makes it easier to plan your garden and get the best results.
| Planting Season | Start Seeds Indoors | Transplant Outdoors | Harvest Time | Notes |
|---|---|---|---|---|
| Spring | 4–6 weeks before last frost | After the last frost (early spring) | Late summer to early fall | Less sweet flavor; may struggle in hot summers |
| Fall | Mid to late summer (indoors or direct sow) | Late summer to early fall | Late fall to early winter | Best flavor after light frost; preferred method |
| Mild Climates | Late summer to early fall | Fall to early winter | Winter to early spring | Great for regions without hard freezes |
Where to Plant Brussels Sprouts
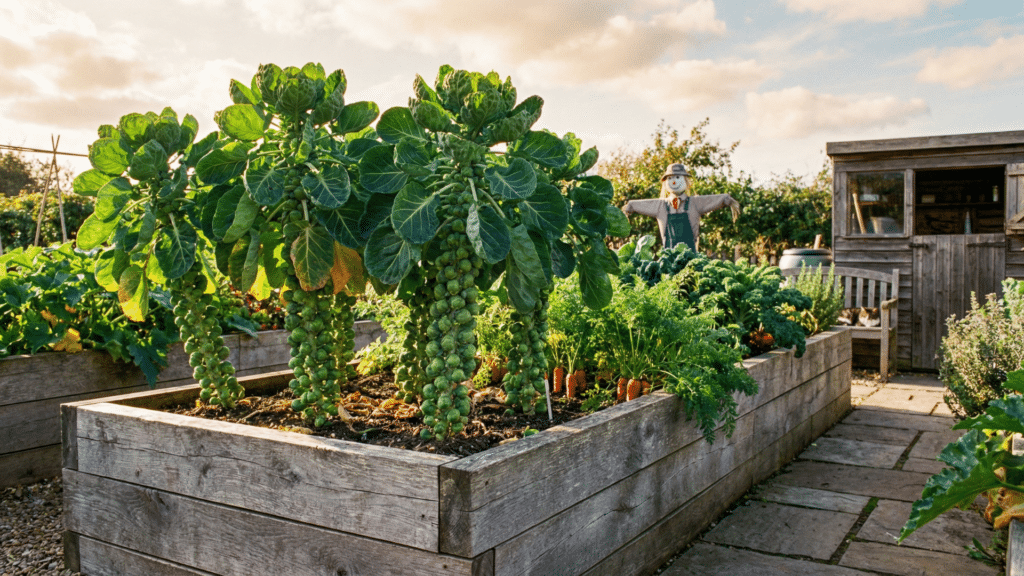
Brussels sprouts grow best in full sun, so pick a garden spot that gets at least 6 hours of sunlight daily. The soil should drain well but still hold some moisture.
Since these plants can grow tall, give them enough space to stay upright without being shaded by nearby plants. Raised beds or open garden rows are great choices.
Avoid planting them where you’ve grown cabbage, broccoli, or other brassicas in the past two years.
Rotating crops helps reduce the risk of soil diseases and pests, giving your Brussels sprouts a healthier environment in which to grow strong and produce well-formed sprouts.
Best Soil for Growing Brussels Sprouts
Healthy soil is one of the most important parts of learning how to grow Brussels sprouts. These plants need rich, well-prepared ground to grow tall and form firm, tasty sprouts.
- Soil Type: Loamy soil works best. It should feel soft and crumbly, with plenty of organic matter to feed the plant.
- Drainage: The soil should drain well but still hold enough moisture to keep roots from drying out. Avoid soggy or waterlogged areas.
- pH Level: Aim for a soil pH between 6.0 and 7.5, which is slightly acidic to neutral.
- Before Planting: Mix in compost or aged manure a few weeks before planting to boost nutrients. You can also add a balanced fertilizer to give your plants a good start.
How to Start Brussels Sprouts from Seeds
Growing Brussels sprouts from seed is simple when you follow a few easy steps. Starting seeds indoors gives the plants a strong head start, especially for early planting.
Step 1: Start Seeds Indoors
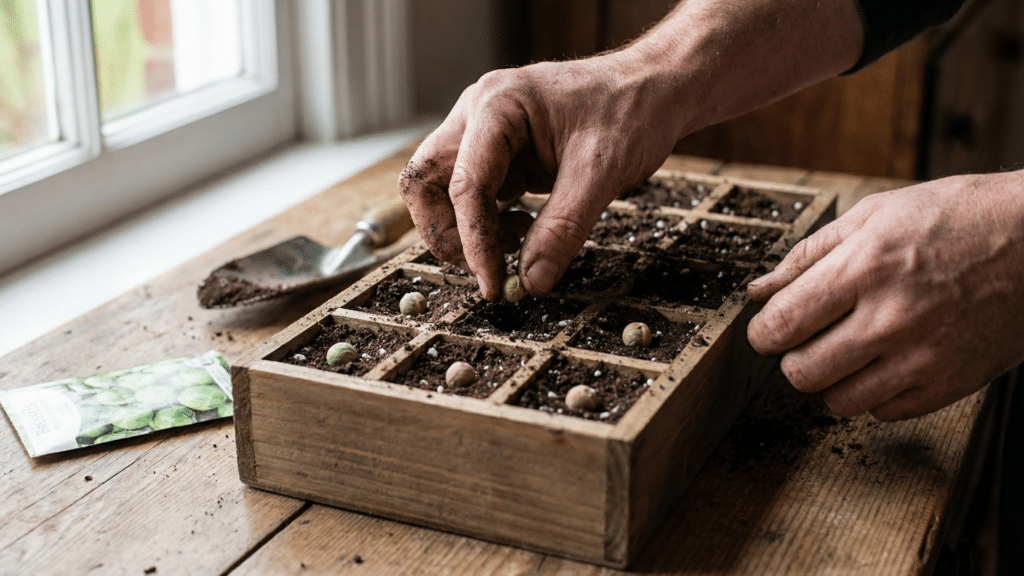
Start 6 weeks before your last spring frost date.
- Use small pots or seed trays.
- Fill with seed-starting mix for good drainage.
- Plant seeds ½ inch deep.
- Water gently to keep the soil moist (not soggy).
- Place in a sunny window or under grow lights.
Step 2: Thin the Seedlings
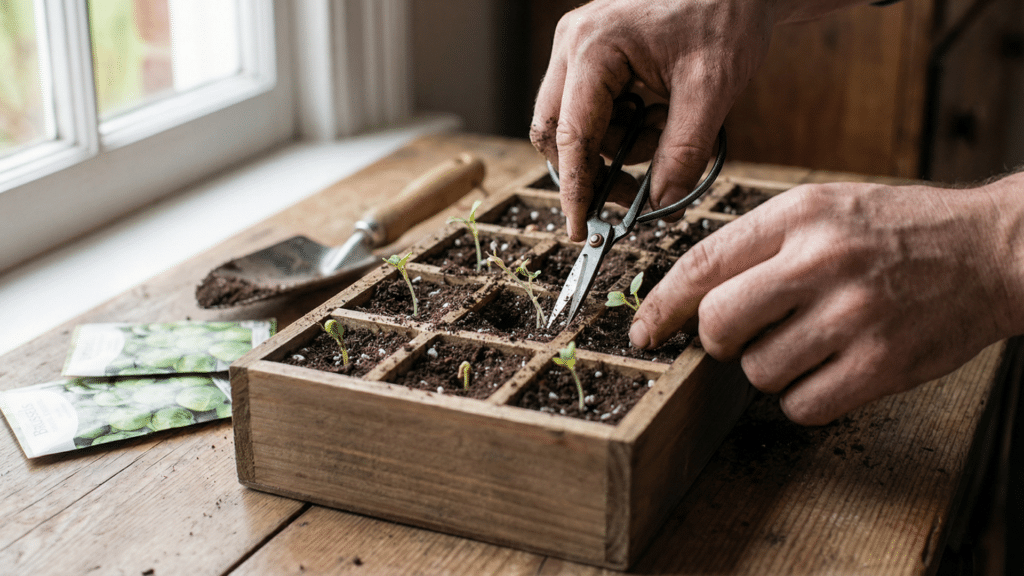
After sprouts grow two or more leaves:
- Keep only the strongest seedling per pot.
- Trim the weaker ones with scissors at the base.
- This gives the healthy plant room to grow big and strong.
Step 3: Harden Off Seedlings
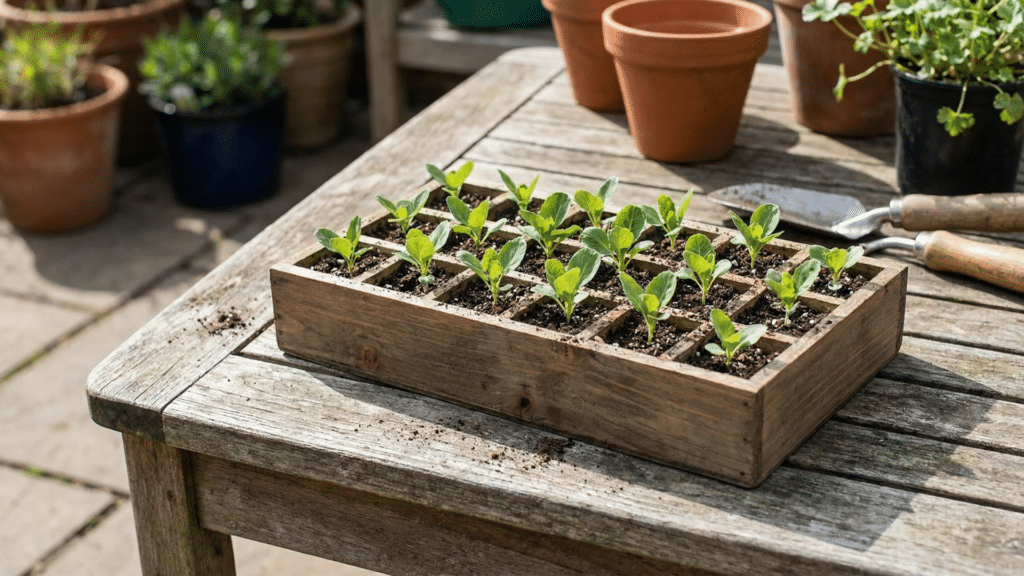
Do this 7–10 days before planting outdoors.
- Set seedlings outside for a few hours each day.
- Increase outdoor time a little more each day.
- Avoid direct sunlight or strong wind on the first day.
- After about a week, plants should be used to outdoor conditions.
Step 4: Transplant into the Garden
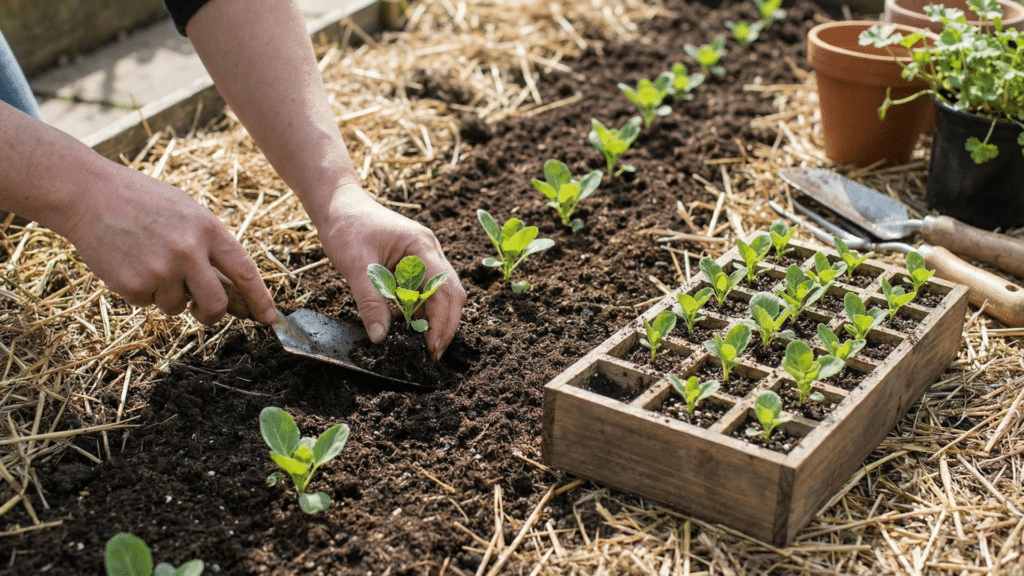
When seedlings are 4–6 inches tall with 4–6 strong leaves:
- Choose a cool, cloudy day to reduce stress.
- Space plants 18–24 inches apart in rows.
- Keep 2–3 feet between rows.
- Dig a hole deep enough to hold the roots.
- Place the seedling in the hole and cover with soil.
- Press the soil down gently and water well.
- Add mulch around each plant to keep the soil cool and moist.
Step 5: Container Planting (Optional)
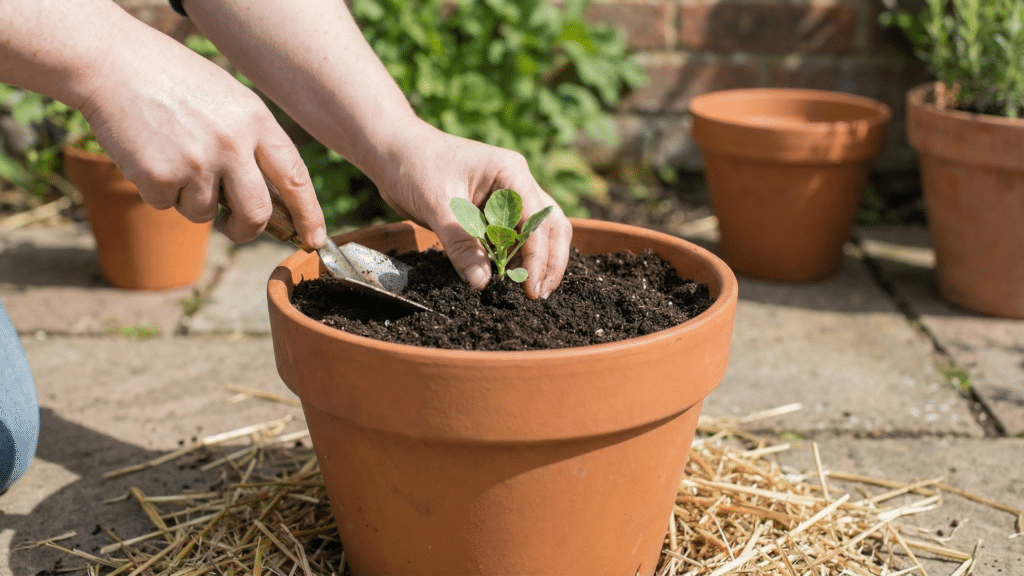
Don’t have garden space? Use pots instead!
- Choose a pot 12–14 inches deep or larger.
- Fill with rich potting soil mixed with compost.
- Plant one Brussels sprout per container.
- Place in a sunny spot (6+ hours of sun daily).
- Water often, as pots dry out quickly.
Step 6: Watering Brussels Sprouts
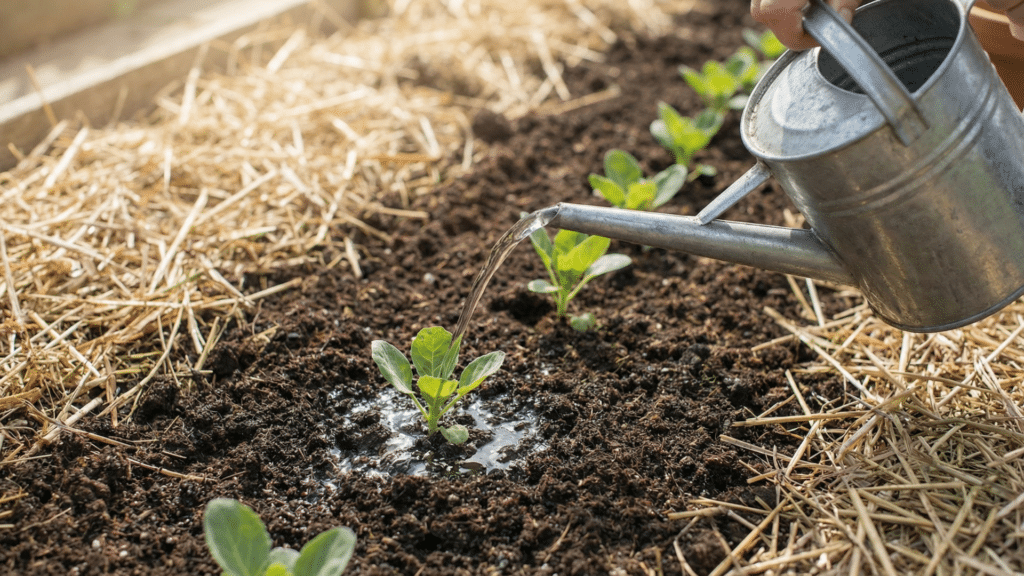
Watering is key to good sprout growth.
- Water deeply once or twice a week.
- Keep soil evenly moist, not soaked.
- Use mulch to hold moisture and stop weeds.
- Avoid letting the soil dry out or flood.
Step 7: Feed the Plants (Fertilizing)
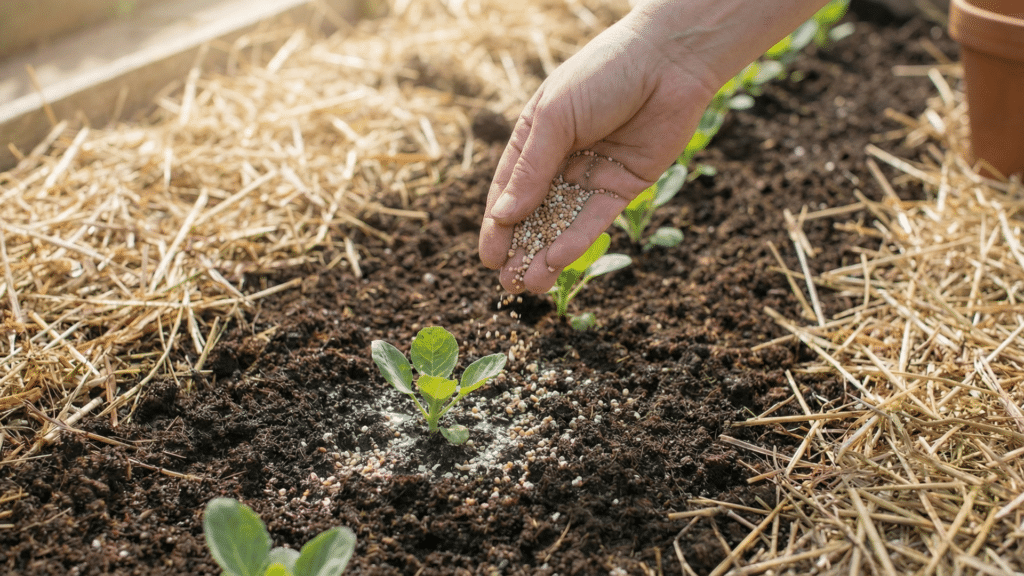
Brussels sprouts are heavy feeders and need regular nutrients.
- Use a balanced fertilizer (10-10-10) every 3–4 weeks.
- Add compost mid-season (side-dress near the plant).
- Don’t overdo nitrogen; it causes big leaves but fewer sprouts.
- Add calcium or magnesium if leaves show signs of damage.
Step 8: Support Tall Plants
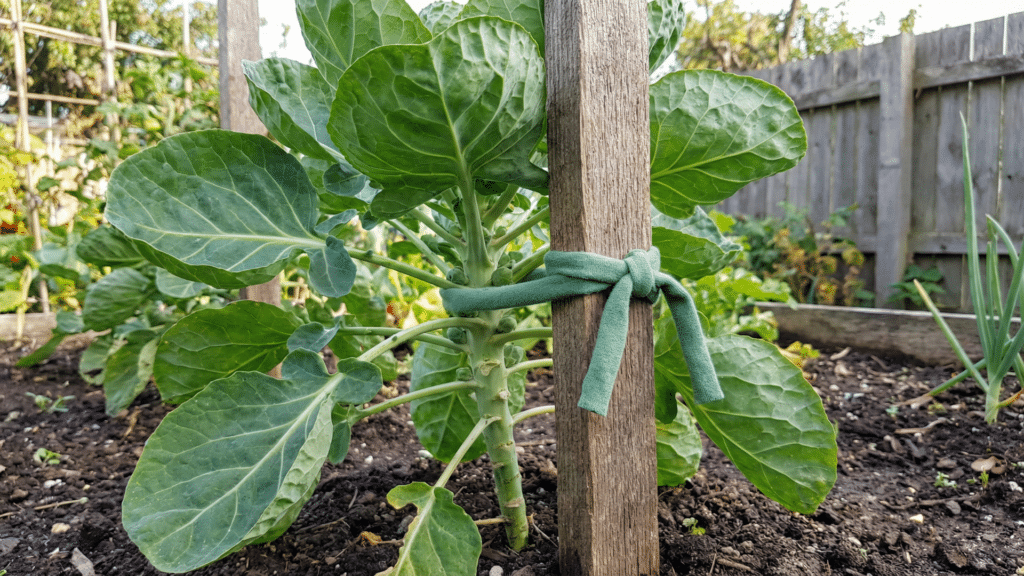
These plants can grow tall and heavy.
- Use stakes or tomato cages to support plants.
- Tie stalks gently with soft garden ties.
- Check often and adjust ties as plants grow.
- This helps sprouts stay clean and easy to pick.
Common Pests and Problems
Brussels sprouts can face a few common pests and issues while growing. Use this table to identify and manage them early for a healthy crop.
| Problem | What to Look For | How to Manage It |
|---|---|---|
| Cabbage Worms & Loopers | Green worms are chewing holes in leaves | Handpick, use neem oil or Bt (Bacillus thuringiensis) |
| Aphids | Tiny green or black bugs in clusters under leaves | Spray with water or insecticidal soap |
| Flea Beetles | Small jumping bugs, tiny round holes in leaves | Use row covers and mulch, keep soil moist |
| Clubroot | Swollen, twisted roots; stunted plant growth | Rotate crops, avoid planting brassicas too often |
| Tip Burn | Brown edges on leaves, weak sprout heads | Add calcium, keep soil evenly moist |
How to Care for Brussels Sprouts as They Grow
Caring for your plants takes time, but it’s not hard.
- Keep the soil moist and weed-free.
- Remove yellow leaves from the bottom of the plant.
- Watch for pests and treat early.
- Hill up soil around the base for extra support.
Some gardeners pinch off the top leaves about 4 weeks before harvest. This helps the plant focus on making larger sprouts.
Growth Stages of Brussels Sprouts
Brussels sprouts grow slowly and go through several stages before they are ready to harvest. This table shows each stage and what to expect.
| Growth Stage | What Happens | What to Do |
|---|---|---|
| Seed Stage | Small, round seeds are planted | Start indoors or direct sow in soil |
| Seedling Stage | Sprouts emerge with first leaves | Thin the seedlings and keep the soil moist |
| Vegetative Stage | Tall stalks and large leaves begin to grow | Feed with nitrogen-rich fertilizer and water well |
| Sprout Formation | Small sprouts appear along the stem where leaves meet the stalk | Remove yellow leaves to help sprouts form better |
| Mature Plant Stage | Sprouts reach 1–2 inches in size and feel firm | Begin harvesting from the bottom up |
Tips for a Better Harvest
To get the best results from your Brussels sprouts, a few simple care steps can make a big difference. These tips will help you grow stronger plants, prevent common problems, and enjoy a bigger, tastier harvest.
- Use mulch around the base of each plant to retain moisture, keep the soil cool, and reduce weeds.
- Remove the yellowing lower leaves as sprouting begins. This improves airflow and provides more energy to the sprouts.
- Fertilize lightly mid-season with compost or balanced plant food to keep growth steady.
- Avoid overcrowding by giving each plant enough space and sunlight.
- Rotate crops each year to prevent soil diseases and improve overall soil health.
- Water regularly and evenly, don’t let the soil dry out completely.
- Watch for pests like cabbage worms and aphids, and take action early.
- Pinch the top of the plant off about 3–4 weeks before the first frost. This helps the plant focus on growing larger sprouts instead of more leaves.
To Conclude
Growing Brussels sprouts doesn’t have to be hard. With some planning and steady care, you can enjoy firm, fresh sprouts from your own garden.
Just stay consistent with watering, feeding, and checking for pests. Don’t rush the process; Brussels sprouts take time, but the results are worth the wait.
Even a small harvest can feel like a big win. Use the tips in this guide to avoid common mistakes and grow healthy plants.
Have questions or want to share how your sprouts are doing? Leave a comment below or share this guide with a fellow gardener to help them get started, too.