
If your kitchen feels a bit crowded or missing something, I’ve been there, too. That’s why I love DIY kitchen islands—they’re simple to build and make a big difference.
I’ve made a few myself, and they really helped me add more space, storage, and even a spot to sit and eat.
In this blog, I’ll walk you through easy DIY kitchen island ideas that anyone can try. I’ll share options for small spaces, movable islands, and designs with seating.
You’ll also learn what materials to use, how to build one step by step, and tips to match your kitchen style. Let’s make your kitchen more useful and comfortable!
What is a DIY Kitchen Island?
A DIY kitchen island is a versatile, budget-friendly addition that can be tailored to your kitchen’s needs. It enhances storage, prep space, and seating, all while matching your unique style.
- A DIY kitchen island is a custom-built piece that enhances both functionality and style in your kitchen. It allows you to tailor it to your space and needs.
- It offers extra storage, prep space, and seating, based on your personal needs. This flexibility makes it a valuable addition to any kitchen.
- Building your own island is cost-effective, as you can choose affordable materials and designs. This makes it more budget-friendly than purchasing a pre-made one.
- The DIY project allows full customization, ensuring it matches your kitchen’s layout and style. You can create an island that perfectly suits your aesthetic.
- It can serve multiple purposes, such as storage with shelves or drawers for kitchen tools. This maximizes space and keeps things organized.
- A DIY kitchen island provides extra prep space for cooking and seating with stools or benches. It creates a cozy space for informal dining.
- It offers a personalized solution for more prep space or a cozy seating area. This is all achieved at a fraction of the cost of pre-built islands.
How to Build a Kitchen Island: Essential Tips
Building a DIY kitchen island can enhance your space. Follow this step-by-step guide to create your perfect island.
Tools and Materials Needed
Before starting, gather all the basic tools and materials to make the process easier and smoother.
- Plywood
- Countertop material
- Wood screws
- Wood glue
- Paint or wood stain
- Sealant
- Handles knobs or hooks
- Measuring tape
- Drill or screwdriver
- Saw circular or hand saw
- Sandpaper or sander
- Paintbrush or roller
- Clamps
1. Choose the Right Materials
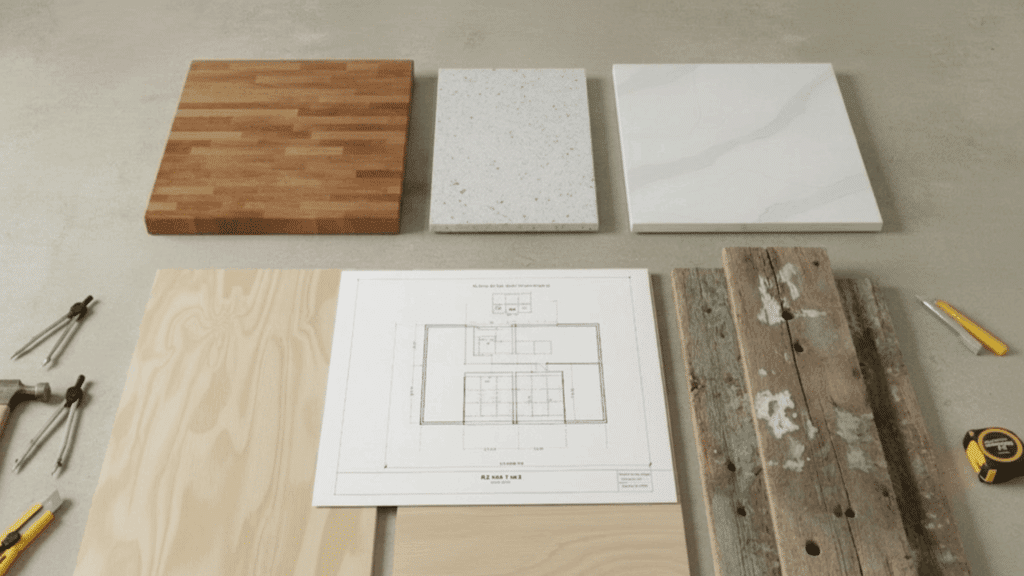
Select materials based on style, durability, and budget. For the countertop, wood, granite, or quartz are popular choices, each offering unique looks and functionality.
The base can be built using plywood, MDF, or reclaimed wood for a rustic touch. Ensure the materials complement your kitchen’s existing decor and can handle daily wear and tear.
Don’t forget to factor in your skill level when choosing materials to ensure ease of installation.
2. Measure the Space

Accurate measurements are crucial for a well-fitting kitchen island. Measure the available space to ensure proper clearance around the island for easy movement.
Typically, 36-48 inches of space around the island is ideal. Factor in the island’s size relative to your kitchen layout, ensuring it doesn’t overcrowd the space or restrict access to other areas.
Precise measurements will help guide material selection and ensure your island fits comfortably in your kitchen.
3. Build or Repurpose a Base
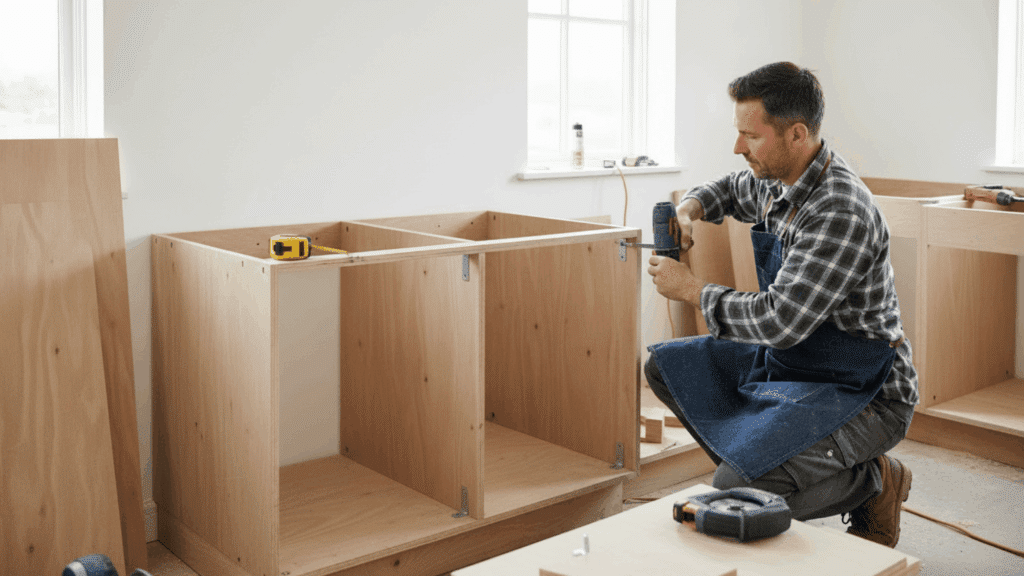
You can either build a new base from plywood or repurpose old furniture, like a sturdy table or cabinet. For a custom build, measure and cut the base pieces to size, ensuring they align properly.
If repurposing, make sure the existing base is solid enough to support the weight of the countertop.
Reinforce the corners and joints with screws or brackets for extra stability, ensuring it will hold up to everyday use.
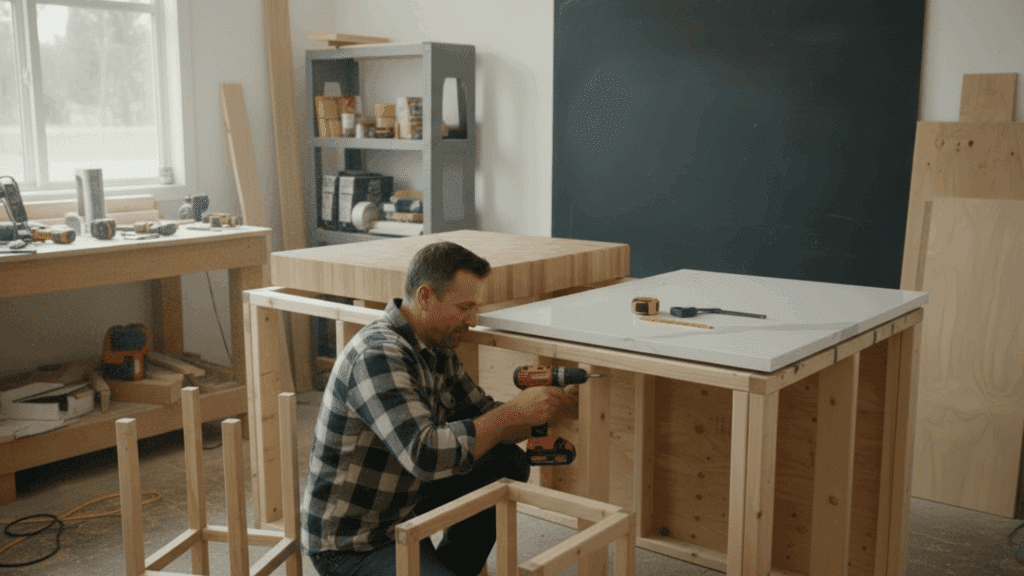
4. Add Countertop Options

Choose a countertop that matches your style and needs. Wood gives a warm and simple look, while granite or quartz is strong and long-lasting.
Measure the surface carefully and cut it to fit the base. Leave a small overhang on each side for a clean finish.
Attach the countertop using screws or strong glue and make sure it is level. You can also seal the surface to protect it and make cleaning easier.
5. Install Seating (Optional)
If you want to add seating to your island, measure for barstools or a bench. Standard counter height is 36 inches, while bar height is around 42 inches.
Install a comfortable overhang on the countertop where stools can tuck in. Ensure there’s enough legroom and space between seating for comfortable dining.
You can choose built-in seating with storage or simply add stools, depending on your preference and available space.
6. Final Touches (Paint, Handles, etc.)
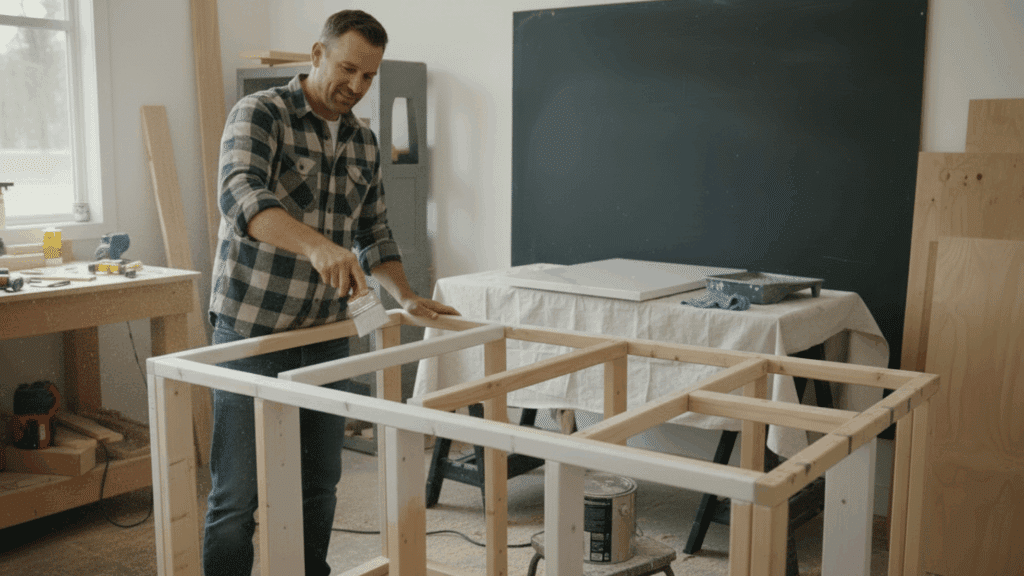
After assembling the base and countertop, finish your kitchen island with the final touches. Sand the surface for smoothness, then apply paint or stain to protect the wood and match your kitchen’s color scheme.
Install cabinet handles, knobs, or hooks to enhance functionality and style. Consider adding backsplash tiles or accent lighting for extra flair.
These small details will give your island a professional, polished look while making it more practical.
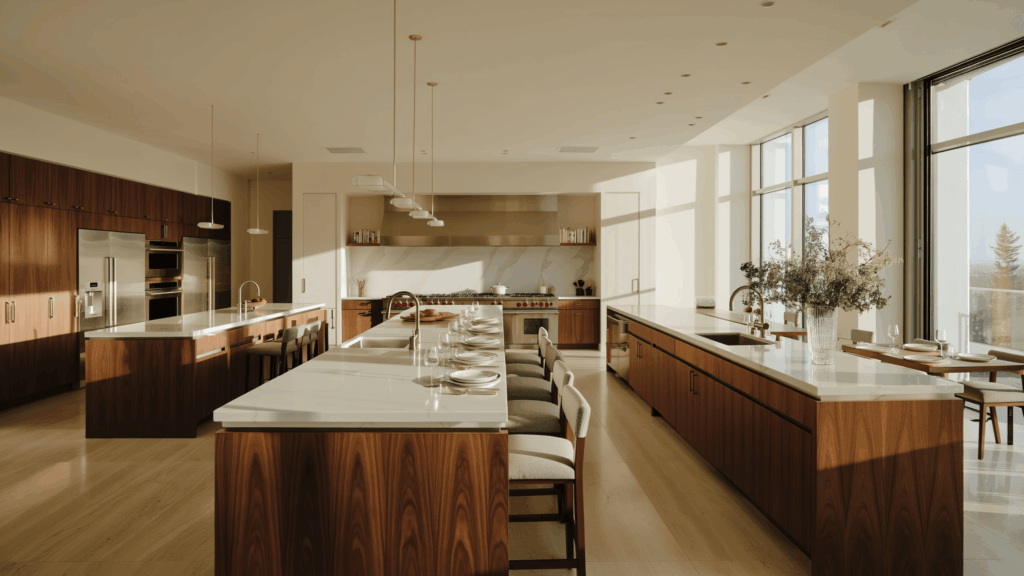
DIY Kitchen Island Ideas
These simple DIY kitchen island ideas help you add extra space and storage. Each option works well for different kitchen sizes and everyday needs.
1. Small Islands for Tight Spaces
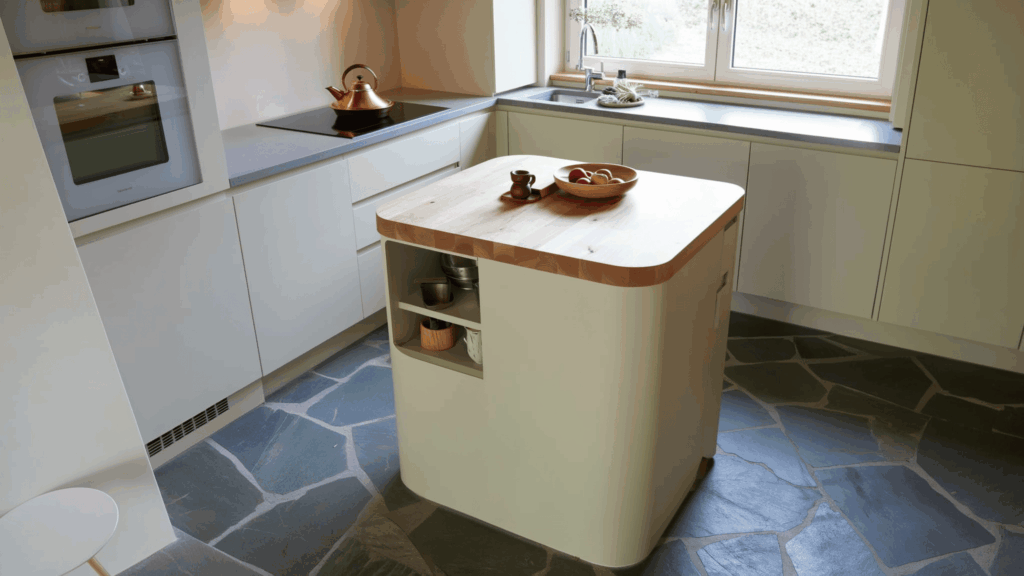
For smaller kitchens, a compact island is a great solution. Opt for a simple design with built-in storage or open shelving to maximize space without overcrowding.
Use lightweight materials like plywood or MDF to ensure the island blends seamlessly into tight areas. This type of island provides extra counter space and storage, offering functionality without taking up too much room.
It’s an ideal option for making the most of limited kitchen space while maintaining a clean, organized look.
2. Portable Kitchen Islands
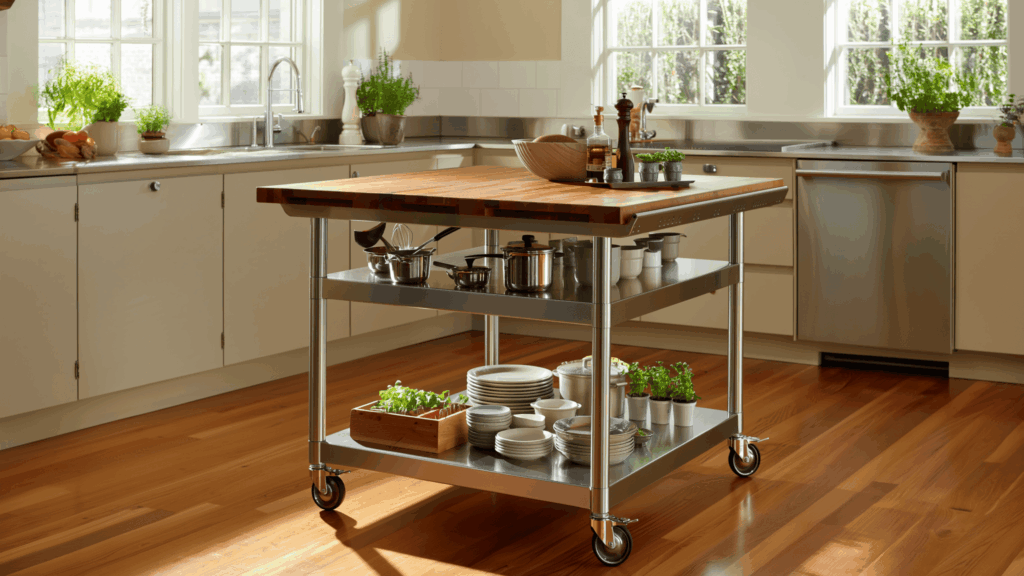
A portable kitchen island is perfect for small kitchens, offering flexibility and mobility. Add wheels to easily move it around as needed.
Use lightweight materials like pine wood for the frame, and include shelves, drawers, or baskets for added storage.
This island provides extra workspace without being a permanent fixture, making it ideal for kitchens that require adaptability.
It’s a versatile and practical solution, adding both functionality and organization to your kitchen without taking up too much space.
3. Fold-out Designs for Versatility

For kitchens with limited space, a fold-out kitchen island is ideal. It features foldable or retractable sides that extend for extra workspace and collapse when not needed.
This design offers versatility, providing ample counter space without taking up unnecessary room. Use durable materials like wood or laminate to create a sturdy, adaptable island that adjusts to your needs.
It’s a perfect solution for maximizing space and functionality in smaller kitchens, offering both convenience and practicality.
4. Multi-purpose Carts
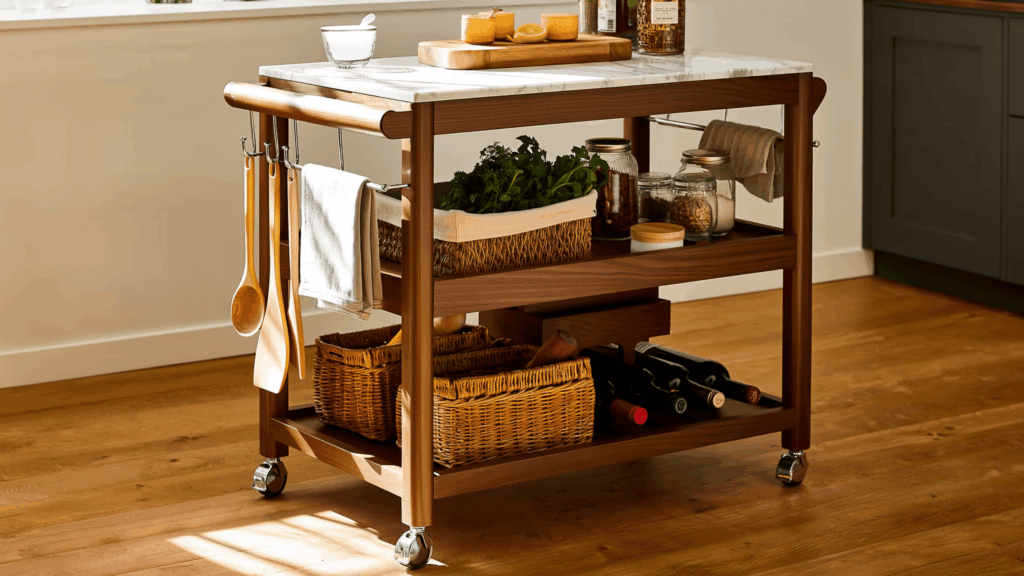
A multi-purpose cart serves as both a kitchen island and an organizational solution. These compact carts are movable and can function as a food prep station, storage space, or serving area.
With shelves, drawers, or baskets for utensils, gadgets, or pantry items, they’re perfect for small kitchens. Build the cart with durable wheels and materials like wood or metal for easy movement.
This versatile piece adds functionality and organization without taking up too much space in your kitchen.
5. Features for Adding Stools or Benches
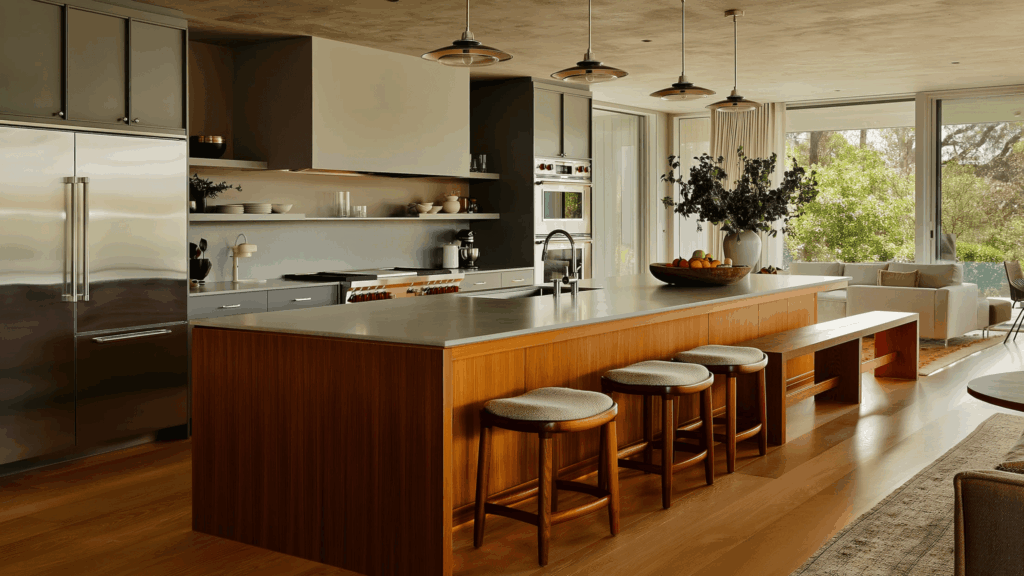
A seating-friendly kitchen island includes stools or benches for extra functionality. Add a counter-height overhang to the edge for easy seating.
Consider including a bench along one side for a cozy dining or gathering spot. Use sturdy materials like hardwood for seating to ensure durability.
Make sure there’s enough clearance for comfort and space, so your island remains both practical and stylish. This design enhances your kitchen by offering additional seating without sacrificing functionality or style.
6. Islands with Integrated Breakfast Bars
An integrated breakfast bar adds seating to your kitchen island, featuring a countertop that extends for stools or chairs. This design is perfect for quick meals or casual gatherings.
For a DIY version, extend one side of the island countertop and add comfortable seating. Use materials like quartz or butcher block to match your kitchen’s style and provide a durable surface.
This simple addition enhances both functionality and style, creating a cozy spot for family or guests to enjoy meals.
7. Sliding Tables for Flexible Seating
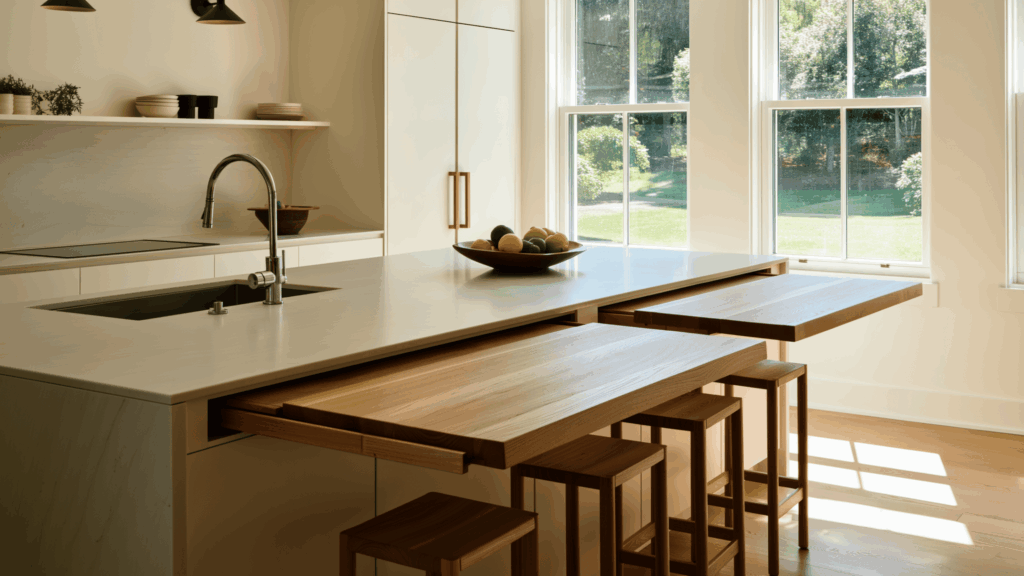
A sliding table on your kitchen island provides flexible, space-saving seating. Pull it out when extra seating is needed and tuck it back when not in use.
The table can be built into the island or mounted on a track for easy movement. Use sturdy wood for the surface and ensure it’s simple to extend and retract.
This design offers convenient seating without taking up extra space, making it a practical addition to your kitchen island.
8. Extra Deep Drawers for Tools and Utensils

Baker’s kitchen islands should have extra-deep drawers to store essential tools and utensils. Build your island with spacious drawers to hold items like rolling pins, mixers, measuring cups, and baking sheets.
This keeps your kitchen organized and clutter-free. Use heavy-duty hardware to support the weight of baking tools and ensure everything stays in place.
With this setup, you’ll have easy access to all your baking supplies when needed, making your kitchen more efficient and functional.
9. Modern, Minimalist Islands with Sleek Finishes
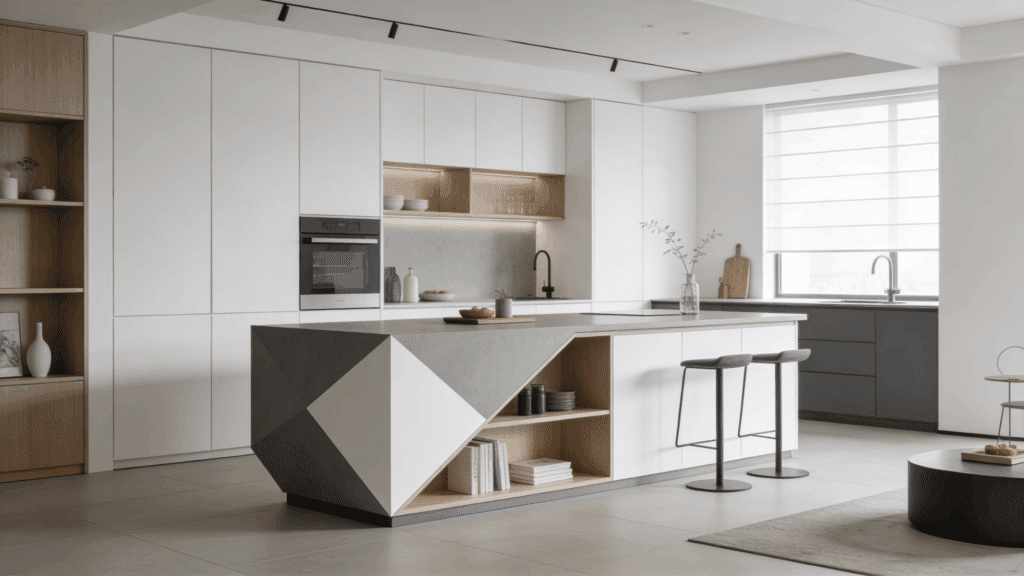
A modern, minimalist kitchen island focuses on clean lines and simplicity. Use sleek materials like stainless steel, concrete, or glossy wood for the surface.
Keep the design streamlined with minimal detailing and integrated storage. This type of island works well in contemporary kitchens, offering both functionality and aesthetic appeal.
It enhances the space without overwhelming it, creating a sleek, organized look that complements modern interiors while providing essential workspace and storage.
10. Incorporating Lighting Features into Your Island

Add creativity to your kitchen island with lighting features. Install under-cabinet lights or pendant lights above the island to brighten the area and create a welcoming atmosphere.
Use LED strips along the base or perimeter for a modern touch. This not only enhances the island’s functionality but also adds style, making it the focal point of the room.
With the right lighting, your DIY kitchen island will stand out and become both practical and visually appealing in your kitchen.
11. Open Shelving for Easy Access to Kitchenware
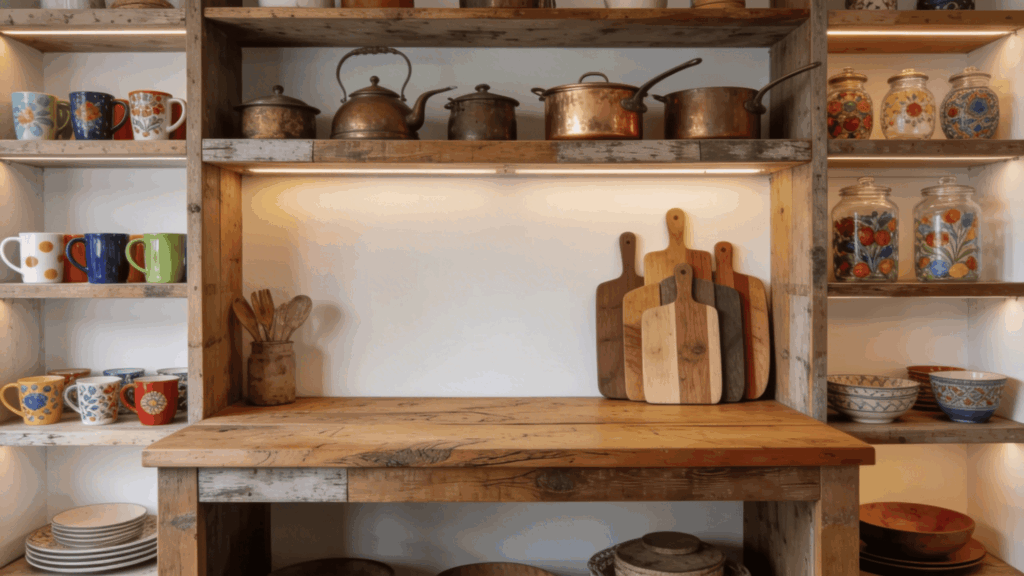
Open shelving on your kitchen island offers easy access to everyday items like spices, cookware, and utensils. Add shelves along the sides or under the countertop for a practical design that keeps everything within reach.
Use sturdy materials like wood or metal to ensure the shelves can hold heavy items while maintaining a neat and organized look.
This setup enhances both functionality and style, making it easier to find what you need while keeping your kitchen clutter-free.
Choosing the Best Style for Your DIY Kitchen Island
To pick the right style, focus on both how your kitchen looks and how you plan to use the island.
- Match your kitchen design: Choose a style that fits your kitchen, like modern, rustic, farmhouse, or industrial.
- Pick a style based on theme: Modern uses clean lines, while farmhouse uses wood and warm details.
- Use the right materials: Industrial style uses metal and concrete for a strong and bold look. You can add wood to balance the design and make it look better
- Match colors and finishes: Keep colors similar to cabinets, counters, and floors for a clean setup.
- Focus on function and looks: Add storage or seating while making sure the island still looks good.
Final Considerations: Installing and Finishing Touches
When installing your DIY kitchen island, the final steps are crucial to ensure both functionality and aesthetic appeal. From securing the island for stability to adding those final touches, each step enhances the overall experience of your kitchen project.
| Category | Content |
|---|---|
| Securing the Island for Stability | To ensure stability, if needed, secure the island to the floor using brackets or screws. |
| Adding Finishing Touches | Add finishing touches like a backsplash, lighting, and paint to enhance the look and style of your kitchen. |
| Protective Coatings | Finish the island with varnish or other protective coatings to protect the surface and add longevity. |
Conclusion
Creating a DIY kitchen island can completely change the look and feel of your kitchen. Whether you choose a compact, space-saving design or a larger island with seating and storage, there are plenty of ideas to match your style.
From rustic wood islands to sleek modern designs, the possibilities are endless. Adding personal touches like lighting, custom cabinetry, or a protective finish will make your island unique and functional.
The best part is that you can customize it to suit your needs and the space available in your kitchen. Ready to transform your kitchen with a DIY island?
Choose your favorite design idea, gather your materials, and get started today! The kitchen of your dreams is just a project away!