
I’ve worked with granite countertops long enough to know they don’t stay shiny on their own. Daily use, spills, and the wrong cleaners can slowly dull them. The good news is you don’t need special skills to fix that.
In this guide on how to polish granite countertops, we will walk through simple steps that actually work.
You’ll learn what tools to use, how to clean the surface the right way, and how to bring back that smooth shine. I’ll also share tips to keep your countertops looking fresh for longer.
If you want a clean, glossy finish without calling a pro, this article will help you get there step by step.
Why Polishing Granite Countertops Is Important
Polishing granite countertops keeps them shiny, smooth, and protected from damage. When you let polish maintenance slide, a few things happen fast:
- Residue from soap, hard water, and cleaners builds up, blocking light from reflecting off the surface
- Acidic spills (lemon juice, vinegar, coffee) etch the protective layer
- Small surface scratches from daily use scatter light instead of reflecting it cleanly
- Without a sealed surface, liquids absorb into the stone and stain permanently
Regular polishing restores the reflective layer, brings out the stone’s natural color depth, and makes future cleaning easier since dirt won’t grip a smooth surface.
DIY Polishing vs. Professional Granite Polishing
Not every granite problem is a DIY fix. Here’s how to know which route to take:
| Situation | Best Approach | Estimated Cost |
|---|---|---|
| Light surface haze, water spots, minor dullness | DIY polishing (this guide) | $20–$50 in supplies |
| Deep scratches visible to the touch | Professional grinding + polishing | $300–$600 |
| Etching from acid (wine, citrus, vinegar) | Professional honing + sealing | $200–$500 |
| Large surface area (countertops + floors) | Professional wet polishing | $500–$1,500+ |
| New countertop first-time sealing | DIY sealing after installation | $15–$40 in sealer |
As a rule: if you can feel a scratch with your fingernail, a professional needs to grind it out before polishing. If the surface just looks dull or hazy, DIY polishing will restore it.
Tools and Supplies Needed to Polish Granite
Having the right tools and supplies makes the polishing process easier and helps you get a smooth, long-lasting shine.
- Soft microfiber cloths
- Warm water
- Mild dish soap
- Granite cleaner (pH-balanced)
- Baking soda (for light stains)
- Granite polish or polishing powder
- Spray bottle
- Non-abrasive sponge
- Polishing pads or buffing pads
- Electric polisher (optional for deep polishing)
How to Polish Granite Countertops
Follow simple steps to restore shine, remove dullness, and keep your granite countertops looking smooth and like new.
Step 1: Deep Clean the Surface
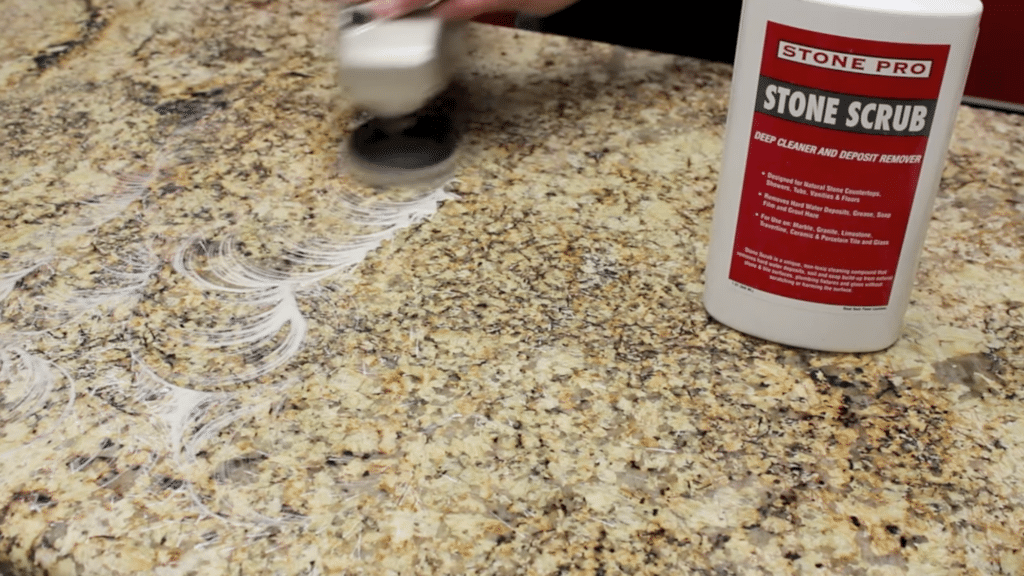
The first step in polishing granite countertops is deep cleaning. Use a stone scrub to remove hard water stains and detergent buildup that dull the surface.
Apply the scrub with a polishing pad and spread it evenly across the countertop. Let it sit for a few seconds so it can break down residue.
This step is important because trapped buildup blocks light from reflecting, making granite look dull rather than shiny.
Step 2: Wipe Off Residue
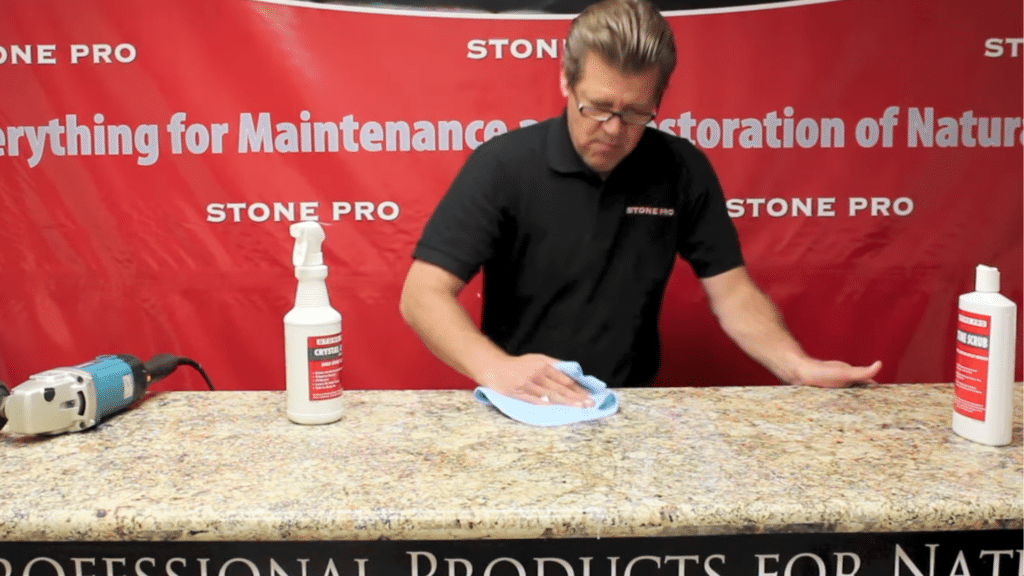
After scrubbing, clean the surface using a pH-balanced granite cleaner and a microfiber cloth. This step in the polishing process removes leftover chemicals and dirt.
Gently wipe the entire area until the surface feels smooth and residue-free.
A clean base ensures that polishing products work properly and give better results. Skipping this step can lead to uneven shine or streaks later on.
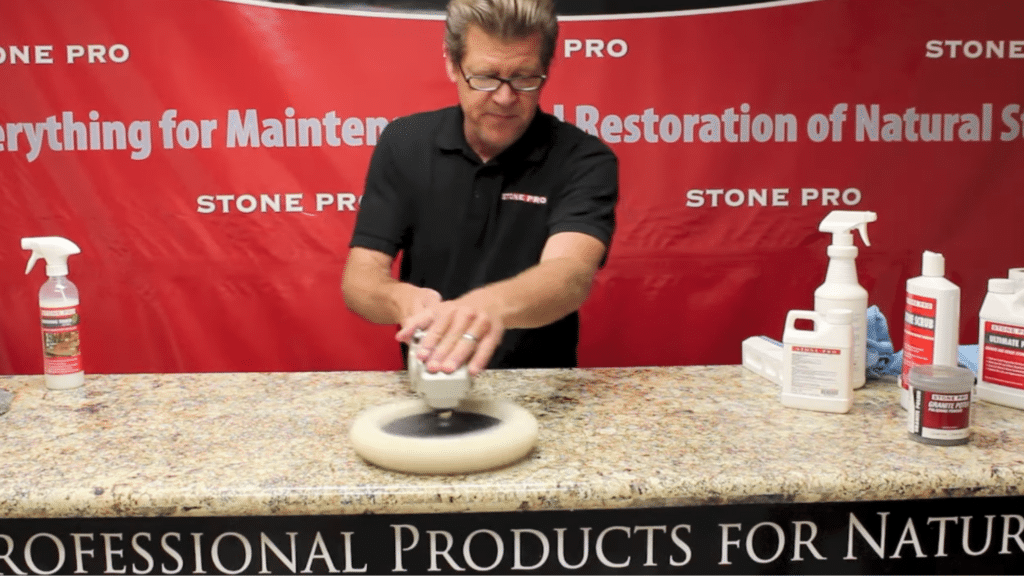
Step 3: Apply Granite Polish
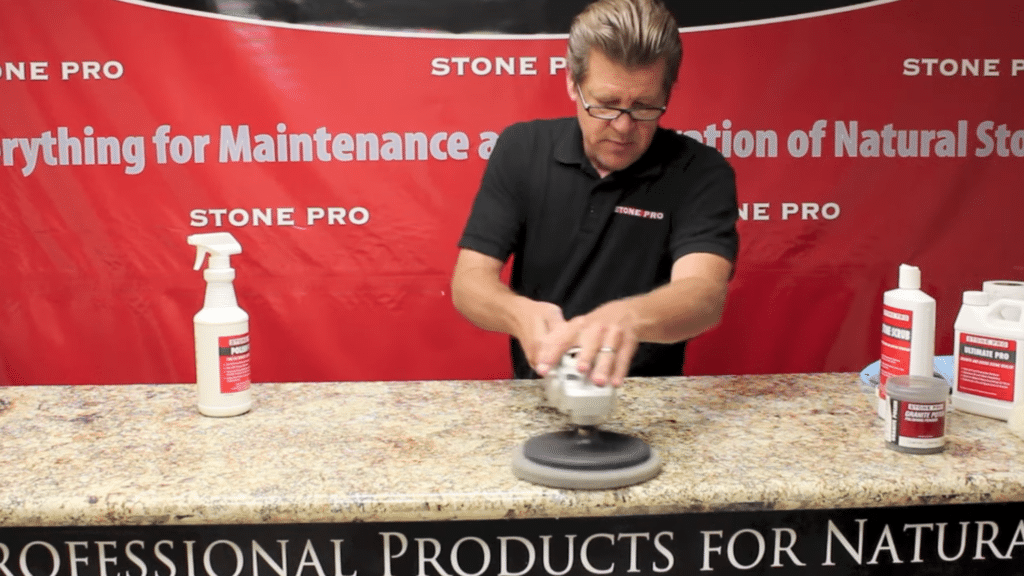
Now comes the main step in polishing granite countertops: applying the polish. Use a small amount of polishing compound and work it in with a low-speed polisher set at around 600 RPM.
Spread it evenly and avoid using too much product. Repeat the polishing process 4–6 times until you get the desired shine.
This step enhances the color and brings out the natural gloss of the granite surface.
Step 4: Seal the Granite
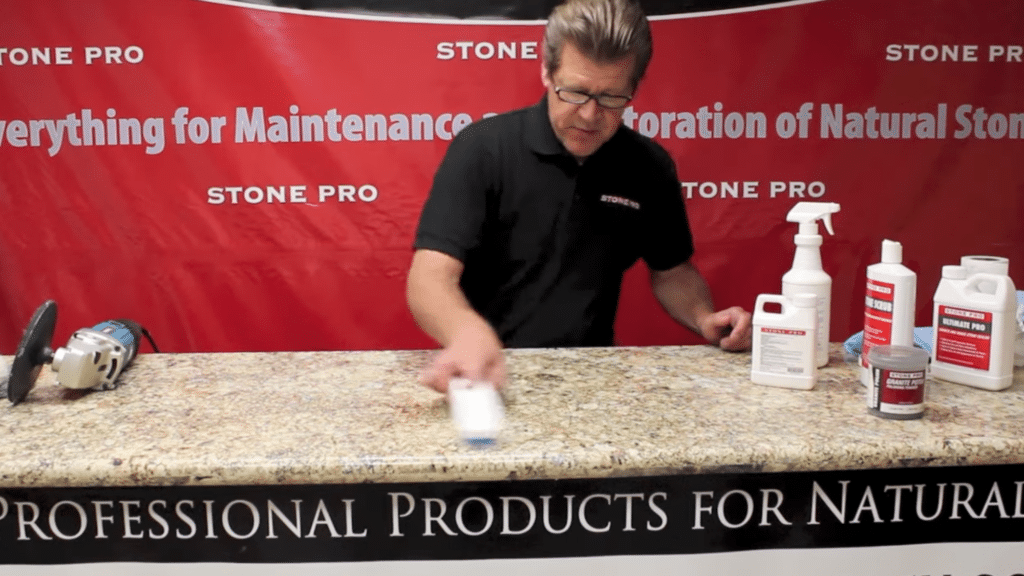
Sealing is a key part of polishing granite countertops because it protects the surface. Apply a granite sealer using an applicator pad and spread it evenly.
Let it sit for about 3–5 minutes so it can absorb into the stone.
This helps guard against water and oil stains. Work in small sections and only add more sealer if needed. A good seal keeps your countertop looking fresh for longer.
Step 5: Final Buff for Shine
The final step in polishing granite countertops is buffing. Use a clean buffing pad to smooth out the surface and enhance the shine.
Start at a low speed and gradually work across the countertop.
This step helps remove fingerprints and gives the granite a sleek, glossy finish. It also improves the overall feel, making the surface smooth and polished like new.
This tutorial is based on a helpful video by Stone Pro (StonePro Videos). You can check out the video for a detailed visual guide here:
Wet vs. Dry Polishing: Which Should You Use?
| Method | How It Works | Pros | Cons |
|---|---|---|---|
| Dry Polishing | Polish applied directly to dry surface, buffed with pad | Simple, no cleanup, good for countertops | Can overheat stone if used too long in one spot |
| Wet Polishing | Water used as coolant while polishing compound is worked in | Prevents heat damage, better for large areas | Messier, requires water management |
For kitchen countertops, dry polishing is the standard DIY approach and works perfectly well. Wet polishing is more common in professional floor and large-surface restoration work.
Can You Damage Granite While Polishing?
Yes, but only if you make avoidable mistakes. Here’s what actually causes damage:
- Polishing Too Fast: High-speed polishers (above 1,500 RPM) generate heat that can crack the resin in engineered granite or dull natural stone
- Using the Wrong Products: Vinegar, bleach, and ammonia-based cleaners etch the protective layer and accelerate dullness
- Over-Applying Polish: Thick layers dry uneven, leave streaks, and require extra buffing to remove
- Skipping Sealer: Polishing without sealing leaves the surface vulnerable to staining within days
If you stick to a low-speed polisher, pH-balanced products, and proper sealing, granite is very forgiving to work with.
Why Granite Countertops Lose their Shine Over Time
Granite countertops lose their shine due to daily wear, buildup, and improper cleaning. Over time, residue builds up, blocking light reflection and making the surface look dull.
When you understand how to polish granite countertops, it becomes clear why shine fades in the first place.
Spills, soap residue, and hard water deposits slowly accumulate on the surface, forming a film that reduces gloss. Using harsh or acidic cleaners can also damage the protective layer, causing the stone to look faded.
Small scratches from regular use can further dull the finish. Without proper care, granite loses its smooth, reflective look.
Regular cleaning and polishing help remove buildup, restore shine, and keep the surface looking fresh and well-maintained for years.
Tips to Maintain a Long-Lasting Shine
Simple care habits can make a big difference in how your countertops look over time. Follow these easy tips to keep the surface smooth and fresh.
- Clean Daily: Wipe your granite with a soft cloth and mild cleaner to remove dust, spills, and buildup before they dull the surface.
- UsepH-balanced cleaners: Harsh or acidic products can damage the finish, so always choose cleaners specifically formulated for granite.
- Dry After Cleaning: Leaving water on the surface can cause spots, so always dry with a microfiber cloth for a streak-free look.
- Avoid Abrasive Tools: Scrubbing pads and rough sponges can leave tiny scratches that dull the shine over time.
- Seal Regularly: Apply a granite sealer every few months to protect against stains and keep the surface looking polished.
- Wipe Spills Quickly: Oil, juice, and other liquids can leave marks if left too long; clean them up right away.
- Polish occasionally: Light polishing helps restore shine and keeps your countertops looking smooth and well-maintained.
Common Mistakes to Avoid When Polishing Granite
Avoiding simple mistakes can help you get better results and protect your countertop. These tips will guide you toward a smoother and longer-lasting finish.
1. Using Harsh Or Acidic Cleaners
One common mistake in polishing granite countertops is using strong or acidic cleaners, such as vinegar or bleach. These products can break down the protective layer and dull the surface over time.
Instead of improving shine, they cause damage that is hard to fix. Always use a pH-balanced cleaner made for granite. This keeps the surface safe and ready for polishing.
Choosing the right cleaner is the first step to maintaining a smooth and glossy finish without harming the stone.
2. Skipping The Deep Cleaning Step
Many people jump straight into polishing without properly cleaning the surface. In how to polish granite countertops, this step is very important because dirt and residue block the polishing effect.
If buildup is left behind, the polish will not stick well, and the shine will look uneven. A proper deep clean removes grime, stains, and old product layers.
This creates a clean base so the polish can work effectively and give the countertop a clear, even shine.
3. Using Too Much Polish
Applying too much product is another mistake when learning how to polish granite countertops. More polish does not mean better results.
In fact, excess product can leave streaks, residue, and a cloudy finish. It can also make the surface feel sticky instead of smooth.
Always use a small amount and spread it evenly. Light layers work better and are easier to control. This helps you achieve a clean, glossy look without buildup or uneven patches on the surface.
4. Polishing At High Speed
Using a polisher at a very high speed can damage the granite surface.
When polishing granite countertops, it is best to work at a low to medium speed. High speed generates excessive heat and friction, which can damage the finish and even cause small cracks over time.
A slower speed allows better control and even distribution of the polish. This helps bring out the natural shine without risking damage or uneven results across the countertop.
5. Ignoring The Sealing Step
Skipping the sealing step is a big mistake when polishing granite countertops. Polishing improves shine, but sealing protects the surface from stains and moisture.
Without a seal, the granite can absorb liquids and quickly lose its polished look. Applying a sealer after polishing helps lock in the shine and protect the surface. It also makes future cleaning easier.
This step ensures your countertop stays smooth, shiny, and durable for longer.
Cost of Polishing Granite
DIY polishing pays for itself after one session compared to professional rates. The initial supply investment covers multiple years of maintenance.
| Service | DIY Cost | Professional Cost |
|---|---|---|
| Basic polish + reseal (kitchen countertop) | $20–$50 | $150–$300 |
| Full restoration (honing + polish + seal) | Not DIY-suitable | $300–$700 |
| Polishing supplies starter kit | $40–$80 one-time | N/A |
| Annual maintenance (4 sessions/year) | $5–$15/session | $100–$200/session |
Final Thoughts
Taking care of your granite countertops doesn’t have to feel hard or time-consuming. With the right steps, you can bring back the shine and keep the surface looking smooth and clean every day.
A little effort goes a long way in protecting your countertop from dullness, stains, and wear.
Now that you know how to polish and maintain it, you can handle the process with confidence. Try these steps at your own pace and see what works best for you.
If you’ve already tried polishing your granite, I’d love to hear how it went. Share your experience, tips, or even mistakes in the comments below, your story might help someone else too!
Frequently Asked Questions
Can You Polish Granite Yourself?
You can safely make your own granite polish using ingredients you may already have at home.
Can Dull Granite be Fully Restored?
Yes, in most cases. Light to moderate dullness from buildup or minor scratches responds well to DIY polishing.
Can I Use Baking Soda to Polish Granite?
The only time you would use baking soda on natural stone would be to remove a stubborn oil stain.