
If you’ve been searching for new floors and keep seeing the term “floating floor,” you’re not alone.
Most people hear it and wonder if the floor is literally hovering mid-air. It’s not. But the way it works is actually pretty clever.
A floating floor does not attach to the subfloor at all, and that one difference changes everything about how it installs, moves, and lasts.
This post breaks down what a floating floor is, how it’s installed, the types available, and whether it’s the right choice for your home. No jargon, no fluff. Just the answers you need.
What Is a Floating Floor?
A floating floor is a type of floor that is not nailed, stapled, or glued to the subfloor below it.
Instead, the individual planks or tiles lock together and sit on a layer called underlayment, forming a single connected surface that “floats” above the subfloor.
The floor stays in place through its own weight, friction with the underlayment, and the baseboards or molding around the room’s edges.
It is not a type of material; it is an installation method, and several different floor types can be installed this way.
Types of Floating Floors

Not every floating floor looks or feels the same. Each type has its own strengths, so the right pick depends on your room, your budget, and how much wear the floor will see.
Laminate Flooring: Made with a high-density fiberboard core and a printed top layer that mimics wood or stone. It is affordable, scratch-resistant, and good for dry areas.
Luxury Vinyl Plank (LVP) / Luxury Vinyl Tile (LVT): Built with multiple layers including a rigid composite core; fully waterproof, highly durable, and works well in kitchens and bathrooms.
Engineered Hardwood: Has a real wood veneer on top of a layered wood core; more stable than solid hardwood and better at handling humidity.
Floating Floor vs. Glue-Down vs. Nail-Down: Key Differences
Choosing how your floor gets installed matters just as much as the material you pick. Here is a side-by-side look at the three main methods.
| Feature | Floating | Glue-Down | Nail-Down |
|---|---|---|---|
| Attached to the subfloor | No | Yes (adhesive) | Yes (nails/staples) |
| Best subfloor type | Concrete, plywood, tile, existing floor | Concrete or plywood | Plywood/wood only |
| DIY-friendly | Yes | No | No |
| Installation cost | $2 to $4 per sq ft | $3 to $5 per sq ft | Moderate to high |
| Sound underfoot | Slightly hollow | Solid | Solid |
| Ease of repair | High | Low | Low |
| Can be refinished | No (most types) | Yes (hardwood) | Yes (hardwood) |
| Removal | Easy | Difficult | Moderate |
| Good for basements | Yes | Depends | No |
How Does a Floating Floor Work?
Each plank has a tongue on one side and a groove on the other. When you lay them side by side, the tongue clicks into the groove of the next plank. This creates one large, locked surface.
Because it is not fixed to the subfloor, the whole floor can expand and contract slightly as temperature and humidity change, which is why a small gap is always left around the room’s edges during installation.
Advantages and Disadvantages of Floating Floors
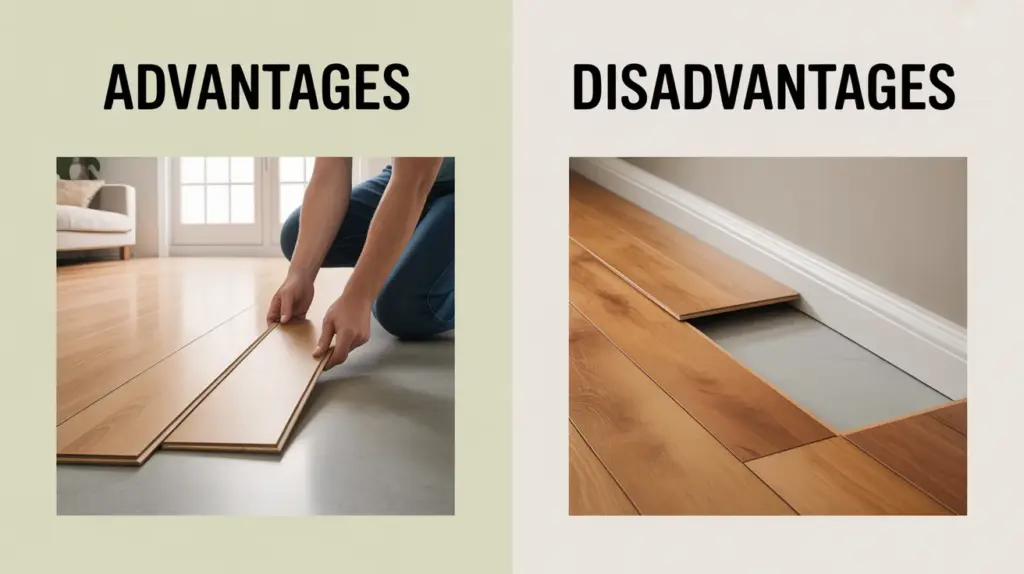
There is a lot to like about floating floors, but the trade-offs are worth knowing before you commit. Here is an honest look at both sides.
Advantages:
- Easy to install: No glue or nails needed. Planks click into place, making it a realistic DIY project.
- Works over many subfloors: Can go directly over concrete, existing tile, plywood, and even low-pile carpet.
- Simple to repair: A damaged plank can be removed and replaced without tearing up the entire floor.
- Lower installation cost: Saves $1.50 to $2.50 per square foot compared to glue-down installation.
- Good for basements: Works well over concrete with the right moisture-barrier underlayment.
- Handles seasonal movement: Because it is not fixed down, the floor can shift slightly without cracking.
Disadvantages of Floating Floors:
- Hollow sound: Walking on it, especially with shoes, can produce a tapping or hollow noise due to the air gap below.
- Moisture sensitivity: Excess moisture can cause warping, buckling, or even mold if the wrong type is used in wet areas.
- Cannot be refinished: Most floating floors have a pre-finished surface. Once it wears down, the plank gets replaced, not sanded.
- Less stable under heavy loads: Heavy furniture or wheelchair use can cause faster wear and joint shifting over time.
- Subfloor must be level: Any dip or bump in the subfloor will affect how the floor sits and sounds.
- May affect resale perception: Some buyers in the higher-end market view floating floors as a less permanent option than nailed or glued options.
What to Check Before You Install
Two things tend to cause the most problems with floating floors: an unprepared subfloor and moisture that was not tested. Run through this checklist before you buy a single plank.
| What to Check | Why It Matters | What to Look For |
|---|---|---|
| Subfloor flatness | Bumps and dips make the floor flex and squeak | No dip greater than 3/16 inch over 10 feet |
| Moisture levels | High moisture leads to warping and mold | Use a moisture meter; follow the manufacturer’s limits |
| Existing floor condition | Floating floors can go over many surfaces, but not unstable ones | Stable, clean, no soft spots or loose tiles |
| Room size | Very large rooms expand more and can stress the plank joints | Consult a pro for rooms over 40 feet in any direction |
| HOA or building rules | Some buildings require sound-dampening underlayment for hard floors | Check your HOA rules before purchasing |
| Subfloor type | Determines which installation method is even possible | Concrete, plywood, tile, or existing flooring |
How to Install a Floating Floor: Step-by-Step
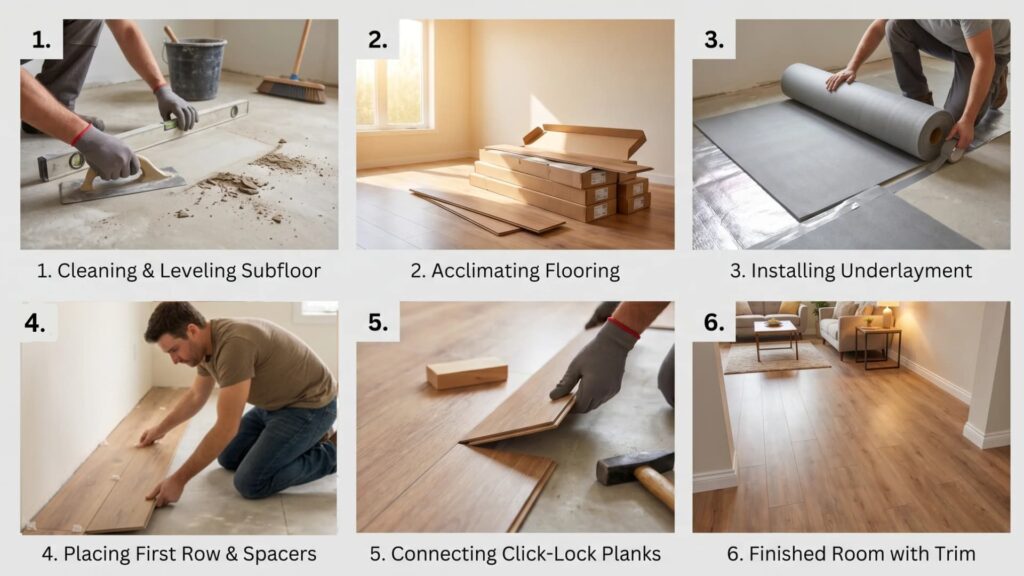
The process is straightforward, but skipping any of these steps is where most problems start. The acclimation step especially tends to get skipped by first-timers.
Step 1: Prepare the Subfloor
Clean the subfloor completely. Remove any debris, raised nails, or loose sections. The surface must be flat, dry, and stable before anything goes down.
Step 2: Let the Flooring Adjust to The Room
Leave the boxes of flooring open in the room for at least 48 hours before installation. Wood and composite materials expand or contract based on the room’s temperature and humidity. Installing straight from the box without this step is one of the most common reasons floors warp or gap within weeks.
Step 3: Lay the Underlayment
Roll out the underlayment across the subfloor, taping any seams. Choose a type that matches your needs: moisture barrier for concrete, acoustic foam for upper floors, or a combination product for basements.
Step 4: Start the First Row Along the Longest Wall
Place spacers between the planks and the wall to maintain the expansion gap. This gap, usually around 1/4 inch, gives the floor room to move without buckling against the wall.
Step 5: Click the Planks Together Row by Row
Insert the tongue of each new plank into the groove of the previous one at a slight angle, then press down to lock it into place. Use a tapping block and rubber mallet to close any gaps. Never use a hammer directly on the plank.
Step 6: Stagger the End Joints
Offset the end joints of each row by at least 6 to 8 inches from the row before it. This makes the floor stronger and looks better once it is finished.
Step 7: Complete the Edges and Transitions
Remove the spacers. Install baseboards or quarter-round molding to cover the expansion gap. Add transition strips wherever the floating floor meets a different floor type.
How to Choose the Right Underlayment?
The underlayment sits between the subfloor and your floating floor, and it does more than just add cushioning.
A foam underlayment works for basic installations on plywood, but concrete subfloors need a moisture-barrier product to stop water vapor from reaching the planks.
For apartments or multi-story homes, an acoustic underlayment absorbs footstep noise and reduces sound travel between floors.
Always check the manufacturer’s recommendation for your specific floor product.
Using the wrong underlayment type can void your warranty, and no amount of underlayment will fix a subfloor that has dips, moisture problems, or structural issues.
How Much Does a Floating Floor Cost?
The total cost depends on the material you choose, the size of the room, and whether you install it yourself or hire someone. Here is a general breakdown.
| Cost Item | Low End | High End | Notes |
|---|---|---|---|
| Laminate flooring (material) | $1 per sq ft | $5 per sq ft | Budget-friendly; wide style range |
| LVP flooring (material) | $2 per sq ft | $7 per sq ft | Waterproof; good for most rooms |
| Engineered hardwood (material) | $3 per sq ft | $10 per sq ft | Real wood top layer; most realistic look |
| Floating installation (labor) | $2 per sq ft | $4 per sq ft | DIY can cut this cost to near zero |
| Underlayment | $0.25 per sq ft | $1 per sq ft | Higher cost for acoustic or moisture barrier types |
| Subfloor leveling | $1 per sq ft | $5 per sq ft | Only needed if the subfloor has major issues |
| Transition strips and trim | $20 per piece | $80 per piece | Needed at doorways and room edges |
A typical 200 square foot room with LVP and a mid-range underlayment, DIY-installed, usually comes out to around $500 to $900 total in materials.
Where Can You Install a Floating Floor?
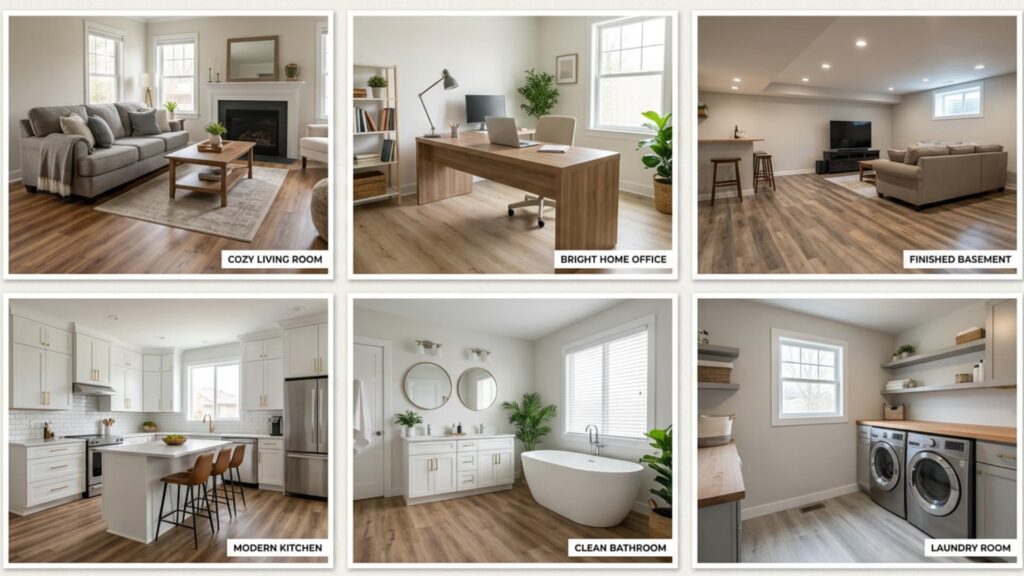
Floating floors work in most rooms, but the material you choose matters a lot, especially given the room’s moisture levels.
- Living rooms and bedrooms: Strong fit for all three types. Laminate, LVP, and engineered hardwood all work well here.
- Home offices: Any floating floor type works; LVP is a solid pick if you roll a chair across it daily.
- Basements: LVP is the best option here due to its waterproof core; engineered hardwood works with a proper moisture barrier; laminate is not recommended.
- Kitchens: LVP only. Spills and humidity make laminate and engineered hardwood risky in this room.
- Bathrooms: LVP is the only floating floor type safe for full bathrooms with tubs and showers.
- Laundry rooms: LVP only, same reasoning as bathrooms.
- Commercial spaces or wheelchair-accessible homes: Not recommended. The constant pressure from wheels and heavy foot traffic wears out floating floors faster than glued or nailed-down options.
Floating Floor Maintenance and Repair Tips
Day-to-day care is simple. Sweep or dry mop regularly, and wipe up spills quickly before they sit.
Never use a steam mop on laminate or engineered hardwood floating floors; the steam forces moisture into the joints, causing swelling.
If your floor starts squeaking, try working a small amount of talcum powder into the joints between boards. It reduces friction and often stops the noise without needing to lift a single plank.
For a damaged board, start at the nearest wall, remove rows back to the damaged piece, swap in the new plank, and click everything back into place.
Put felt pads under furniture legs to reduce surface scratches, and avoid dragging heavy appliances across the floor.
Wrapping It Up
A floating floor is one of the most practical flooring options available for homeowners today. It goes in fast, costs less to install than glued or nailed alternatives, and can sit over almost any existing subfloor.
The trade-offs are real. It is not the right choice for every room, and moisture is always something to plan around. But for most living spaces, it gets the job done well and at a price that makes sense.
If you are comparing your options, start with the room you are renovating, check the subfloor condition, and pick the material that matches the moisture level in that space.
That alone will point you in the right direction.