

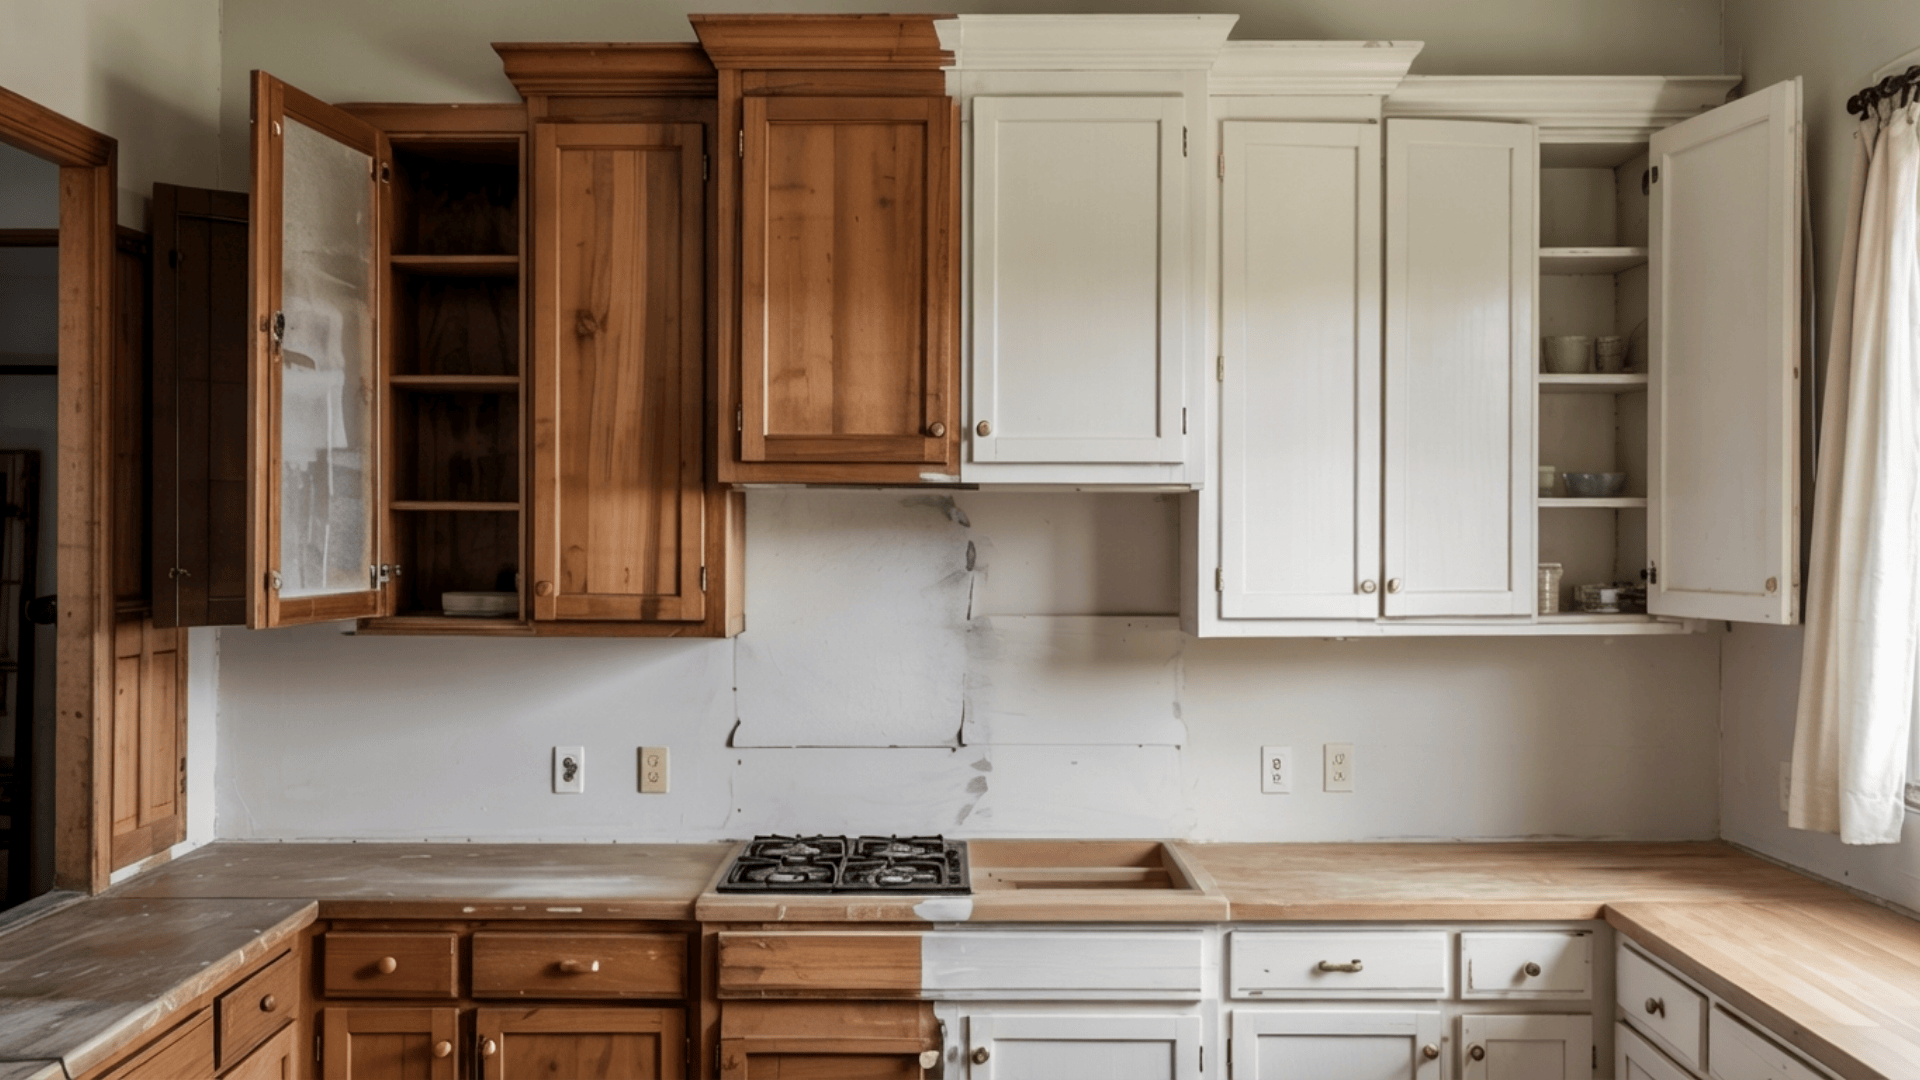
Thinking about giving your kitchen a fresh look, many homeowners update their cabinets during a remodel to make the space feel new without spending too much.
Two popular options are kitchen cabinet refinishing and refacing. Refinishing includes steps such as cleaning, sanding, repairing, painting or staining, and sealing, often clearly shown in step-by-step YouTube guides.
Refinishing is the right choice for many kitchens, but refacing can be a stronger option when a bigger style change is needed.
This blog explains what refinishing is, how the process works, and when refacing may be a better choice. It will also cover costs, benefits, and helpful tips to choose the right option.
What Is Kitchen Cabinet Refinishing
Kitchen cabinet refinishing involves updating the surfaces of existing cabinets rather than replacing them.
It includes sanding off the old finish, repairing minor damage, and applying a fresh coat of paint or stain to improve the cabinets’ appearance without altering their structure.
The main goal is to give cabinets a clean and updated surface.
The process usually includes cleaning to remove grease, sanding to prepare the surface, repairing scratches or dents, applying new paint or stain, and sealing the finish for protection.
This method works best when cabinets are still strong and not damaged. It is a good choice if a simple color refresh is needed or if a budget-friendly upgrade is desired. Because nothing structural changes, the process works around existing plumbing and appliances; no demolition, no reinstallation.
Benefits of Professional Kitchen Cabinet Refinishing
Refinishing improves the look of cabinets without touching the structure, which means no plumbing changes, no new measurements, and no extended kitchen downtime.
-
Cost-effective upgrade: Refinishing costs much less than replacing cabinets, making it easier to improve the kitchen without a large budget.
-
Faster process: The work takes less time compared to a full replacement, so the kitchen is ready to use sooner.
-
Keeps the existing layout: Cabinets stay in the same place, avoiding extra work like plumbing or structural changes.
- Less waste: Since cabinets are reused, less material is sent to landfills, making it a cleaner option for renovation.
Step-by-Step Kitchen Cabinet Refinishing Process
A clear breakdown of each stage helps make the refinishing process easier to handle and more organized.
Tools and Materials Required
- Gel stripper
- Scraper
- BIN oil-based primer
- Cabinet-grade paint
- Spray gun
- Denatured alcohol
- Ultrasonic cleaner
- Lubricant for hinges
Step 1: Plan the Project and Set Realistic Expectations
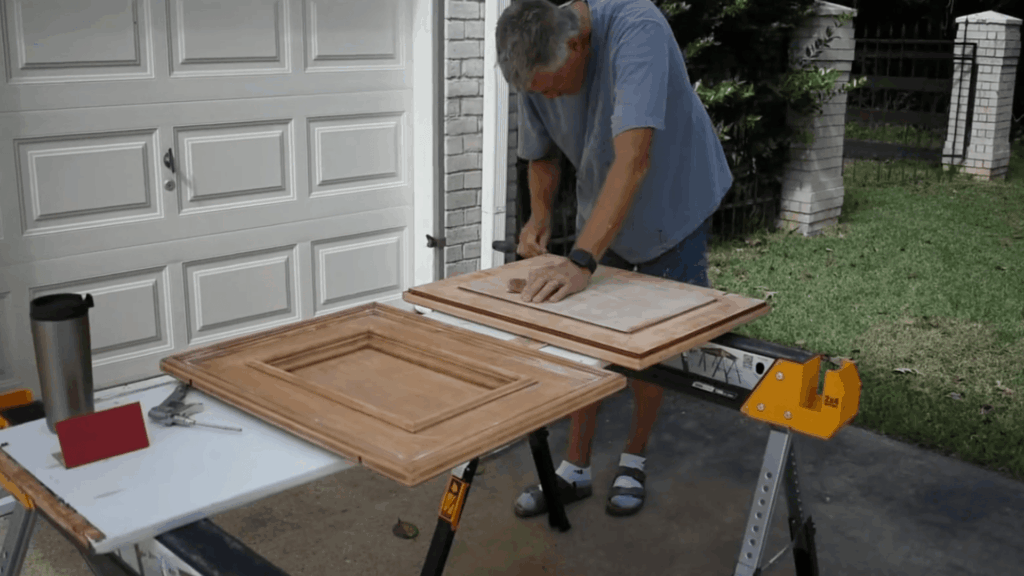
Kitchen cabinet refinishing is a large and time-consuming task. Expect it to take longer than you anticipate.
To make the process easier, start with the upper cabinets and tackle the lower cabinets later. Breaking the job into stages helps manage the workload and reduce stress.
Plan ahead, set aside enough time, and decide how much of the kitchen to refinish at once. This makes the entire project much more manageable.
Step 2: Strip, Sand, and Prepare the Cabinet Surface
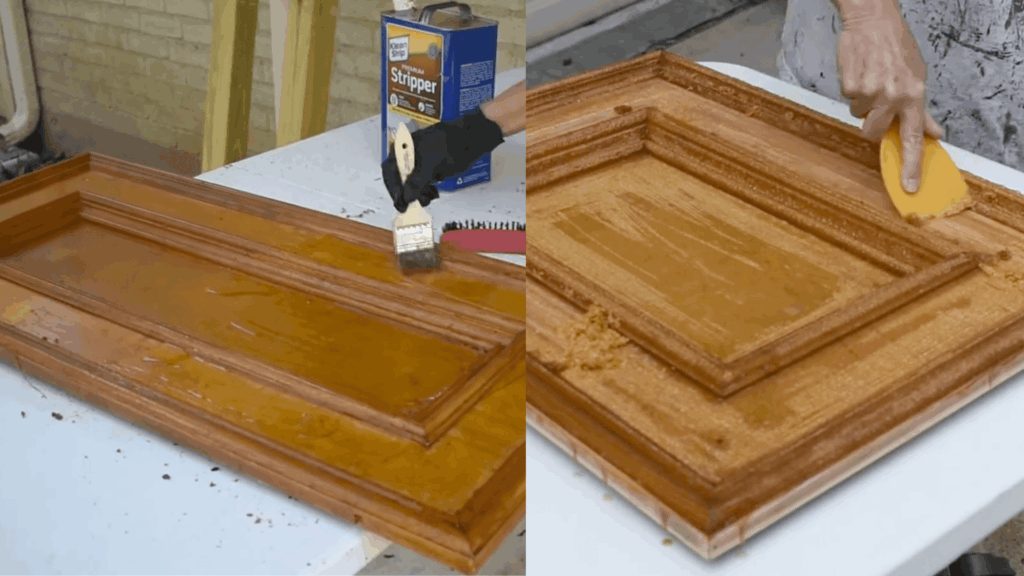
Begin by preparing the cabinets for painting. Remove peeling finishes, smooth out damage, and create a slightly textured surface so paint adheres well.
For thick, glossy varnish, apply a gel stripper with a brush and let it sit before scraping it off. Several applications may be needed to reach bare wood.
After stripping, sand the surface with 180-grit sandpaper. Clean the grooves carefully and fill any dents with wood filler to create a smooth surface ready for primer.
Step 3: Apply Primer for Adhesion and Stain Blocking
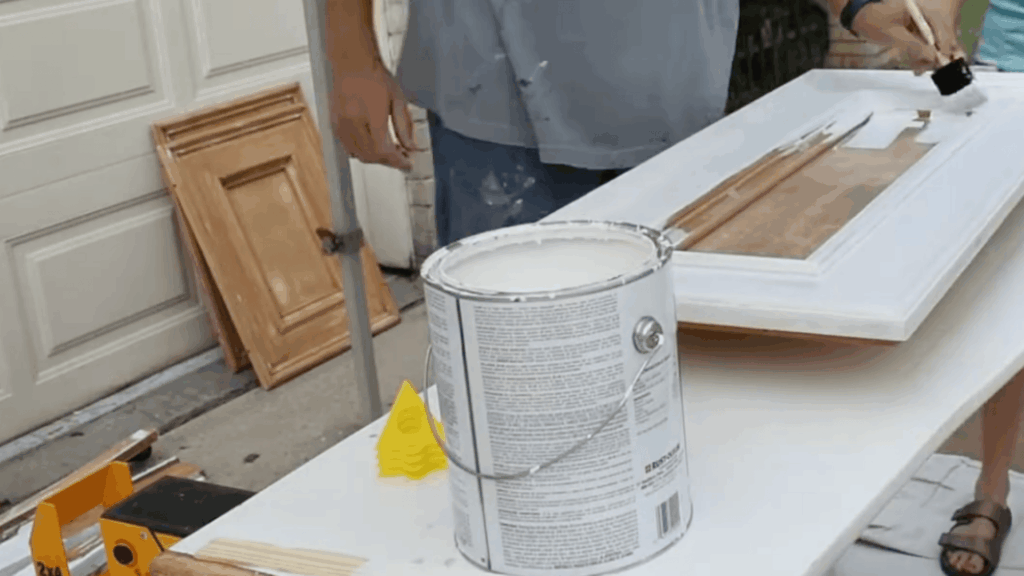
Once the cabinets are clean and prepped, apply primer to help paint adhere and block stains or odors from the wood.
Use an oil-based primer to prevent wood tannins from bleeding through white paint. Place cabinet doors on small stands and prime them with a brush and roller.
After the primer dries completely, lightly sand it with 220-grit sandpaper to smooth the surface before painting.
Step 4: Spray Durable Cabinet Paint in Thin Coats
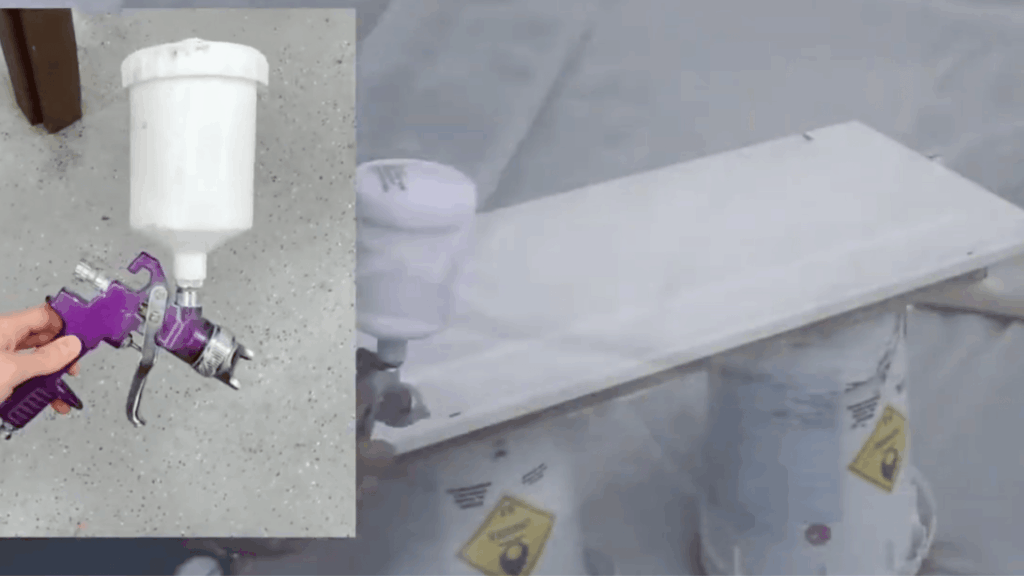
Choose a paint designed for cabinets and trim, such as a urethane enamel, which cures into a strong finish that handles regular kitchen use.
Instead of brushing, spray the paint using an air compressor and spray gun for a smoother finish. Stir, strain, and slightly thin the paint before spraying.
Apply several thin coats, sanding lightly with 400-grit sandpaper between coats to remove imperfections and maintain a smooth surface.
Step 5: Allow Proper Drying and Full Paint Curing
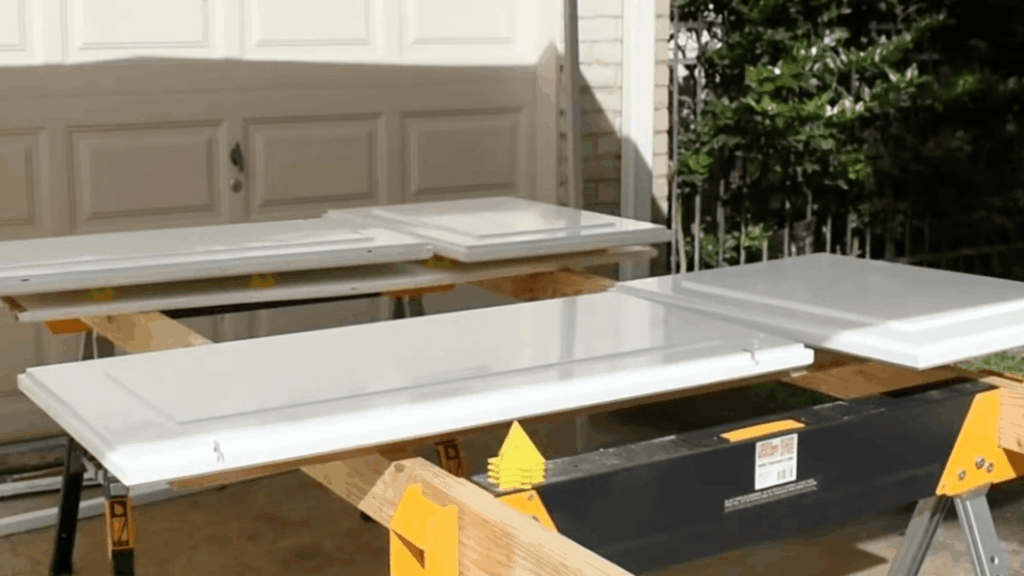
Paint may feel dry in four to six hours, but it takes much longer to fully cure and harden.
Apply multiple coats, sanding between each to maintain a clean finish. Allow sufficient drying time to prevent dents, fingerprints, or damage.
Wait an extra day or two before reinstalling doors and hardware to protect the newly painted surfaces.
Step 6: Clean Hardware and Prepare for Reassembly
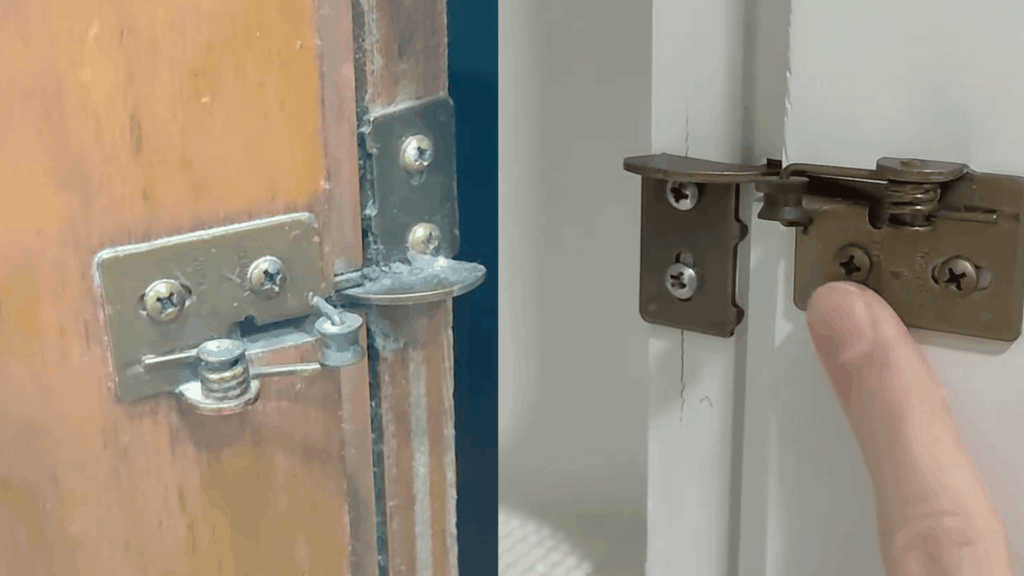
Inspect all hardware before reassembly. Clean and reuse hinges if they are still functional.
Soak hinges in denatured alcohol and clean them with an ultrasonic jewelry cleaner to remove dust, grime, and varnish buildup.
After cleaning, lubricate the hinges so they move smoothly. Reusing original hinges avoids drilling new holes or realigning cabinet doors.
Step 7: Reinstall Doors and Complete the Kitchen Update
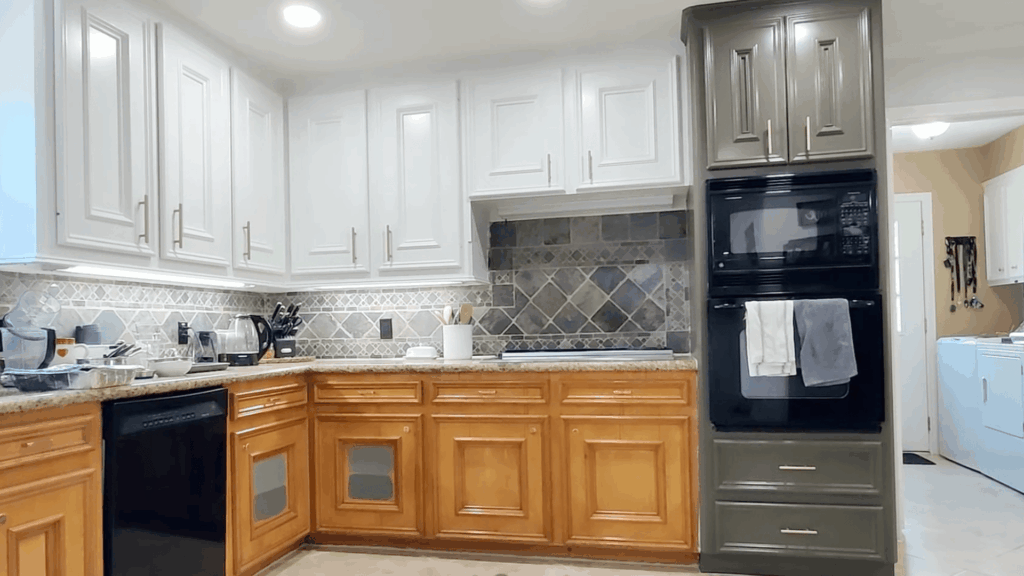
Once the paint has fully cured and the hardware is ready, reinstall the cabinet doors.
The transformation becomes visible as outdated glossy wood cabinets turn bright white.
While achieving a perfect factory finish at home is challenging, careful preparation, quality paint, and patience produce a professional-looking result that greatly improves the kitchen’s appearance.
For an in-depth look at the whole process, check out the complete video tutorial below:
Kitchen Cabinet Refinishing vs. Refacing Cost
For a DIY refinishing project, materials typically run $200 to $600 for paint, primer, sandpaper, and a spray gun. Refacing done yourself is more involved; expect $1,000 to $2,500 in materials for a standard kitchen, not counting tools or time.
| Service | Low End | Average Cost | High End |
|---|---|---|---|
| Refinishing / Staining | $1,500 | $3,650 | $5,000 |
| Painting | $2,000 | $4,250 | $6,500 |
| Refacing | $4,000 | $6,750 | $13,000 |
Refinishing and staining are the most budget-friendly options for professional work. Refacing costs significantly more because it involves replacing all door fronts and applying new veneer to the cabinet boxes.
The higher high-end figures for refacing reflect custom door styles, premium wood species, and larger kitchens.
How to Choose the Right Cabinet Update Method
Choosing the right option depends on a few simple factors that help guide the decision in a practical way
Start with the budget since cost plays a big role. Refinishing is usually more affordable, while refacing costs more but gives a bigger visual change
Next, think about a kitchen style change. If only a color update is needed, refinishing is a good option. If a new look or modern design is the goal, refacing is often a better fit
Check the condition of cabinets. Strong cabinets with minor wear are good for refinishing. Damaged or outdated styles may need refacing
Finally, consider a professional assessment. An expert can examine the cabinets and recommend the most suitable option based on condition and goals.
DIY vs. Hiring a Professional for Cabinet Refinishing
Refinishing cabinets yourself is possible, but it is a large and time-consuming project. Most DIY kitchens with 10 to 15 cabinets take two full weekends to complete, and the paint needs another week to fully cure before doors go back on.
The material cost for a DIY project typically runs between $200 and $600, covering paint, primer, sandpaper, and basic tools. Hiring a professional costs between $1,500 and $4,000 for the same kitchen, depending on size and finish type.
DIY makes sense when the cabinets are in good shape, the finish needed is straightforward (solid paint over wood), and enough time is available to do the prep properly.
Professional refinishing is worth considering when the cabinets have significant buildup or detail work, when a spray-only finish is required, or when the timeline is tight.
The biggest difference in results almost always comes down to preparation. Professionals spend the majority of their time on stripping, cleaning, and sanding, not painting. Rushing the prep stage is the most common reason DIY refinishing jobs fail early.
Useful Tips for Better Kitchen Cabinet Refinishing
Small steps and careful work can help achieve a cleaner and longer-lasting finish
- Clean thoroughly before sanding: Grease and cooking residue prevent paint from sticking, so wipe down every surface with a degreaser first.
- Sand evenly across all surfaces: Light, consistent sanding creates the texture primer and paint need to bond properly.
- Use a stain-blocking primer: An oil-based primer such as BIN prevents wood tannins from bleeding through light-colored paint, which is the most common cause of discoloration on refinished cabinets.
- Apply thin coats only: Multiple thin layers dry more evenly and sand more cleanly than a single thick coat, and they’re far less likely to run or sag.
- Allow full drying time between coats: Rushing this step leaves the surface soft and prone to dents and fingerprints.
- Work in a dust-free space and label every part: Dust particles stick to wet paint and are difficult to fix once dry. Labeling doors and hardware makes reassembly straightforward and avoids alignment problems.
Conclusion
Kitchen cabinet refinishing and refacing both offer smart ways to update a kitchen without going through a full replacement.
Refinishing works best for simple surface updates, while refacing offers a bigger change with new doors and a new style. The right choice depends on budget, cabinet condition, and the desired look.
Both options can improve the kitchen without major construction, saving time and cost while still making a visible difference. Taking time to understand each method helps in making a more confident decision.
Frequently Asked Questions
Can Laminate Kitchen Cabinets Be Refinished?
Laminate cabinets can be refinished with proper preparation. Light sanding and a high-quality bonding primer are required to ensure paint adhesion and achieve a smooth, long-lasting finish.
How Long Does Kitchen Cabinet Refinishing Last?
Refinished cabinets can last around 8 to 10 years when proper preparation, quality materials, and careful application techniques are used, along with regular cleaning and maintenance.
Is Indoor Cabinet Refinishing Safe?
Indoor refinishing is safe with proper ventilation. Opening windows, using exhaust fans, and wearing protective gear help reduce exposure to fumes from primers, paints, and cleaning products.
Can the Cabinet Color Be Changed from Dark to Light?
Changing the cabinet color from dark to light is possible. It requires a strong stain-blocking primer and multiple thin coats of paint to ensure full coverage and prevent discoloration.
Is Removing Cabinet Doors Necessary Before Refinishing?
Removing cabinet doors and hardware is recommended. This step allows better surface access, improves paint application, and helps achieve a smoother, more even, and professional-looking finish.