

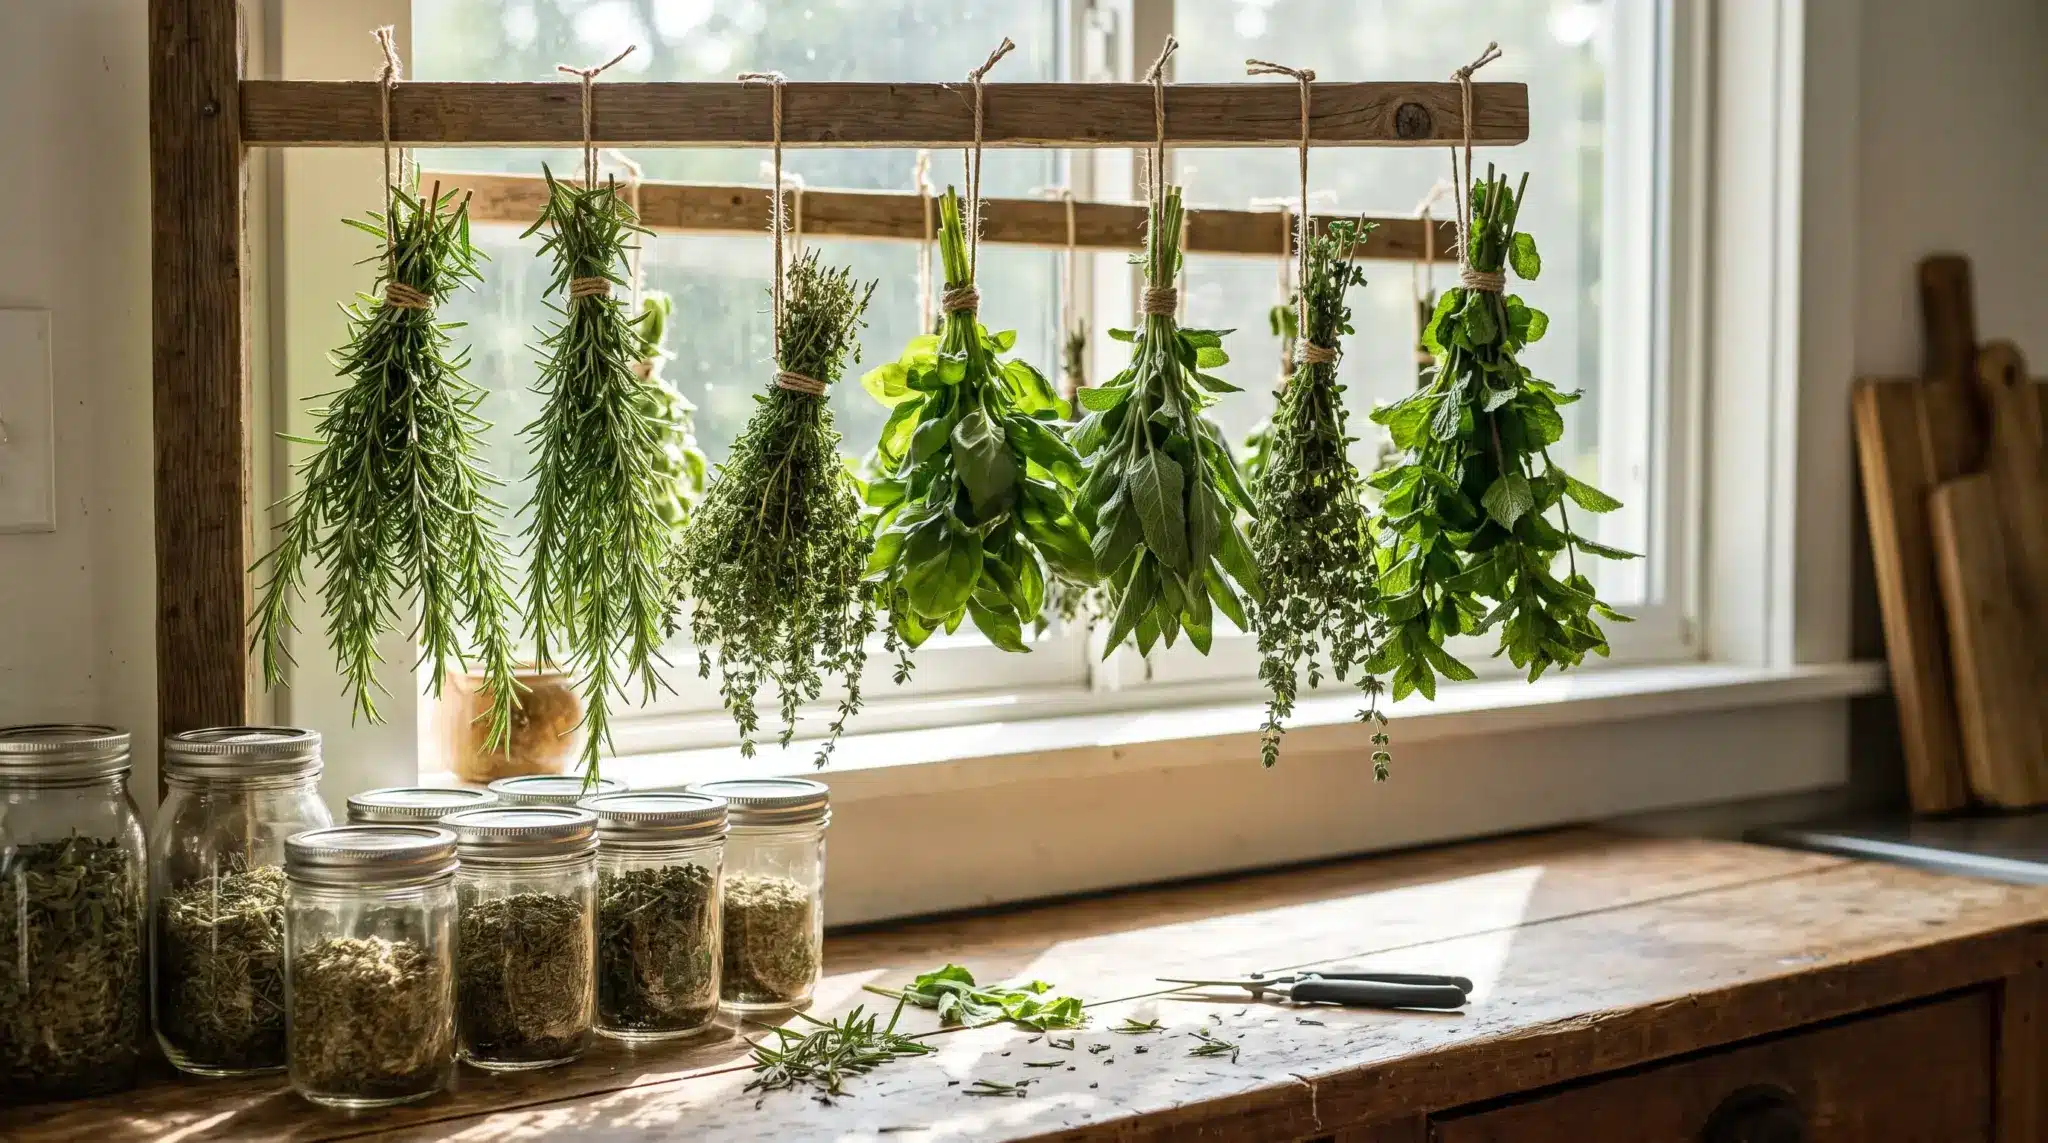
Drying herbs sounds simple, but a few small mistakes can leave you with jars full of bland, brittle leaves instead of flavorful seasonings.
If you want to know how to dry herbs the right way, choosing the proper method matters just as much as growing or harvesting them.
I know you want herbs that keep their aroma, color, and taste long after the growing season ends. The good news is that you don’t need expensive equipment or special skills to get great results.
You’ll learn which drying method suits each herb, how to tell when they’re fully dry, the best storage practices, and simple tips to keep your herbs fresh for months.
| Best For | Home-grown culinary herbs: rosemary, thyme, basil, mint, and more |
| Fastest Method | Microwave, 1 to 3 minutes |
| Most Reliable Method | Food dehydrator, 1 to 4 hours |
| Best Natural Method | Air drying, 1 to 3 weeks |
| Shelf Life When Stored Properly | 1 to 3 years |
Which Drying Method Fits Which Herb
Not every herb dries the same way, and that is the first mistake most beginners make: they treat basil like rosemary and wonder why it turns black instead of green. Woody, low-moisture herbs hold up under slow, natural drying.
Tender, high-moisture herbs need faster methods with more airflow, or they turn brittle and lose most of their oils before they finish drying. A few herbs, cilantro especially, never taste like much once the water is gone, and I tell readers to freeze those instead of drying them.
| Herb | Recommended Method | Average Drying Time | Flavor Retention |
|---|---|---|---|
| Rosemary | Air Dry | 1 to 2 weeks | Excellent |
| Thyme | Air Dry | 1 to 2 weeks | Excellent |
| Oregano | Air Dry | 1 to 2 weeks | Excellent |
| Sage | Air Dry | 1 to 2 weeks | Excellent |
| Mint | Air Dry | 1 to 2 weeks | Very Good |
| Basil | Food Dehydrator | 1 to 4 hours | Good |
| Parsley | Food Dehydrator | 2 to 4 hours | Good |
| Dill | Food Dehydrator | 1 to 3 hours | Good |
| Chives | Food Dehydrator | 1 to 3 hours | Fair |
| Cilantro | Freeze Instead | N/A | Poor After Drying |
A plant that struggled in poor ground rarely dries into anything worth keeping, since weak growth means thin leaves and fewer of the oils that carry flavor. Getting the soil mix right before you ever plant is what gives your rosemary or thyme the concentration to survive the drying process in the first place.
Harvest Timing Affects Flavor More Than People Expect
I pick herbs in the mid-morning, after the dew has burned off but before the sun gets high enough to stress the plants. That window is when essential oil concentration peaks in the leaves, and it is the single biggest factor readers overlook when their dried herbs come out weak.
Choose stems with full color and no wilting, rinse only if the leaves are dusty or you have been companion planting nearby with pest-prone vegetables, and pat everything dry before you start. Trapped moisture is the number one cause of mold in home-dried herbs, more common than a poor drying method.
If pest pressure is why you are rinsing more than usual, pairing plants strategically in the beds nearby can cut down on that problem well before harvest.
5 Ways to Dry Herbs at Home
Each method below trades speed for control differently, and the right one often depends on how much you grew in the first place.
A patio full of small-space growing setups tends to yield smaller harvests suited to air-drying, while a full garden bed calls for faster batch methods. Air-drying requires patience but needs no equipment.
A dehydrator gets you there in an afternoon. The oven and microwave are backups for when you are short on time, and paper bags solve a specific problem: keeping dust and light off herbs that shed easily.
Method 1: Air Drying (Best for Woody Herbs)
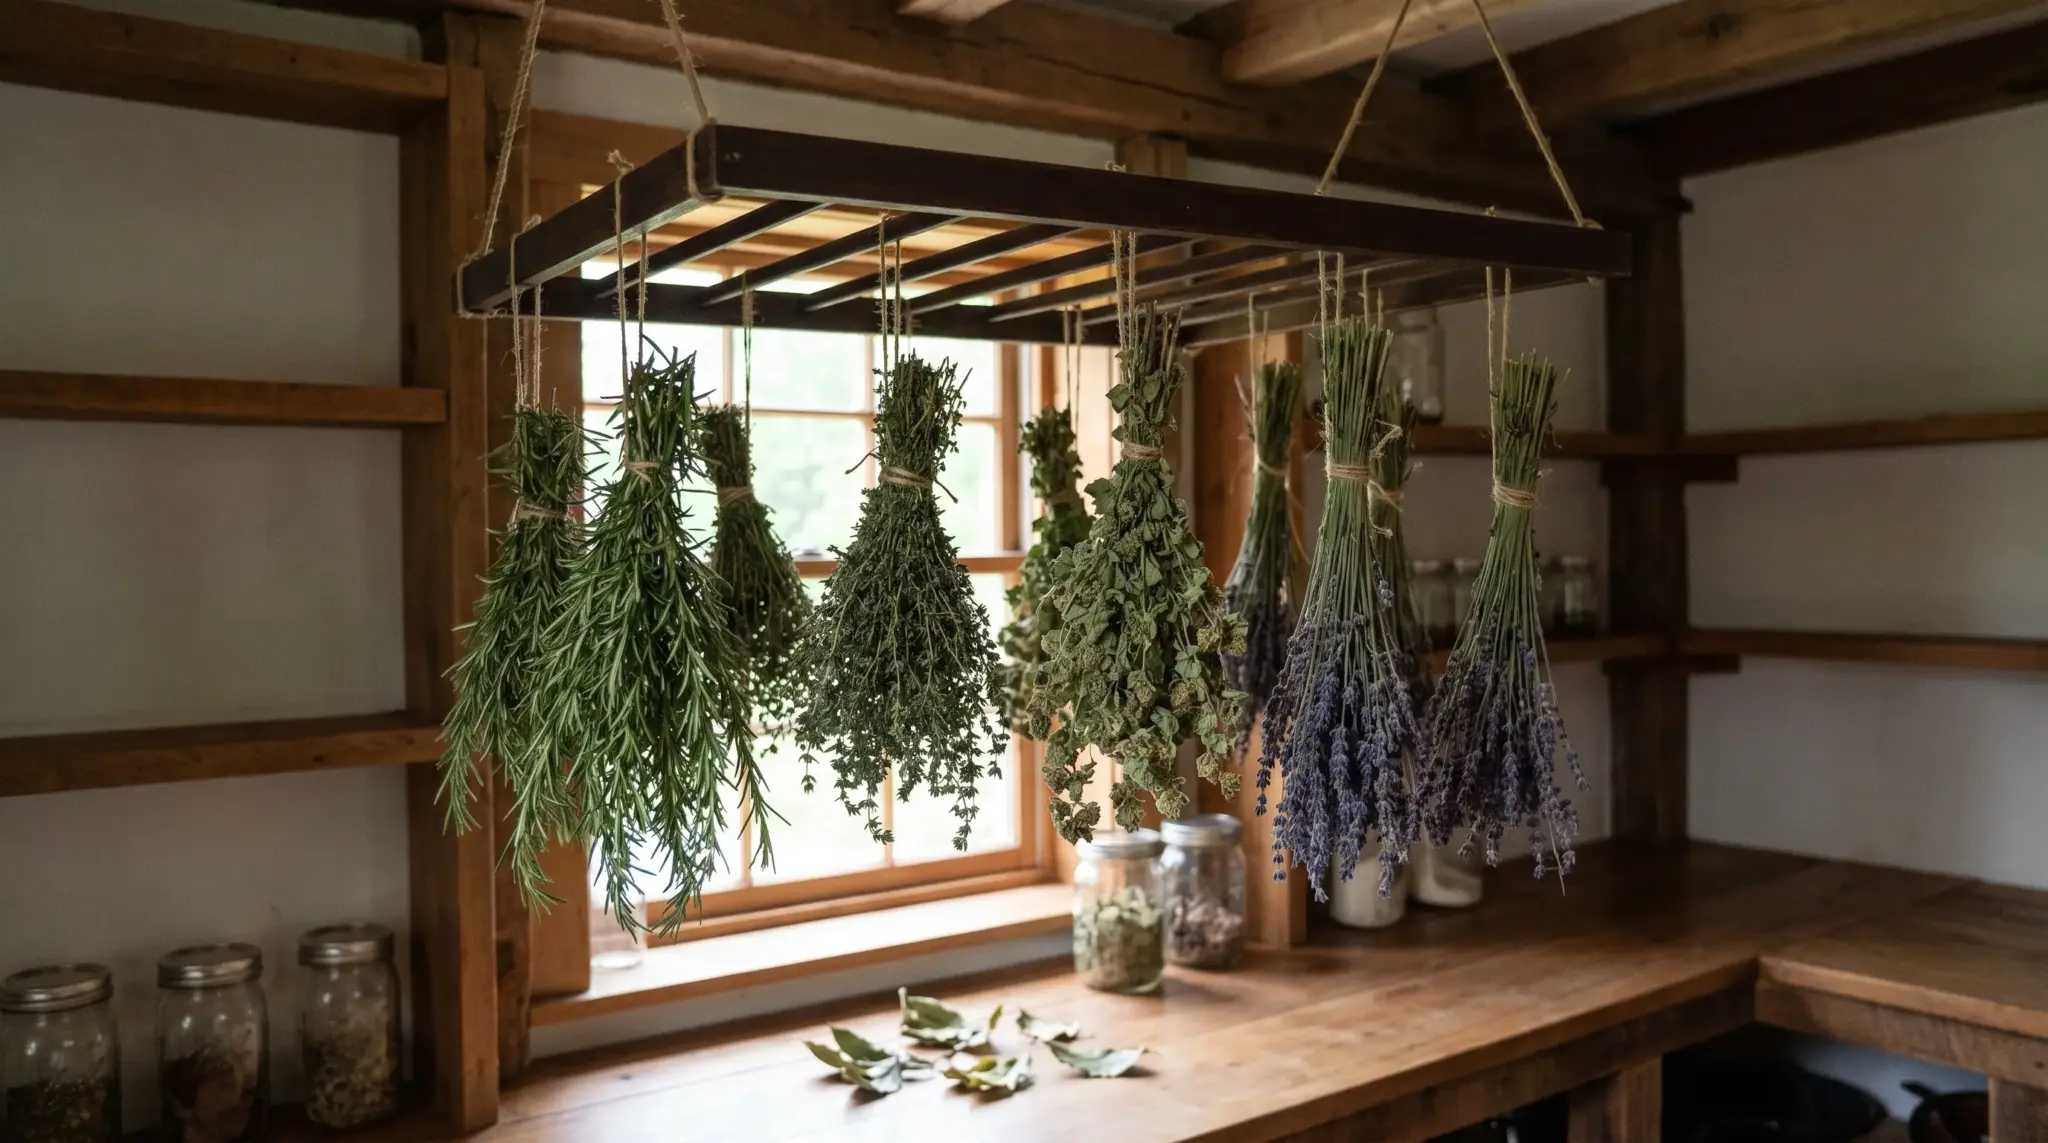
Air drying works because rosemary, thyme, oregano, and sage already carry low moisture content in their leaves, the same reason these varieties dominate most growing herbs in indoor setups. The biggest mistake I see is bundles tied too tightly, which trap humid air at the center of the bundle and invite mold before the outer leaves even finish drying.
- Tie small bundles: Group 4 to 6 stems per bundle, no more, and secure with string or a rubber band that will tighten as the stems shrink.
- Hang upside down: Stems up, leaves down, in a warm, dry, ventilated spot.
- Keep out of direct sun: Sunlight fades color and breaks down the oils that carry flavor.
- Space bundles apart: Air needs to move freely around every bundle, not just past it.
- Check for crumble: Leaves are ready when they crush easily between your fingers and the stem snaps rather than bends.
Expect 1 to 3 weeks depending on humidity and airflow. Skip damp basements, thick bundles, and any spot near a stove or heater vent.
Method 2: Food Dehydrator (Fastest Reliable Method)
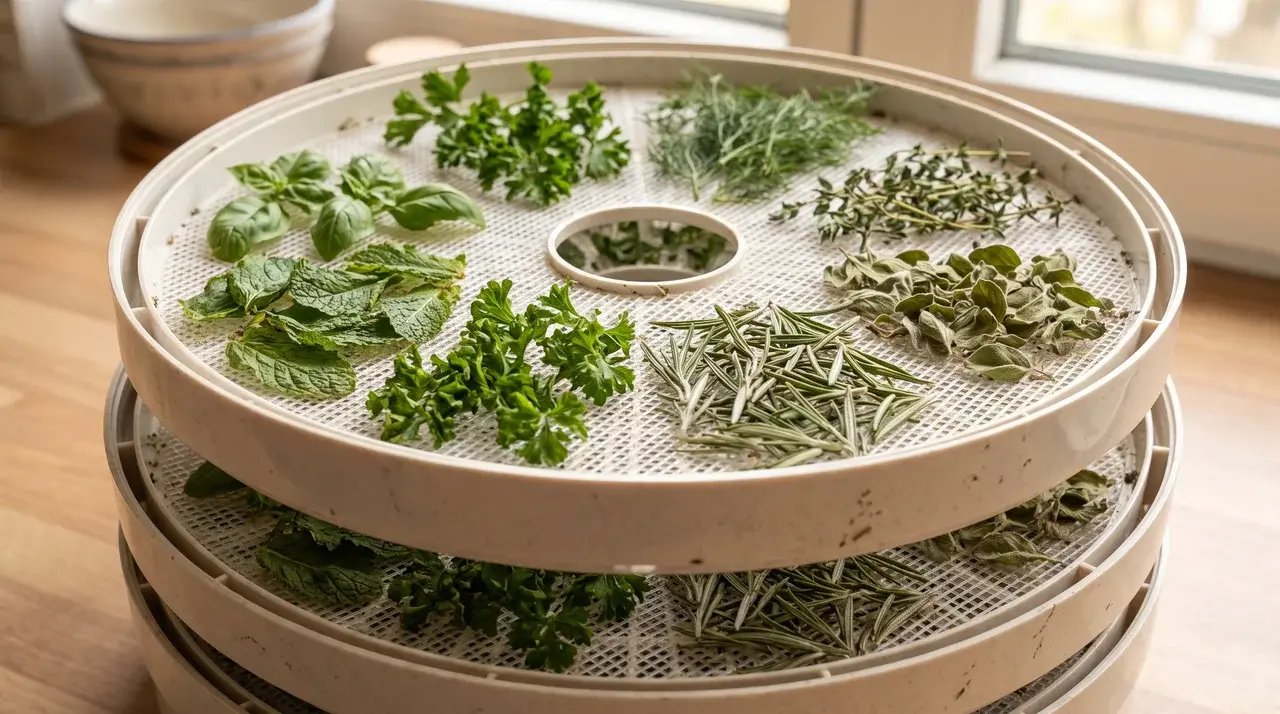
A dehydrator holds a steady low temperature, which is exactly what tender herbs like basil and parsley need since they scorch easily at higher heat. This is the method I recommend most for beginners because it removes guesswork.
- Wash and dry thoroughly: Any leftover surface water adds hours to the drying time.
- Discard damaged leaves: Yellow or bruised leaves dry unevenly and can seed mold in the batch.
- Arrange in a single layer: Overlapping leaves block airflow and dry inconsistently.
- Set 95°F to 115°F: Push closer to 125°F if your kitchen runs humid, per Clemson Cooperative Extension guidance.
- Test for crispness: Done when leaves crumble and no soft spots remain.
Most herbs finish in 1 to 4 hours. Overcrowded trays and high heat are the two mistakes that ruin a dehydrator batch fastest.
Method 3: Oven Drying
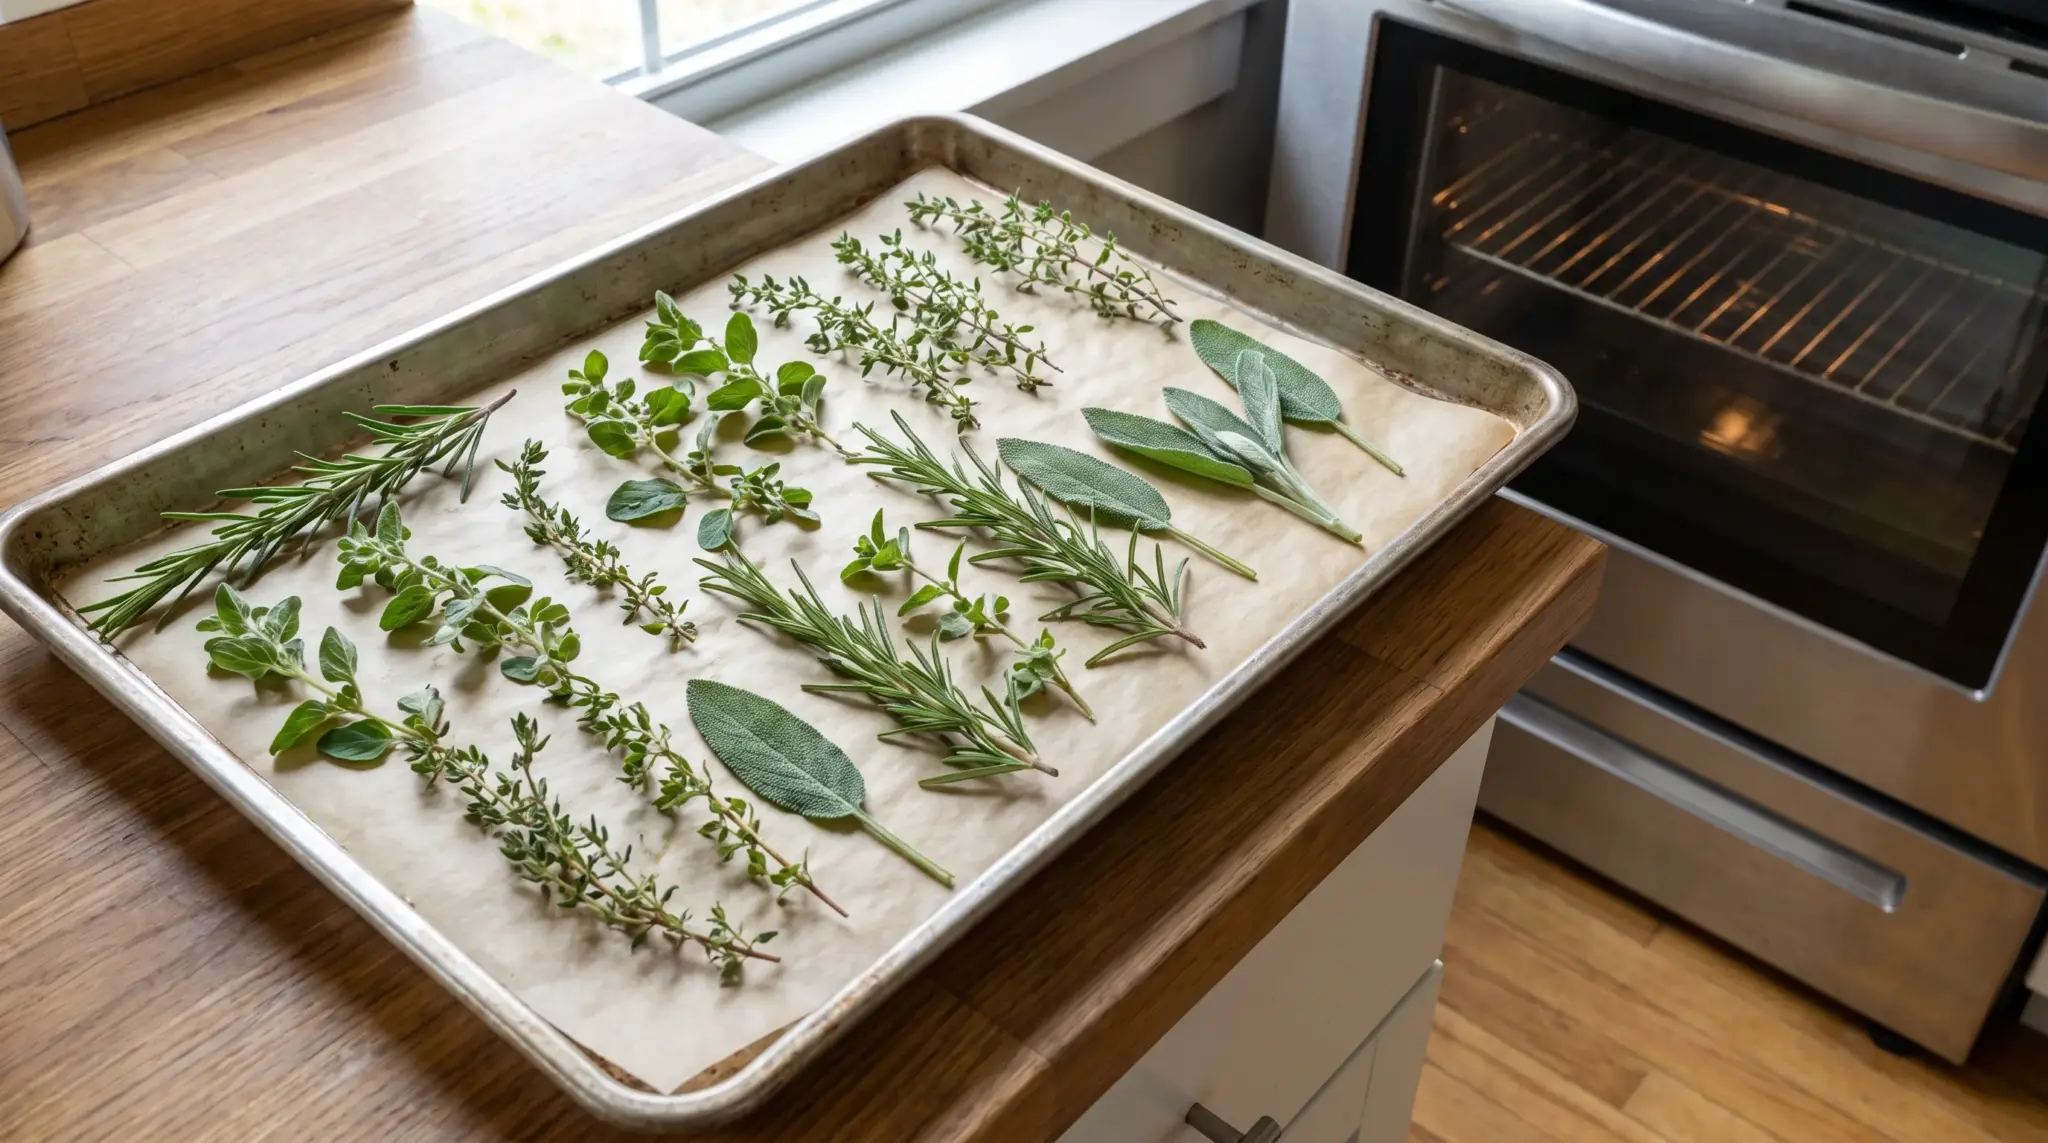
This is the method I suggest when someone does not own a dehydrator and cannot wait two weeks for air drying. It works for the same sturdy herbs that do well air drying: rosemary, thyme, sage, oregano, and marjoram.
- Prep the herbs: Rinse, dry completely, and strip any thick, woody stems.
- Line a tray with Parchment paper to keep leaves off the hot metal.
- Spread in a single layer: Stacking traps moisture and causes uneven drying.
- Set the oven to 150°F to 170°F: Prop the oven door open slightly so moisture can escape.
- Turn every 20 to 30 minutes: Check both sides to prevent scorching.
Plan on 1 to 3 hours. Never walk away from an oven running this low and slow; check it on a timer, not by memory.
Method 4: Microwave Drying (Small Batches Only)
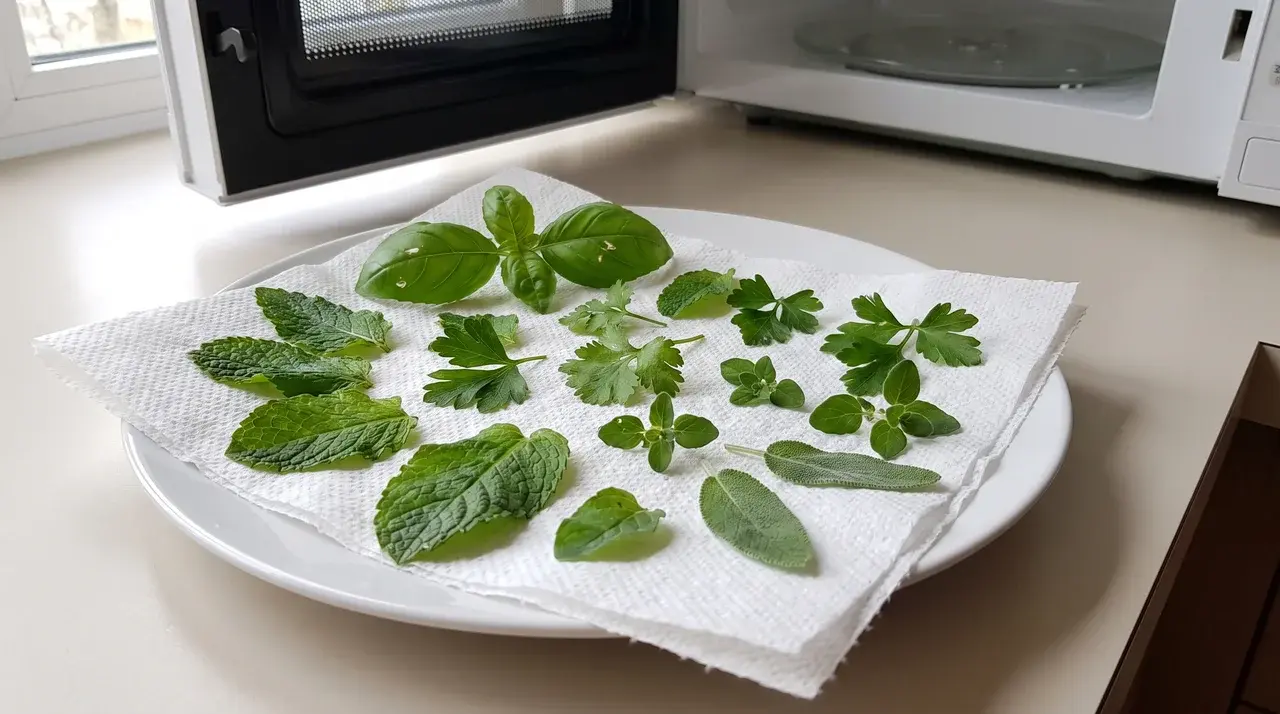
I only reach for this when I need a spoonful of one herb right now, not a full jar. It works on individual leaves pulled from basil, mint, parsley, cilantro, oregano, and sage for immediate use.
- Dry the leaves fully: Wet leaves steam instead of drying.
- Separate from stems: Stems and leaves dry at different rates.
- Layer between paper towels: One layer of leaves, plain towels on both sides.
- Heat in 20 to 30 second bursts: Check and rearrange after every interval.
- Stop at crisp: Let cool before judging texture; warm leaves feel drier than they are.
Total time runs from 1 to 3 minutes. Longer bursts and recycled paper towels are the two habits most likely to scorch a batch.
Method 5: Paper Bag Drying
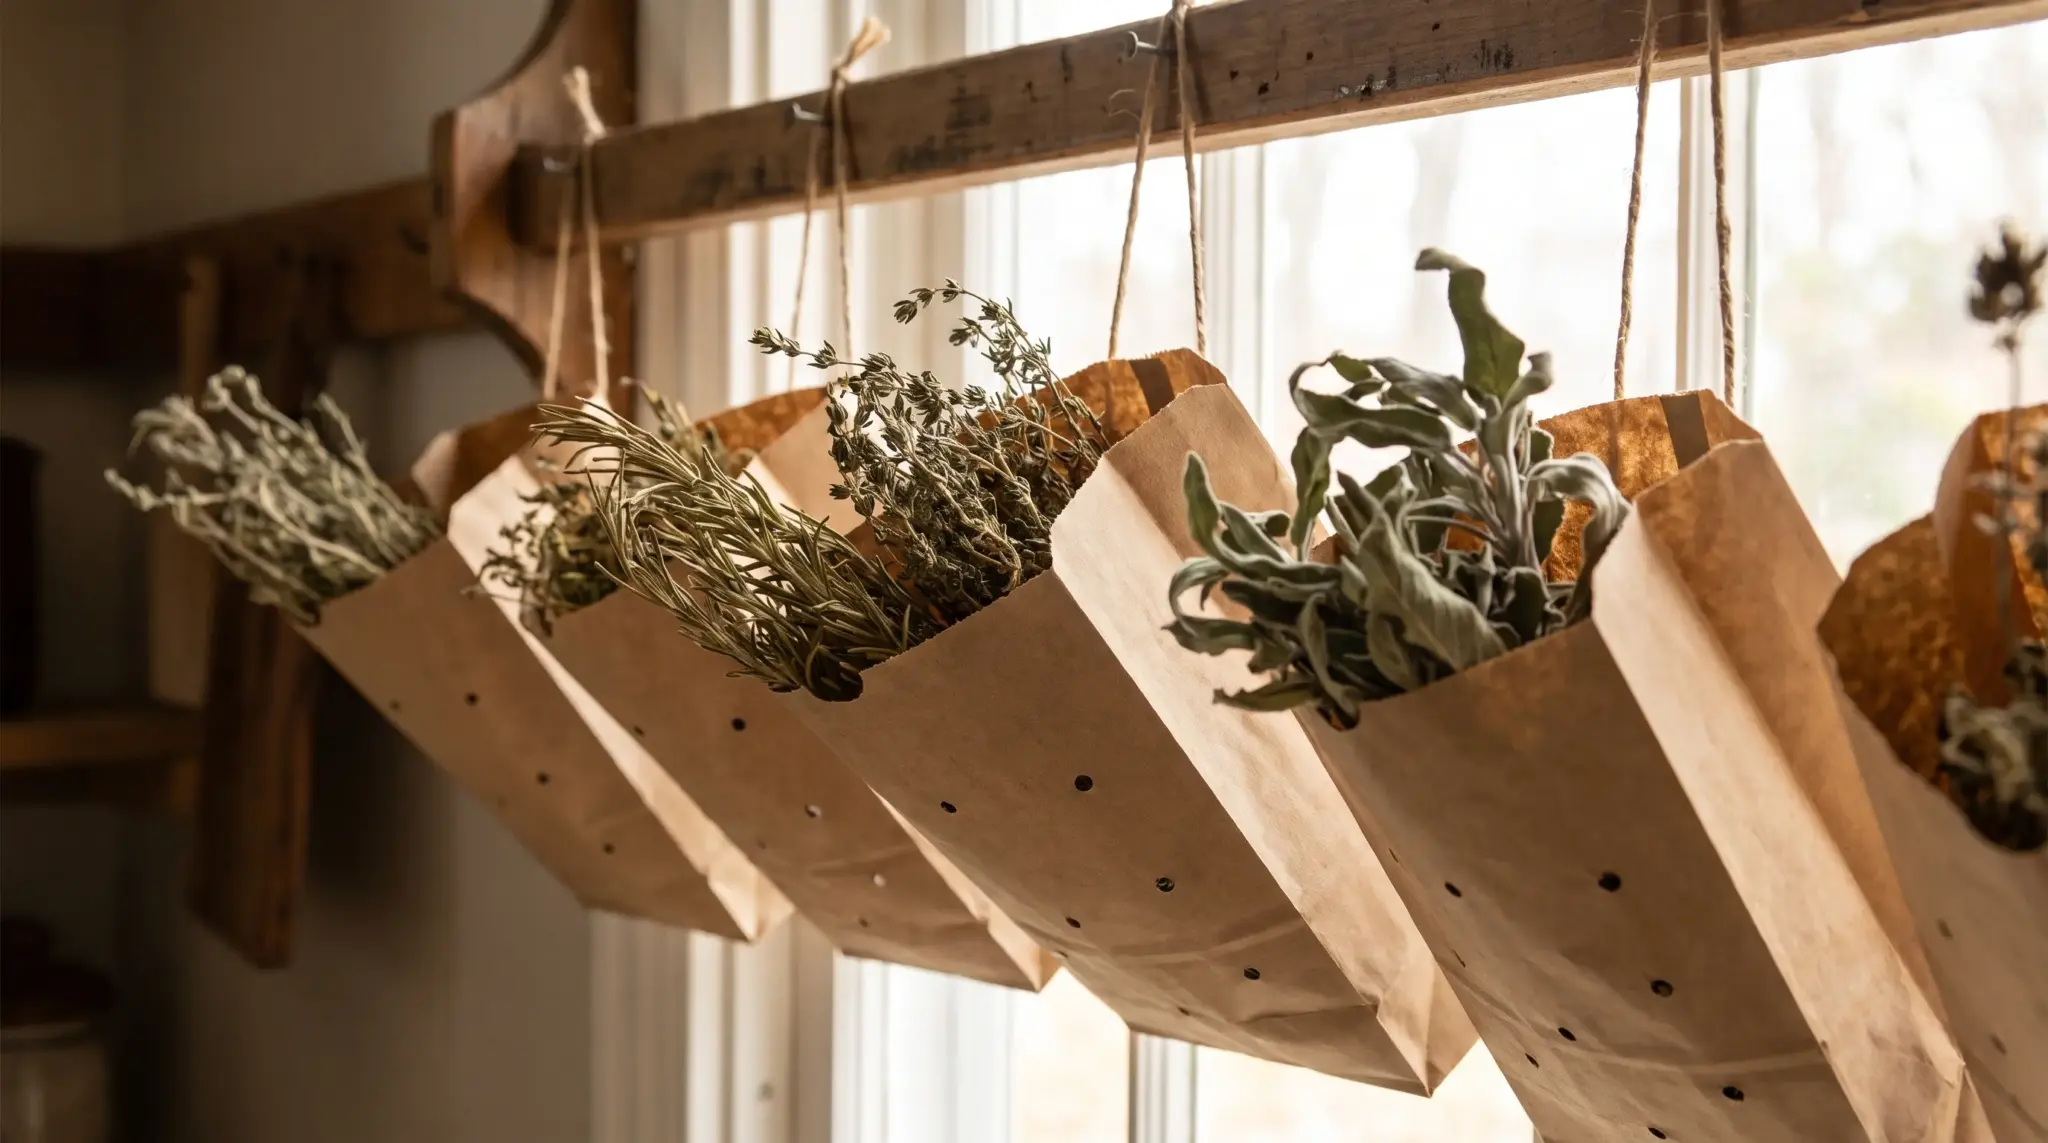
This is my go-to for herbs that shed small leaves or seeds as they dry, like dill and thyme, since the bag catches everything that falls instead of scattering it across a shelf.
- Bundle small stems: Same rule as air drying: keep bundles thin.
- Cut ventilation holes: Several small holes in the sides of a clean paper bag.
- Insert upside down: Leaves inside the bag, tied stems poking out the opening.
- Loosely secure the opening: Air still needs to pass through.
- Hang in a dry spot: Check every few days for dryness or unexpected moisture.
Expect 1 to 3 weeks. Plastic bags, damp herbs, and sealed openings all trap moisture and invite mold, so avoid all three.
Storing Dried Herbs So They Last
Drying the herb correctly only gets you halfway. I have seen readers do everything right through the drying stage and then store the jars on a sunny windowsill, which undoes most of the work within weeks.
- Use airtight glass jars: Plastic lets air in over time and can absorb odors; glass does not.
- Keep away from heat and light: A jar by the stove loses potency within weeks rather than years.
- Store whole; crumble when cooking. Crumbling early breaks the cell structure that holds in flavor.
- Label with the herb and drying date: Dried herbs show no visible sign of age, so the date is the only way to track age.
- Use within 1 to 3 years: Well-stored herbs reach the long end of that range; sunlight and heat push them toward the short end.
Well-labeled, airtight storage is what actually protects the flavor you worked to preserve, so it is worth setting jars up properly before the first batch ever comes off the dehydrator.
Using Dried Herbs in the Kitchen
| Practice | What to Do | Example |
|---|---|---|
| Convert the ratio | Use 1 teaspoon dried for every 1 tablespoon fresh | 1 tbsp fresh oregano becomes 1 tsp dried |
| Add early | Let heat and time release the oils | Add thyme when the stew starts simmering |
| Crush before adding | Rub between fingers to wake up the aroma | Crush rosemary just before it hits the pan |
| Adjust gradually | Taste before adding more | Build up seasoning in small additions |
Common Herb-Drying Mistakes to Avoid
Most failed batches trace back to one of these, and I’d rather you catch it before you start than after you’ve lost a harvest.
- Skipping the pre-dry pat-down: Surface moisture is the top cause of mold in bundled or bagged herbs.
- Drying wet-leaf herbs the same way as woody herbs: Basil and parsley need faster, controlled heat, not a slow open-air hang.
- Crumbling herbs before storage: This releases the oils you spent weeks preserving.
- Storing near the stove: Heat cycling degrades flavor faster than almost anything else in the kitchen.
With those covered, here are the questions readers ask most often once they’ve picked a method.
Conclusion
Learning how to dry herbs is one of the easiest ways to enjoy fresh garden flavor long after the harvest ends.
I hope you now feel confident choosing the right drying method, picking herbs at the best time, checking for complete dryness, and storing them correctly to protect their flavor.
Small details, like avoiding excess heat and using airtight jars, make a bigger difference than many people expect.
Once you try these techniques, you’ll have a reliable supply of home-dried herbs ready for everyday cooking throughout the year.
Give one method a try with your favorite herbs, and share your experience or any tips that worked well for you
Frequently Asked Questions
Can you dry different herbs together?
It is better to dry herbs separately. Different herbs contain different amounts of moisture, so they rarely dry at the same speed. Drying them together can leave some herbs under-dried while others become overly brittle.
Is it better to dry herbs with the stems on or remove the leaves first?
For air drying, keep the stems attached because they make bundling easier and slow moisture loss naturally. For dehydrators, ovens, or microwaves, removing the leaves from thick stems usually produces faster and more even drying.
Do dried herbs lose their nutritional value?
Dried herbs retain many of their beneficial plant compounds, although some heat-sensitive vitamins decrease during the drying process. Their concentrated flavor also means you typically use smaller amounts in cooking.
Can dried herbs become moldy after they are stored?
Yes. Mold usually develops if the herbs were not completely dry before storage or if moisture enters the container later. If you notice a musty smell, clumping, or visible mold, discard the entire batch.
What is the best container size for storing dried herbs?
Choose a jar that closely matches the amount of herbs you have. A container with too much empty space holds more air, which can gradually reduce flavor and aroma over time.
Can you revive dried herbs that have lost their flavor?
Unfortunately, no. Once the essential oils have faded, the flavor cannot be restored. Replacing old herbs with a fresh batch is the best way to maintain good taste in your cooking.
Should dried herbs be refrigerated or frozen?
No. Most dried herbs stay fresher in airtight containers stored in a cool, dark cupboard. Refrigerators and freezers can introduce condensation when containers are opened, reducing their shelf life