

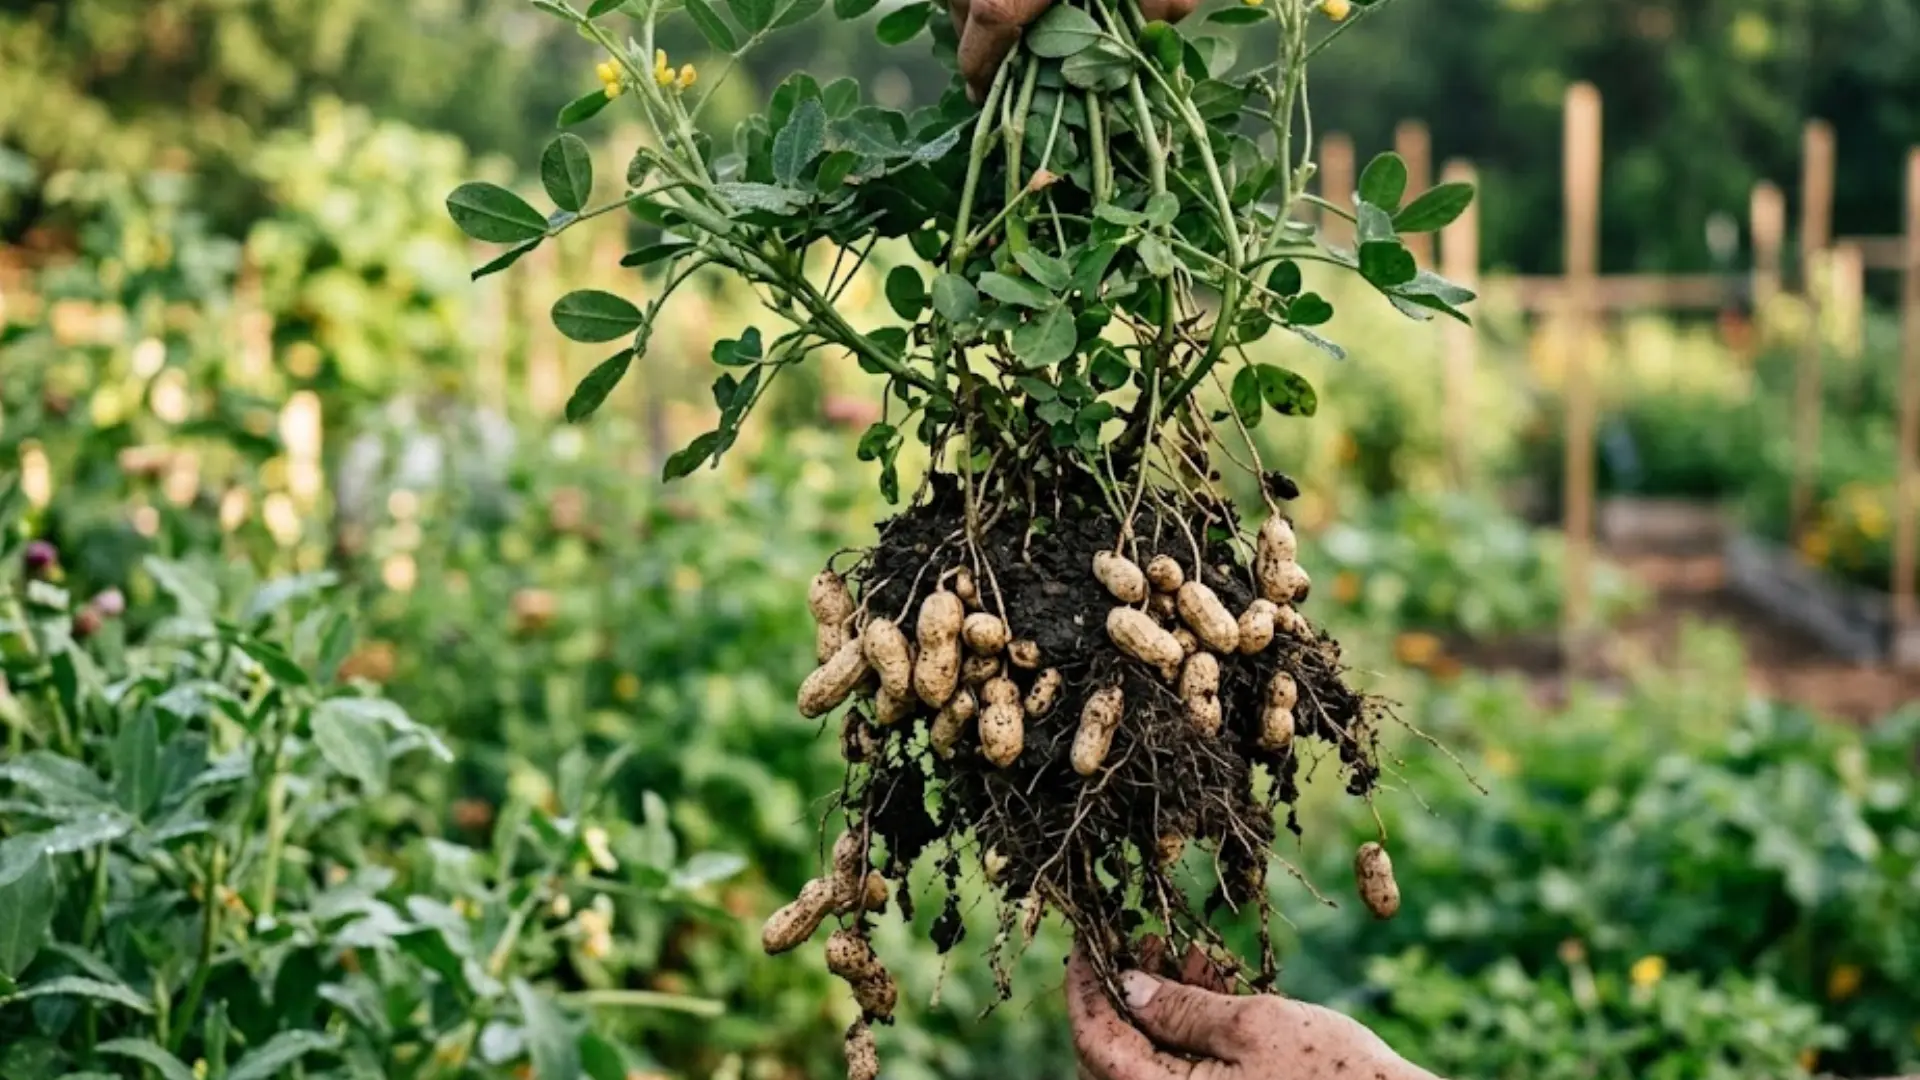
Peanuts grow in a way that surprises almost everyone who plants them. I want to explain how peanuts grow, since the process is pretty unusual.
You won’t see peanuts hanging from branches like other crops. Instead, the plant pushes its flowers straight into the soil. That part alone makes peanuts stand out from typical garden plants.
I’ll walk you through each stage in simple, clear terms. You’ll learn how a small yellow flower becomes a full pod. Understanding this process makes growing peanuts feel much less confusing.
Gardening gets easier once you know what’s happening underground. Keep reading to see every stage explained clearly below.
What Kind of Plant Is a Peanut?
Peanuts aren’t true nuts at all. They’re actually legumes, just like beans and peas. Their scientific name is Arachis hypogaea, which sounds fancy but just means peanut plant.
Peanuts belong to the same big plant family as beans, peas, and lentils. That’s part of why they act more like beans than almonds or walnuts.
The peanut plant itself is small and grows low to the ground. It’s an annual, meaning it grows, produces peanuts, and dies within just one season.
It doesn’t come back year after year as some other plants do. The edible part we eat is simply the seed, tucked safely inside its pod.
How Do Peanuts Grow: A Stage-by-Stage Breakdown
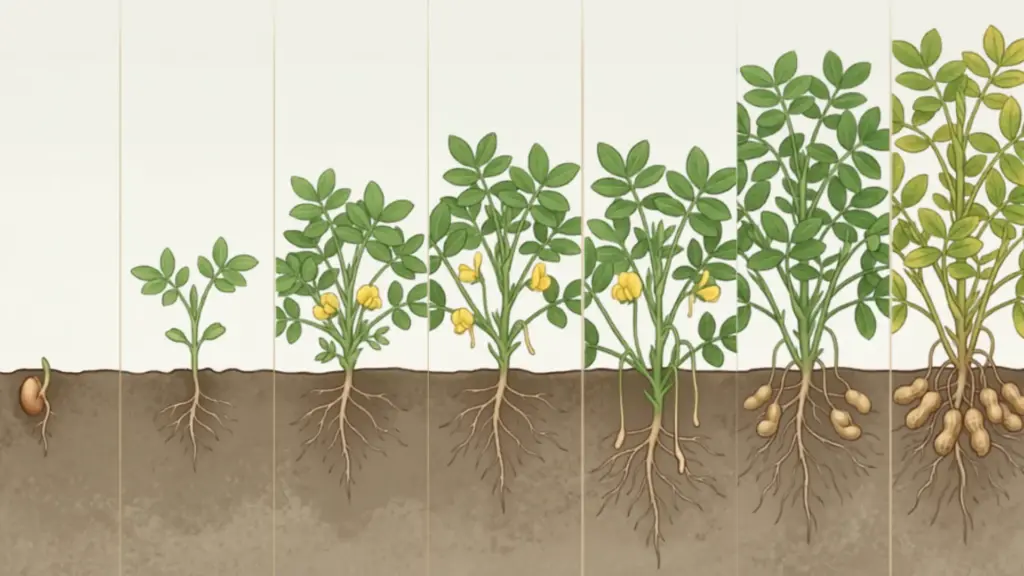
I’ve seen a lot of crops, but peanuts still surprised me the most. Their flowers bloom above ground, yet the real growing happens out of sight, underground.
Stage 1: Peanut Seeds Germinate
Peanut seeds get planted directly into warm soil. Moisture in the soil triggers the germination process to begin. Roots form first, anchoring the seed firmly in place.
Shoots then emerge and push their way up above the soil. Under good conditions, this stage usually happens within just several days.
Warm soil helps speed things along nicely. Cooler or overly wet soil can slow the whole process down.
Stage 2: The Peanut Plant Develops Leaves
Once the shoot emerges, the young plant starts growing stems and leaves. These leaves are compound, meaning each one has several small leaflets attached.
Underground, the roots keep spreading wider through the surrounding soil. As the plant matures, it becomes noticeably bushier and fuller-looking.
Strong, healthy leaves matter a lot at this point. They fuel the flowering and pod production stages that come later on.
Stage 3: Yellow Flowers Begin to Appear
Small yellow flowers start appearing on the growing plant. These flowers usually form near the lower parts of the plant. Peanut flowers are mostly self-pollinating, so they don’t need outside help.
Each flower has the potential to eventually become a peanut pod. Not every flower succeeds in this process, though. The ones that do get pollinated move on to the next stage of growth.
Stage 4: Pegs Form After Pollination
After a flower gets fertilized, something pretty interesting starts happening. The base of the flower begins developing into a structure called a peg.
This peg grows downward, stretching away from the flower itself. Gravity helps guide the peg toward the soil sitting below.
This step is really what makes peanut plants so unusual. Most familiar garden crops never do anything quite like this.
Stage 5: The Peg Pushes Into the Soil
The peg travels downward and eventually enters the soil below. It usually lands a few inches away from the plant’s main stem. Inside the peg, the developing ovary gets carried underground with it.
Loose, soft soil makes it much easier for the peg to penetrate. If a peg never manages to reach the soil, that flower won’t produce anything. Soil condition really matters a lot at this particular stage.
Stage 6: Peanut Pods Develop Underground
Once the peg is settled underground, its tip starts forming a pod. This pod slowly grows larger and larger as time passes by. Inside the shell, tiny seeds begin developing bit by bit.
Depending on the peanut variety, each pod might hold one seed or several. This entire process happens completely out of sight underground.
The real growing action is happening quietly beneath the soil’s surface.
Stage 7: Peanuts Mature Inside the Pods
As pods keep developing, the kernels inside grow bigger and noticeably firmer. The inside lining of the shell also changes texture as it matures.
Meanwhile, the plant keeps supporting all the pods growing underground. Eventually, the leaves above ground may start turning yellow. That yellowing is usually a clear sign that harvest time is getting close.
By this point, the whole underground growing cycle is nearly complete.
Where Do Peanuts Grow Best?
I learned pretty quickly that peanuts aren’t fussy plants, but they do have a few non-negotiables. Once I got these conditions right, my plants rewarded me with a strong, healthy harvest.
Here’s what peanuts need to thrive from planting to harvest:
- Warm temperatures: Peanuts are warm-season plants needing a long, frost-free growing period; cold soil slows growth, and frost damages plants.
- Full sun: Plenty of direct sunlight supports healthy growth, strong flowering, and solid pod development throughout the entire growing season.
- Loose, well-drained soil: Sandy soil lets pegs enter easily, while compacted or waterlogged soil hinders penetration and risks damaging roots.
- Consistent moisture: Young plants need steady moisture to establish well, especially during the critical flowering and pod development stages.
- Evenly moist soil: Keep soil consistently moist throughout the season, but avoid letting it become soggy or waterlogged at any point.
Get these basics right, and peanuts are actually quite forgiving. It’s a simple checklist, but it makes all the difference by harvest time.
Where Do Peanuts Grow Best?
I learned pretty quickly that peanuts aren’t fussy plants, but they do have a few non-negotiables. Once I got these conditions right, my plants rewarded me with a strong, healthy harvest.
Here’s what peanuts need to thrive from planting to harvest:
|
Condition |
Ideal Range |
Why It Matters |
|---|---|---|
|
Warm temperatures |
70–90°F, frost-free |
Cold soil slows growth, and frost damages plants. |
|
Full sun |
6+ hours daily |
Supports healthy growth, flowering, and pod development. |
|
Loose soil |
Sandy or loamy |
Lets pegs enter the ground and reach pod-forming depth. |
|
Consistent moisture |
Evenly moist |
Supports establishment, flowering, and pod filling. |
|
Good drainage |
Moist, not wet |
Prevents waterlogged roots and pods. |
Get these basics right, and peanuts are actually quite forgiving. It’s a simple checklist, but it makes all the difference by harvest time.
Harvesting Peanuts: Timing and Technique
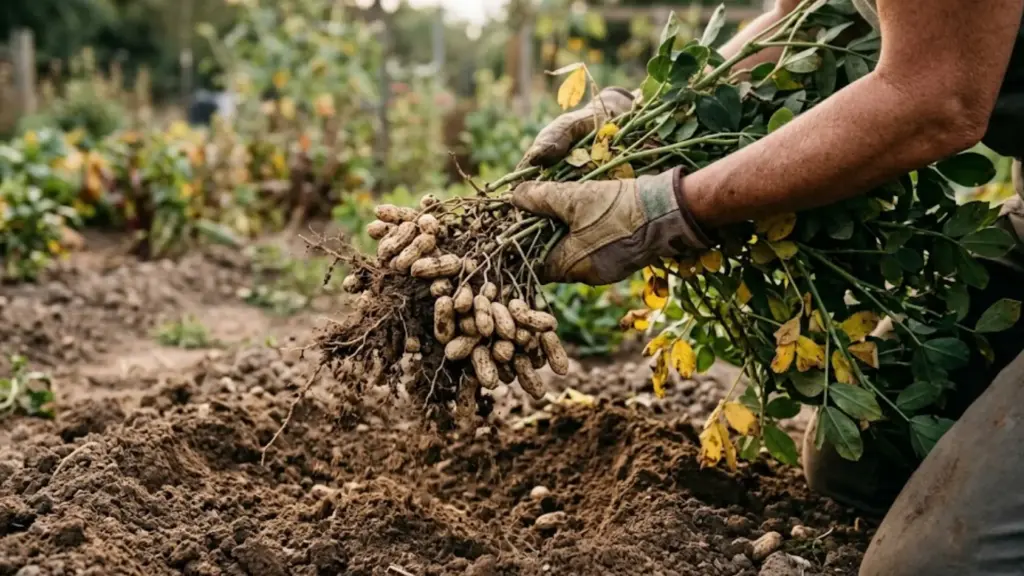
Harvesting peanuts always felt like the trickiest part until I got the hang of it. Here’s how I figure out when and how to do it right:
When to Harvest Peanuts?
Peanuts are generally ready to harvest when the plants begin yellowing, and the pods have fully developed kernels with mature inner shell markings. Here’s what to check before you start digging:
- Look for yellowing leaves: Lower foliage often turns yellow as the crop matures, and overall plant growth slows down, though this alone shouldn’t be your only signal.
- Check a few peanut pods: Dig up a test plant, open several shells, and see whether kernels fill the pods well with mature coloring inside.
- Check the growing time: Compare the crop’s age with the expected days to maturity for your variety, keeping in mind that weather can speed up or delay things.
- Harvest before a hard frost: Mature peanuts should be lifted before severe freezing weather, since cold, wet soil complicates both harvesting and curing.
Once I saw two or three of these signs line up, I knew it was time to pull my plants. That little bit of patience always paid off with a better harvest.
How to Harvest Peanuts From the Ground
Digging up peanuts the right way protects your pods and makes the whole process much smoother. Here’s how to harvest peanuts step by step:
- Loosen the soil around the plant: Use a garden fork or shovel several inches away from the plant, avoiding slicing through underground pods.
- Lift the entire peanut plant: Pull carefully from the base, lifting roots, pegs, and attached pods together as one unit.
- Shake away loose soil gently: Remove excess dirt from the roots and pods without shaking too hard or damaging the shells.
- Collect any pods left behind: Check the surrounding area for detached mature pods, and avoid washing peanuts immediately if you plan to cure them.
Take your time with each step, and the payoff is worth it. A gentle, careful harvest sets you up for better curing and storage later on.
How to Cure Peanuts After Harvest?
I’ve tried skipping the curing step before, and it cost me a good chunk of my harvest to mold. Here’s how I cure them properly now:
- Leave pods attached: This makes the crop easier to handle and lets moisture release gradually when practical.
- Keep well-ventilated: A warm, dry spot with good airflow speeds up drying and helps prevent mold from taking hold.
- Protect from rain: Moisture exposure during curing can undo your progress and invite spoilage.
- Dry pods fully first: Rushing this step before removing or storing them often leads to problems later on.
- Ensure shells are dry: Dry shells significantly reduce the risk of mold once peanuts are stored.
Curing takes patience, but it’s a step worth doing right. Properly cured peanuts hold up far better once stored away.
Frequently Asked Questions (FAQs)
Can Peanuts Be Grown in Containers or Raised Beds?
Yes, peanuts grow well in containers or raised beds at least 12 inches deep, as long as the soil stays loose, well-drained, and gets full sun exposure.
How Many Peanuts Does One Plant Typically Produce?
A single healthy peanut plant usually produces 25 to 50 pods, though this varies based on variety, soil quality, and overall growing conditions throughout the season.
Do Peanut Plants Need Fertilizer to Grow Well?
Peanuts generally need minimal nitrogen fertilizer since they fix their own nitrogen, but they benefit from calcium and phosphorus, especially during flowering and pod development.
Final Words
Now you understand how peanuts grow underground, from flower to pod. I’ve seen a small yellow bloom turn into a snack in my own garden.
You just need warm soil, sunlight, and a little patience. Every peg pushing into soil plays its own small part. Once pods mature, digging them up feels satisfying and simple.
This makes planting season feel a lot less mysterious. You can grow your own peanuts with basic care. Peanuts reward patient gardeners with pods full of flavor.
Try planting a few this season and see how they grow. Share your peanut-growing experience in the comments below!