

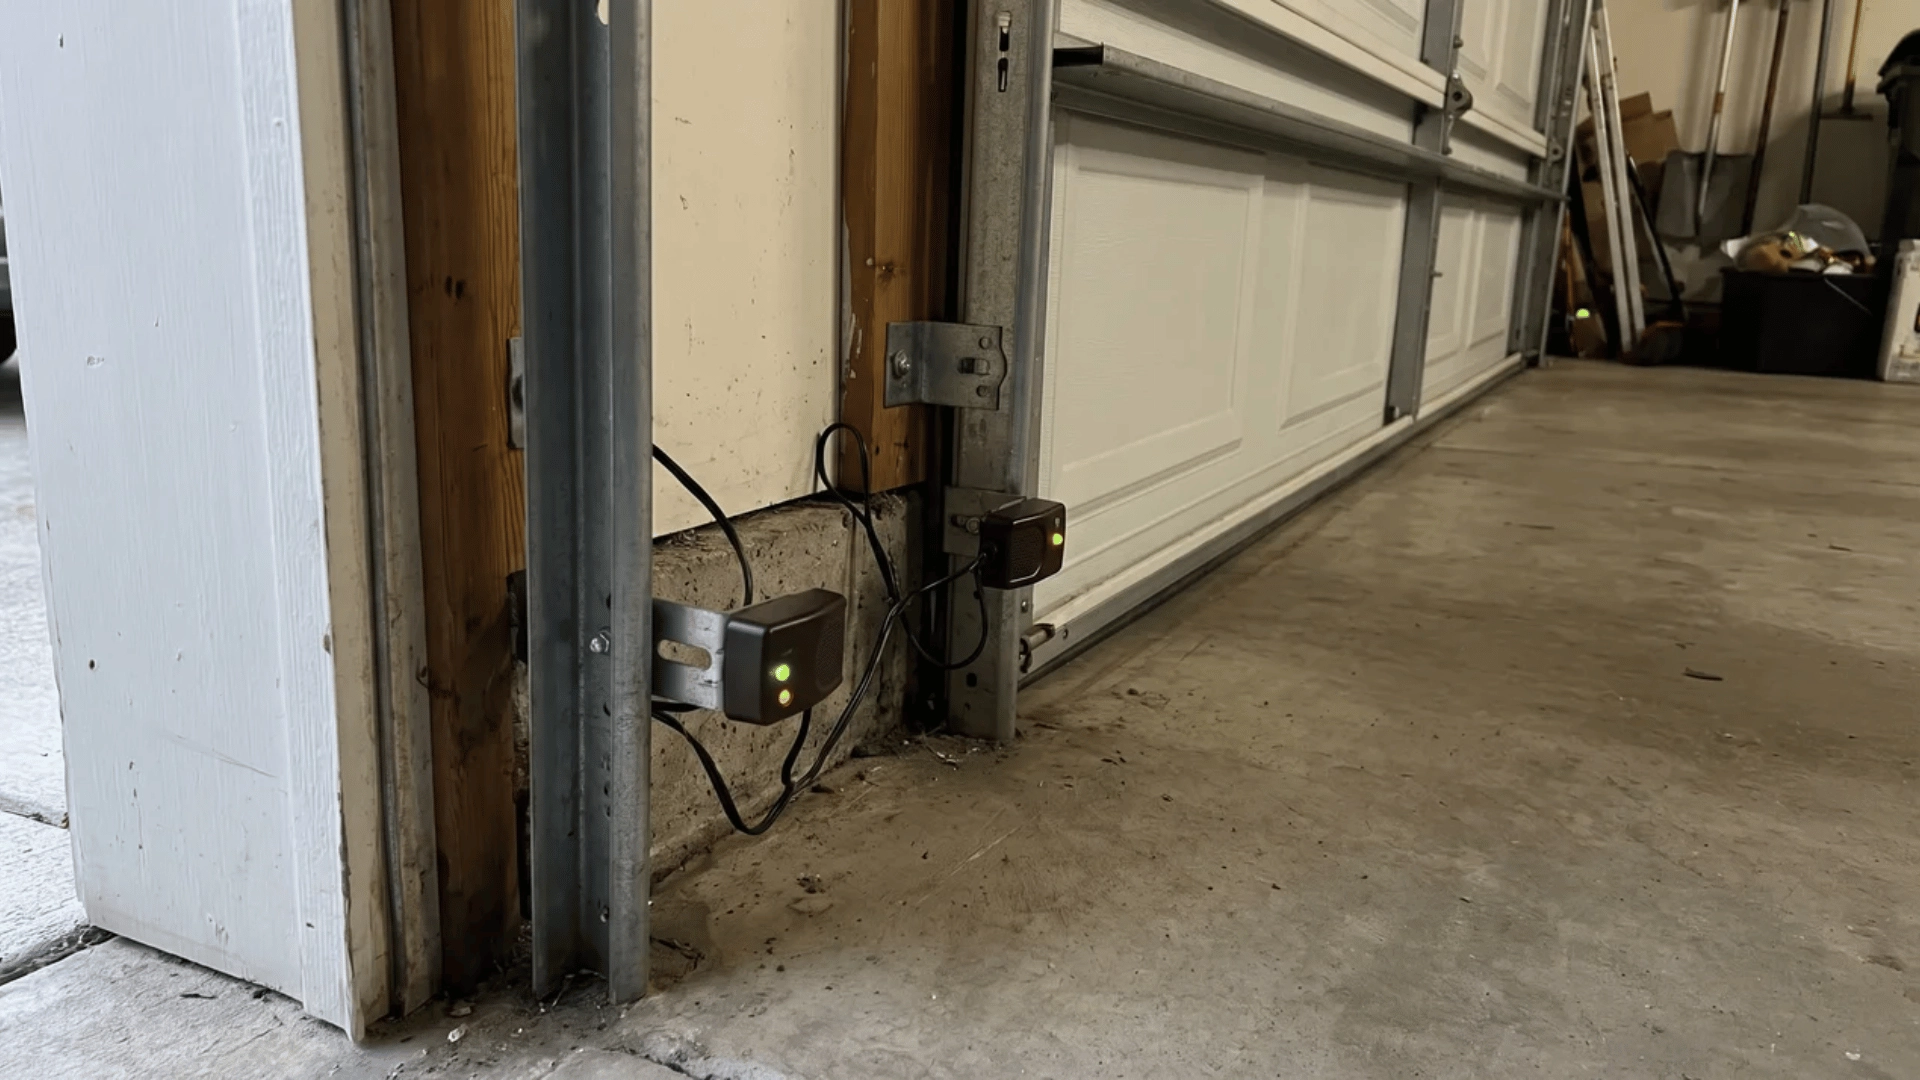
A garage door that starts closing, then suddenly reverses, can turn a simple routine into a frustrating problem. I know how confusing it feels when both sensors look fine, but the opener still refuses to cooperate.
Learning how to fix garage door sensor problems starts with checking the beam, cleaning the lenses, and correcting small alignment issues.
You also need to inspect nearby objects, loose brackets, wiring, and sunlight interference. These checks help you identify the real cause before replacing any parts.
By the end, you will know which fixes are safe to handle yourself, how to test the repair properly, and when calling a garage door technician makes more sense.
Why Garage Door Sensors Stop Working
Garage door sensors usually stop working because the invisible beam between them is blocked, weakened, or misaligned. Dust, cobwebs, moisture, and dirt can collect on the lenses and prevent a clear signal.
Boxes, tools, leaves, cords, or other objects may also sit in the beam’s path without being obvious. A bumped bracket or settling garage frame can shift one sensor slightly, causing the indicator light to blink.
Loose terminals, pinched insulation, and frayed wires may create intermittent problems that come and go. Direct sunlight can also overpower the receiving sensor, especially during certain hours of the day.
In some cases, the sensor housing, lens, or internal components may be damaged. If cleaning and alignment do not explain the reversal, broader door troubleshooting can help separate sensor faults from opener, track, or mechanical problems. Identifying the exact cause first makes the repair faster and prevents unnecessary replacement.
How Garage Door Safety Sensors Work
Garage door safety sensors use an invisible beam to detect objects beneath the door and stop it from closing when the path is blocked.
- One sensor sends an infrared beam across the garage doorway toward the sensor mounted on the opposite side.
- The second sensor receives the beam and sends a clear signal to the garage door opener.
- Both sensors must face each other directly and remain mounted at approximately the same height.
- When a person, pet, tool, or other object interrupts the beam, the opener stops or reverses the door.
- Dirt, poor alignment, damaged wiring, or sunlight interference can prevent the receiving sensor from detecting the beam.
- Steady indicator lights usually show that the sensors are powered, aligned, and communicating correctly.
Understanding this basic process makes troubleshooting easier because every repair focuses on restoring power, alignment, wiring, or a clear beam path. A sensor-related reversal usually happens without scraping or banging, while unusual door noises may point to rollers, tracks, springs, or the opener instead.
How to Fix a Garage Door Sensor Using Various Methods
Sensor problems usually come down to one of four fixes. Work through these in order, starting with the simplest.
Method 1: Clean the Sensor Lenses
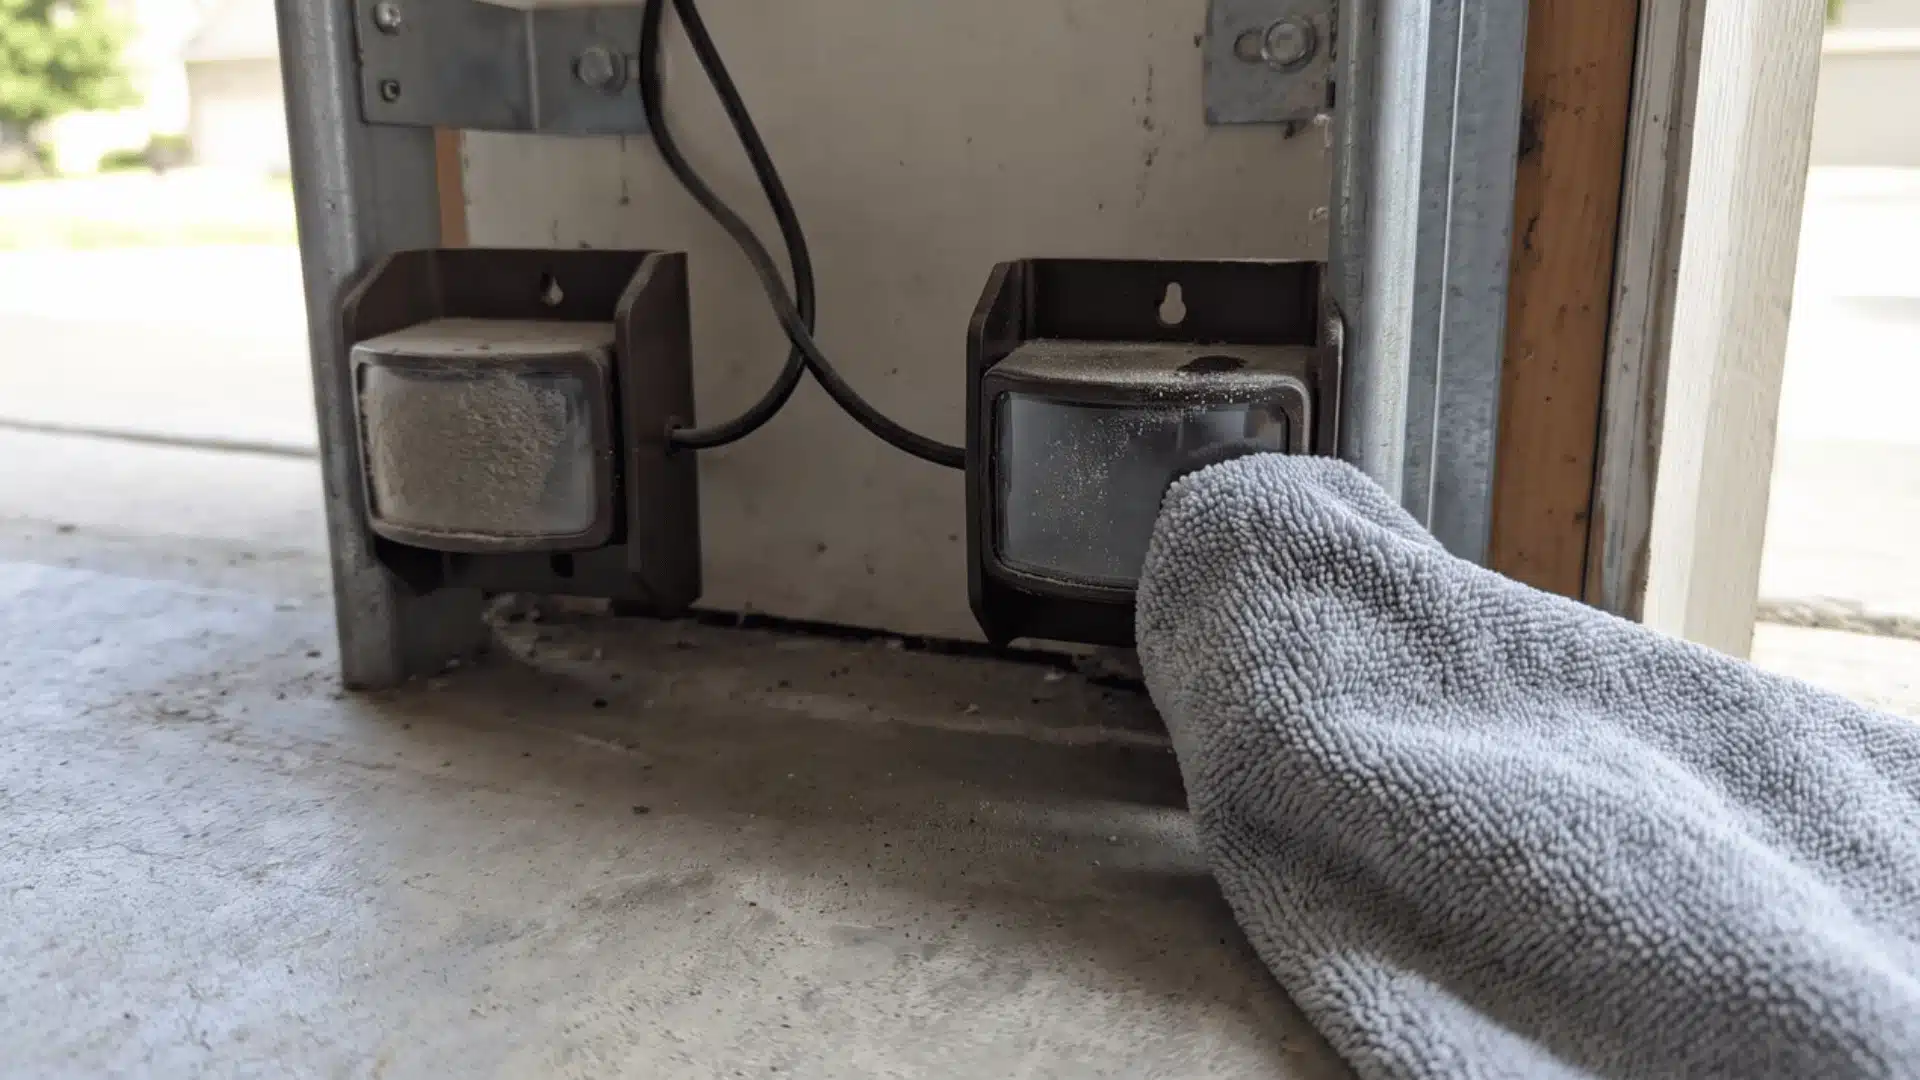
Tools needed: a soft, clean cloth.
Dust builds up fast on these lenses since they sit low near the floor. Here’s how I handle it every time.
- Wipe both lenses gently with a soft cloth to clear off dust, dirt, or cobwebs sitting on top.
- Check both sensors carefully, since one side often looks clean while the other quietly collects dust unnoticed.
- Look for a light haze on the lens surface, since even a thin film can weaken the beam enough to matter.
- Dampen the cloth slightly if the dust feels stubborn, but avoid soaking it near the sensor housing.
- Wipe in gentle circles instead of pressing hard, so you don’t scratch the lens by mistake.
- Test the door once both lenses look clear, since this simple step fixes more problems than people expect.
If the door closes fine now, you’re done. If not, move on to checking alignment next.
Method 2: Realign the Sensors Using a String Guide
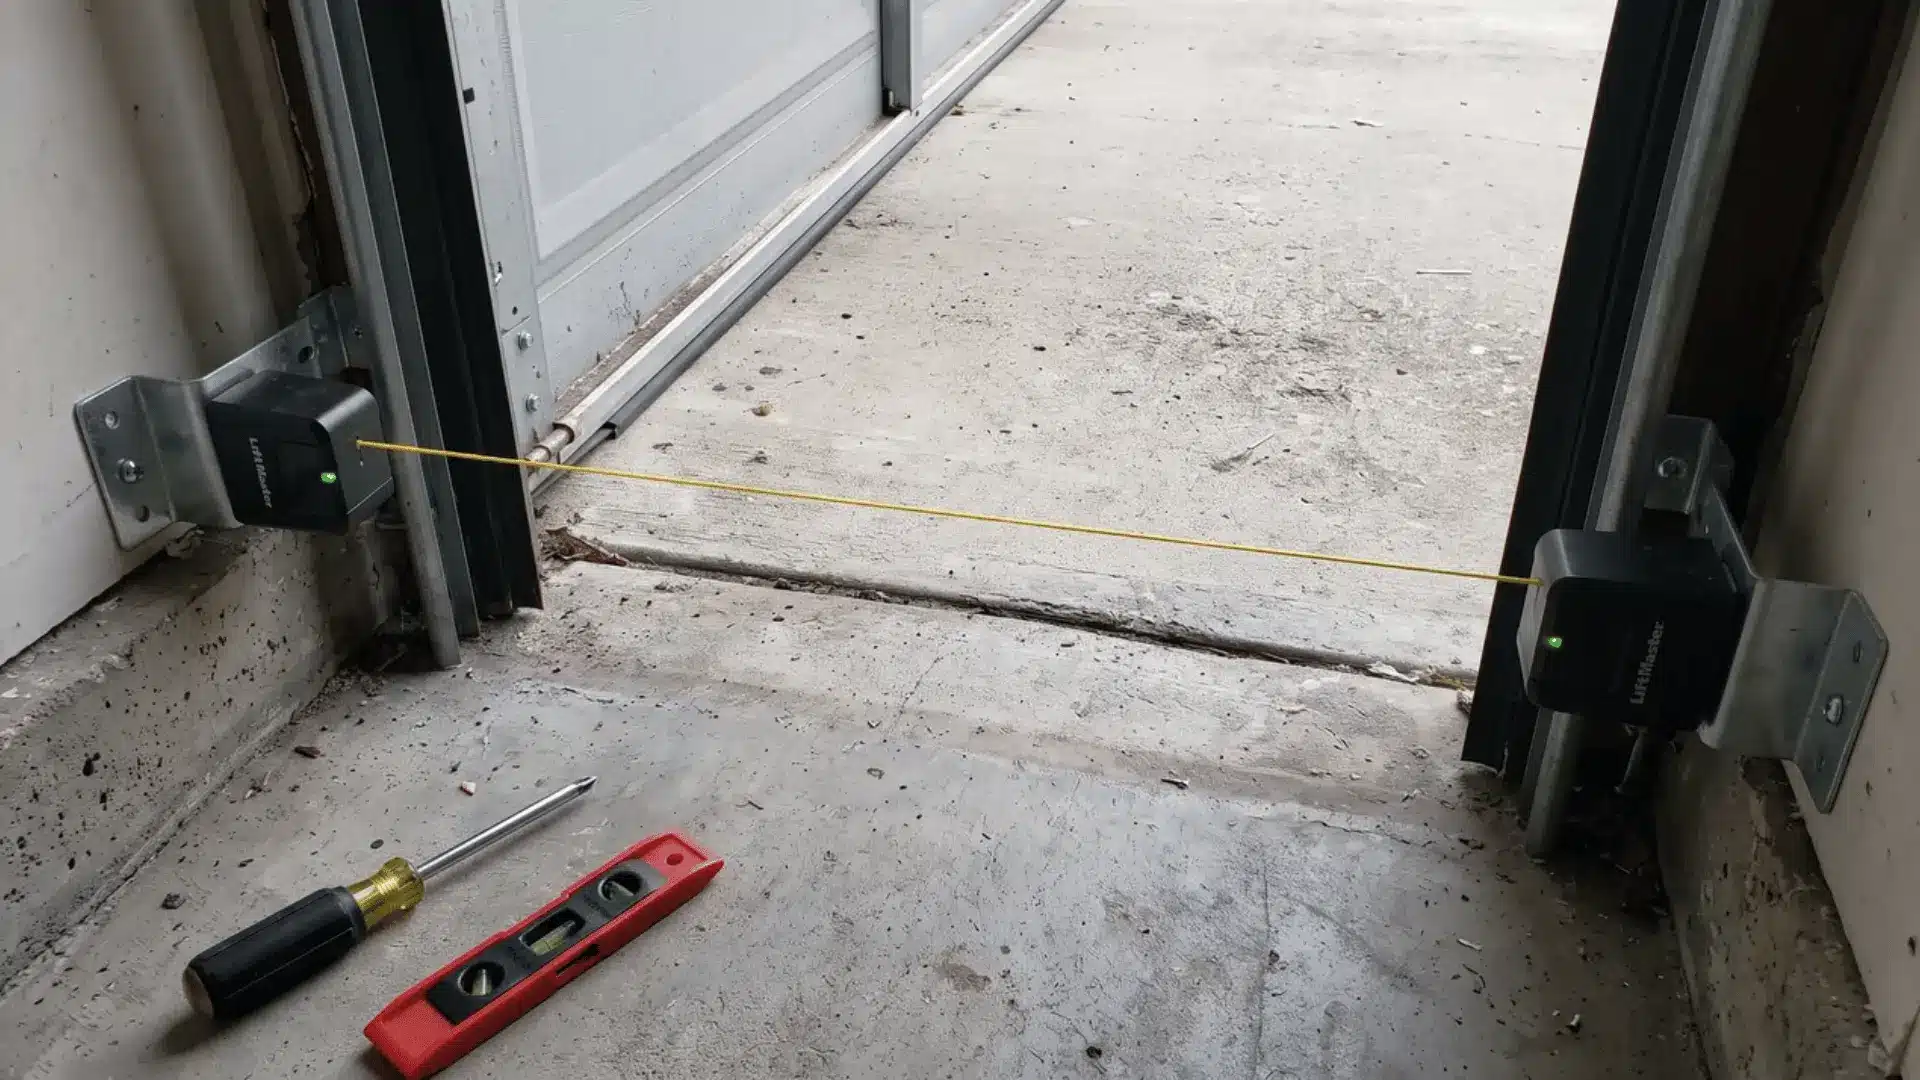
Tools needed: a string, a screwdriver, and a small level.
Misalignment is the most common cause of sensor trouble, usually from a small bump nobody noticed.
- Tie a string to one bracket and stretch it across to the other sensor to create a straight guide.
- Keep the string fairly tight, since a sagging line won’t give you an accurate reference to work from.
- Look at both sensors from above to check whether they’re actually pointing directly at each other.
- Loosen the wing nut on the weaker sensor just enough to let the bracket shift slightly.
- Adjust it slowly, since small movements make a bigger difference than they seem to.
- Tighten it back up once both lights turn solid, which confirms the beam is connecting properly again.
I always recheck from both sides before calling this done, just to be sure nothing shifted back.
Method 3: Clear Obstructions Between the Sensors
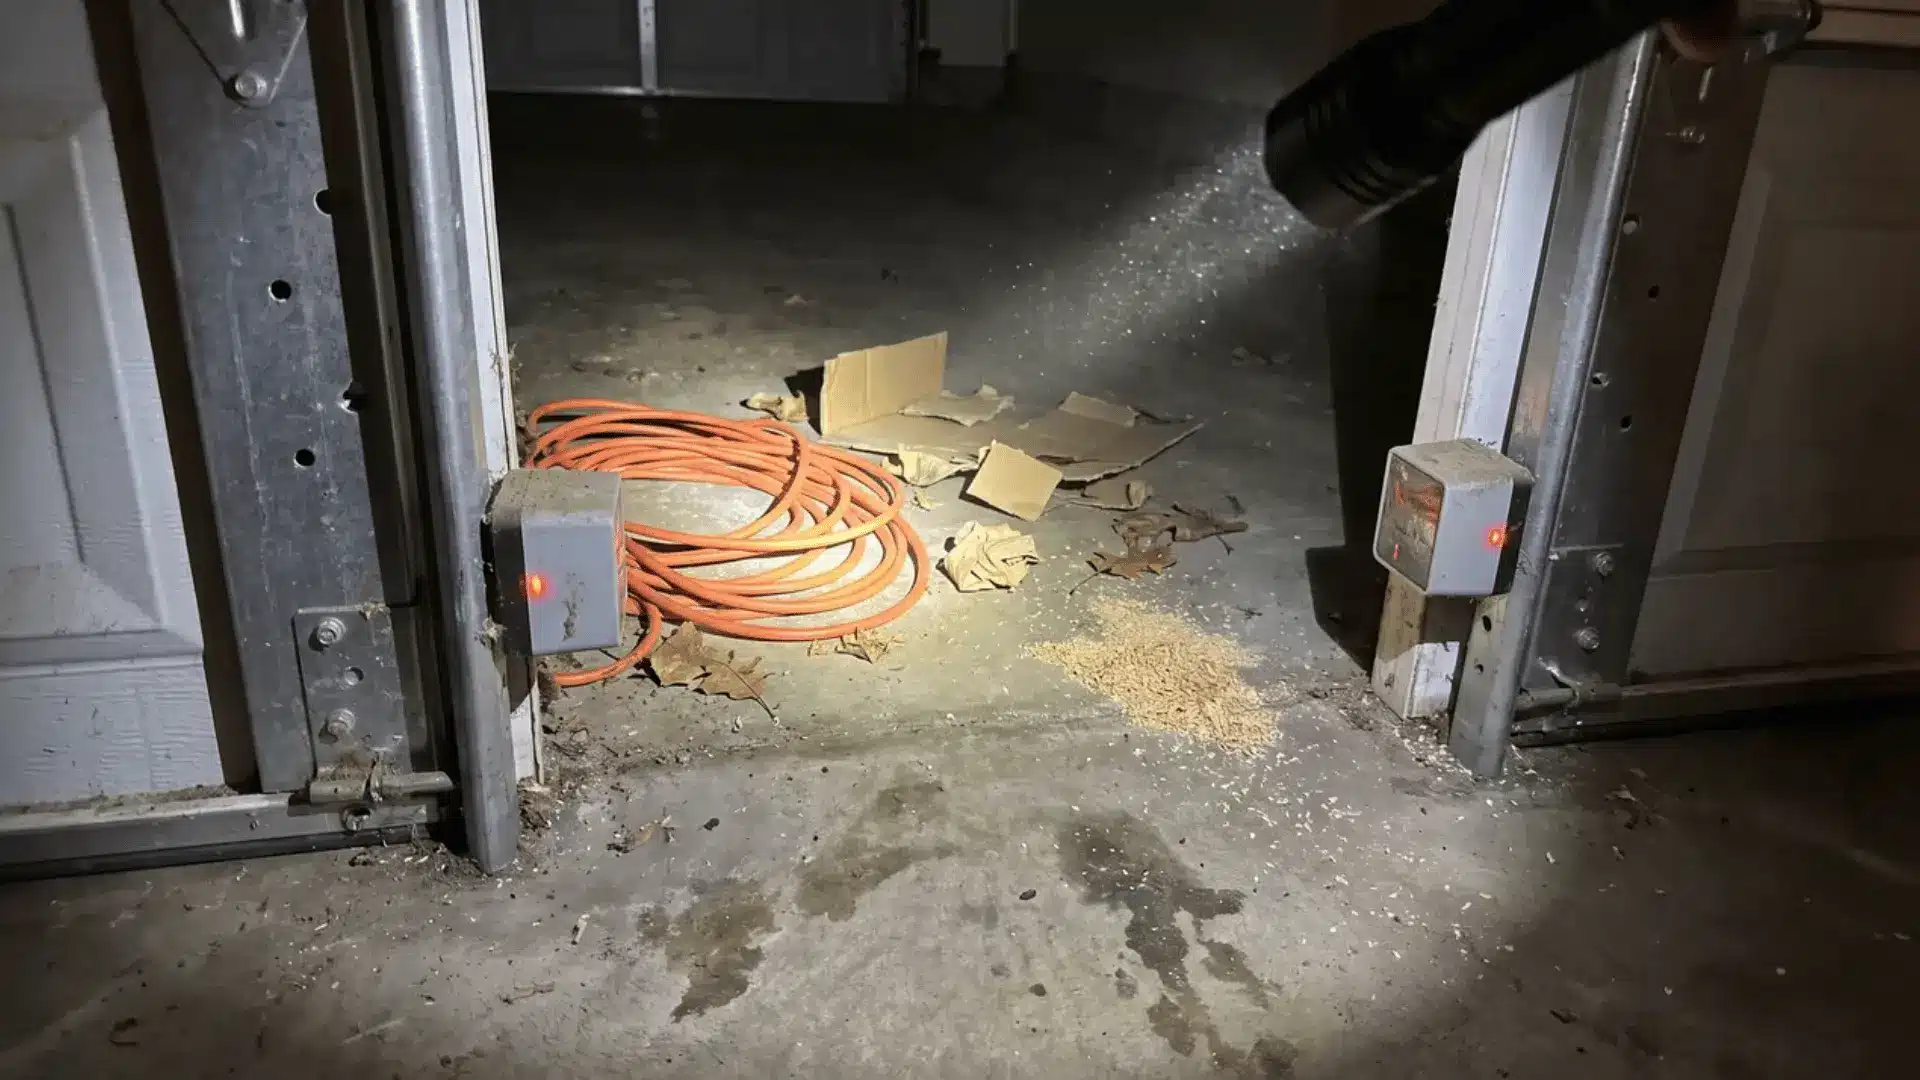
Tools needed: a flashlight.
This is the easiest fix to overlook, since the blocking object is often something you’ve walked past for weeks.
- Check the full space between both sensors, not just the middle, since beams sit lower than most people expect.
- Shine a flashlight along the floor between the units to spot smaller obstructions you might otherwise miss.
- Move any tools or boxes sitting near the door track or anywhere close to the sensor path.
- Check for hanging cords or decorations, since these swing slightly and can block the beam on and off.
- Clear away leaves or debris that may have built up near the base of either sensor.
- Test the door again once the entire path between both sensors is completely clear.
A stray broom or extension cord causes this more often than you’d think, so give the floor a real look.
Method 4: Inspect and Fix Sensor Wiring
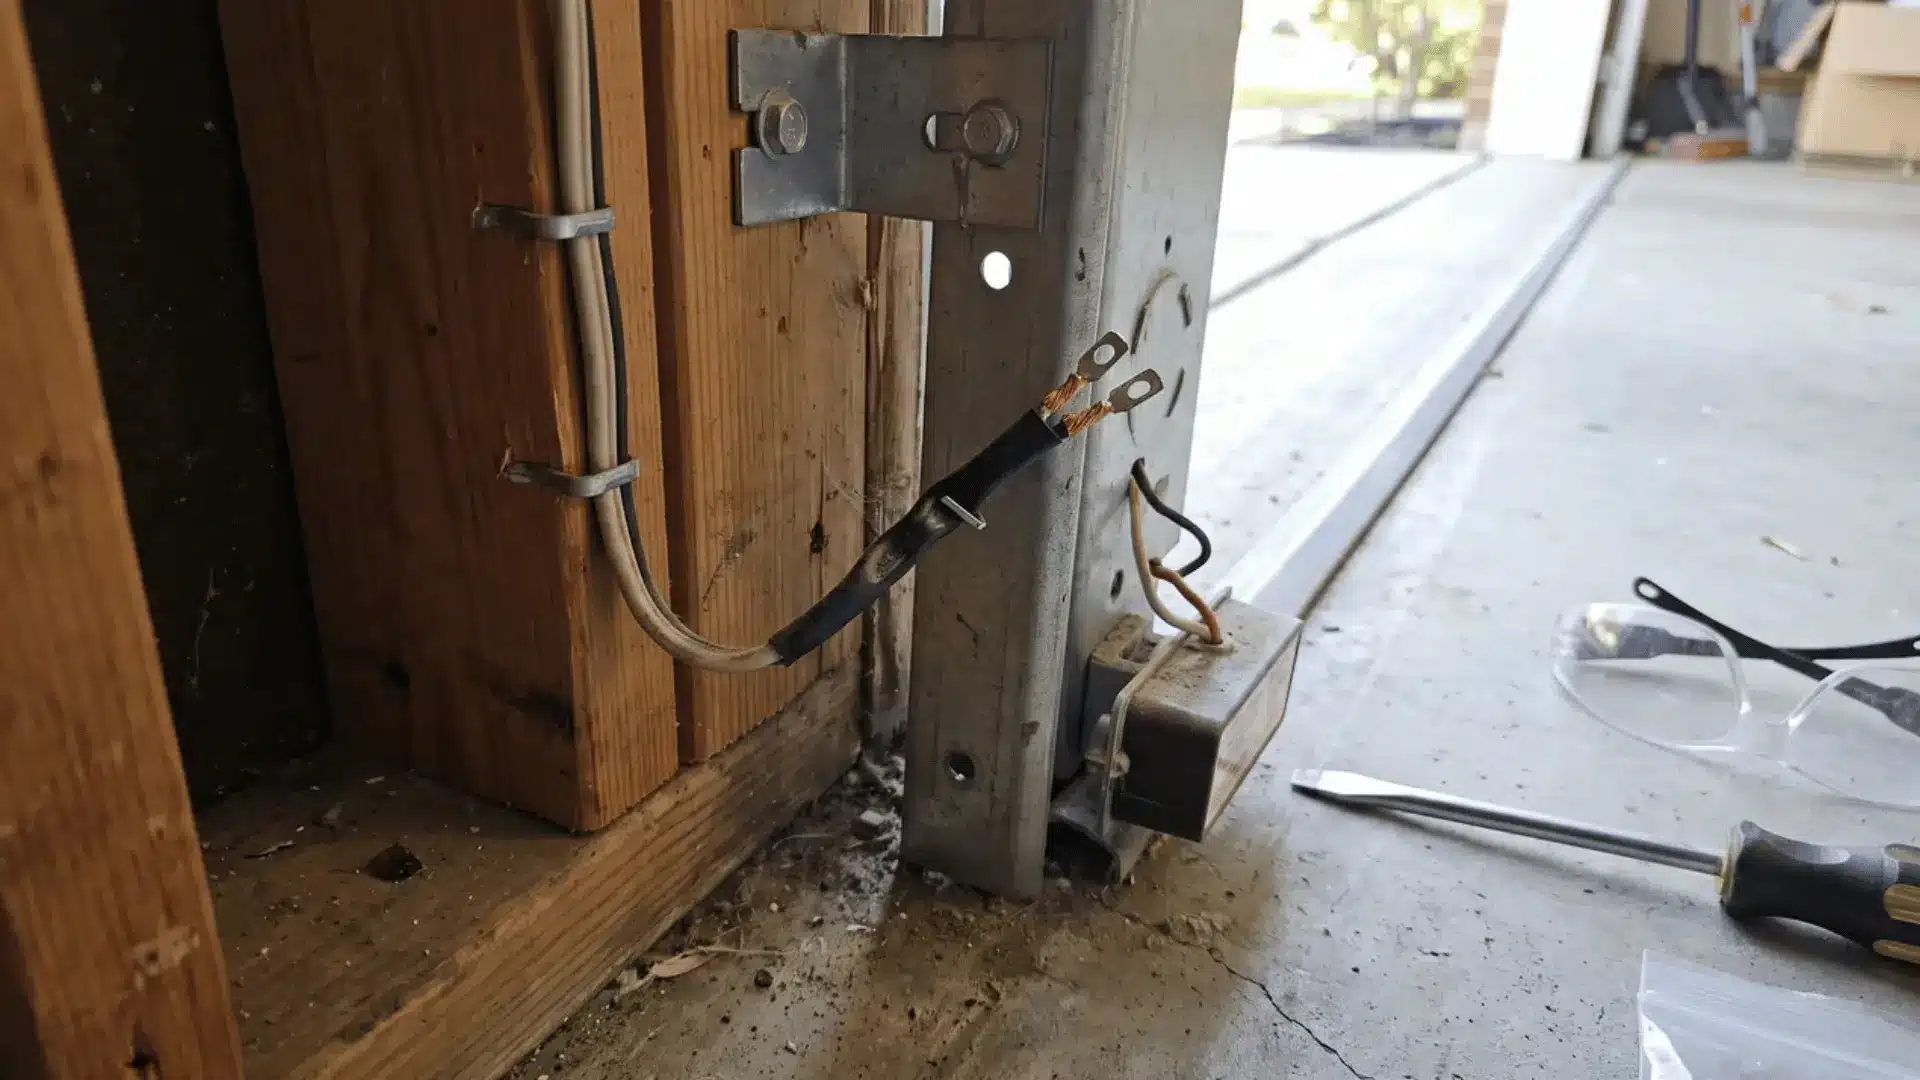
Tools needed: a flashlight, a screwdriver, and safety glasses.
If cleaning and alignment don’t solve it, the wiring is usually the next place to look.
- Follow each wire from the sensor back to the opener unit, checking the whole run along the way.
- Check the terminals where wires connect, looking for anything loose or not fully seated in place.
- Look near staples for insulation that’s been pinched or squeezed tighter than it should be.
- Check for frayed wire, especially near the moving door track, where wear happens most often.
- Tighten any loose connections you find, being careful not to overtighten the small terminal screws.
- Test the door once the wiring looks intact and secure to confirm everything’s working again.
An intermittent fault, one that comes and goes, almost always points back to wiring rather than the other three causes. However, heavy lifting, uneven movement, or a sudden bang are signs of spring failure, indicating that the problem extends beyond sensor wiring and requires professional attention.
Quick Temporary Fixes for Garage Door Sensor Problems
Temporary fixes can help restore normal operation when sunlight, dirt, loose brackets, or nearby objects interrupt the sensor beam unexpectedly.
| Temporary Fix | How It Helps | Best Use |
|---|---|---|
| Shade the receiving sensor | Blocks direct sunlight from overpowering the infrared beam | Door fails at the same time each day |
| Remove nearby objects | Restores a clear path between both sensors | Door closes intermittently |
| Hold the wall button | Uses constant-pressure mode on some openers | Temporary emergency closing only |
| Secure a loose bracket | Stops the sensor from shifting out of alignment | Sensor moves when the door operates |
| Clean the lenses | Removes dust, moisture, or cobwebs weakening the beam | Sensor light suddenly starts blinking |
These solutions should remain temporary. Never disconnect, bypass, tape together, or reposition safety sensors away from the doorway to force the door closed.
How to Verify the Fix Worked
Don’t stop once both LEDs turn solid. That’s a good sign, but it’s not proof that the problem is fixed.
Here’s how to confirm the fix actually worked:
- Run the door through a full open and close cycle, not just a quick test
- Watch the entire cycle, since a reversal partway through means it’s not fixed yet
- Check that the door closes completely without stopping or reversing at any point
- If one sensor won’t hold a steady light, that unit might be failing
- Swap the two sensors’ positions and test again to confirm which one’s at fault
If the fault follows the unit you moved, replacement makes more sense than continued troubleshooting.
Signs Your Garage Door Sensor Needs Replacement
Garage door sensors usually need replacement only after cleaning, alignment, obstruction, and wiring checks fail. The following warning signs point to a damaged or incompatible unit.
- One sensor light never turns on, even after confirming that the opener and wiring are supplying power.
- The indicator light continues flickering after both sensors have been cleaned, leveled, and correctly aligned.
- The sensor housing or lens is cracked, cloudy, water-damaged, or visibly worn.
- Tightening connections or repairing damaged wiring does not restore consistent sensor operation.
- The problem follows the same sensor when the two units are swapped during testing.
- Replacement sensors are incompatible with the garage door opener’s brand, model, or communication system.
- The garage door continues reversing despite having clean lenses, steady lights, and a completely clear beam path.
When several of these signs remain after troubleshooting, replace both sensors as a matched pair compatible with the opener rather than continuing temporary adjustments.
When to Call a Garage Door Technician
Call a garage door technician when the problem extends beyond basic sensor cleaning, alignment, or minor wiring checks.
Professional help is necessary if wiring damage reaches the opener unit, sensors repeatedly shift out of alignment, or the opener displays an unfamiliar error code.
You should also schedule service when newly installed replacement sensors fail to solve the issue. Stop troubleshooting immediately if the door has damaged tracks, broken springs, loose cables, or uneven movement, since these parts can create serious safety risks.
A technician should also inspect the system when the door keeps reversing even though both sensor lights remain steady and the beam path is clear. These signs may point to opener, travel-limit, force-setting, or mechanical problems.
Final Thoughts
A faulty garage door sensor does not always mean the entire system needs replacement. I recommend starting with the simplest checks: clean both lenses, clear the beam path, confirm alignment, and inspect the low-voltage wiring.
You should also test the door through a complete cycle instead of relying only on steady indicator lights.
Knowing how to fix garage door sensor problems helps you handle minor faults safely, avoid unnecessary parts, and recognize when the issue goes beyond the sensors.
Stop DIY work if you notice damaged springs, cables, tracks, or wiring near the opener. Try these steps carefully, then share which repair solved your problem or check out my related garage door maintenance tips.
Frequently Asked Questions
How Do I Reset a Garage Door Sensor?
Most sensors don’t have a real reset button, since they’re simple optical eyes, not electronics with memory. Unplug the opener for 30 seconds, then plug it back in.
How Do I Know if My Garage Door Sensor Is Bad?
A sensor is likely bad if one light never turns on, even after cleaning and realigning it. Swap the two units’ positions. If the fault follows it, that sensor has failed.
Can I Replace Garage Door Sensors Myself?
Yes. Sensors connect through simple low-voltage wiring, and no opener rewiring is needed. Buy a matched pair, mount them at the same height, and reconnect the wiring carefully.
Why Does My Garage Door only Refuse to Close when It’s Sunny?
Direct sunlight can overpower the receiving sensor’s ability to catch the beam, mimicking a real blockage. Shading the sensor or angling it away from the light usually fixes this.