
Looking at those bare walls can feel a bit sad, right? Maybe you’re renting, and drilling isn’t allowed. Or perhaps you just don’t want permanent holes everywhere.
But hanging a tapestry doesn’t have to damage your walls. There are plenty of smart ways to display that beautiful fabric without picking up a drill or hammer.
Some methods work better for lightweight pieces, while others can handle heavier textiles. The key is finding what fits your space and situation.
This blog will walk through several practical options that keep walls intact. No landlord drama, no patching holes later, and your tapestry still looks great hanging exactly where you want it.
Best Places to Hang a Tapestry for The Best Appeal
The right spot can make or break a tapestry’s impact. Location matters just as much as the hanging method itself, turning fabric art into a real statement piece that transforms the entire room.
- Above the Bed: Creates an instant headboard effect and becomes the bedroom’s natural focal point.
- Behind the Couch: Fills that awkward empty wall space and ties the living room together beautifully.
- Opposite the Entry Door: Catches attention the moment someone walks in, making a strong first impression.
- On a Blank Dining Room Wall: Adds warmth and texture to eating spaces that often feel too plain or sterile.
- In a Reading Nook: Defines the cozy corner and makes it feel like a separate, special retreat.
- Dorm Room Ceiling: Covers harsh lighting and creates a canopy effect that feels personal and dreamy.
- Home Office Background: Provides an attractive backdrop for video calls while showcasing personality and style.
Different Ways to Hang a Tapestry
Hanging a tapestry without wall damage is easy using renter-friendly tools. Below are the most effective, no-nail methods that keep walls intact while ensuring a neat, secure display.
1. Using Command Hooks
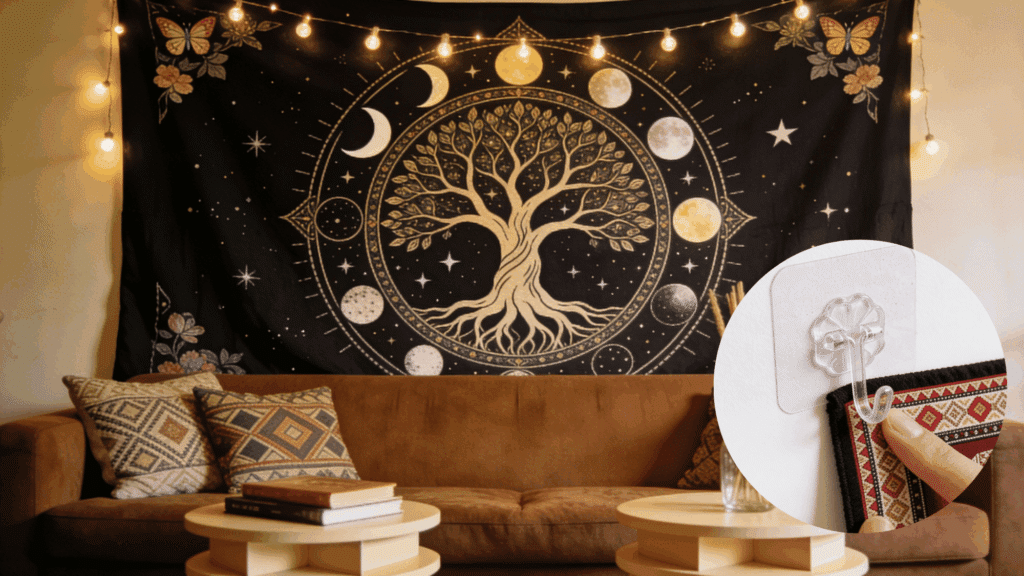
Command hooks offer a strong, removable solution for hanging tapestries securely without nails. They work best for lightweight to medium fabrics and are ideal for rentals and dorm rooms.
Step-by-Step Instructions:
- Clean the wall surface thoroughly and let it dry.
- Attach Command hooks evenly along the top edge.
- Press firmly and wait as per the hook instructions.
- Hang the tapestry loops or corners onto hooks.
Tip: Always check the weight limit on the hook packaging to prevent the tapestry from falling.
2. With Adhesive Strips
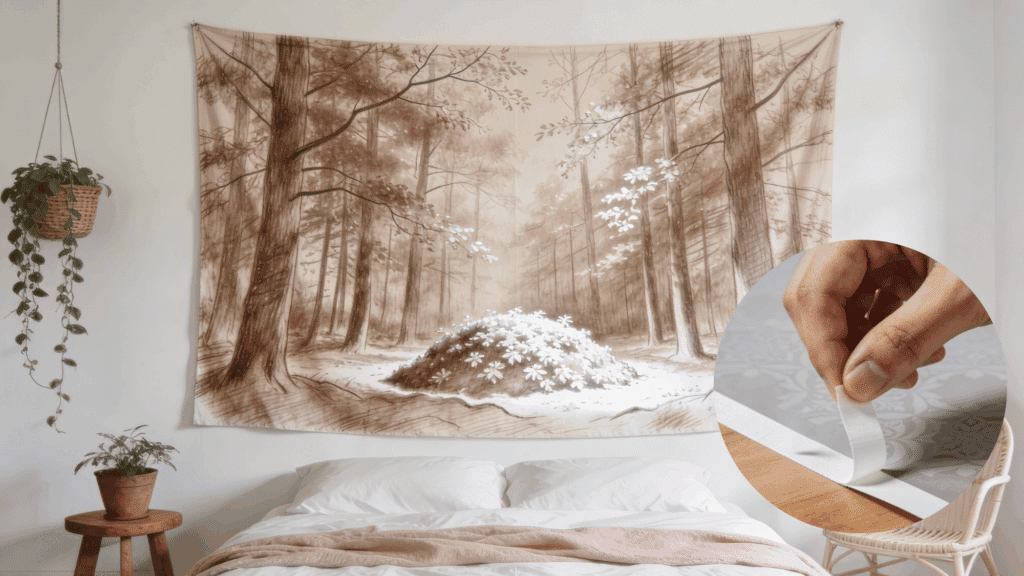
Adhesive strips provide a nearly invisible way to hang tapestries flat against the wall. This method works well for thin, lightweight fabrics and creates a clean, seamless look.
Step-by-Step Instructions:
- Clean and dry the wall and tapestry corners.
- Apply strips to tapestry edges or corners.
- Press firmly against the wall for secure bonding.
- Allow the adhesive to set before adjusting.
Tip: Use wall-safe, removable strips to avoid paint damage during removal.
3. Using Velcro

Velcro strips are excellent for heavier tapestries, offering strong hold and easy realignment. This method allows repeated removal while keeping the tapestry evenly positioned on the wall.
Step-by-Step Instructions:
- Attach one side of Velcro to the tapestry back.
- Fix the matching Velcro side to the wall.
- Align carefully before pressing together.
- Smooth fabric to remove wrinkles.
Tip: Measure and level Velcro placement to keep the tapestry straight.
4. With Clips or Clothespins
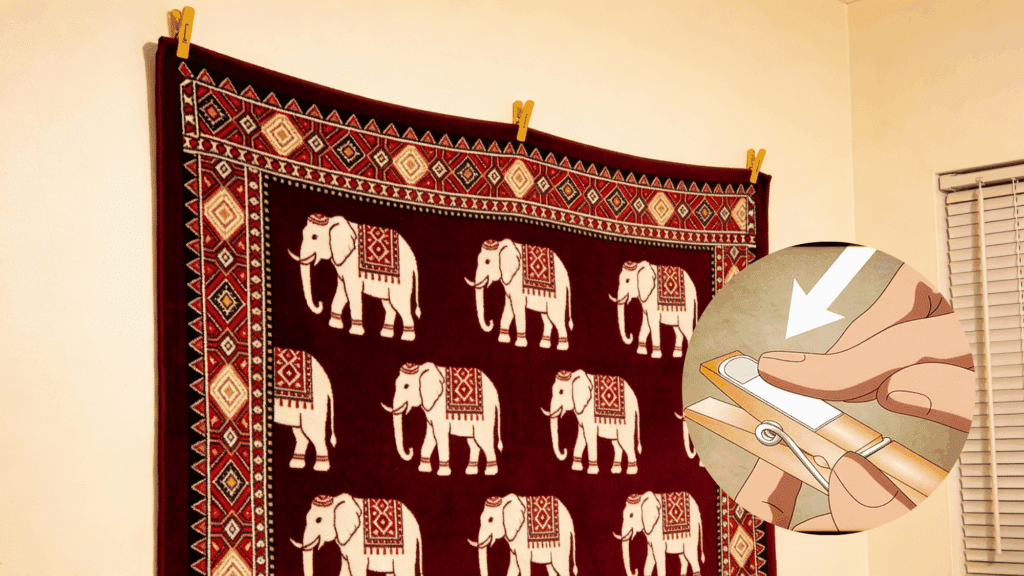
Clips or clothespins add a relaxed, decorative touch while avoiding wall damage. This method pairs well with boho or casual interiors and works best with rods or string supports.
Step-by-step instructions:
- Install a tension rod or removable hooks.
- Clip tapestry evenly along the top edge.
- Hang clips onto the rod or string.
- Adjust spacing for balanced drape.
Tip: Choose decorative clips to enhance the overall room style.
How to Hang a Tapestry on Different Wall Types
Different walls need different approaches. What works on smooth drywall might fail on brick, and textured surfaces create their own unique set of challenges.
| Wall Type | Best Method | What to Know |
|---|---|---|
| Drywall Without Nails | Adhesive strips or hooks | Clean surface first; weight limits apply based on strip strength |
| Brick or Concrete Walls | Brick clips or adhesive hooks | Clips slide between bricks; heavy-duty adhesive for flat concrete |
| Textured Walls | Tension rods or curtain clips | Adhesives don’t stick well; mechanical hanging works better |
| Wallpaper | Magnetic strips or tension rods | Avoid adhesives completely; they’ll tear wallpaper when removed |
How to Remove a Tapestry Without Damaging the Wall
Taking down a tapestry the wrong way can leave sticky residue, paint damage, or worse. The removal process needs just as much care as hanging it up in the first place.
1. Start from One Corner: Gently peel from a top corner instead of yanking the whole thing down at once. This prevents sudden stress on the wall surface.
2. Pull Slowly and Steadily: Work your way across with even pressure, not quick jerks. Rushing increases the chance of taking paint or drywall with it.
3. Warm Up Adhesive Strips: Use a hairdryer on low heat for adhesive hooks or strips. The warmth softens the glue, making removal much cleaner and easier.
4. Remove Residue Carefully: Rub leftover adhesive gently with your finger or a bit of rubbing alcohol. Avoid harsh scrapers that can gouge the wall.
5. Check for Wall Damage: Inspect the area once everything’s off. Small touch-ups now prevent bigger problems when you hang something new later.
How High Should You Hang a Tapestry?
Height makes a huge difference in how a tapestry looks. Hang it too high, and it floats awkwardly near the ceiling. Too low and it gets lost or looks like an afterthought.
The perfect height depends on a few things. Room size matters, and so does furniture placement. A tapestry behind a couch needs a different positioning than one on an empty wall. Ceiling height plays a role, too.
Most designers follow the gallery rule: center the tapestry at eye level, roughly 57 to 60 inches from the floor. But that’s just a starting point, not a strict rule. The goal is balance.
The tapestry should feel connected to the room, not randomly slapped up wherever. Taking a minute to measure and visualize before hanging saves frustration later.
How to Clean and Maintain a Hanging Tapestry
Tapestries collect dust and dirt over time, especially when hanging for months. Regular care keeps colors bright and fabric looking fresh longer.
- Vacuum gently once a month using the upholstery attachment on low suction to remove surface dust.
- Shake it outside every few months to dislodge dirt that vacuuming misses.
- Spot clean small stains immediately with cold water and mild detergent, blotting, not rubbing.
- Keep tapestries away from direct sunlight to prevent fading and color deterioration over time.
- Rotate the tapestry occasionally if one side gets more sun exposure than the other.
- Hand-wash delicate fabrics in cold water when needed, then air dry flat or hanging.
Conclusion
Drilling holes isn’t the only way to get that tapestry up. The method depends on weight, wall surface, and how permanent the setup needs to be.
Placement height and location transform how the piece looks.
Regular cleaning keeps it looking good for years. And when it’s time to move or redecorate, proper removal protects the walls.
All these methods are renter-friendly and reversible. That bare wall doesn’t stand a chance now. Pick a method, grab that tapestry, and give the space the personality it deserves.