
I used to think outside noise was just something I had to live with. Traffic, loud neighbors, and random sounds would come right through my windows.
If outside noise keeps finding its way into your home, too, then your windows are likely the problem.
Glass is thin, gaps let sound through, and standard window treatments do almost nothing to help. I’ve tested several fixes over the years, and some work a lot better than others.
I’ve put together different methods for soundproofing windows that are easy to follow and actually make a difference.
I will share how to seal gaps, use window inserts, and try basic DIY fixes that can lower noise levels.
By the end, you’ll have a better idea of how to make your room quieter and more comfortable.
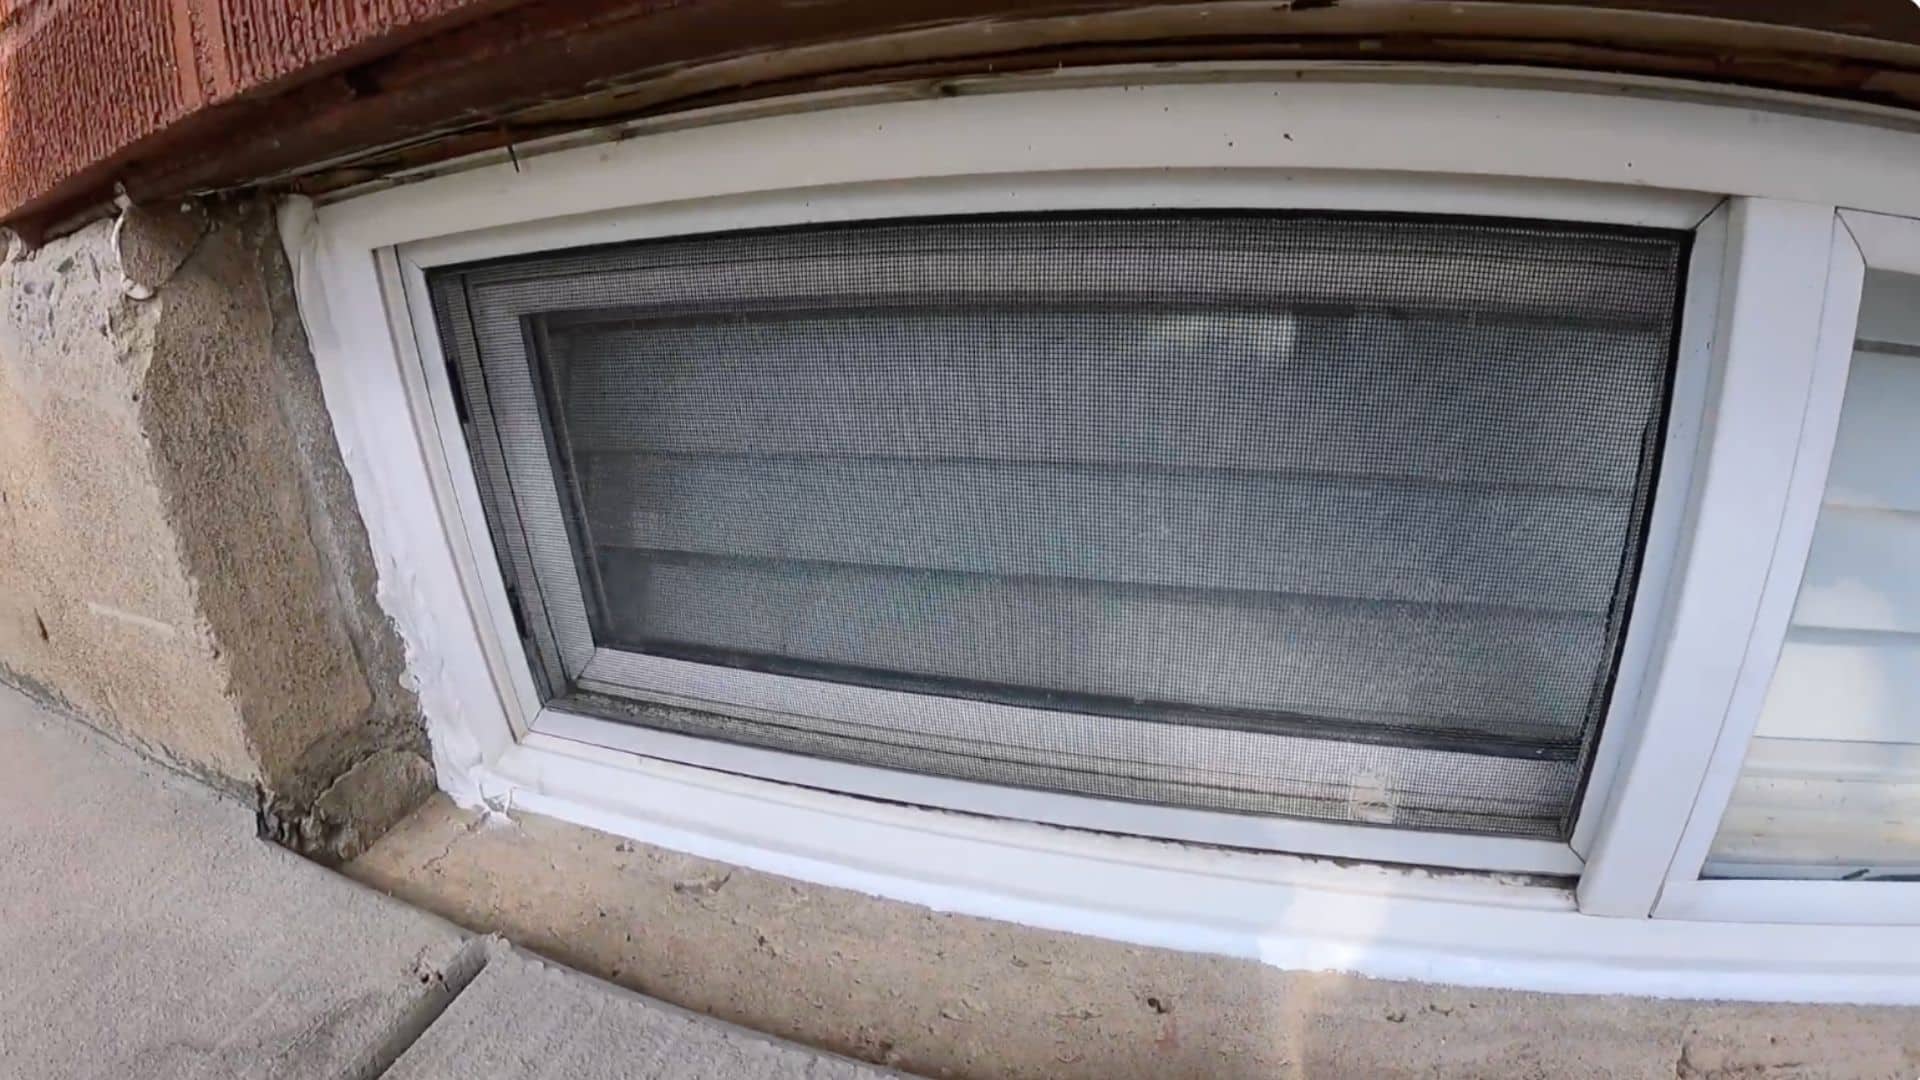
Why Does Windows Let So Much Noise Inside?
Windows often allow outside noise to enter because they are thinner and lighter than walls. Sound waves travel through materials and also slip through tiny openings around window frames.
Several factors make windows weaker at blocking noise:
- Glass vibration: Sound waves make glass vibrate, letting noise pass through.
- Air gaps: Small cracks around frames allow sound to leak inside.
- Single-pane glass: One thin layer of glass blocks very little sound.
- Low STC rating: Sound Transmission Class measures how well materials block noise. Higher STC windows reduce more sound.
How to Seal Window Gaps with Caulk to Soundproof Windows?
Small gaps around window frames allow outside noise, air, and moisture to enter your home. Sealing these gaps with caulk creates a tighter barrier and improves overall window soundproofing.
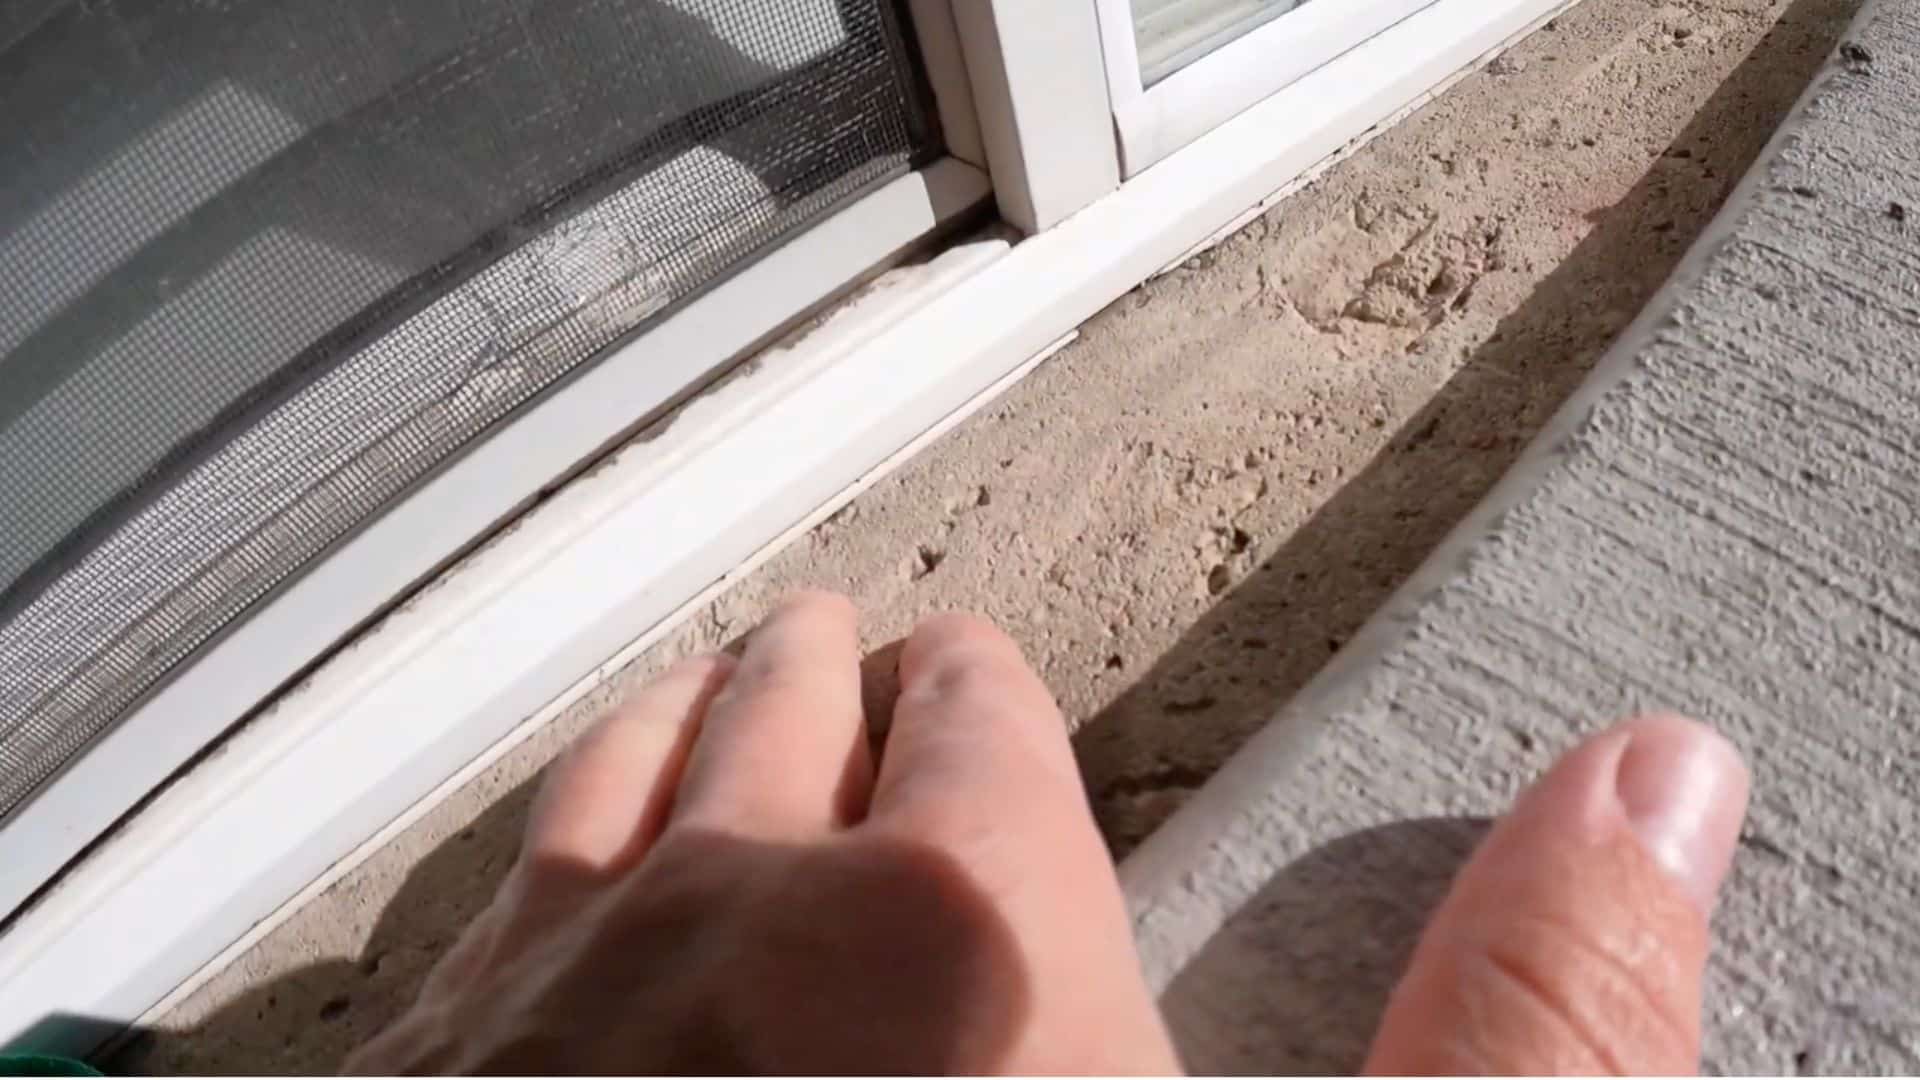
Step 1: Clean and Prepare the Window Surface
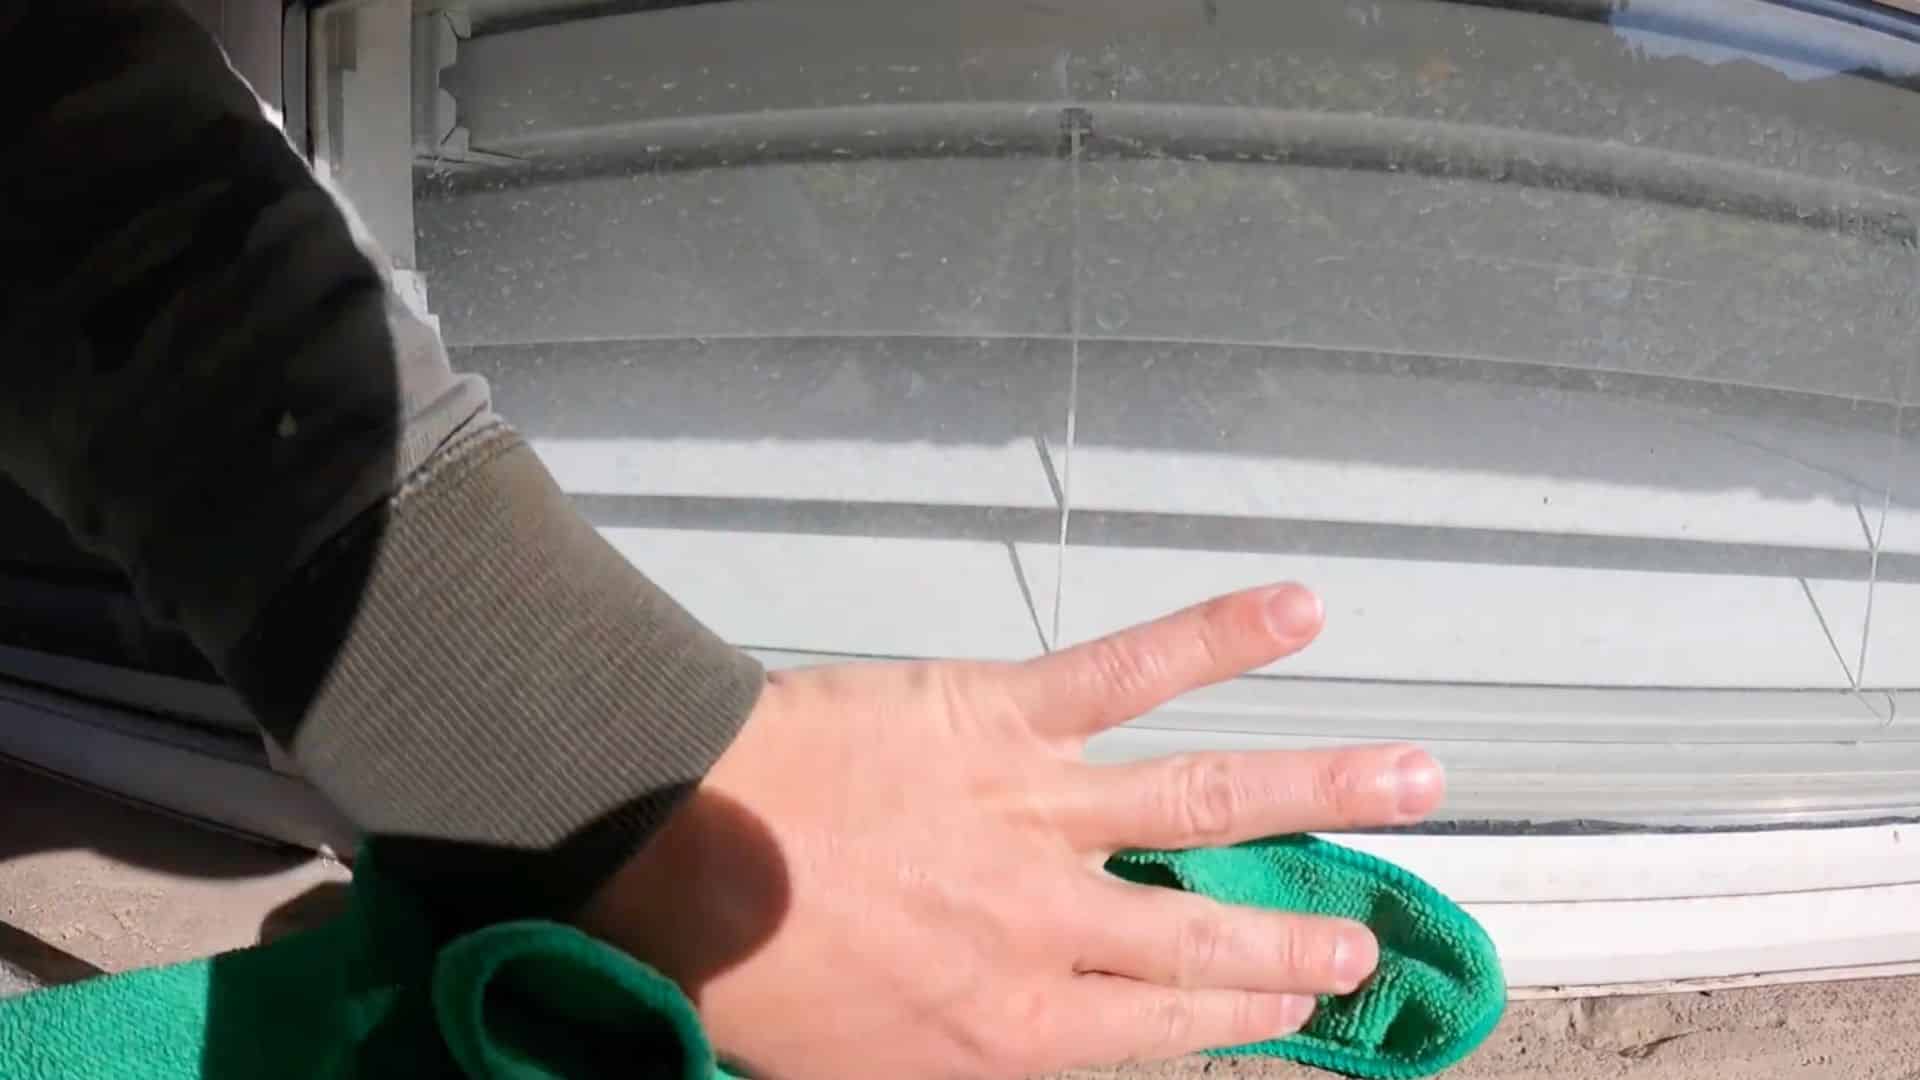
Before applying caulk, clean the entire window frame and the surrounding area carefully. Dust, dirt, and old debris can prevent the sealant from sticking properly.
Use a dry cloth to remove loose particles and then wipe the surface with a slightly damp cloth to clear stubborn grime.
Pay attention to rough areas such as concrete or textured surfaces where dirt tends to collect.
Proper cleaning ensures the caulk bonds well to the surface and creates a strong, long-lasting seal that helps block outside noise.
Step 2: Allow the Surface to Dry and Choose the Right Caulk
After cleaning the area, allow the window frame to dry completely before applying any sealant. Caulk adheres best to dry surfaces, so waiting a few minutes helps improve the final result.
While the surface dries, choose a durable exterior caulk designed to withstand weather exposure.
A good sealant should handle sunlight, rain, and temperature changes without cracking or shrinking.
Using the right type of caulk helps maintain a tight seal around the window and prevents sound, air, and moisture from leaking inside.
Step 3: Prepare the Caulking Tube and Tools
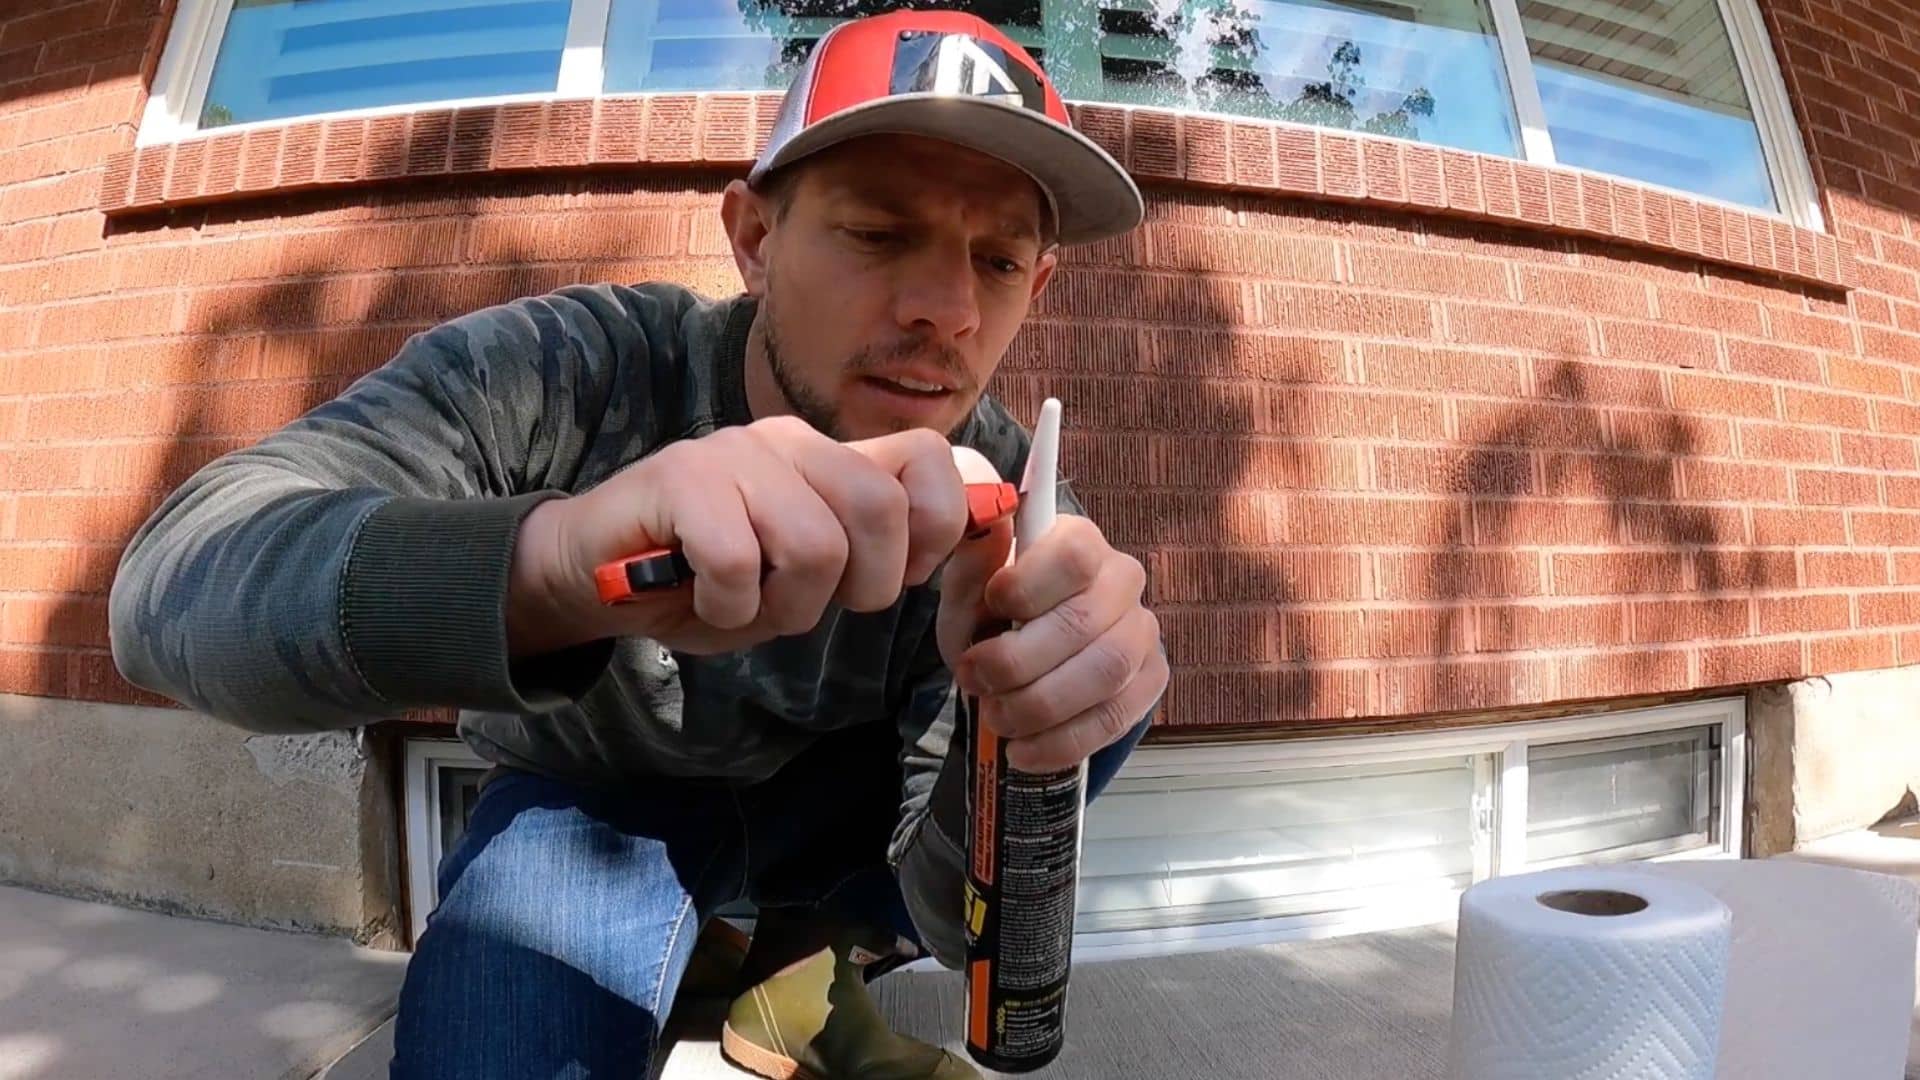
Place the caulk tube into a caulking gun so you can apply it with better control and steady pressure. Use a sharp utility knife to cut the tip of the tube at a slight angle.
The size of this opening will decide how thick your caulk bead will be, so adjust it based on the gap size.
For wider gaps, cut a slightly larger opening to ensure proper filling.
Make sure the cut is smooth and clean, because rough edges can lead to uneven application and messy results along the window frame.
Step 4: Apply Caulk Along the Window Gap
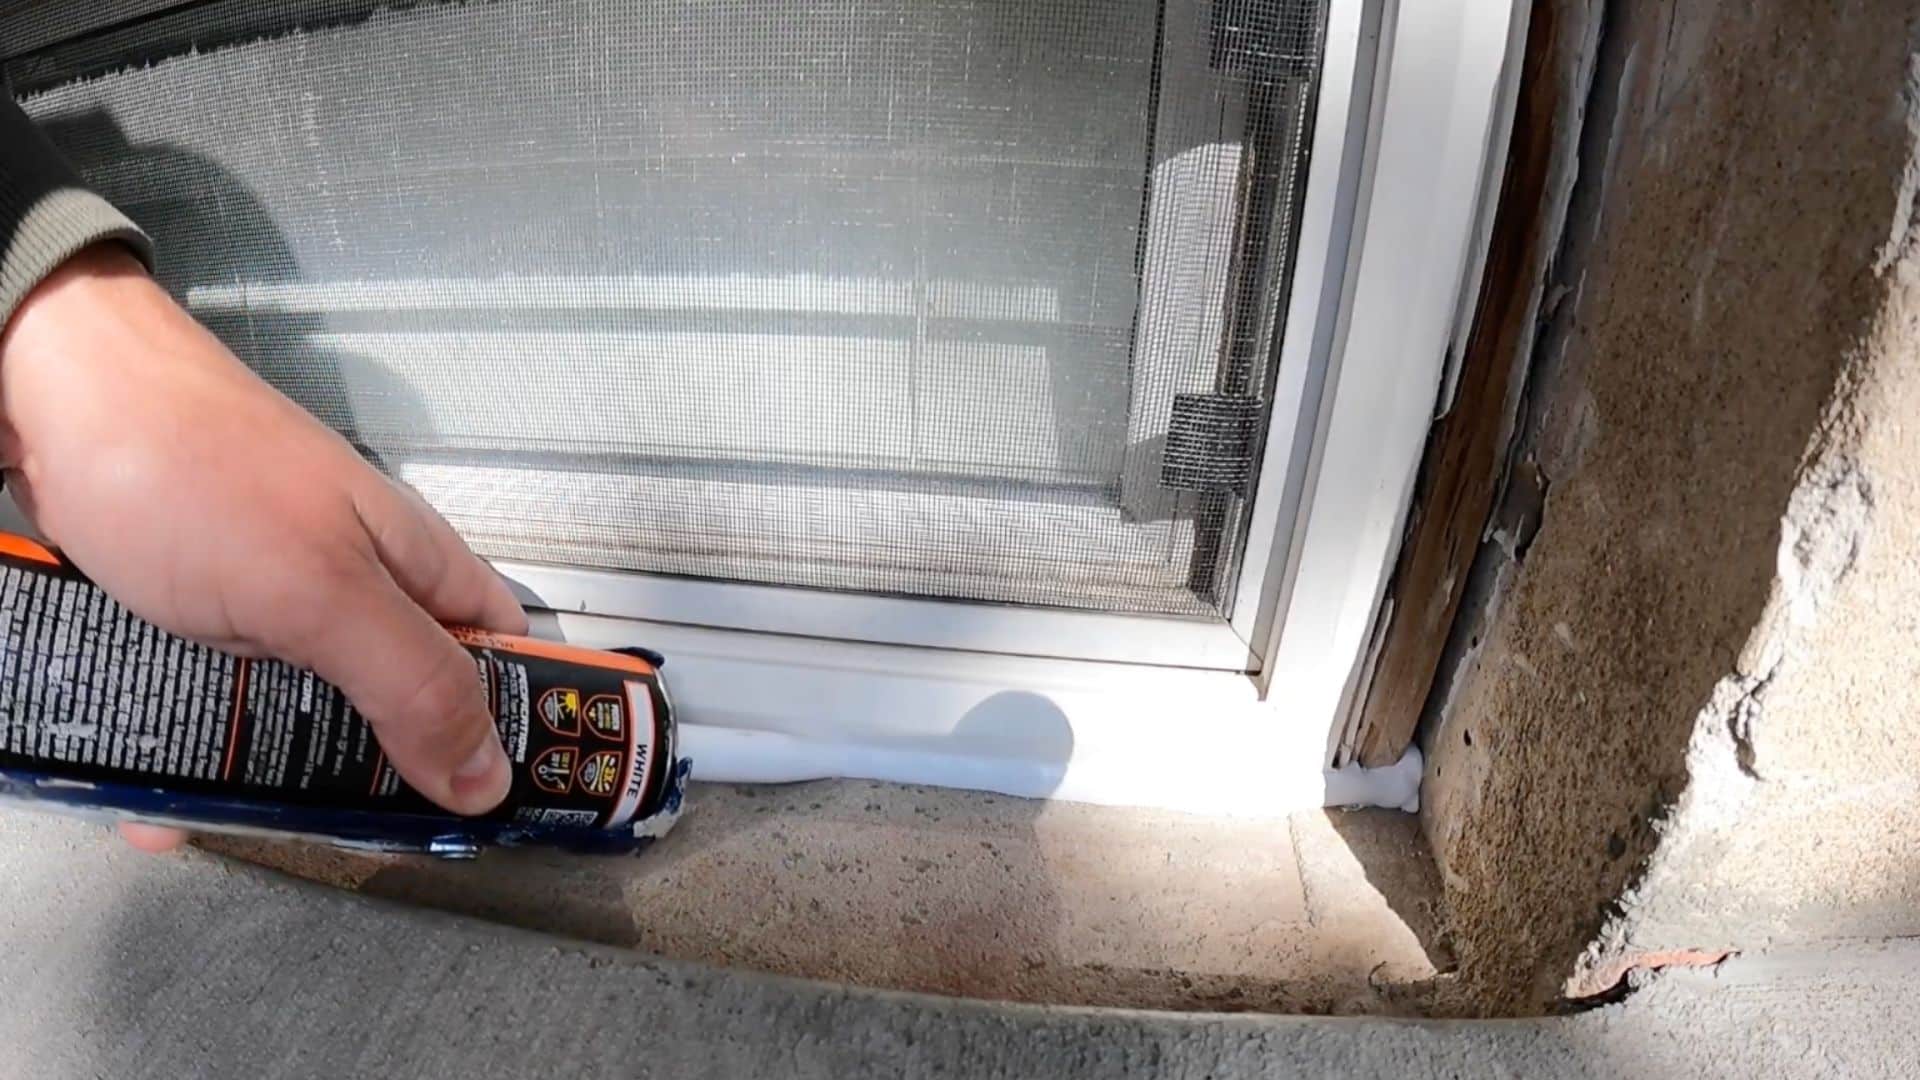
Begin at one corner of the window and slowly move along the gap while pressing the caulking gun trigger steadily.
Keep the nozzle close to the surface so the caulk fills the joint completely.
Maintain even pressure and a consistent speed to create a smooth, continuous bead without breaks. Do not rush this step, as moving too fast can leave gaps or uneven lines.
Focus on filling the entire space between the frame and wall so outside noise, air, and moisture are blocked effectively.
Step 5: Fill Larger Gaps and Check the Seal
If you notice larger or deeper gaps, apply extra caulk to fully seal those areas. Move the nozzle slightly to push the sealant into both sides of the gap for better coverage.
After applying, go back and inspect the entire window frame carefully.
Look for any thin spots, missed sections, or uneven areas and add more caulk where needed.
A complete, continuous seal is important for reducing noise and preventing drafts. Taking time to double-check your work ensures a stronger, longer-lasting barrier around the window.
This tutorial is based on a helpful video by Todays Task. You can check out the original video on their YouTube channel here or watch it below.
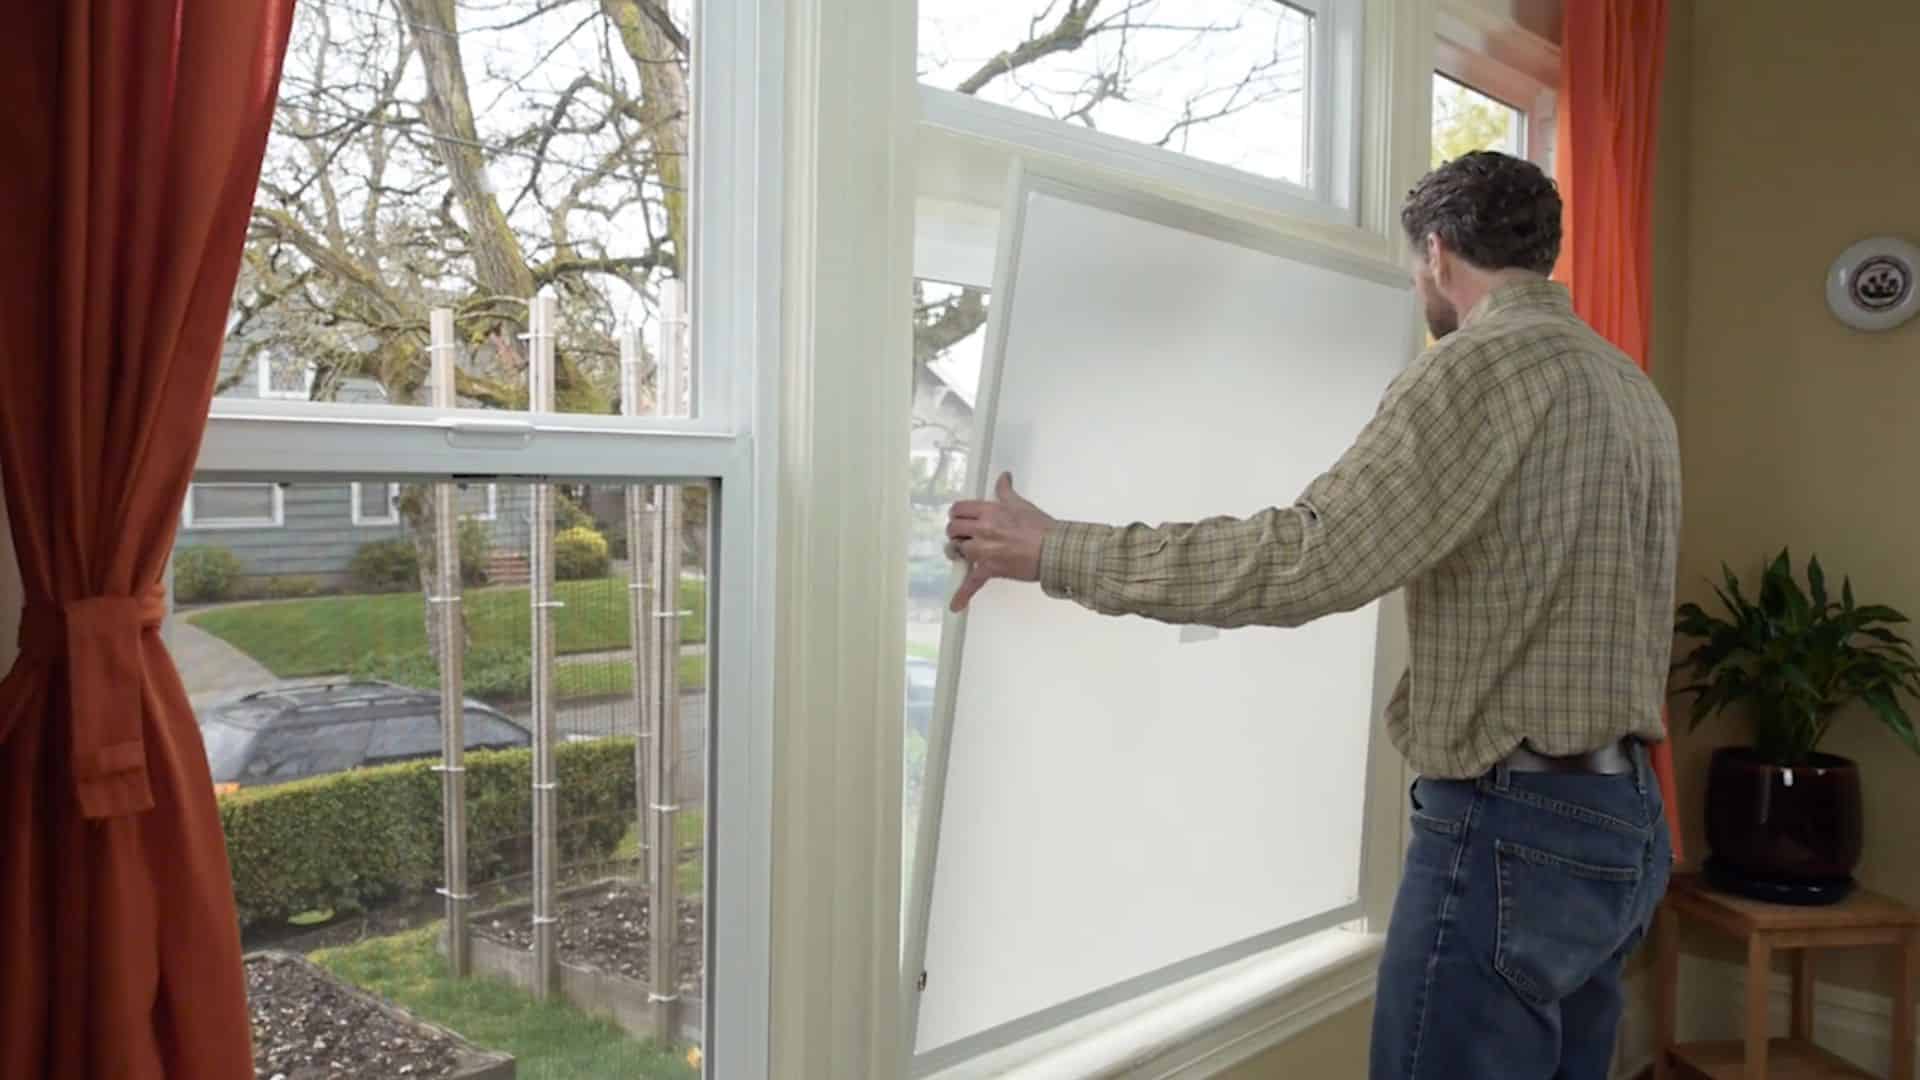
How to Install DIY Window Inserts for Soundproofing Windows?
Window inserts are an easy way to reduce outside noise without replacing your windows. They create a tight seal and an extra layer that effectively blocks sound.
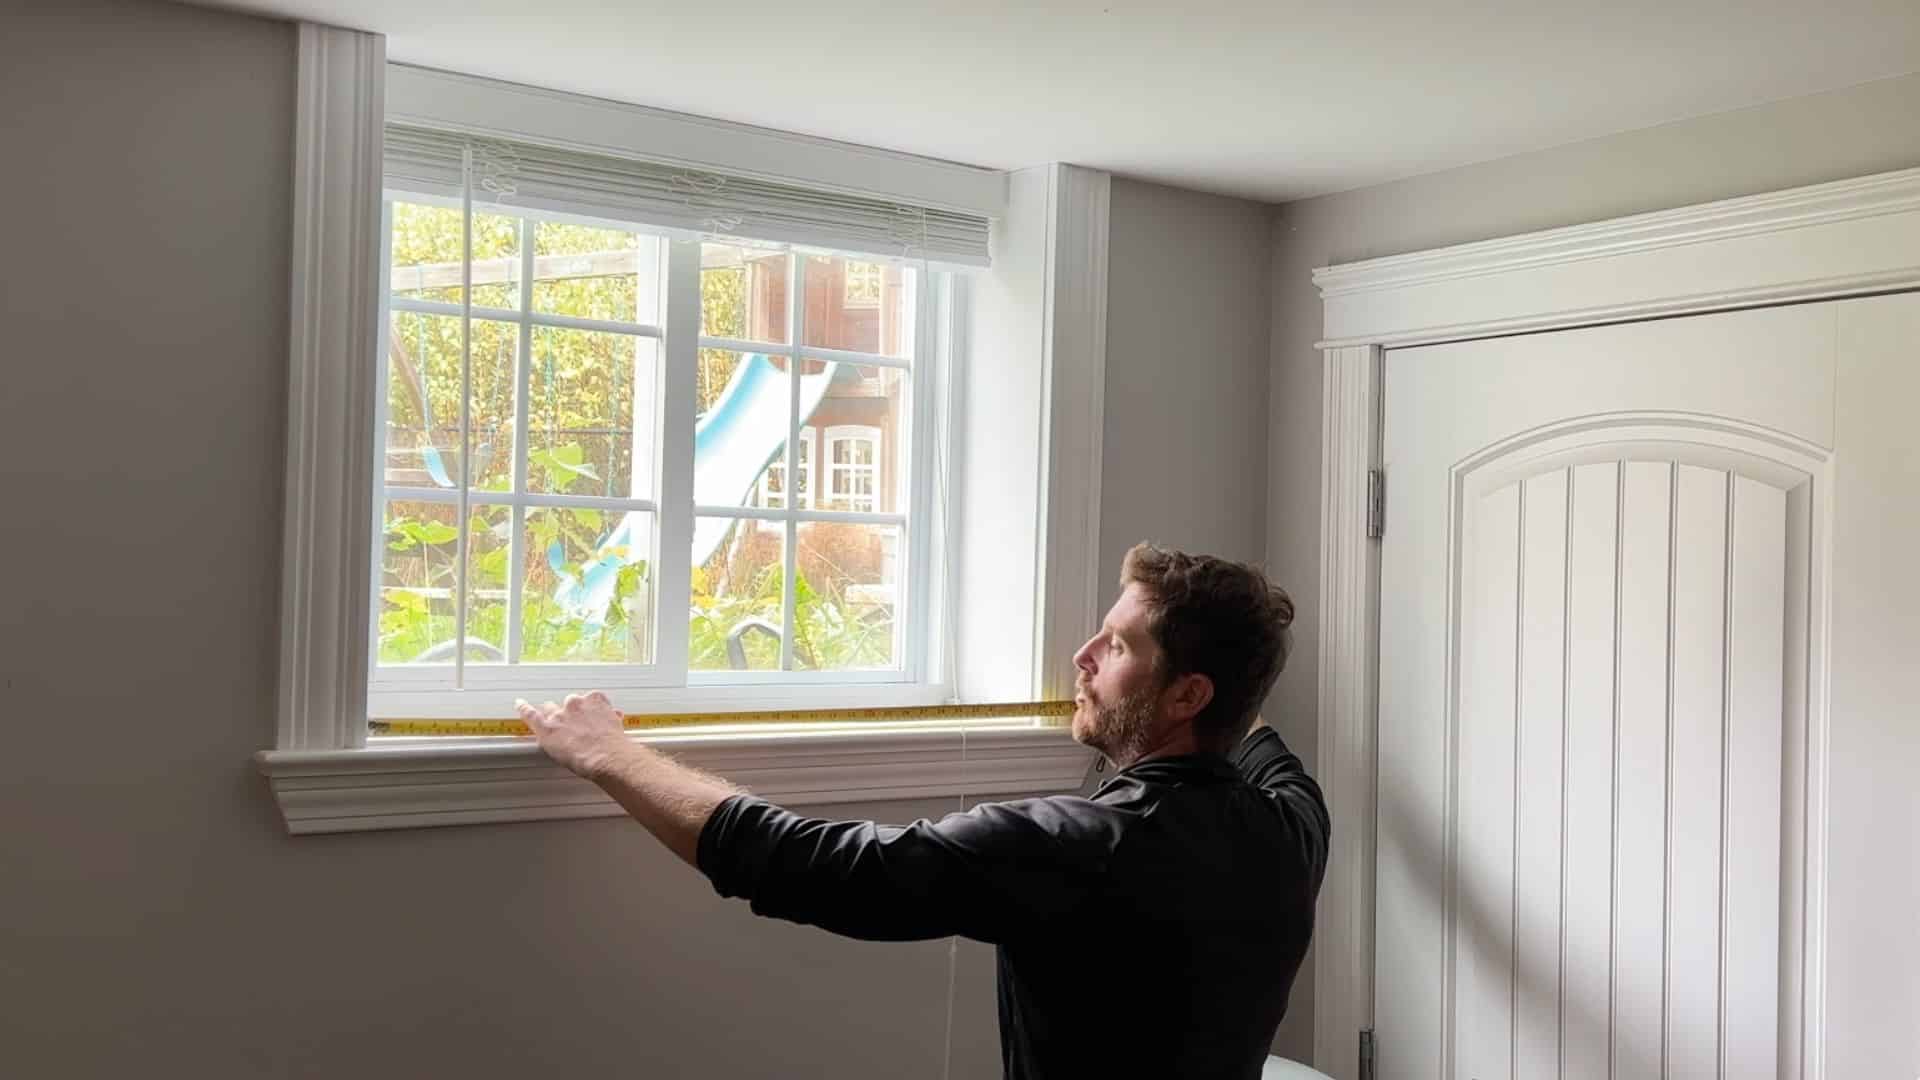
Step 1: Check Size and Do a Test Fit

Start by confirming that your insert matches the size of your window opening.
Carefully measure the width and height of the frame, then place the insert inside without securing it permanently.
Rest it on the sill and observe how it sits within the frame. Look at the spacing on both sides and check if it feels balanced. This test fit helps you identify any sizing issues early.
Making adjustments at this stage prevents future gaps and ensures better soundproofing performance once fully installed.
Step 2: Align and Center the Insert Properly
Once the insert is placed inside the frame, adjust it so it sits evenly on all sides. Move it gently left or right until the spacing appears equal.
Check that the insert is straight and not tilted or leaning to one side. Uneven alignment can cause pressure differences along the edges, leading to gaps.
A centered insert ensures even compression around the frame.
This balanced positioning is important because it helps create a consistent seal, which improves the insert’s ability to block outside noise effectively.
Step 3: Press the Insert into the Frame Gradually
Begin securing the insert by pressing the bottom corners into place first. Apply gentle pressure and work your way upward along the sides.
Avoid forcing the insert too quickly, as this can cause uneven sealing or damage the edges.
Once the sides are positioned, press the top center and move outward toward the corners.
This gradual method allows the insert to settle evenly within the frame. A smooth and steady approach helps create a snug fit that improves sound insulation and reduces the chances of gaps.
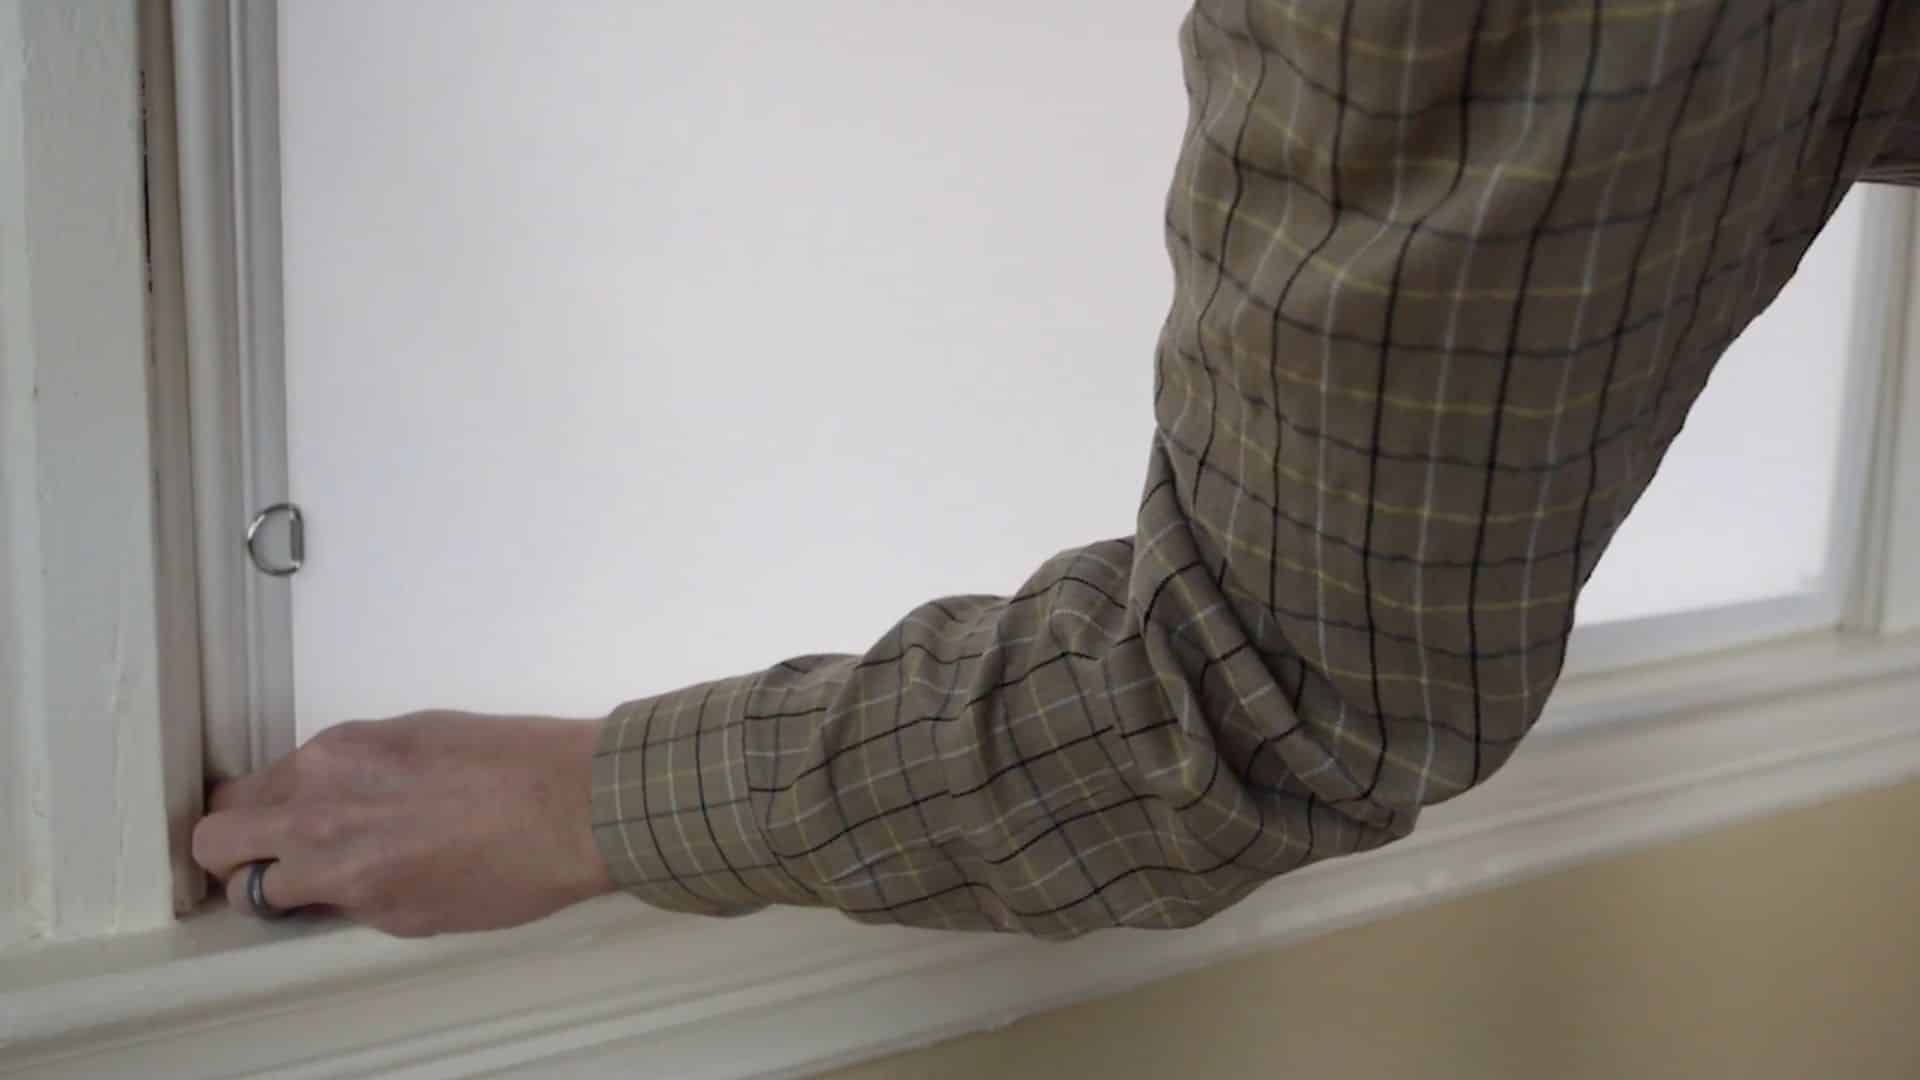
Step 4: Install Support Brackets if Needed
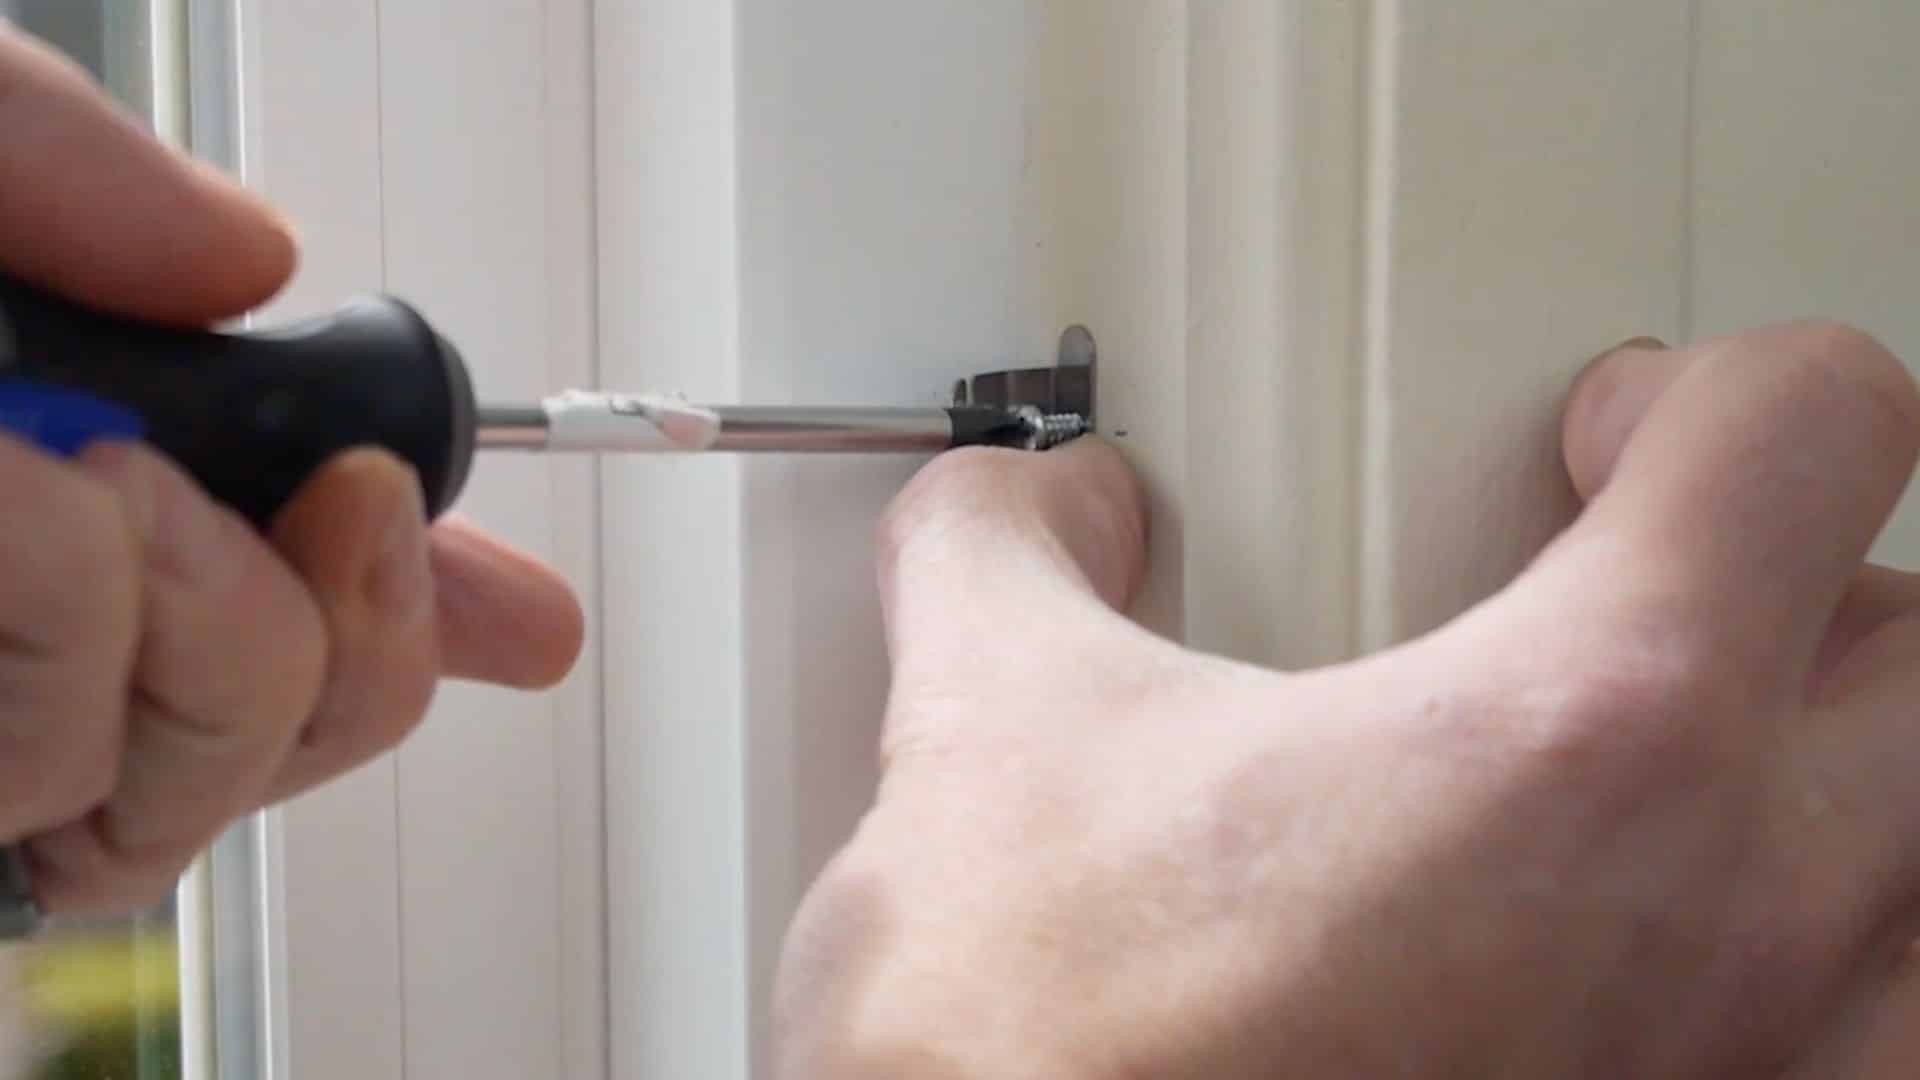
If your insert is large or heavy, adding support brackets can help keep it stable. Measure the correct height for bracket placement based on the insert size and frame design.
Mark the spots clearly before drilling. Pre-drill small holes to make installation easier and prevent damage to the frame.
Secure the brackets using screws, ensuring they align with the insert position.
Properly installed brackets help hold the insert firmly in place, reducing movement and maintaining a consistent seal that improves long-term soundproofing performance.
Step 5: Clean the Insert and Window Frame
Before final installation, clean both the insert and the window frame carefully.
Use a soft cloth to remove dust, dirt, and debris from all contact surfaces. Pay special attention to the sill and edges where the insert will sit.
Even small particles can prevent a proper seal and create tiny gaps for sound to pass through. Cleaning also helps improve the grip between the insert and the frame.
A clean surface ensures better contact, which leads to improved sound blocking and a more effective installation.
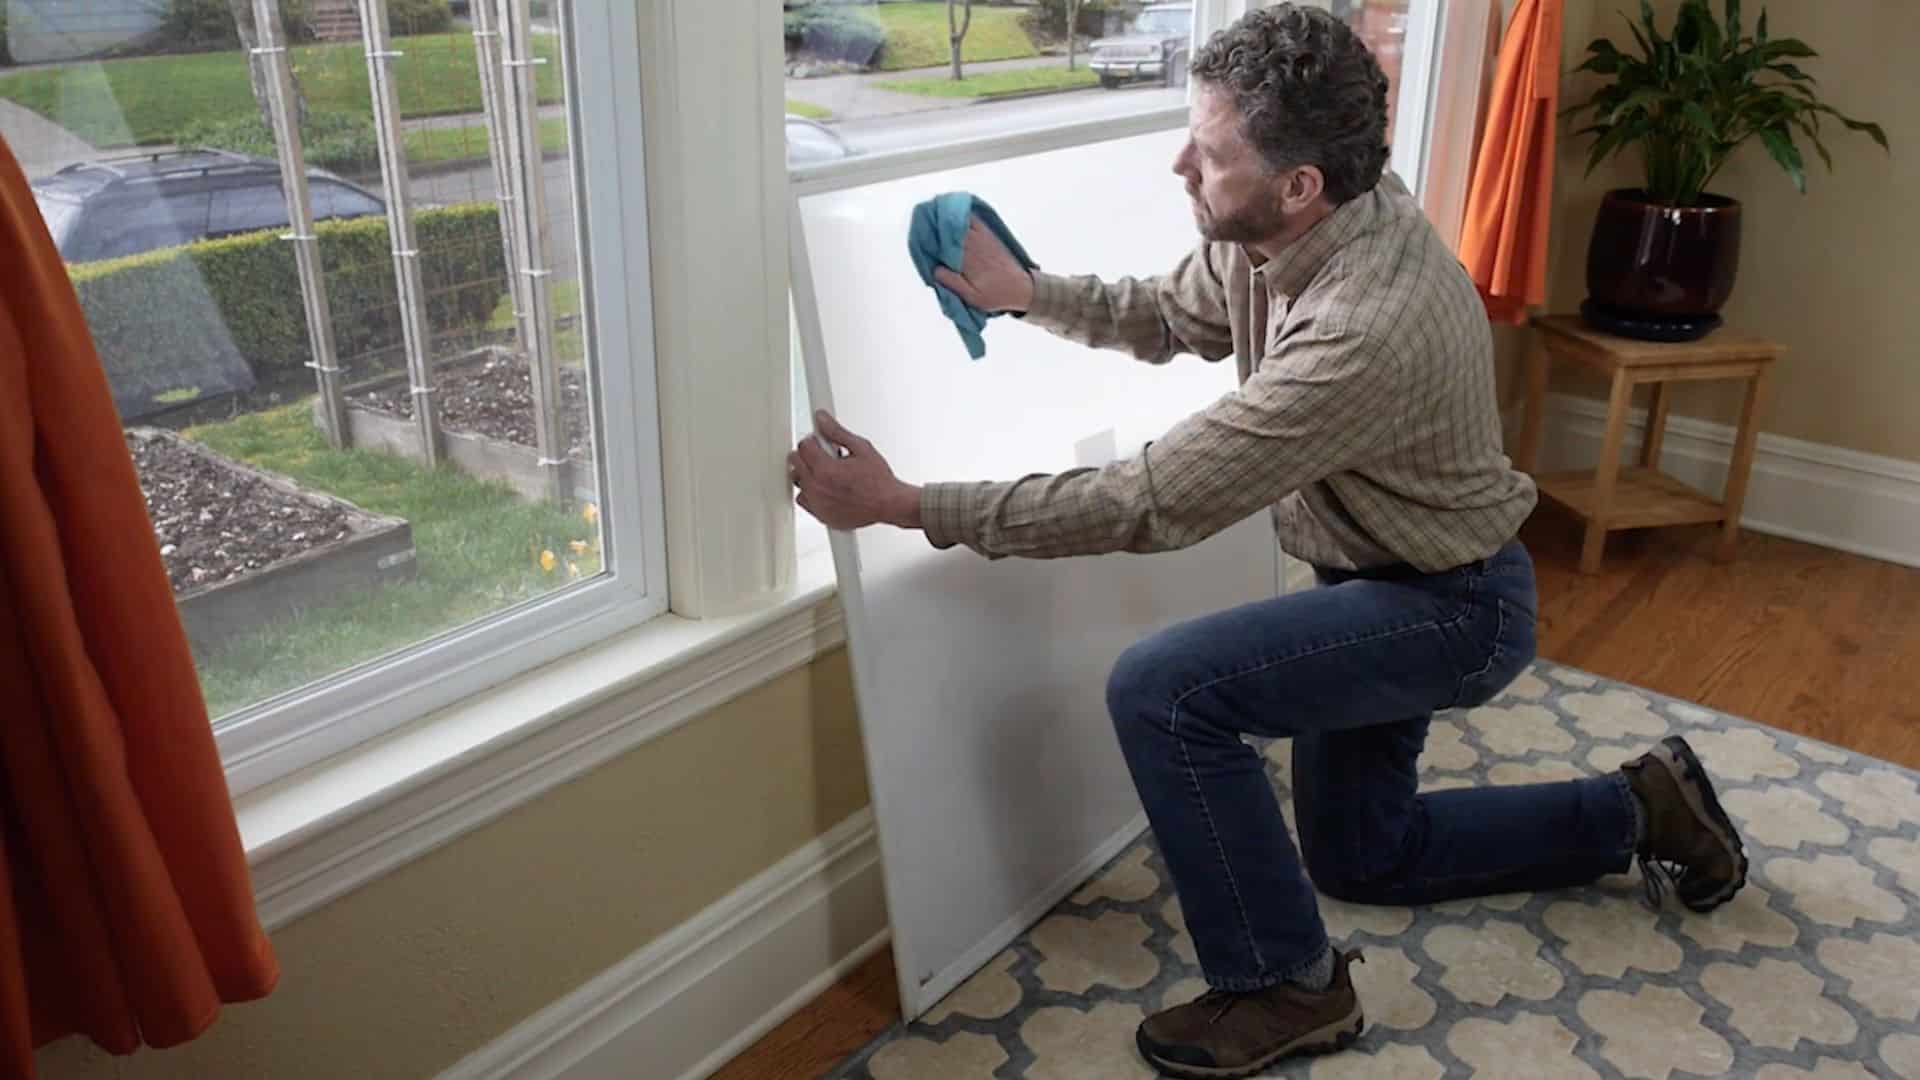
Step 6: Install the Insert Tool Carefully

Place the insert back into the frame, starting with the bottom edge resting on the sill. Gently tuck the corners into place and press the insert inward.
Work slowly along the sides and then move to the top edge, ensuring even placement.
Avoid pushing too hard, as excessive force can distort the insert or create uneven compression.
The goal is to achieve a snug but balanced fit. Careful installation helps maintain the insert’s structure and ensures it forms a strong barrier against outside noise.
Step 7: Check the Seal and Maintain the Fit
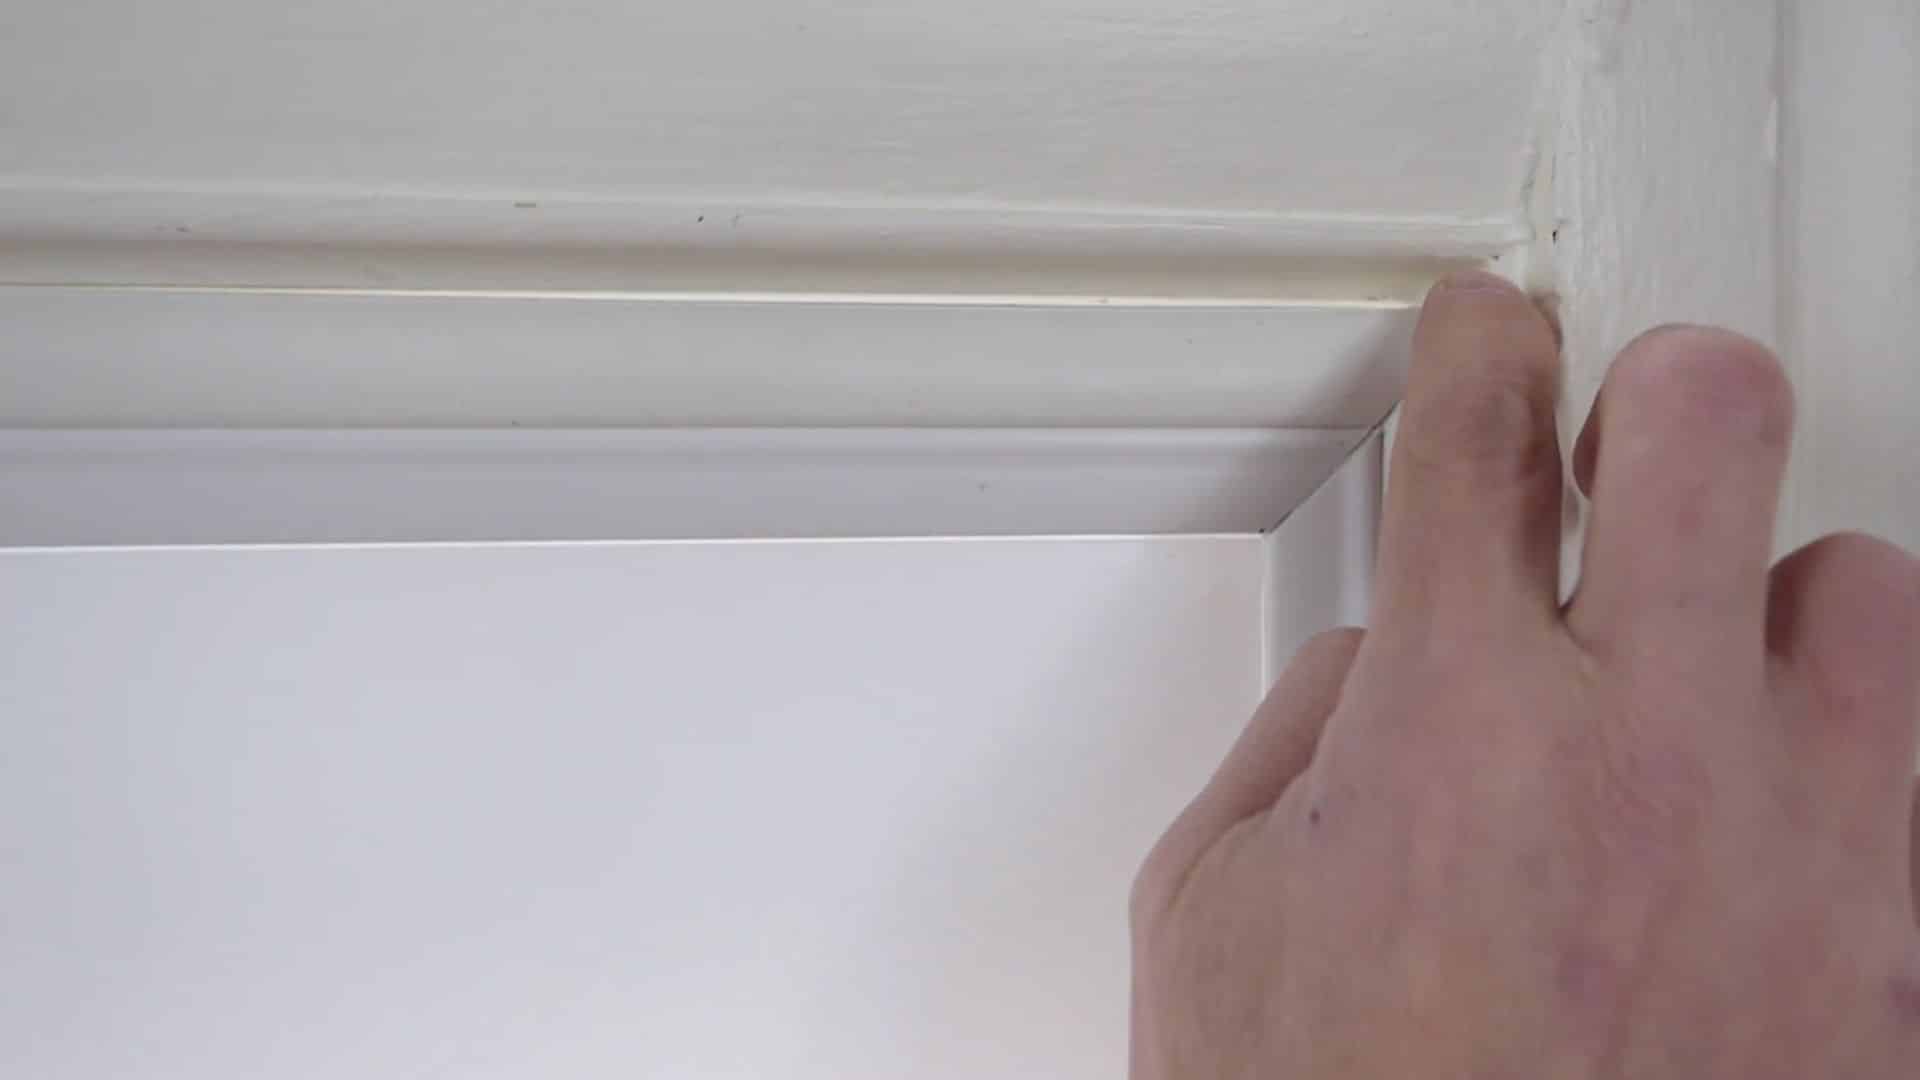
After installation, inspect the insert carefully to ensure a tight and even seal along all edges.
Run your fingers around the frame to check for loose spots, uneven pressure, or small gaps where sound could pass through.
If you notice any issues, adjust the insert slightly to improve the fit.
Look for light entering through edges, as this indicates gaps. Over time, temperature changes may shift the insert, so check it occasionally.
Repositioning it when needed helps maintain a strong seal and consistent soundproofing performance.
This tutorial is based on a helpful video by Indow. You can check out the original video on their YouTube channel here or watch it below.
How to Build a DIY Window Plug for Soundproofing Windows?
A window plug is one of the most effective DIY methods for completely blocking noise. It fills the entire window space, creating a thick barrier that stops sound from entering your room.
Step 1: Measure the Window and Plan the Fit
Start by carefully measuring the width, height, and depth of your window frame using a measuring tape. Write down the dimensions to avoid mistakes later.
When building the plug, make it slightly smaller than the opening so it can fit easily without getting stuck.
This extra space allows room for weather stripping, which will seal the edges later.
Avoid making it too tight, as that can damage the frame or make removal difficult. Accurate measurements are important because even small gaps can reduce soundproofing performance.
Step 2: Build the Wooden Frame Structure
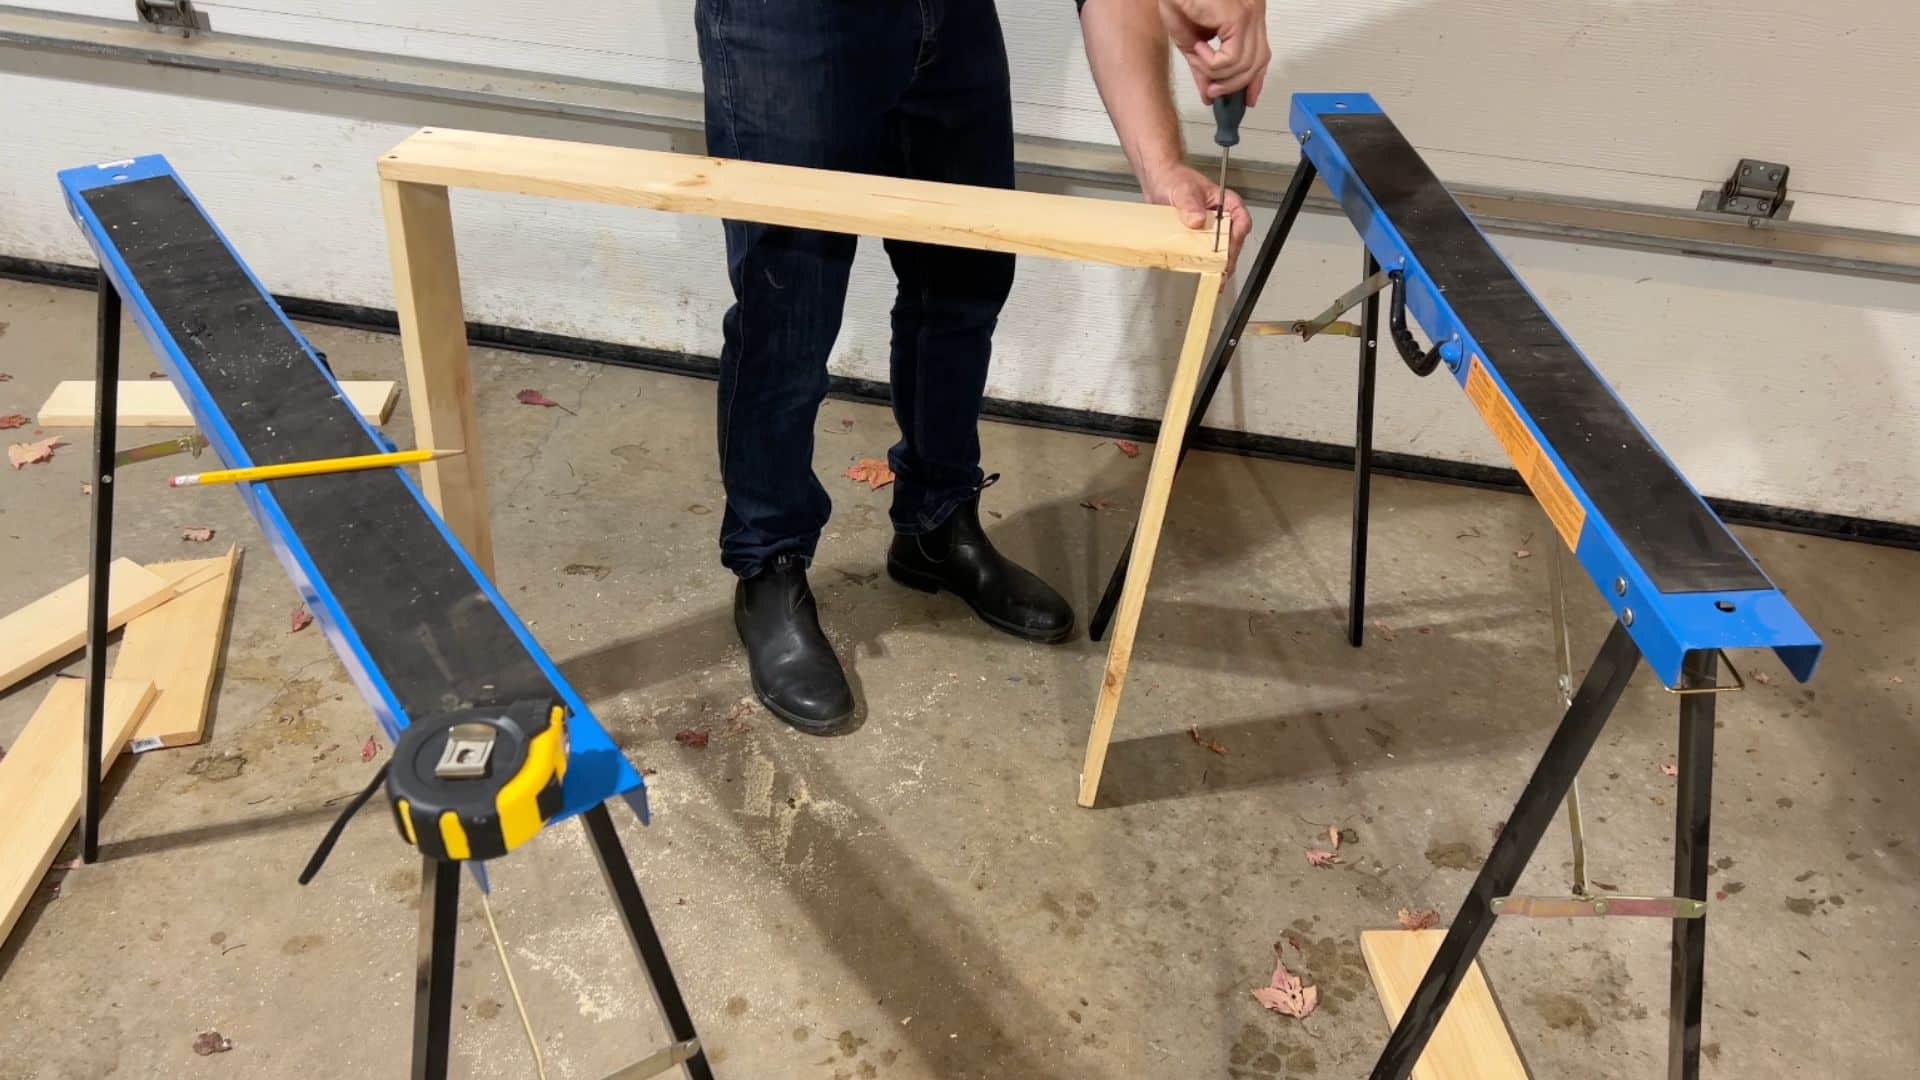
Cut wooden boards according to your measurements and assemble them into a rectangular frame.
The top and bottom pieces should match the width, while the side pieces should match the height minus the thickness of the wood.
Use screws to secure the corners and keep the frame square. Drill pilot holes first to avoid splitting the wood.
A strong and even frame provides the base for all other materials. Take your time to ensure the frame is sturdy and properly aligned for the best results.
Step 3: Cut Drywall Panels to Measured Size
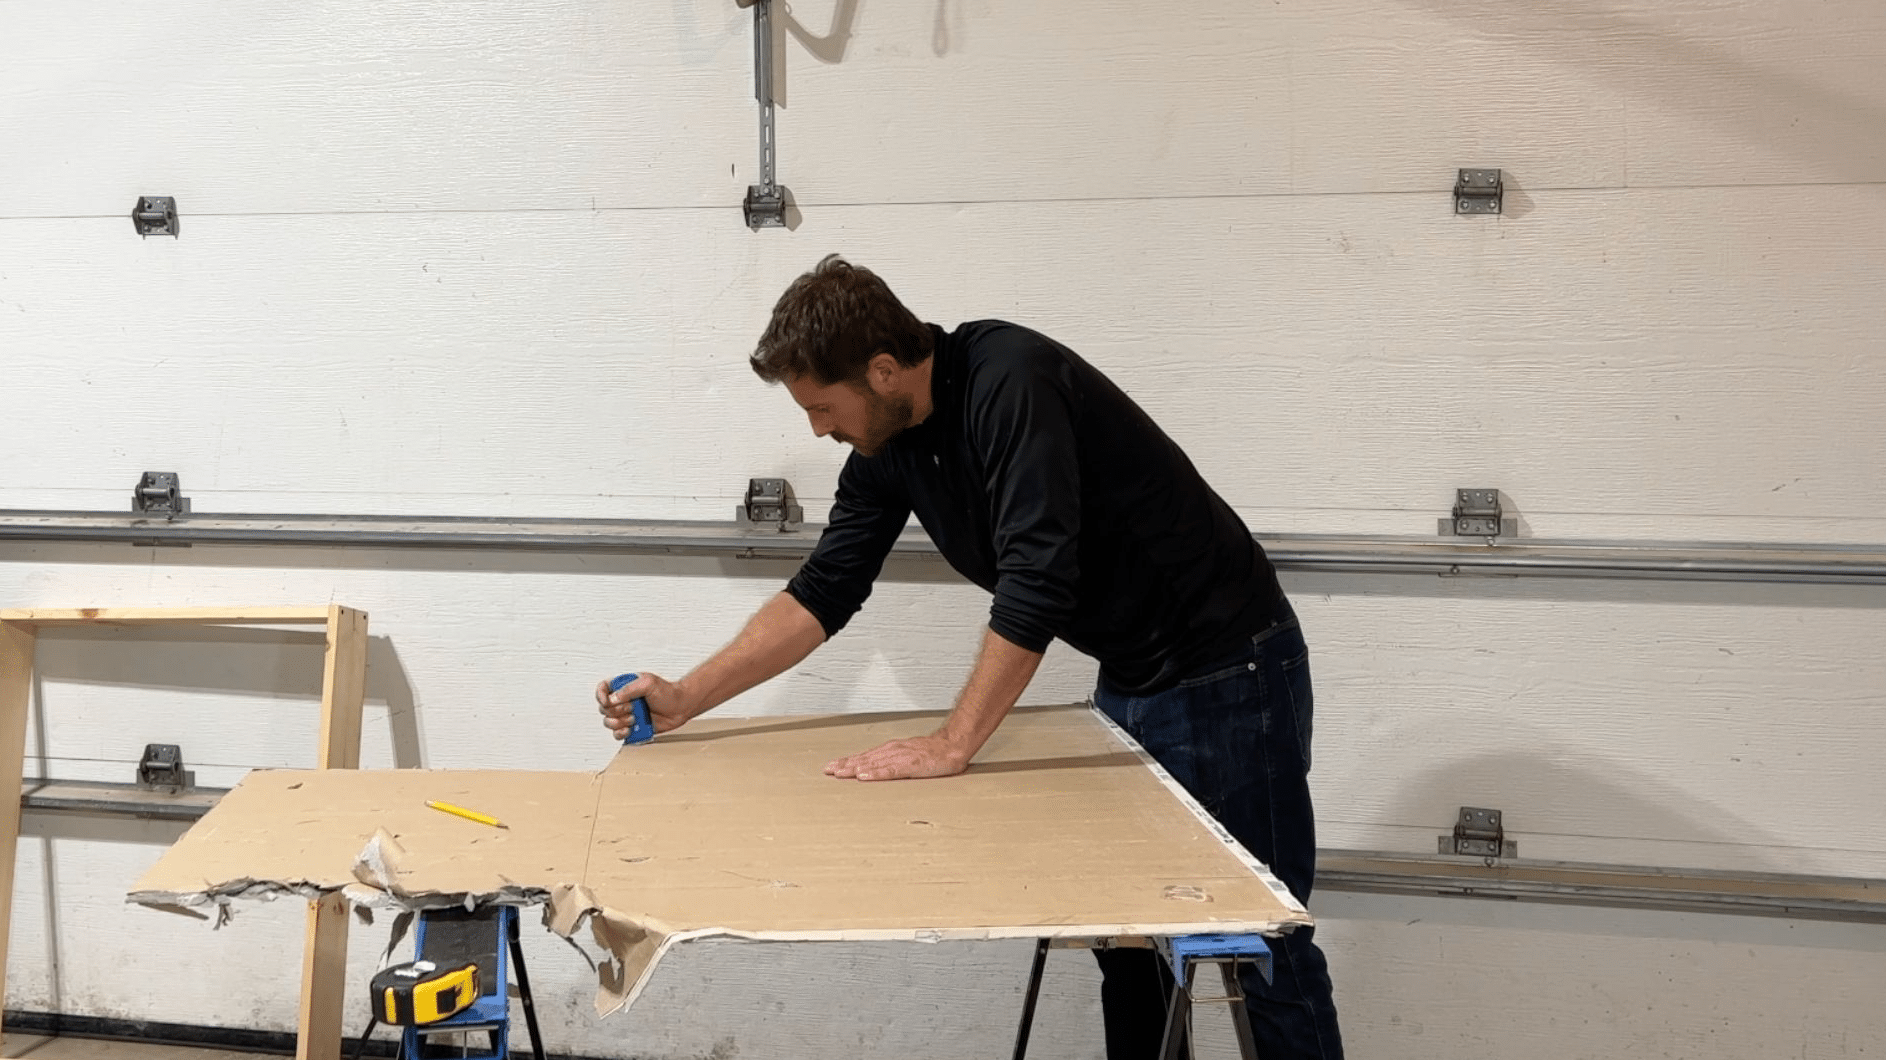
Measure the wooden frame and mark the same dimensions on the drywall sheet.
Use a sharp cutter to carefully score and cut the drywall to the correct size.
Make sure each panel fits neatly within the frame edges without gaps. Drywall adds mass, which helps block sound waves from passing through.
Thicker panels provide better sound reduction but also increase weight.
Prepare one or two panels as needed. Cut them accurately for a tight fit and better soundproofing.
Step 4: Seal Edges with Acoustic Sealant
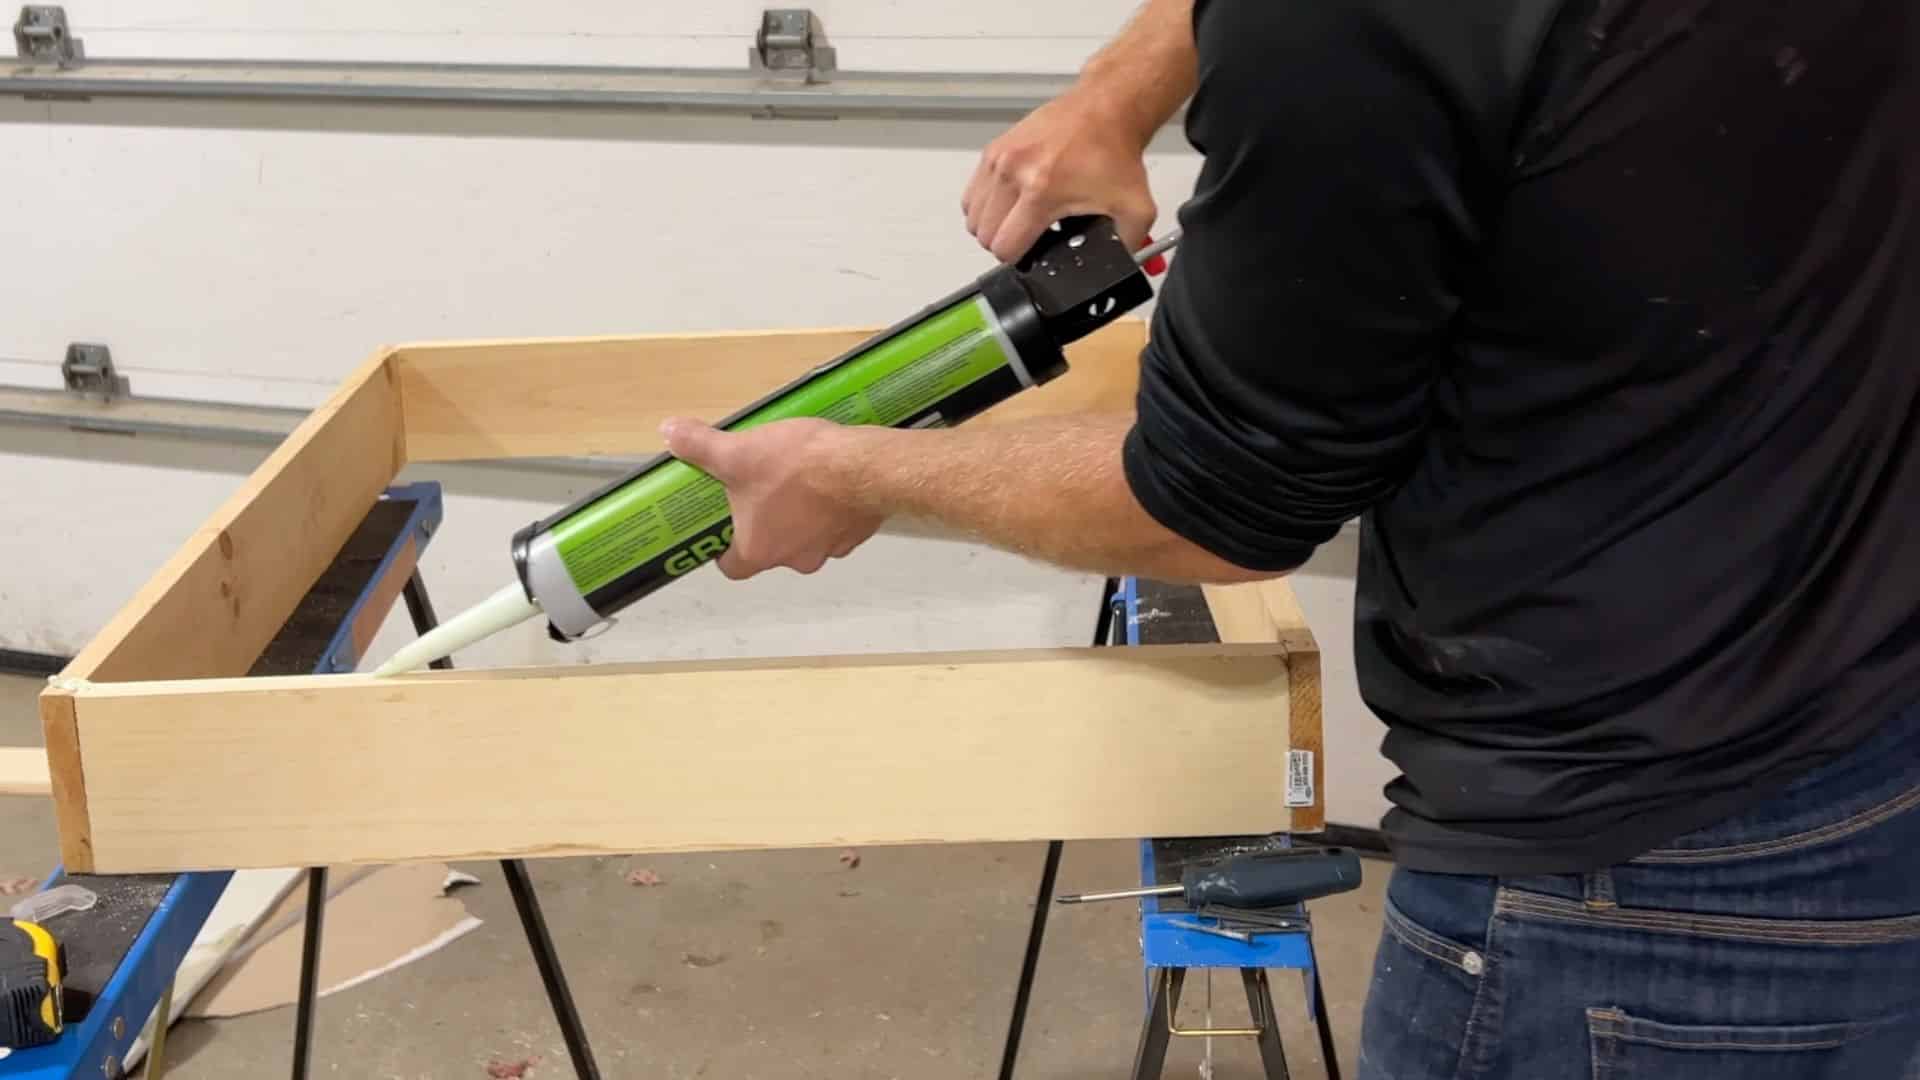
Apply acoustic sealant along all edges where the drywall meets the wooden frame.
This step is important because even tiny gaps can allow sound to pass through. Use a steady hand to apply a consistent line of sealant, ensuring all joints are covered.
Unlike regular caulk, acoustic sealant remains flexible over time and cracks less easily.
This flexibility helps maintain a long-lasting seal, especially if the plug is removed and reinstalled. A properly sealed frame improves both soundproofing and durability.
Step 5: Add Dense Soundproofing Materials
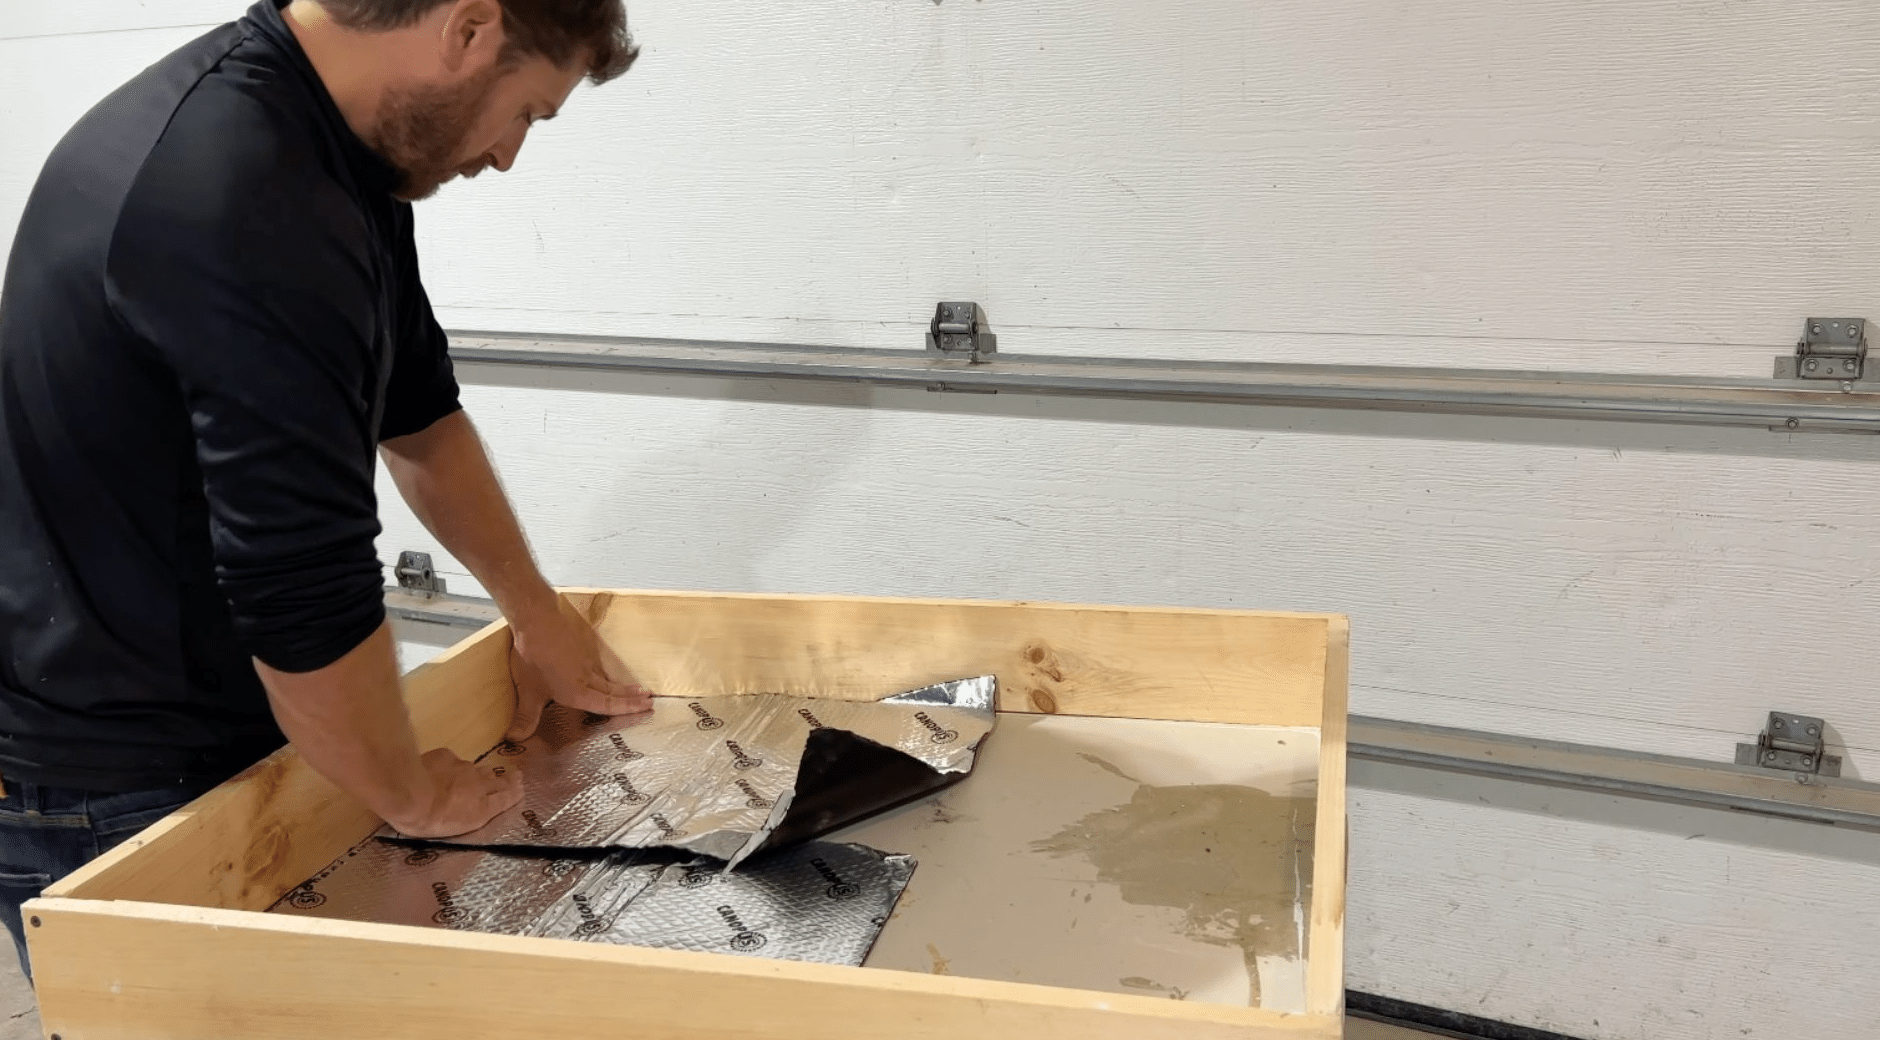
Fill the inside of the frame with dense materials such as insulation, mass-loaded vinyl, or sound-deadening sheets.
These materials help absorb and block sound waves before they pass through the plug.
If your frame is shallow, use thinner layers that can be stacked. If it is deeper, you can use thicker insulation for better results.
Combining different materials often works best because it targets different sound frequencies.
The goal is to increase both mass and density, which are key factors in reducing outside noise effectively.
Step 6: Install Handles and Finishing Layers
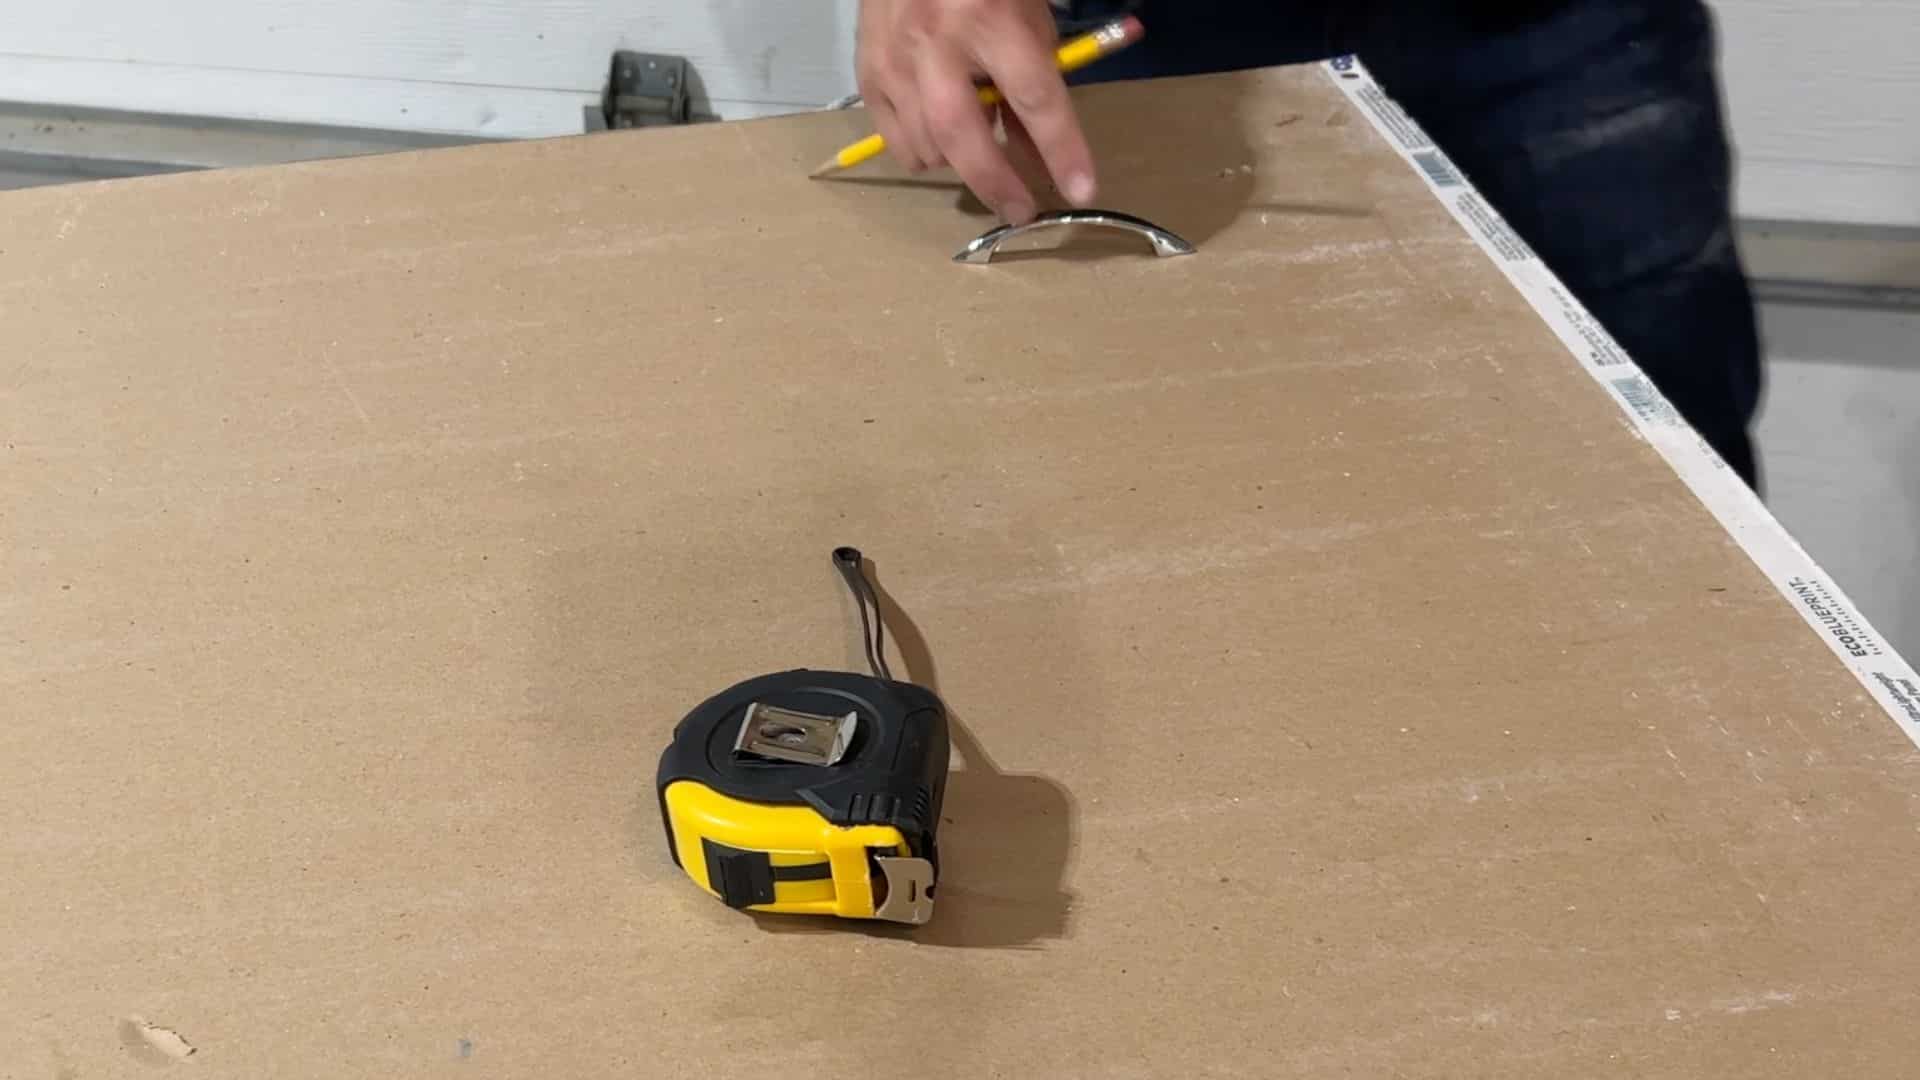
Attach sturdy handles to the plug so it can be easily installed and removed when needed. Place the handles in a position that allows you to lift the plug comfortably without damaging it.
If the plug feels too heavy, consider using lighter materials or reducing layers slightly.
You can also add an extra finishing layer, such as another drywall sheet or soundproofing material, to improve performance.
Make sure everything is secured tightly so the plug remains stable and does not shift during use.
Step 7: Add Weather Stripping for a Tight Seal
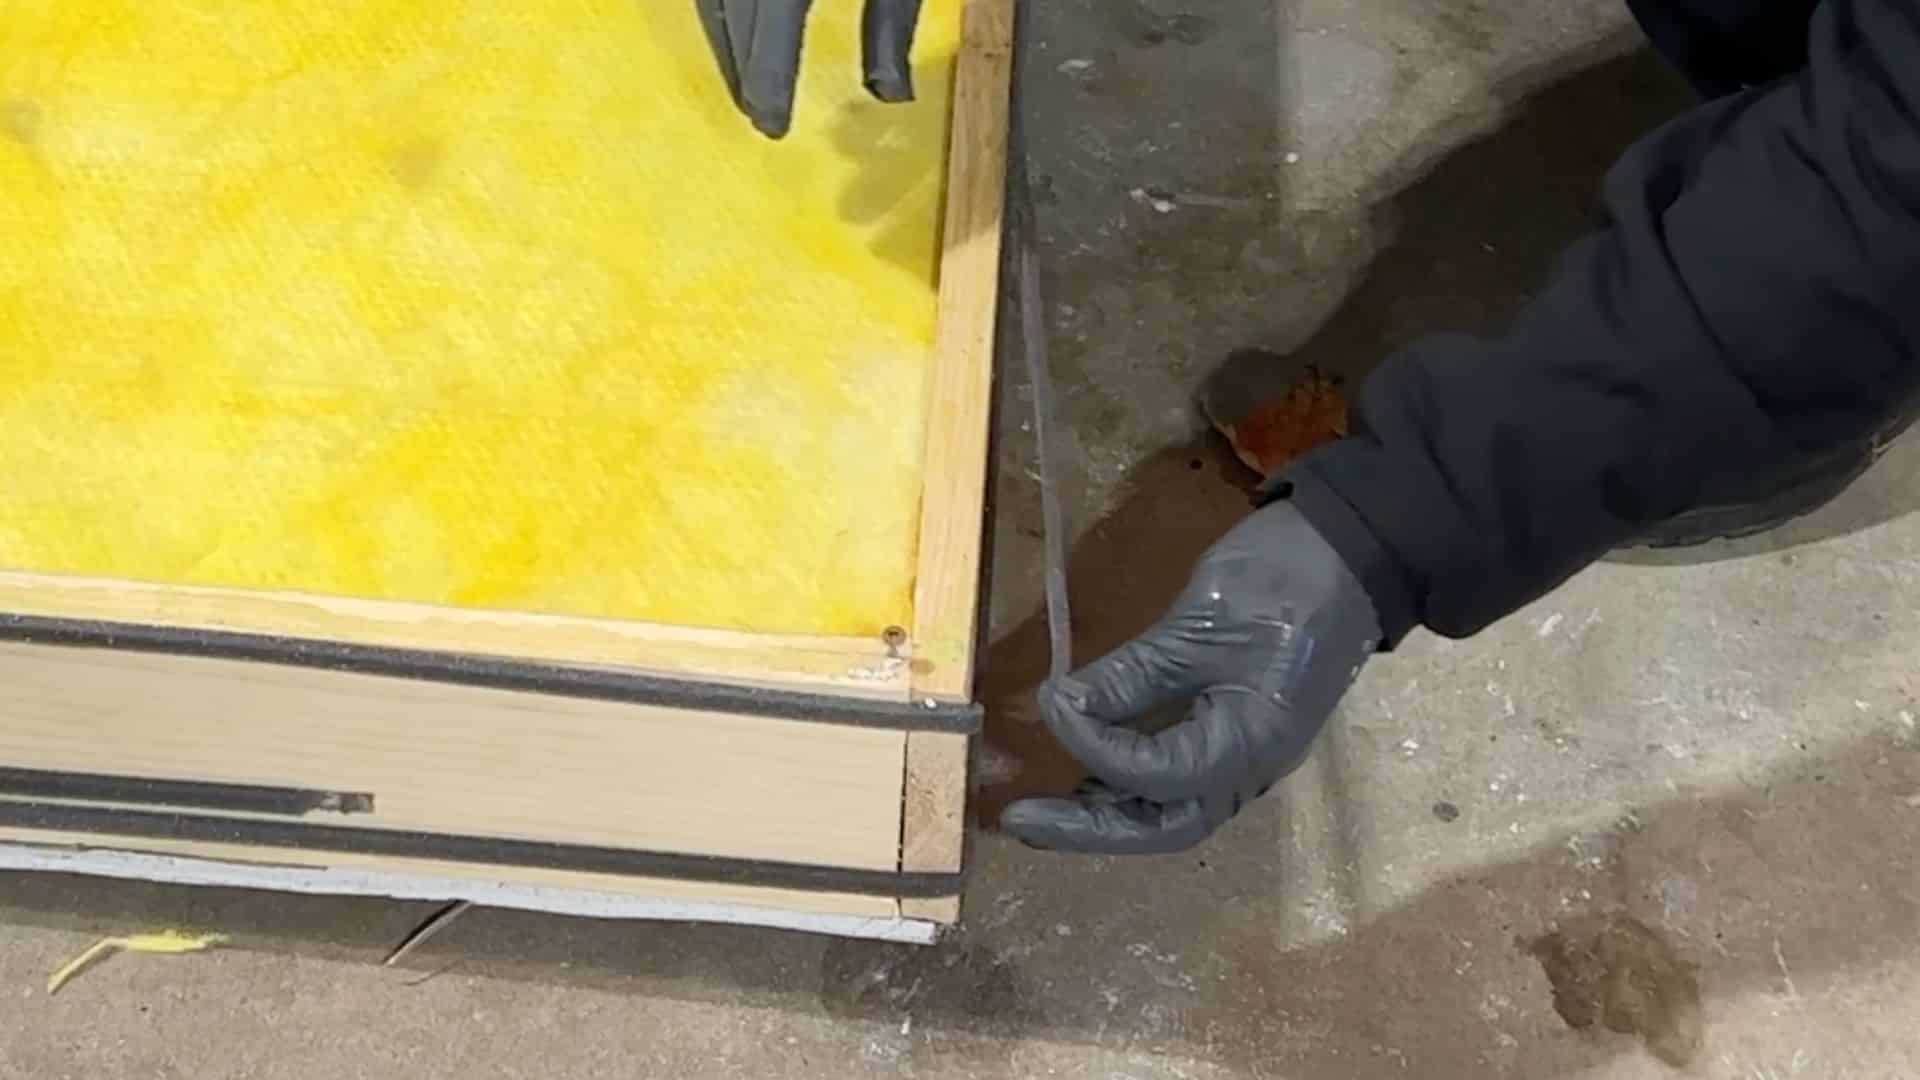
Apply weather stripping around the entire edge of the plug to create a tight seal against the window frame. This soft material fills small gaps and prevents sound from leaking through.
Use self-adhesive weather stripping for easy installation and press it firmly along all edges.
If you notice any light passing through after installation, add another layer of weather stripping to improve the seal.
A tight seal is essential because even small openings can reduce the overall effectiveness of your soundproofing efforts.
Step 8: Fit the Plug and Check for Gaps
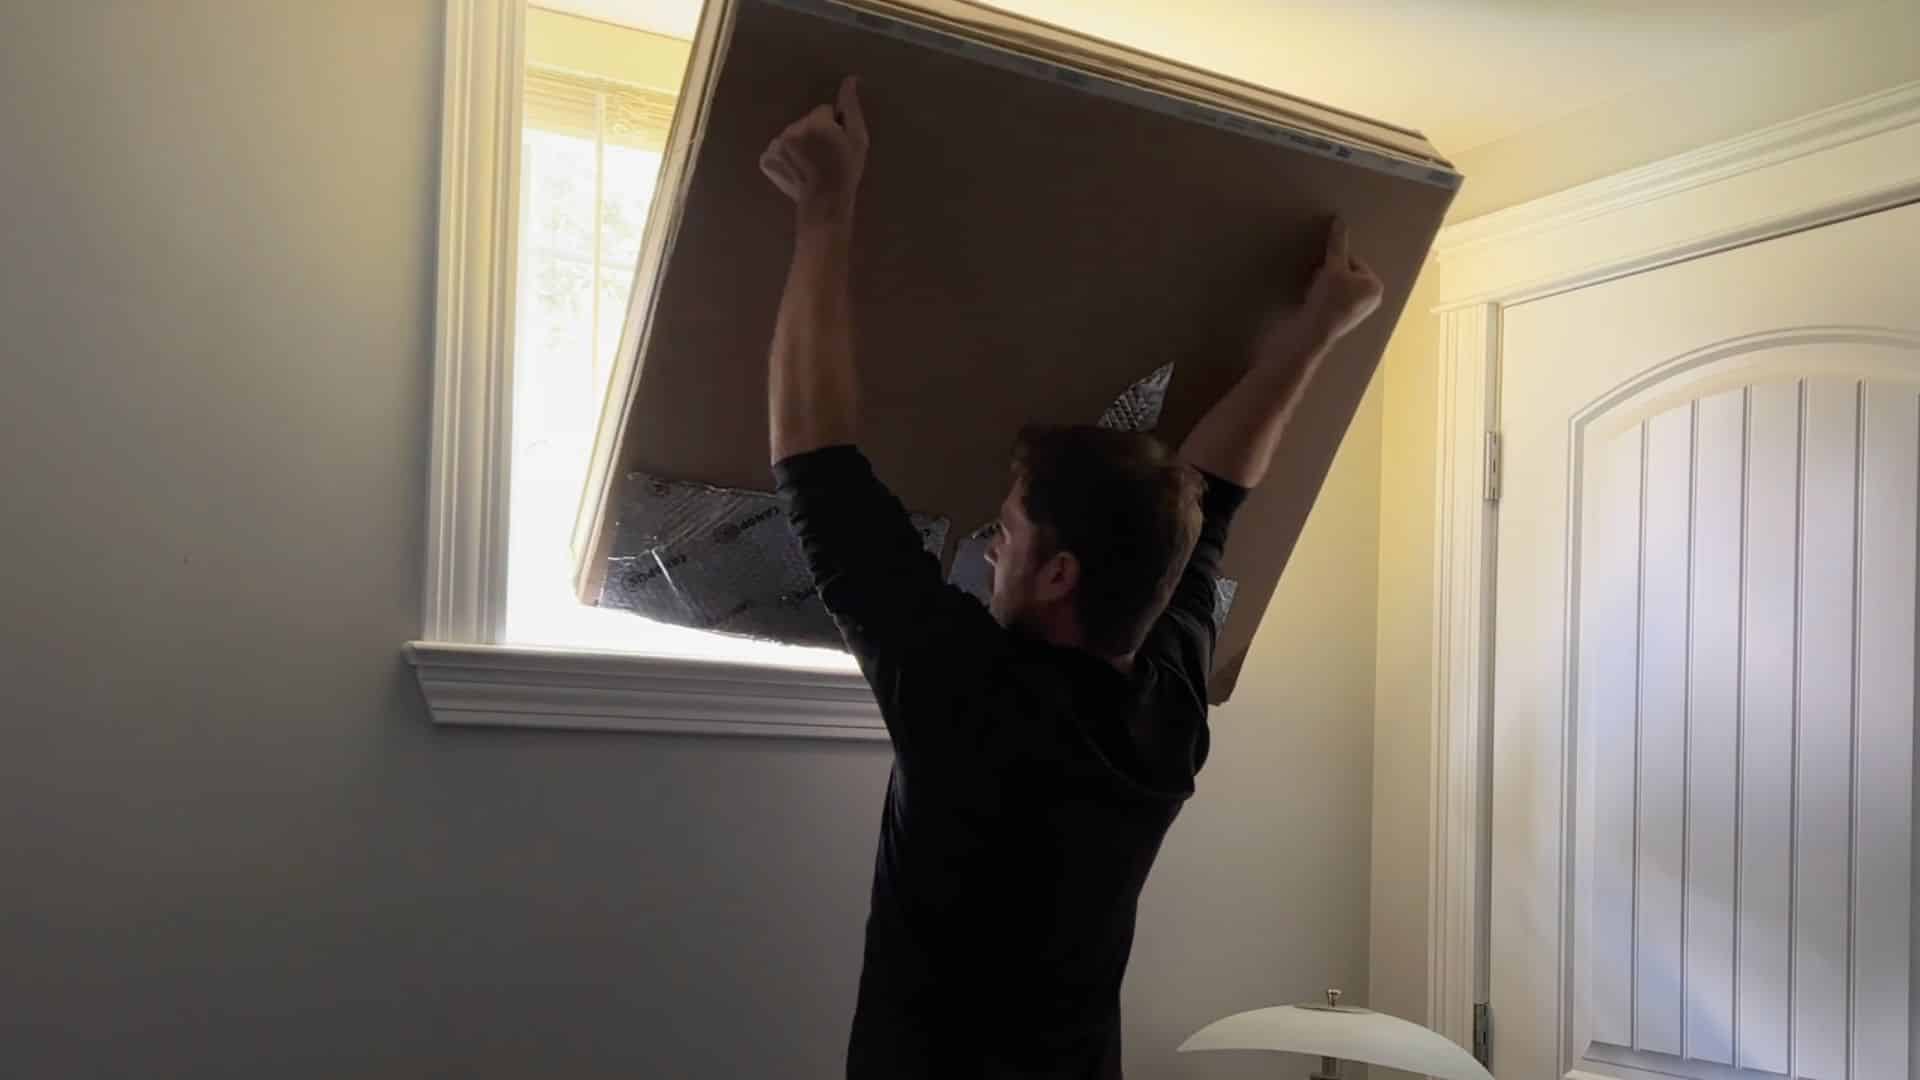
Place the completed plug into the window frame and press it gently into position.
Make sure it sits evenly and does not tilt or shift. Check all sides for visible gaps or areas where light is coming through.
If you find any gaps, adjust the plug or add more sealing material until the fit is tight.
A well-fitted plug should stay in place without force and block noise effectively, making your room quieter and more comfortable.
This tutorial is based on a helpful video by Soundproof Guide. You can check out the original video on their YouTube channel here or watch it below.
Helpful Tips for Better Window Soundproofing
Improving window soundproofing works best when you follow simple habits and smart choices. These tips can help you get better results and make your room quieter over time.
- Start with small fixes: Begin with simple methods like sealing gaps before trying complex solutions. Small improvements can reduce noise noticeably and help you understand what works best in your space.
- Combine multiple methods: Using more than one method together improves results. For example, sealing gaps and adding curtains or inserts creates stronger sound blocking than relying on just one solution.
- Focus on sealing gaps: Even tiny openings can let sound pass through easily. Check edges, frames, and corners carefully and seal them properly to improve overall soundproofing performance.
- Use heavier materials: Dense and heavy materials block sound better than light ones. Adding layers like thick curtains, inserts, or panels can help reduce noise entering through windows.
- Check windows regularly: Over time, seals can wear out or shift. Inspect your windows often and fix any new gaps to maintain good soundproofing results.
- Test and adjust methods: Try one method at a time and see how it works. Adjust or combine solutions based on your results to find what suits your room best.
Conclusion
I’ve learned that making a room quieter doesn’t always need big changes or a lot of money. What really helps is choosing the right method and doing it properly.
Whether you seal small gaps, add inserts, or build a window plug, each step brings you closer to a quieter space.
You don’t have to do everything at once. Start with one fix and see how much it improves your space. Then, if needed, try another method.
Over time, these small efforts can make a big difference in how your room feels. What I like most is that you stay in control of the process. You can adjust things based on your needs and comfort.
If you try any of these methods, I’d love to hear how it worked for you. Share your experience in the comments below.