
Learning how to start an Airbnb business is easier when you know the right order. Most beginners stall because they skip straight to finding a property without checking whether it’s legal to host there.
If you want to become an Airbnb host without owning property, you have three real paths: co-hosting, rental arbitrage, and property management.
Today, I’ll cover model selection, local regulations, business setup, and listing creation in the order they need to happen.
What Are Your Options for Running an Airbnb?
You can earn income through four different Airbnb models, and each one comes with different risks, control, and upfront costs.
The model you pick shapes everything This is especially relevant for people exploring how to become an Airbnb host without owning property, because each model changes ownership requirements and control.
1. Own Property or Real Estate Investment
You buy a property specifically to run as a short-term rental. Full control, no landlord to answer to. It also carries the highest upfront cost and the most direct financial risk if the market shifts or local rules tighten.
2. Co-Hosting
Co-hosting means managing someone else’s Airbnb listing in exchange for a cut of the revenue. You handle guest messages, bookings, and daily operations. The property stays in the owner’s name.
I’ve seen this work well as a starting point because your financial exposure is close to zero. It’s the lowest-stakes way to learn how Airbnb actually runs before you take on any costs of your own.
3. Rental Arbitrage
Rental arbitrage means signing a long-term lease and renting the property short-term on Airbnb with written permission from the landlord. You control pricing and operations.
Here’s the part most people don’t think about until it’s too late: you owe rent every single month, whether you have bookings or not.
A slow month doesn’t cut your fixed cost by a dollar. That’s the real risk of this model, and it catches a lot of new hosts off guard.
4. Property Management
Property management means running short-term rentals for owners under a formal agreement. You earn a percentage without carrying rent liability.
It scales better than co-hosting and carries less financial risk than arbitrage. If you’re serious about building a portfolio, this is the model I’d point you toward first.
Here’s a quick comparison so you can see where each model sits:
| Model | Control | Risk Level | Startup Cost | Best For |
|---|---|---|---|---|
| Own Property | Full | High | Very High | Real estate investors |
| Co-Hosting | Low | Low | Minimal | Beginners with no capital |
| Rental Arbitrage | High | High | Medium-High | Hosts willing to carry fixed costs |
| Property Management | Medium-High | Medium | Low | Those building toward scale |
The pattern holds across every model: more control means more financial exposure. Pick the one that fits what you can actually afford to lose in a bad month.
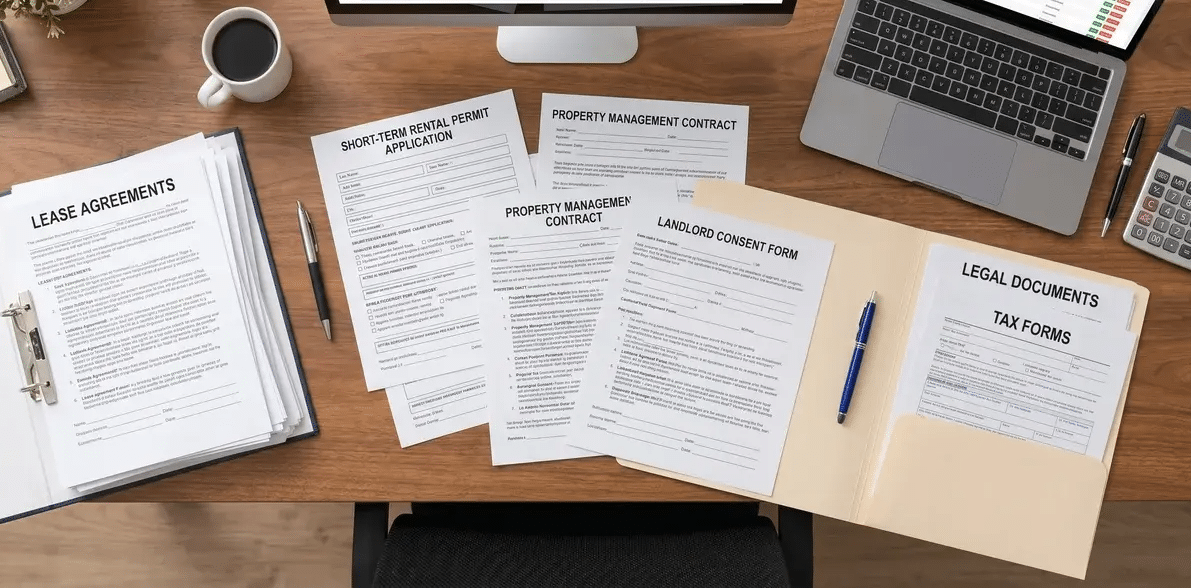
What Regulations and Business Setup Do You Need Before You List?
Confirm local short-term rental laws before you lease, buy, or list anything on Airbnb. I’ve watched hosts skip this step and pay for it.
A listing that goes live in the wrong area can get shut down fast, and there’s no easy fix once you’ve already signed a lease.
Check Local STR Laws First
Start with your city or municipality’s rules on short-term rentals. Many cities require a short-term rental permit or a local business license before you can legally host a single guest.
Some areas restrict STRs to primary residences only, which takes rental arbitrage off the table entirely.
Check zoning after permits. A permit doesn’t help if the zoning code for that property type doesn’t allow short-term use. Confirm both before you commit to a lease or purchase. Getting the order wrong wastes money.
STR rules change at the city level more often than people expect. Check them annually, not just when you launch.
Review HOA Rules and Your Lease
If you’re doing rental arbitrage, you need the landlord’s written permission before you list. A handshake deal isn’t enough.
Get a lease clause or signed addendum that covers subletting rights, guest rules, and how the arrangement ends.
If the property has an HOA, read the bylaws before you sign anything. Some HOAs ban short-term rentals outright, and Airbnb listing activity isn’t hard for neighbors or management to find.
Set Up Your Business Structure
Once the model is confirmed legal in your area, set up your business structure before your first booking.
Many hosts form an LLC (Limited Liability Company) to keep personal assets separate from hosting liability.
An LLC also makes it cleaner to register for occupancy taxes, which most cities require STR hosts to collect and send in.
Get an EIN (Employer Identification Number) when you form the LLC. Open a dedicated business bank account. Mixing Airbnb income with personal funds makes tax time much harder than it needs to be.
Use accounting software like QuickBooks or Xero from day one to track what’s coming in and going out.
Before your first guest checks in, install a smart lock. Brands like Schlage or Yale make self-check-in seamless. Add a noise monitoring device like NoiseAware to protect the property from events that can get your listing suspended.
How Do You Set Up the Property and Create a Listing That Gets Booked?
Equip the space first, then build the listing around what you’ve set up. The order matters; a listing that promises more than the space delivers will hurt your early reviews, and your reviews drive your ranking.
1. Furnish and Equip the Space
Put your money into quality bedding first. Guests notice sheets and pillows more than almost anything else in the space, and they mention them in reviews more often than you’d expect.
Stock the kitchen, bathrooms, and bedrooms with essentials: extra linens, toiletries, a coffee maker, and anything that removes a reason for a guest to leave less than five stars.
Install a smart lock for self-check-in. Add a NoiseAware device if a noise complaint in that neighborhood would cause real problems. These aren’t nice-to-haves; they’re what protect your listing from the kind of incident that gets you suspended.
2. Create the Listing
Your photos are your storefront. Hire a real estate photographer, or shoot in daylight with every light on and every surface clear. Dark or cluttered photos cost you bookings, no matter how good the space is.
Build your title and description around your strongest selling points: walkability, fast Wi-Fi, a well-equipped kitchen, a family-friendly setup.
Use AirDNA to check what comparable listings in your area charge and how often they book.
Set your nightly rate slightly below established competitors when you launch. You’re buying your first reviews, not your first profit.
Pricing Optimization After Reviews
Once you have a review base, bring in a dynamic pricing tool like PriceLabs or Wheelhouse to adjust rates based on demand. Don’t use these tools at launch; they need booking history to work properly.
Enable Instant Book if it suits your hosting style. It gives your listing a visibility boost and removes the wait for guests who want to book quickly.
3. Set Up Guest Operations
Get your systems in place before you accept your first reservation. Guests form their impression of a listing before they arrive. A smooth check-in and a clear house manual tell guests they’re in good hands — which shows up in your star rating.
Here’s what needs to be ready before your calendar opens:
- An automated welcome message that sends when a booking is confirmed
- Check-in instructions are clear enough to follow without texting the host
- A house manual covering Wi-Fi, appliances, parking, and house rules
- A cleaning process with a turnaround time that fits your minimum stay
- A plan for guest questions that come in late at night or on weekends
This feels like admin. In practice, it’s what separates hosts who consistently earn five stars from those who can’t figure out why they don’t.
What Should You Expect in Your First 90 Days?
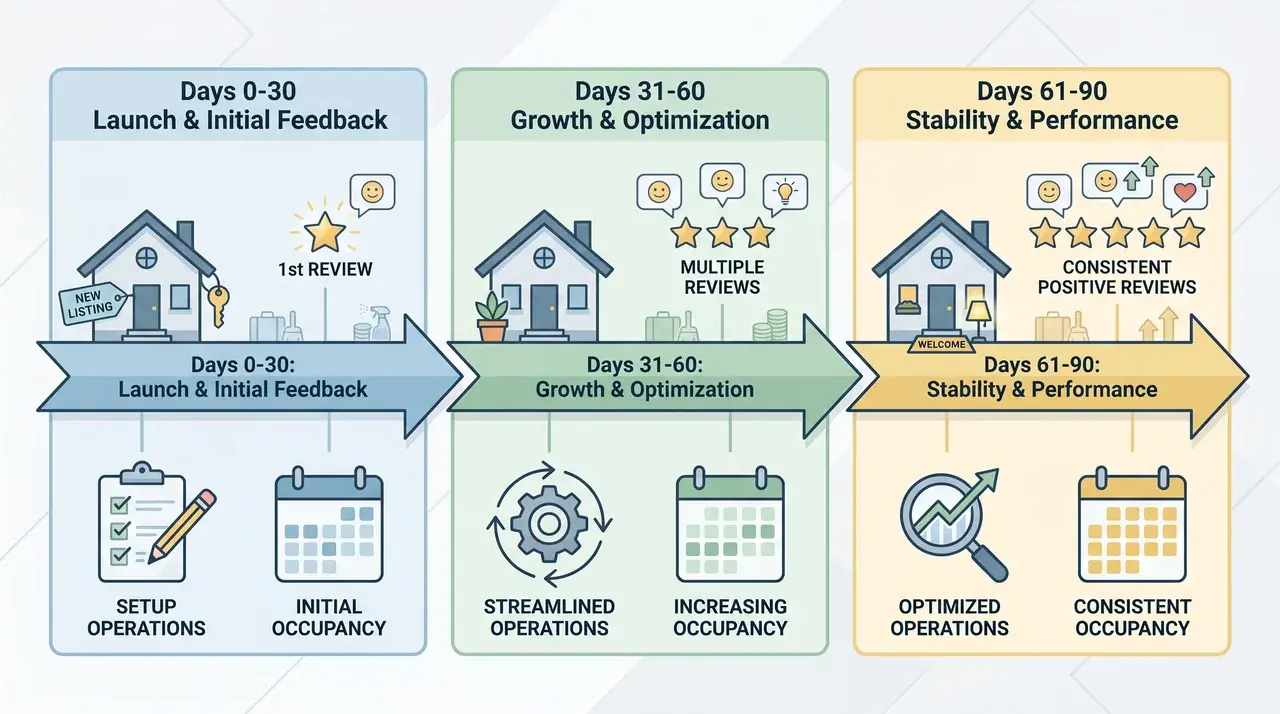
Your first 90 days are about earning reviews, not making money. I know that’s not what most people want to hear, but treating month one as a revenue sprint leads to bad decisions: overpriced nights, ignored guest feedback, and operational problems that quietly kill your rating.
Here’s how the first three months typically go:
| Time Period | What Usually Happens |
|---|---|
| Weeks 1–4 | Your listing earns its first bookings and reviews. Many hosts price slightly below market to attract guests and build credibility faster. |
| Weeks 4–8 | Patterns emerge. You adjust pricing, tighten check-in instructions, and fix the small operational issues every new listing surfaces. |
| Weeks 8–12 | With several reviews in place, your listing gains better visibility in Airbnb search. Occupancy starts to get predictable. |
Here’s why it works this way:
Airbnb gives new listings a temporary visibility boost to help them earn initial reviews. Once that boost fades, your ranking runs on review count and recency.
A listing with no reviews tends to rank lower because reviews act as the strongest trust signal in search results. This is especially important when figuring out how to start an Airbnb business, since early performance sets the foundation for long-term visibility.
Keep your focus on earning strong feedback and fixing anything guests flag. Once your review base is solid, usually after the first 90 days, that’s when dynamic pricing tools like PriceLabs actually help you. Before that, they’re calibrating against nothing.
Wrapping Up
Every Airbnb business follows the same order: choose a model, check the legal ground is solid, set up the business structure, and then build the listing. Skip any step, and you create a problem that’s harder to fix once you’re already living.
The path looks different depending on where you start. If you already own a property, you move straight to regulations and setup.
If you’re coming in through rental arbitrage or co-hosting, model selection and written agreements with the property owner come first. Either way, the sequence is the same.
Get the foundation right, and the rest of the Airbnb business gets a lot easier to manage from there.
Frequently Asked Questions
How much does it cost to start an Airbnb business?
It depends on the model. Co-hosting requires almost no upfront investment. Rental arbitrage typically means a security deposit, first and last month’s rent, furnishing costs, and permit fees. Buying a property adds acquisition and renovation costs on top of all that. Check figures for your specific market before you commit; costs vary a lot by city.
Do I need an LLC to start an Airbnb?
You don’t need one, but many hosts form an LLC to keep personal assets separate from hosting liability and to make occupancy tax registration cleaner. Set it up before your first booking, not after. If you plan to grow past one property, it’s the smarter structure. Talk to a local accountant or attorney to see what fits your situation.
How long does it take to get your first Airbnb booking?
Most new listings get their first booking within one to two weeks, especially when launch pricing sits slightly below comparable properties. Airbnb gives new listings a temporary visibility boost to help earn early reviews. The first 30 days matter most; the review base you build then shapes your search ranking for months.
What is rental arbitrage on Airbnb?
Rental arbitrage means leasing a property long-term and renting it short-term on Airbnb with written permission from the landlord. You keep the profit above your rent and expenses. The core risk: you owe rent every month regardless of bookings. A slow week doesn’t reduce what you owe by a cent.