

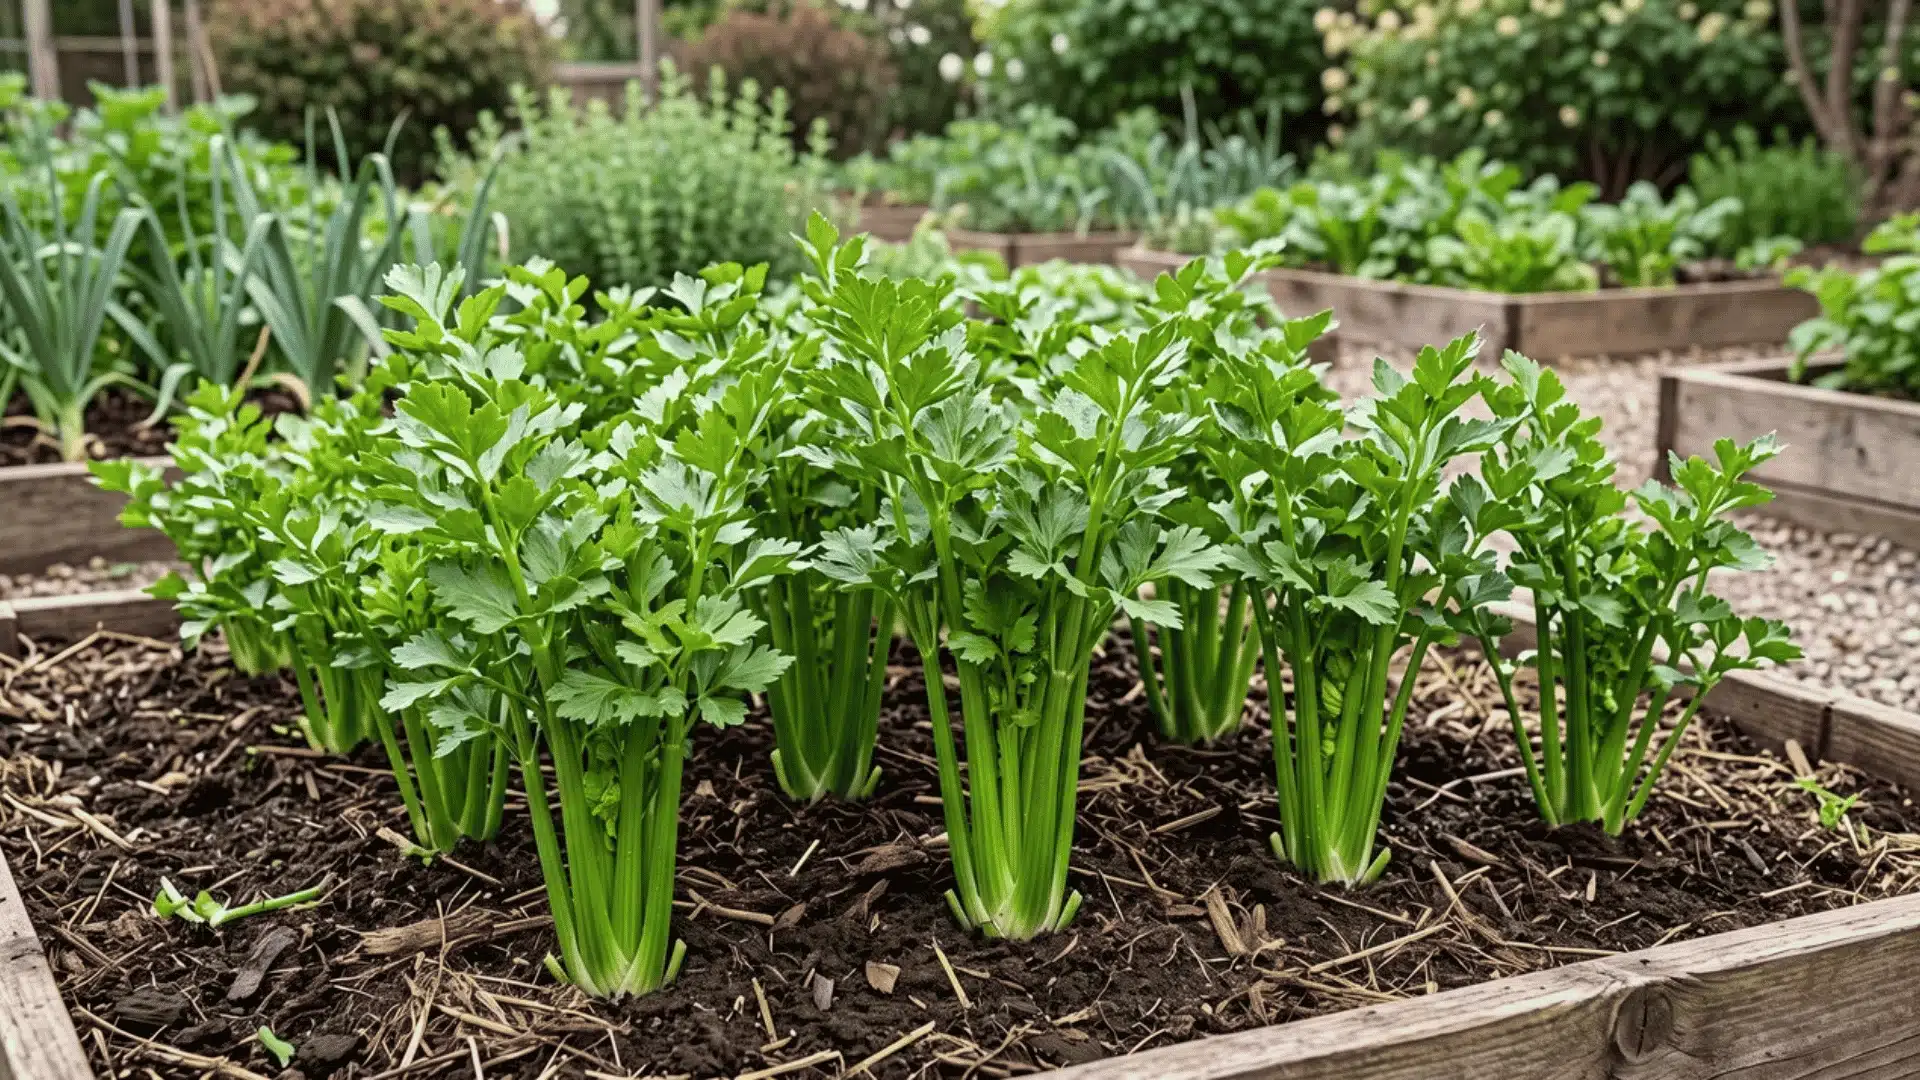
You planted celery with high hopes, and the stalks came out thin, bitter, and barely worth cutting. Sound familiar?
That disappointing first try isn’t a sign you lack a green thumb. It usually comes down to timing and moisture, not skill.
This piece covers picking the right planting window and starting seeds the correct way. You’ll also find how to catch trouble early and try a quicker shortcut from the kitchen.
By the end, you’ll know how to grow celery from seed to your first cut stalk. Start with the one decision that shapes everything else: when to plant.
Is Celery Hard to Grow?
Celery is considered challenging because it grows slowly and needs steady care. The plant takes several months to mature and requires regular attention throughout the growing season.
The biggest challenge is keeping soil consistently moist. Celery has shallow roots, so dry conditions can lead to thin, bitter, or tough stalks.
Celery also prefers cool temperatures. Hot weather can slow growth or cause plants to bolt before producing good stalks.
Beginners often make mistakes by watering irregularly, planting too late, or expecting quick results. Freshly grown celery usually has a stronger flavor and crisp texture compared with store-bought stalks.
When Should You Plant Celery?
Celery doesn’t follow one calendar date. It follows temperature, and that gives you two solid windows to work with.
| Planting Window | Why It Works | Watch Out For |
|---|---|---|
| Spring | Gets celery growing before summer heat arrives | Cold soil below 50°F slows root growth, so wait before transplanting |
| Fall | Uses cooler weather at the end of the season to finish growth | Late frost can still stunt young seedlings, so time transplanting carefully |
Whichever window you pick, don’t move plants outside until soil reaches about 50°F. Cold soil stunts young celery regardless of season.
A few site conditions matter no matter which window you choose. Get these right and either season will work well:
- Full sun for 6 to 8 hours a day
- Moist soil that’s rich in nutrients
- Soil pH between 6.0 and 7.0, slightly acidic to neutral
Set up the site this way first, then pick spring or fall based on your local frost and heat pattern.
Use the USDA Plant Hardiness Zone Map to find your zone and confirm whether spring or fall planting suits your climate.
How to Start and Plant Celery
Celery takes patience to start, but the steps themselves are simple. Here’s the process from seed to transplant:
Step 1: Sow the Seeds Indoors
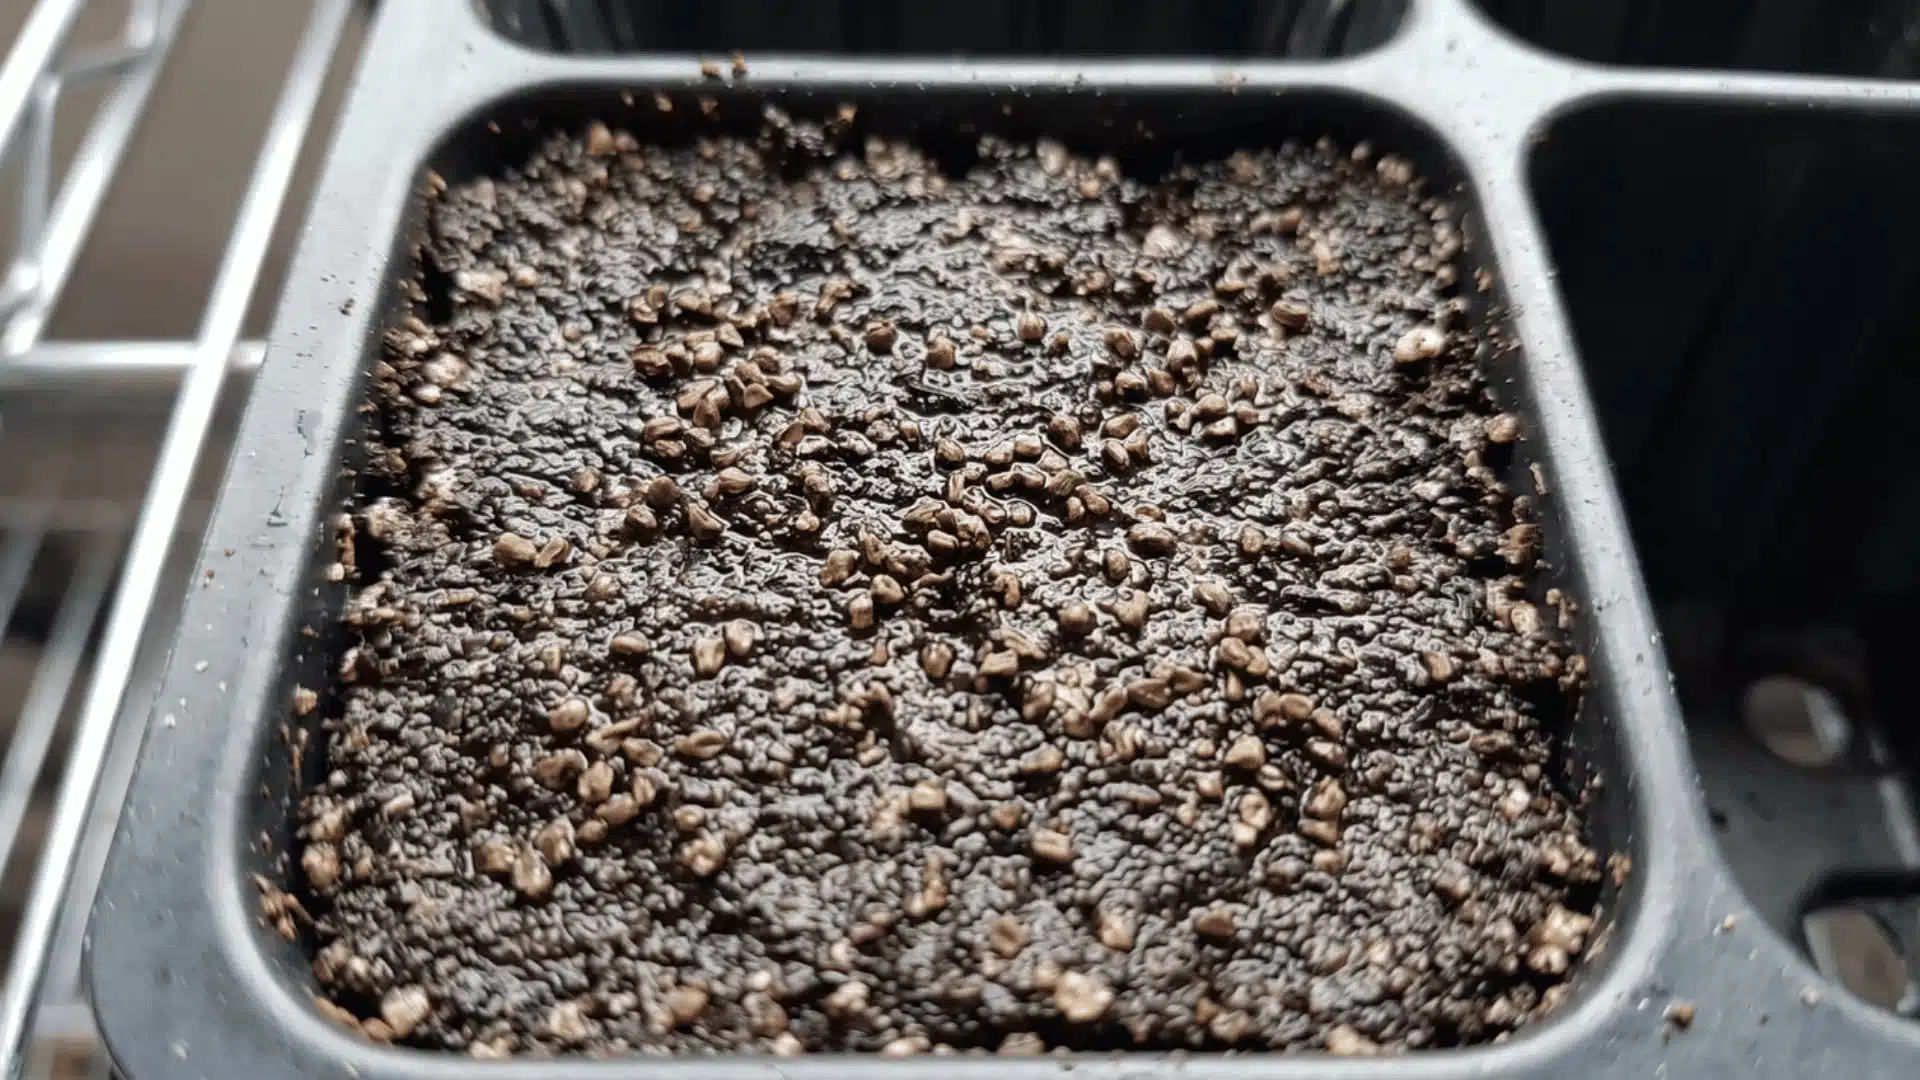
Start celery seeds indoors 10 to 12 weeks before your last frost date, since celery grows slowly. Scatter seeds on top of damp starting mix without burying them.
Light triggers germination, so covering seeds blocks sprouting. Keep the mix damp and warm, and expect germination within two to three weeks.
According to Oregon State University’s horticulture program, celery requires a uniform, regular water supply throughout its entire growing season.
Step 2: Let the Soil Warm Before Transplanting
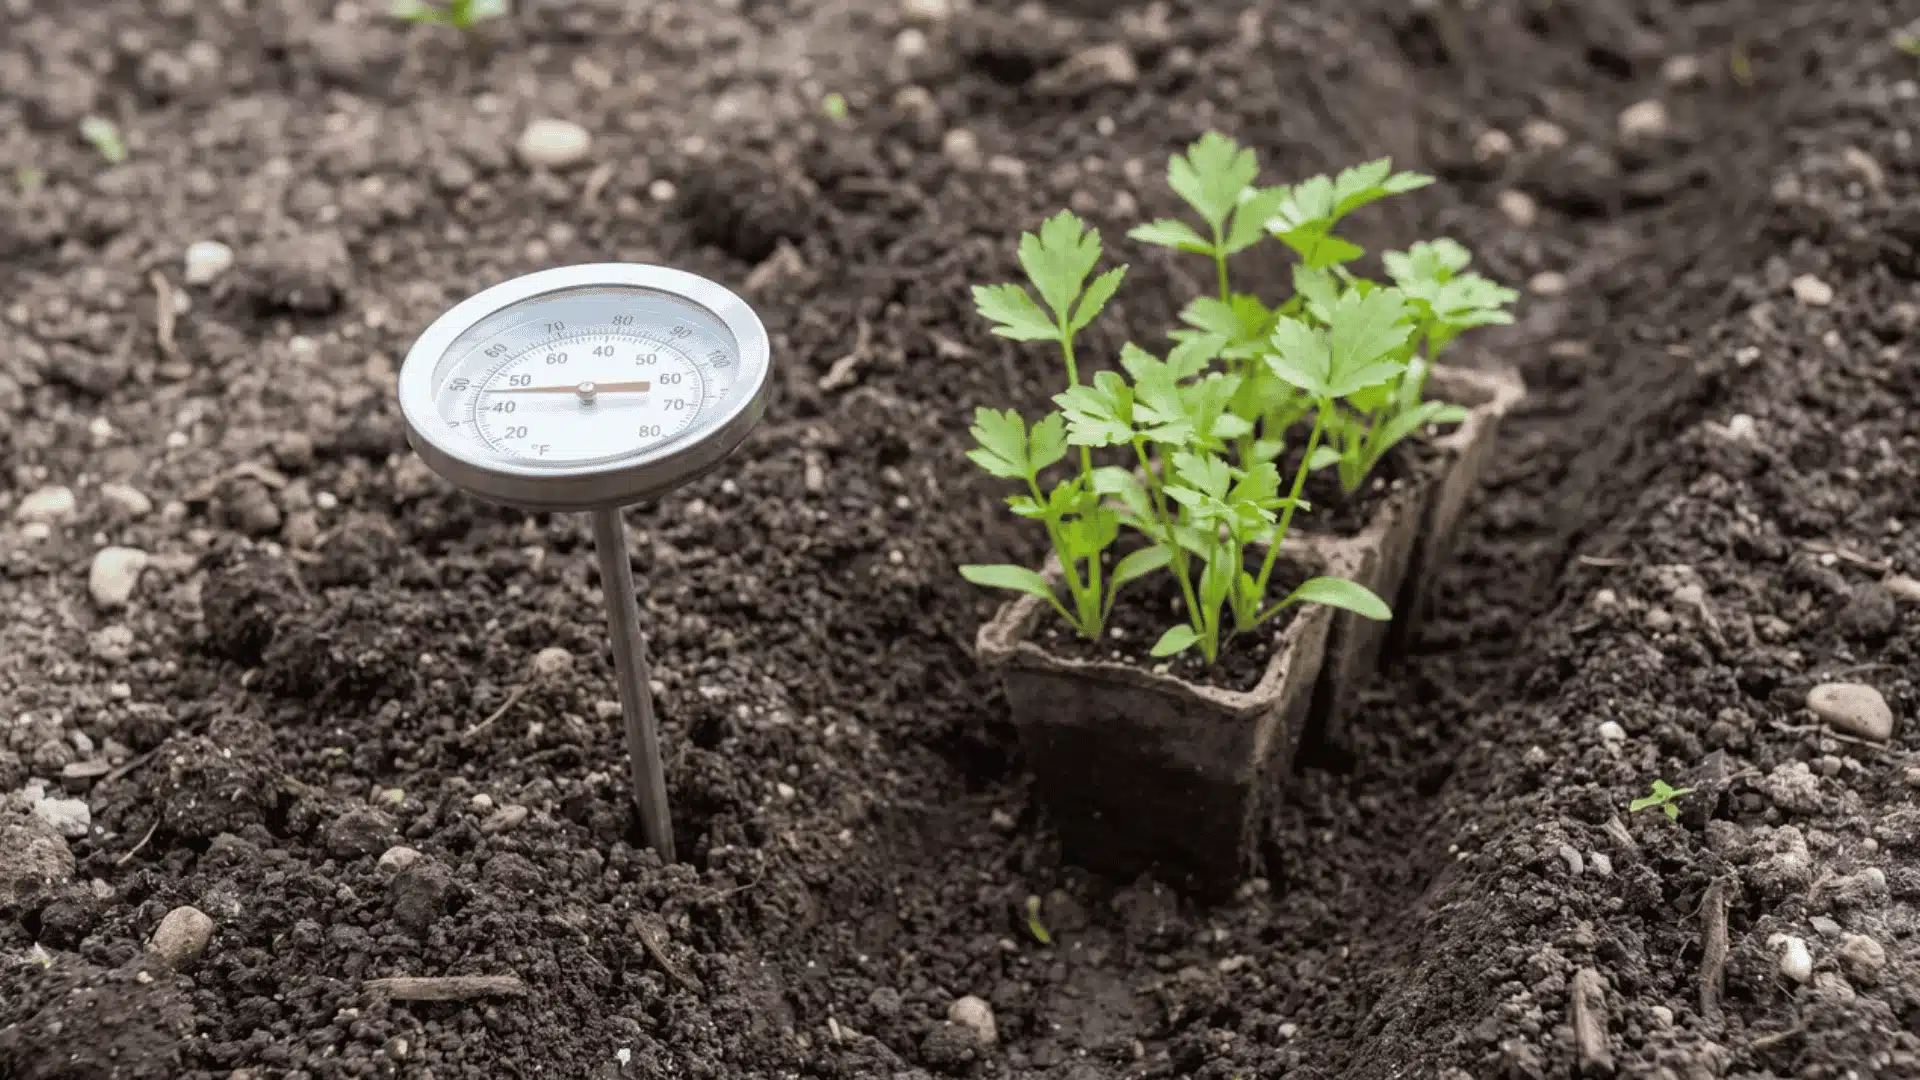
Check outdoor soil before moving seedlings out. It needs to reach about 50°F, since cold soil stalls root growth for weeks.
Use a soil thermometer and test in the morning for accuracy. If soil stays cold, keep seedlings indoors under grow lights a bit longer.
Step 3: Harden Off the Seedlings
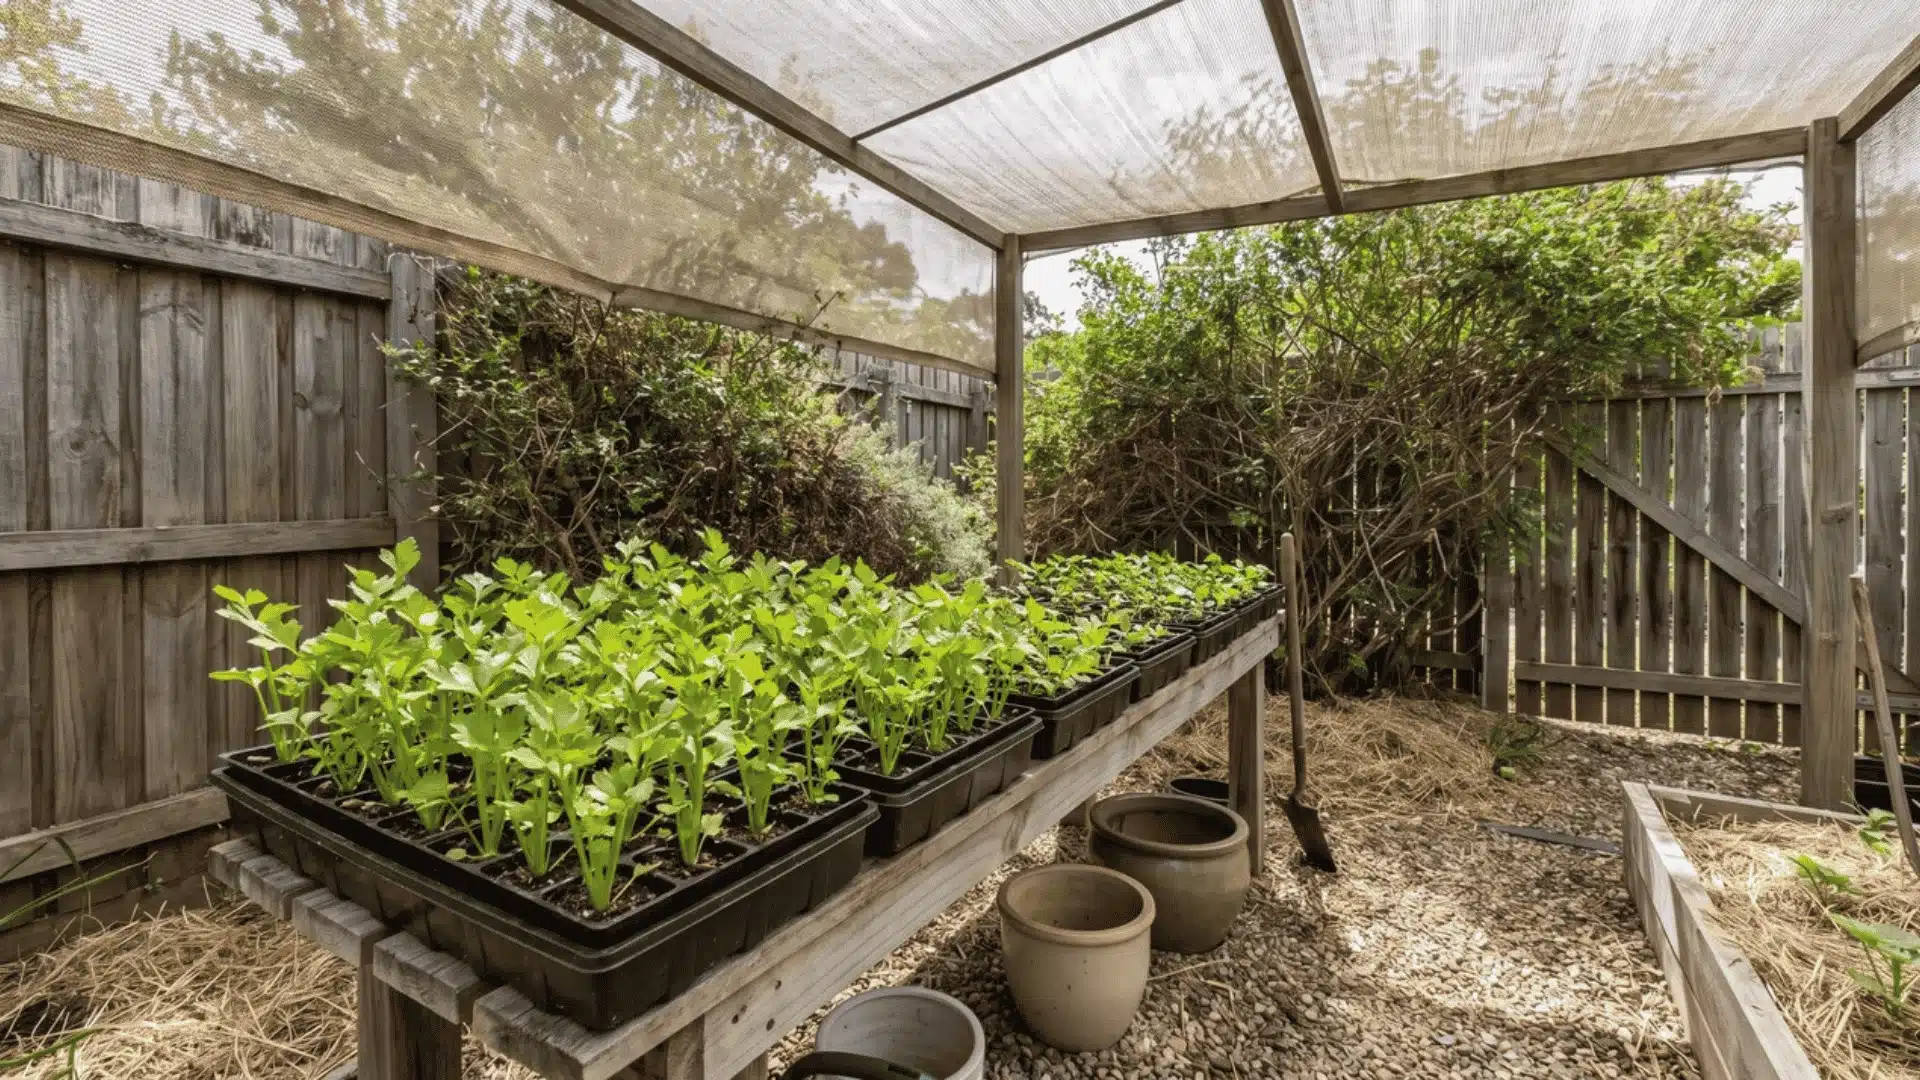
Before transplanting, seedlings need time to adjust to outdoor conditions. Set trays outside for an hour or two in a shaded, wind-protected spot.
Gradually increase outdoor time over about a week. Skipping this step often causes wilting within a day of transplanting.
Step 4: Transplant Into the Garden
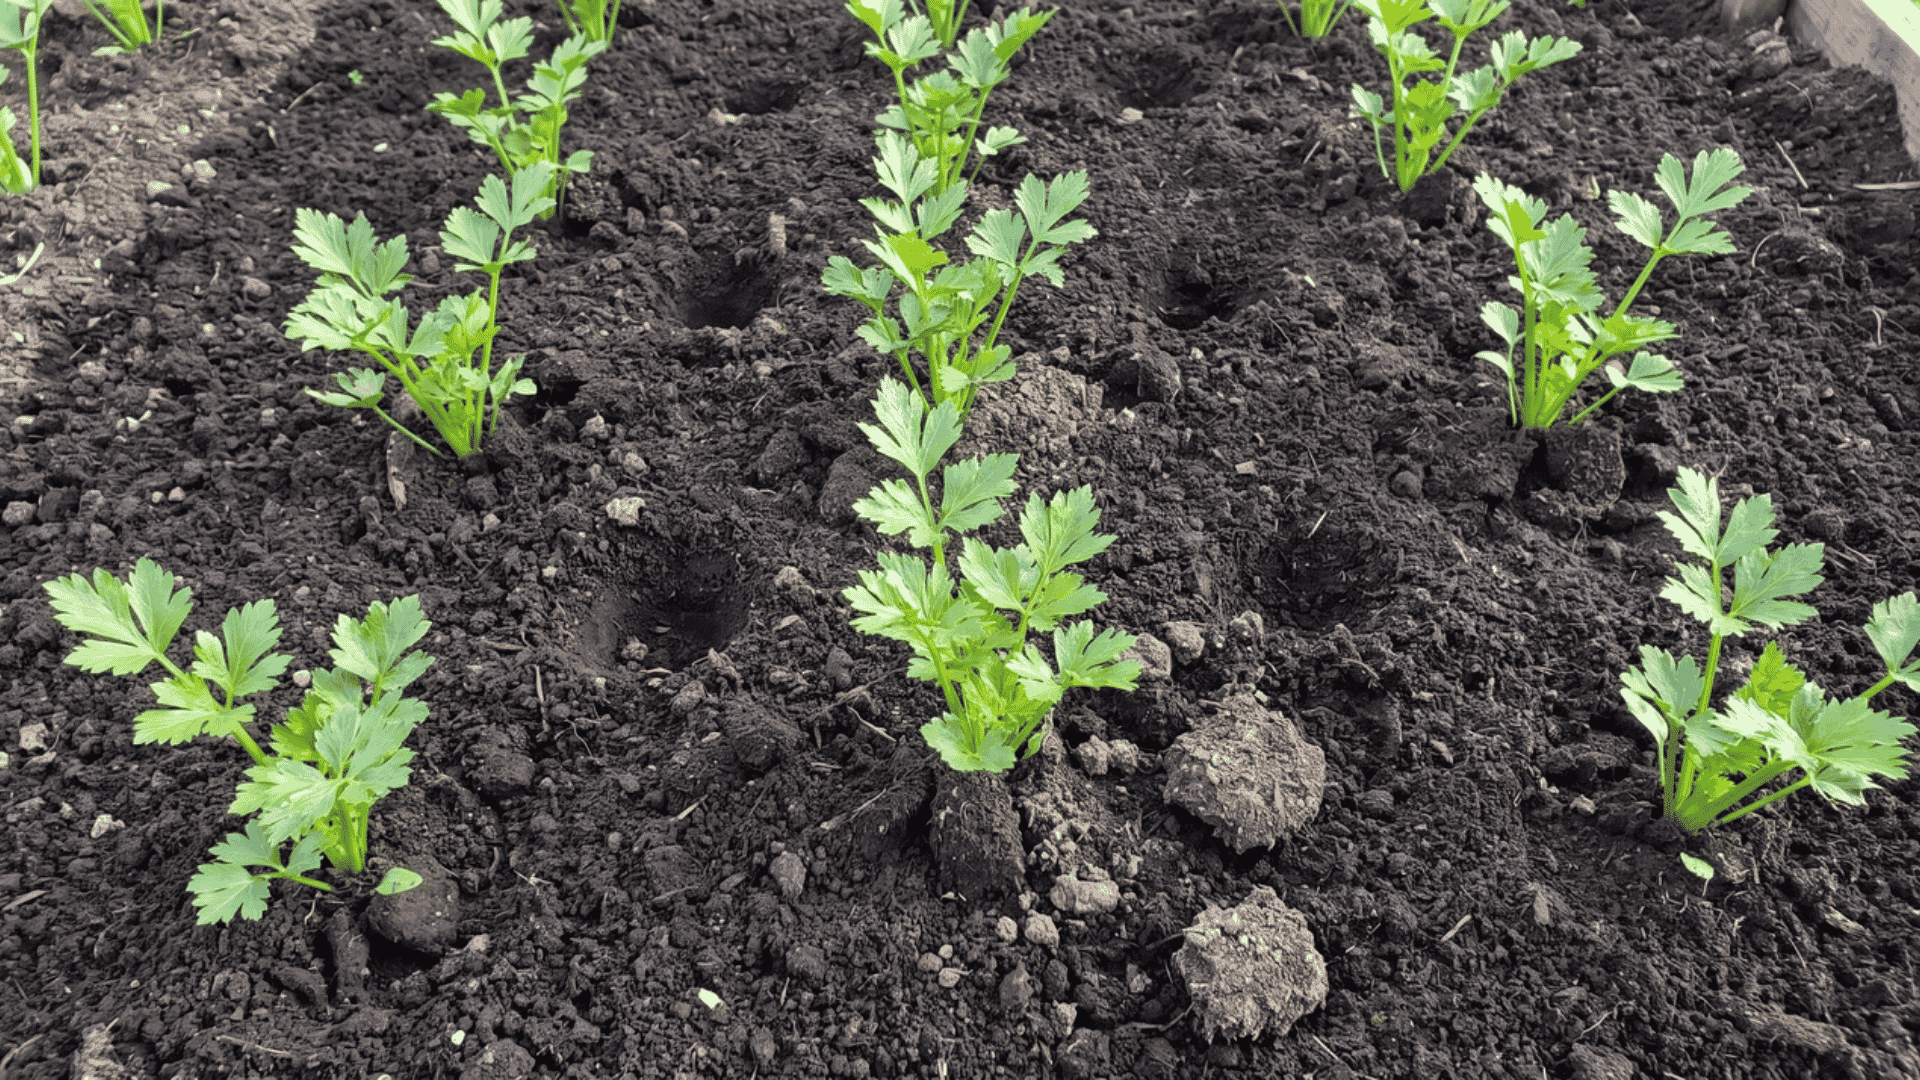
Once hardened off, move seedlings into full sun for at least six hours daily. Space plants 8 to 10 inches apart to avoid competition.
Set plants at the same depth they grew in trays. Water immediately after transplanting to settle roots and reduce shock.
Can You Grow Celery from A Store-Bought Stalk?
Yes, and it’s a real shortcut worth trying. Cut about two inches off the base of a grocery store bunch and set it in a shallow dish of water.
Roots typically form within a week, at which point you can plant the base in soil. It’s a fast, low-effort way to get started.
Just set your expectations correctly. A regrown base draws on stored energy rather than a full root system, so it tends to produce smaller, thinner stalks than a plant grown from seed.
Why Celery Plants Fail and How to Prevent It
Most celery problems trace back to heat or moisture stress, not the plant being inherently difficult. Here’s a quick breakdown of the most common issues:
| Problem | Why It Happens | How to Prevent It |
|---|---|---|
| Bolting | Heat and dry spells signal the plant to end its first-year cycle early, redirecting energy into a flower stalk | Keep soil consistently moist and plant within the correct cool-weather window |
| Stringy, bitter stalks | Underwatering alone, without full bolting, is the most common cause | Water deeply and on a steady schedule, not just when soil looks dry |
| Leaf miners | Larvae tunnel inside leaf tissue, leaving pale trails across leaves | Check leaves weekly and remove affected ones before damage spreads |
| Slugs | Feed on leaves overnight, leaving ragged holes or missing edges | Inspect plants in the morning and handpick slugs before they multiply |
Most of these issues share the same root cause: inconsistent moisture. Fix that, and you prevent nearly every problem on this list.
When and How to Harvest Celery
Celery is ready once a plant has at least 10 stalks, and you have two ways to bring it in.
Method 1: Cut Outer Stalks as Needed
This method works well once your plant is established and growing steadily. Follow these steps to harvest without disturbing the rest of the plant:
Step 1: Check the stalk count
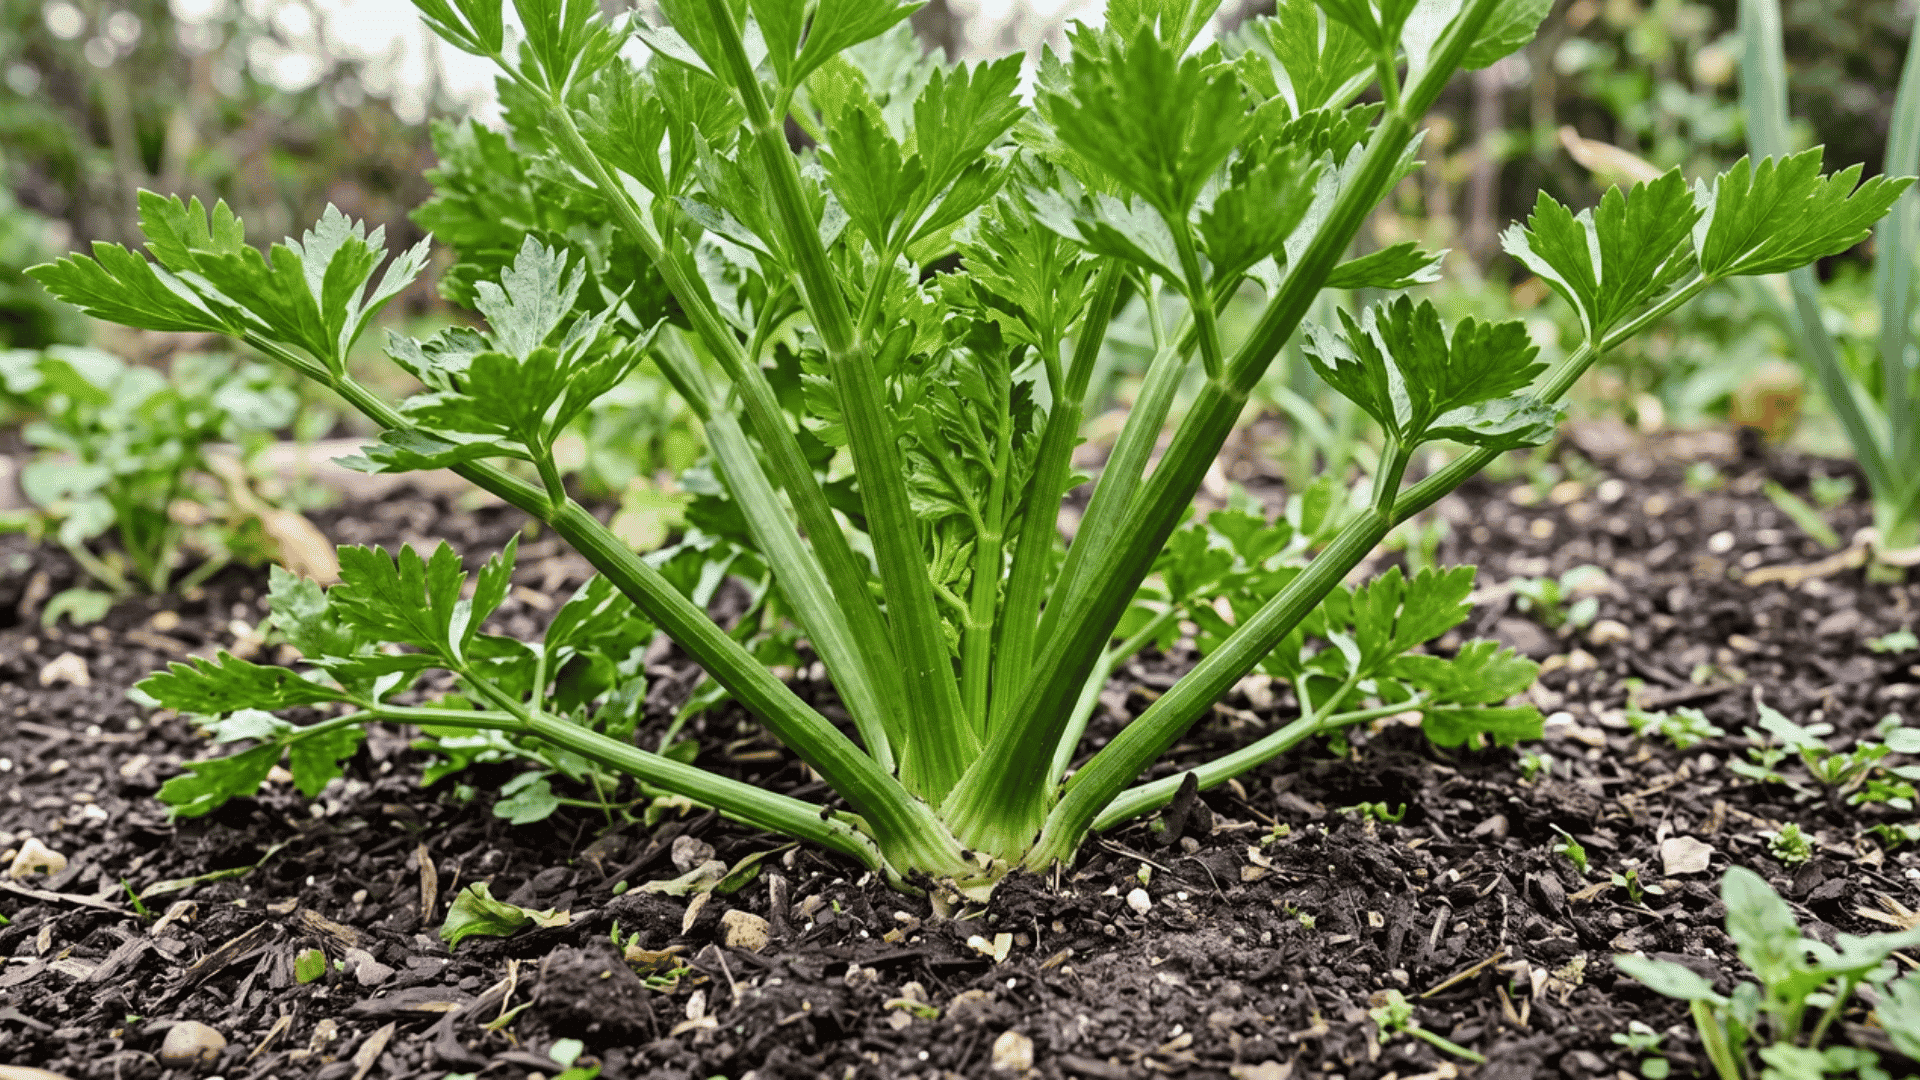
Count the stalks on your plant before cutting anything. Wait until it has at least 10 stalks total.
Cutting too early weakens the plant, since it hasn’t built enough energy reserves yet. Ten stalks gives it a strong enough base to keep producing after you harvest.
Step 2: Cut the Outer Stalks at Soil Level
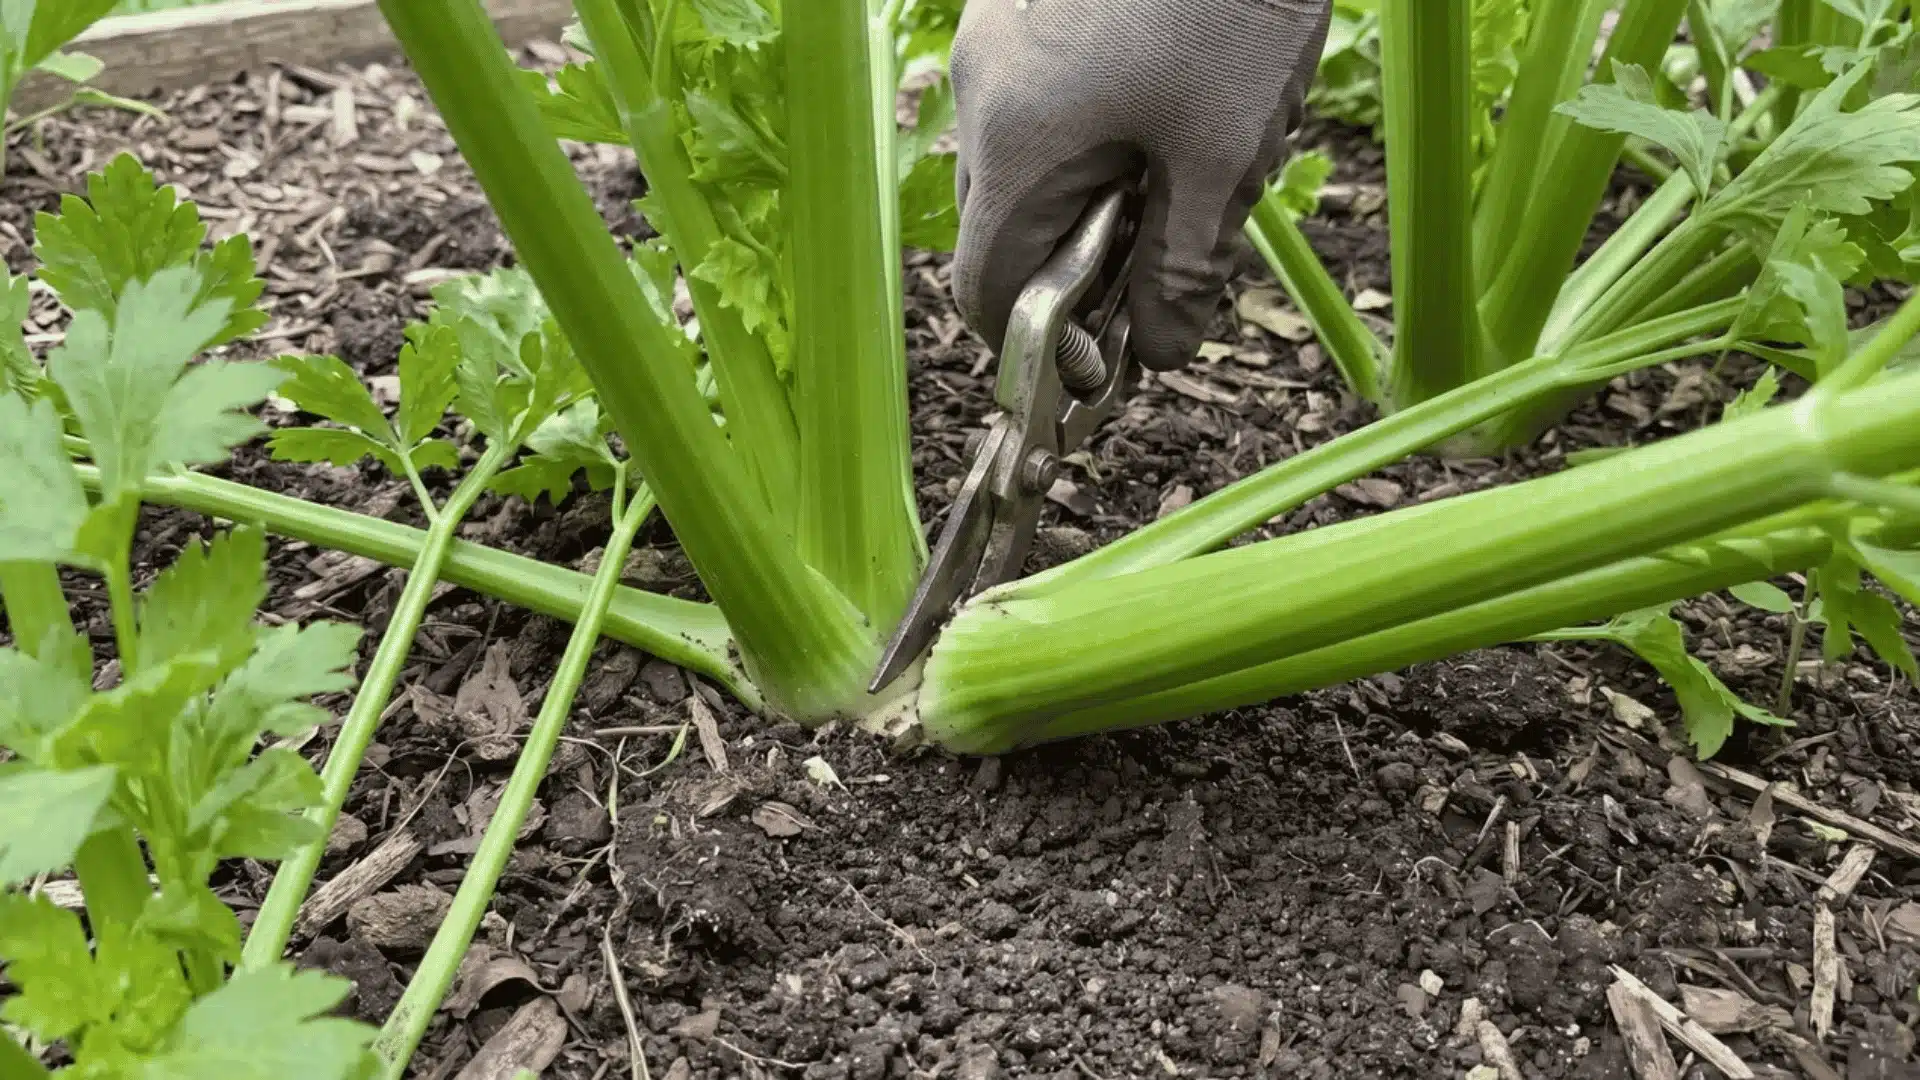
Choose the outer stalks first, since they mature earlier than the ones growing at the center. Cut each one at soil level using a clean, sharp knife or shears.
Avoid pulling or twisting the stalks off by hand. That can damage the base of the plant and disturb the roots underneath.
Step 3: Leave the Inner Stalks to Keep Growing
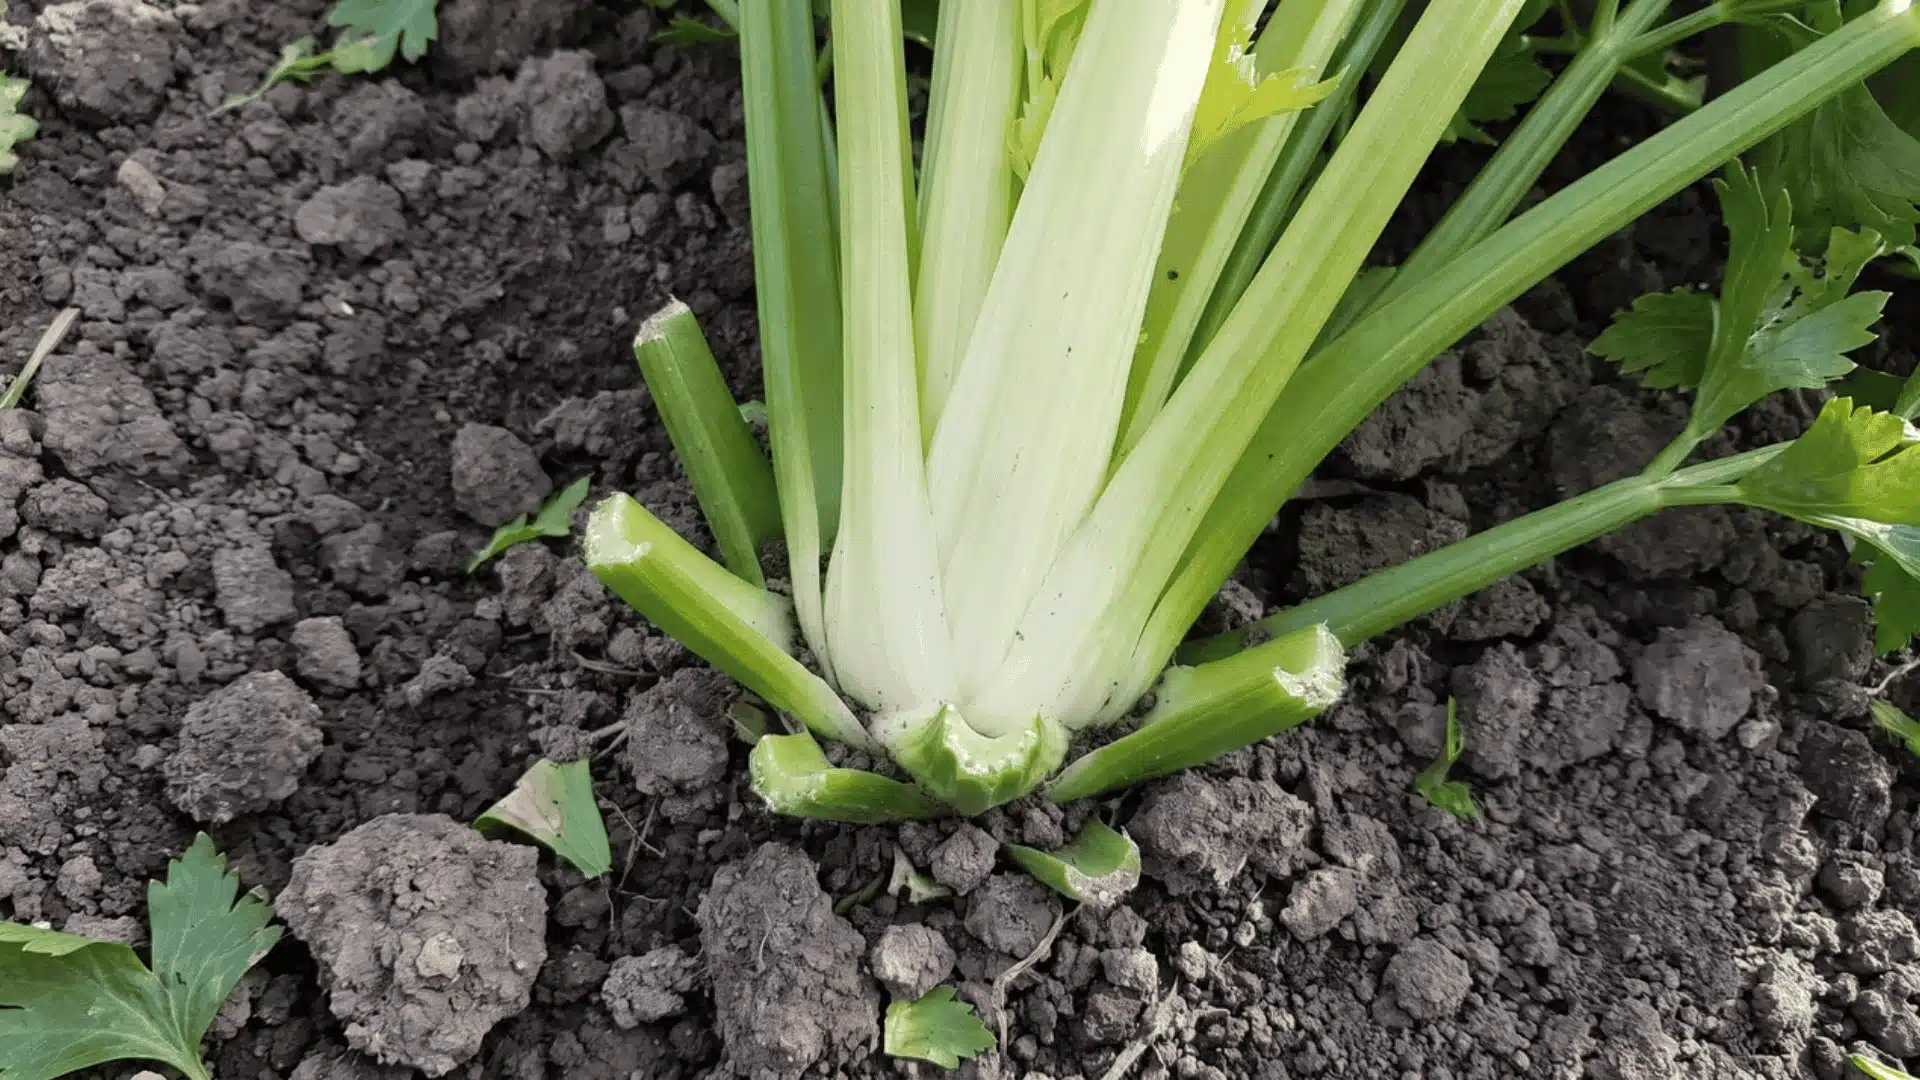
Once you’ve removed what you need, leave the remaining inner stalks untouched. They’ll continue maturing while the outer ring regrows over time.
This gives you a rolling harvest instead of one single cutting. You can return every few weeks and repeat the process as new stalks mature.
Method 2: Cut the Whole Plant
This method suits growers who want a full batch at once, rather than harvesting gradually. Here’s how to do it correctly:
Step 1: Confirm the Plant Is Fully Mature
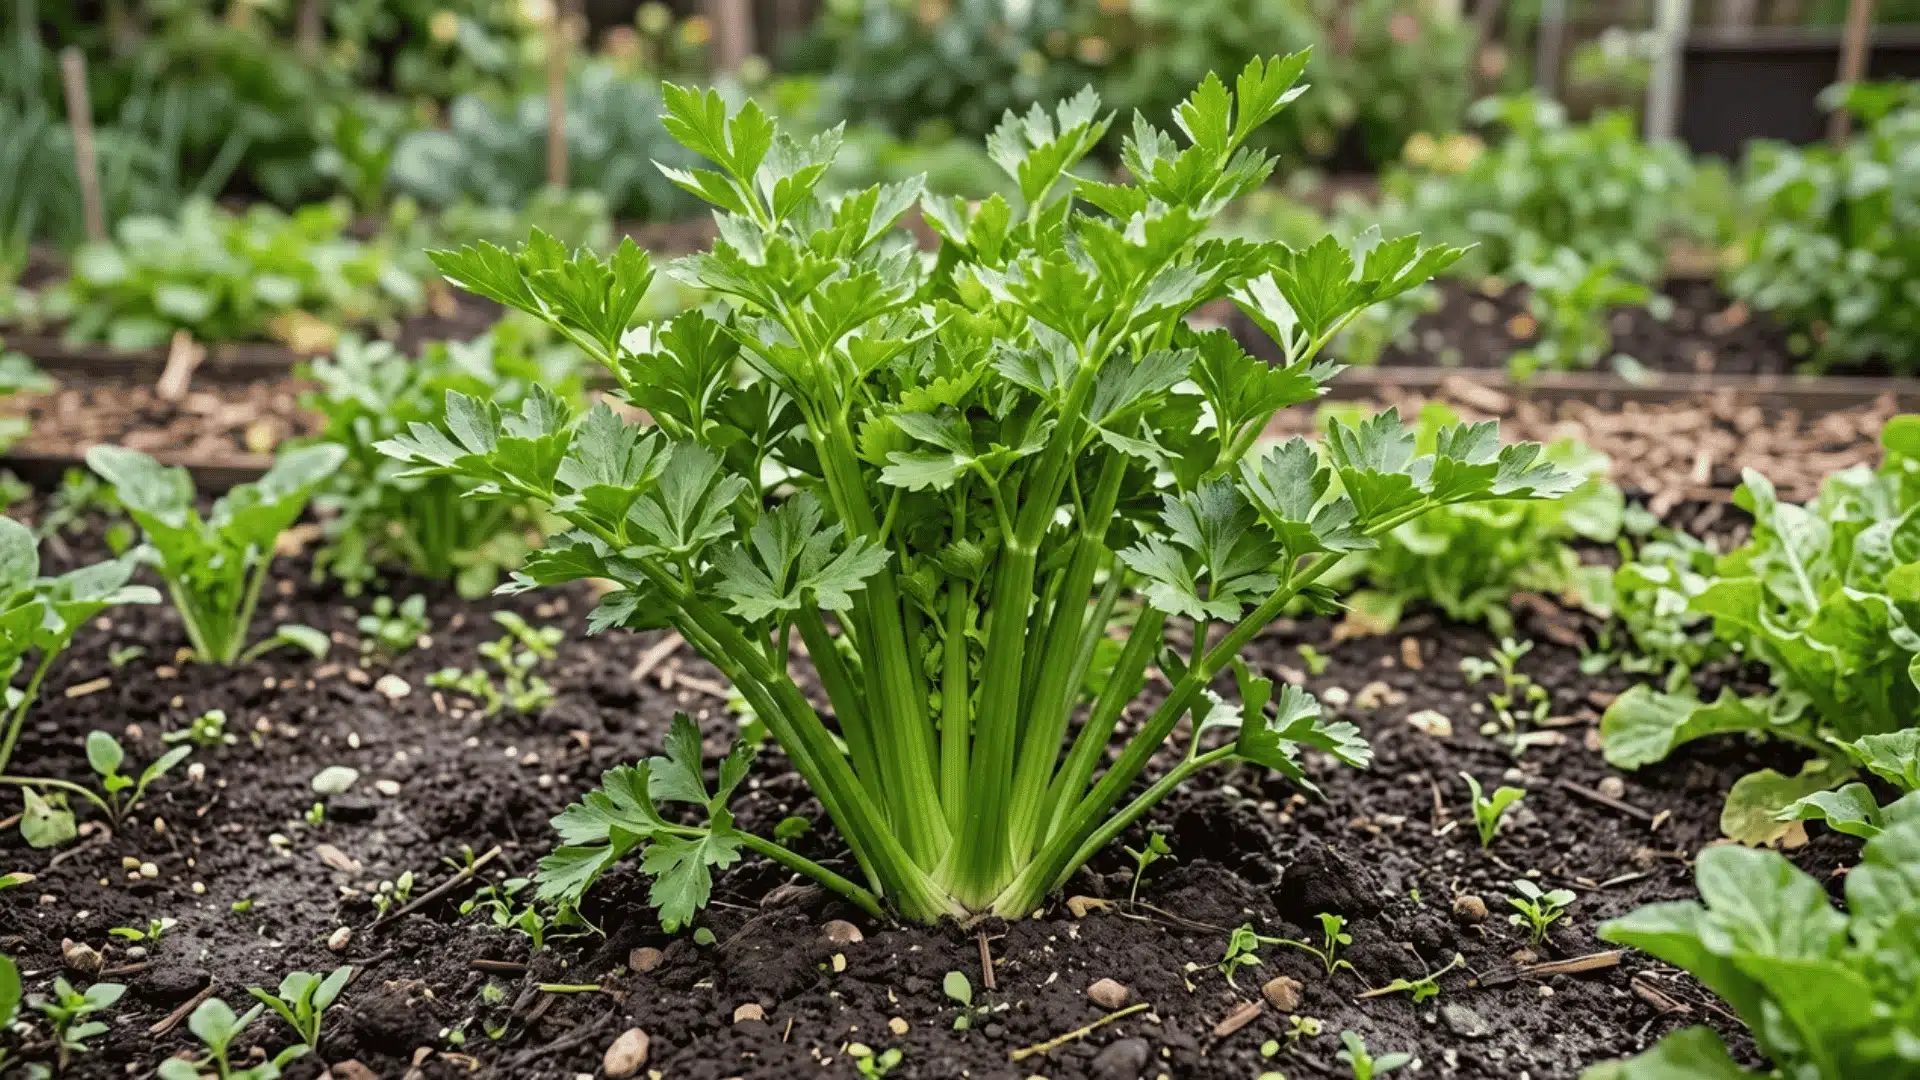
Check that the plant has reached a good size, with a thick cluster of stalks at the base. This usually lines up with the 4 to 5 month mark after planting.
Harvesting too early means smaller, less developed stalks. Waiting for full maturity gives you the best yield from the plant.
Step 2: Slice the Plant at The Base
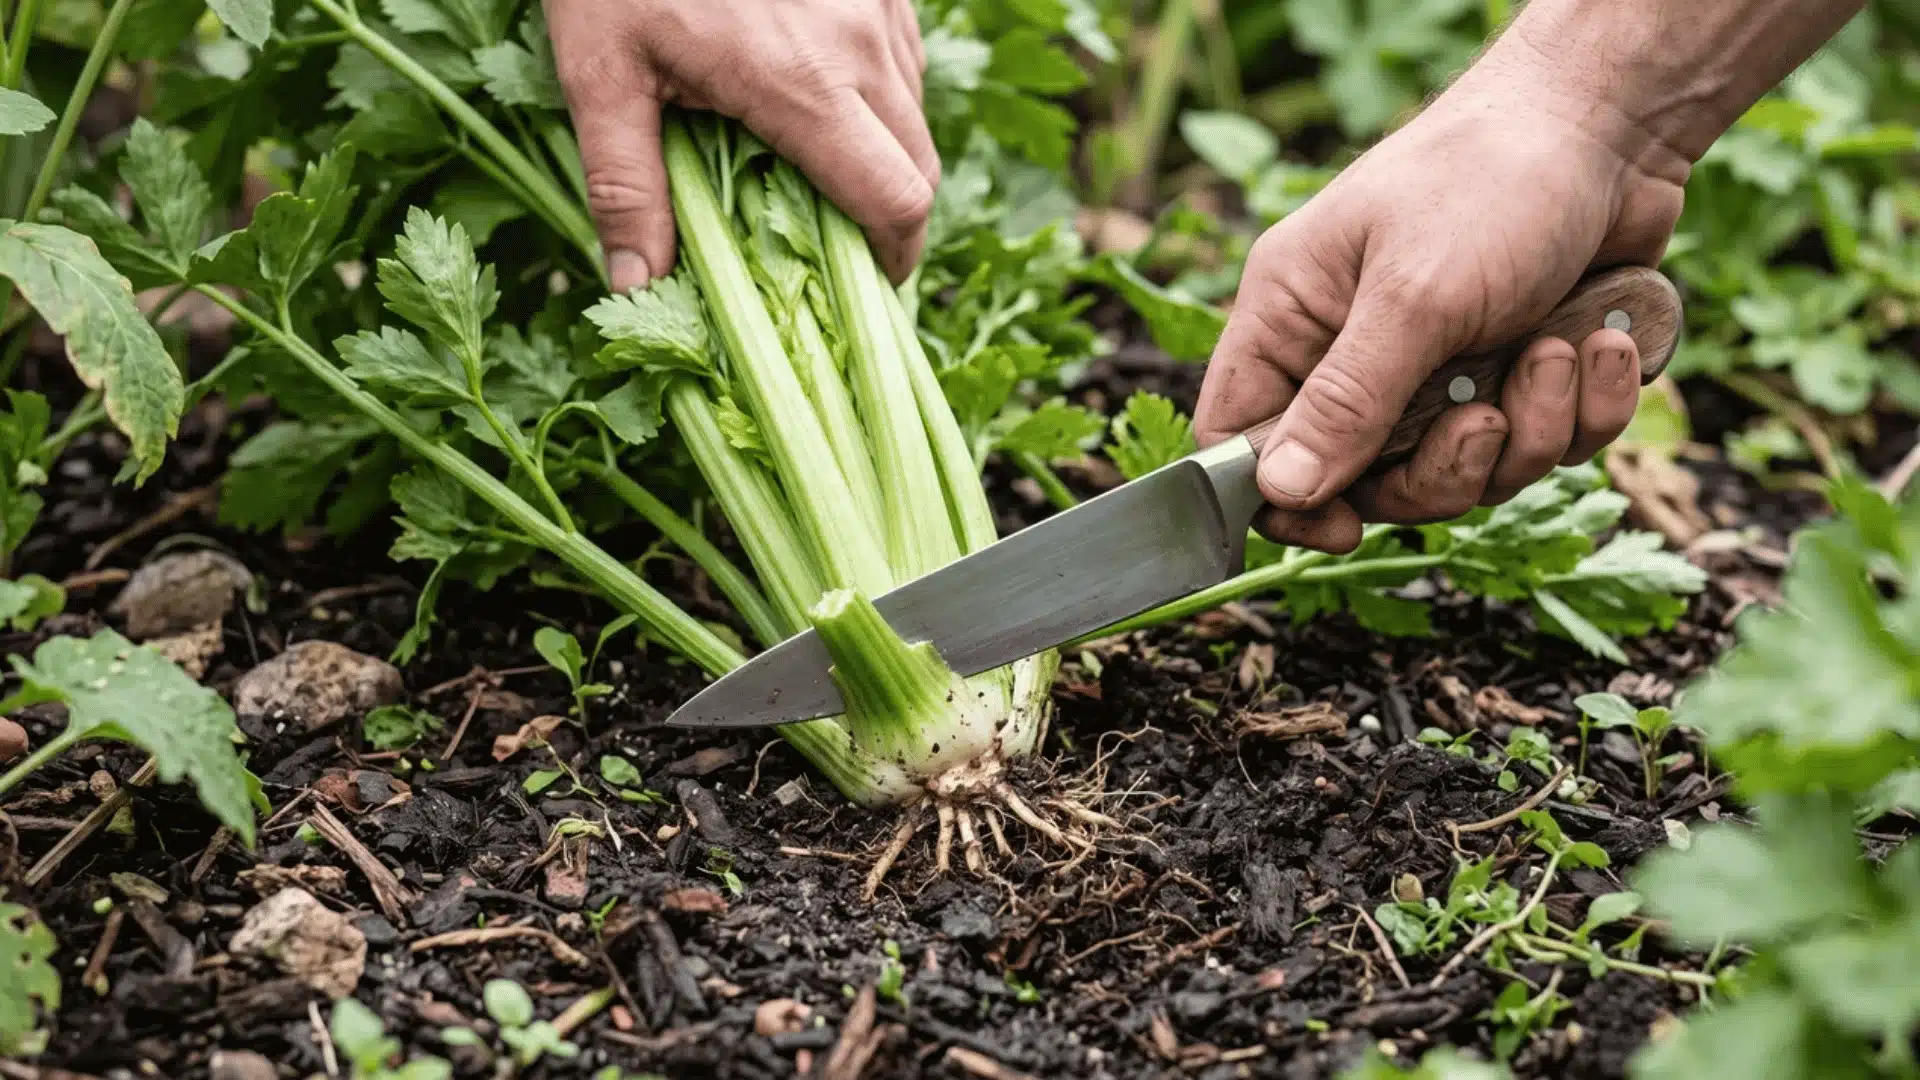
Use a sharp knife to cut straight across the base of the plant, just above soil level. One clean cut through the base separates the entire stalk cluster at once.
Avoid sawing or tearing through the base. A single clean motion keeps the stalks intact and easier to clean afterward.
Step 3: Use or Store the Full Harvest Promptly
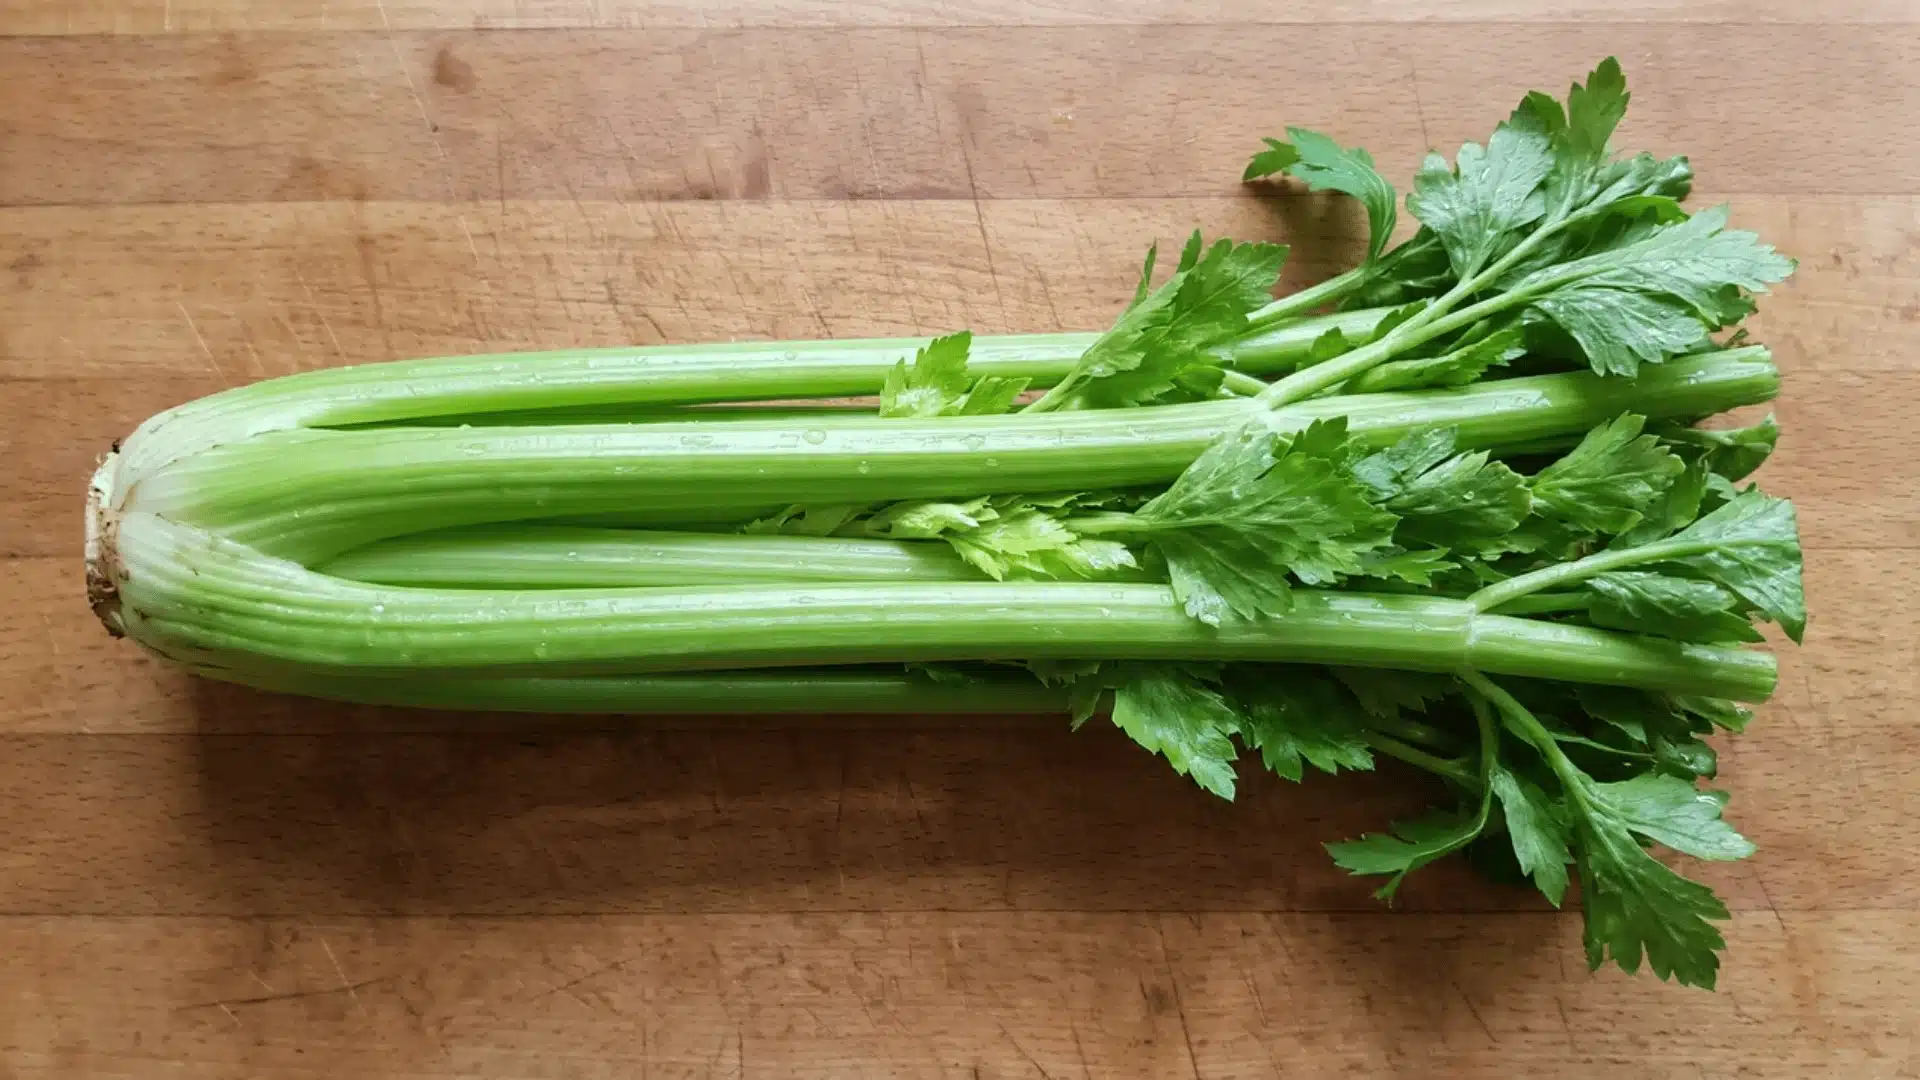
Once cut, the whole plant stops growing, so there’s no regrowth to wait for. Move the stalks to the kitchen or storage soon after cutting.
This method ends that plant’s cycle completely. If you want more celery later, you’ll need to start or transplant a new one.
Wrapping Up
Growing celery well isn’t about one secret step, it’s about staying consistent from planting to harvest. Steady moisture and the right timing matter more than any single trick.
Small, steady effort beats occasional bursts of attention every time. Once you understand how to grow celery through each stage, it becomes far more predictable.
Most failures come from small lapses in watering or timing, not from anything complicated. Start small if this is new territory for you.
One healthy planting teaches more about your soil and climate than any article can. Pick your window, prep your soil, and start your first celery seeds this week.
Frequently Asked Questions
What is the trick to growing celery?
Consistency is the real trick behind good celery. It needs steady, deep moisture from planting day, since it’s mostly water and dries out fast.
Rich soil, full sun, and cool early temperatures round out the mix. Together, these conditions grow tender stalks instead of stringy, bitter ones.
Why is celery difficult to grow?
Celery is harder than most vegetables to grow well. It needs a narrow, cool temperature range for months, plus constant moisture throughout. Too much heat triggers bolting and bitterness. Too little water causes stringy stalks. That combination leaves less room for error than typical crops.
Can you grow celery in containers?
Yes, as long as the container is deep enough. Celery has a shallow but wide root system, so it needs at least 12 inches of depth and similar width per plant. Containers dry out faster than garden soil, so check moisture daily. Consistent watering matters even more in pots than in the ground.
How do you store celery after harvesting?
Wrap freshly cut stalks in foil rather than plastic and place them in the fridge. Foil lets the stalks breathe while still holding in moisture.
Stored this way, celery stays crisp for two to three weeks. Avoid trimming the ends until you’re ready to use it, since cut ends dry out faster.