
Change your living space today with a beautiful sliding door that you build yourself. Creating a DIY barn door is easier than you think and costs far less than buying one pre-made.
This project adds instant beauty while solving common space problems in your home.
Traditional swinging doors often waste valuable floor area, but sliding versions glide smoothly along your wall instead.
This will help you cover everything from selecting the right lumber to mounting your completed door. Get ready to impress your family with your new handmade feature.
What is a Barn Door?
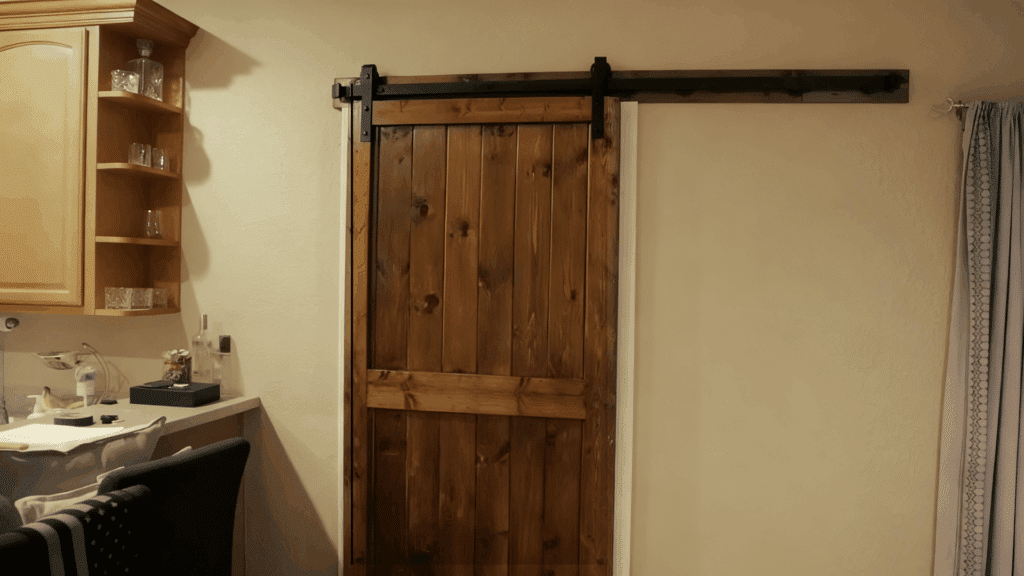
A barn door is a sliding door that moves along a track mounted above the doorway, rather than swinging open on hinges.
Originally used in actual barns and agricultural buildings, these doors have become popular in modern homes for their unique appearance.
The door hangs from a metal rail using rolling hardware, allowing it to slide smoothly to one side when opened.
Barn doors typically feature a rustic, farmhouse design with horizontal or vertical wooden planks held together by cross braces.
You can find them made from reclaimed wood, new lumber, or even modern materials like metal and glass.
Tools and Materials Required
| Category | Items |
|---|---|
| Wood | Tongue-and-groove boards (8 pieces), two 1×4 boards, one 1×6 board, one 1×5 header board |
| Hardware | Barn door hardware kit (track, rollers, stoppers, handles), lag screws |
| Fasteners | 1¼-inch 18-gauge Brad nails |
| Finishes | Wood stain, clear coat, wood glue |
| Tools | Miter saw or circular saw, nail gun, drill, tape measure, ratchet straps or clamps, sander, brush or rag, stud finder |
Step-by-Step Process: How to Build and Install a Barn Door
Change any doorway with this straightforward barn door project that adds rustic beauty and functional style to your home space.
Step 1: Measuring the Door Panel

Start by measuring your door opening to determine the correct dimensions for your barn door.
Uses a 36-inch-wide opening and builds a door 40 inches wide to cover the trim with a slight overlap.
The height is set at 84 inches. Adjust these measurements according to your doorway. This extra width ensures privacy and full coverage.
Step 2: Preparing and Cutting the Boards
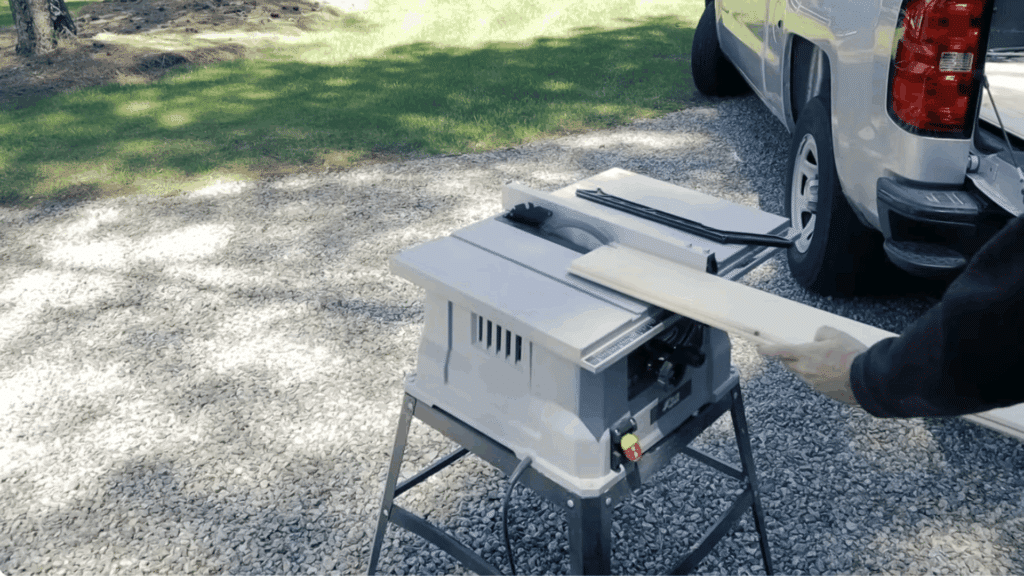
Cut all eight tongue-and-groove boards and two 1×4 side boards to match your door’s height (84 inches).
Then, trim half an inch from the edges of two tongue-and-groove boards to create flat ends on both sides of the door.
Use a miter or circular saw for accurate cuts. Label each board if needed to maintain order during assembly.
Step 3: Sanding and Assembling the Panels
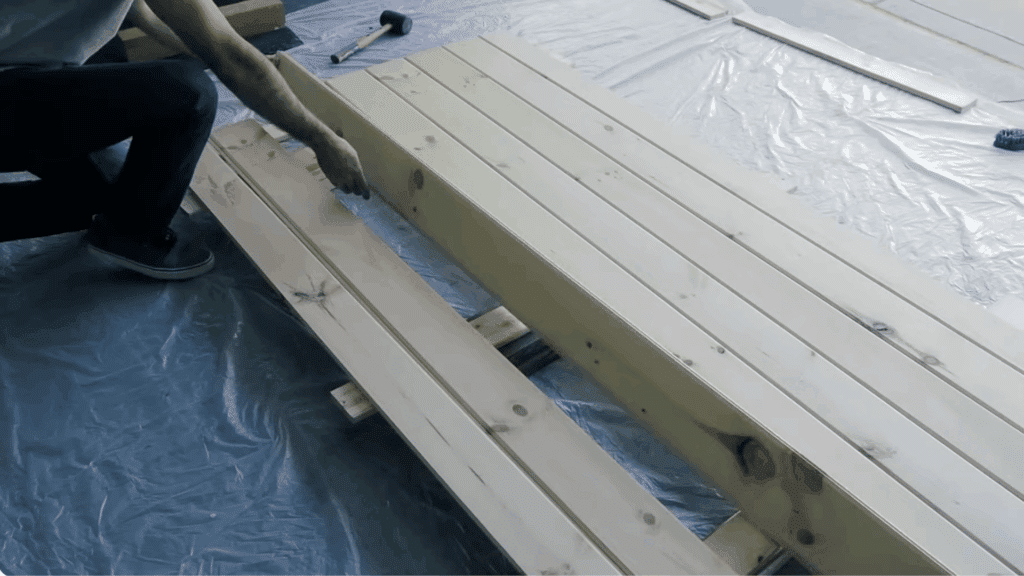
Lightly sand each tongue-and-groove board, focusing on the edges and sides before assembly. Full sanding will come later, but this initial step helps prevent splinters.
Apply wood glue along the grooves and connect the boards carefully, pressing them tightly together. Check alignment frequently so that all edges remain even.
If you have long clamps, use them to hold the structure in place; otherwise, ratchet straps work perfectly to secure the assembly while it dries.
Step 4: Adding Support and Side Frames
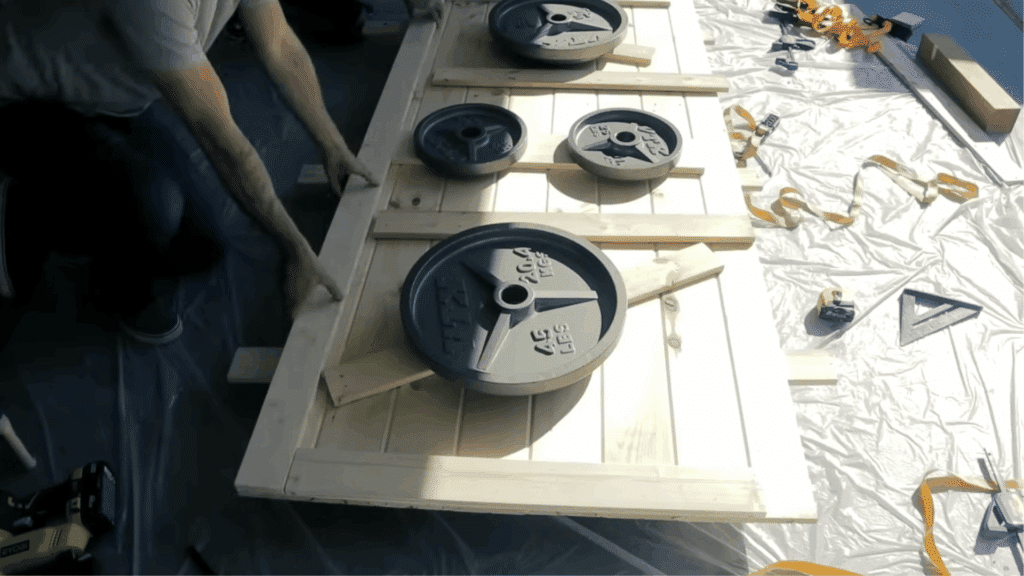
Once the main panel is assembled, cut three horizontal support boards that fit the door’s width.
Attach the side frames first using glue and brad nails, then secure the middle board precisely at the door’s center for structural strength and symmetry.
This framing keeps the boards aligned. Check that edges are flush before proceeding, as misalignment at this stage affects the balance operation of the door.
Step 5: Finishing the Door

After assembly, thoroughly apply the stain to the entire surface of the door to make it shiny and smooth.
Apply your chosen stain color evenly using a brush, following the wood grain. Allow it to dry for about 24 hours before applying two coats of clear protective finish.
This seals the wood, adds durability while improving the color depth. If you want a rustic look, you can light the edges after staining. Let the door cure before installation.
Step 6: Installing the Header Board
To prepare for hanging, install a 1×5 header board above your doorway. This board must be at least 2 inches longer than the metal rail for the hardware system.
Use a stud finder to locate wall studs, mark them with painter’s tape, and drill pilot holes. The header board will anchor the rail, ensuring it supports the door’s weight.
Stain or paint the header to match your trim or door for a cohesive look. Fasten it firmly into the studs using lag screws for maximum stability.
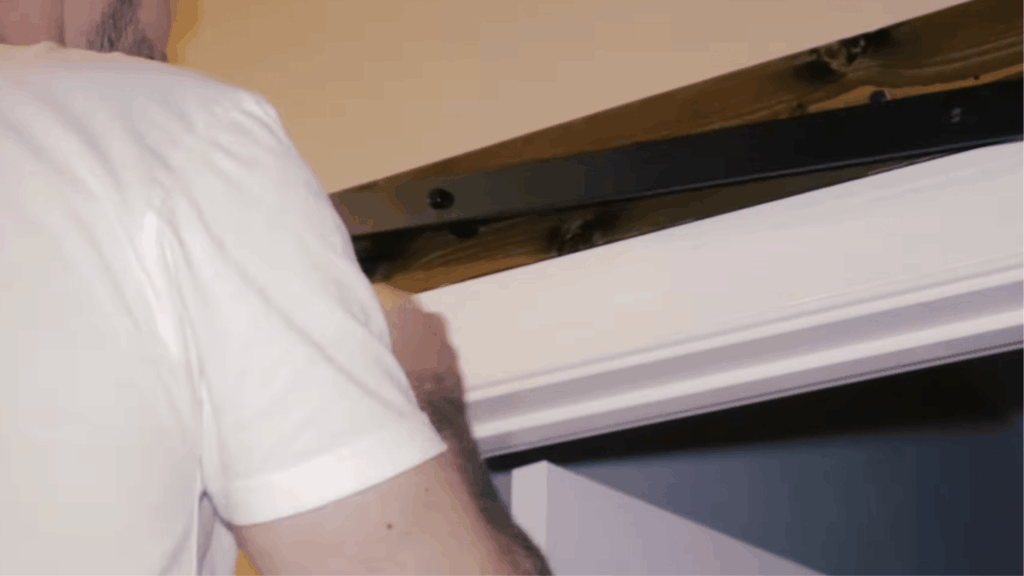
Step 7: Mounting the Rail and Hanging the Door
Attach the barn door rail to the header board, aligning the pre-drilled holes carefully to avoid hitting studs directly.
Use the hardware kit to install rollers on the top edge of the door, then lift and hang it onto the rail track.
Test the door’s movement to ensure it slides smoothly without friction or imbalance. Add door stoppers from your hardware kit to prevent the door from swinging.
For more detailed steps, check out this YouTube video by Kelly Concept, “How to Make & Install a Barn Door | EASY!“.
Common Mistakes to Avoid when Building a Barn Door
Making a DIY barn door requires careful planning and attention to avoid simple errors that could ruin your hard work completely.
- Skipping measurements: Always measure your doorway twice before cutting any wood to avoid costly material waste.
- Using wet wood: Choose properly dried lumber, or your finished door will warp and twist as moisture escapes.
- Forgetting diagonal bracing: Install a diagonal support board to prevent sagging and maintain your door’s structural integrity.
- Inadequate sanding: Sand thoroughly between coats, or your finish will look rough and uneven on the surface.
- Wrong hardware weight: Check that your track system supports your door’s weight, or it will fail and create problems.
- Ignoring wall studs: Mount the track into solid wall studs, not just drywall, for safe and secure installation.
Final Thoughts
Building a DIY barn door changes your space while staying within your budget. This project combines function with an eye-catching style that guests will notice.
Your handmade door will serve your home for many years while showcasing your personal craftsmanship.
Each time you slide it open, you’ll feel proud knowing you created something beautiful with your own hands.
Build your own DIY barn door this weekend and see how simple it is to add a rustic vibe to your home.