
Unwanted plants often grow back quickly, even after being pulled out and cleaned. Simple home mixtures are commonly used to manage this problem in outdoor spaces.
Effectiveness depends on plant type, since young weeds respond differently compared to deep-rooted perennials that store energy underground for regrowth after treatment.
Ingredients like vinegar, salt, and soap work together to dry out plant tissue on contact, but the strength and timing determine the overall results.
What is DIY Weed Killer and What Does it Actually Do?
The vinegar-salt-soap mixture is a contact desiccant used in a homemade weed killer, meaning it kills by pulling moisture out of leaf tissue on impact, not by moving through the plant.
When sprayed, the acetic acid draws water out of the cells it touches. The plant dries out fast, but the solution never enters the stems or travels to the roots.
That’s what separates it from a systemic herbicide like glyphosate. Glyphosate moves through the plant’s vascular system until it reaches the root, killing it from the inside.
This mixture doesn’t do that.
Young annual weeds don’t need it to. Shallow roots and soft stems burn off quickly, so a homemade weed killer handles them easily.
Perennial weeds like dandelions and bindweed are different. They store energy deep in the root. The leaves die, but the plant returns.
DIY Weed Killer Recipe: Ratios, Ingredients, and What Each One Does
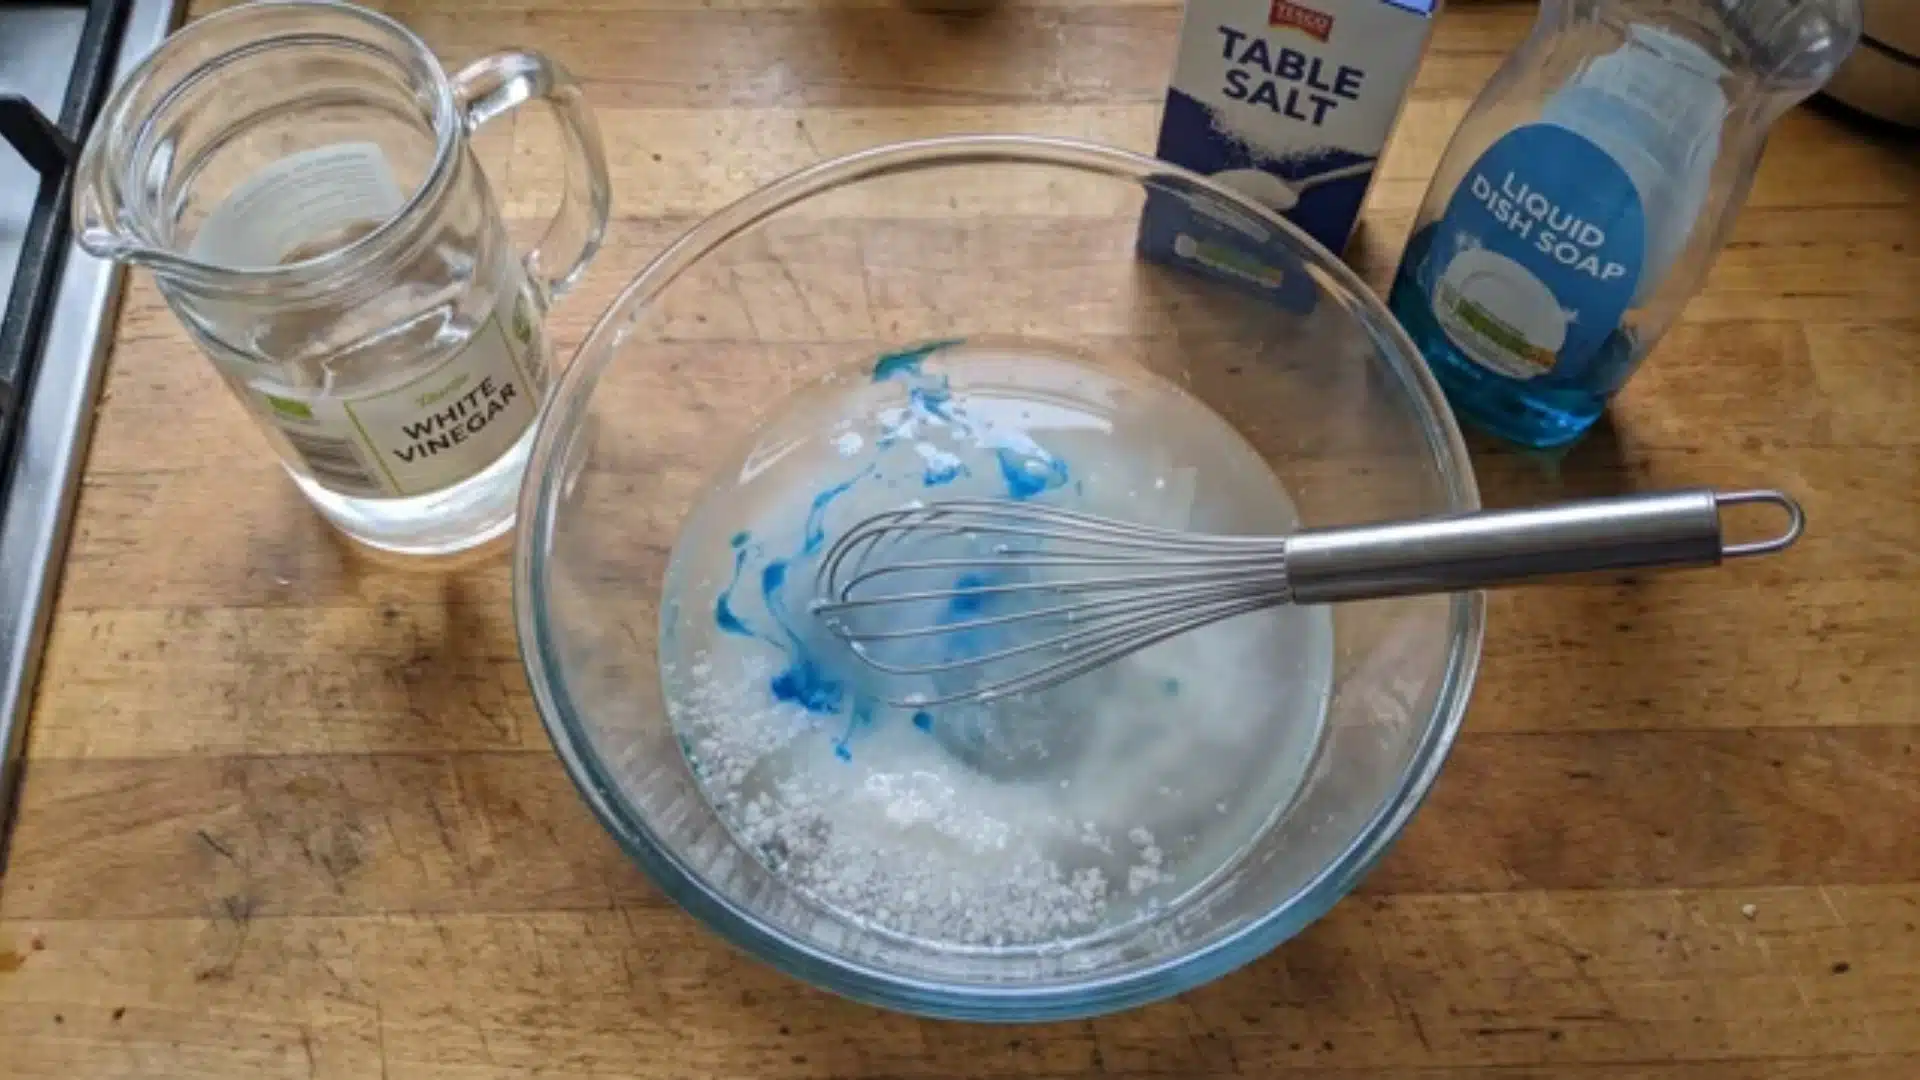
This homemade weed killer uses three ingredients:
- 1 gallon of white vinegar
- 1 cup of table salt
- 1 tablespoon of liquid dish soap
Each one has a job.
Vinegar is the active ingredient in a homemade weed killer. Its acetic acid burns leaf tissue and draws moisture out on contact, especially in young, tender weeds.
Standard household vinegar has about 5% acidity, which is effective against soft growth. Older or woody weeds often survive, showing temporary wilting before recovering within a few days.
Salt helps pull extra moisture from the plant and improves contact. One cup per gallon is enough, since higher amounts can create long-term soil issues.
Dish soap breaks the waxy coating on leaves, allowing the solution to spread evenly. One tablespoon is sufficient, as extra soap does not improve sticking or effectiveness.
To mix it: Add the salt and soap to your sprayer first, pour in a small amount of vinegar, and swirl until the salt fully dissolves before adding the rest. Undissolved crystals block sprayer nozzles and cause uneven application.
Vinegar Strength: Which Concentration to Use and When?
Household vinegar at 5% works on young annual weeds when applied early in the season, especially before roots deepen or stems become tougher.
Horticultural vinegar ranges from 10% to 30% acidity and works faster, making it more effective on established perennial weeds that survive weaker home-made weed killer mixes.
At 20–30% strength, it can irritate skin and eyes, so gloves and eye protection are necessary. It is sold as horticultural or cleaning vinegar in garden centers.
Here’s How to Apply DIY Weed Killer for the Best Results
Getting the recipe right is only half the job; timing, weather, and application conditions matter just as much for consistent and effective results overall.
1. Pick the Right Day
Conditions matter just as much as the mixture itself when applying a homemade weed killer, since timing and environment directly affect how well it works.
Choosing the right moment ensures better results, so applying it under proper conditions greatly improves effectiveness and reduces wasted effort from poor absorption or runoff.
2. Apply with Precision, Not Volume
This is a non-selective homemade weed killer that damages any plant it touches, including grass, flowers, vegetables, and ground cover, so apply it carefully.
A hand-pump sprayer with a narrow nozzle gives better control near edges and beds. Always rinse equipment after use to prevent corrosion from vinegar and salt.
3. What to Expect After Spraying
Wilting usually begins within a few hours after spraying. Within 24 hours, young annual weeds typically turn brown, collapse, and show clear visible damage.
Wait about 48 hours before pulling weeds. After that, remove dead growth manually if needed, especially when the weed killer hasn’t fully broken down plants.
The Soil Salinity Problem: What Happens After You Spray?

The recipe works. What most people don’t think about is what the salt leaves behind.
Salt doesn’t break down in soil. It accumulates. Over time, it raises the osmotic pressure around plant roots: water can’t move in the way it normally would. The plant can’t hydrate even with regular rainfall.
Salt-damaged soil can stay hostile to new growth for months.
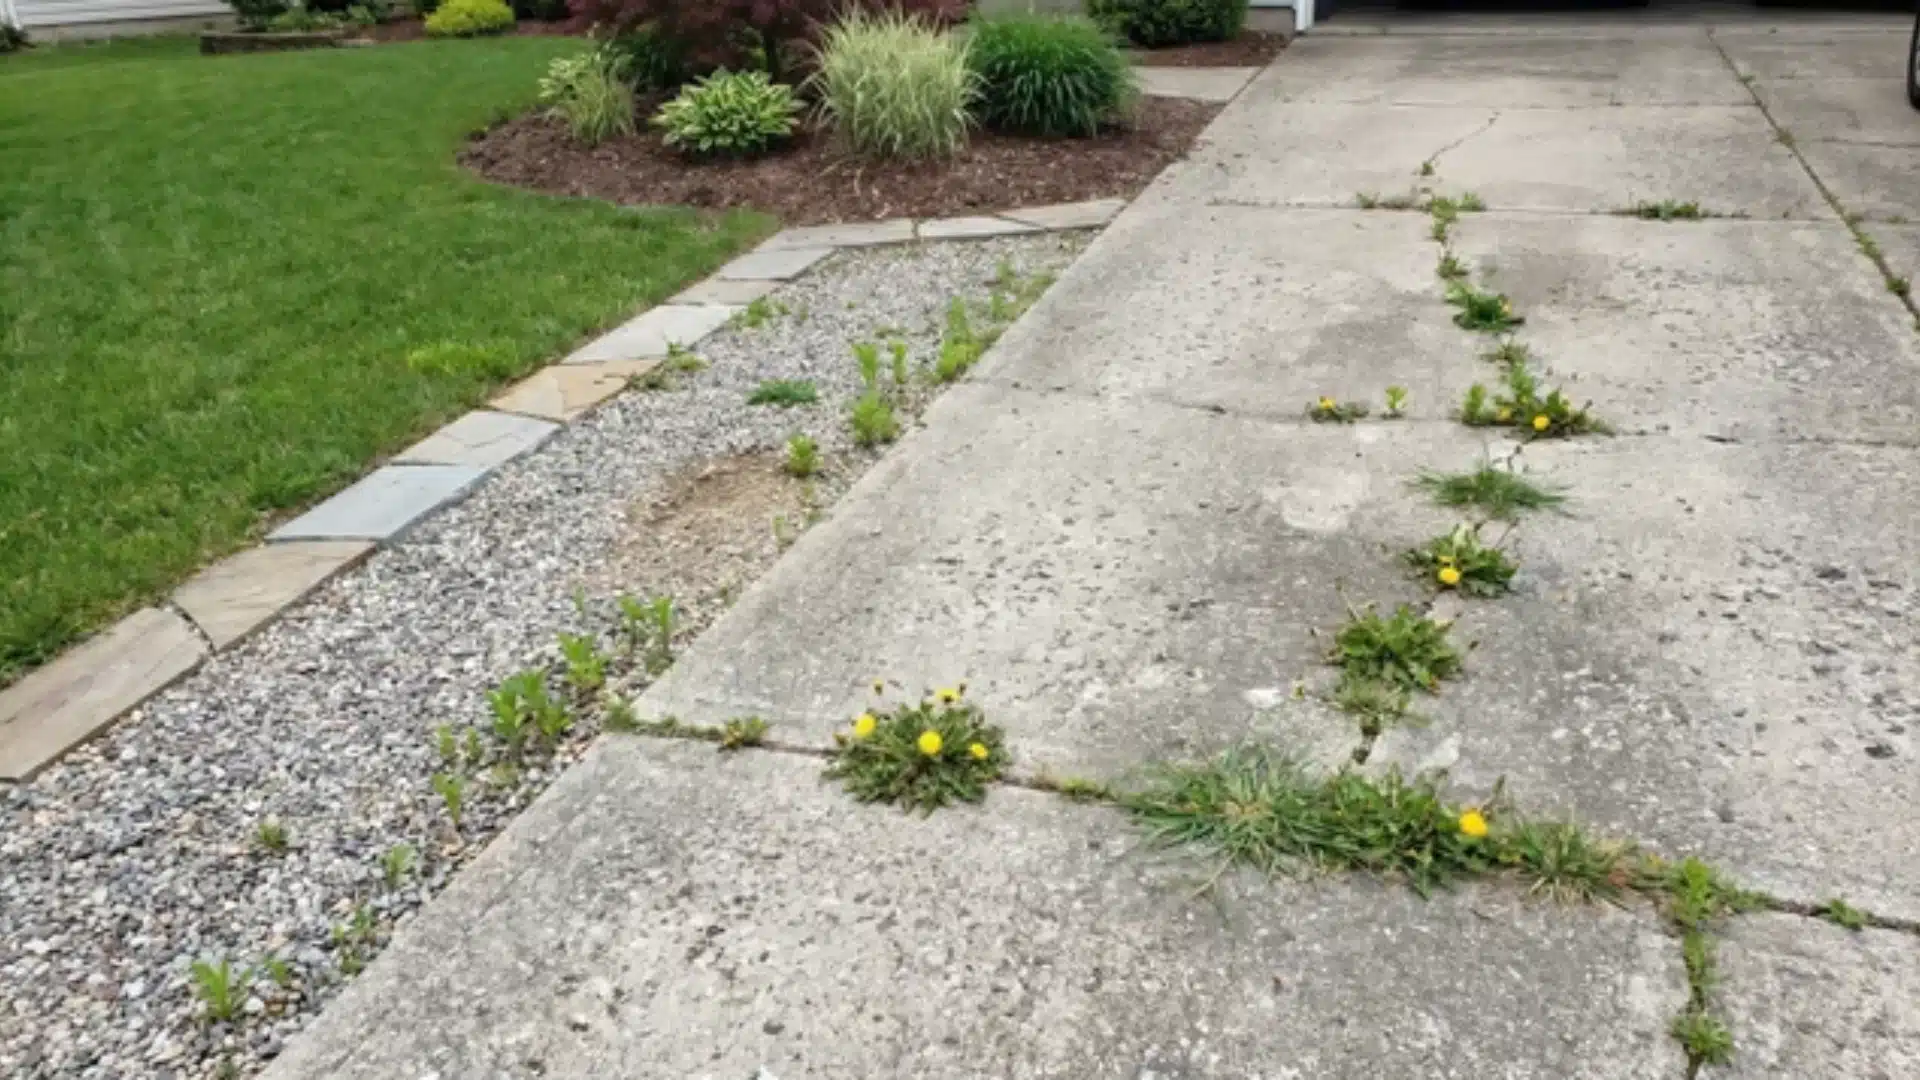
A single application in a driveway crack carries minimal risk. A garden bed edge you spray every few weeks through summer is a different situation: the salt compounds with every pass.
Note: Use this DIY weed killer where you don’t need the soil to perform, such as hardscaping, gravel paths, patio joints, and fence lines.
Where this Works and Where it Doesn’t?
Understanding where a DIY weed killer works and where it fails helps prevent damage, improve results, and ensure safer, more targeted weed control.
| Category | Details |
|---|---|
| Where Does It Work Well? | Driveways, cracks, patios, gravel paths, fence lines, and young annual weeds with shallow roots respond best to precise, non-selective application. |
| Where Does It Cause Problems? | Lawn edges, flower beds, and vegetable areas are at risk of damage from drift, runoff, and soil salt buildup, making coverage risky and inefficient overall. |
| What Won’t It Fix? | Perennial weeds regrow after treatment due to deep roots, often requiring multiple applications across seasons to achieve visible weakening and easier removal later. |
A homemade weed killer works best for targeted control in hard surfaces, but long-term weed removal depends on repeated use and realistic expectations
Conclusion
Results depend on using the right mix, applying it at the right time, and choosing suitable surfaces where unwanted plants are easier to control effectively.
Each ingredient plays a role, but effectiveness varies with weed type, weather, and the care with which the mixture is applied.
Careful use helps manage unwanted growth in targeted areas while reducing damage to nearby plants and limiting long-term soil impact from repeated applications.
Apply what you’ve learned here and start using your homemade weed killer only where it makes sense.
Frequently Asked Questions
What kills weeds fast and cheaply?
The three-ingredient DIY recipe (1 gallon of white vinegar, 1 cup of salt, 1 tablespoon of dish soap) is among the fastest and least expensive options for hardscape weeds, showing visible results within hours on a sunny day. For lawn weeds or large areas, a targeted commercial herbicide is typically more cost-effective due to the volume of vinegar required.
How do you make a stronger homemade weed killer?
Use cleaning vinegar (10–30% acetic acid) instead of standard 5% household vinegar. Higher-concentration vinegar is more effective against woody or mature weeds and requires less reapplication. It is available at hardware and grocery stores, but should be handled with care; it can irritate skin and eyes at concentrations above 10%.
Can salt permanently prevent weeds from growing back?
In theory, yes, high enough soil salinity prevents germination. In practice, the salt concentrations from a standard DIY recipe require many repeated applications to reach that threshold, and by that point, the soil is also hostile to any plant you might want to grow there. For permanent weed suppression in a contained area, landscape fabric or hardscape is more
Do vinegar, salt, and Dawn really kill weeds?
Yes, on contact. The acetic acid in vinegar desiccates leaf tissue, salt amplifies the dehydration, and dish soap helps the mixture stick to waxy leaves rather than bead off. It reliably kills the above-ground plant within hours on a hot day, but does not kill the root system, so perennial weeds typically regrow.