

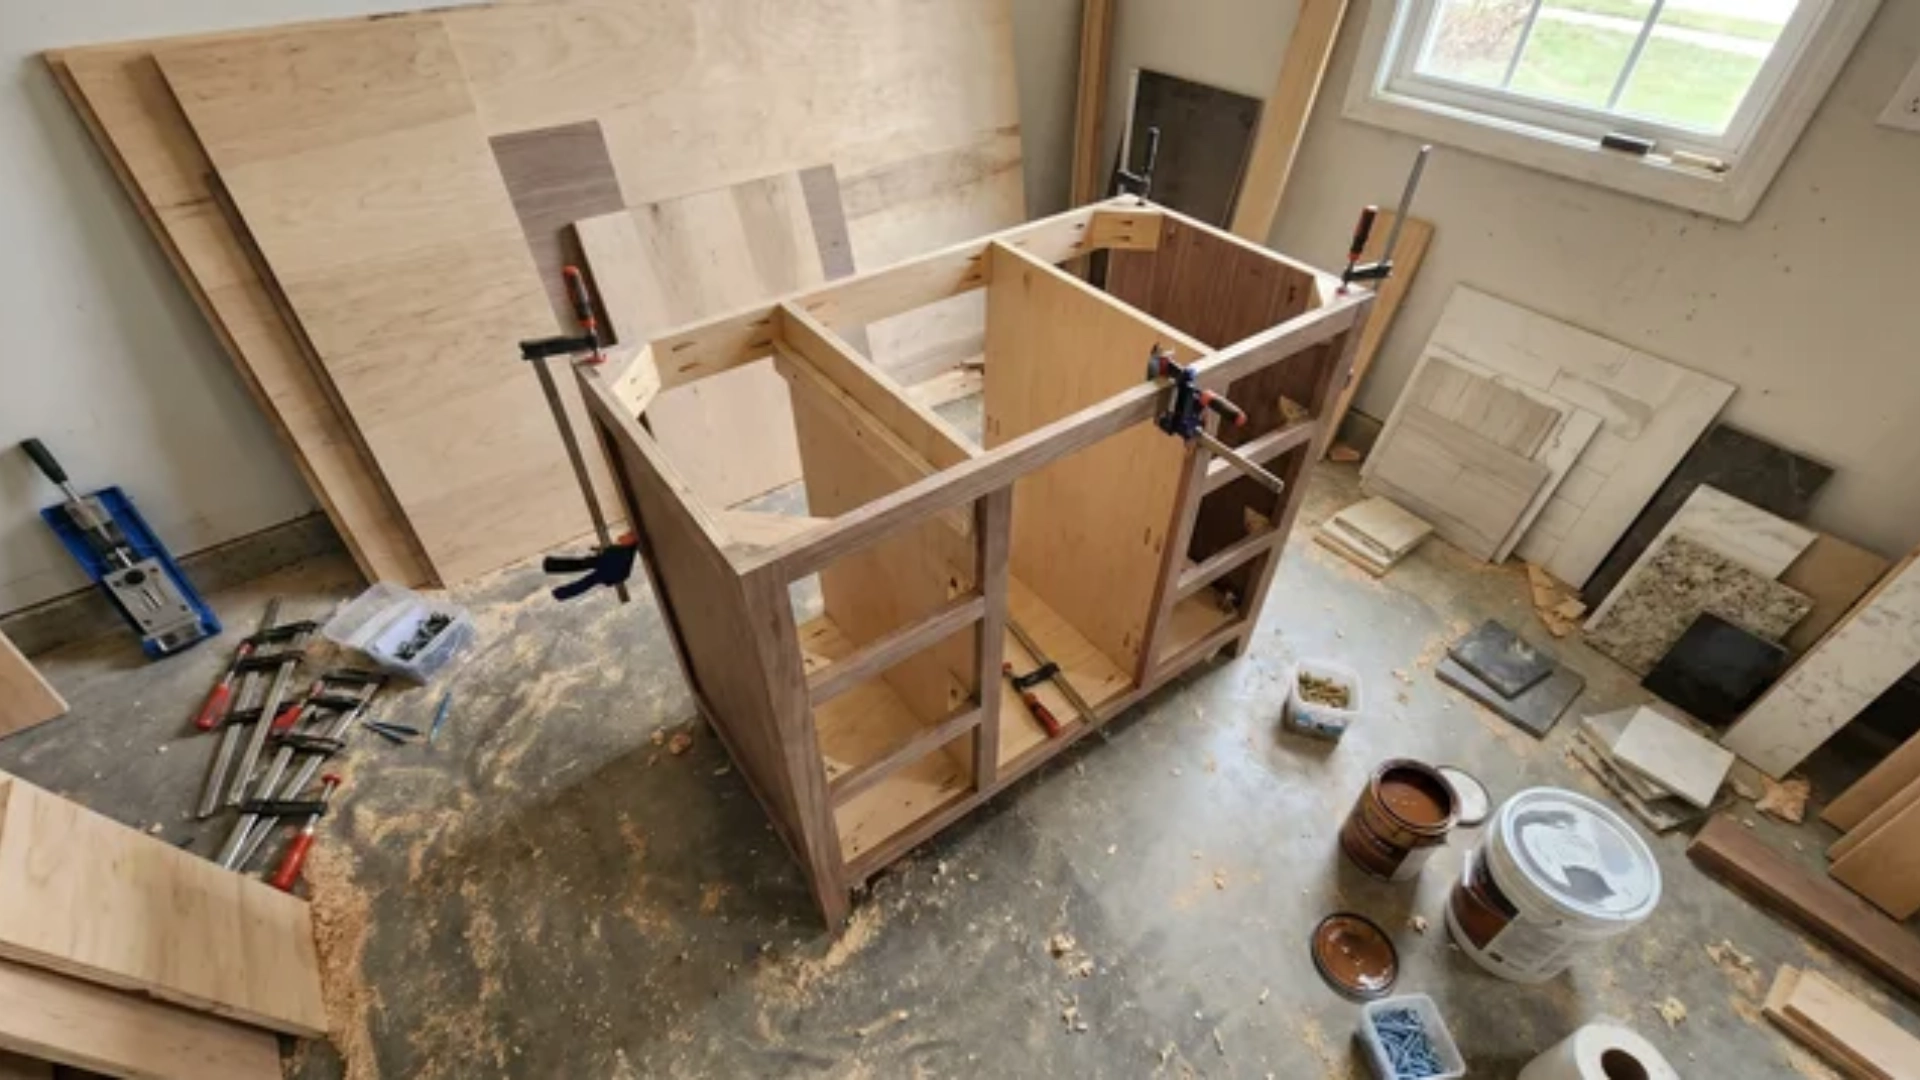
| Difficulty | 3 out of 5; carcass and drawer work is beginner-friendly; doors are the hard part |
| Time | One weekend if you order pre-made doors, up to a week if you build them from scratch |
| Cost | $150 to $400 in materials |
| Tools Needed | Circular saw, table saw, pocket hole jig, router table, orbital sander, airless sprayer |
| Skill Required | Beginner to intermediate |
| Cost Note: Figures here are materials estimates based on a standard single-sink build. Adding stone countertops, custom hardware, or pre-made door fronts pushes the total higher. Get pricing on your specific countertop and sink before you finalize a budget. |
A bathroom vanity that almost fits can create more problems than it solves. You may end up with awkward gaps, blocked plumbing, or storage that does not suit your routine.
A DIY bathroom vanity gives you more control over size, layout, materials, and finish without forcing you to settle for a standard design. Getting that control right starts with planning your vanity depth before you ever pick up a saw, since width and height only tell half the story.
I know the project can feel complicated, especially when drawers, doors, plumbing, and countertop installation are involved. The key is to handle each stage in the right order.
Here, you will learn how to measure accurately, build a square cabinet, install doors and drawers, choose moisture-resistant materials, avoid common mistakes, and finish the vanity securely.
Why a DIY Bathroom Vanity Can Upgrade Your Space
A bathroom vanity does more than support a sink. It shapes storage, movement, visual balance, and the overall character of the room. A DIY design gives you control over the size, finish, layout, and features your bathroom needs.
You can repurpose a vintage dresser, build a floating wood unit, add open shelves, or refresh an existing cabinet with paint and new hardware. This flexibility is especially valuable in small bathrooms, awkward alcoves, and shared spaces where standard vanities may not fit properly.
A carefully planned project can also create a custom, high-end look without replacing every fixture.
By combining accurate measurements, moisture-resistant materials, practical storage, and a style that complements the room, a DIY bathroom vanity can become both a useful upgrade and an attractive focal point.
How to Build a Bathroom Vanity Step by Step
Seven sequential stages covering carcass construction, face frame attachment, drawer assembly, door installation, painting, hardware, and final wall mounting for a complete custom vanity build.
Tools and Materials You’ll Need
Before you start cutting anything, it helps to have everything gathered: plywood, poplar, slides, and a handful of specific tools make this build go a lot smoother.
| Category | Item | Used For |
|---|---|---|
| Material | 3/4″ sanded plywood | Carcass, face frame backing |
| Material | 3/4″ poplar | Face frame, drawer fronts |
| Material | 1/2″ plywood | Drawer box sides |
| Material | 1/4″ plywood | Drawer bottoms, front panels, spacers |
| Material | Wood filler & primer | Prep before painting |
| Material | Satin acrylic paint | Final finish coat |
| Material | Pocket screws, glue, brad nails | Assembly and joinery |
| Tool | Circular saw & table saw | Cutting plywood and poplar |
| Tool | Pocket hole jig | Drilling joinery holes |
| Tool | 90-degree clamps | Squaring carcass and frame |
| Tool | Router table + 1/4″ bit | Drawer grooves, tongue-and-groove fronts |
| Tool | Soft-close drawer slides + Kreg jig | Mounting drawers |
| Tool | 1-3/8″ Forstner bit + hinge template | Drilling and aligning hinges |
| Tool | Drawer face brackets | Mounting drawer fronts |
| Tool | Handle drilling template | Consistent hardware placement |
| Tool | Airless sprayer + spray tent | Priming and painting |
| Tool | Orbital sander | Smoothing surfaces to 220 grit |
| Pro Tip: Don’t skimp on the 90-degree clamps and spacers. They cost almost nothing next to the lumber bill, and squareness plus consistent spacing is what separates a clean build from one you’re fighting at every single step. |
Step 1: Build the Vanity Carcass
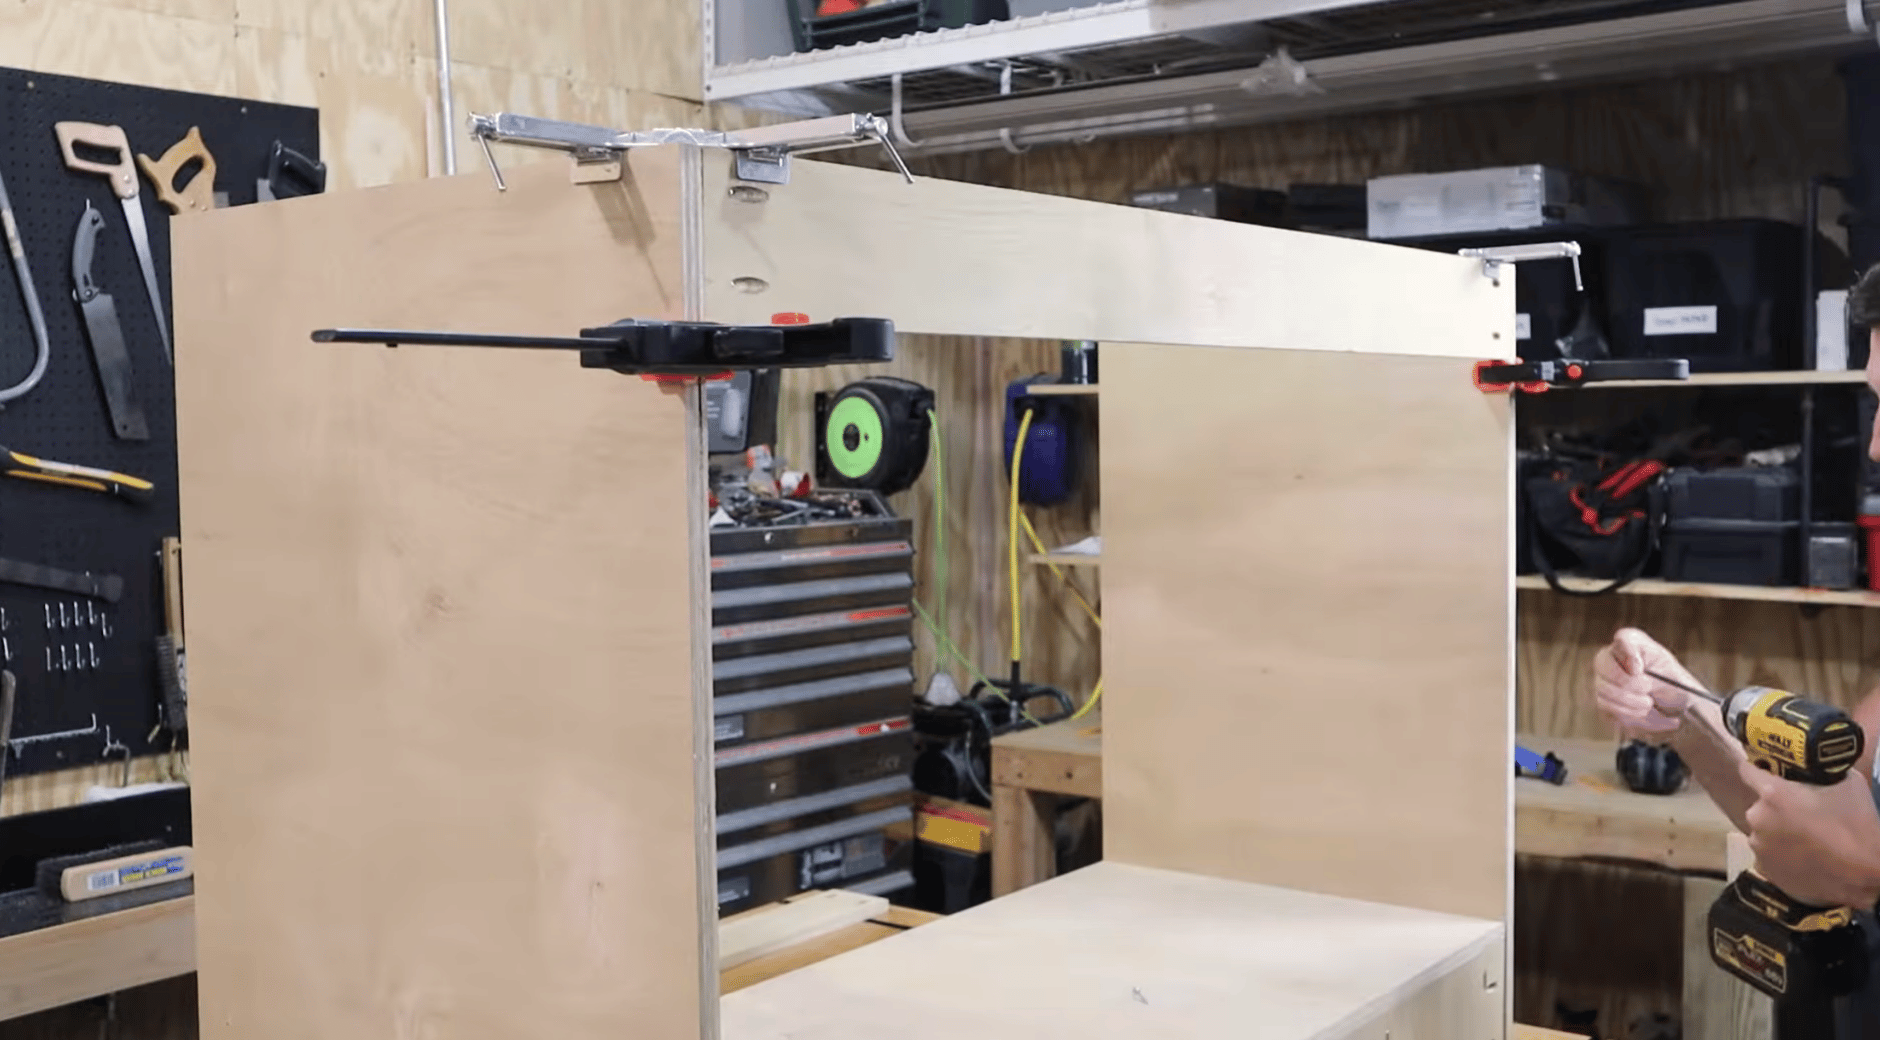
Break down 3/4″ sanded plywood with a circular saw, then clean up cuts on the table saw, choosing plywood over MDF since it resists moisture in bathrooms.
If you’re unsure which grade to buy, picking the right plywood for a cabinet box makes a real difference in how the carcass holds up over time. Drill pocket holes into the interior or back faces of dividers, stretchers, and toe kick before assembly.
Assemble in order: back brace, toe kick, sides, stretchers, and dividers, using clamps and spacers for consistency. Check squareness with diagonal measurements before glue sets, since even small errors carry through every later step.
Step 2: Build and Attach the Face Frame
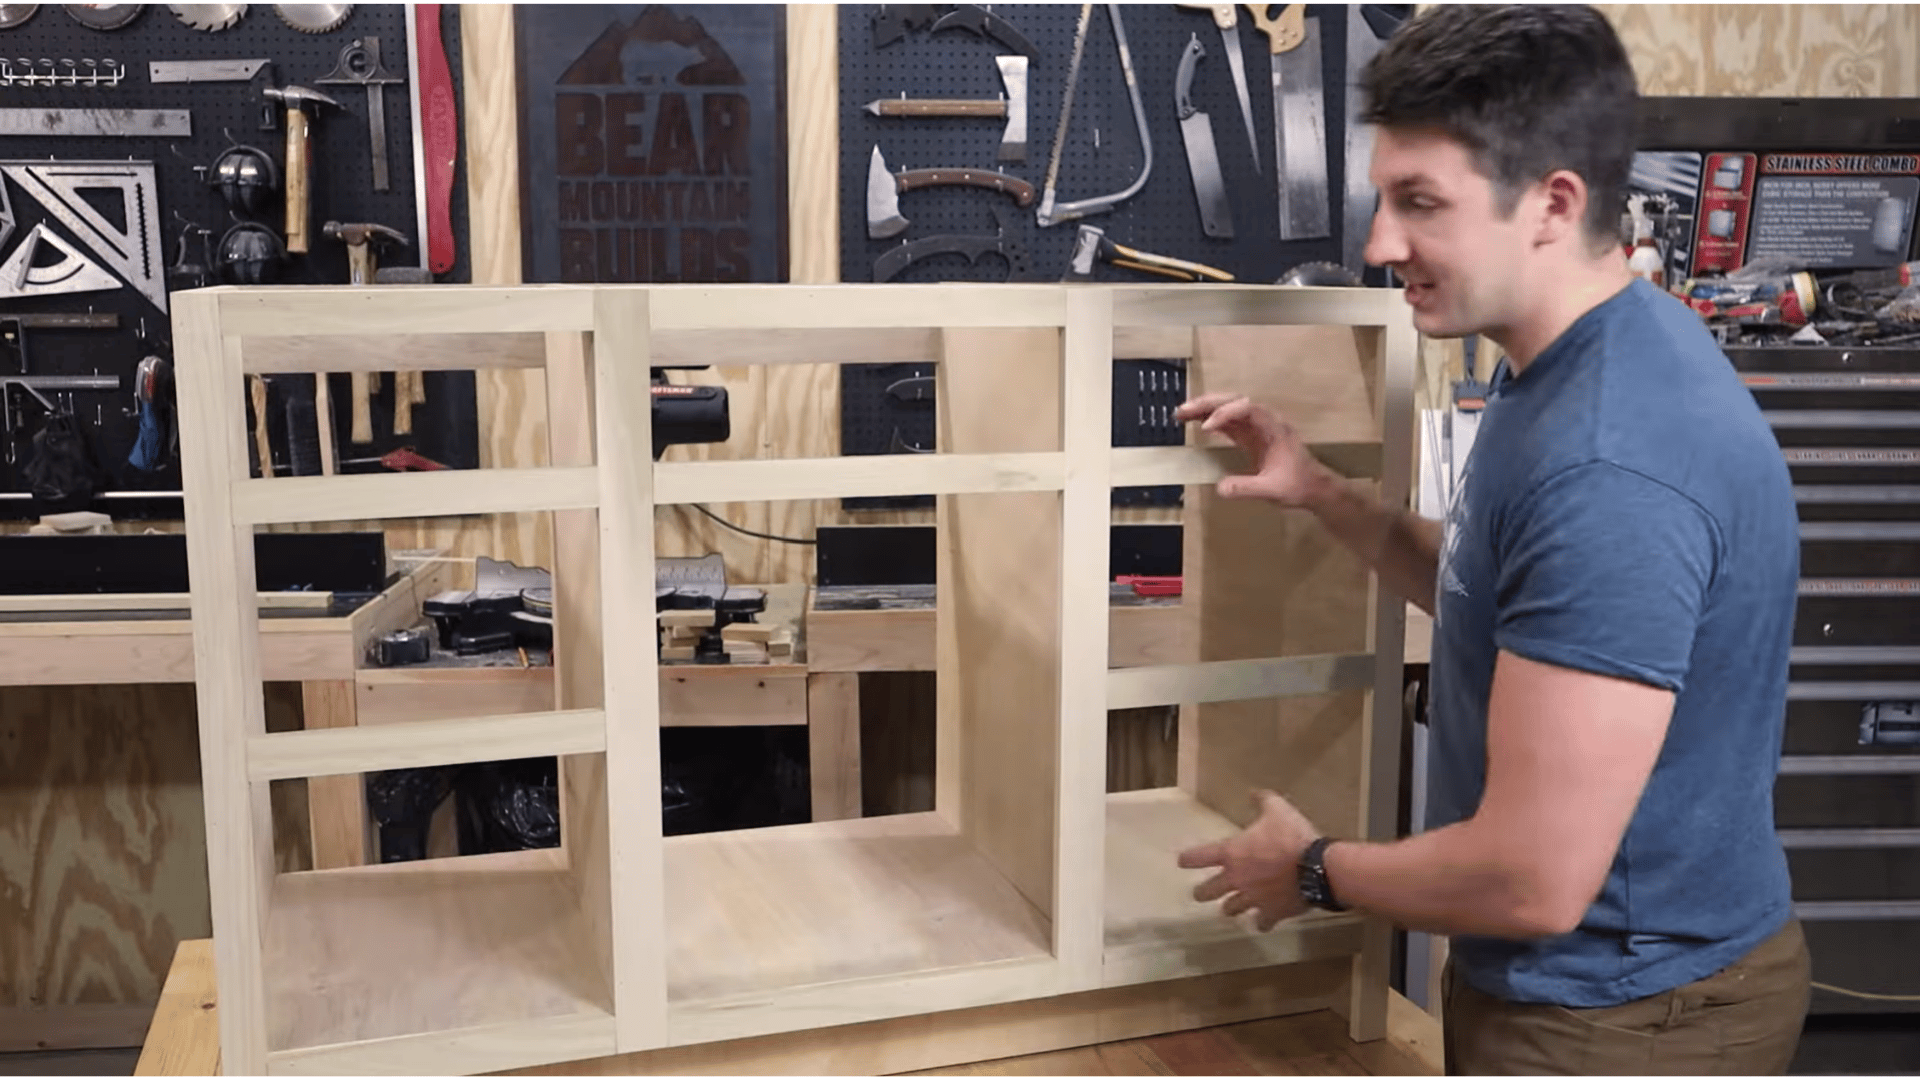
Rip 3/4″ poplar into 1-1/2″ and 2″ widths, chosen for its clean paint finish and affordability compared to pine or maple. Drill pocket holes into the horizontal pieces and assemble the outer frame first, using spacers to set accurate drawer opening heights before securing with screws.
Glue and brad nail the completed face frame onto the carcass front. Nail holes get filled with wood filler later, so they disappear completely once painted.
Step 3: Build the Drawer Boxes and Install the Slides
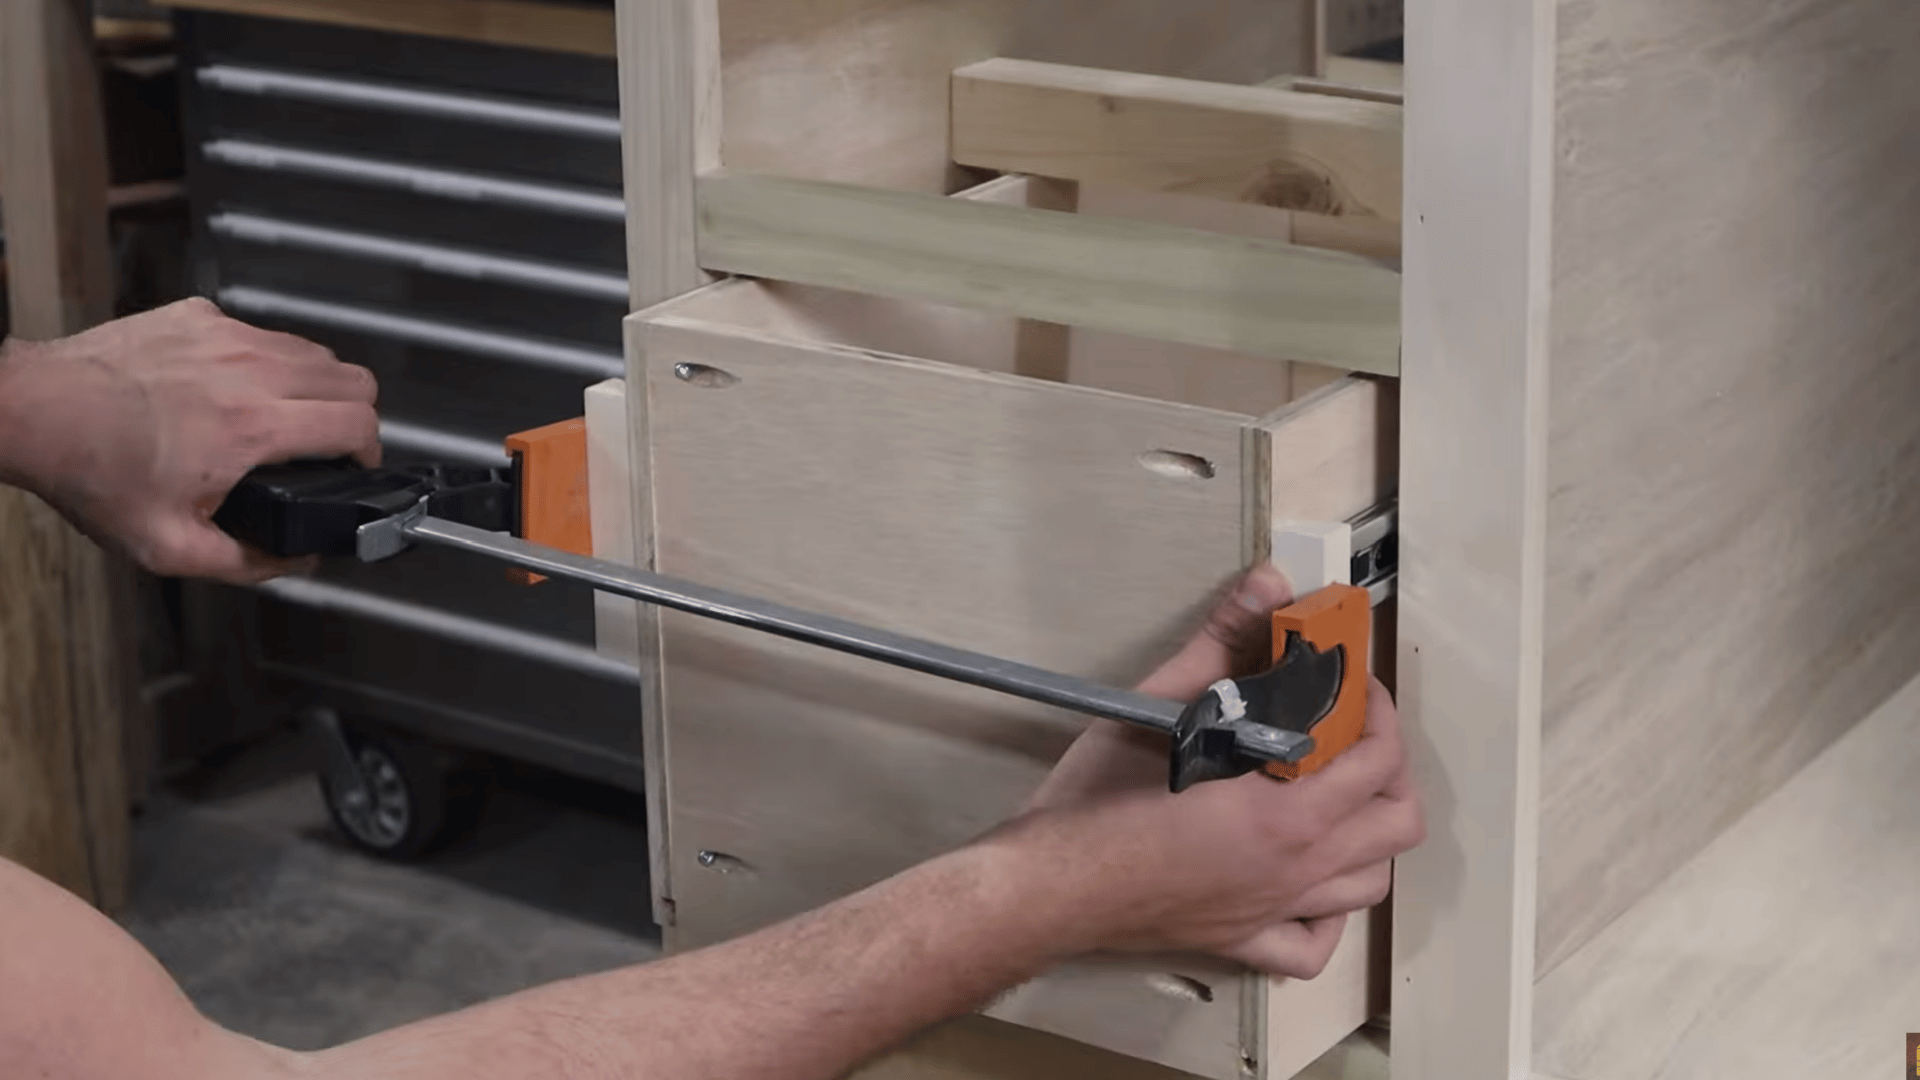
Mount soft-close slides on the interior dividers first, adding a 3/4″ spacer on outer sides to offset the face frame overhang. Cut drawer sides from 1/2″ plywood and rout a 1/4″ groove for the bottom panel.
Getting the slides level matters as much here as it does on any furniture piece, and installing smooth drawer slides the same careful way keeps drawers from binding once the box is loaded down.
Assemble boxes with pocket holes facing outward so they stay hidden, then insert the plywood bottom. Mount drawers from the bottom up using spacers for height, recessing slides so fronts sit flush once installed.
Step 4: Build or Buy Your Cabinet Doors
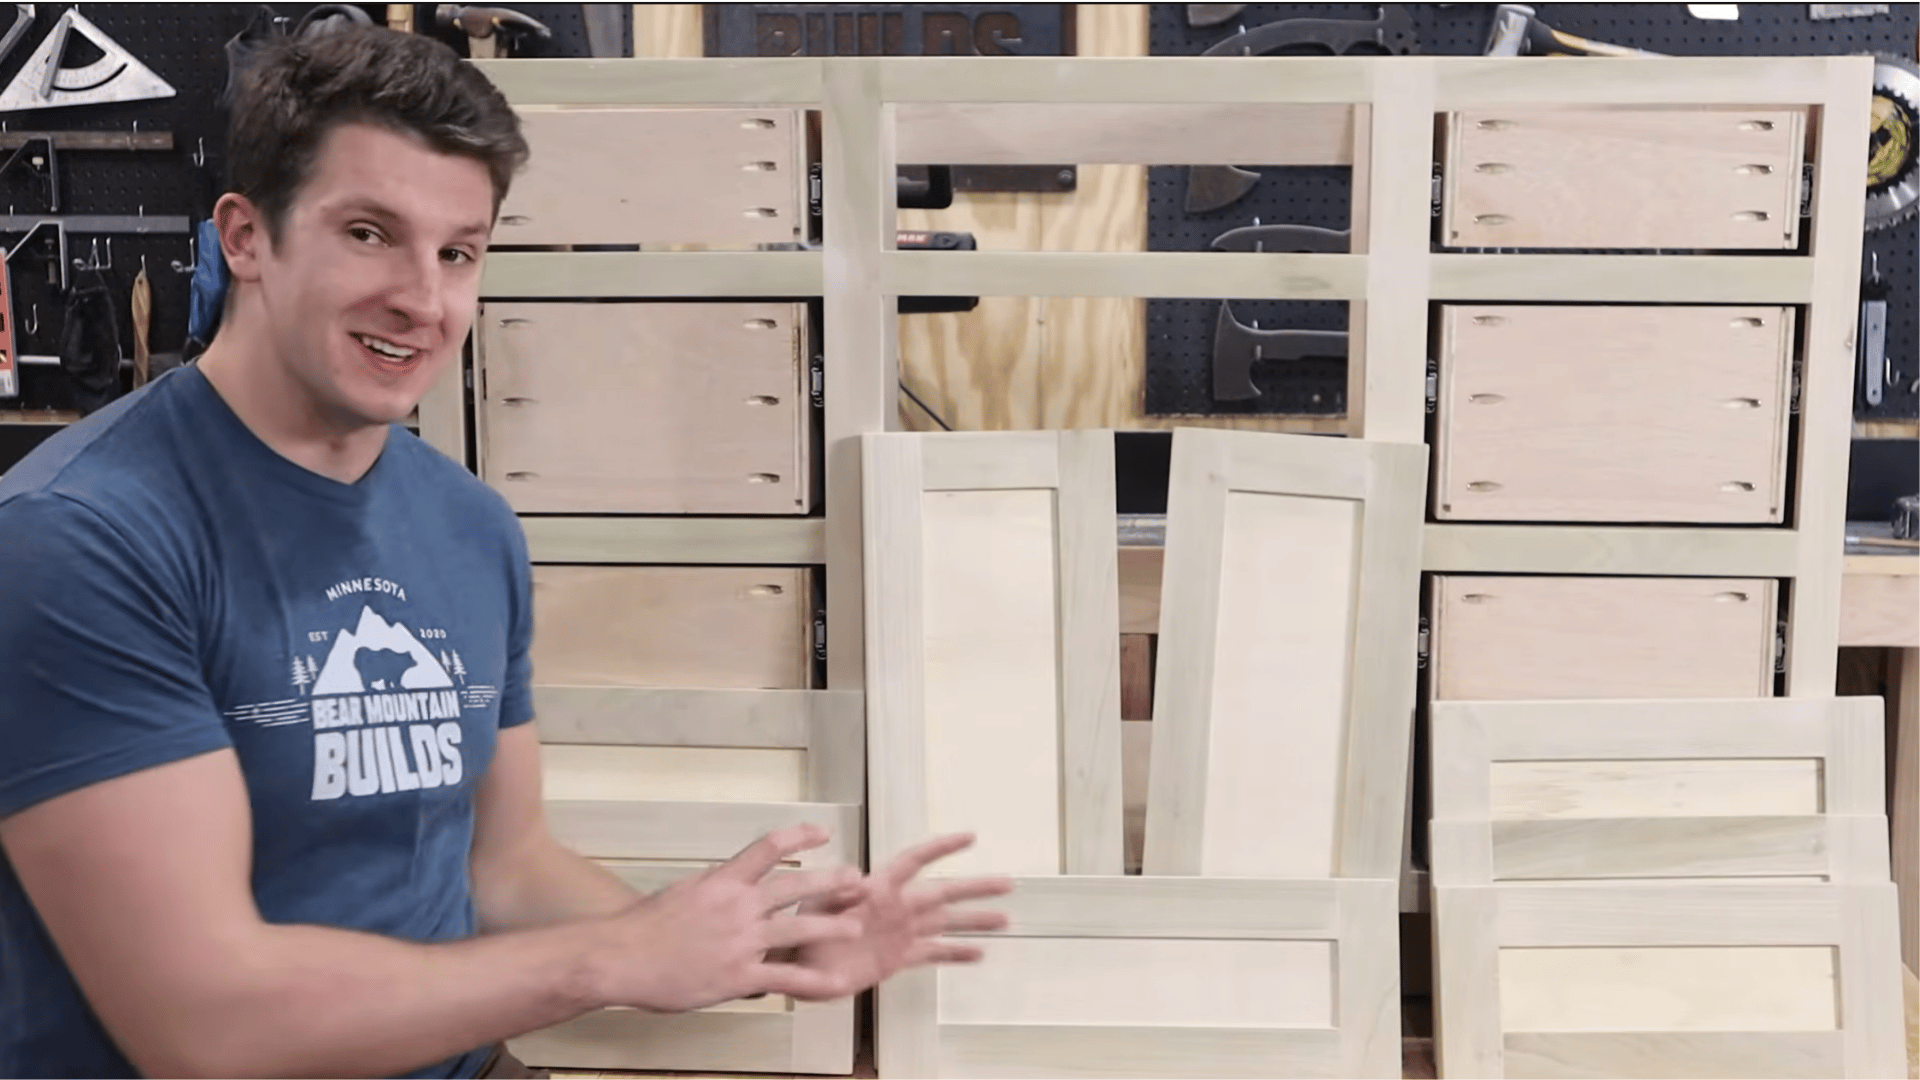
Choose between ordering pre-made door fronts or building shaker doors from scratch, depending on whether openings are standard sizes.
Pre-made fronts require measuring each opening plus overlay, arrive sanded in various profiles, and take one to three weeks to ship. Scratch-built shaker doors use poplar rails and stiles with a floating MDF center panel for stability. Dry-fit before gluing, then drill hinge cups using a placement template for consistent alignment across all doors.
Step 5: Sand, Prime, and Paint
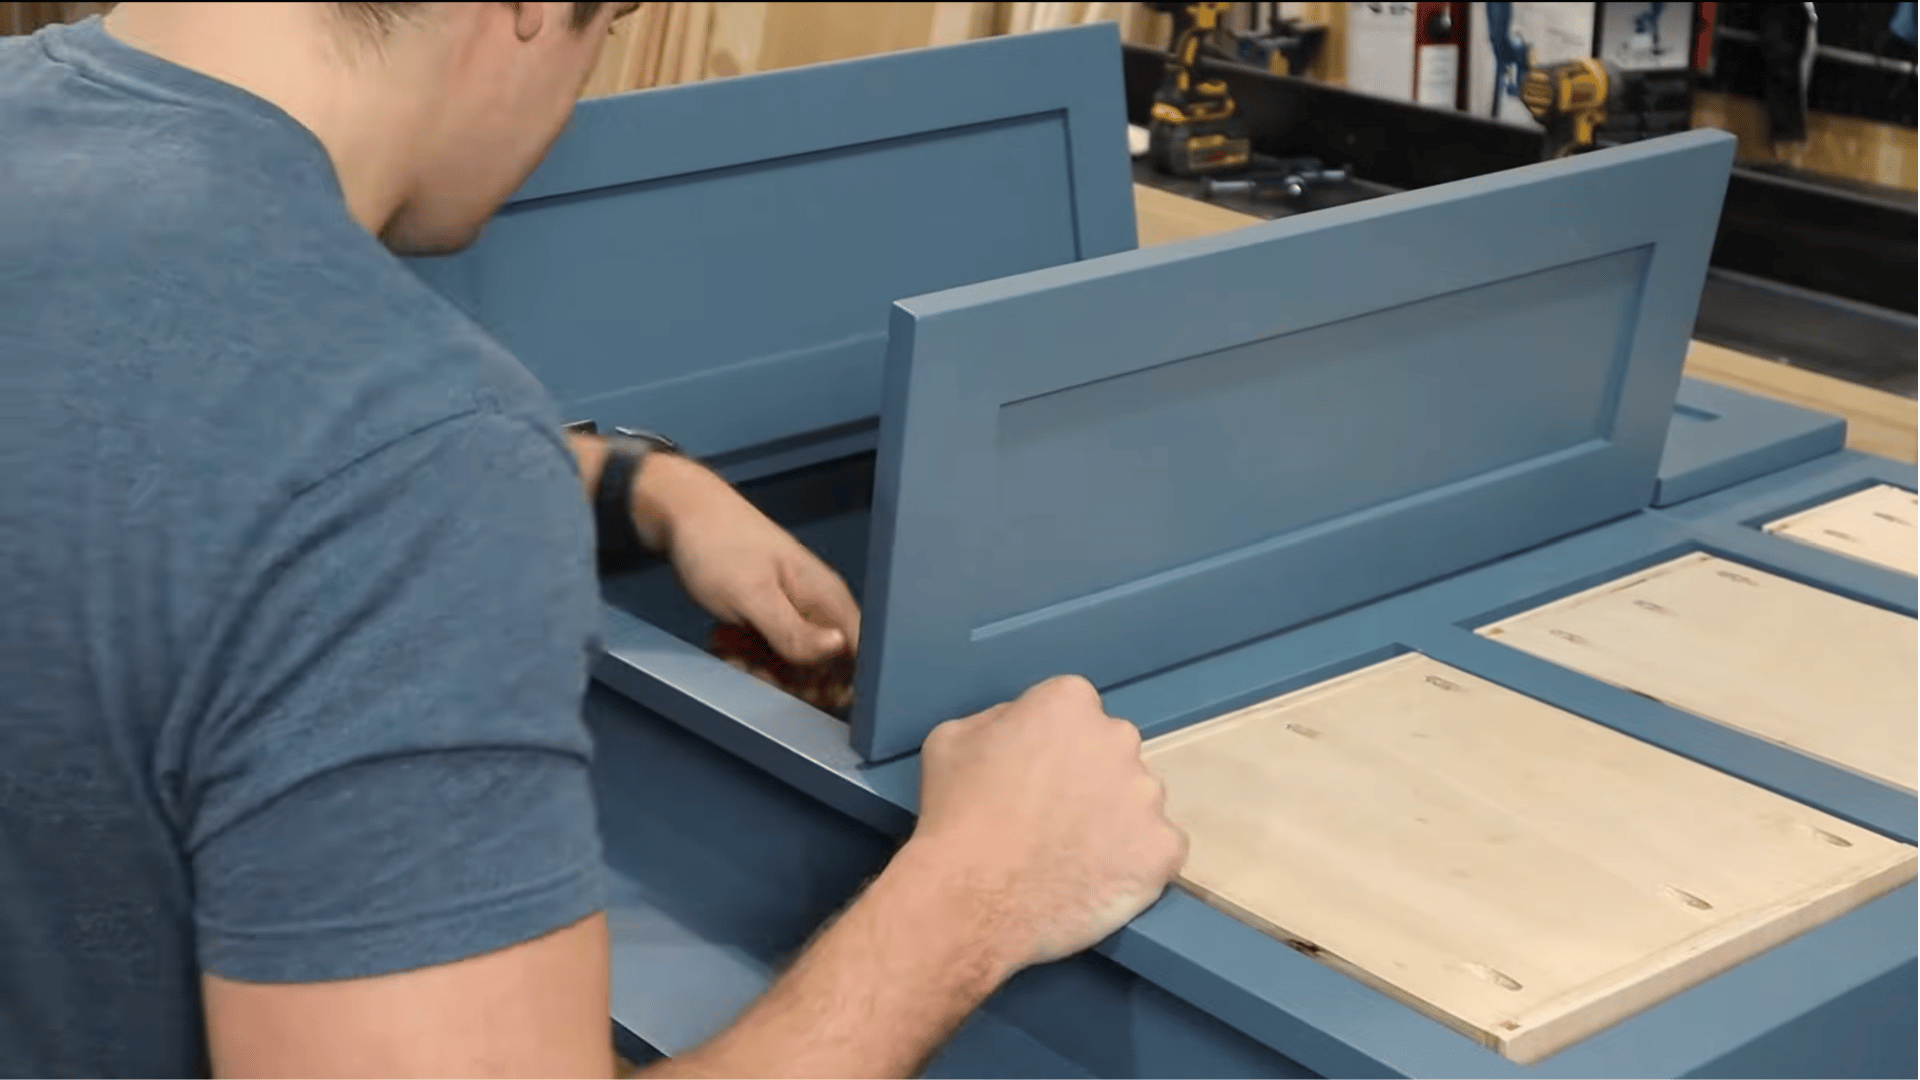
Fill all seams and nail holes with wood filler, then sand the entire piece to 220 grit and ease sharp edges for a refined feel. Apply a moisture-blocking, shellac- or oil-based primer instead of standard drywall primer, since bathroom humidity causes regular primer to fail and peel over time.
Sand again to 220 grit after priming, then apply the finish coat, ideally with an airless sprayer for even coverage across all the cabinet’s surfaces and angles.
Step 6: Final Assembly: Drawer Fronts and Hardware
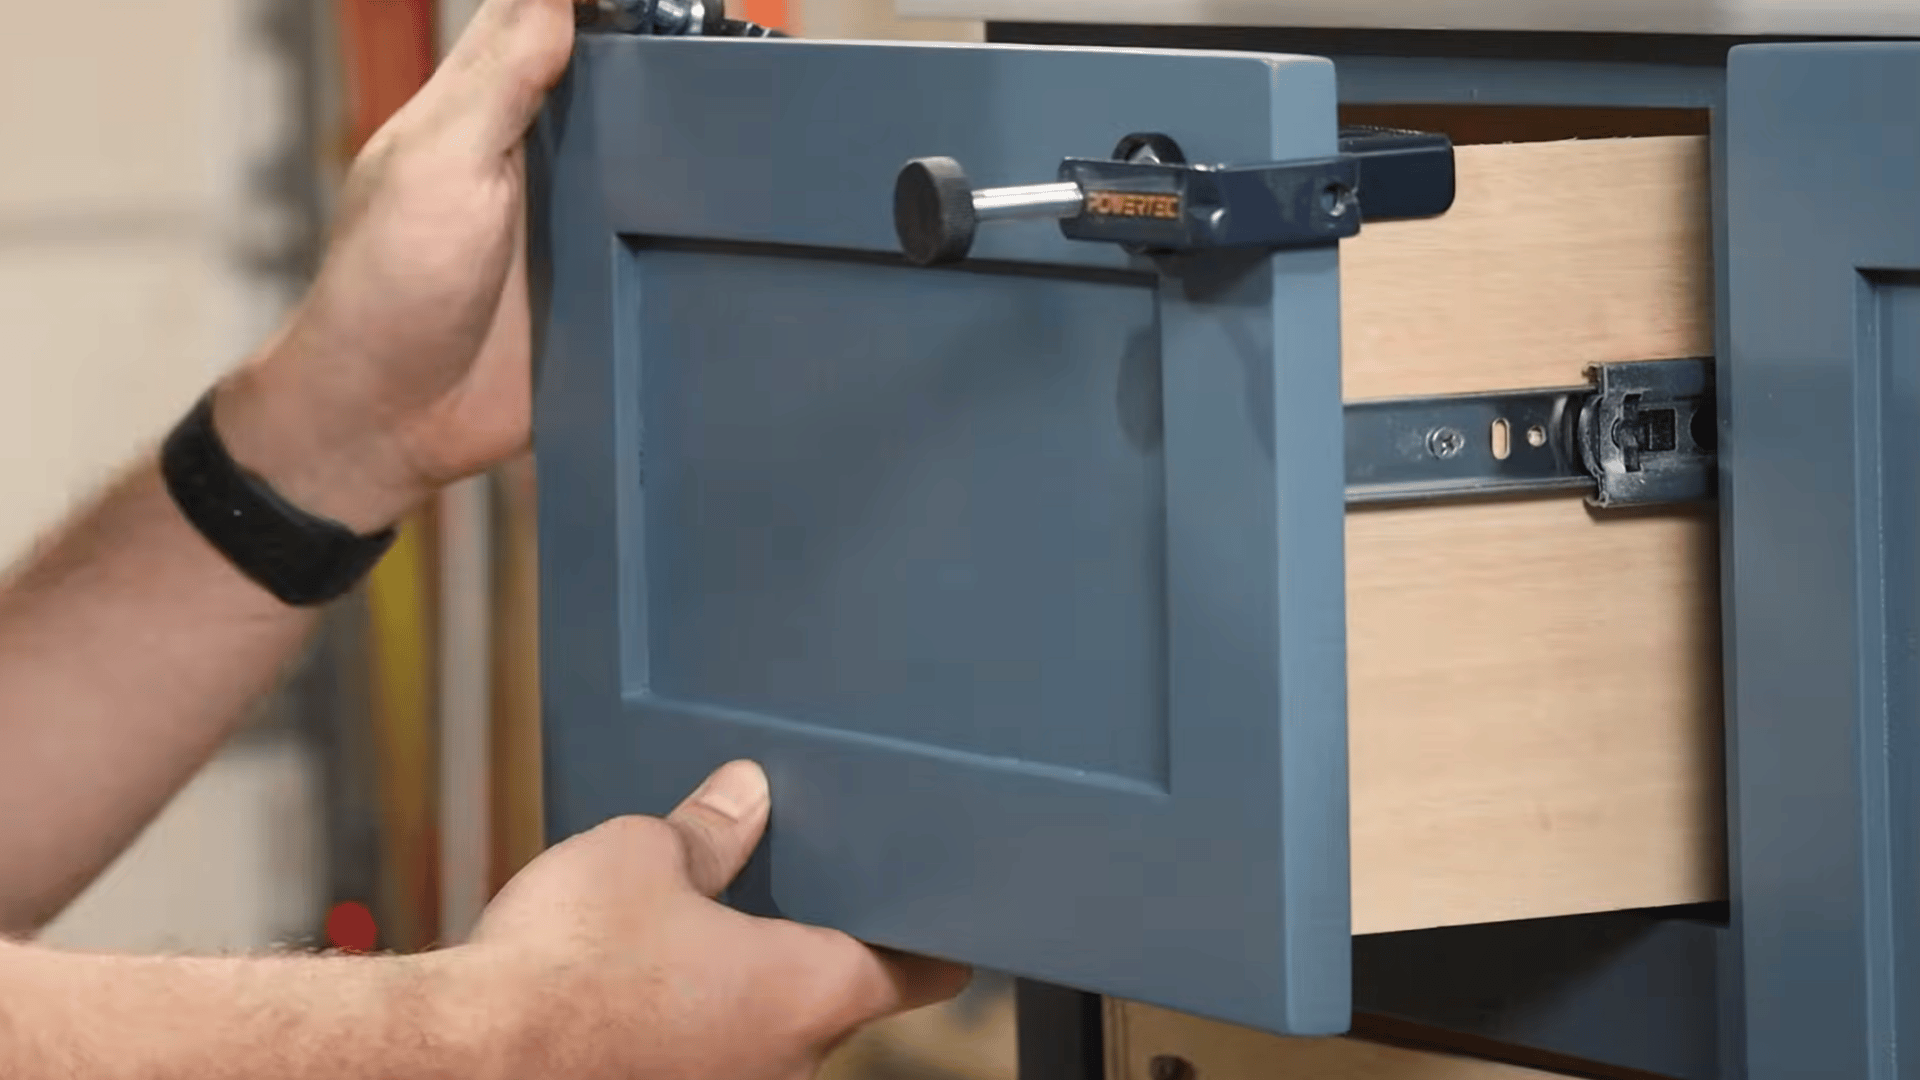
Attach drawer fronts using face-mounting brackets, working from bottom to top and adjusting gaps evenly on all sides before locking each one in place. Keep gaps around 1/8″ so they look intentional without binding when drawers extend fully.
This step gets the most visual attention, so take extra care here. Finish by using a drill template to place hardware consistently across every door and drawer front, then drive the screws to complete the look.
Step 7: Install the Vanity
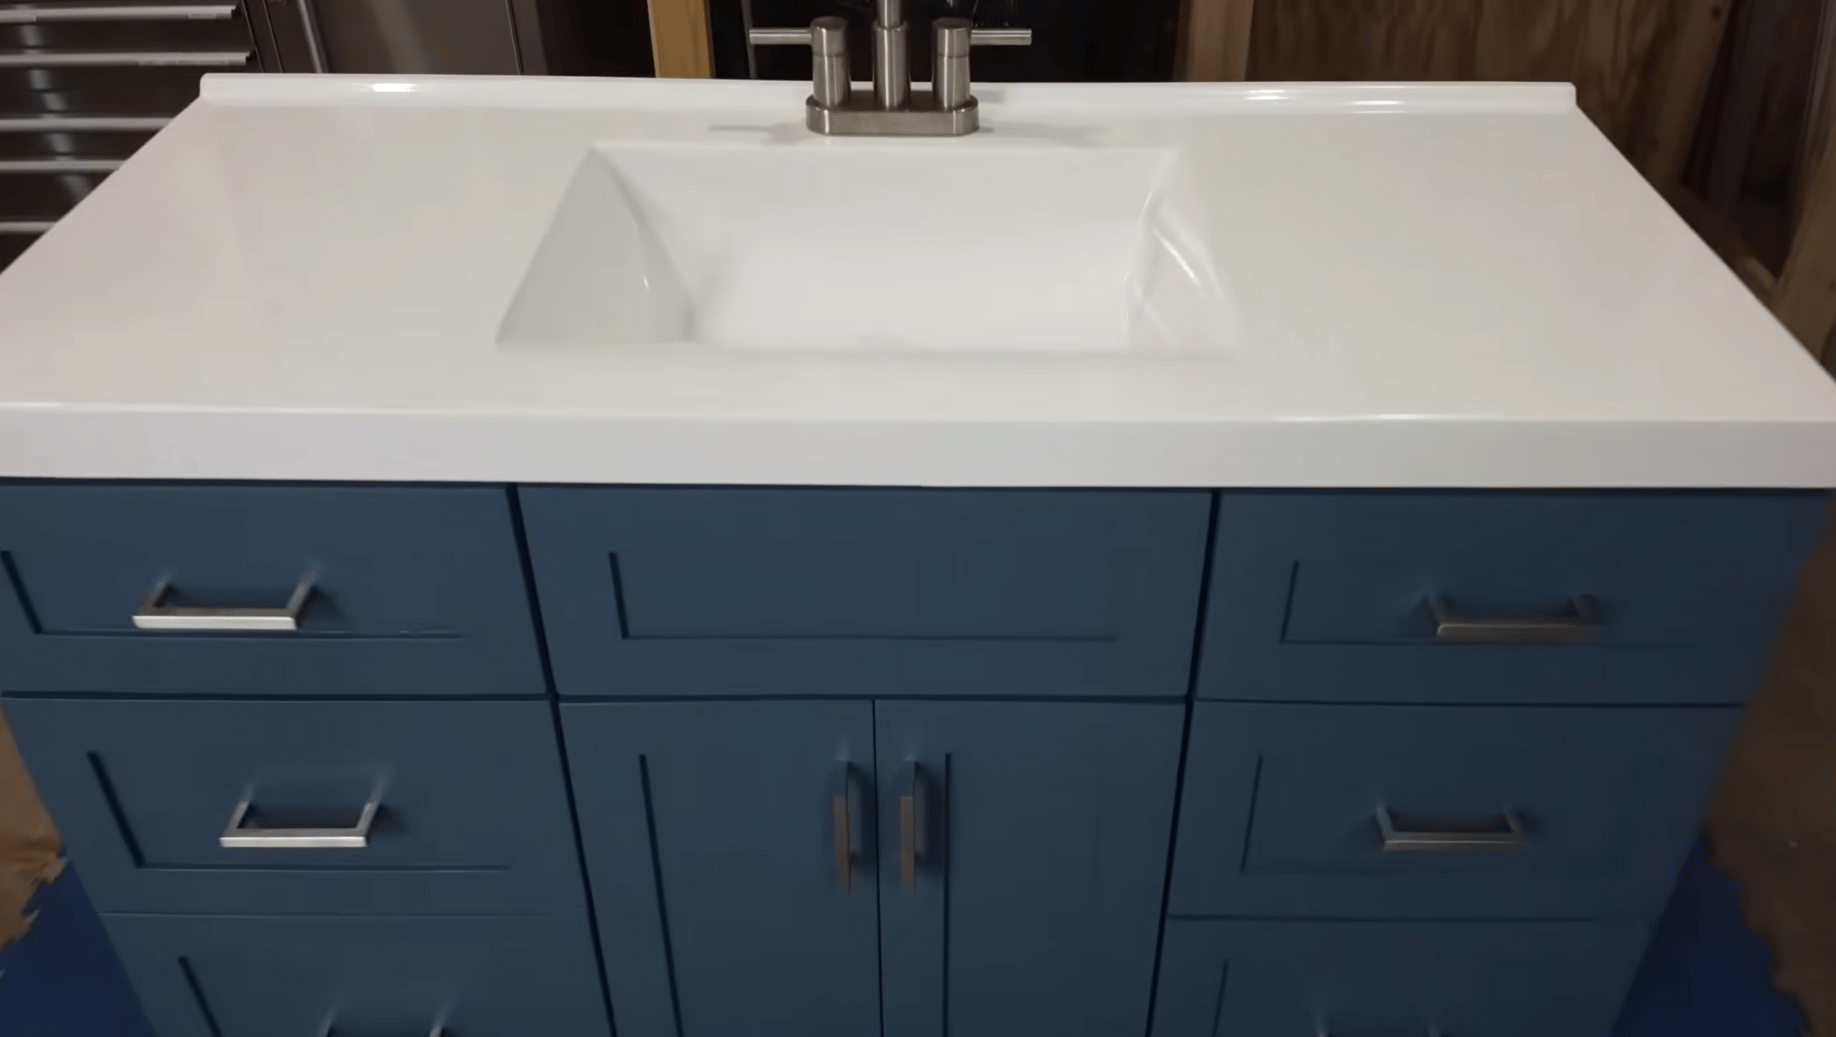
Locate wall studs and drill pilot holes through the cabinet back on the workbench before moving it into position, since drilling on-site in a tight bathroom is difficult.
Level the cabinet front-to-back and side-to-side, shimming as needed, then secure it to the studs with snug screws. Dry-fit the countertop, confirm the sink cutout aligns with the drain, then set it with silicone and wait 24 hours before connecting the drain, supply lines, and testing under water pressure.
For an in-depth walkthrough of the whole process, check out the complete video tutorial below:
Common Mistakes to Avoid
- Skipping the plumbing measurements. Design and cut everything first, then find the drain sticks out further than the shelf allows. Measure drain height, supply line height, and protrusion before finalizing any dimension.
- Letting the carcass be out of square. A quarter-inch of error here becomes uneven door gaps and binding slides later. Check your diagonals before the glue sets; fix it now or fight it for the rest of the build.
- Using MDF anywhere in the carcass. Fine for a sealed, painted door panel. Bad news for structural pieces that’ll swell with bathroom humidity. Plywood for the box, MDF only for panels.
- Gluing the shaker door panel in place. It’s supposed to float. Glue it along with the corners and humidity swings will crack or bow the frame over time.
- Using standard primer instead of moisture-blocking primer. Looks fine for a year, then peels. This is the one corner that always shows up as a redo, not a shortcut.
- Rushing the countertop or wall install. Connecting supply lines before silicone cures can shift the countertop and open a gap. Over-tightening wall screws can pull the cabinet out of level. Both need patience, not force.
DIY Bathroom Vanity Ideas
Once you’ve got the carcass-and-frame method down, the style options open up. Here are ten directions I’ve seen work well, from floating minimalist builds to reclaimed furniture conversions.
1. Floating Vanity with Hidden Wall Cleats
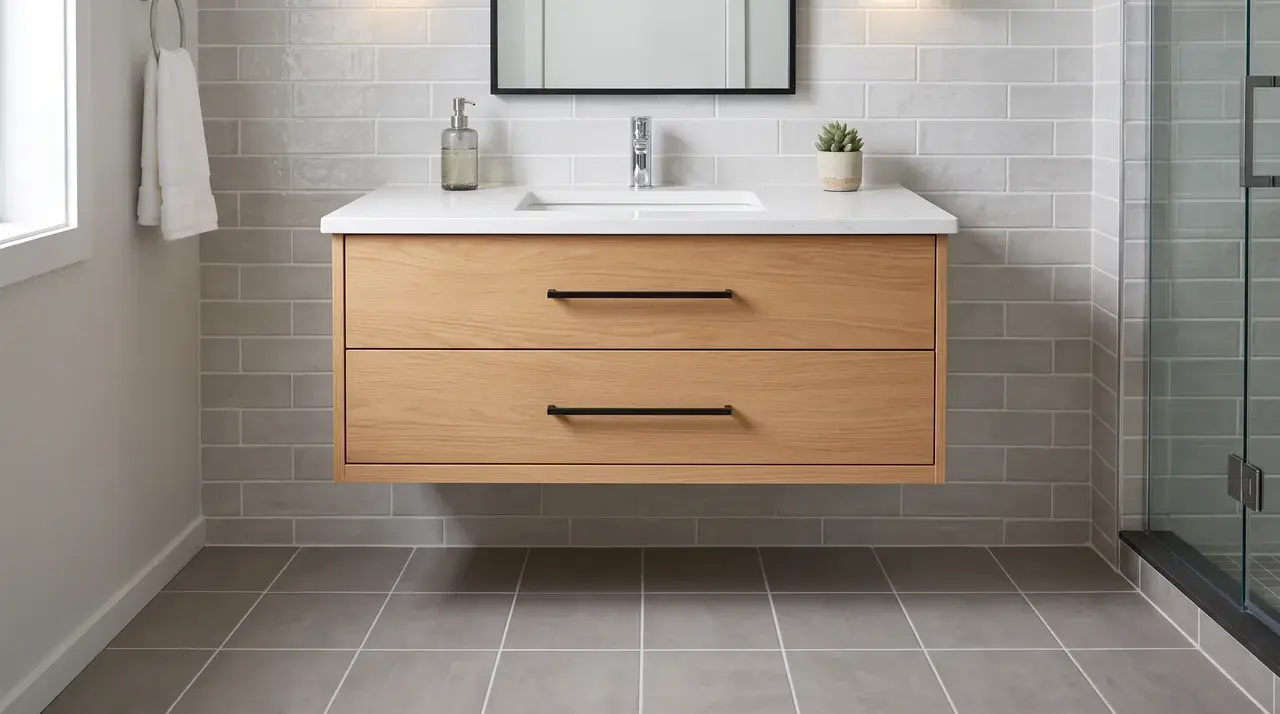
A wall-mounted cabinet hangs above the floor with a clear gap beneath it, held by a French cleat rather than screws through the back panel.
No legs or toe kick interrupt the base, so the floor stays fully visible underneath. This construction method suits small bathrooms where exposed floor space helps the room read larger and less crowded.
2. Reclaimed Dresser Conversion
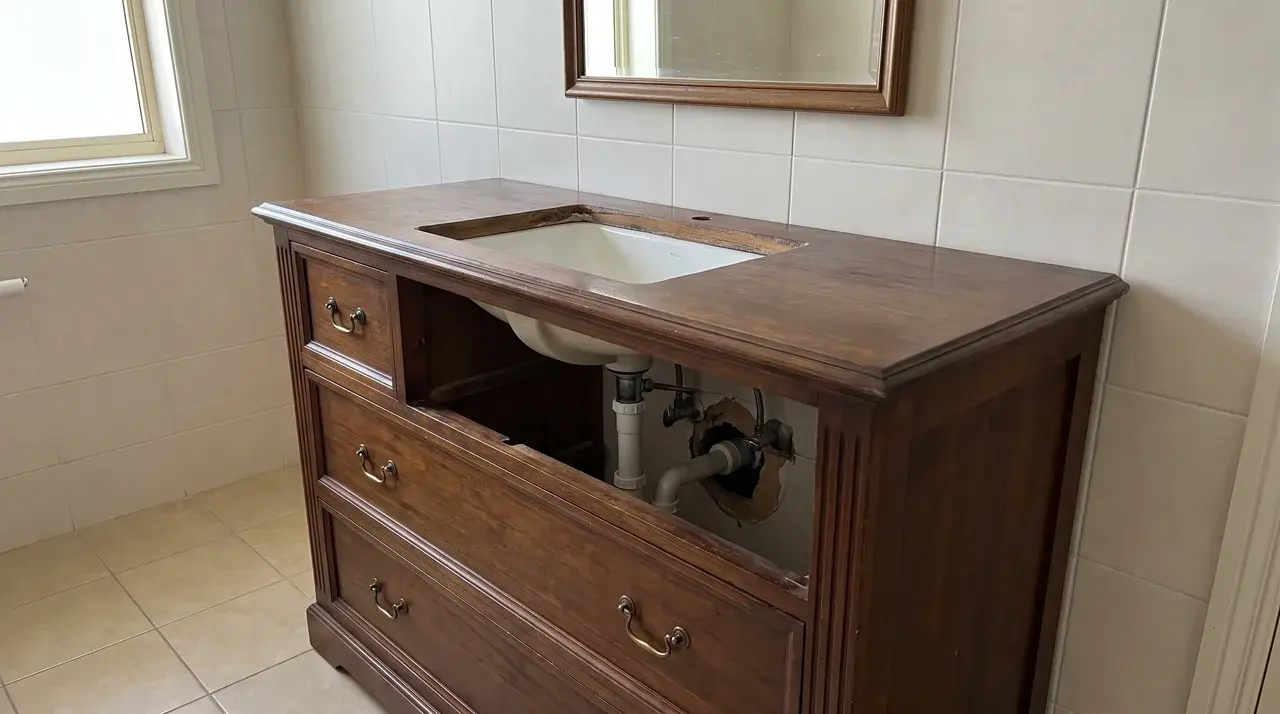
A solid wood dresser has been repurposed into a vanity, with sink and drain openings cut directly into the top surface and back panel.
Upper drawers are rebuilt with false fronts to conceal the plumbing while preserving the dresser’s original silhouette. Starting with existing furniture, rather than building a carcass from scratch, yields a furniture-grade result with far less joinery work.
3. Open-Shelf Vessel Sink Stand
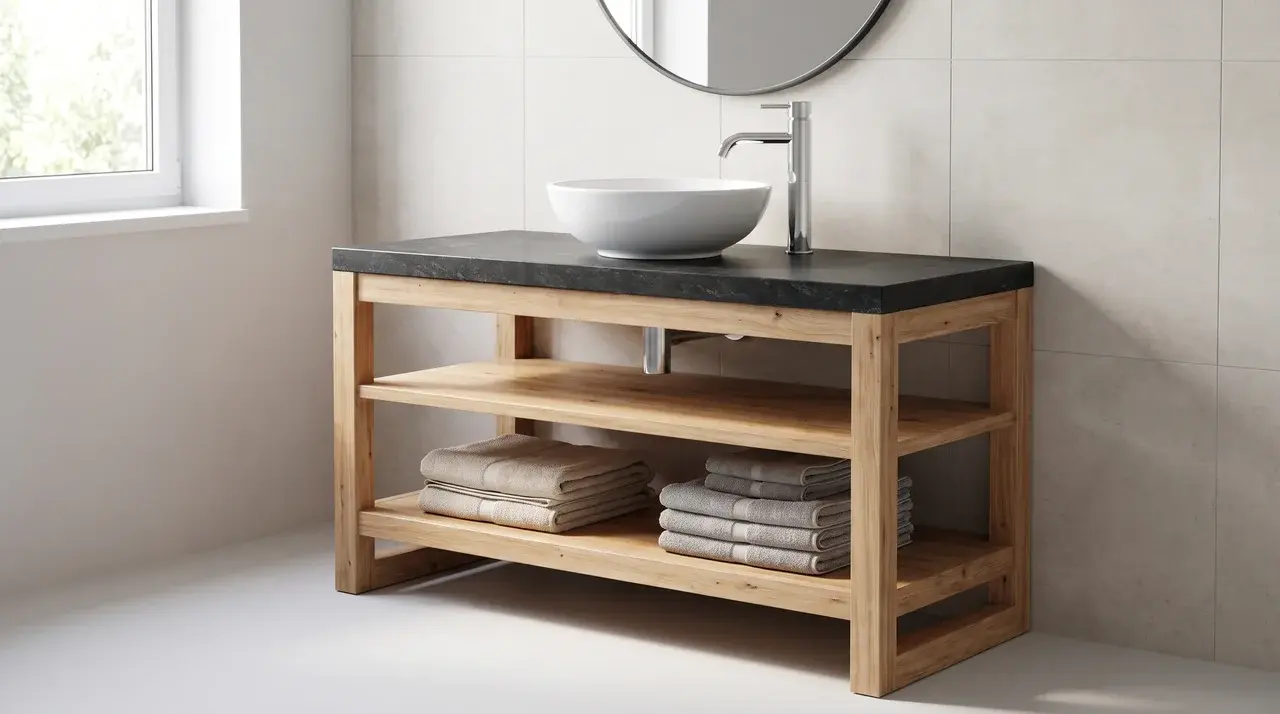
A table-height wood frame stands open beneath a countertop, with shelves in place of drawers or enclosed cabinet doors. A vessel sink sits directly on top of the surface rather than being dropped in.
Without doors or drawer boxes to build, the construction reduces to leg-and-shelf joinery, making it the least carpentry-intensive option in the group.
4. Industrial Pipe-Leg Vanity
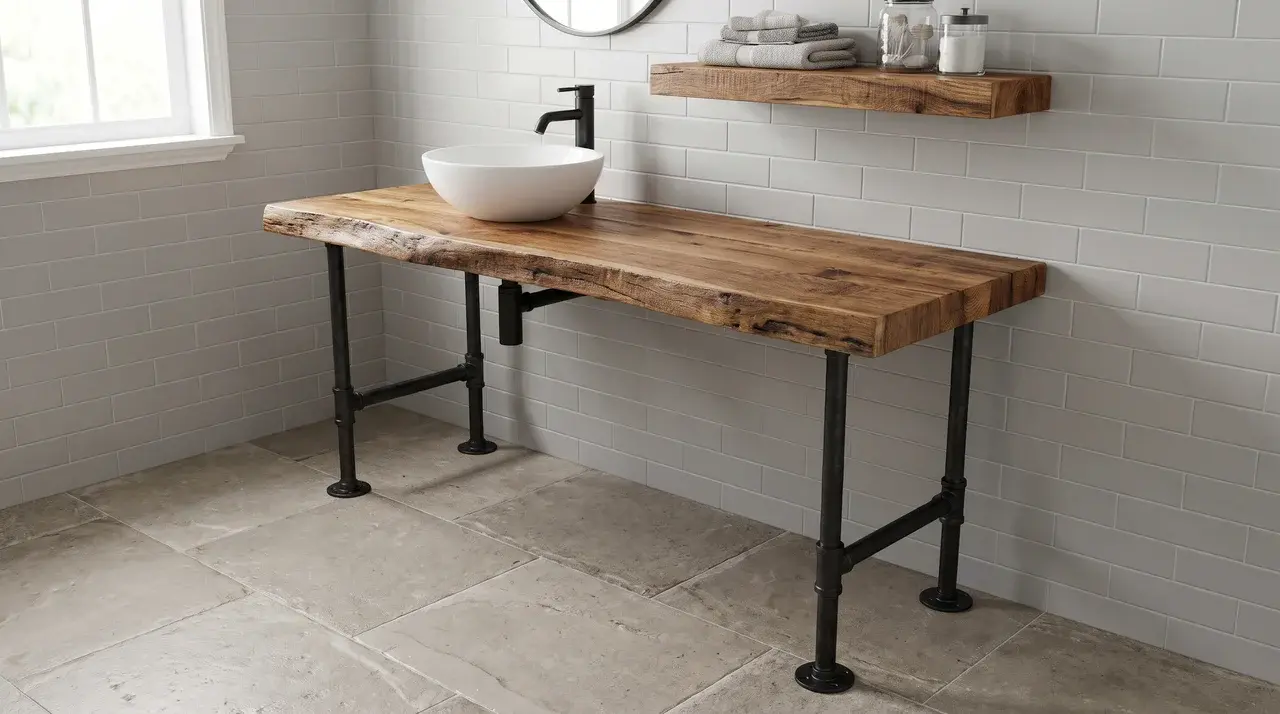
A wood or concrete countertop rests on black iron pipe legs rather than a solid plywood carcass, leaving the underside exposed.
Storage is limited to a single floating shelf or a compact wall-mounted cabinet nearby. The exposed hardware and raw material pairing fit loft-style bathrooms or spaces built around an industrial, unfinished aesthetic.
5. Double Vanity with a Center Tower
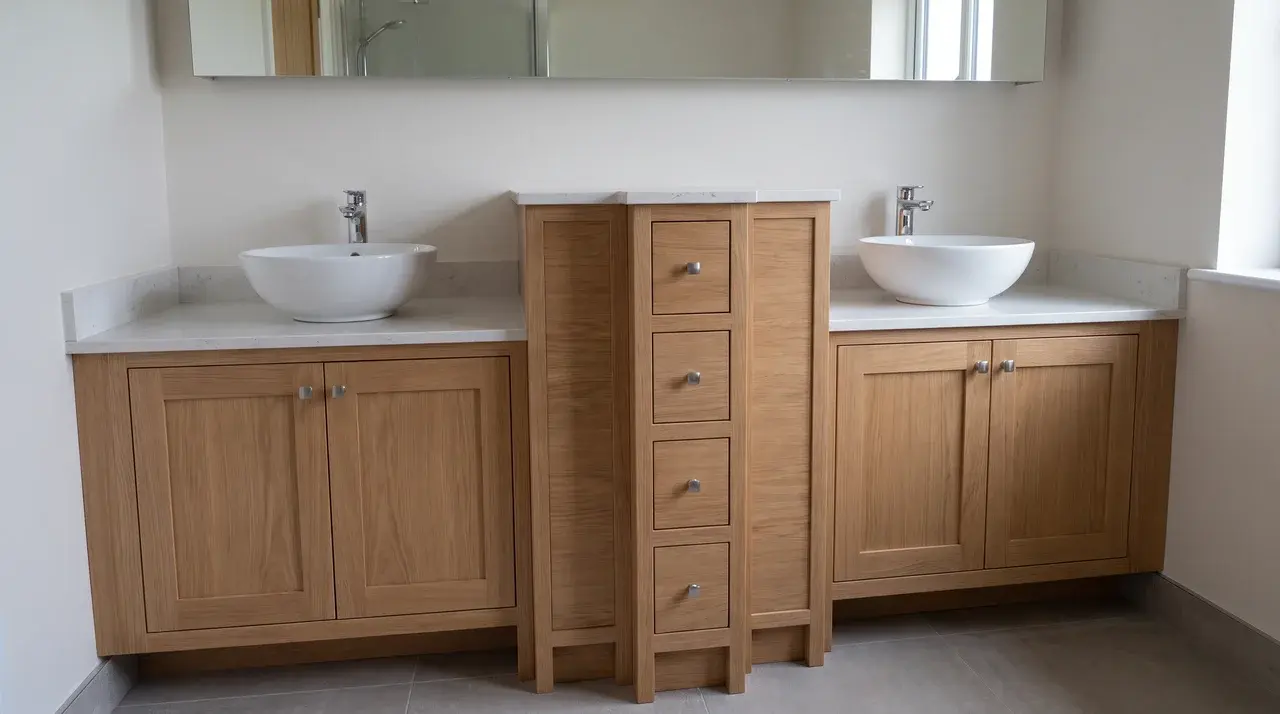
Two separate sink cabinets flank a narrower drawer tower positioned between them, creating a three-piece configuration.
Each sink cabinet keeps its own simple door front, while the center tower handles towel and toiletry storage. Running plumbing independently to each side simplifies installation compared to a single continuous double-sink cabinet run.
6. Corner Vanity for a Tight Layout
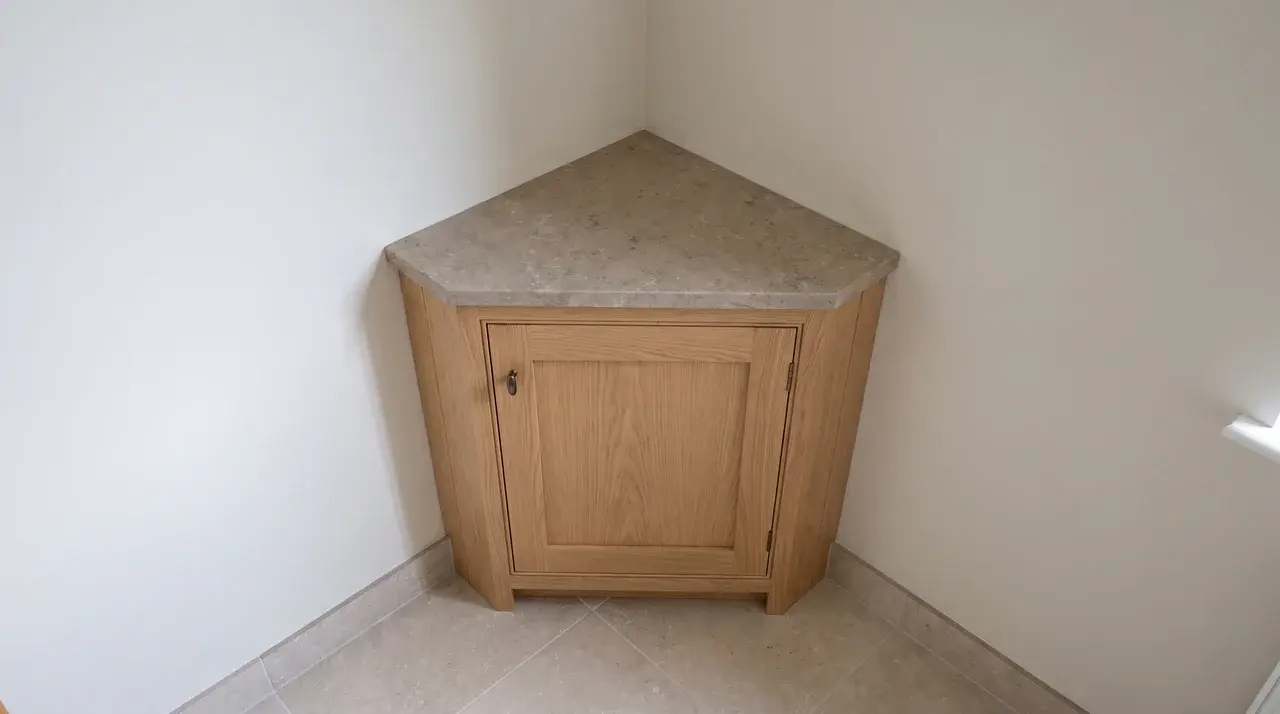
A triangular cabinet carcass fits into a bathroom corner, with its face frame mitered to match the angle of the walls. This shape solves the problem of a room too narrow for a standard straight cabinet run.
Because the angle varies by space, this build typically requires custom dimensions rather than stock measurements.
7. Beadboard Shaker Vanity
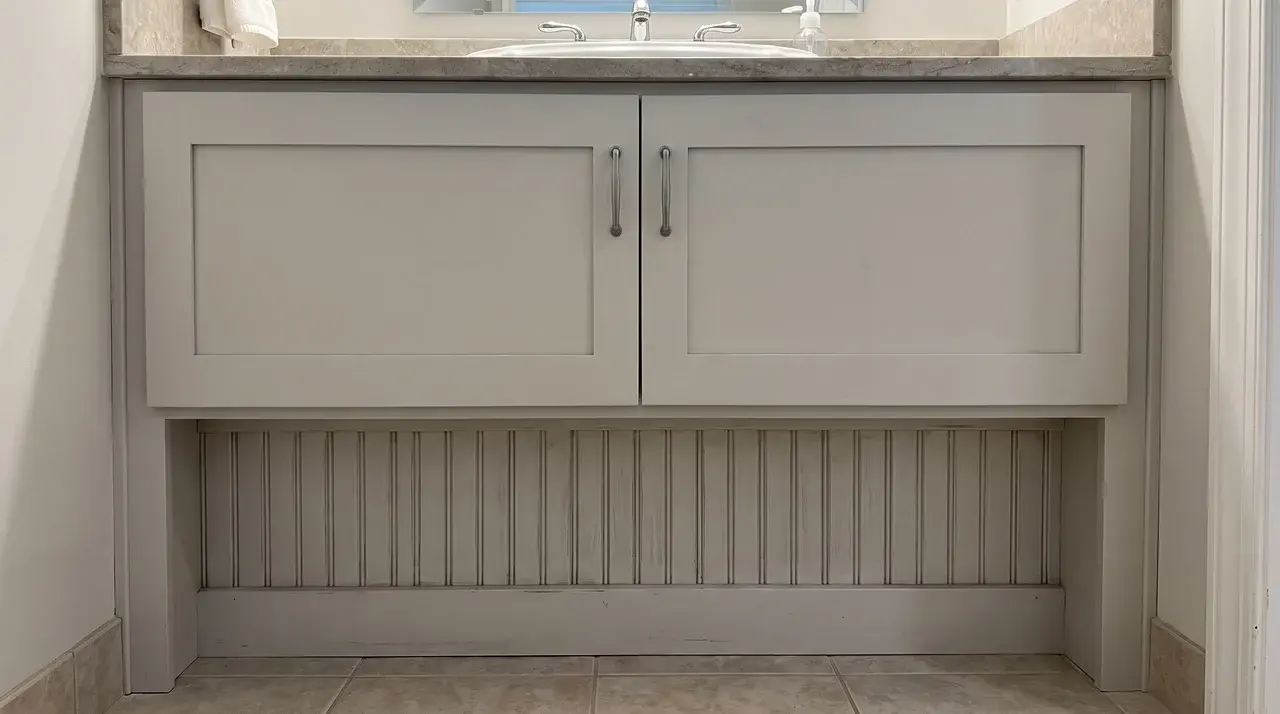
The cabinet follows standard shaker door construction, but the sides and toe kick feature a beadboard panel insert instead of flat plywood.
This single detail shifts the overall look toward a cottage or farmhouse style without changing the underlying cabinet structure. Adding the beadboard groove pattern requires only one extra pass with the router during construction.
8. Black Vanity with Brass or Unlacquered Hardware
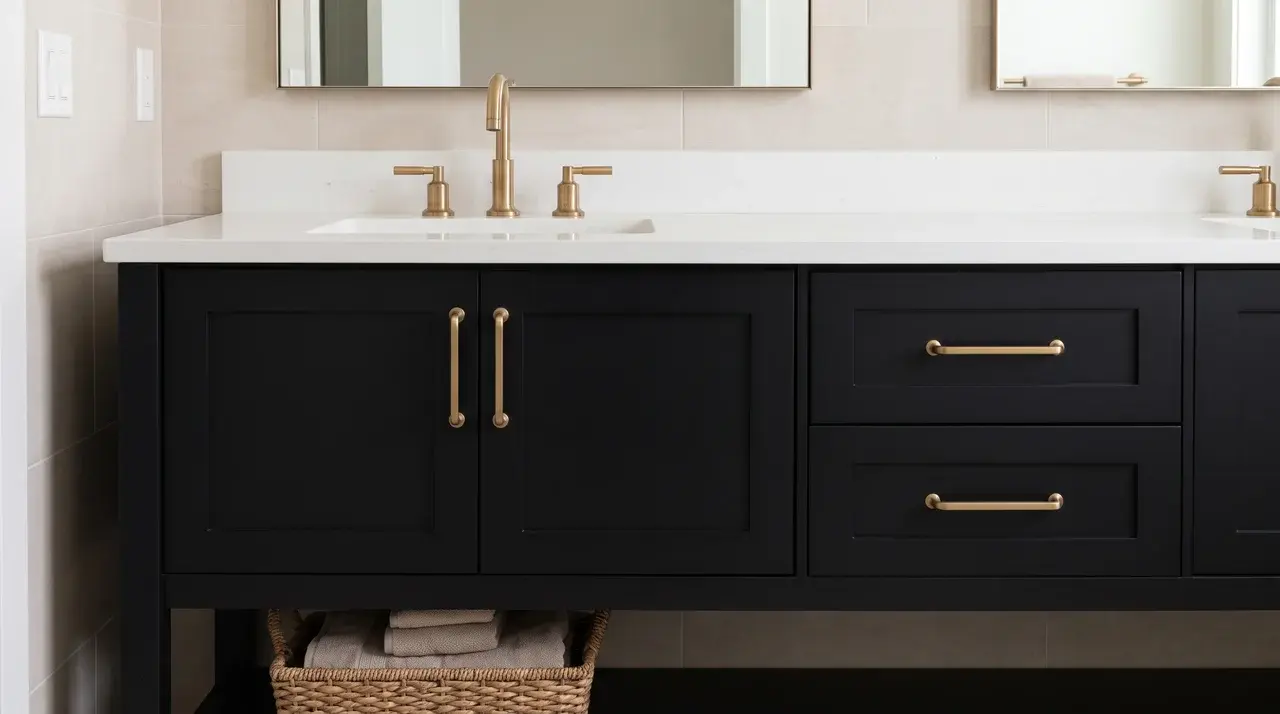
Structurally identical to a standard shaker vanity, this version is finished in satin black paint and paired with unlacquered brass pulls and a matching brass faucet.
The build itself doesn’t change; the transformation comes entirely from finish choices. Paint sheen and hardware finish are often the details that separate a polished result from a homemade one.
9. Wall-Mounted Ladder Vanity for Small Spaces
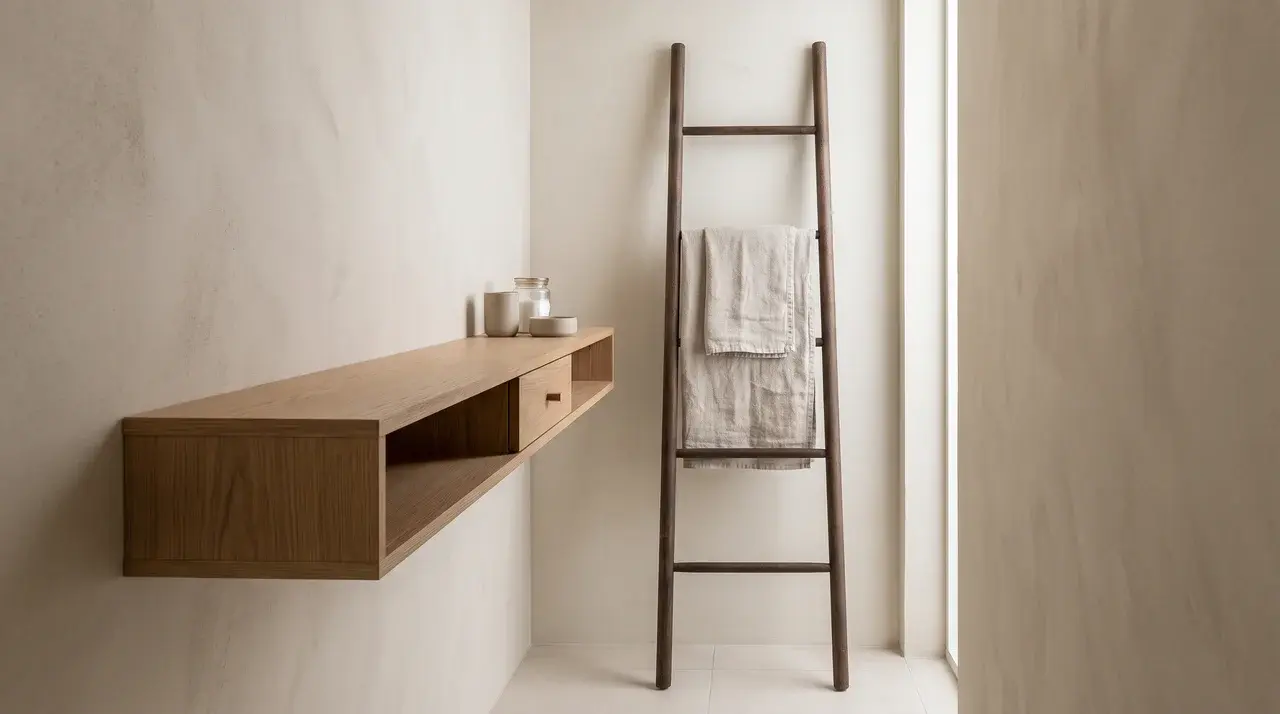
A slim wall-mounted shelf holds a small drawer, positioned beside a freestanding towel ladder rather than built into the cabinet itself.
Skipping the full cabinet box entirely reduces the footprint to fit narrow powder rooms. This layout trades storage capacity for space savings, prioritizing fit over function in tight quarters.
10. Mixed-Material Vanity with a Tile Kick or Face Panel
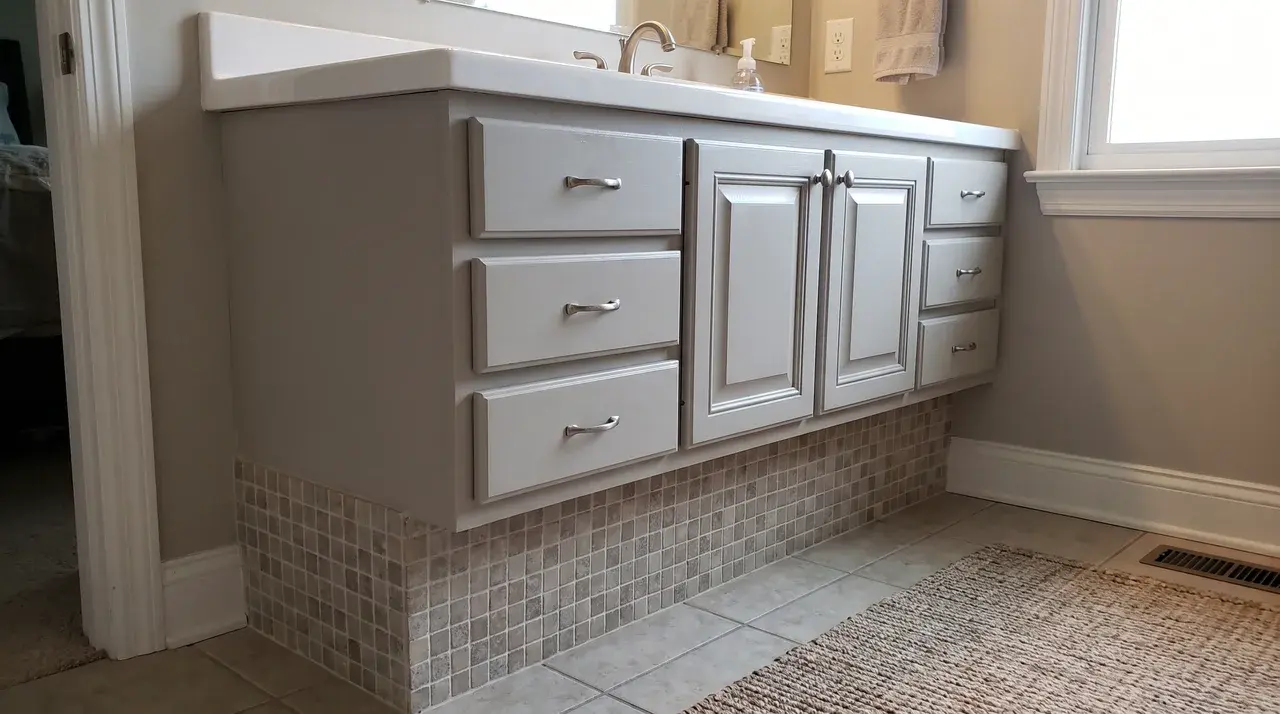
The cabinet keeps its standard carcass and drawer layout, but the toe kick or a center panel is finished in tile instead of painted wood.
Painted drawers and doors remain above the tiled section, creating a mixed-material look. This small substitution visually connects the vanity to a tiled shower elsewhere in the room.
Common DIY Bathroom Vanity Mistakes to Avoid
Small construction errors can affect the fit, finish, and durability of a vanity. Avoid these common mistakes before cutting, assembling, or installing the cabinet.
- Ignoring plumbing measurements: Measure the drain height, supply-line position, and pipe projection before finalizing the cabinet dimensions. Otherwise, drawers, shelves, or internal dividers may block the plumbing.
- Building an out-of-square carcass: Check both diagonal measurements before the glue dries. Even a small alignment error can cause uneven door gaps, sticking drawers, and poorly fitting countertops.
- Using MDF for structural sections: MDF can swell when exposed to bathroom moisture. Use cabinet-grade plywood for the carcass and reserve properly sealed MDF for decorative or floating door panels.
- Gluing the center door panel: Shaker door panels need room to expand and contract with humidity. Glue only the rail-and-stile joints and allow the center panel to float.
- Choosing the wrong primer: Standard wall primer may peel or allow moisture damage. Apply a moisture-blocking shellac- or oil-based primer before adding the final bathroom-safe paint.
- Rushing the sanding process: Unfilled nail holes, rough edges, and visible seams become more noticeable after painting. Fill imperfections and sand progressively to create a smooth, professional finish.
- Installing drawer slides without spacers: Inconsistent slide placement can make drawers sit unevenly or bind. Use matching spacers and work from the bottom upward to maintain equal gaps.
- Mounting hardware without a template: Measuring each handle separately increases the risk of uneven placement. A drilling template keeps knobs and pulls aligned across every door and drawer.
- Skipping wall studs during installation: Screwing only into drywall may not support the vanity, countertop, and sink. Locate the studs and secure the cabinet with suitable structural screws.
- Connecting plumbing before silicone cures: Moving or loading the countertop too soon can break the seal. Allow the silicone to cure fully before attaching the drain and supply lines.
Careful measuring, moisture-resistant materials, square assembly, and patient installation prevent most costly problems and help the completed vanity look professionally built.
Summing Up
Building a vanity becomes much easier when you plan around the room instead of forcing a standard cabinet into the space.
Accurate plumbing measurements, a square plywood carcass, properly fitted drawers and doors, and moisture-resistant finishes all help the project last.
A DIY bathroom vanity also lets you control the storage, style, hardware, and overall cost. I recommend taking extra time during measuring, sanding, and installation because small errors at these stages can affect the final fit.
Use the steps and ideas above to choose a design that matches your skill level and bathroom layout. Start planning your build, gather the right materials, and share how your finished vanity turns out.
Frequently Asked Questions
Is it cheaper to build your own bathroom vanity?
Yes, in most cases. A DIY vanity built from plywood and poplar runs $150–$400 in materials depending on size versus $400–$1,200 for a comparable store-bought unit. The savings come from eliminating labor markup. Costs go up if you add stone countertops, specialty hardware, or pre-made door fronts.
How hard is it to build a bathroom vanity for a beginner?
The carcass and face frame are beginner-friendly with a pocket hole jig and a table saw. The difficulty jump comes with doors, specifically fitting them flush and square. Ordering pre-made fronts removes that challenge entirely and still produces a fully custom result. Plan for a full weekend minimum, more if you’re building and finishing doors from scratch.
What wood is best for a DIY bathroom vanity?
Cabinet-grade plywood, birch or maple veneer, for the carcass. It’s stable, holds screws well, and handles bathroom humidity far better than MDF, which swells when it absorbs moisture. Poplar for the face frame and door frames: affordable, machines cleanly, and takes paint without grain telegraphing through. Don’t use MDF for any structural carcass parts in a bathroom.
Do I need to hire a plumber to install a DIY vanity?
Not if you’re swapping an existing vanity and the supply lines and drain are already roughed in at the right height. Connecting the drain and supply lines is a standard DIY task with adjustable wrenches and plumber’s tape. You need a plumber if lines are being moved, the drain needs to be relocated, or your cabinet height doesn’t match the existing rough-in.