
I’ve tried a few ways to feed chickens without wasting feed or spending too much money. Store-bought feeders can be expensive, and some don’t last very long or fit every setup.
That’s why I started using a DIY chicken feeder at home. It’s simple to make, budget-friendly, and works well for most backyard flocks.
In this guide, I’ll walk you through each step using basic tools and easy-to-find materials.
You’ll learn how to build a feeder that keeps feed clean, dry, and easy for chickens to reach.
If you want a simple setup that saves money, reduces waste, and makes daily feeding easier, this guide will help you get started with confidence.
Why a DIY Chicken Feeder Is a Smart Choice?
A DIY chicken feeder is a smart choice because it helps you save money while giving you full control over how your chickens are fed.
Store-bought feeders can be expensive and may not always fit your flock’s needs.
When you make your own, you can choose the size, design, and materials that work best for your setup.
Another big benefit is reducing feed waste. Many DIY designs are designed to keep chickens from scratching or spilling food, helping you use feed more efficiently.
You can also build a feeder that keeps food dry and clean, protecting it from rain and pests.
Plus, creating your own feeder is simple and fun. It’s a practical project that improves your chicken care routine and makes daily feeding easier.
Materials Needed to Build a DIY Chicken Feeder
Below is a simple list of items you’ll need to build a strong and easy-to-use diy chicken feeder at home.
- Plastic bucket or PVC pipe (with lid)
- PVC elbows or feeder ports
- Screws or bolts
- Strong adhesive or sealant
- Wooden base (optional for stability)
- Wire or rope (for hanging feeder)
- Drill machine
- Hole saw or cutting tool
- Screwdriver
- Measuring tape
- Marker for marking cuts
How to Make a DIY Chicken Feeder at Home As a Beginner?
If you are just starting, making a simple chicken feeder at home is easy and saves money. I always begin by collecting basic items that are easy to find today.
Step 1: Gather Your Materials
Start by collecting everything you need to build your diy chicken feeder.
You’ll need a sturdy 5-gallon bucket with a lid and a feeder kit that includes ports, gaskets, and a hole saw.
Make sure the bucket is clean and strong enough to hold feed. Having all materials ready before you begin will save time and make the process smoother.
This simple setup is beginner-friendly and ensures your feeder will be durable and easy to assemble.
Step 2: Measure and Mark the Bucket
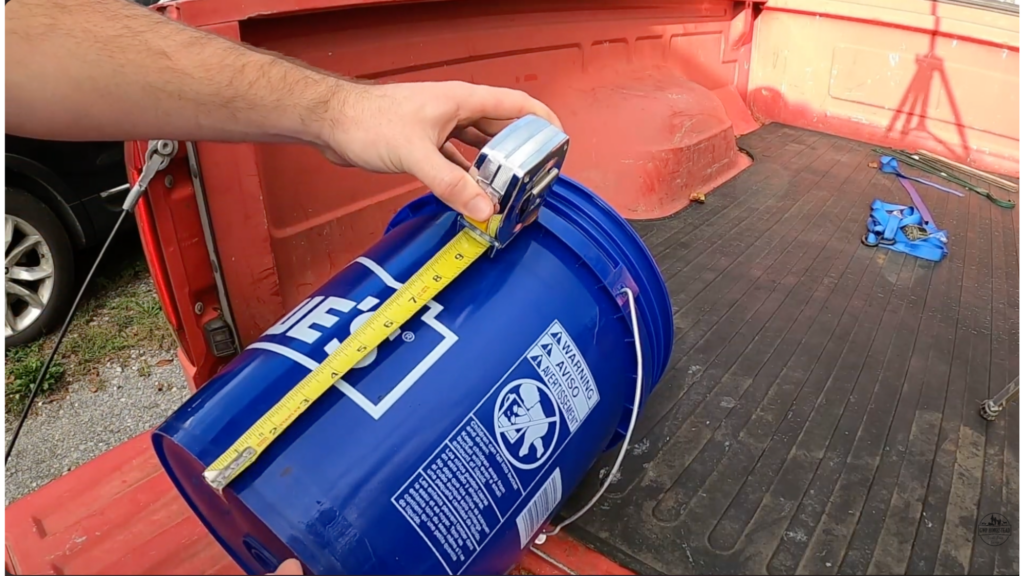
Take your bucket and measure about 3 inches up from the bottom. This height allows chickens to access feed easily while reducing waste.
Use a measuring tape and marker to mark three evenly spaced spots around the bucket.
Proper spacing ensures multiple chickens can eat at the same time without crowding.
Double-check your markings before moving forward, as accurate placement will make drilling easier and help your diy chicken feeder work more efficiently.
Step 3: Drill the Holes
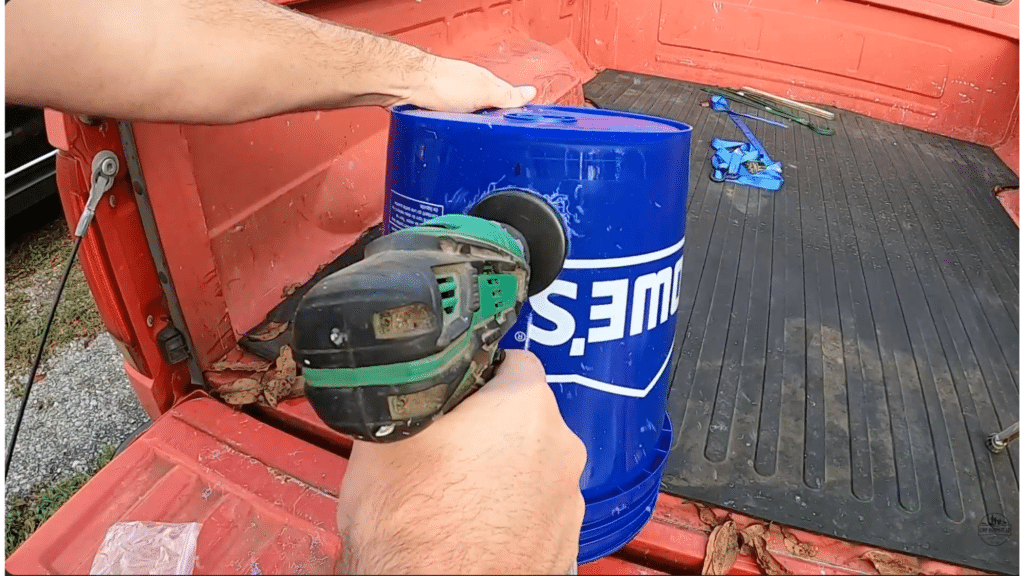
Use a drill with a hole saw attachment to cut holes where you marked on the bucket.
Drill slowly and carefully to keep the holes clean and even.
Once done, check the edges for any rough plastic or “fuzzies.” Smooth them out using a pocket knife or sandpaper to prevent injury and ensure a snug fit for the feeder ports.
Clean holes will help your diy chicken feeder assemble properly and work more efficiently.
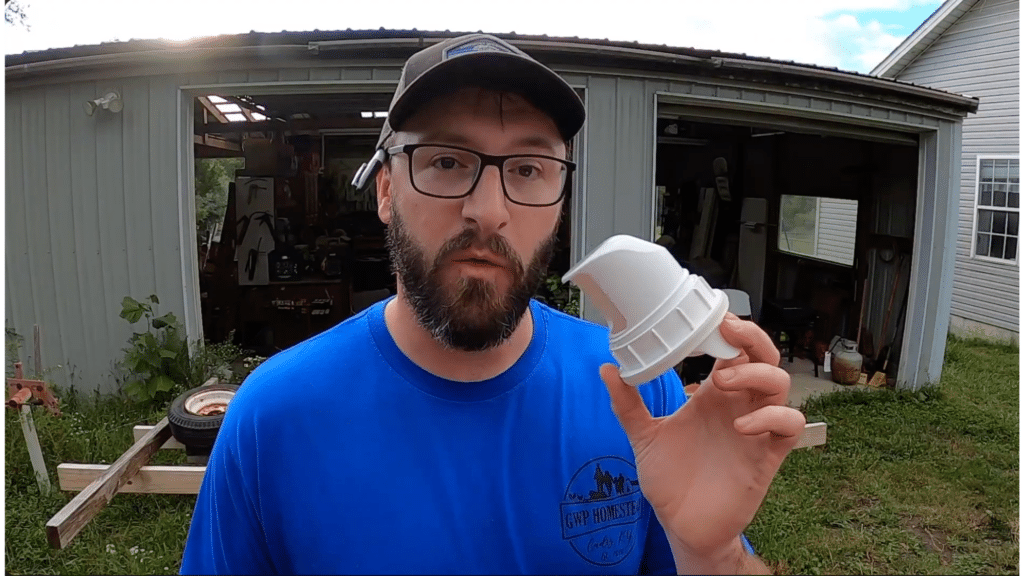
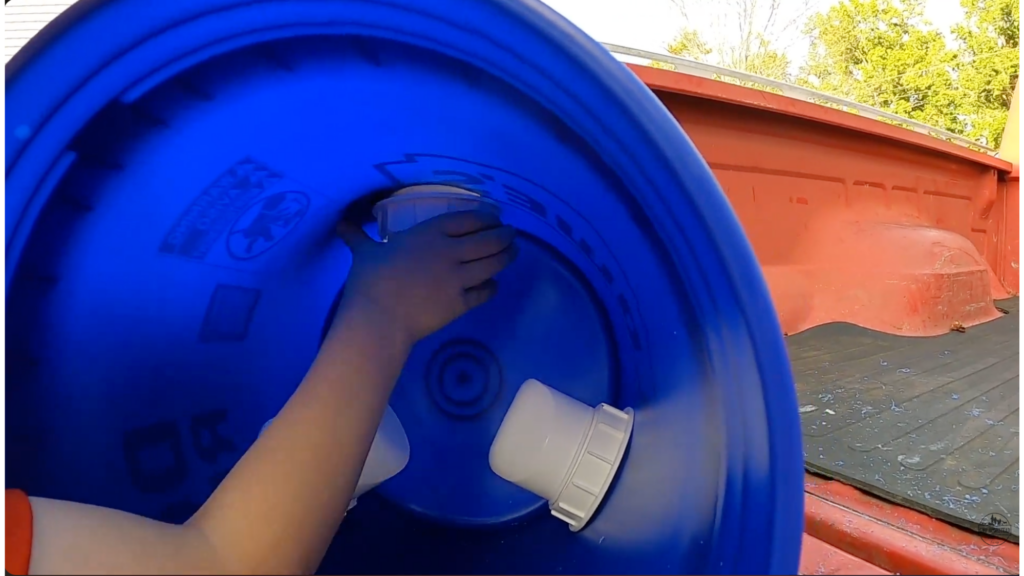
Step 4: Attach the Feeder Ports
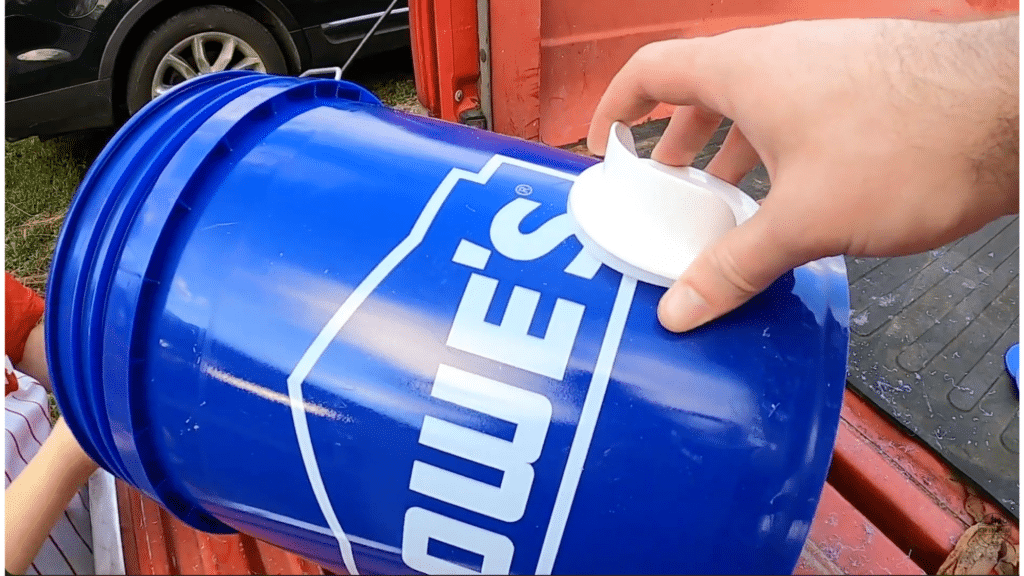
Remove each feeder port by unscrewing the parts. Place the gasket on the outside of the bucket to create a tight seal.
Insert the feeder port through the hole from the outside, then secure it from the inside by tightening the backing piece.
Make sure each port is firmly attached and properly aligned.
Repeat this process for all holes. A secure fit will prevent leaks and keep your diy chicken feeder strong and long-lasting.
Step 5: Assemble and Secure
Once all feeder ports are attached, double-check that each part is securely fastened. Twist and lock each piece into place so nothing feels loose.
Gently press around the fittings to ensure they are sealed properly and won’t shift during use.
This step is important to keep the feeder stable and prevent feed from leaking. A well-secured setup will make your diy chicken feeder more durable and ready for daily use.
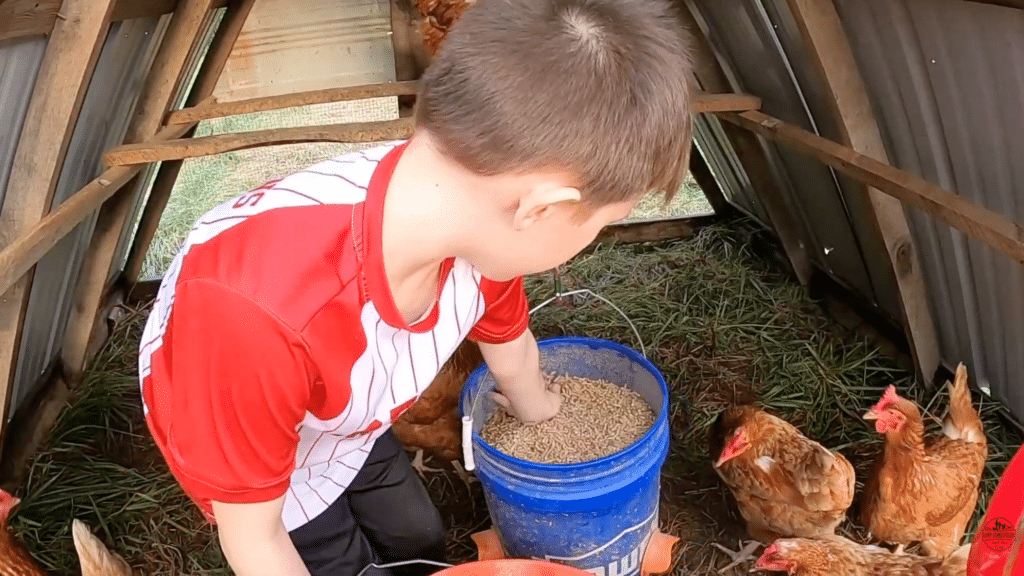
Step 6: Fill and Test
Now fill your bucket with chicken feed and securely close the lid.
Place the feeder at the correct height, around your chickens’ chest level, so that they can eat comfortably. Let your chickens try it out and watch how they use it.
Check that the feed flows properly and that there’s no spilling or blockage.
Testing helps you spot small issues early and ensures your diy chicken feeder works smoothly before regular use.
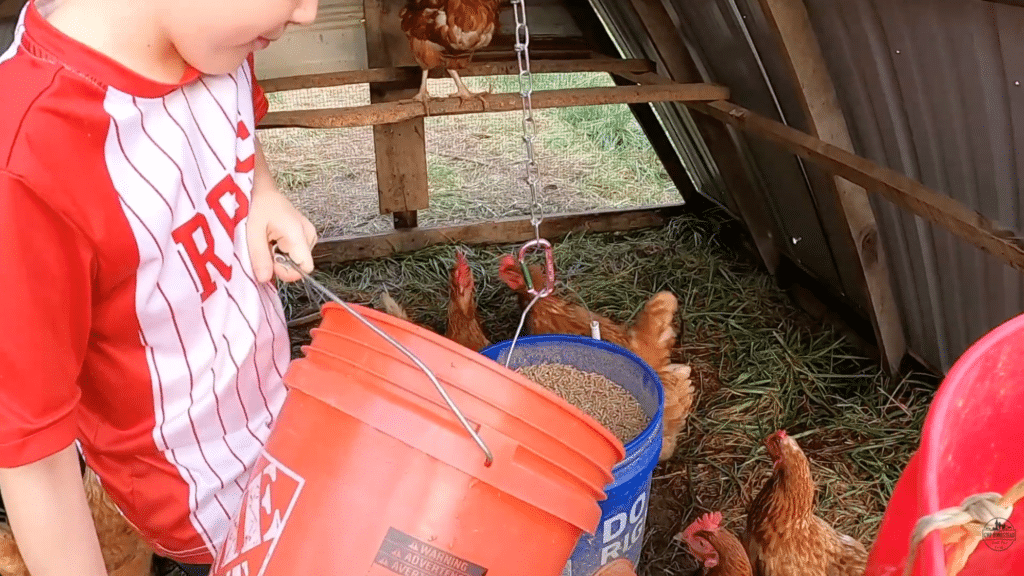
Step 7: Position Properly
Place your diy chicken feeder in a dry, shaded area to protect the feed from rain and moisture.
Make sure it sits on a stable surface or is securely hung to prevent tipping.
Keep it at chest height so chickens can eat comfortably without wasting feed. Avoid muddy or crowded spots in the coop or run.
Proper placement helps keep the feed clean, reduces waste, and ensures your chickens can access it easily every day.
This tutorial is based on a helpful video by GWP Homestead. You can check out the original video on their YouTube channel here or watch it below.
Benefits of Using a DIY Chicken Feeder at Home
Building your own diy chicken feeder comes with practical advantages that make chicken care easier and more cost-effective.
| Benefit | Description |
| Cost Saving | A diy chicken feeder is much cheaper than store-bought options, helping you save money. |
| Less Feed Waste | Smart designs prevent chickens from spilling or scratching out feed. |
| Custom Design | You can build the feeder to fit your flock size and space. |
| Easy to Maintain | Simple designs make cleaning and refilling quick and easy. |
| Keeps Feed Clean | Protects food from dirt, rain, and pests. |
| Durable Build | You can choose strong materials for long-lasting use. |
| Fun Project | It’s an easy and rewarding project for beginners and hobby farmers. |
Tips to Know While Building the Perfect DIY Chicken Feeder
Building a feeder at home needs a bit of planning to keep it safe and easy to use. I focus on simple steps that help save feed and keep chickens healthy.
- Choose the right material: Use strong items like plastic buckets or PVC pipes so the feeder lasts longer and does not break easily.
- Keep it weather-safe: Make sure rain cannot enter the feeder, or the feed may get wet and spoil quickly.
- Set the correct height: Place the feeder at chicken chest level so they can eat comfortably without making a mess.
- Avoid feed waste: Add a lip or cover to stop chickens from scratching out food onto the ground.
- Ensure easy refilling: Design the feeder so you can refill it fast without taking the whole setup apart.
- Keep it clean: Pick a design that allows quick cleaning to prevent dirt buildup and keep chickens safe.
- Check feeder size: Make sure the feeder holds enough food based on how many chickens you have.
How to Keep Feed Fresh and Dry?
To keep chicken feed fresh and dry, always use a feeder with a tight lid to block rain and moisture. Place the feeder in a covered or shaded area so water cannot get inside during bad weather.
Avoid placing it directly on the ground, as damp soil can make the feed wet.
Use airtight containers for storing extra feed to protect it from humidity and pests.
Check the feeder daily and remove any wet or spoiled feed right away. Clean the feeder regularly to prevent mold and dirt buildup.
Do not overfill the feeder, as old feed can sit too long and lose its quality.
Keep the surrounding area dry and clean so your chickens always get safe, fresh, and healthy food every day without any risk.
Conclusion
Building your own chicken feeder may seem like a small project, but it can make a big difference in your daily routine.
With the right setup, you can save money, reduce feed waste, and keep your chickens happier and healthier. The best part is that you can adjust the design to fit your space and flock size.
Now that you know the steps, it’s time to give it a try.
Take it one step at a time, and don’t worry about making it perfect on the first go. Small improvements can always be made later.
Suppose you’ve built your own feeder or plan to. Share your experience in the comments below. Your ideas and tips can help others get started, too!
Frequently Asked Questions
Will Rain Affect the DIY Chicken Feeder?
It can, so always use a lid and place it in a dry or covered area.
Do Chickens Learn to Use Feeder Ports Easily?
Most chickens learn quickly, especially if the feed is visible and easy to reach.
Can a DIY Chicken Feeder Be Hung?
Yes, hanging helps prevent tipping and keeps the feed cleaner.