
Flower crafts are one of those projects I always return to because they’re simple, satisfying, and suitable for nearly any occasion.
If you’re looking to brighten up a room, create a thoughtful gift, or keep the kids entertained on a rainy day, these easy flower crafts are perfect for beginners.
No fancy tools or experience are required, just a few basic supplies and a little creativity.
From paper flowers to fabric blooms, these crafts can be tailored to fit your style and needs. Plus, they’re an ideal way to add a personal touch to your home decor or give a meaningful, homemade gift.
Even if you’re crafting with kids or creating on your own, these projects are a fun and easy way to bring a bit of nature indoors and spark your creativity.
Flower Crafts Easy Enough for Any Skill Level
These easy flower crafts are perfect for anyone looking to create beautiful blooms with minimal effort.
Even if you’re a beginner or just looking for a fun project, these simple steps will guide you to creating colorful flowers that add a personal touch to any occasion.
1. Paper Loop Flowers
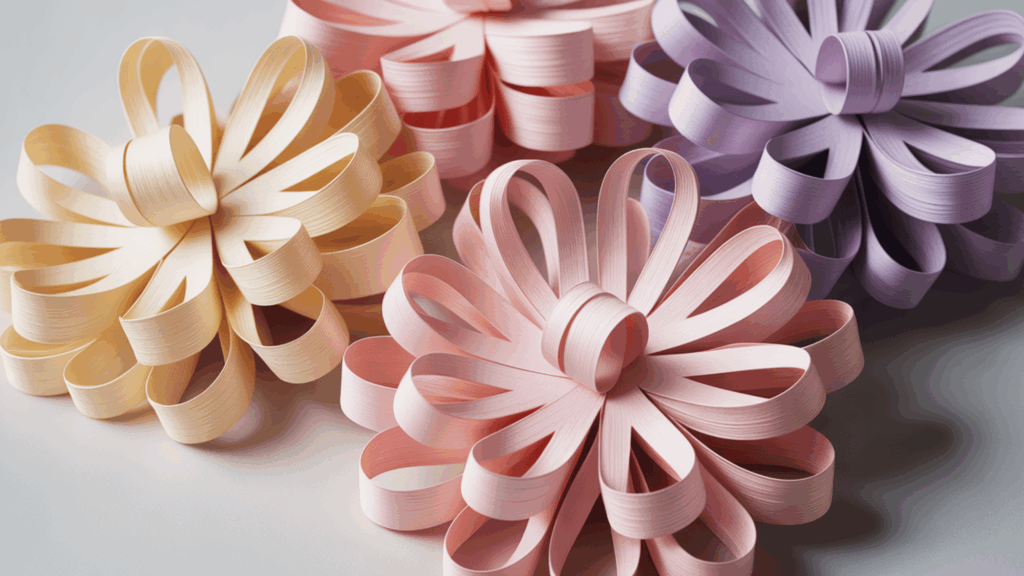
To make paper loop flowers, you’ll need colored paper, glue, scissors, and a green paper straw.
For customization, use glitter or patterned paper to add a colorful touch, and consider adding buttons or beads in the center for extra flair.
When working with scissors, handle them carefully to avoid accidents, and be sure to keep glue away from your eyes and skin to stay safe during the crafting process.
This simple project can result in a fun and decorative flower bouquet.
Steps:
- Cut strips of colored paper.
- Fold each strip into a loop and secure the ends with glue.
- Start with four loops placed evenly around a paper circle.
- Add more loops to fill in the space, forming a full flower.
- Attach a green paper straw to the back of the stem.
2. Construction Paper Flowers
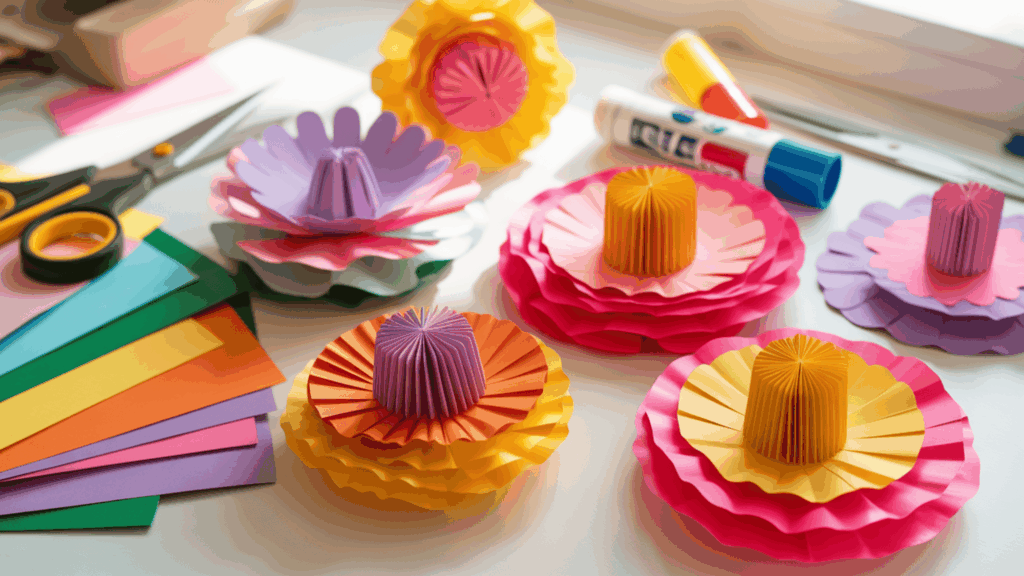
To create construction paper flowers, you’ll need construction paper, glue, and scissors.
For customization, try layering multiple petals to create a fuller flower, and enhance the center with buttons or sequins for added texture.
This craft offers endless possibilities for creativity. However, always supervise children when using scissors to ensure safety.
This simple and budget-friendly project is perfect for kids to make and can serve as a thoughtful gift or fun home decoration.
Steps:
- Cut out petal shapes from construction paper.
- Arrange the petals in a circular pattern around a small circle for the center.
- Glue each petal down, one at a time, allowing each layer to dry before adding the next.
3. Tissue Paper Pom-Pom Flowers
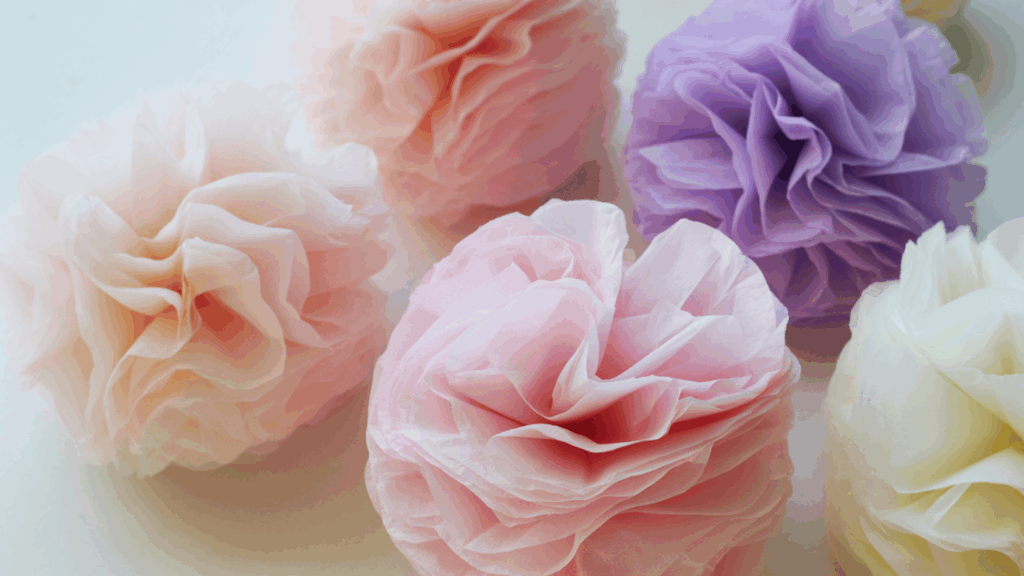
To make tissue paper pom-pom flowers, you’ll need tissue paper, string or a pipe cleaner, and scissors.
For a creative twist, use various tissue paper colors to create multi-colored pom-poms, and add glitter or small beads for extra sparkle. While cutting the tissue paper, be sure to handle the scissors carefully to avoid injury.
These fun, colorful pom-poms are perfect for party decorations or adding a pop of color to any room or event, making them both easy and decorative.
Steps:
- Stack six to eight sheets of tissue paper.
- Fold the stack back and forth in even sections.
- Tie the middle with a string or pipe cleaner.
- Cut the ends into round or pointed shapes.
- Fluff the layers apart to create a pom-pom.
4. Straw Flowers
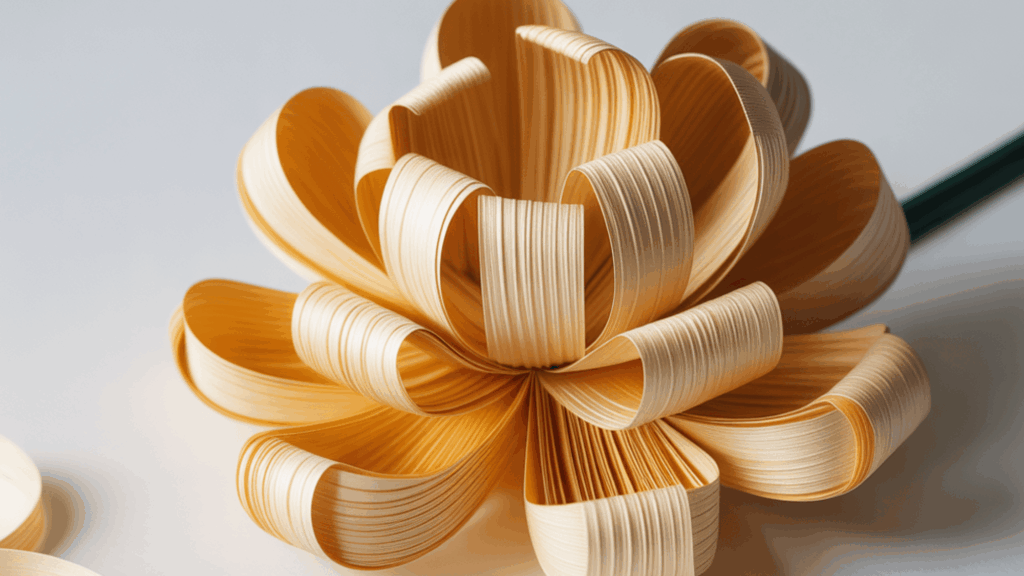
Straw flowers are a very easy craft for kids. They use simple supplies and take only a few minutes to make. Kids can practice cutting, coloring, and gluing while making bright paper flowers they can place in a cup or vase.
Colored paper, drinking straws, scissors, glue, markers or crayons, and optional stickers or buttons for the flower center.
Kids can draw smiley faces in the center, add glitter, use patterned paper, or cut petals in different shapes. They can also make several flowers to create a small bouquet.
Use child-safe scissors and non-toxic glue. Younger kids should get help from an adult when cutting paper. Keep small items like buttons away from very young children.
Steps:
- Cut flower shapes from colored paper. You can draw the flower first and then cut it out.
- Color or decorate the flower petals using markers, crayons, or stickers.
- Cut a small circle from paper and glue it in the center of the flower.
- Glue the flower to the top of a drinking straw to make the stem.
- Let the glue dry for a few minutes.
- Place the straw flowers in a cup, jar, or small vase to display them.
5. Origami Paper Flowers (8-Petal Fold)
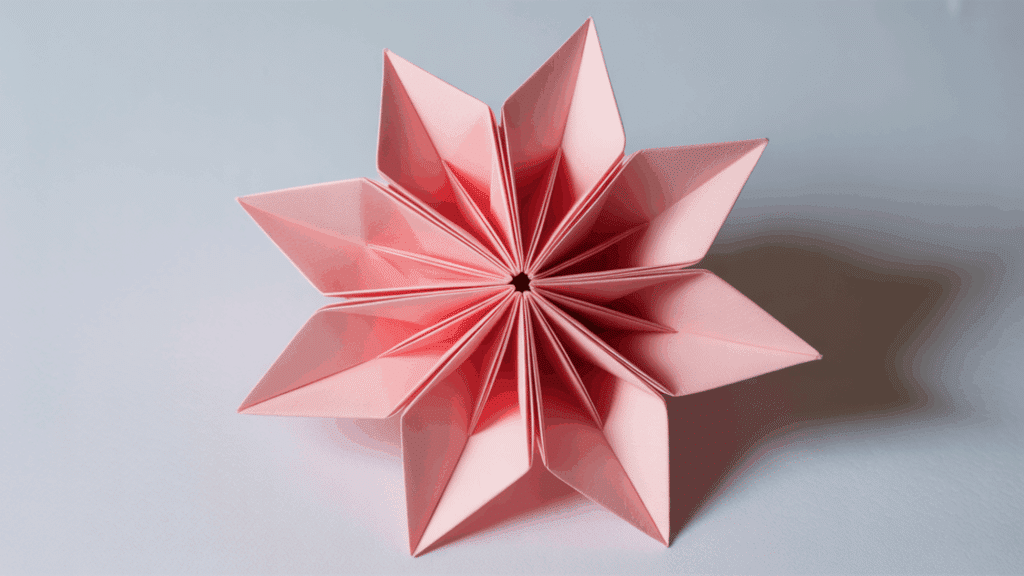
To make origami paper flowers, you’ll need square paper. For customization, try using patterned paper or experiment with cutting the petals into different shapes for unique variations.
This adds a personal touch and gives each flower a distinct look. When folding the paper, be sure to do so carefully to avoid any tearing, as precision is key in origami.
These delicate flowers are perfect for creating a clean, structured look, making them a fun and simple project to complete.
Steps:
- Start with a square piece of paper. Fold it diagonally to make a triangle.
- Fold the triangle again to make a smaller triangle.
- Fold once more so the paper becomes a narrow triangle.
- Draw a curved line on the folded edge.
- Carefully cut along the curved line with scissors.
- Open the folded paper slowly. You will see an eight-petal paper flower.
6. Paper Circle Flowers
Paper circle flowers are a simple craft that works well for kids and beginner adults. The project uses basic shapes and easy steps, so anyone can arrange colored circles and glue them together to make a bright flower.
Colored paper, scissors, glue, markers or crayons, and optional buttons or stickers for the center. Kids can use different colors for each petal or draw patterns on the circles.
Beginner adults can try layered circles, mix paper textures, or use the flowers on greeting cards, scrapbooks, or wall art.
Kids should use child-safe scissors and non-toxic glue. Adults should help younger children and keep small items away from toddlers.
Steps:
- Cut several circles from colored paper to use as petals.
- Cut one slightly larger circle for the center of the flower.
- Arrange the petal circles in a ring shape on a sheet of paper.
- Glue the circles in place so they form the flower shape.
- Glue the center circle on top where the petals meet.
- Decorate the center with markers, stickers, or a button if desired.
7. Yarn Wrapped Flowers
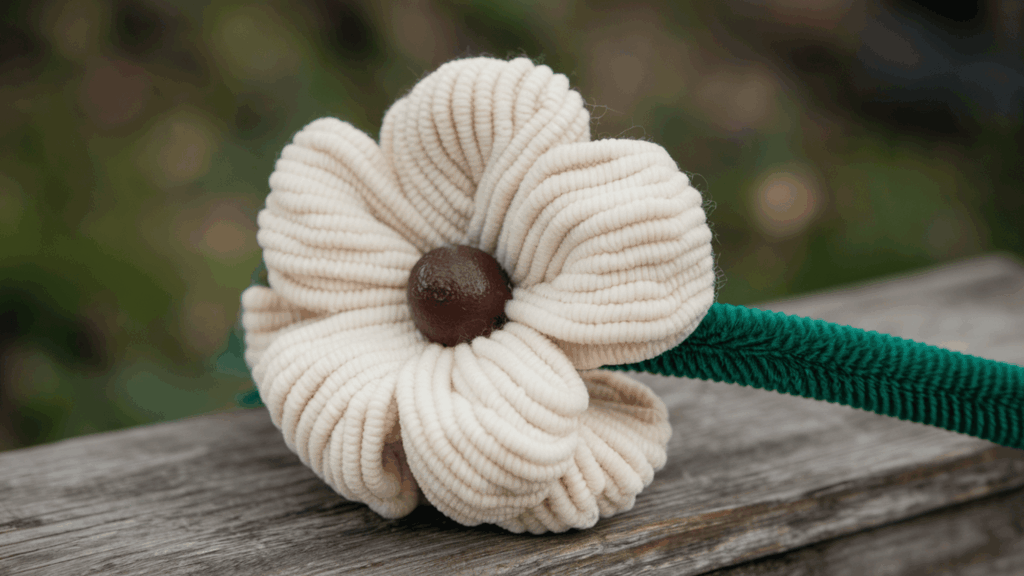
Yarn-wrapped flowers are an easy craft for kids and beginner adults. The project uses simple materials and basic wrapping steps to make a soft, textured flower. It is also a fun way for kids to practice hand control.
Cardboard, yarn in different colors, scissors, glue, and optional beads or buttons for the center.
Kids can wrap bright yarn colors or mix two shades for patterns. Beginner adults can use thicker yarn, layer petals, or add the flower to cards or wall art.
Kids should use child-safe scissors. Adults should guide younger children and keep small items away from toddlers.
Steps:
- Draw a simple flower shape on cardboard and cut it out.
- Cut a small slit on one petal to start wrapping the yarn.
- Hold the yarn end in place and begin wrapping it around the flower petals.
- Continue wrapping until the cardboard flower is mostly covered.
- Tie or glue the yarn end at the back to secure it.
- Glue a bead or button in the center to finish the flower.
8. Quilled Paper Flowers
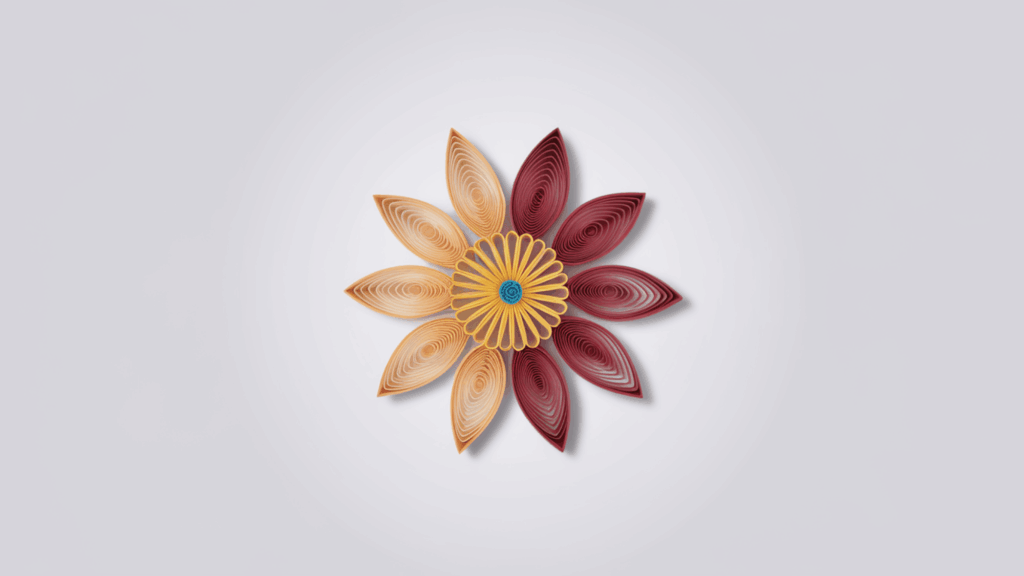
To make quilled paper flowers, you’ll need thin strips of paper, a toothpick, and glue. For customization, experiment with different colors and shapes of coils to create a unique look.
You can also add beads to the center for extra detail and texture. When working on this project, be cautious while rolling the paper strips and using glue to avoid messes or accidents.
These intricate flowers add a beautiful touch to cards, scrapbooks, or framed artwork, making them perfect for decorative crafts.
Steps:
- Cut thin strips of paper for quilling.
- Take one strip and place the end on a toothpick.
- Roll the paper tightly around the toothpick.
- Slide the coil off the toothpick carefully.
- Loosen the coil a little to make it bigger.
- Pinch one side to make a teardrop or petal shape.
- Make several petals in the same way.
- Glue the petals around one small, tight coil to form a flower.
9. Button Flower Canvas Art
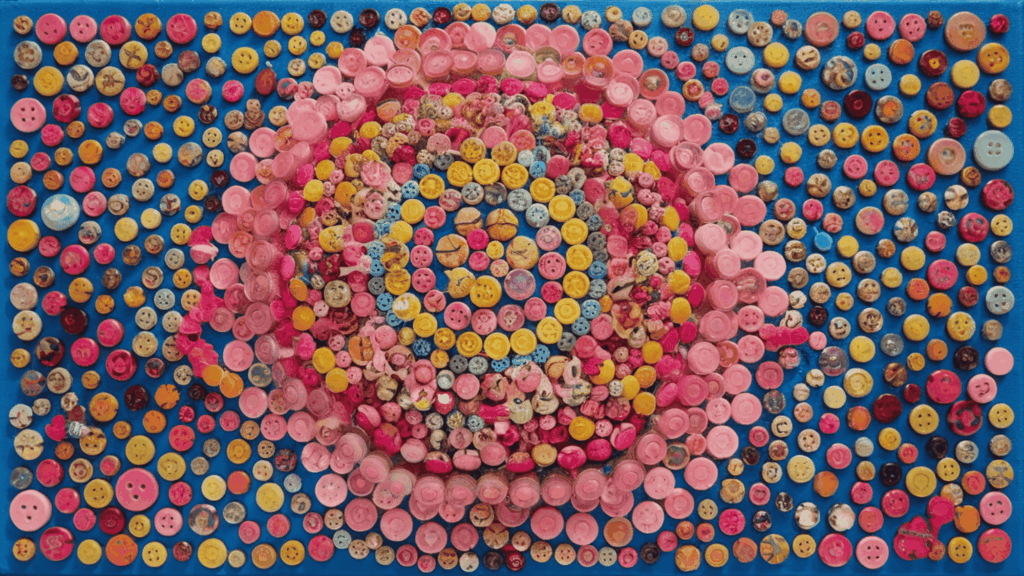
To create button flower canvas art, you’ll need a canvas, buttons, glue, and paint or markers. Customize your design by mixing and matching button sizes and colors for a personalized touch.
You can also add beads or fabric flowers to introduce variety and texture. When using glue, be careful to avoid spills or stains on the canvas or your work area.
This fun and creative project is a great way to make unique decorations or a heartfelt gift for someone special.
Steps:
- Paint a small canvas and let it dry.
- Use a brush or marker to draw green stems and leaves.
- Choose buttons in different sizes and colors.
- Arrange the buttons on the canvas to form flower shapes.
- Place the buttons along the stems as flower heads.
- Glue the buttons in place carefully.
- Let the glue dry before displaying the canvas.
10. Paper Plate Flowers
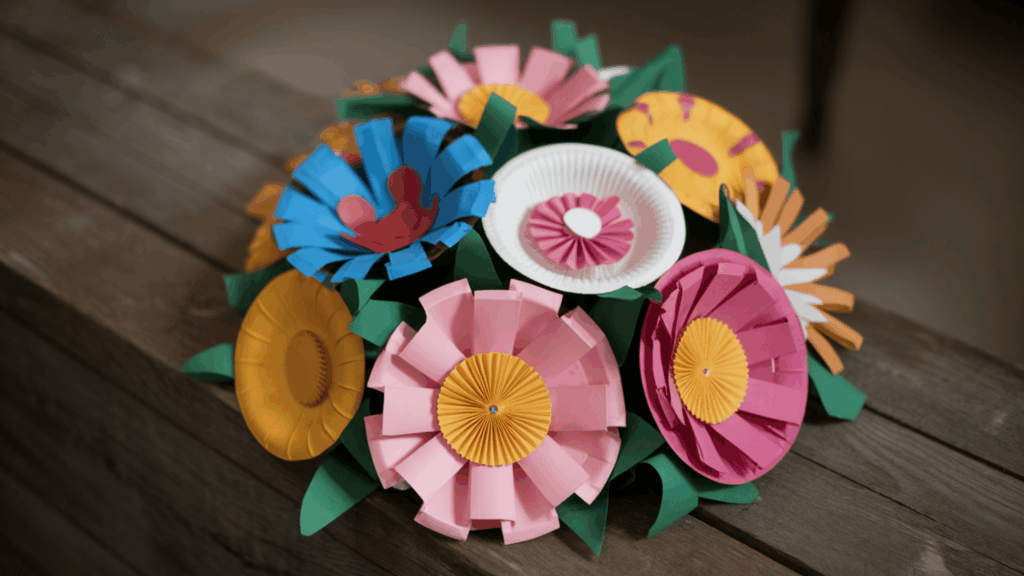
To make paper plate flowers, you’ll need a paper plate, scissors, glue, and paint or markers.
Customize your flowers by using vibrant paints for the petals and adding glitter or stickers for extra flair. This will give your flower a fun, personalized touch.
When using scissors to cut the paper plate, be sure to supervise, especially with young children, to avoid accidents.
These colorful flowers make a great craft for spring-themed projects and can be used as decorations or gifts.
Steps:
- Take a paper plate and draw petal shapes around the edge.
- Cut along the lines to create the flower petals.
- Gently bend or curl each petal outward with your fingers.
- Paint or color the petals using bright colors.
- Let the paint or color dry for a few minutes.
- Cut a small circle from colored paper for the center.
- Glue the circle in the middle of the flower.
- Glue another paper plate behind the first one for a fuller flower.
11. Pop-Up Flower Card
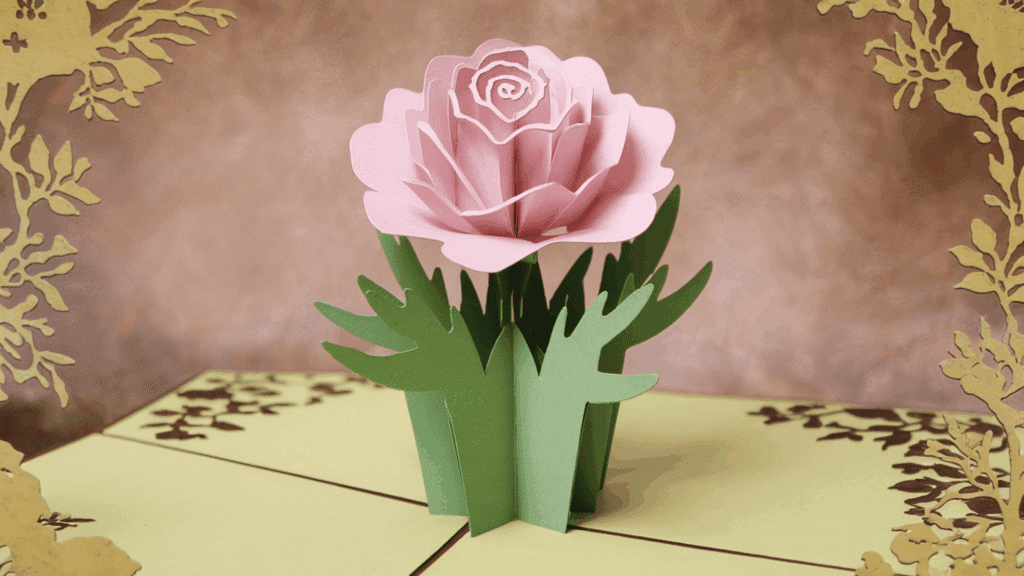
Pop-up flower cards are a simple paper craft for kids and beginner adults. When the card opens, the flower stands up inside, which makes the card more fun and special.
This craft is great for birthdays mothers day or thank you cards. Colored paper or cardstock, scissors, glue, markers or crayons, and optional stickers or buttons for decoration.
Kids can color the petals and draw patterns on the card. Beginner adults can add layered flowers, write short messages, or decorate the background with leaves and hearts.
Kids should use child-safe scissors and non-toxic glue. Adults should help younger children when cutting paper and keep small decorative items away from toddlers.
Steps:
- Fold a piece of cardstock in half to make the base of the card.
- Cut a small flower shape from colored paper.
- Fold the flower in half to help it pop up when the card opens.
- Glue one side of the folded flower inside the card near the center fold.
- Close the card gently to press the flower in place.
- Open the card and decorate around the flower with drawings or stickers.
12. Cotton Pad Poppy Flowers
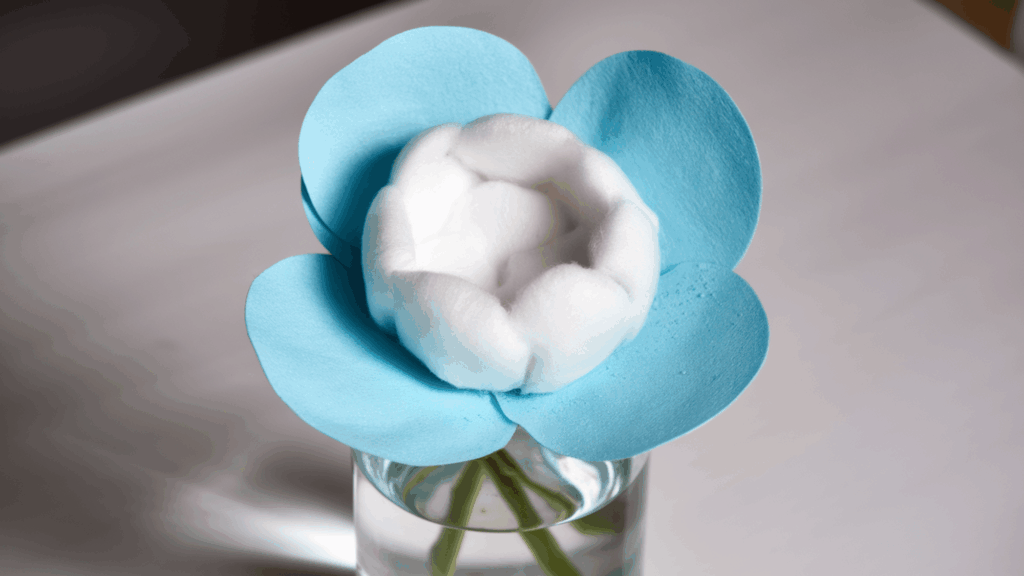
Cotton pad poppy flowers are an easy craft for kids and beginner adults. Soft cotton pads form the petals, which make the flower look light and fluffy. This simple activity works well for school crafts or handmade cards.
Cotton pads, red paint or markers, black paper or buttons for the center, glue, green paper or pipe cleaners for stems, and scissors.
Kids can paint the cotton pads in bright red shades to look like poppies. Beginner adults can layer two cotton pads for fuller petals or add green paper leaves for decoration.
Kids should use washable paint and child-safe scissors. Adults should help younger children while cutting paper and keep small items away from toddlers.
Steps:
- Take one cotton pad and gently flatten it on the table.
- Color the cotton pad with red paint or a marker to make the poppy petals.
- Cut a small circle from black paper for the center.
- Glue the black circle in the middle of the cotton pad.
- Attach a green paper strip or pipe cleaner to the back of the stem.
- Add green paper leaves if desired and let the glue dry.
13. Foam Sheet Flowers
To make foam sheet flowers, you’ll need foam sheets, glue, a heat gun or warm iron, scissors, and stamens.
Customize your flowers by using different colors and shapes of foam sheets to create unique effects. You can also add beads or small embellishments for extra detail and texture.
Be sure to handle the heat gun or warm iron carefully to avoid burns, and always supervise when using these tools.
These flowers make stunning and long-lasting decorations for any space.
Steps
- Cut petal shapes from foam sheets in different sizes.
- Warm each petal slightly with a heat gun or warm iron.
- Gently bend the warm petals to give them a curved shape.
- Glue the largest petals on a foam base first.
- Add the medium petals on top of the first layer.
- Glue the smallest petals in the center.
- Make a small hole in the middle of the flower.
- Push the stamens through the hole and secure with glue.
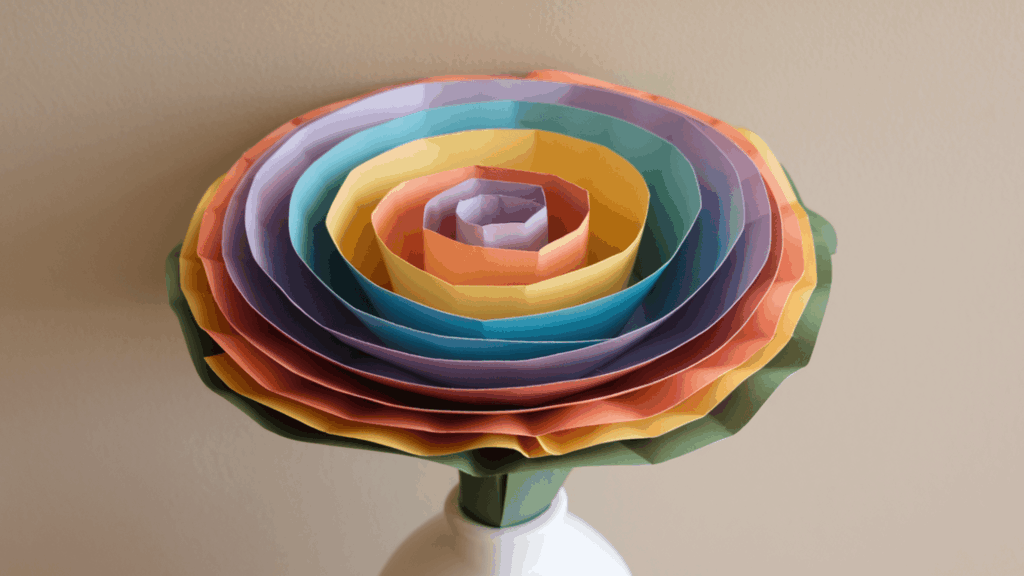
14. Paper Hibiscus or Hanging Wisteria

To create paper hibiscus or hanging wisteria flowers, you’ll need tissue paper (purple for wisteria and various colors for hibiscus), glue, scissors, and floral wire.
For customization, experiment with different flower shapes and lengths to achieve a cascading effect. You can also add faux greenery or leaves to enhance the design.
When using scissors, handle them carefully to avoid injury, and be cautious not to get glue on your skin. These flowers make a stunning and vibrant addition to any decor or event.
Steps:
- Cut several petal shapes from colored tissue paper.
- For hibiscus, make larger petals and stack them in layers.
- Glue the tissue paper petals together to form the flower.
- Add yellow stamens in the center to finish the hibiscus flower.
- For wisteria, cut many small purple tissue paper petals.
- Group the petals into small clusters and glue them together.
- Attach the clusters to hanging strings or thin wire branches to create the wisteria look.
Tips for Making Flower Crafts Easier
A little preparation goes a long way in flower crafts. These tips will save you time and help your finished projects look their best.
| Tip | Description |
|---|---|
| Start With Simple Materials | Begin with tissue or construction paper. They are easy to handle and budget-friendly. This helps you learn without stress or waste. Later, try foam or crepe for more detail. |
| Use Templates | Templates help create uniform petals. Print, trace, and cut for clean, matching shapes, great for large or detailed flowers. |
| Work in Batches | Cut all petals first, then assemble. This saves time, keeps things neat, and makes crafting smoother. |
| Let Glue Dry | Allow glue to set between layers. This keeps your flower neat and sturdy. |
| Mix Colors & Textures | Combine shades and materials for depth. This adds a more natural and detailed look. |
Final Thoughts
Flower crafts are one of the most rewarding DIY projects you can take on because the results are beautiful, the process is relaxing, and the supplies are always affordable.
Whether you are making paper loop flowers with your kids on a weekend afternoon, pressing garden blooms for a handmade bookmark, or crafting a giant paper dahlia for a party backdrop, there is a flower craft on this list that fits your time, budget, and skill level.
The wide range of materials, paper, felt, foam, and real flowers, means you can keep making new versions without ever repeating the same project twice.
I would love to hear which one you try first. Leave a comment below and let me know how yours turned out!