
Tired of shoes scattered across your floor? Building a DIY shoe rack at home is easier than it looks and can be done with basic tools and simple materials.
You’ll learn how to measure your space, cut and prep lumber, assemble a strong frame, and finish it for long-lasting protection.
Proper shelf spacing, shelf angles, and simple tips to avoid mistakes that can lead to wobbly or uneven racks are also included for a more reliable build.
Follow these steps to create a sturdy, custom shoe rack that fits your space and keeps your shoes neatly organized.
What Style of DIY Shoe Rack Should You Actually Build?
Before you start measuring or buying lumber, decide what type of shoe rack fits your space. That choice affects the dimensions, materials, and joinery you’ll use later.
For most DIY projects, three designs cover almost every situation. The best option depends more on available floor depth than appearance.
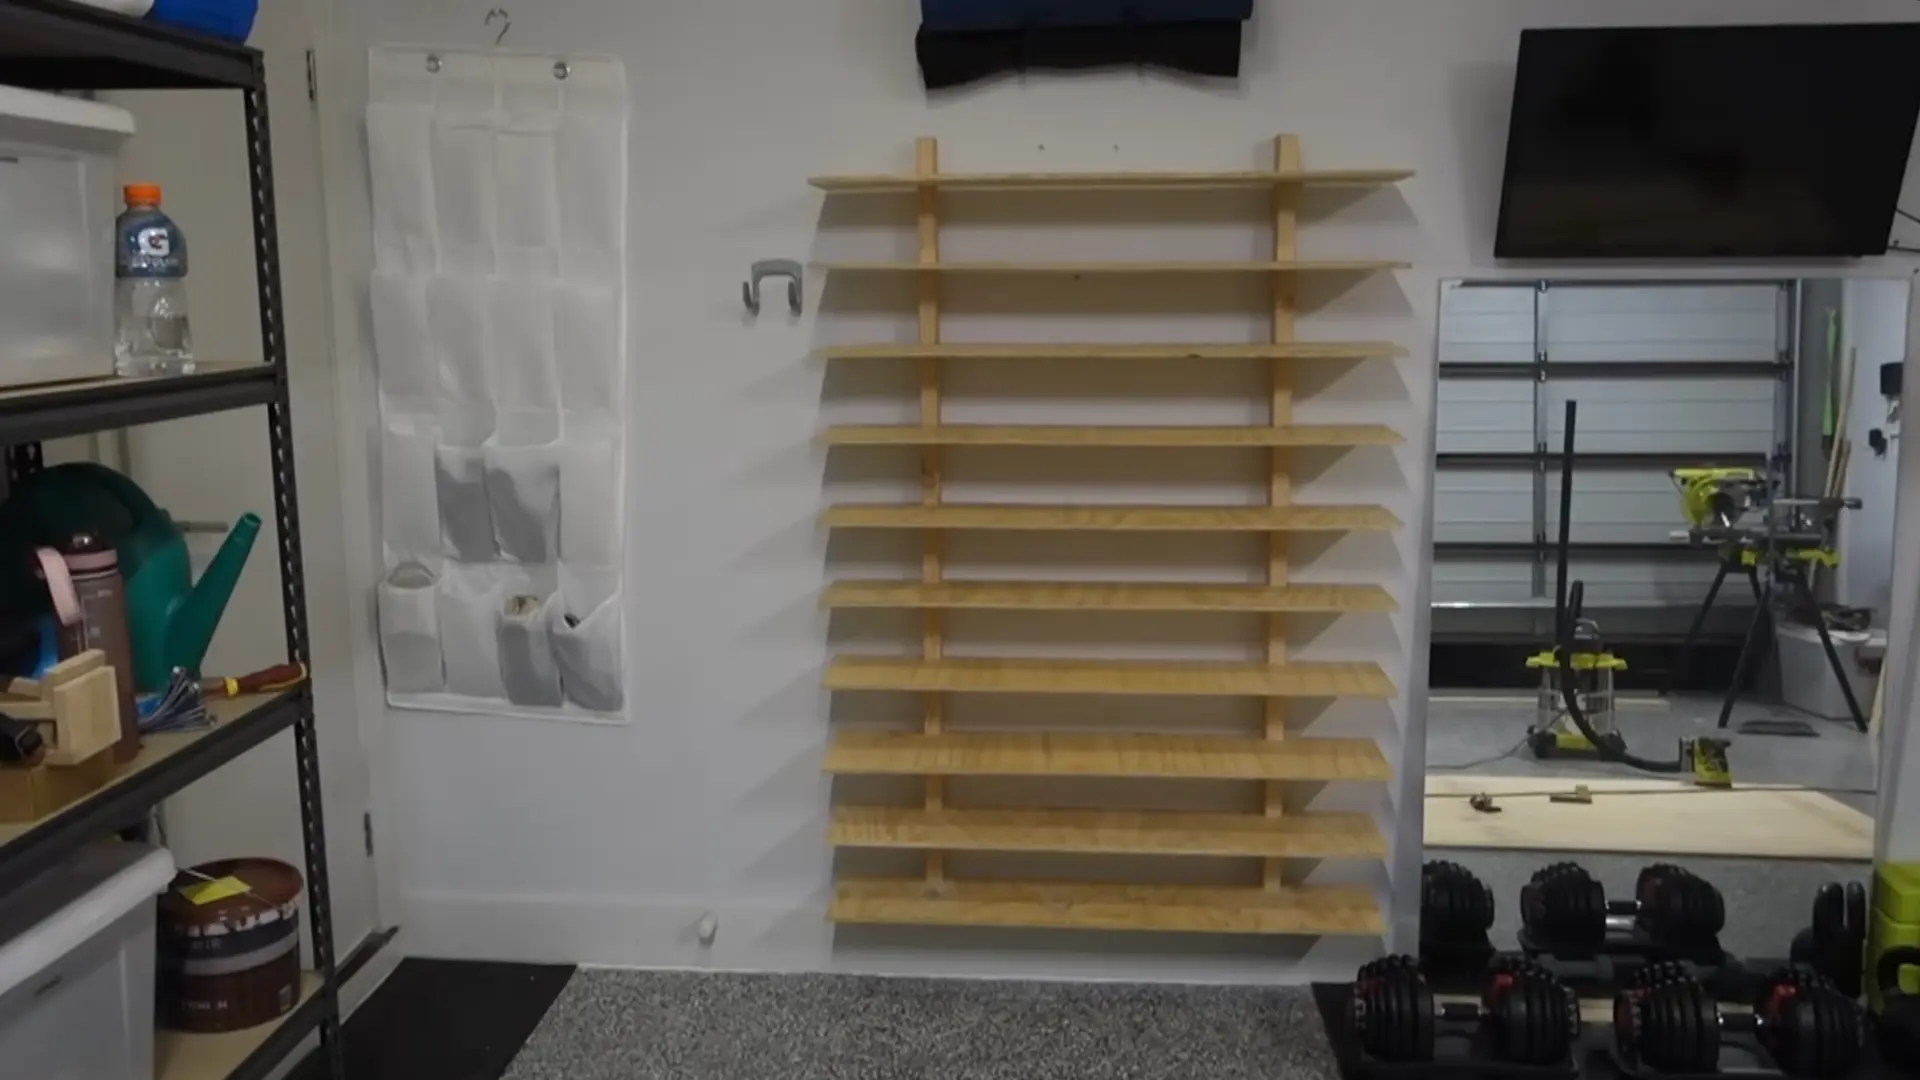
Tiered Flat Shelf
A tiered flat shelf is the simplest shoe rack to build. It works well in:
- garages
- closets
- mudrooms
- Utility areas where storage matters more than looks.
The design uses two side panels connected by horizontal shelves. There are no angled cuts or complicated assemblies. If your available depth is 12 inches or less, this is usually the best choice.
This blog will focus on a wall-mounted tiered flat shelf because it offers the best balance of capacity, simplicity, and space efficiency.
Slanted Shelf
A slanted shelf rack angles each shelf forward, usually between 10 and 15 degrees. That angle makes shoes easier to see and grab. It also reduces the depth needed for each pair compared to a flat shelf.
The main challenge is keeping the shoes from sliding forward. Every shelf needs a front lip to hold them in place. That lip does more work than many people realize. It supports the forward pressure created by every pair of shoes.
I’ve seen slanted racks fail because the lip was treated like trim instead of a structural part. A few brad nails or glue on end grain rarely last.
For a durable build, attach the lip using screws driven into face grain or fit it into a dado. Both methods create a much stronger connection.
Cubby or Bench Hybrid
A bench hybrid combines shoe storage with a seating area. This style works well in entryways where you regularly sit down to put shoes on or take them off. The lower section contains individual cubbies, while the top serves as a bench seat.
The trade-off is complexity. You’ll need more material, more cuts, and stronger joinery than a basic shelf rack.
Space also matters. If your entryway has less than 18 inches of usable depth, a bench-style rack can make the area feel cramped.
How to Size Your Rack Before Buying Lumber
Getting the dimensions right before buying anything saves a second trip and ensures the rack fits your space.
| Factor | Recommendation | Notes |
|---|---|---|
| Width | 24–36 inches | Measure your space and choose a size that minimizes lumber waste from 8-foot boards. Odd sizes like 29 inches often leave unusable offcuts. |
| Shelf Spacing | 6″ for sneakers, 8″ for dress shoes, 12″+ for boots | Plan spacing based on the types of shoes you own. Consider a separate shelf tier for boots to avoid wasted space. |
| Shelf Angle | 10–15° forward tilt | Saves depth, keeps shoes in place, and increases storage capacity. |
Try sketching the rack dimensions on paper before cutting lumber to catch spacing issues early and avoid costly adjustments later.
How to Cut, Prep, and Assemble Your Shoe Rack
Making clean, accurate cuts is important. Good cuts give you a level frame and stable shelves. Rushed or uneven cuts mean you will have to shim and adjust everything during assembly.
Tools and Materials Required
- Mitre saw, or hand saw
- Circular saw
- Drill and driver
- Chisel
- Spirit level
- Square
- Measuring tape
- Pencil or marker
- Sandpaper or a sanding tool
- Screwdriver or drill bits
- Timber boards for uprights
- Plywood sheets for shelves
- Wood screws
- Wall anchors
- Scrap wood offcuts for spacing and marking
- Optional finishes such as paint, varnish, or stain
Step 1: Measure Space and Plan Shelf Layout
Start by measuring the full wall height and available width where the rack will be installed. Decide shelf spacing based on the most high-heeled shoes you plan to store, including boots and high-tops, so nothing gets cramped.
Mark the vertical timber pieces with equal spacing for each shelf position. Double-check spacing consistency from bottom to top to ensure the structure stays balanced and usable once assembled.
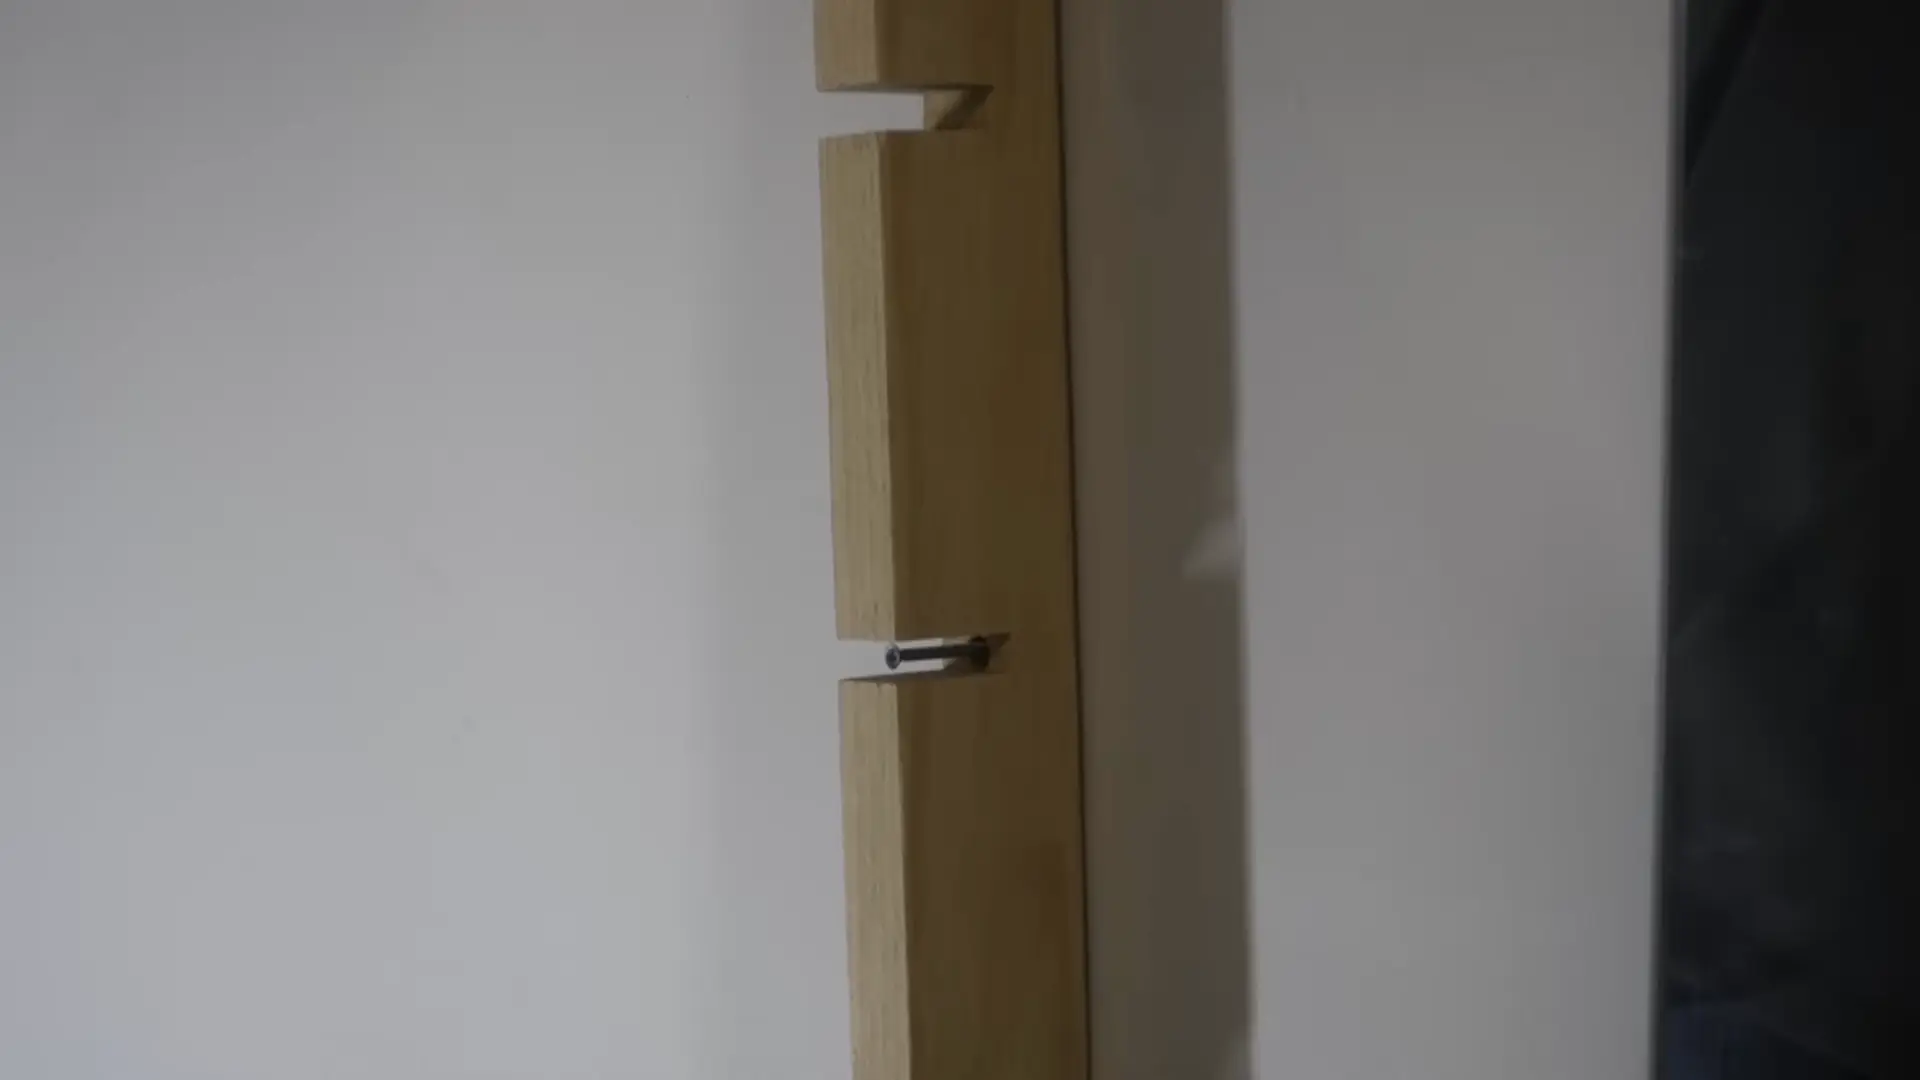
Step 2: Cut and Shape Trench Slots in Uprights
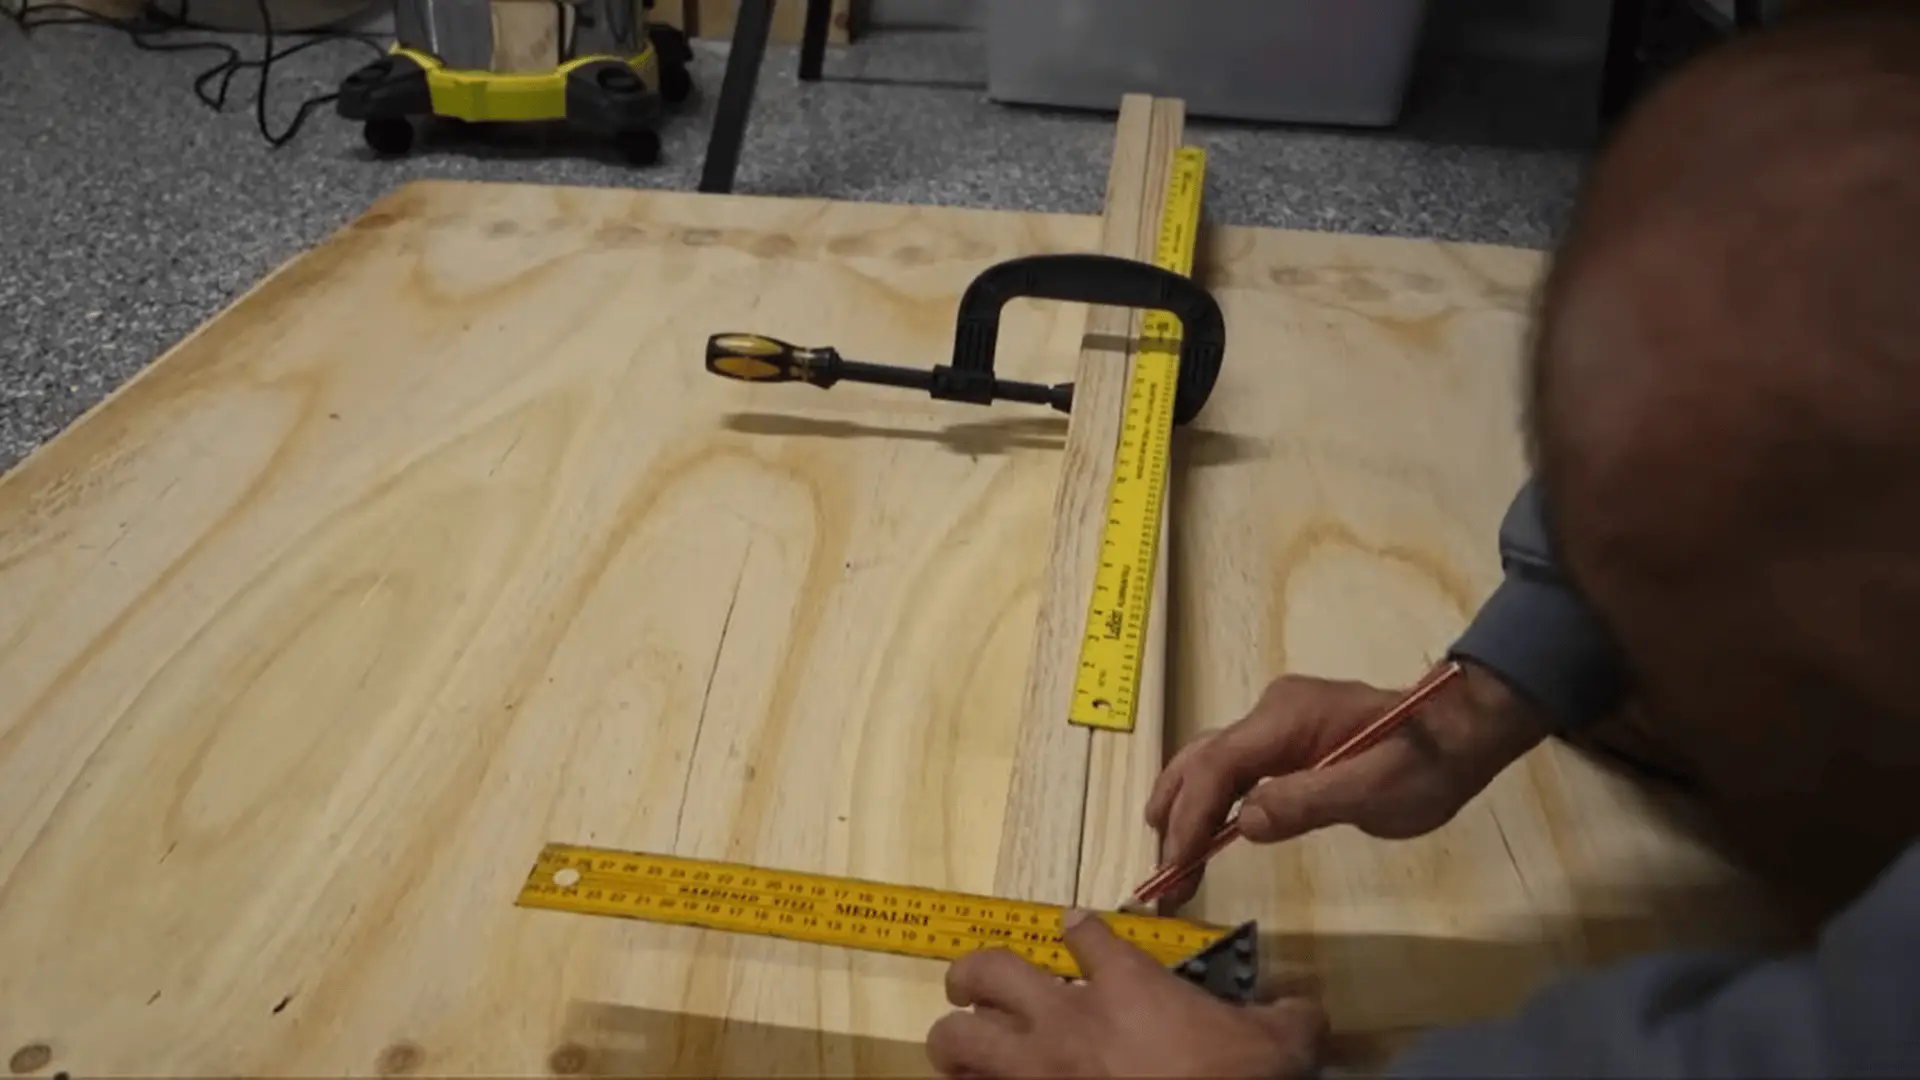
Mark each shelf position clearly on the timber uprights using a pencil and square. These marks define where each shelf will slot in, so precision here will control the final fit.
Cut shallow trench recesses at each marked point, keeping the depth around three-quarters of the timber thickness. Clean up each cut so the shelf edges sit flat and tight without wobble or gaps.
Step 3: Mark Drill Points for Wall Fixing
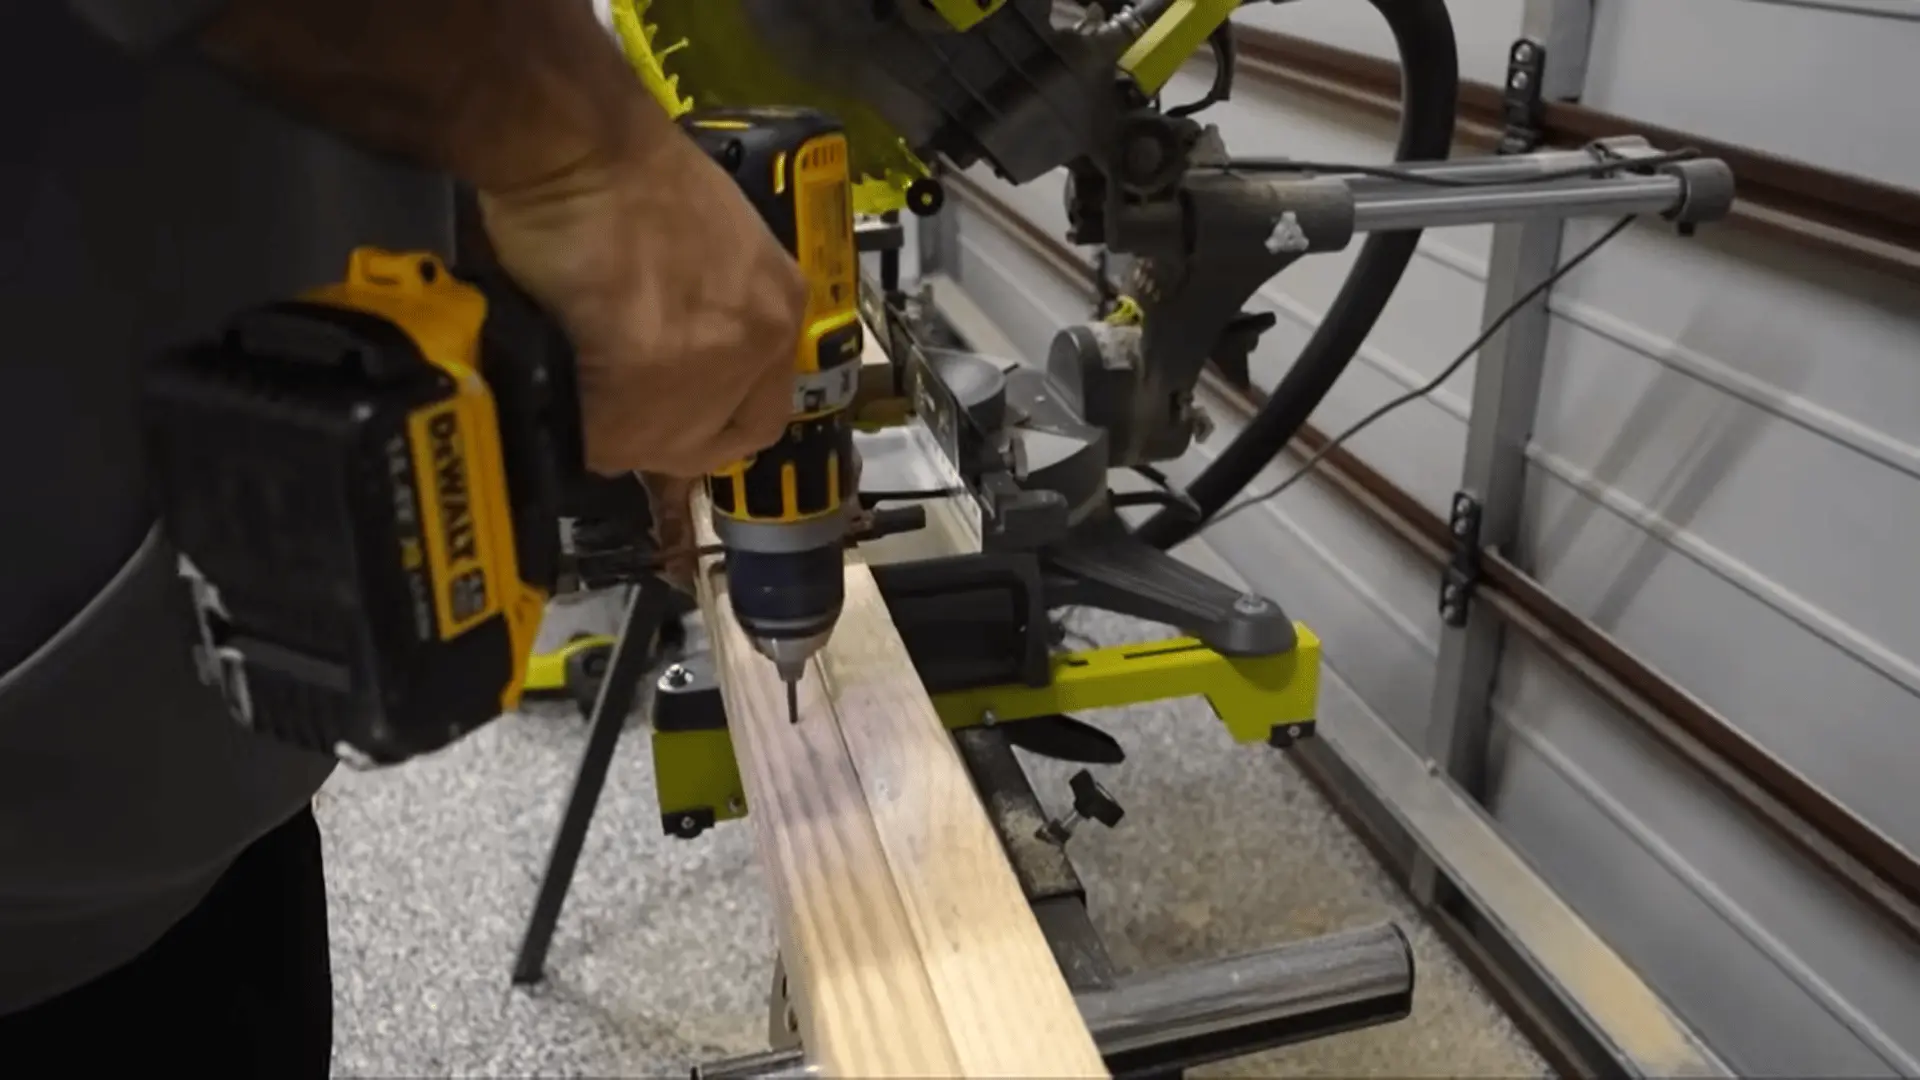
Once trenches are cut, find and mark the center of each shelf slot. These center points will guide where screws pass through the structure into the wall anchors.
Transfer these marks to the rear face of the uprights and drill clean pilot holes. Keep holes straight and aligned so screws can pass through easily during mounting without forcing misalignment.
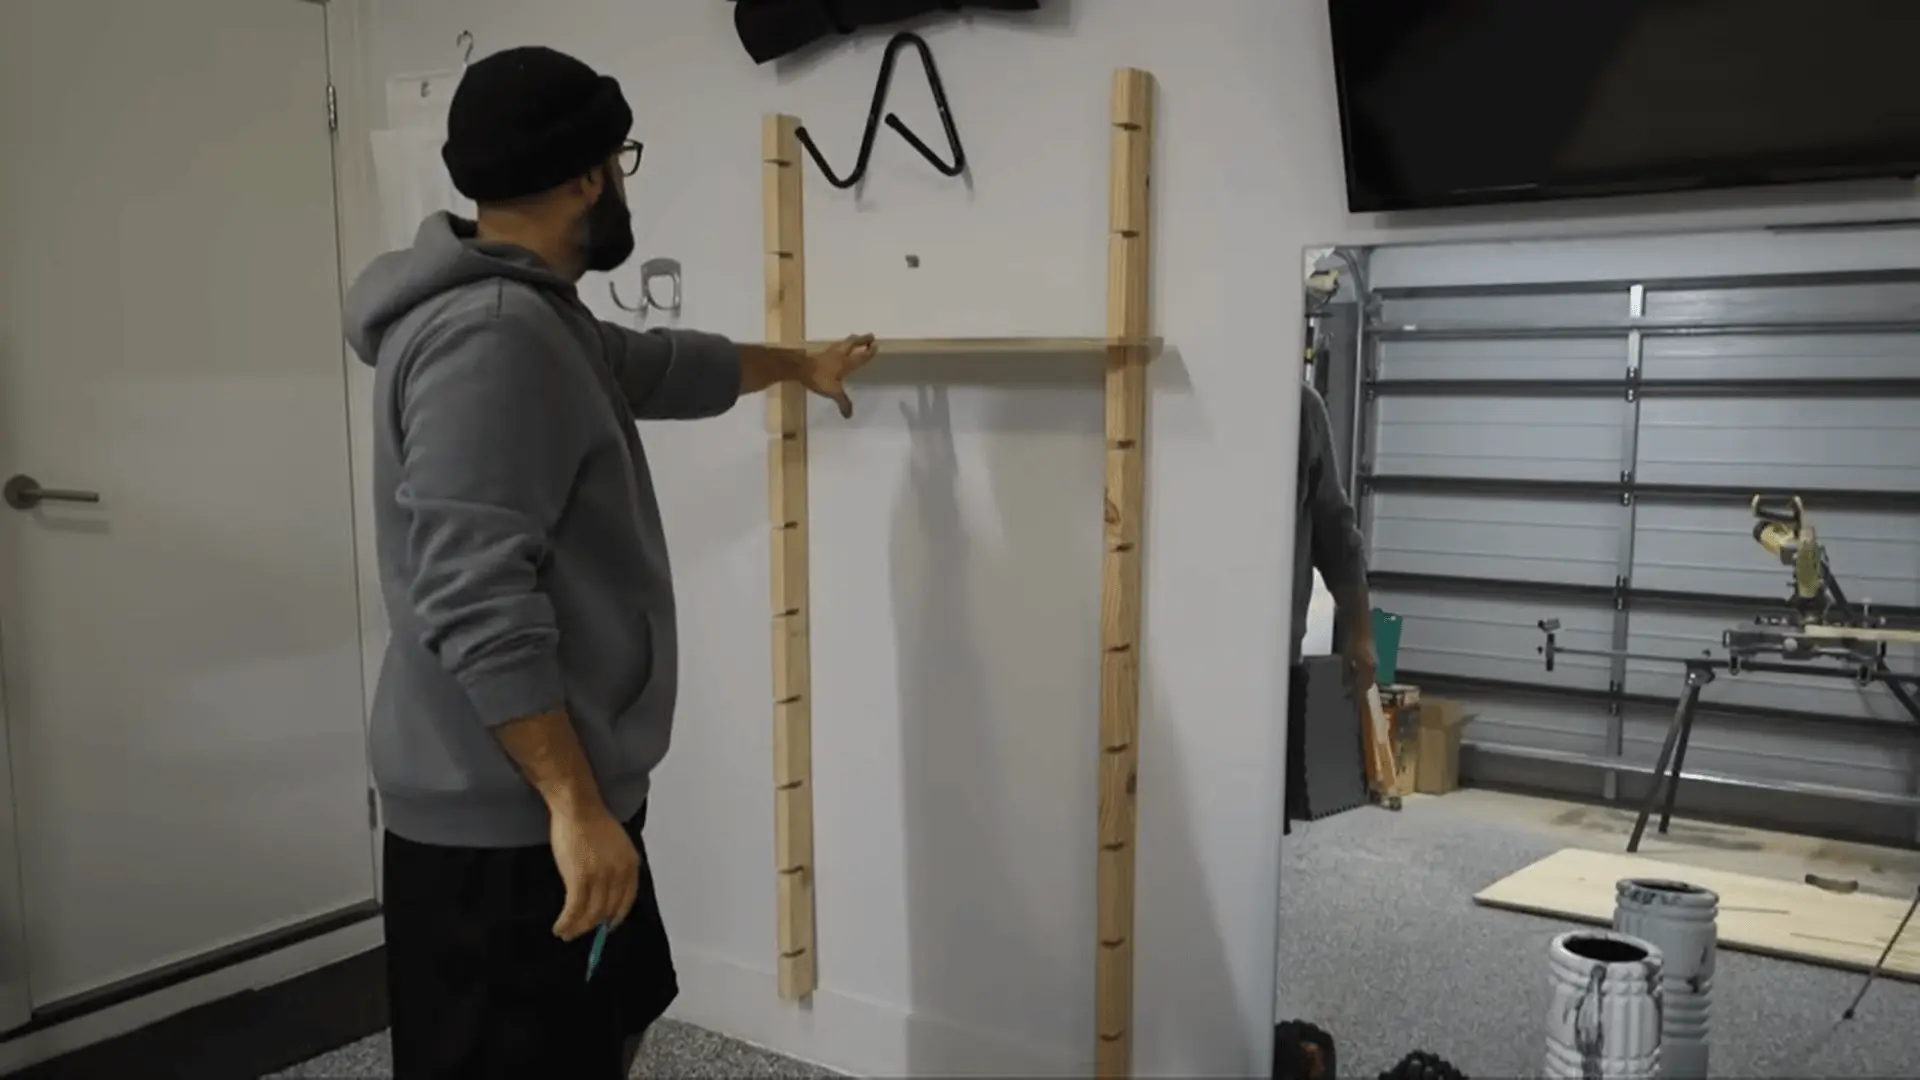
Step 4: Install Anchors and Secure Uprights to Wall
Fix the first wall anchor loosely to act as a pivot point for alignment. Insert a screw partially so the upright can still move while positioning it correctly.
Use a spirit level and square to align the upright vertically. Once straight, install the remaining anchors, tightening screws gradually so the frame locks into position without shifting.
Step 5: Cut, Size, and Sand Shelves
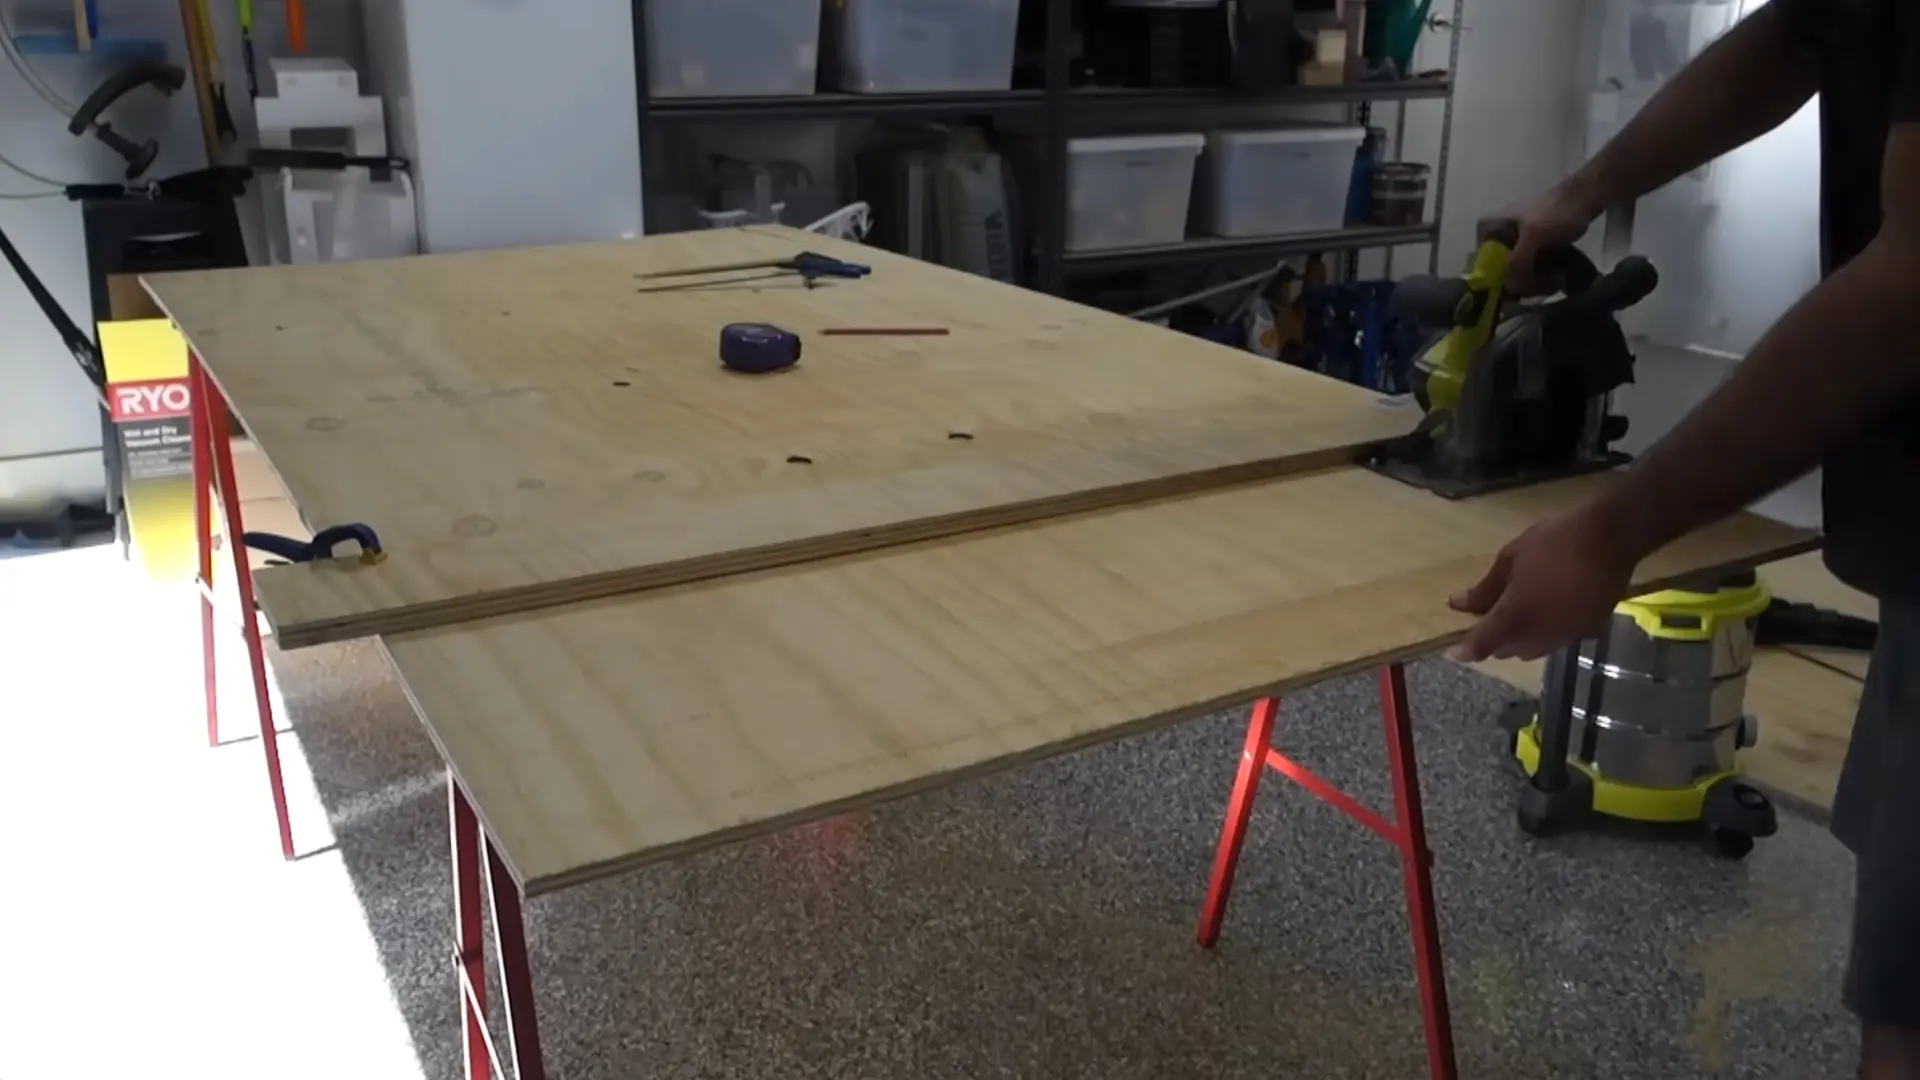
Measure the internal width between uprights and cut plywood shelves to match. Account for saw blade thickness so each shelf fits snugly without needing force during installation.
Sand all edges and surfaces thoroughly to remove splinters and rough cuts. Focus on corners and contact points since these areas will sit inside the trench slots and affect fit quality.
Step 6: Assemble Shelves and Finalize Build
Slide each shelf into its trench slot and check alignment from top to bottom. Adjust any tight spots by light sanding until each shelf sits evenly and securely.
Once everything fits cleanly, tighten all screws fully and recheck wall alignment. Finish the surface if desired using paint, varnish, or leave natural depending on the look and durability needed.
For a complete walkthrough of the process, check out the video tutorial below:
How to Finish and Protect the Wood
A shoe rack gets a lot of abuse from dirty, wet shoes, so the finish needs to protect the wood, not just make it look good.
Seal the Wood; Don’t Just Stain It
If you want to change the color of your shoe rack, stain can help. But stain only adds color. It does not protect the wood from water, dirt, or daily wear.
If you stop after staining, the wood can start soaking up moisture from wet shoes. Before long, you may notice dark spots, rough patches, or raised wood grain.
To protect your shoe rack properly, apply a clear sealer after the stain has dried. This creates a protective layer that helps keep moisture and dirt out while making the finish last much longer.
Choose the Right Sealer
Oil-Based Polyurethane: The most durable option. It creates a hard protective coating that holds up well against dirty shoes, moisture, and daily wear. The tradeoff is longer drying times between coats and before the rack can be used.
Water-Based Polyurethane: A faster-drying option with less odor, making it easier to apply indoors. It provides good protection but is not as hard-wearing as oil-based polyurethane and may show scratches or scuffs sooner with heavy use.
Apply Two Thin Coats, Not One Thick One
A thick coat might seem like a time-saver, but it often leads to problems. It can trap bubbles, leave brush marks, and dry unevenly, creating ridges that are hard to remove later.
For a smoother, more durable finish, apply two thin coats instead. Once the first coat is fully dry, lightly sand it with 220-grit sandpaper before applying the next coat.
Note: let each coat dry completely. If the finish still feels tacky, sanding can pull it up and leave a rough surface instead of smoothing it.
Common Failure Points to Avoid
Most shoe rack problems come from a few common building mistakes. They’re easy to prevent early on, but much harder to fix once the rack is assembled.
Shelf Sag Under Load
A standard 1×12 pineshelf spanning more than 28 to 30inches without support will usually bow under load. A fully loaded shelf often carries 25 to 40 pounds of shoes.
The board rarely breaks. Instead, the center gradually dips downward. Even a quarter-inch of sag is noticeable. It makes the rack look uneven and increases stress at both ends.
I’ve seen builders focus on stronger screws when the real issue was shelf span. The shelf itself was simply too long.
The fix is simple. Add a vertical center support between the base and top shelf. Place it at the midpoint of the rack during assembly. That single divider dramatically reduces deflection and extends the life of the entire structure.
Note: Adding a center support later is much harder. In most cases, it requires removing shelves and partially rebuilding the rack.
End-Grain Glue Failure
Wood glue forms its strongest bond on face-grain surfaces. End grain absorbs glue, creating a much weaker bond.
Because of this, glue alone isn’t ideal for end-grain joints. While they may feel solid initially, repeated use can cause them to loosen over time as stress moves through the rack.
For the strongest connection, apply glue where the end of one board meets the face of another.
If you need to join end-grain surfaces, add mechanical reinforcement:
- Pocket screws: Add strong clamping force and reduce joint movement.
- Dowels: Reinforce the joint by locking boards together.
- Confirmat screws: Work well with plywood, MDF, and other sheet materials.
Moisture Damage at the Base
Concrete floors can hold moisture even when they appear dry. If untreated pine sits directly on the concrete, it can absorb that moisture, causing the wood to swell, warp, or become uneven over time.
Many people assume the screws have loosened, but the real problem is that the wood has changed shape.
To prevent this, keep the rack off the floor with a simple barrier:
- Rubber feet: Raise the rack slightly and reduce moisture contact.
- Closed-cell foam tape: creates a protective moisture barrier under the base rails.
Both options are inexpensive, easy to install, and can help extend the life of your shoe rack.
These three issues account for most long-term shoe rack failures. Address them during the build, and the rack will stay straighter, stronger, and more stable for years.
No-Tool Alternatives Worth Considering
If you are not ready for a wood build, three no-tool options are worth considering as temporary or supplemental storage.
The honest caveat is that each option serves a different purpose, and only one works well as a universal storage solution.
Tension Rods
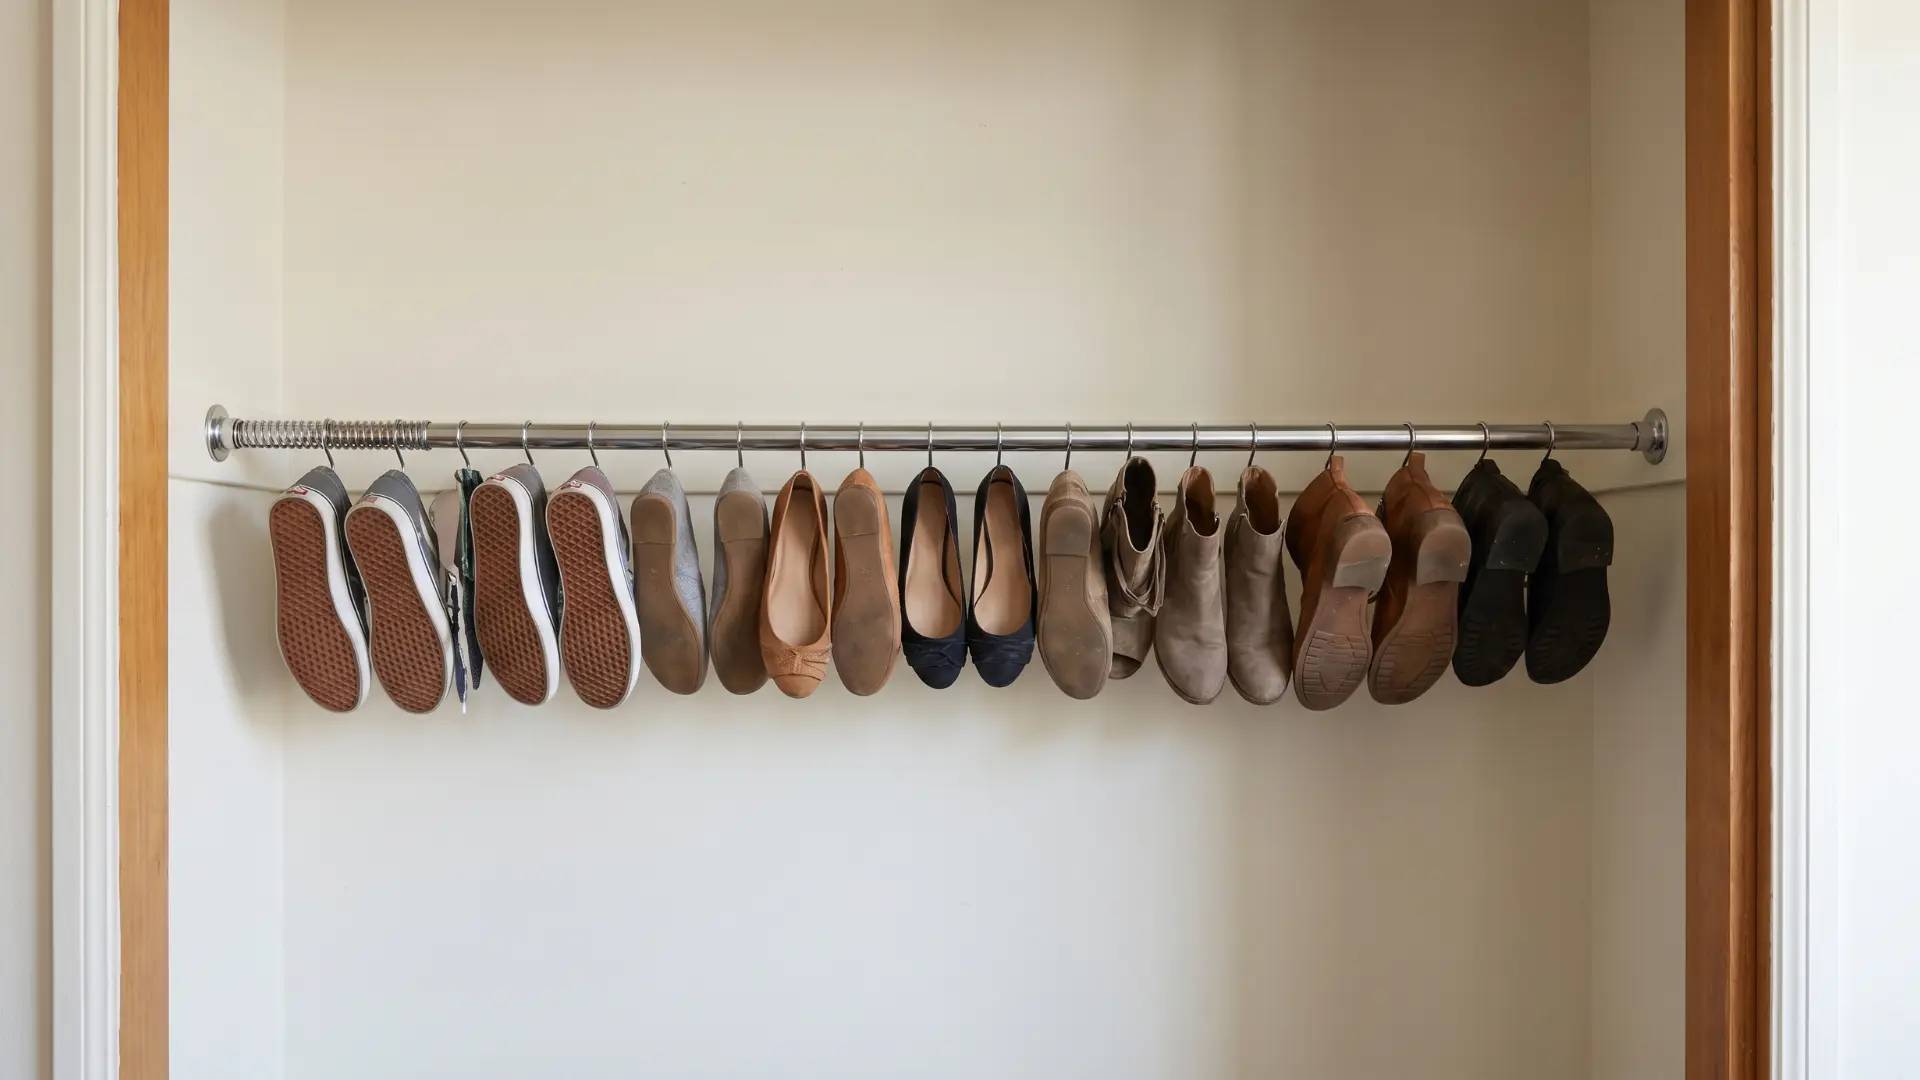
Tension rods are one of the quickest and cheapest shoe storage solutions. Install a rod inside a closet or cabinet and hang shoes by hooking the heel opening over it. The shoes stay off the floor without needing shelves or bins.
Crown Molding Strips
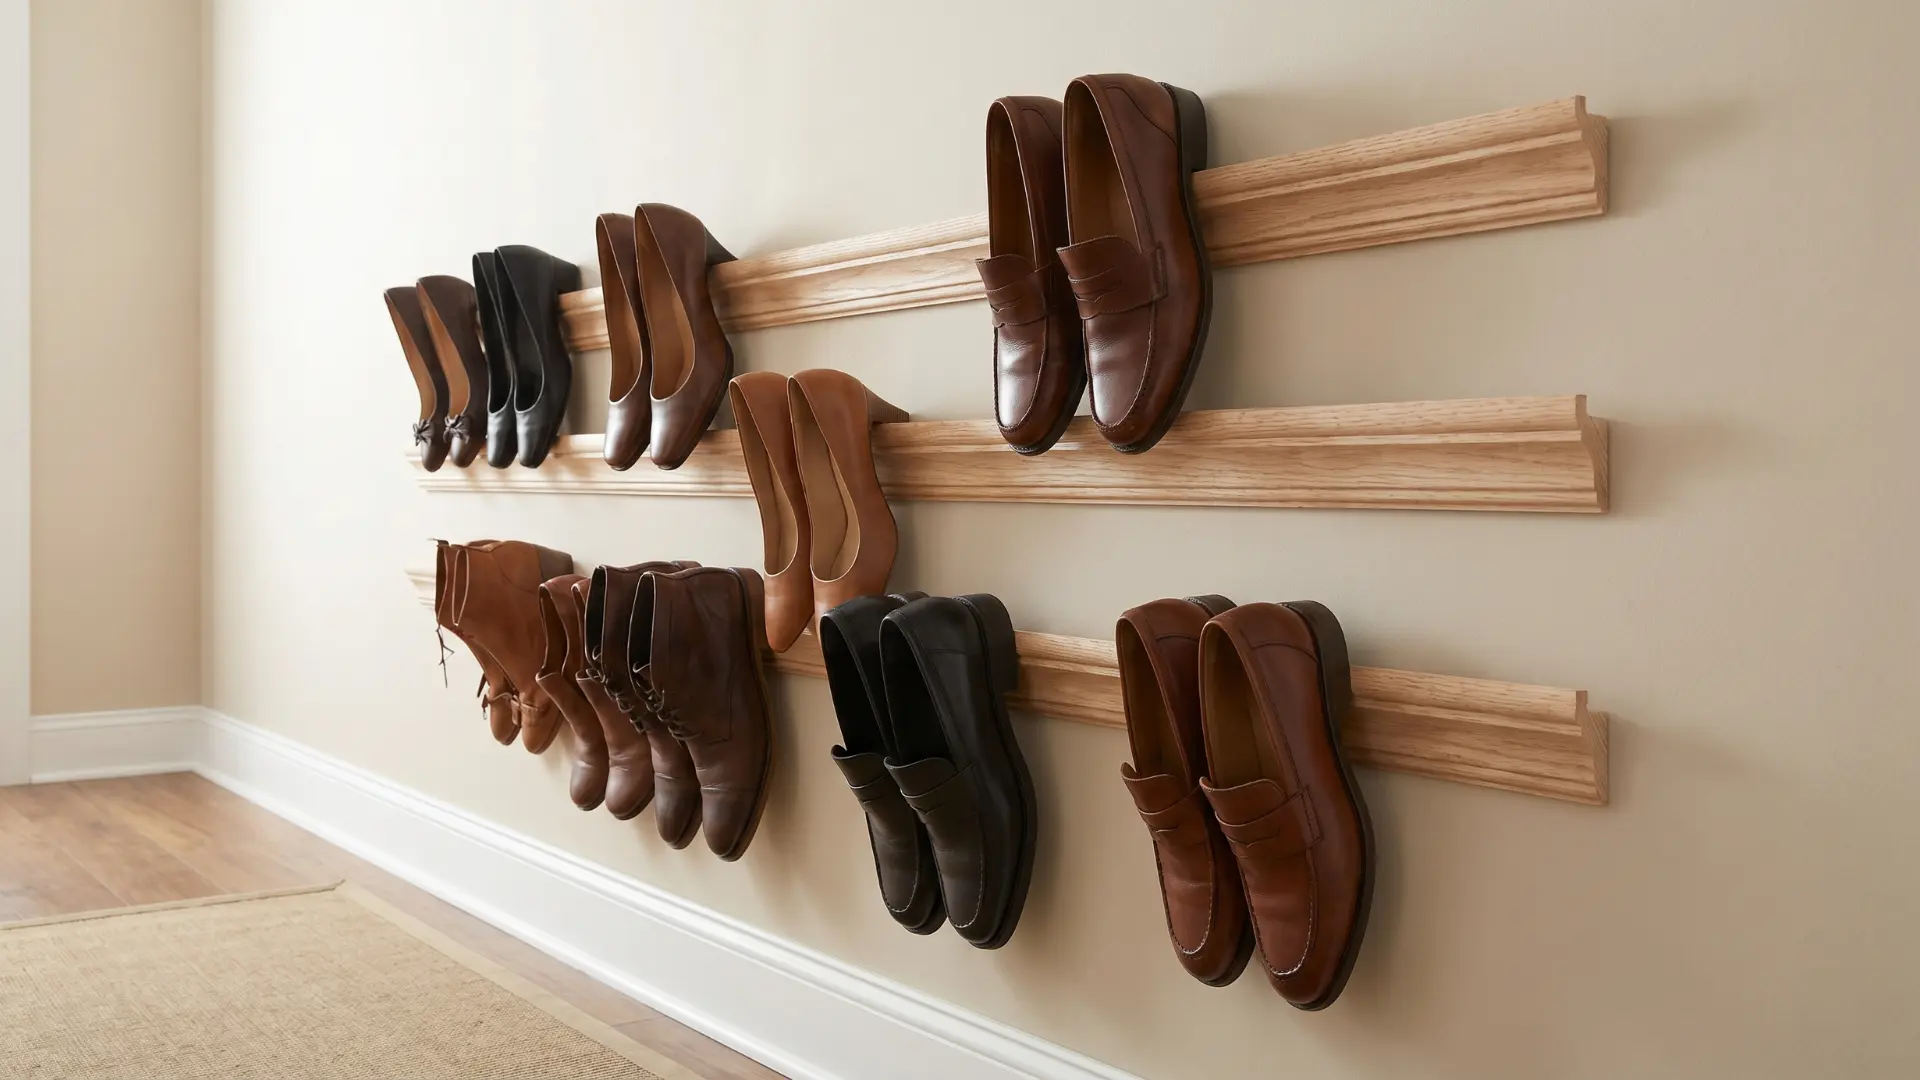
Short pieces of crown molding mounted to the wall create a simple storage system for heels and flats. The shoes hook onto the curved edge, keeping them off the floor and easy to access.
The biggest advantage over tension rods is appearance. You can paint the molding to match the wall, helping it blend in rather than stand out.
That makes it a good option for entryways or dressing areas where the storage will remain visible.
Stacked Wooden Crates
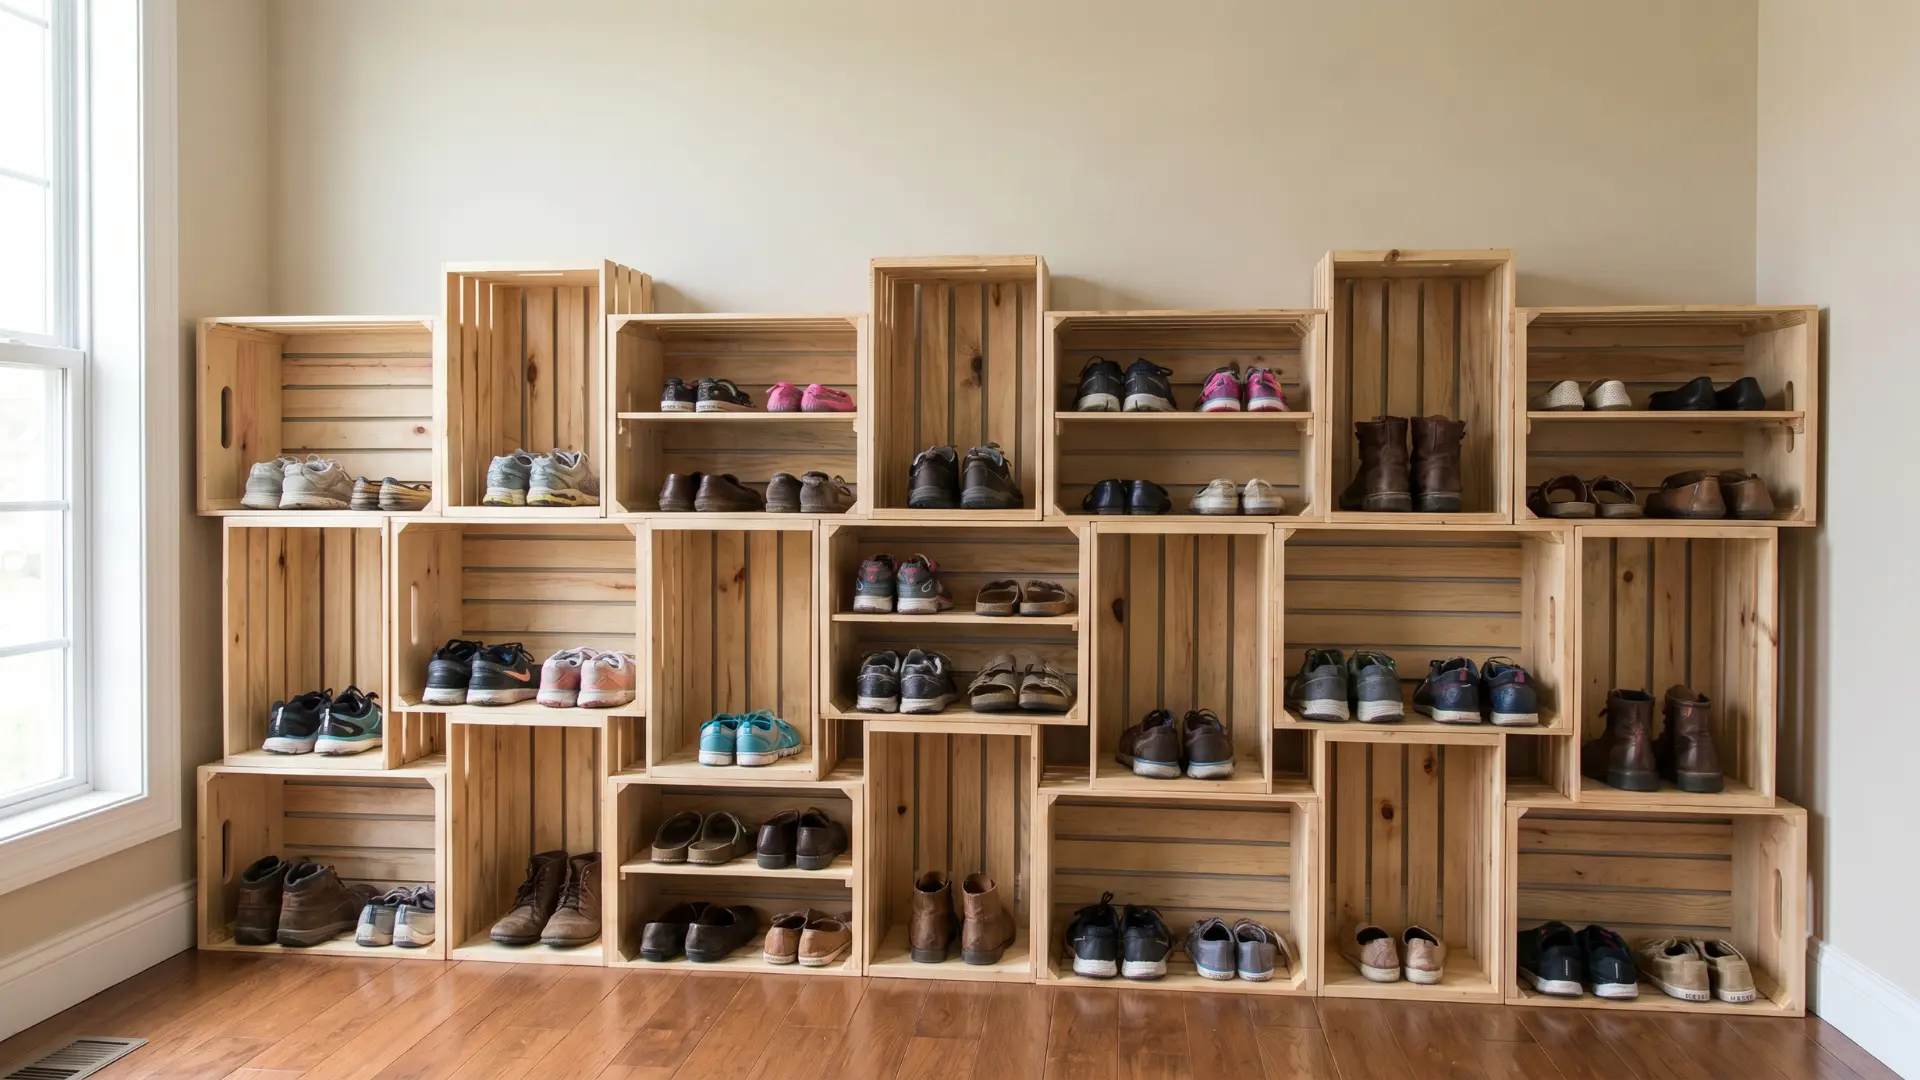
Stacked wooden crates can hold almost any type of shoe, including boots, making them the most versatile option on this list.
Before stacking them, sand the interior surfaces and corners with 120-grit sandpaper. Rough crate wood can scuff leather and suede over time, especially around the toe box. It only takes a few minutes and helps prevent unnecessary wear.
What Is Each Storage Option Best For?
| Storage Option | Best For | Doesn’t Work For |
|---|---|---|
| Tension Rods | Heels and flats with a defined heel opening | Sneakers, boots, loafers, and shoes without a heel opening |
| Crown Molding Strips | Heels and flats that can hook onto the molding edge | Sneakers, boots, loafers, and most flat-soled shoes |
| Stacked Wooden Crates | Mixed shoe collections and general-purpose storage | None. Works with virtually all shoe types when sized appropriately. |
Common Mistakes to Avoid
Avoiding common mistakes ensures your shoe rack is sturdy, level, and long-lasting, saving time and frustration during cutting, assembly, and finishing.
- Skipping Measurements: Failing to measure carefully often leads to a crooked or uneven rack that does not sit level or fit properly.
- Cutting Pieces Separately without Labels: Cutting parts one at a time without labeling them can result in mismatched sizes and a frame that doesn’t align.
- Freehand Cutting without A Guide: Cutting boards without a straightedge can cause small angles to drift, creating crooked shelves and a wobbly structure.
- Sanding After Assembly: Waiting to sand until the rack is built makes inside corners nearly impossible to reach and leaves rough surfaces.
- Using Thick Coats of Finish: Applying thick layers of stain or poly traps bubbles, dries unevenly, and leaves brush marks that feel rough underfoot.
- Ignoring Shelf Spacing: Poorly planned vertical space can make shoes not fit correctly, especially taller boots, forcing you to rebuild sections later.
Keep these tips in mind, follow each step carefully, and your finished rack will look professional, hold shoes securely, and last for years.
Conclusion
Building your own shoe rack saves money and gives you a custom solution that fits your space and shoe collection. By measuring carefully, cutting and sanding properly, and applying the right finish, you’ll have a sturdy rack that lasts for years.
Proper shelf spacing, angled shelves, and mid-span supports make it functional for all types of shoes, from flats to boots.
Avoiding common mistakes ensures a level, stable rack. Take these steps today and enjoy a neat, organized entryway or closet with your handmade shoe rack.
Frequently Asked Questions
What can I use instead of a shoe rack?
Over-the-door organizers, wall-mounted floating shelves, and wooden crates all work as shoe storage without a rack. For tight entryways, a shallow wall shelf at ankle height keeps shoes off the floor without eating floor space. PVC pipe cut into short lengths and stacked in a grid holds individual pairs upright at near-zero cost.
How do I build a shoe rack out of 2×4s?
The assembly process is the same as with 2×2s, two side frames connected by horizontal shelf supports. 2×4s are heavier and wider, which adds bulk without adding meaningful strength for this application. They’re a solid choice for a garage rack where durability matters more than appearance.
How wide should a DIY shoe rack be?
Measure your wall or closet opening first, then work backward to a dimension that fits standard lumber lengths without wasteful offcuts. Twenty-four inches works for a small entryway. Thirty-six inches fits two to three pairs side by side per shelf comfortably.
How many shelves do I need?
Two shelves handle roughly eight to twelve pairs. Three shelves fit fifteen to twenty. The more useful question is vertical clearance: flats need 6 inches per tier, dress shoes need 8, and boots need a dedicated lower tier of at least 12 inches. Count your shoes by type before you decide on shelf count.