
A dripping faucet or outdated fixture can make an otherwise functional bathroom feel frustrating to use.
I know that replacing a faucet might seem like a job best left to a plumber, but in many cases, it is a project you can handle yourself with a few basic tools.
Taking the DIY route can also save money and give your bathroom a fresh, updated look.
In this step-by-step guide to replacing your bathroom faucet, I will walk you through the entire process from start to finish.
You will learn how to choose the right replacement faucet, gather the tools you need, remove the old fixture, install the new one, and test everything for leaks.
By the end, you will have the knowledge and confidence to complete the project safely and correctly.
Signs You Need to Replace Your Faucet
A few common warning signs can help you decide when replacing your faucet makes more sense than repairing it.
- Leaks Around the Base: Base leaks often signal worn seals. Persistent pooling may indicate that a repair won’t help.
- Rust and Mineral Buildup: Rust or mineral buildup can signal an aging faucet. Corrosion and calcium deposits may affect performance over time.
- Poor Water Flow: May signal a failing cartridge. Reduced pressure can continue despite aerator cleaning.
- Outdated Style or Damaged Parts: Damaged parts or an outdated design can make replacement more practical than ongoing repairs.
- Multiple Problems at Once: Multiple faucet issues often make replacement the better choice. A new faucet can refresh your bathroom.
Tools and Materials Needed to Replace a Bathroom Faucet
Having everything within reach before you start is one of the simplest ways to make this job go smoothly. You will not want to stop partway through with the water off to make a hardware store run.
- Adjustable wrench
- Basin wrench
- Plumber’s tape (PTFE tape)
- Bucket
- New bathroom faucet
- New supply lines
How to Easily Replace a Bathroom Faucet?
Replacing a bathroom faucet is a simple project that can improve both the look and function of your sink. With a few basic tools and the right steps, most homeowners can complete the job in just a couple of hours.
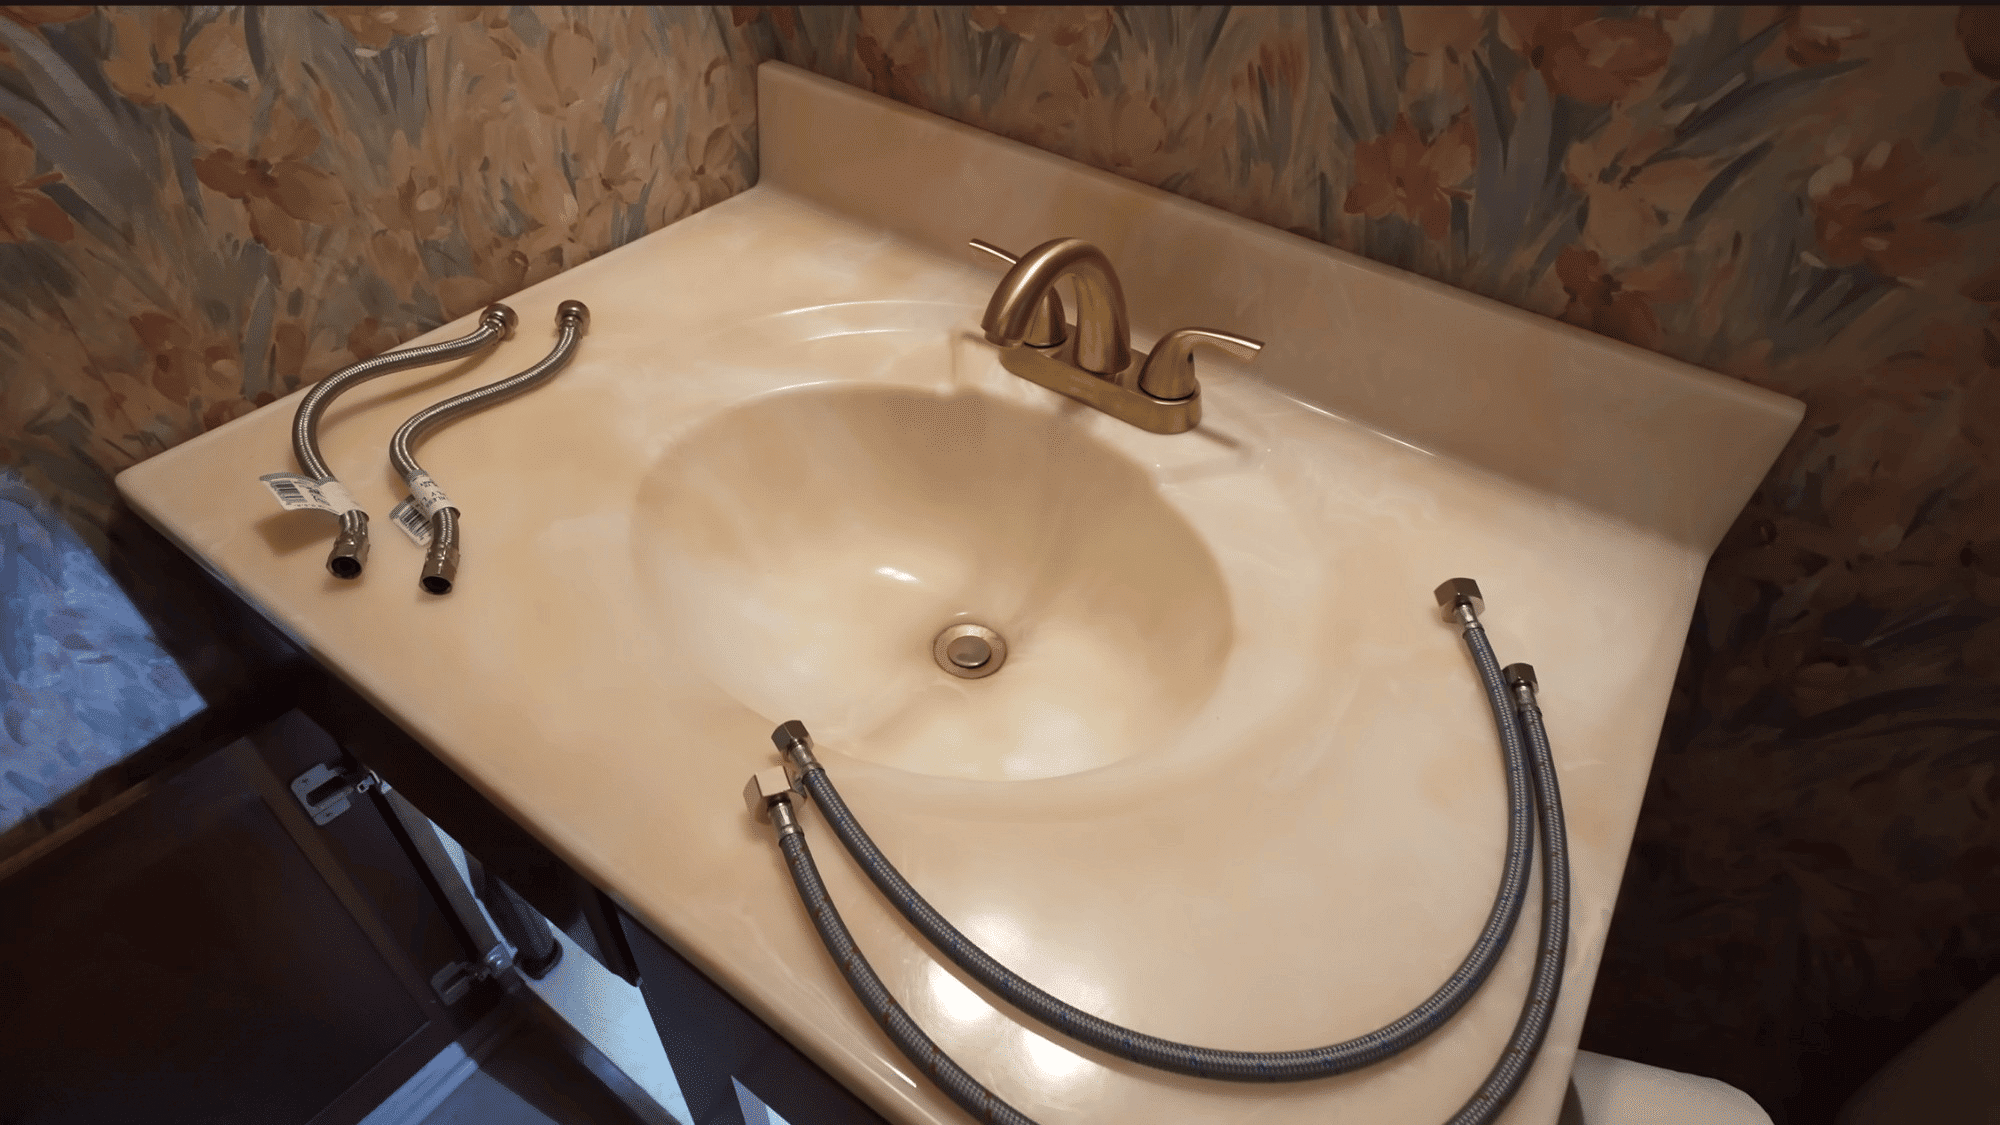
Step 1: Inspect the Faucet and Gather Your Tools
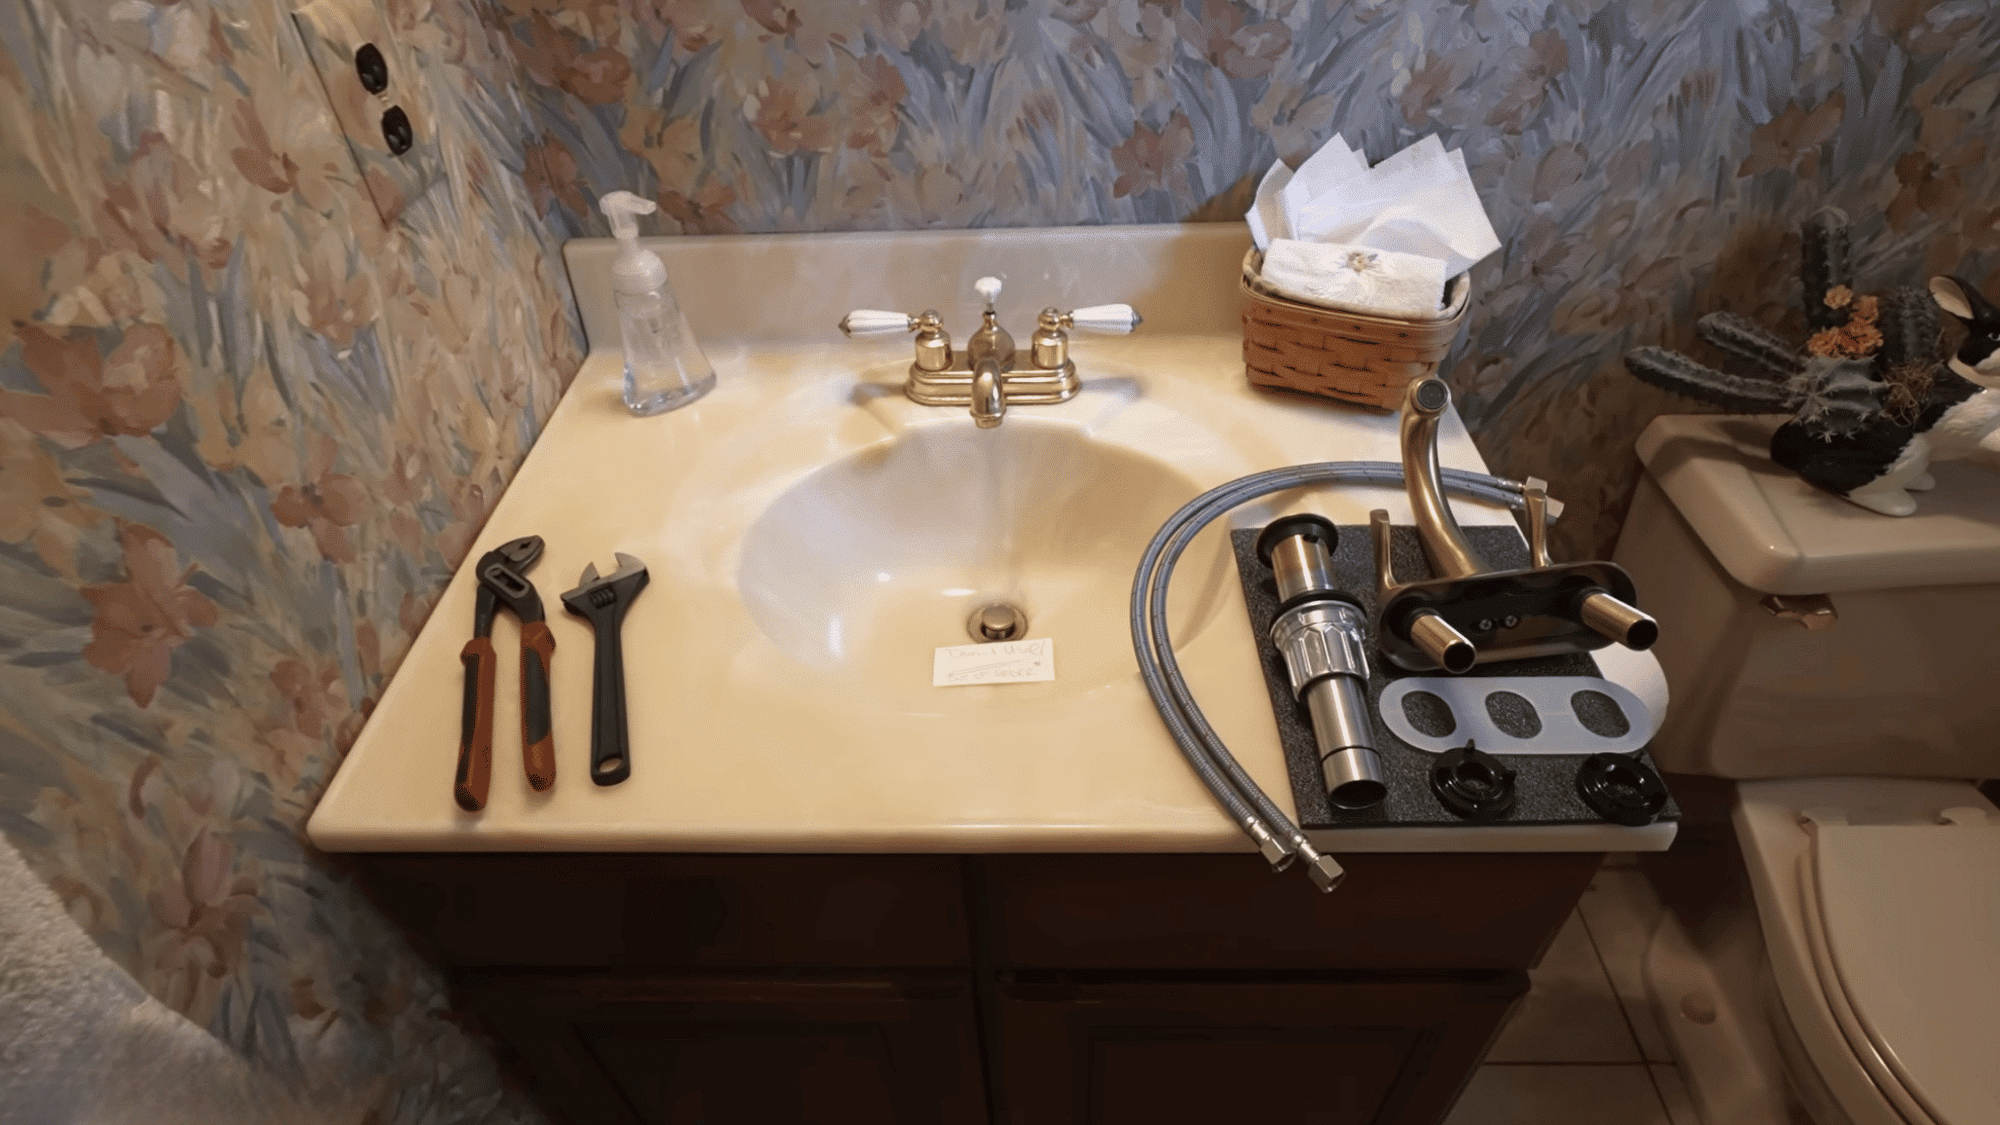
Before starting, take a close look at the existing faucet and identify any leaks, corrosion, or damaged parts. Clear out the space under the sink so you can work comfortably and access the plumbing connections.
Gather the tools and materials you will need, including an adjustable wrench, bucket or towel, replacement faucet, and any new supply lines.
Spending a few minutes preparing the workspace helps the installation go more smoothly and reduces the chance of interruptions later.
Step 2: Turn Off the Water Supply
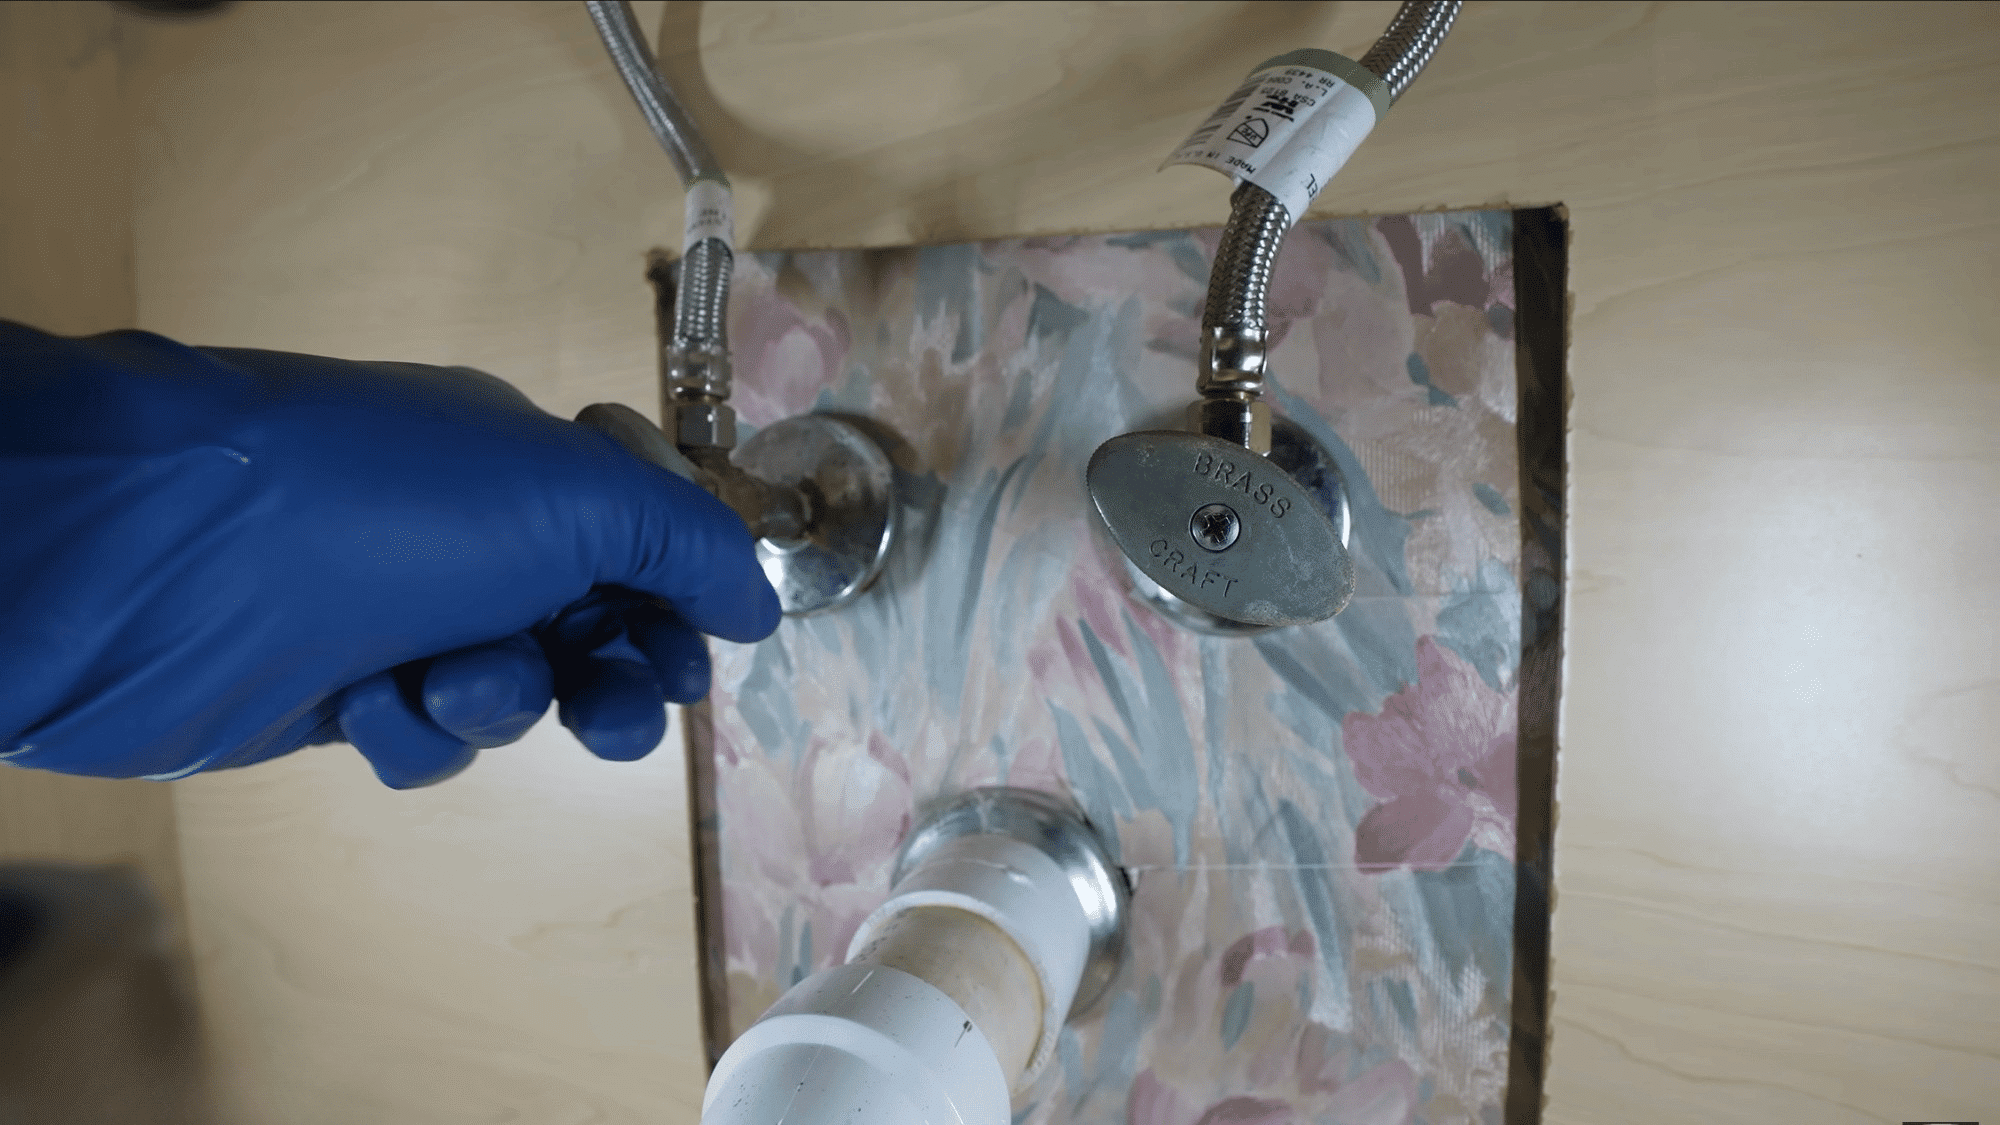
Locate the hot and cold water shutoff valves under the sink and turn them clockwise until they are snug.
Avoid overtightening, as this can damage the valves. Once both valves are closed, turn on the faucet to confirm that the water supply has been shut off.
This step prevents unwanted leaks and makes it safe to disconnect the plumbing.
Always double-check that no water is flowing before moving on to the next stage.
Step 3: Disconnect the Water Supply Lines
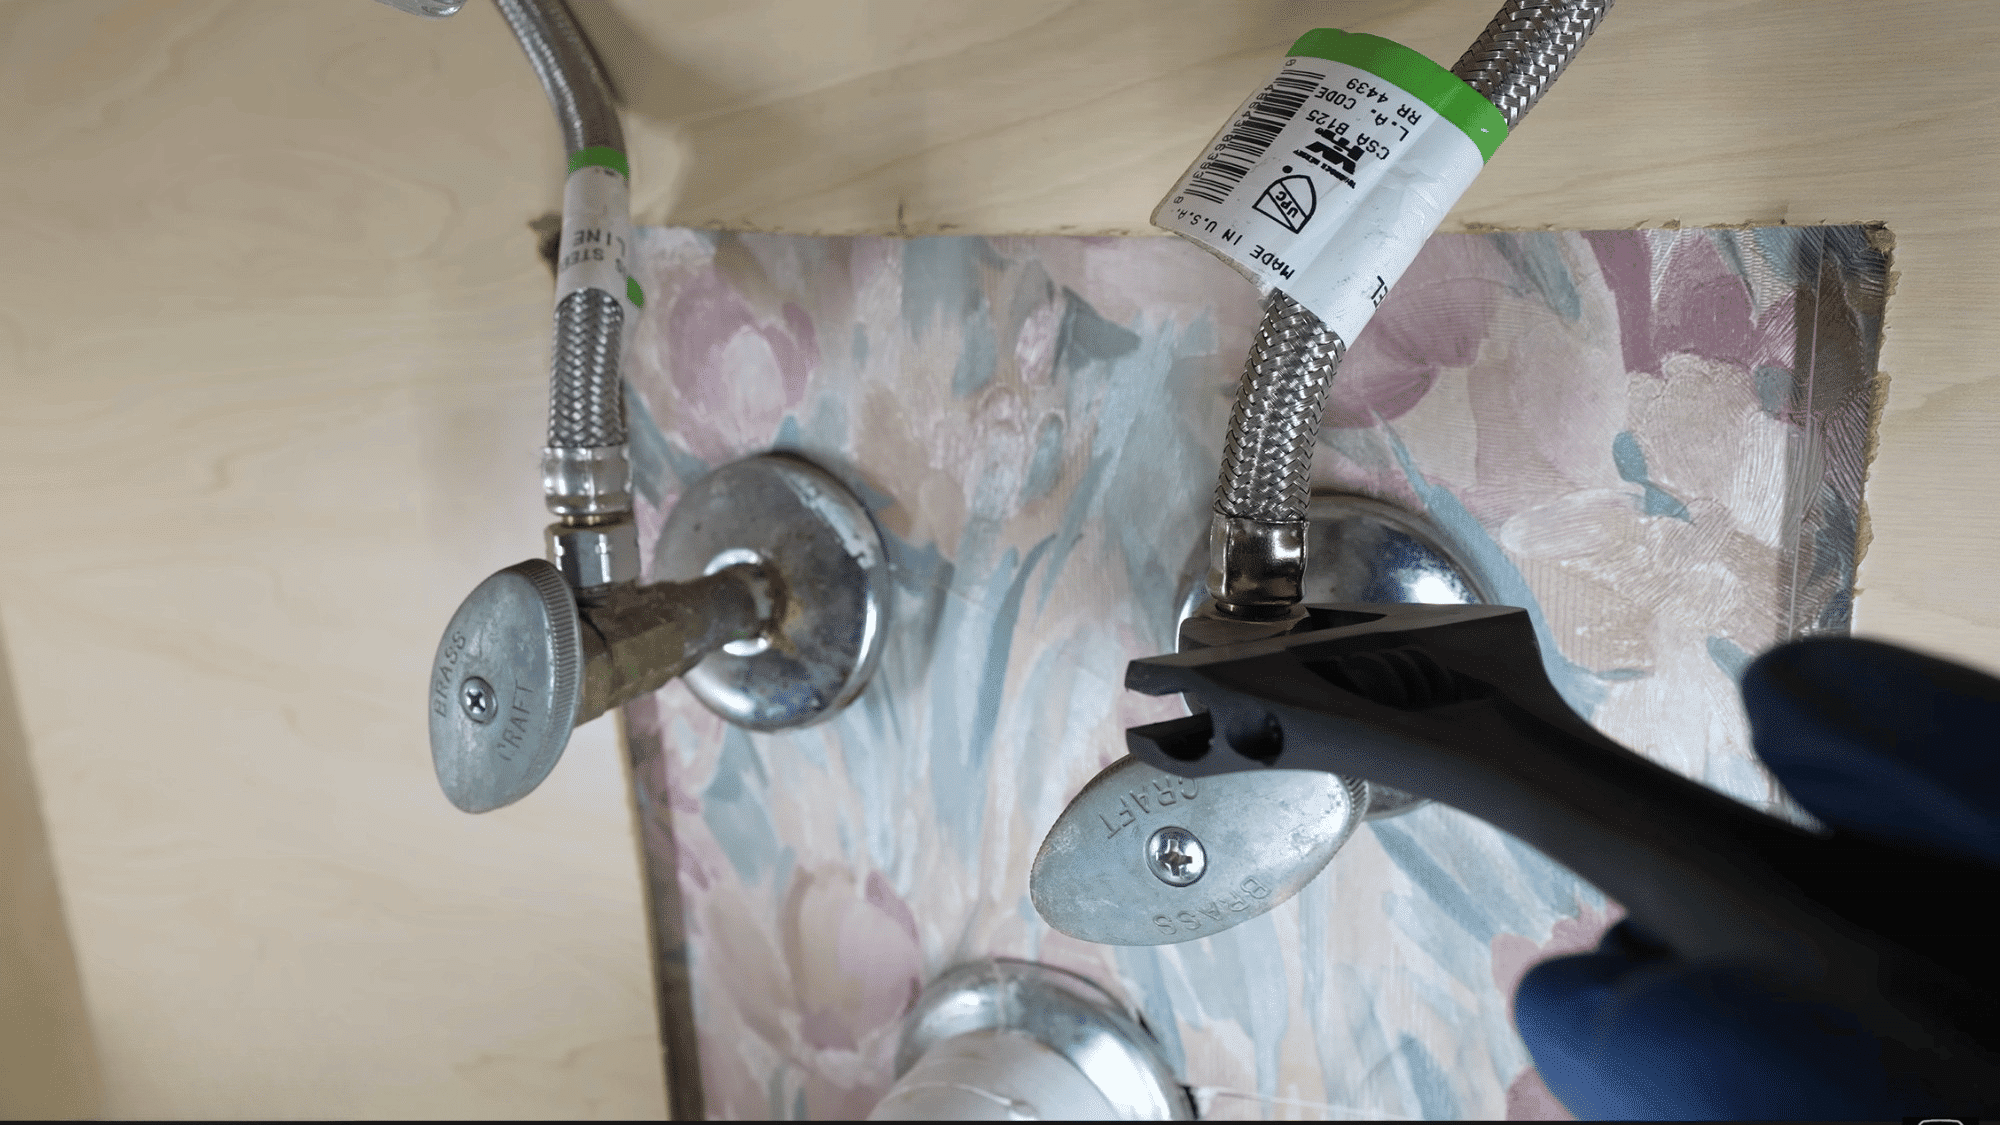
Place a small container or towel beneath the supply line connections to catch any leftover water. Using an adjustable wrench, loosen the nuts connecting the hot and cold water lines and remove them carefully.
Even after the water is turned off, some water will remain inside the lines. Disconnect both sides and move them out of the way.
Keeping the area dry and organized will make it easier to remove the old faucet and install the new one later.
Step 4: Remove the Old Faucet
Under the sink, remove the mounting hardware that secures the faucet in place. This usually includes screw-on washers and any lift rod components.
Work carefully and keep all removed parts together in case you need to reference them later.
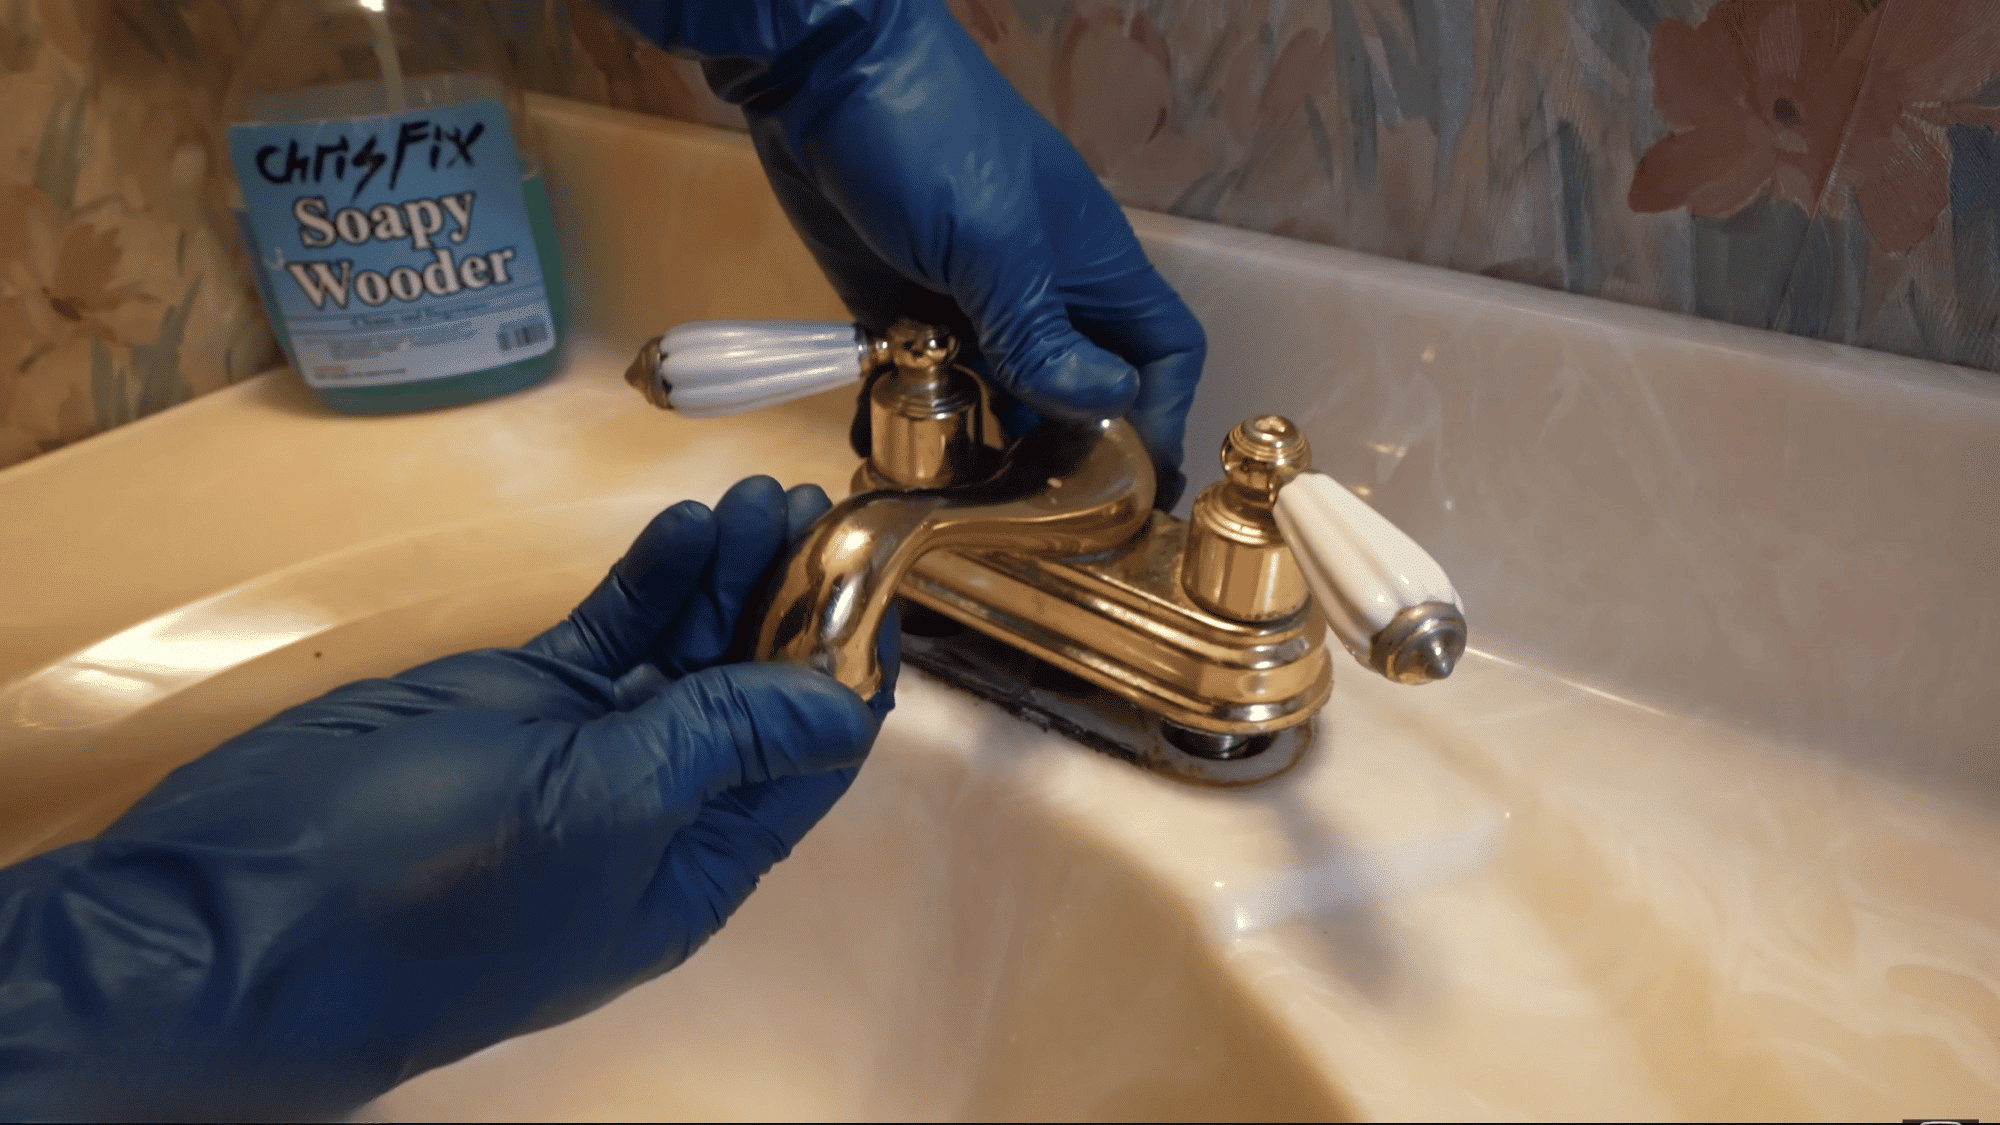
Once the mounting hardware is removed, lift the old faucet out from the top of the sink. The sink surface should now be completely exposed and ready for cleaning.
Step 5: Clean the Sink Surface
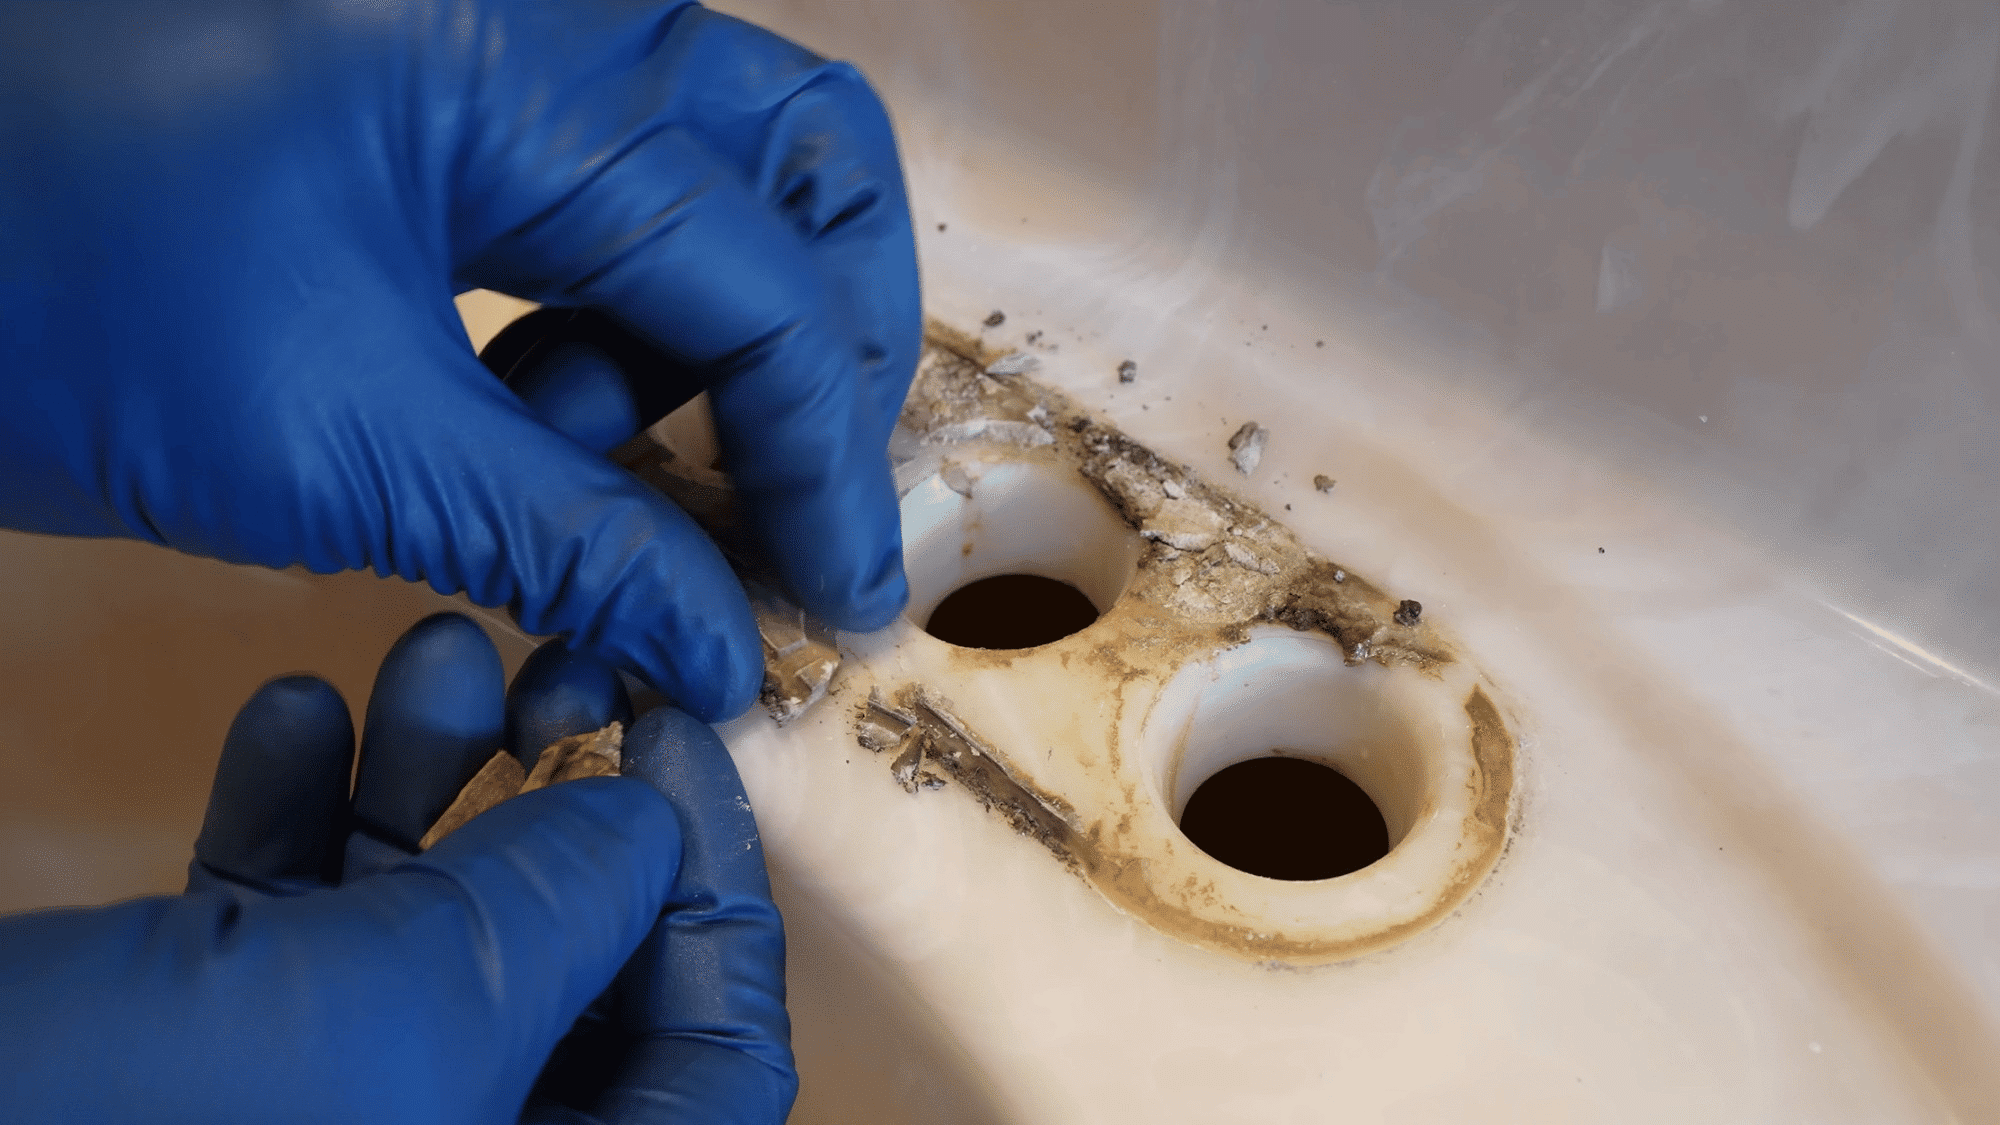
After removing the old faucet, clean away any remaining gasket material, dirt, or buildup left behind on the sink.
Use soapy water and a plastic scraper to remove stubborn residue without scratching the surface.
Avoid metal scrapers because they can damage the finish of the sink. A clean surface helps the new gasket seal properly. Taking time here improves the final result.
Step 6: Install the New Faucet
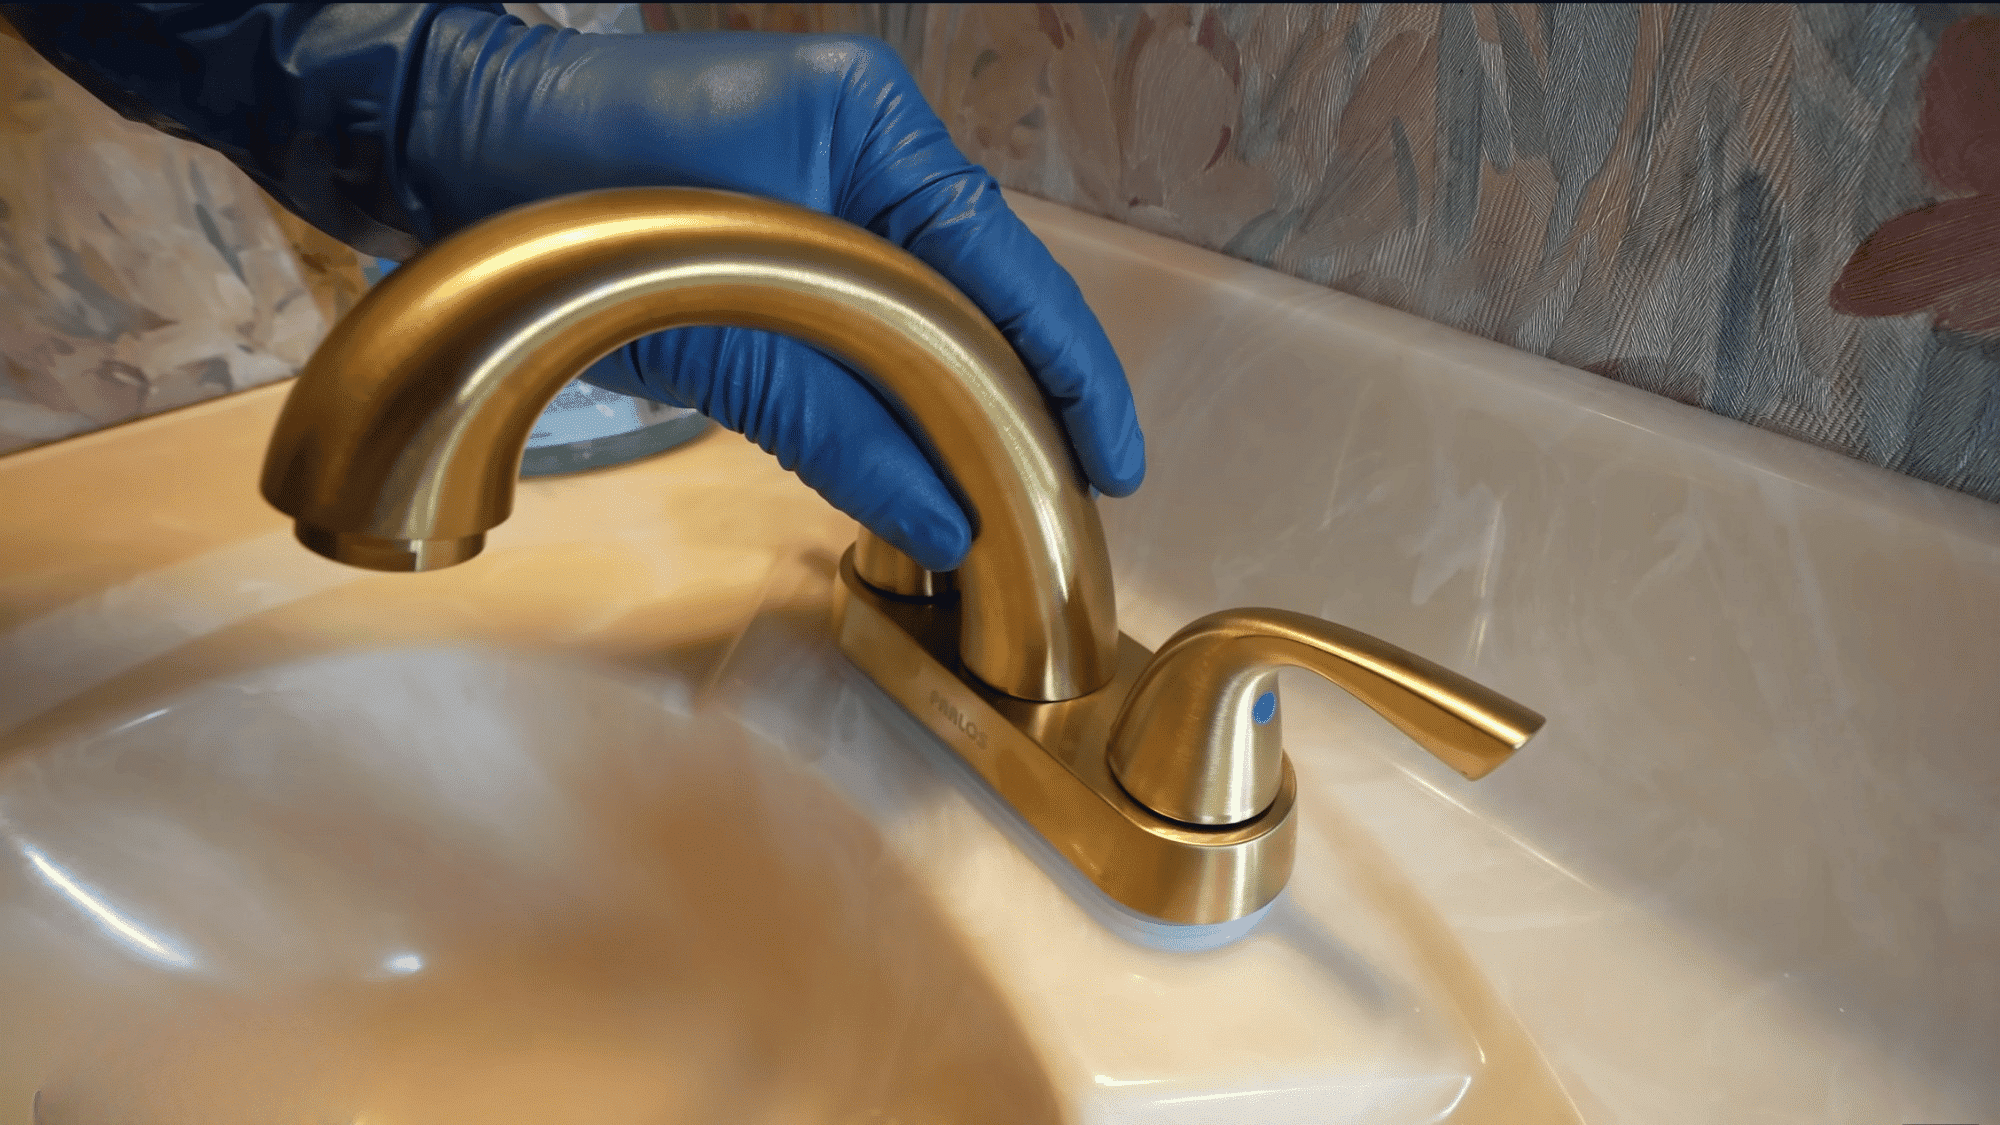
Place the new gasket over the sink holes and carefully position the new faucet on top. Make sure the faucet sits evenly and aligns correctly with the gasket underneath.
Proper alignment is important because it helps prevent water from getting beneath the fixture.
Once the faucet is positioned correctly, hold it steady while preparing to secure it from underneath the sink. Double-check its placement before tightening anything into place.
Step 7: Secure the Faucet and Connect the Supply Lines
From underneath the sink, install the mounting washers and nuts that hold the faucet securely in place. Tighten them evenly so the faucet remains centered and stable.
Next, connect the hot and cold water supply lines to the correct connections.
Most supply lines are color-coded, making identification easier. Tighten all connections until snug, but avoid overtightening.
Make sure the hoses are routed without sharp bends or kinks so water can flow freely once the system is turned back on.
Step 8: Remove the Old Drain Assembly
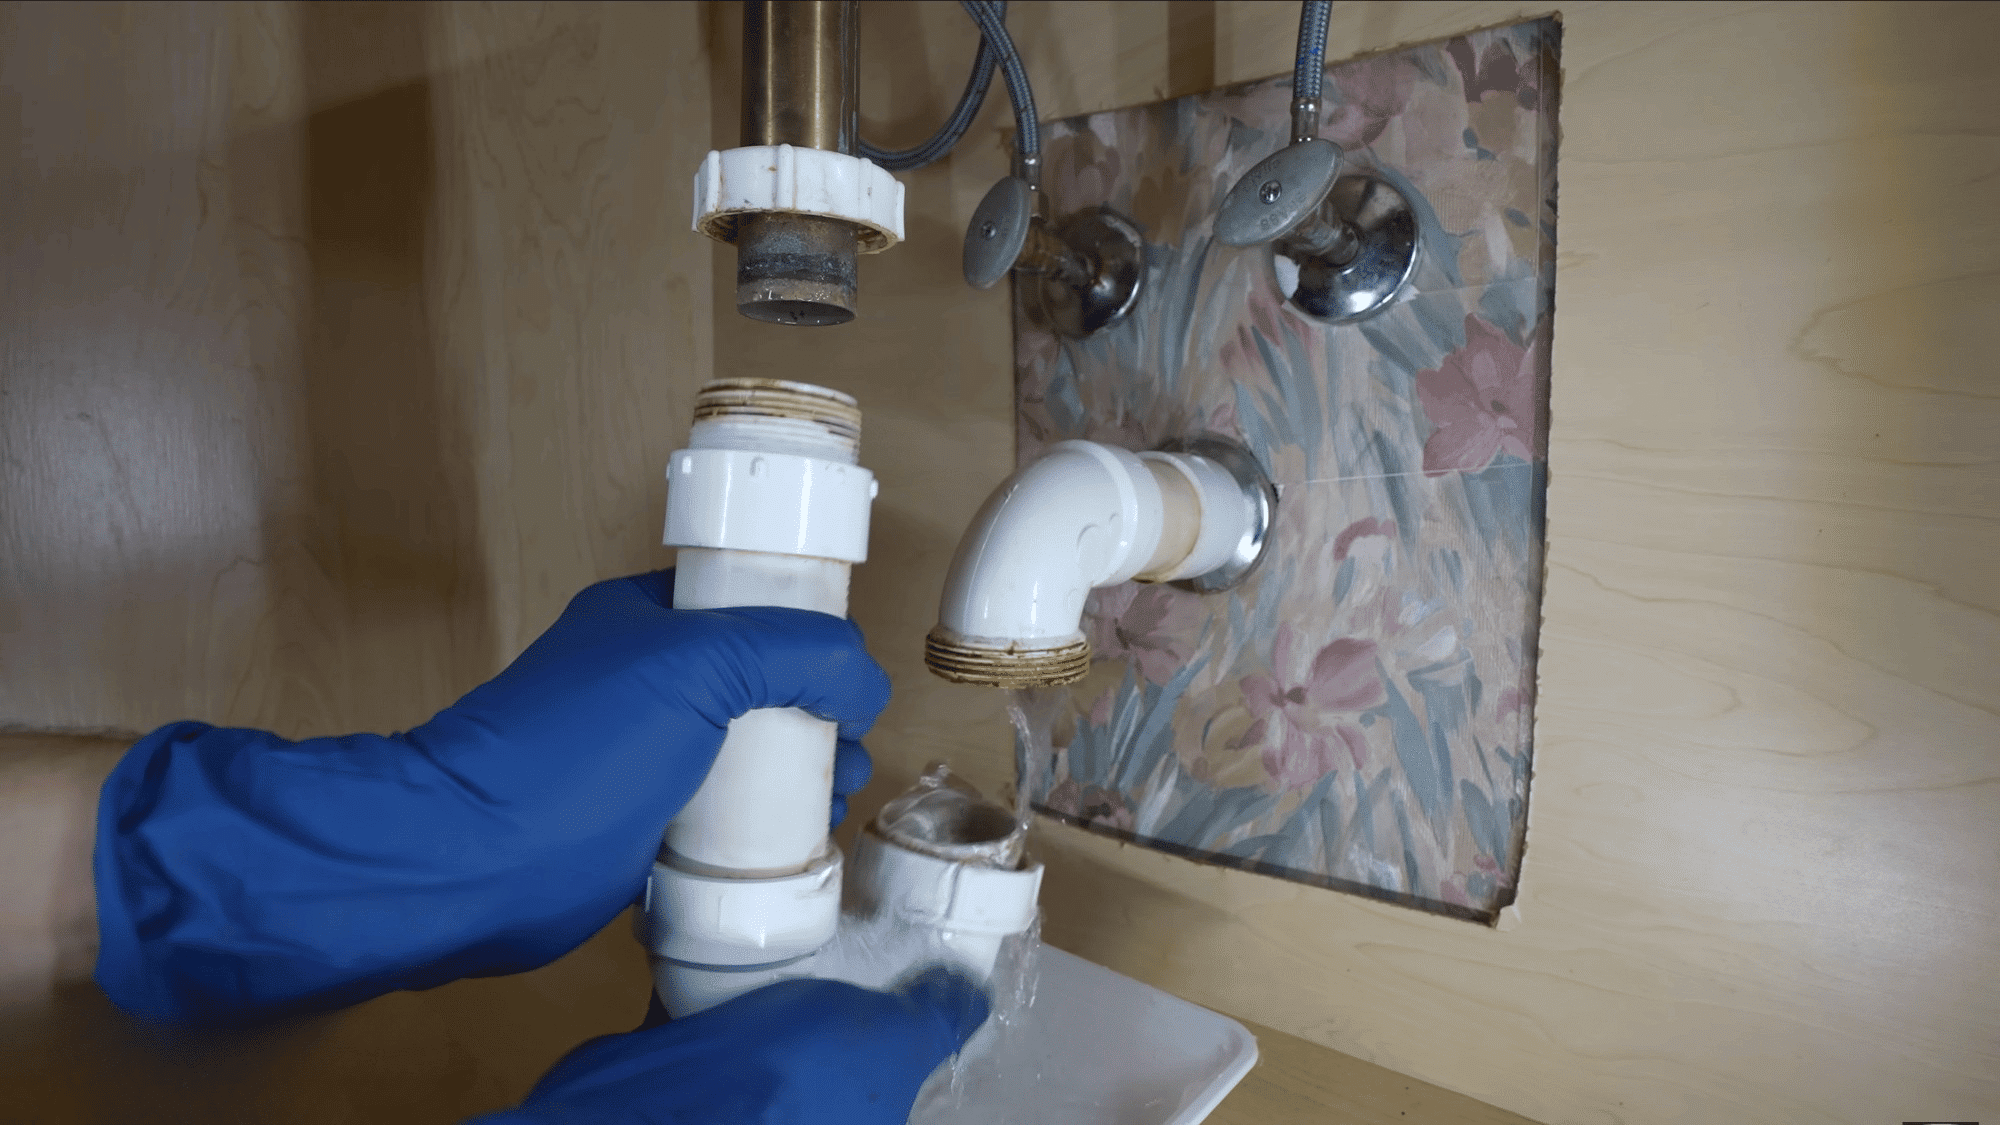
If you are replacing the drain as well, disconnect the drain assembly by loosening the retaining nut and removing the P-trap.
Keep a container nearby because water will likely remain inside the trap. Once the drain pipes are disconnected, remove the old drain from the sink.
Clean away any buildup, old sealant, or debris around the drain opening.
This ensures the new drain assembly can sit properly and create a reliable seal.
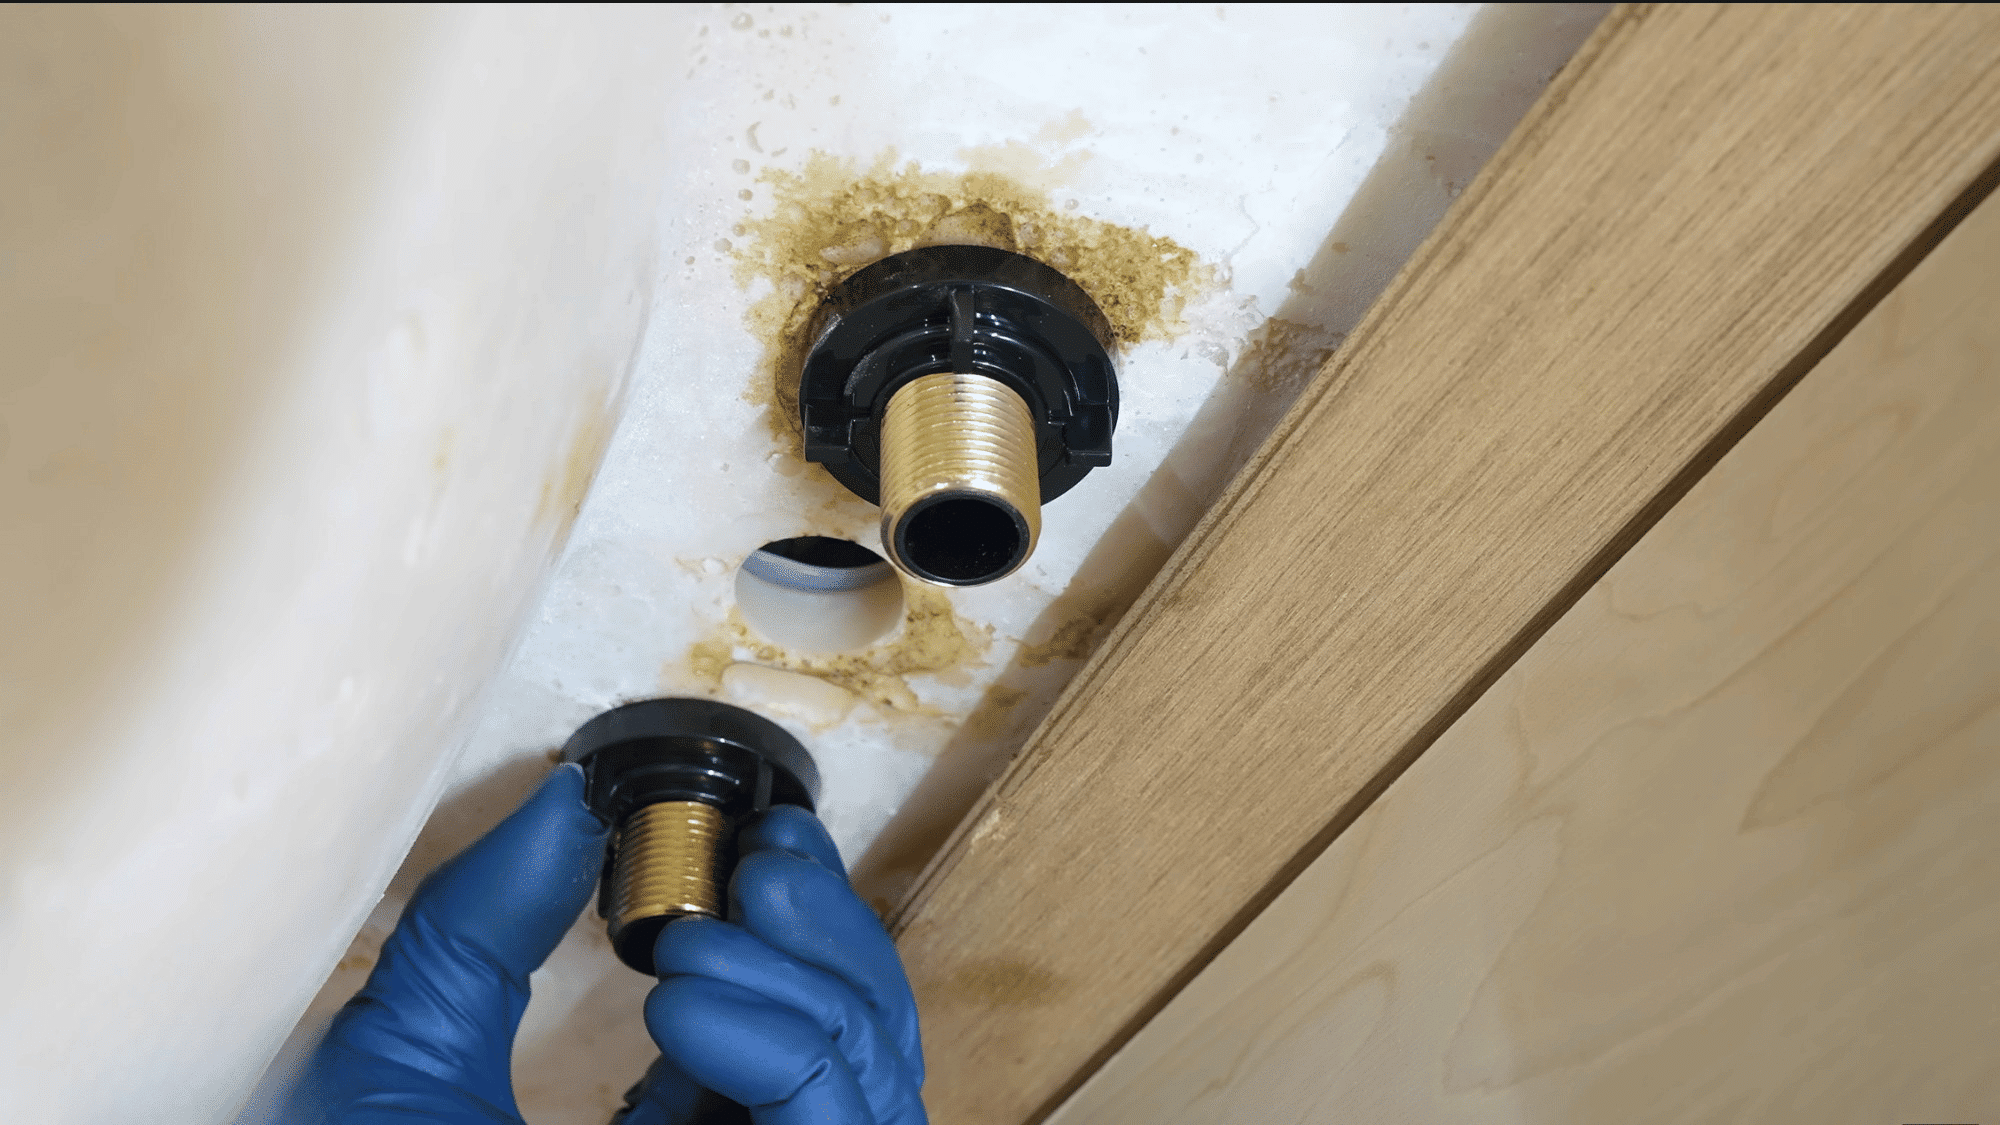
Step 9: Install the New Drain and Reattach the P-Trap
Insert the new drain into the sink opening and align it correctly with the overflow channel if your sink has one.
Install the rubber gasket and retaining nut underneath the sink, tightening everything until snug.
Reattach the P-trap and any drain connections that were removed earlier. Make sure the washers are positioned correctly before tightening the nuts.
Proper alignment and secure connections help prevent leaks and ensure smooth drainage.
Step 10: Turn the Water Back on and Check for Leaks
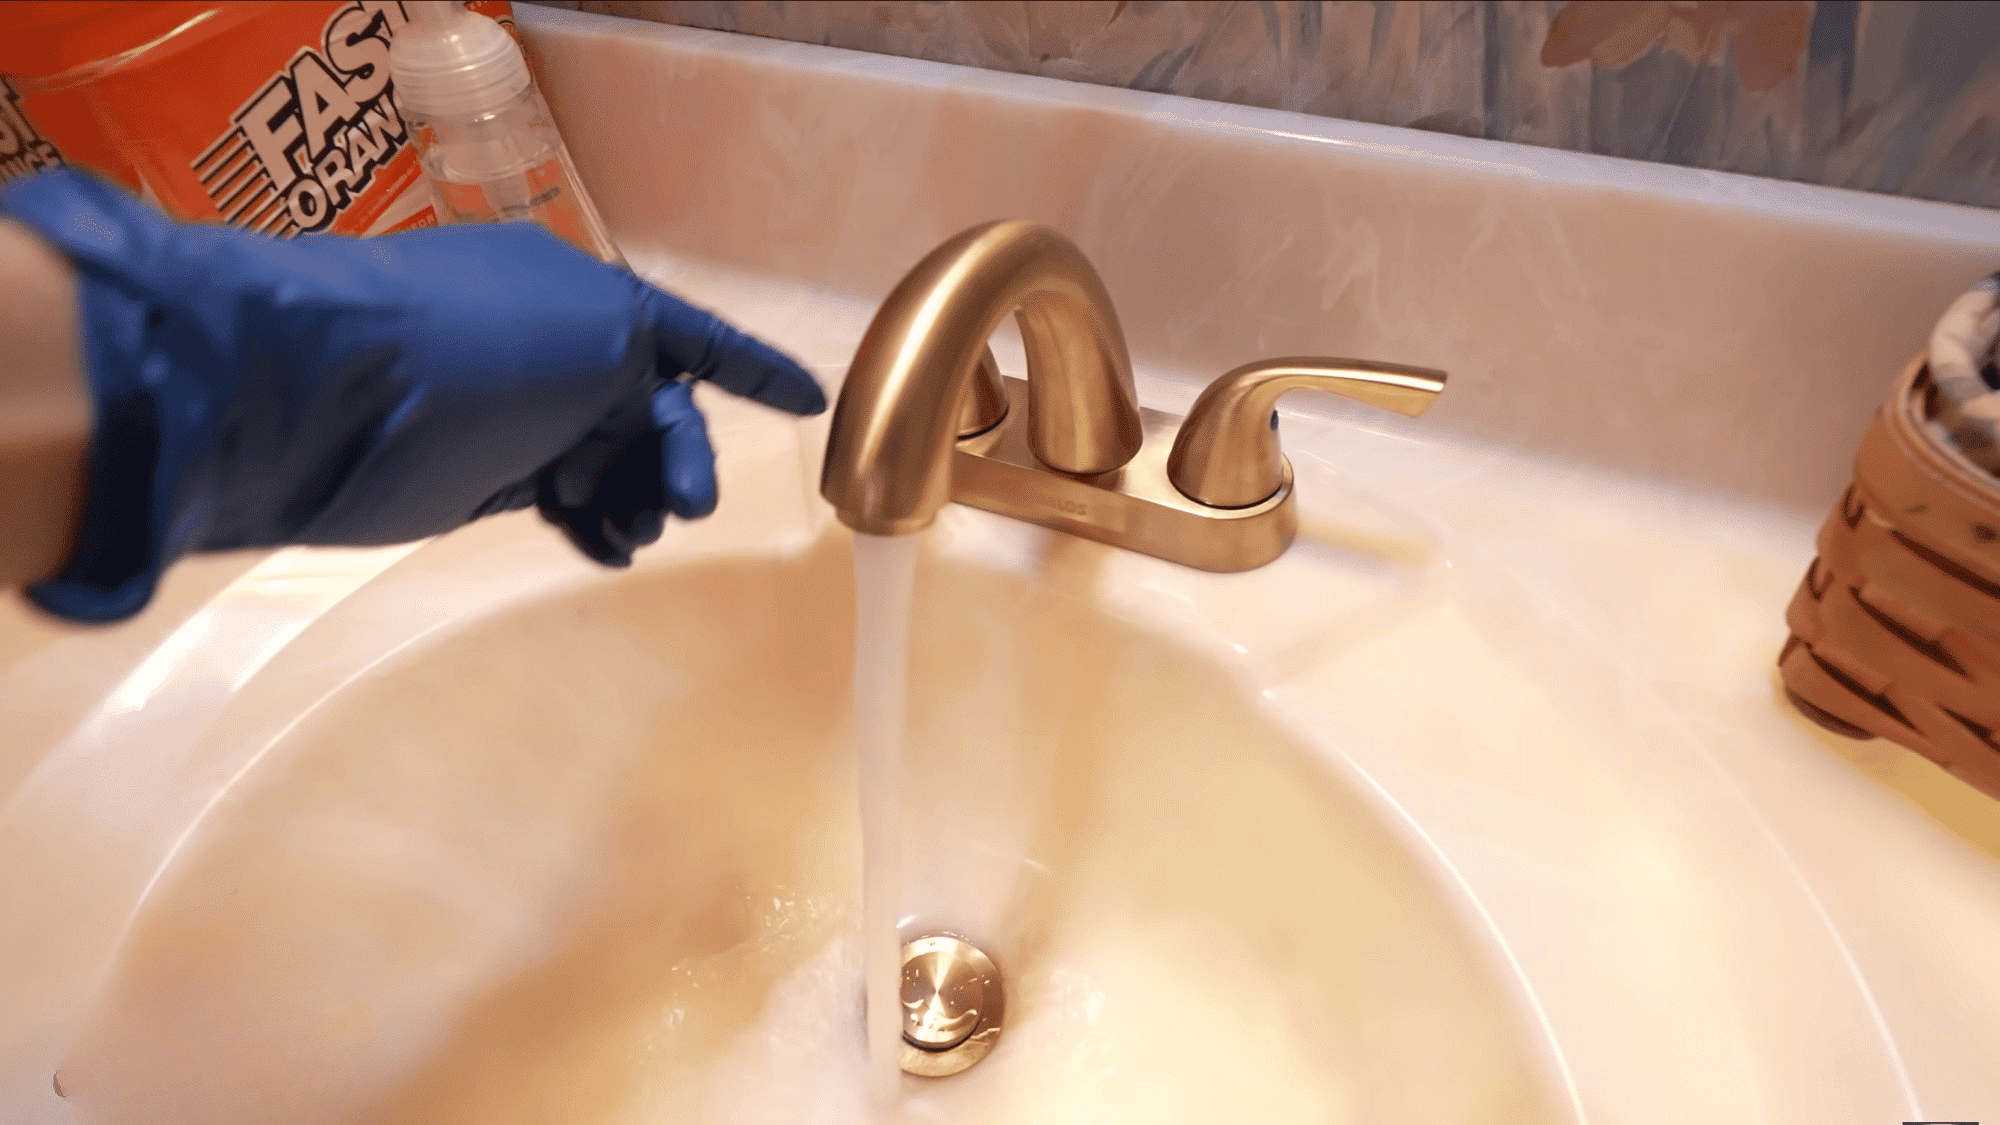
Slowly open the hot and cold water shutoff valves and allow water to flow through the new faucet. Test both handles and check that the drain opens and closes correctly.
Carefully inspect all connections under the sink, supply lines, faucet, and drain fittings.
Use a dry paper towel to check for small leaks. If everything stays dry and works properly, the faucet replacement is done.
This tutorial is based on a helpful video by ChrisFix. You can check out the original video on their YouTube channel here or watch it below.
How to Choose the Right Bathroom Faucet?
Choosing the right faucet starts with checking your sink setup, faucet size, and bathroom finish before you buy.
- Check the sinkhole setup: Count your sinkholes and check spacing to ensure the new faucet fits correctly.
- Match the faucet size and style: Measure the faucet size and ensure the spout reach and height fit your sink properly.
- Choose a finish that suits your bathroom: Match the faucet finish to nearby hardware for a coordinated, polished look.
- Consider water efficiency: Look for WaterSense-certified faucets that reduce water usage without sacrificing performance, helping you save on water bills.
- Check handle type and functionality: Choose between single-handle or double-handle faucets based on your convenience, preferred temperature control, and daily usage needs.
How to Troubleshoot Bathroom Faucet Leaks After Installation?
Even a small issue can cause water to drip after installation. Checking a few common problem areas can help you find the cause and fix it quickly.
| Problem | Possible Cause | Solution |
|---|---|---|
| Leak at the base of the faucet | Loose mounting nuts or missing gasket | Tighten the mounting nuts and make sure the gasket is properly placed. |
| Water leaking from supply lines | Loose supply line connections | Tighten the connections with a wrench, but avoid overtightening. |
| Leak under the sink | Damaged or worn washers and seals | Replace any damaged washers, O-rings, or seals. |
| Dripping from the spout | Cartridge not installed correctly or a faulty cartridge | Remove and reinstall the cartridge or replace it if needed. |
| Leak around the handle | Loose packing nut or damaged handle seal | Tighten the packing nut or replace the seal. |
| Water seeping from threaded connections | Insufficient plumber’s tape | Remove the connection, apply fresh plumber’s tape, and reconnect. |
| Leak after turning the water back on | Connection shifted during installation | Inspect all fittings and tighten any loose connections. |
| Continued leaking after repairs | Defective faucet component | Check the manufacturer’s warranty and replace the faulty part. |
Types of Bathroom Faucets
Bathroom faucets come in several styles, each offering different features, installation requirements, and design benefits.
- Loose Connections: Loose supply line connections can cause leaks, so check and tighten fittings carefully after installation.
- Base Seal Issues: A damaged gasket or poor seal at the base may allow water to leak underneath.
- Handle Leak Signs: Leaks around handles often indicate worn cartridges, washers, or O-rings that need replacement soon.
- Missing Plumber’s Tape: Missing or improperly applied plumber’s tape can allow water to escape from threaded connections.
- Misaligned Parts: Incorrectly aligned faucet components may create gaps that lead to leaks during normal daily use.
- Test for Leaks: Run water for several minutes and inspect all connections to identify hidden leaks early.
- Check Water Lines: Inspect supply lines beneath the sink for drips, moisture, or signs of water damage.
- Secure Mounting Nuts: Loose mounting nuts can cause movement and leaks, so ensure all hardware remains secure.
Approximate Cost to Replace a Bathroom Faucet
The total cost depends on the faucet you choose and whether you install it yourself or hire a plumber. Professional installation increases the overall expense but saves time and effort.
| Expense Category | DIY Replacement | Professional Installation |
|---|---|---|
| Faucet Cost | $50 to $200 | $50 to $200 |
| Supply Lines and Materials | $10 to $30 | Usually included or billed separately |
| Labor Cost | $0 | $100 to $250 |
| Total Estimated Cost | $60 to $230 | $150 to $450 |
| Main Advantage | Lower overall cost | Professional installation with less effort |
| Possible Additional Costs | Specialty tools, if needed | Corroded pipes, valve replacement, or other plumbing repairs |
| Recommended For | Homeowners are comfortable with basic DIY plumbing | Homeowners who prefer professional assistance |
Bathroom Faucet Maintenance Tips
A few simple maintenance habits can help keep your faucet looking good and working properly for years.
- Clean mineral buildup regularly: Clean the faucet monthly with mild vinegar to prevent mineral buildup and maintain water flow.
- Check for small leaks: Check under the sink regularly to catch small leaks before they cause damage or mold.
- Avoid harsh cleaners: Use soft cloths to protect the finish and keep it looking good.
- Replace worn washers when needed: A worn washer or O-ring can often be replaced quickly without changing the entire faucet.
- Clean the aerator periodically: Remove and rinse the aerator every few months to clear debris and maintain steady water pressure.
- Tighten loose handles and connections: Check handles and visible connections occasionally to prevent wobbling and reduce wear on faucets.
- Keep drains clear: A clear drain helps water flow properly and reduces the chance of standing water around the faucet area.
When to Call a Plumber?
DIY faucet replacement is well within reach for most homeowners, but there are situations where bringing in a licensed plumber is the smarter and safer choice.
Old or stuck plumbing connections can quickly turn a simple project into a difficult repair.
If supply line fittings are corroded or stuck, a plumber can safely remove them using the proper tools.
Hidden leaks should never be ignored. If you discover moisture or mold under the sink that goes beyond the faucet, a plumber should assess the situation.
A leaking or faulty shutoff valve should be repaired before the faucet can be replaced safely.
If you are unsure about the work, hiring a plumber can help prevent costly water damage.
Conclusion
Replacing a bathroom faucet may seem difficult at first, but it gets easier when you follow the steps one at a time.
With the right tools and careful attention to the water connections, you can give your bathroom a fresh update without feeling overwhelmed.
A new faucet can also fix leaks, improve daily use, and make the sink area look cleaner and more put-together.
Before you begin, always turn off the water supply, follow the faucet instructions, and check for leaks after installation. If something feels too difficult or unsafe, calling a plumber is always a smart choice.
Have you replaced a bathroom faucet before? Share your tips or questions in the comments below.
Frequently Asked Questions
Can a Beginner Replace a Bathroom Faucet?
Yes, most homeowners can replace a bathroom faucet themselves using basic tools and clear instructions.
How Long Does It Take to Replace a Bathroom Faucet?
Most bathroom faucet replacements take between one and two hours to complete.
Do You Need Plumber’s Putty for a Bathroom Faucet?
It depends on the faucet, as some models use a rubber gasket while others require plumber’s putty.
How Much Does It Cost to Replace a Bathroom Faucet?
A DIY replacement typically costs $60 to $230, while professional installation usually ranges from $150 to $450.