
Vinyl plank flooring is a popular choice because it is durable, affordable, and available in a wide range of styles.
Many homeowners choose it as an alternative to hardwood flooring for its low maintenance, realistic appearance, and long-lasting durability.
Learning how to lay vinyl plank flooring can save money and give you more control over the finished look.
With the right tools, preparation, and installation techniques, many DIY projects can be completed successfully.
In this guide, I’ll explain how to lay vinyl plank flooring step by step, including the tools needed, preparation tips, and common mistakes to avoid.
Quick Answer: How to Lay Vinyl Plank Flooring?
To lay vinyl plank flooring, start by preparing a clean, level, and dry subfloor. After measuring the room and planning the layout, install the first row of planks along the longest wall while maintaining the recommended expansion gap.
Continue connecting the planks row by row according to the manufacturer’s instructions.
As you work, make cuts where necessary to fit around doorways, corners, and other obstacles. Once all planks have been installed, add transition strips, baseboards, or trim pieces to complete the project.
Proper preparation, accurate measurements, and careful installation can help create a durable floor with a professional-looking finish that lasts for years.
What Tools Do You Need to Install Vinyl Plank Flooring?
Having the right tools makes installation easier and helps achieve better results. Most vinyl plank flooring projects only require a few basic tools.
- Tape Measure: Used to measure the room and plan the layout.
- Utility Knife: Helps cut vinyl planks to the required size.
- Straight Edge or Ruler: Provides accurate, clean cuts.
- Spacers: Maintain the recommended expansion gap around the room.
- Rubber Mallet: Helps lock planks together without causing damage.
- Pull Bar: Useful when installing planks near walls or in tight spaces.
- Tapping Block: Helps secure plank joints during installation.
- Pencil or Marker: Used for marking measurements and cut lines.
- Safety Equipment: Gloves and safety glasses can help protect against injuries during installation.
Gathering these tools before beginning can help the installation process move more smoothly and reduce interruptions.
How to Install Vinyl Plank Flooring?
Installing vinyl plank flooring is a manageable DIY project when the process is completed one step at a time.
Step 1: Remove the Carpet and Measure the Room
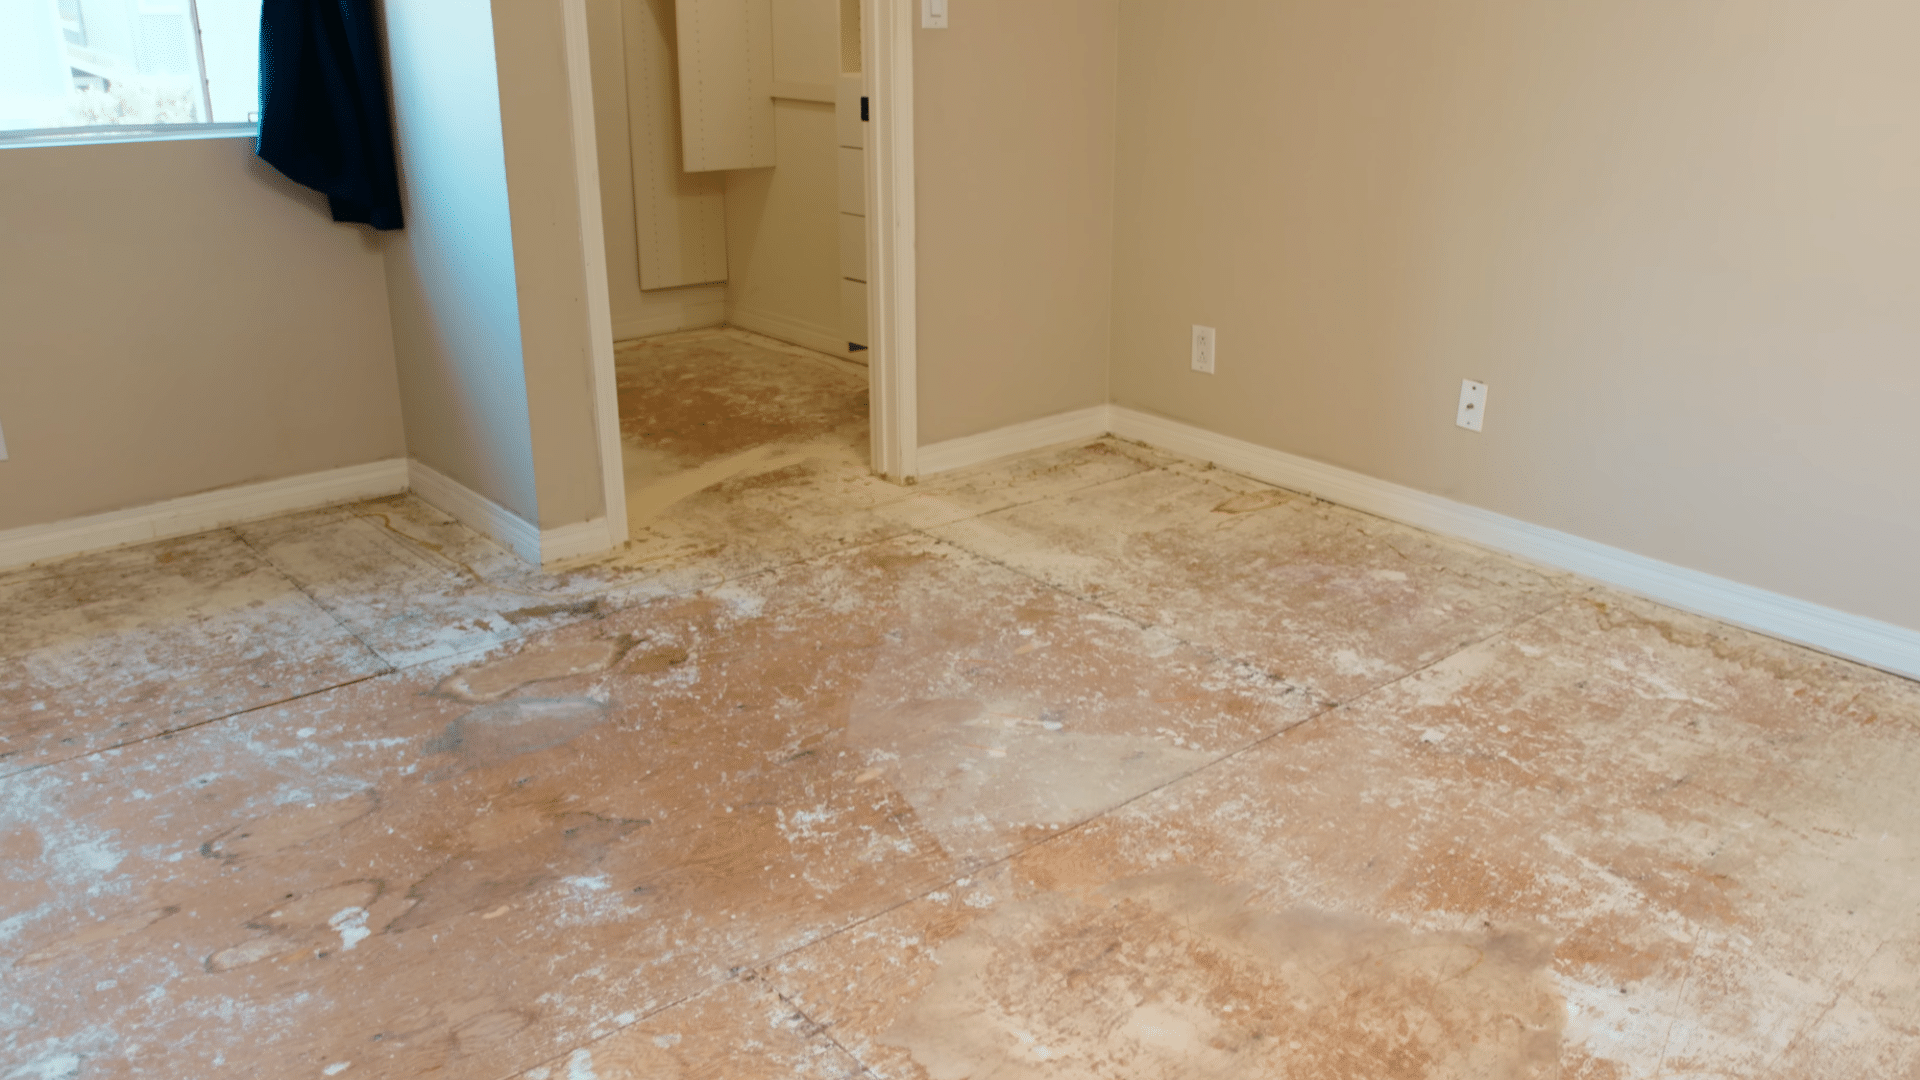
Start by removing any existing carpet or flooring material from the room. Vinyl plank flooring can typically be installed over tile, concrete, or wood subfloors, provided the surface is in good condition.
Next, measure the dimensions of the room and any adjoining spaces, such as closets.
Use these measurements to calculate how much flooring is needed for the project. It is a good idea to purchase a little extra material to account for waste, cutting errors, and future repairs.
Step 2: Prepare the Subfloor
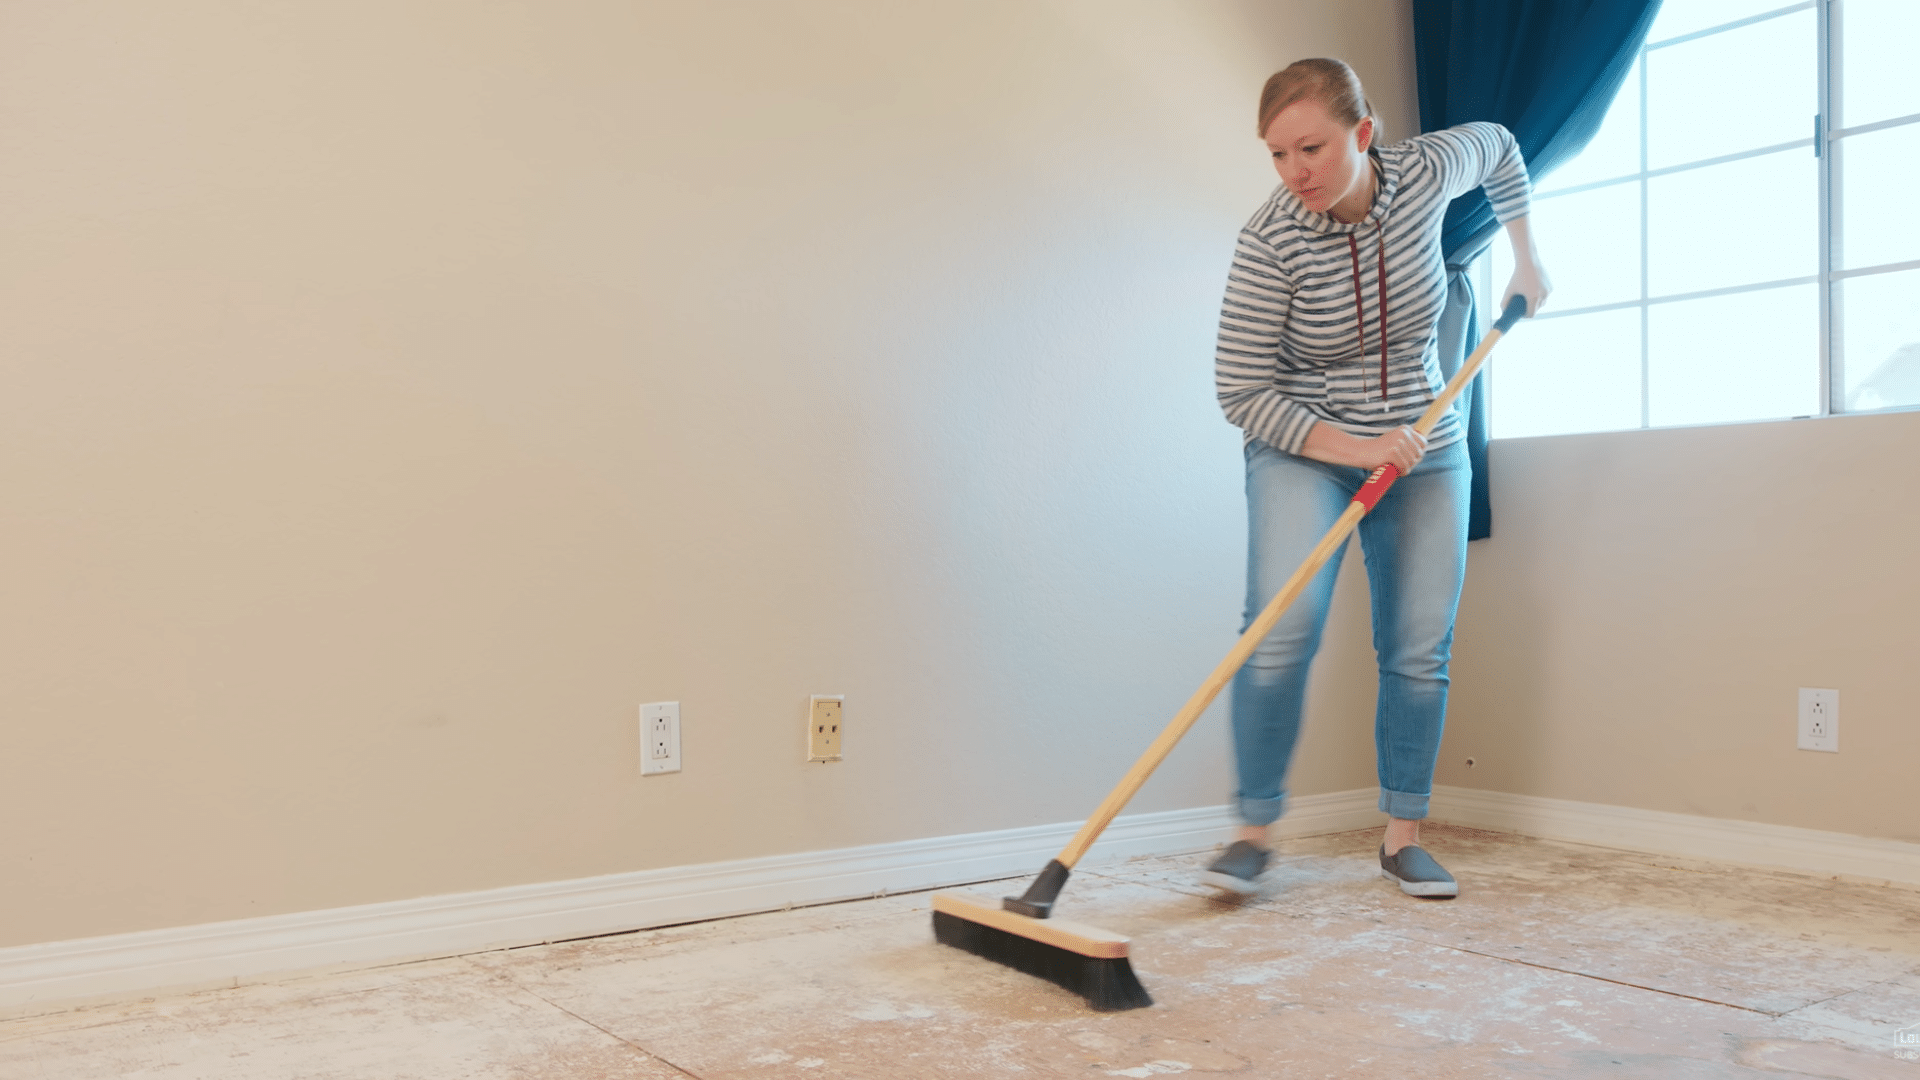
Before installing the flooring, make sure the subfloor is clean, dry, and level. Remove dust, dirt, and debris that could interfere with the locking system of the planks.
Inspect the surface for uneven spots, damage, or moisture issues that may need attention before installation.
Taking the time to properly prepare the subfloor can help ensure a smoother installation process and improve the long-term performance of the flooring.
Step 3: Check the Flooring Product
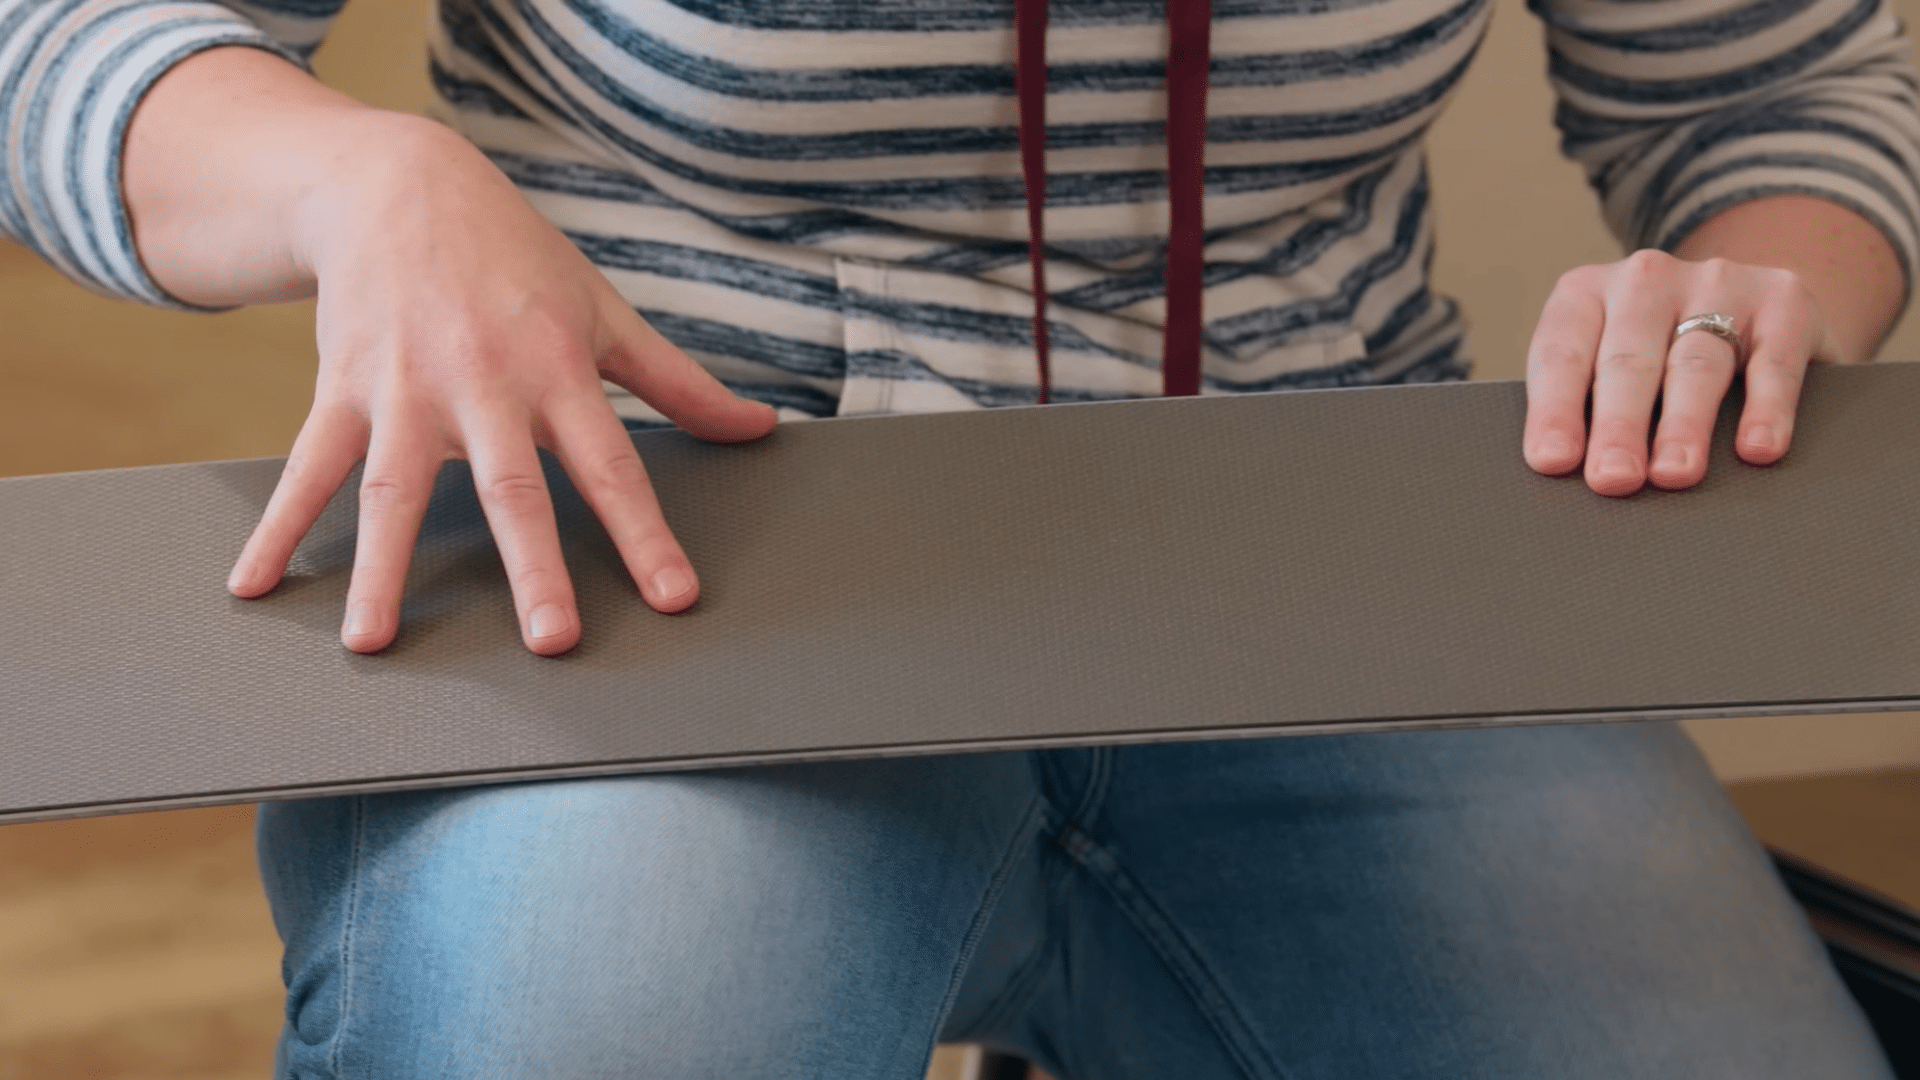
Before installation begins, review the flooring product and the manufacturer’s instructions. Some vinyl plank flooring products include a built-in moisture barrier and underlayment, while others require separate materials.
Understanding the product features before installation can help avoid mistakes and ensure the flooring is installed correctly.
Always confirm the recommended installation requirements before moving to the next step.
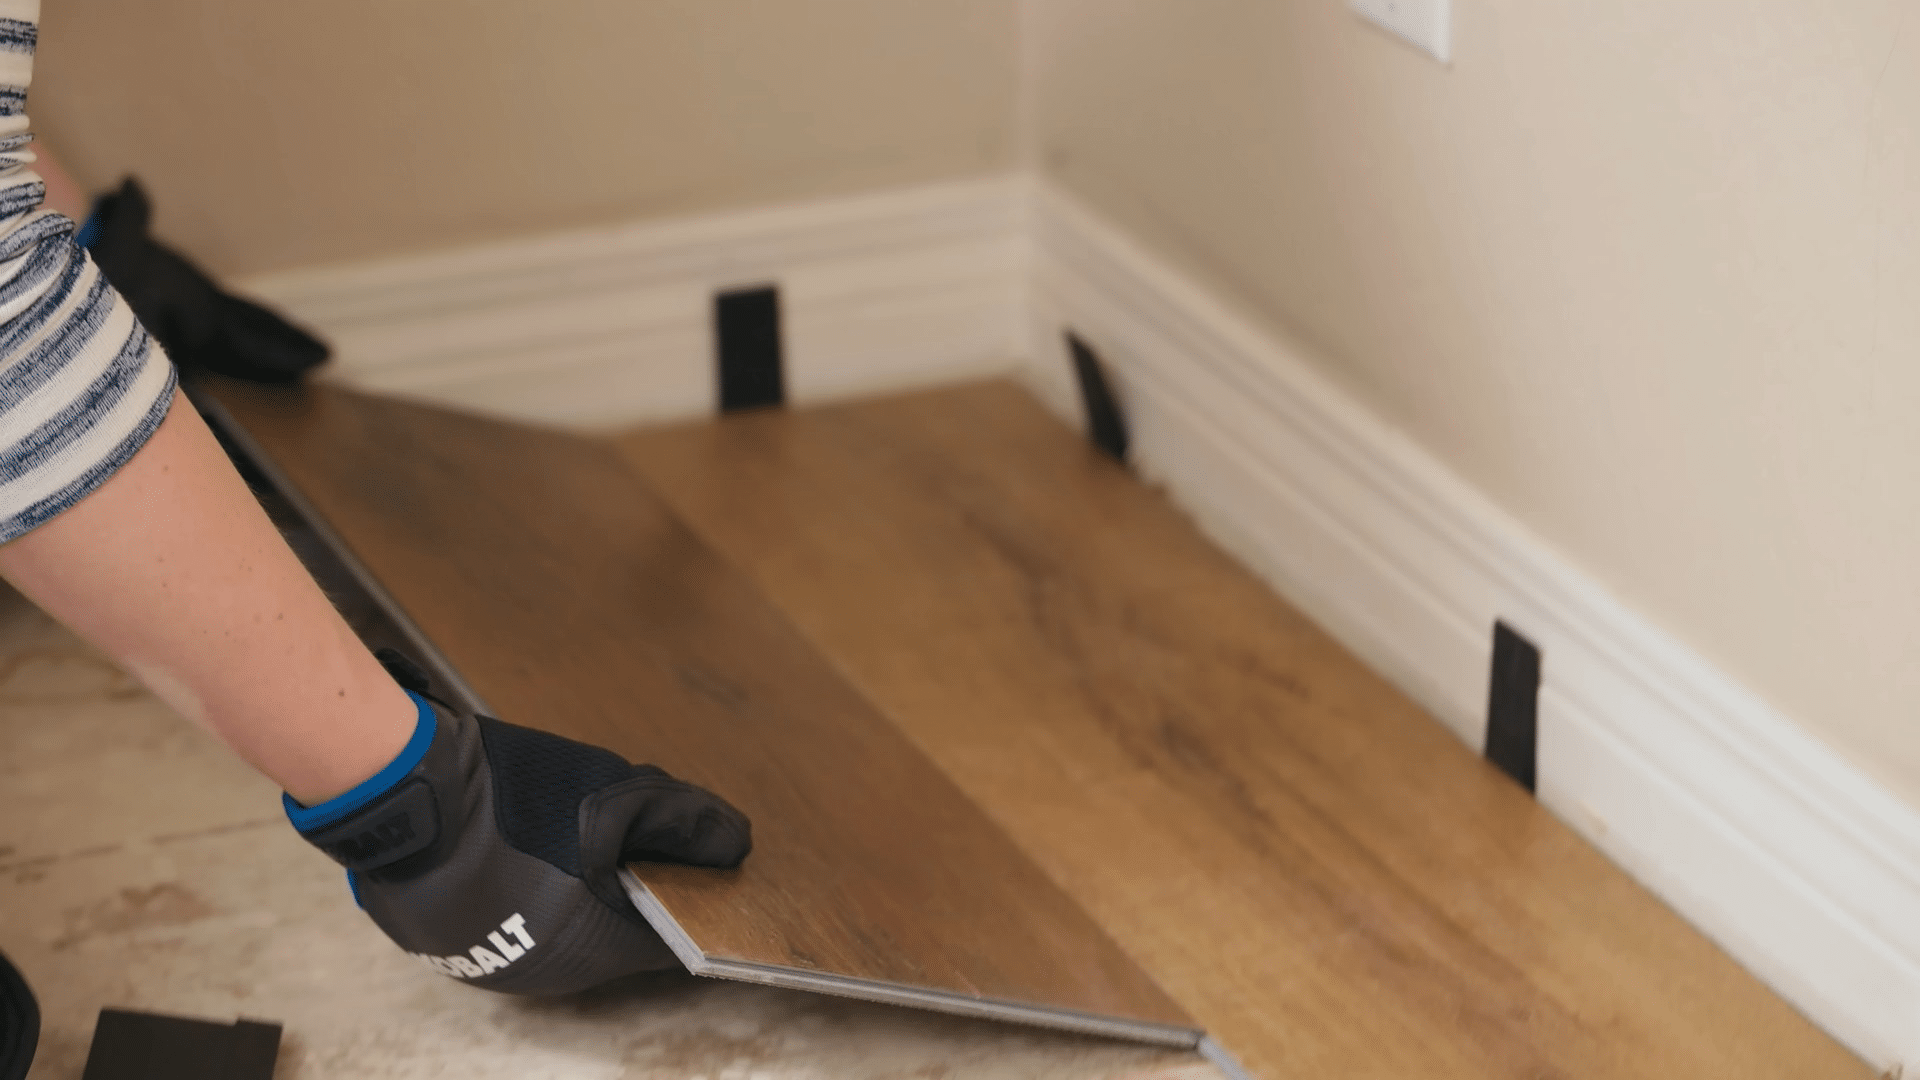
Step 4: Install the First Row of Planks
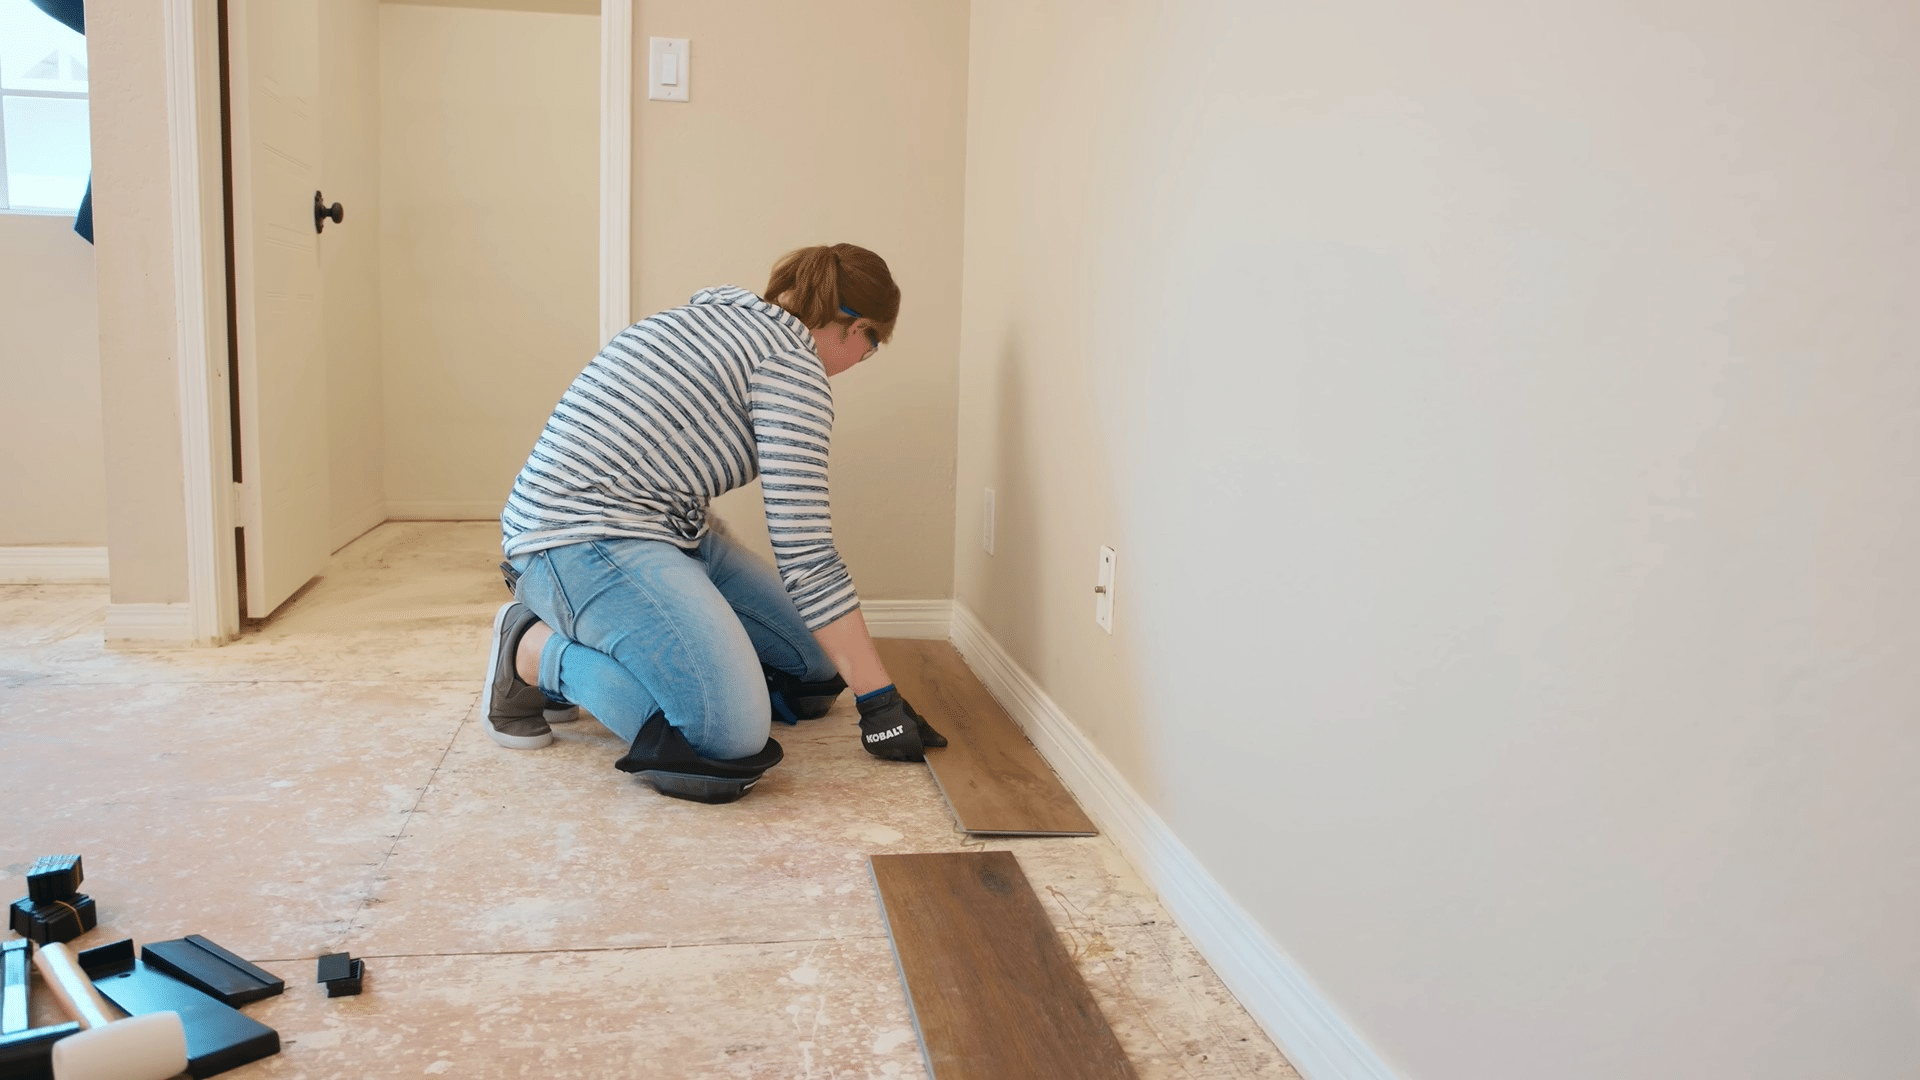
Place spacers around the perimeter of the room to create the recommended expansion gap. This gap allows the flooring to expand and contract naturally over time.
Position the first plank against the spacers and continue connecting additional planks by locking the edges together.
Keep the first row as straight as possible, as it serves as the foundation for the remaining rows and helps maintain proper alignment throughout the installation.
Step 5: Cut and Install the Last Plank in the First Row
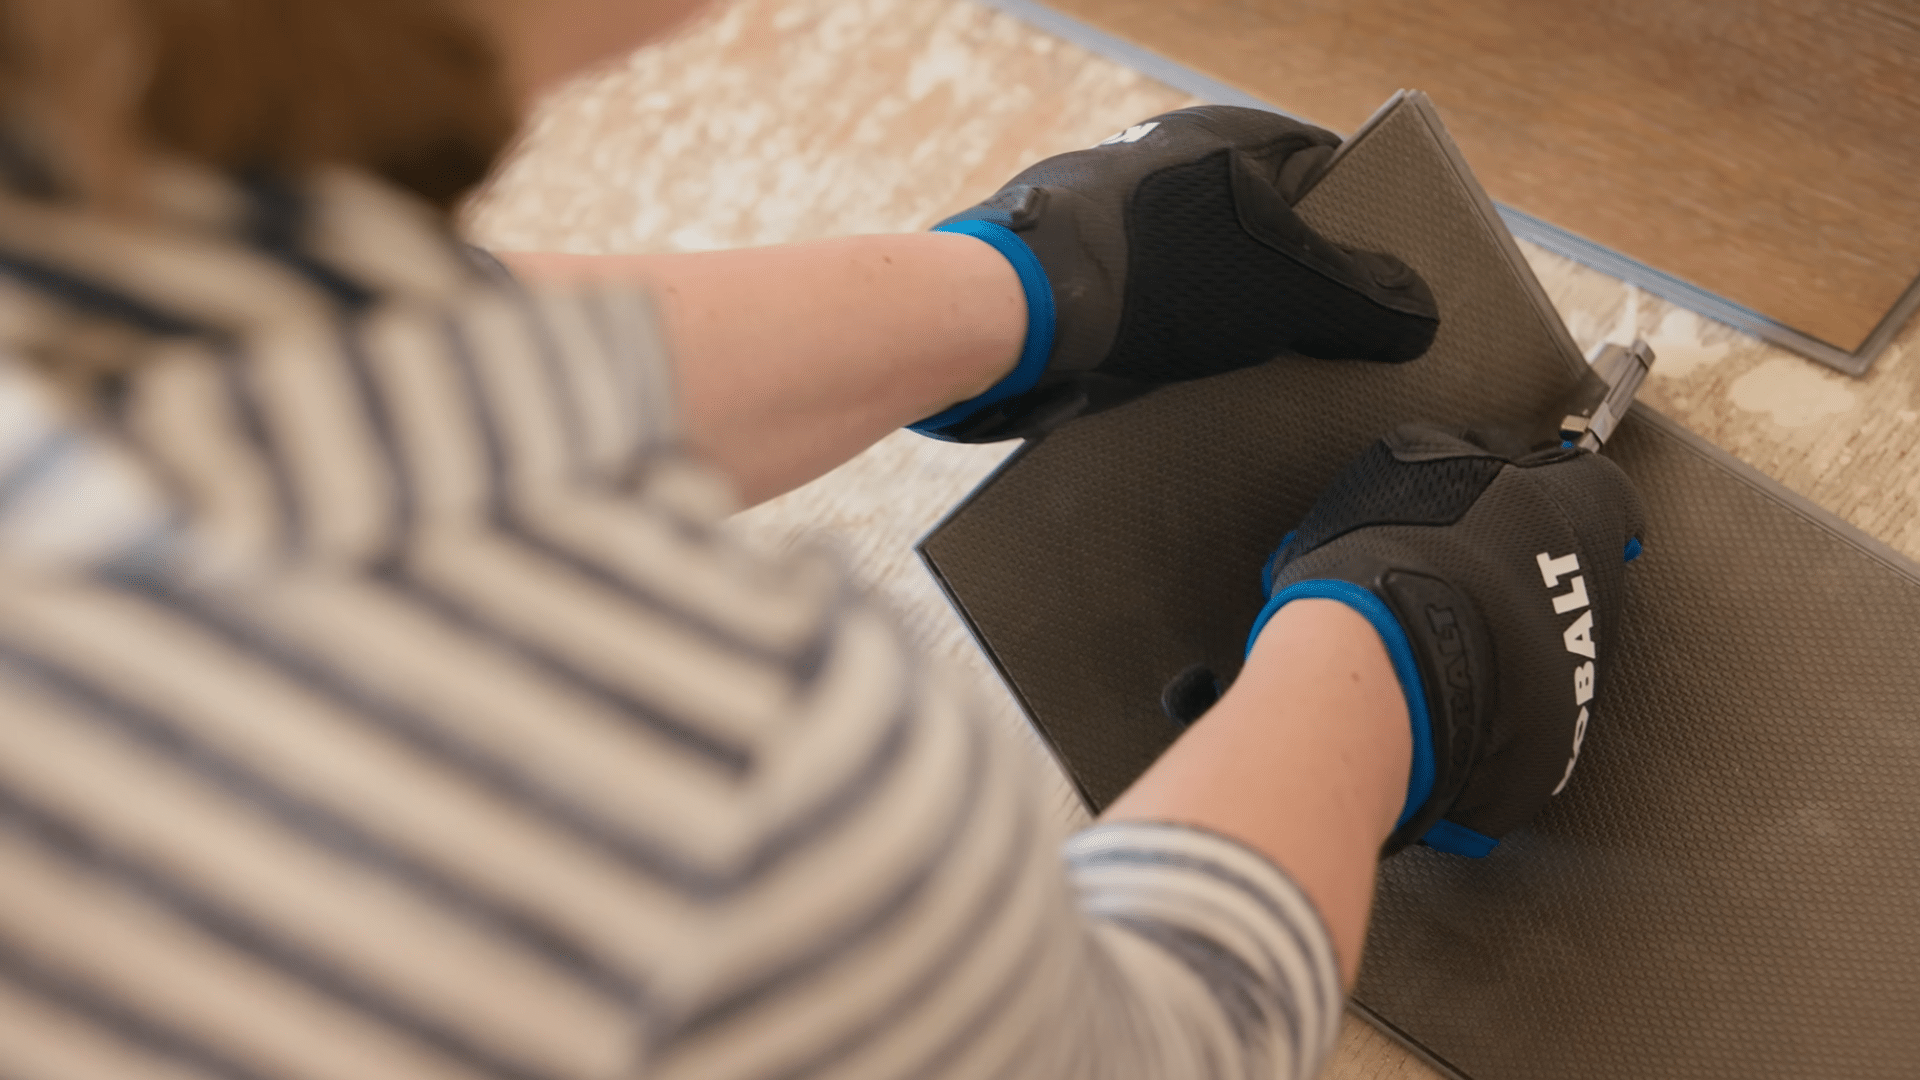
When you reach the end of the first row, measure the remaining space and trim the final plank to fit. A speed square can help create an accurate cut line before scoring the plank with a utility knife.
Score the plank several times before snapping it along the marked line.
Once cut, install the piece with the trimmed edge facing the wall while maintaining the expansion gap created by the spacers.
Step 6: Install the Second Row and Stagger the Seams
Begin the second row by starting with a shorter plank or following the manufacturer’s recommended seam pattern. Staggering the seams helps create a more natural look and adds strength to the floor.
As you install each plank, connect it securely to the previous row and make sure the locking system is fully engaged.
Check the joints carefully to avoid gaps between planks. If needed, use a tapping block and mallet to tighten the seams without damaging the edges.
Continue across the room, keeping rows straight and plank connections secure.
Step 7: Trim the Door Frame for a Seamless Fit
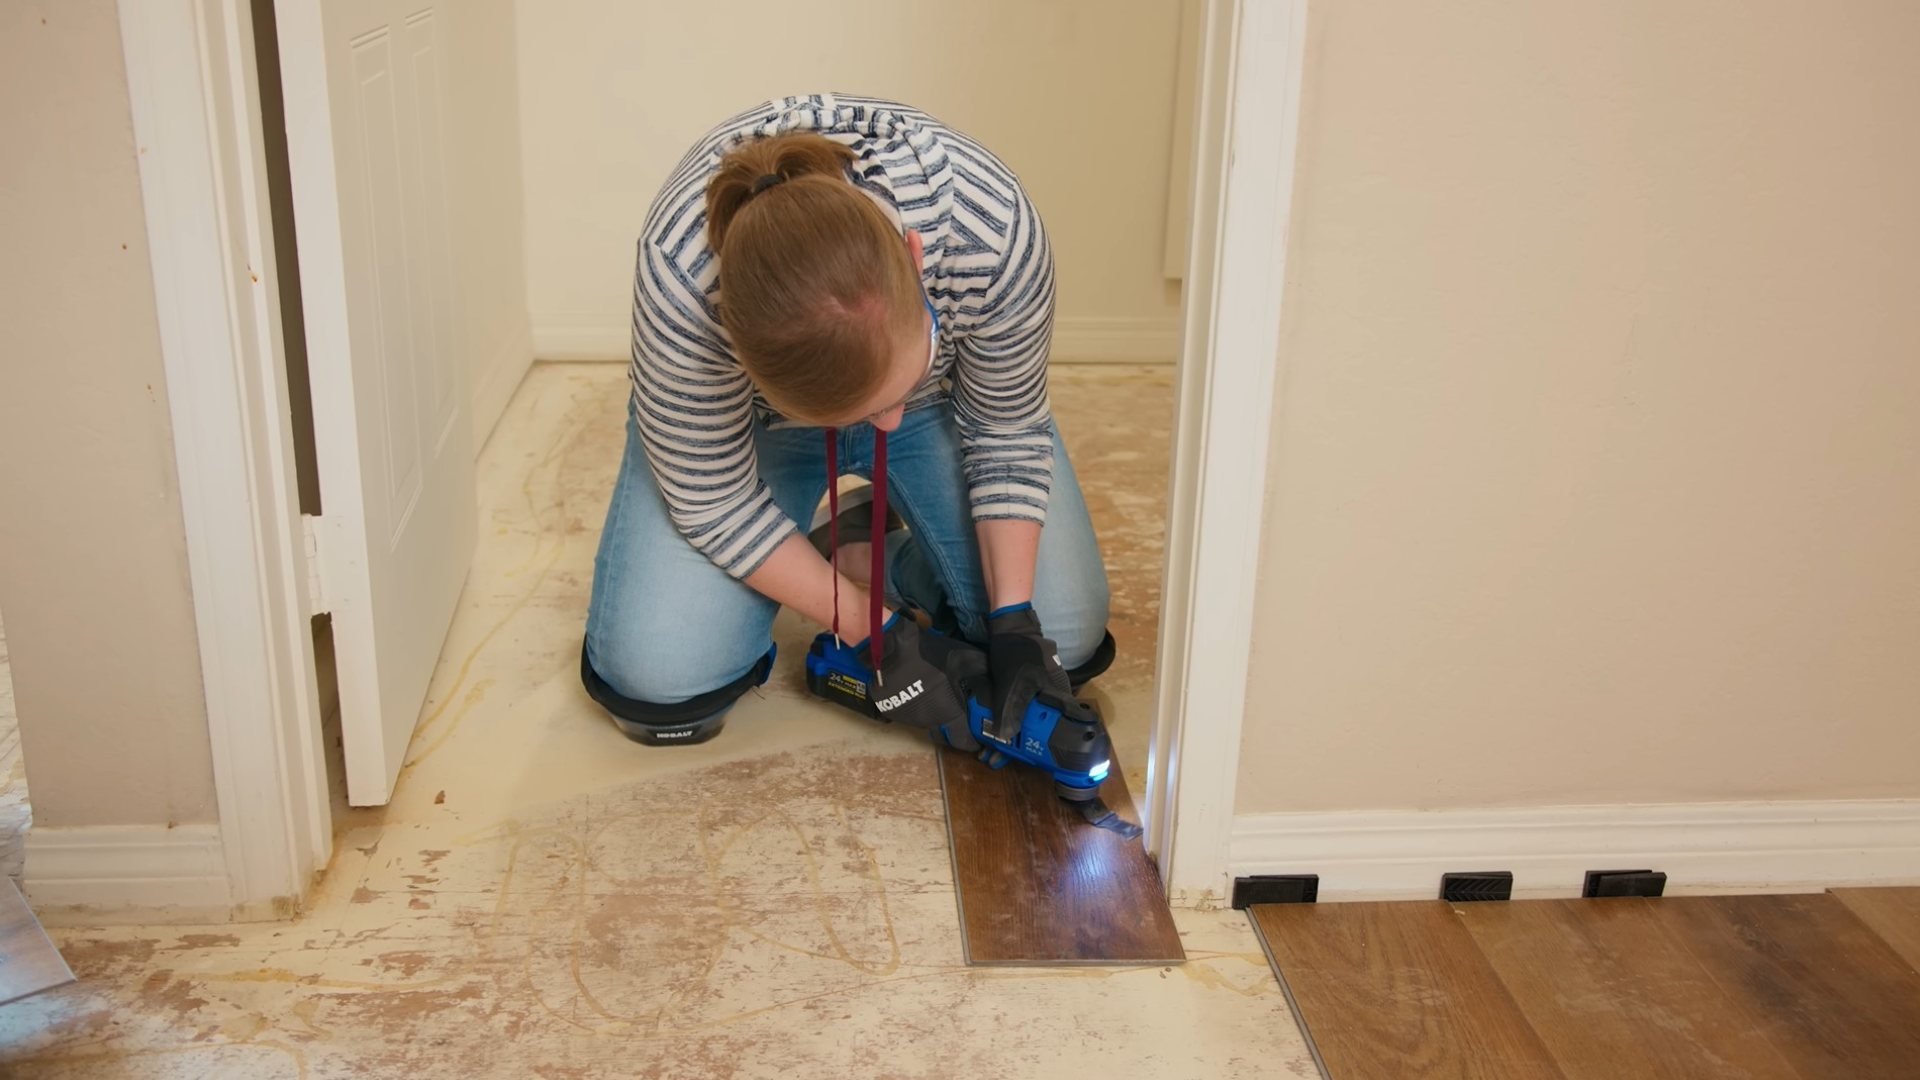
When installing flooring around a doorway, trim the door jamb so the planks can slide underneath. This creates a cleaner and more professional finish than cutting around the frame.
Before trimming, place a scrap piece of flooring next to the jamb to use as a height guide and ensure an accurate cut.
Once the jamb is trimmed, carefully slide the plank underneath and continue the installation.
This method helps create a smooth transition between rooms and gives the finished floor a neater, more polished appearance.
Step 8: Install Quarter Round Molding
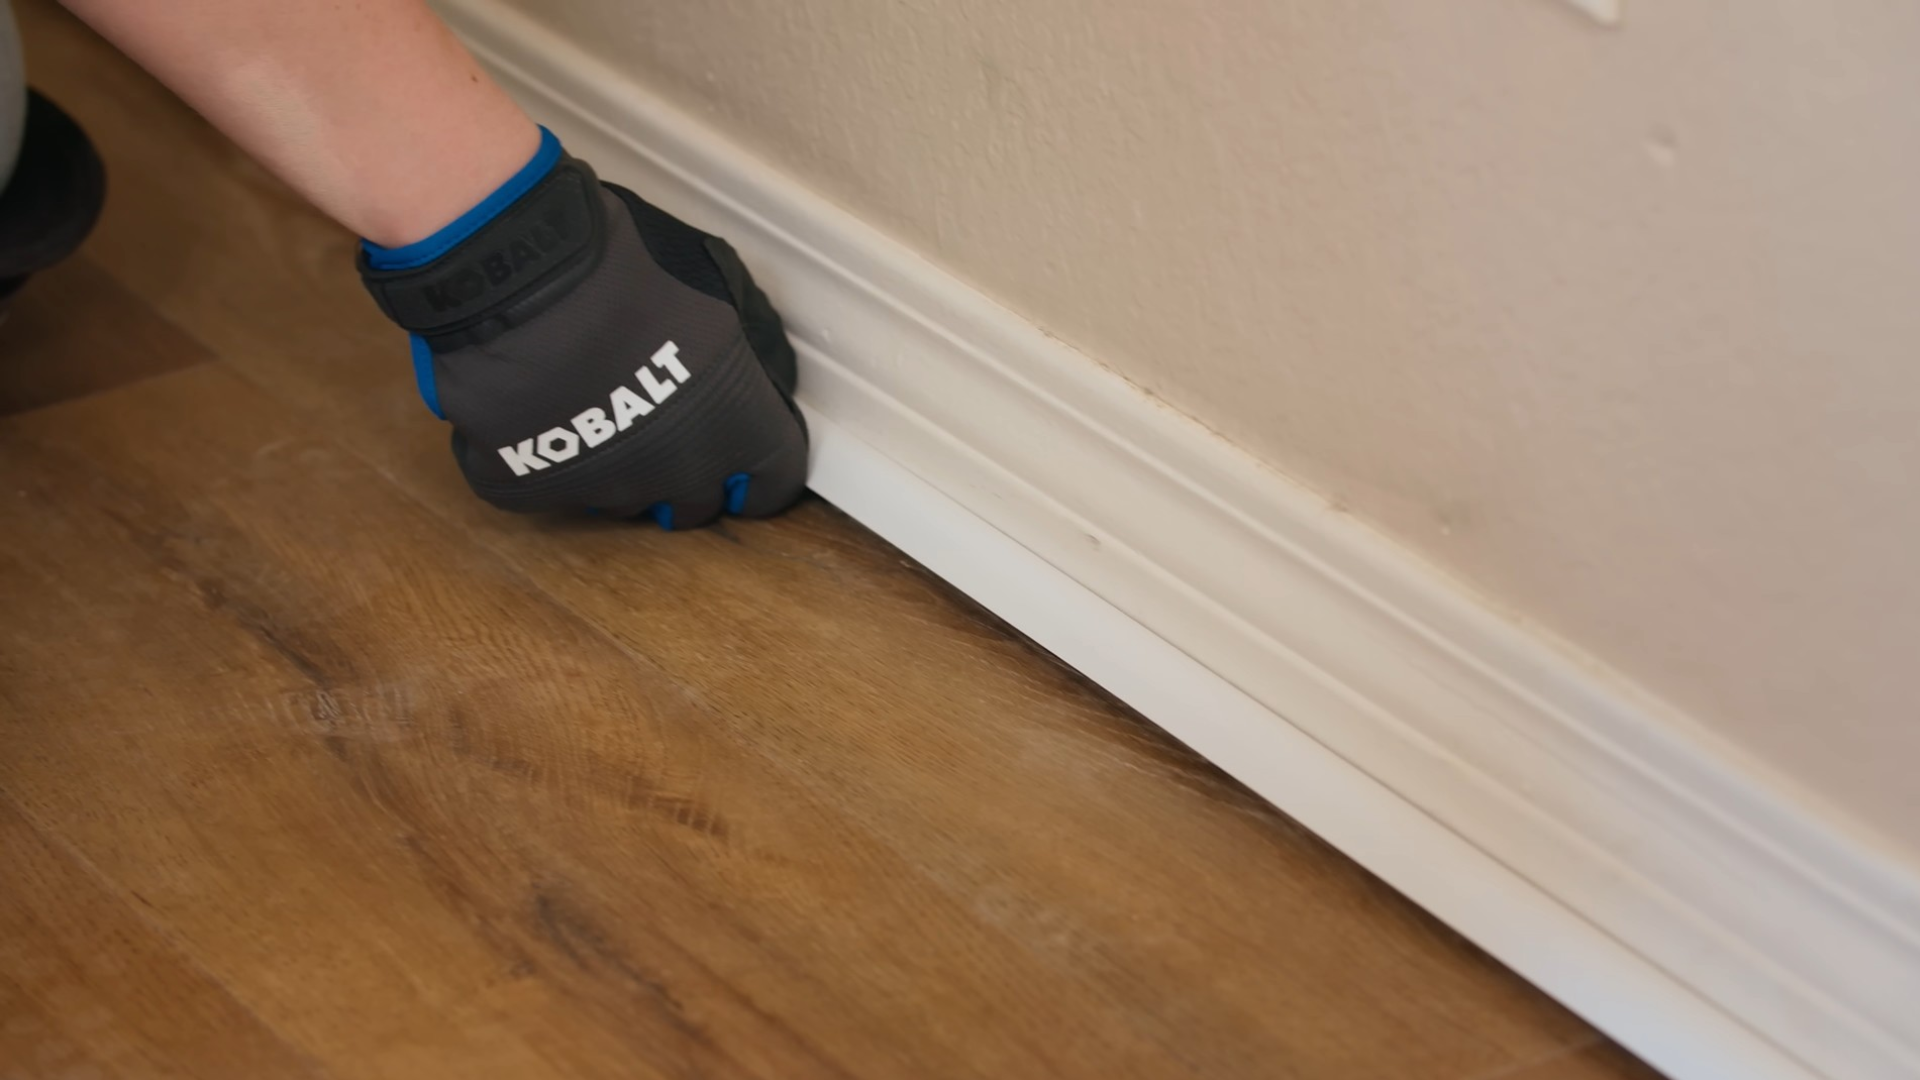
After installing the flooring, remove the spacers and cover the expansion gap with quarter-round molding.
This trim gives the room a clean, finished look while hiding the gap needed for floor movement.
Attach the molding to the wall or baseboard, not the flooring itself. This allows the vinyl planks to expand and contract naturally without affecting the installation.
Properly installed trim helps protect the edges and improves the overall appearance of the finished floor.
Step 9: Inspect the Finished Floor

Once the molding is installed, inspect the entire floor to ensure all planks are secure and properly aligned. Check for gaps, loose joints, or areas that may need adjustment.
A final inspection helps confirm that the installation has been completed correctly and that the flooring is ready for regular use.
Taking a few extra minutes to review the finished project can help prevent minor issues from being overlooked.
This tutorial is based on a helpful video by Lowe’s Home Improvement. You can watch the original video on their YouTube channel here and follow along with the installation process.
What Are the Most Common Vinyl Plank Flooring Installation Mistakes?
Even small installation mistakes can affect the appearance and performance of vinyl plank flooring. Understanding these common issues can help homeowners avoid unnecessary problems and achieve better results.
- Skipping Subfloor Preparation: Installing planks on an uneven or dirty surface can cause gaps, movement, or locking issues.
- Ignoring Expansion Gaps: Failing to leave the recommended expansion space around walls can lead to buckling or other flooring problems.
- Not Following the Manufacturer’s Instructions: Different flooring products may have specific installation requirements that should be followed carefully.
- Poor Layout Planning: Starting without a layout plan can result in narrow plank sections and an uneven appearance.
- Incorrect Measurements: Inaccurate measurements can lead to wasted materials and unnecessary cuts.
- Rushing the Installation: Working too quickly may cause alignment issues, damaged planks, or weak joints.
Avoiding these mistakes can help create a smoother installation process and improve the overall quality of the finished floor.
What Tips Help Create a Professional Finish?
A professional-looking vinyl plank flooring installation depends on careful planning and attention to detail.
While the installation process is straightforward, a few simple practices can improve the final result and help the floor perform well over time.
Take time to measure accurately and plan the layout before installation begins.
Starting with a well-planned design can help reduce awkward cuts and create a more balanced appearance throughout the room.
It is also important to maintain consistent expansion gaps around walls and fixed objects. Regularly checking plank alignment during installation can help prevent gaps and uneven rows.
Finally, use the recommended tools and follow the manufacturer’s instructions for your specific flooring product.
Paying attention to these details can help create a clean, durable floor with a professional finish.
How Much Vinyl Plank Flooring Do You Need?
Before buying materials, calculate how much flooring you need. Accurate measurements help reduce waste, control costs, and ensure you have enough planks to complete the project.
- Measure the Room Area: Multiply the room length by its width to calculate the total square footage.
- Include Closets and Small Spaces: Do not forget to measure closets, hallways, and other connected areas that will receive flooring.
- Add Extra Material for Waste: Most projects require an additional 5% to 10% of flooring to account for cuts, mistakes, and future repairs.
- Consider Complex Room Layouts: Rooms with multiple corners, angles, or obstacles may require more material than simple rectangular spaces.
- Check Product Coverage: Review the flooring packaging to see how many square feet each box covers before purchasing.
- Plan for Future Repairs: Keeping a few extra planks after installation can make it easier to replace damaged sections later.
- Verify Measurements Before Buying: Double-check all room dimensions to avoid purchasing too little or too much flooring.
Conclusion
Learning how to lay vinyl plank flooring can help homeowners complete a flooring project with confidence while saving on installation costs.
With the right tools and preparation, many vinyl plank flooring projects can be installed successfully. Planning the layout, following instructions, and paying attention to details can improve the floor’s appearance and durability.
Vinyl plank flooring is a popular choice because it combines durability, easy maintenance, and a wide range of design options.
Whether you are updating a single room or an entire home, taking the time to install the flooring correctly can help create a clean and professional-looking finish that lasts for years.
Frequently Asked Questions
How Long Does It Take to Install Vinyl Plank Flooring?
Installation time depends on the room size, floor condition, and experience level. Many standard rooms can be completed within a day, while larger projects may take longer.
Can Vinyl Plank Flooring Be Installed Over Tile?
In many cases, vinyl plank flooring can be installed over existing tile if the surface is clean, stable, and reasonably level. Manufacturer recommendations should always be followed.
Should Vinyl Plank Flooring Run Parallel or Perpendicular?
Many homeowners install planks parallel to the longest wall or the primary source of natural light. The best direction often depends on the room layout.
Do You Need Underlayment for Vinyl Plank Flooring?
Some vinyl plank flooring includes built-in underlayment. Others may require a separate layer depending on the subfloor and the manufacturer’s installation requirements.