
Fresh rosemary may be easier to grow than you expect. It is simple when you use the right method. The easiest way is by using stem cuttings, which grow faster than seeds and give you a healthy plant in weeks.
It’s simple, budget-friendly, and a great way to grow healthy rosemary plants without much stress.
In this guide, you will learn how to grow rosemary from cuttings, including choosing healthy stems, rooting them, and caring for new plants.
So, grab a small pot, trim a few stems, and let’s turn one rosemary plant into many.
About Rosemary
Rosemary is a fragrant evergreen herb known for its needle-like leaves and fresh, woody aroma. It belongs to the mint family and is widely used in cooking, natural remedies, and home gardens.
Many people enjoy rosemary for seasoning meats, soups, roasted vegetables, and breads.
It also contains antioxidants and nutrients that may support memory, digestion, and overall wellness.
Rosemary grows best in warm, sunny conditions and is easy to care for, making it a popular choice for both indoor and outdoor herb gardens.
Key Specifications:
- Name: Rosemary
- Type: Evergreen perennial herb
- Family: Mint family (Lamiaceae)
- Region: Native to the Mediterranean region
- Uses: Cooking, herbal remedies, essential oils, and gardening
- Climate Conditions: Grows best in warm, sunny, and mild climates
Can You Propagate Rosemary?
Yes, you can propagate rosemary at home, and it is easier than many people think. The most common way is by using stem cuttings from a healthy rosemary plant.
Cut a soft green stem about 4 to 6 inches long and remove the leaves from the bottom half.
Place the stem in water or moist soil until roots begin to grow. Keep it in a warm spot with indirect sunlight and light watering.
Roots usually appear within a few weeks. Once the roots are strong, move the cutting into a pot or garden soil.
Healthy cuttings, light moisture, and patience are the main things rosemary needs to grow well.
Cuttings vs. Seeds: Which Is Better?
Both methods can grow healthy rosemary plants, but they differ in speed, care, and success rate. Choosing the right option depends on your time, patience, and gardening experience.
| Method | Advantages | Disadvantages |
| Rosemary Cuttings | Faster growth, easier for beginners, keeps the same qualities as the parent plant | Needs an existing rosemary plant to start |
| Rosemary Seeds | Good for growing many plants at once, and an affordable option | Slow germination, lower success rate, and needs more patience |
| Root Development | Roots form more quickly and become stable sooner | Seed-grown plants take longer to establish |
| Care Level | Simple care and easier monitoring | Requires more attention during germination |
| Best For | Beginners and quick results | Gardeners with extra time and patience |
Quick Steps for Propagating Rosemary from Cuttings
Cuttings are small stem pieces taken from a healthy rosemary plant. The stem grows roots and becomes a new plant.
- Choose a healthy rosemary stem.
- Cut a 4–6-inch section.
- Remove lower leaves.
- Place the cutting in water or moist soil.
- Keep it warm with bright indirect sunlight.
- Roots usually appear within 2–4 weeks
How to Grow Rosemary from Cuttings?
Before you start growing rosemary, gather the right materials and tools to make the process easier and more successful.
Materials and Tools Required
- Healthy rosemary plant
- Pruning shears
- Glass container
- Clean water
- LECA
- Cactus soil or sand
- Pots with drainage
- Rooting hormone (optional)
- Spray bottle
Step 1: Select the Right Cuttings
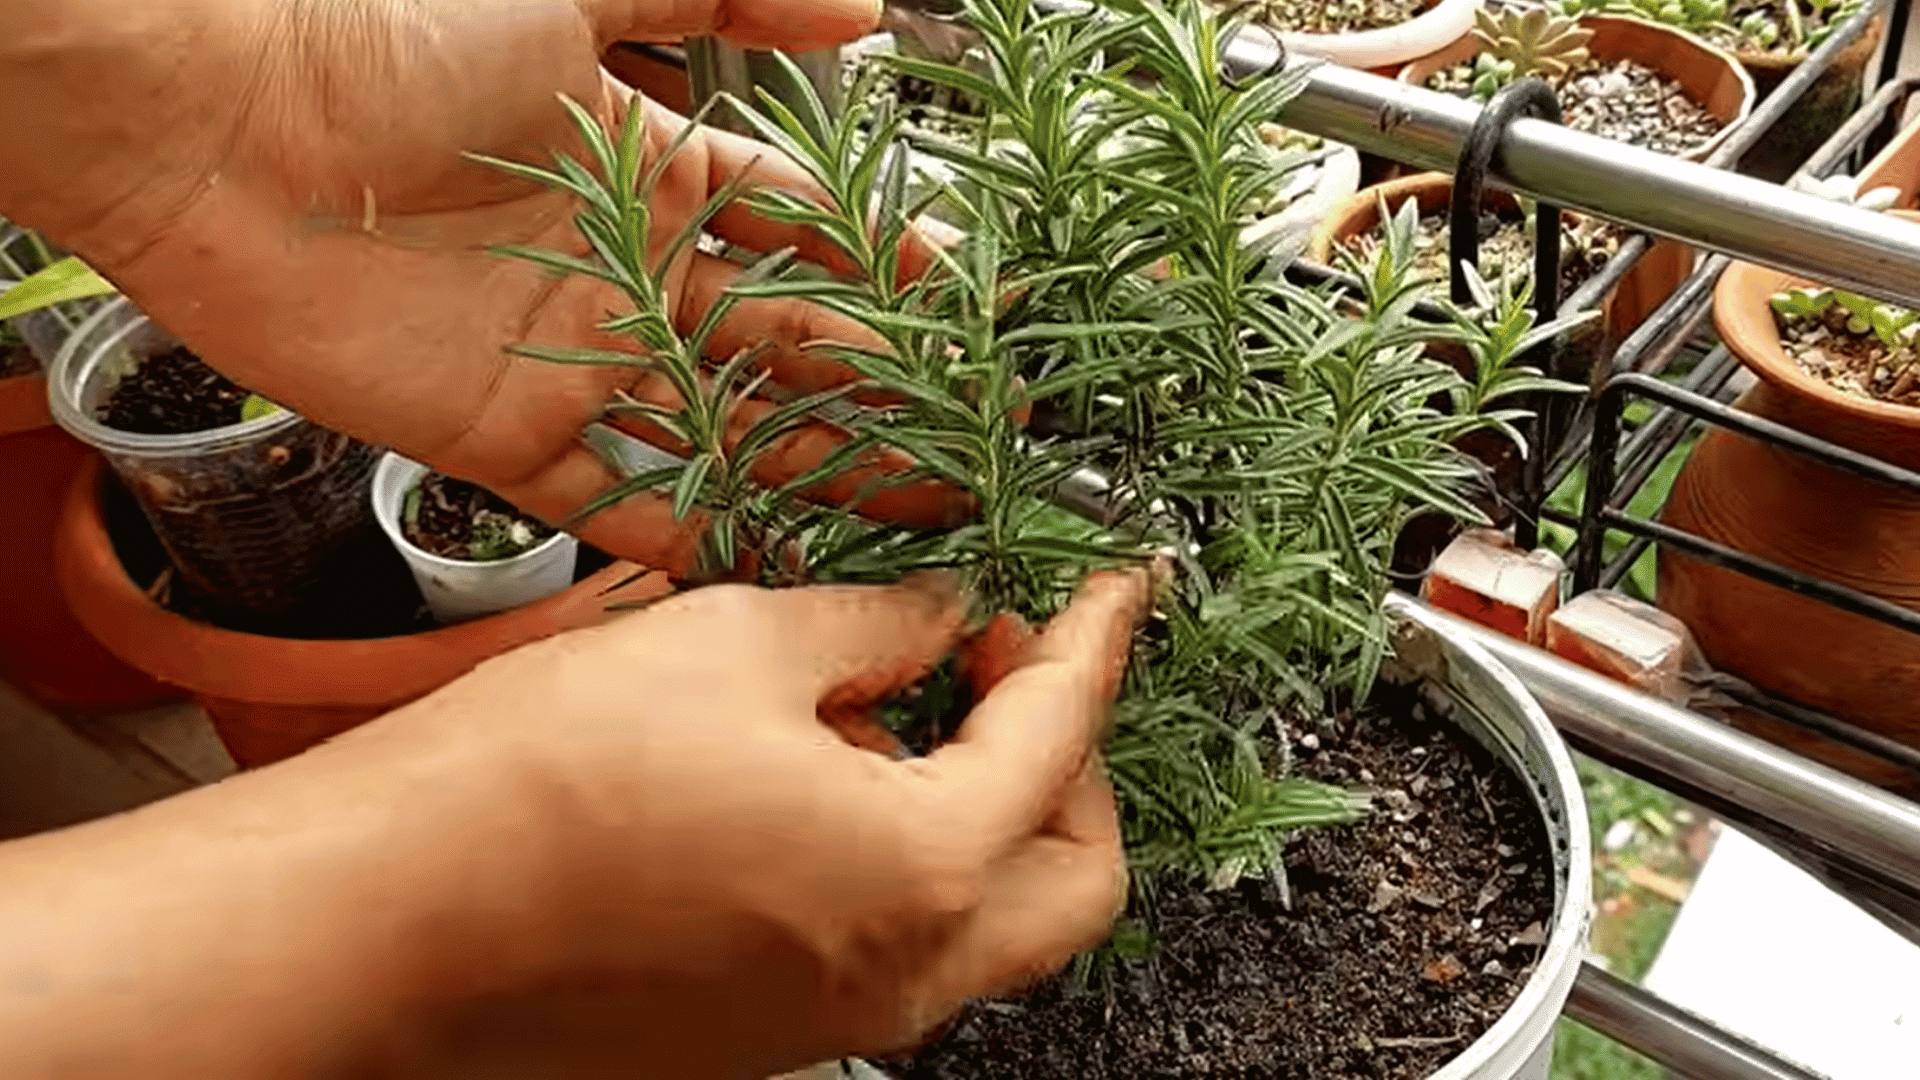
When selecting rosemary cuttings for propagation, choose healthy, semi-hardwood stems that are green and slightly firm, as they root better and are less likely to dry out.
Cut stems that are around 3–6 inches long using clean, sharp pruning shears so the plant has enough space to grow strong roots without bacteria.
Make each cut just below a leaf node since this part of the stem helps new roots grow more quickly.
Pro Tip: Take cuttings during spring or early summer for the best results.
Step 2: Prepare the Cutting
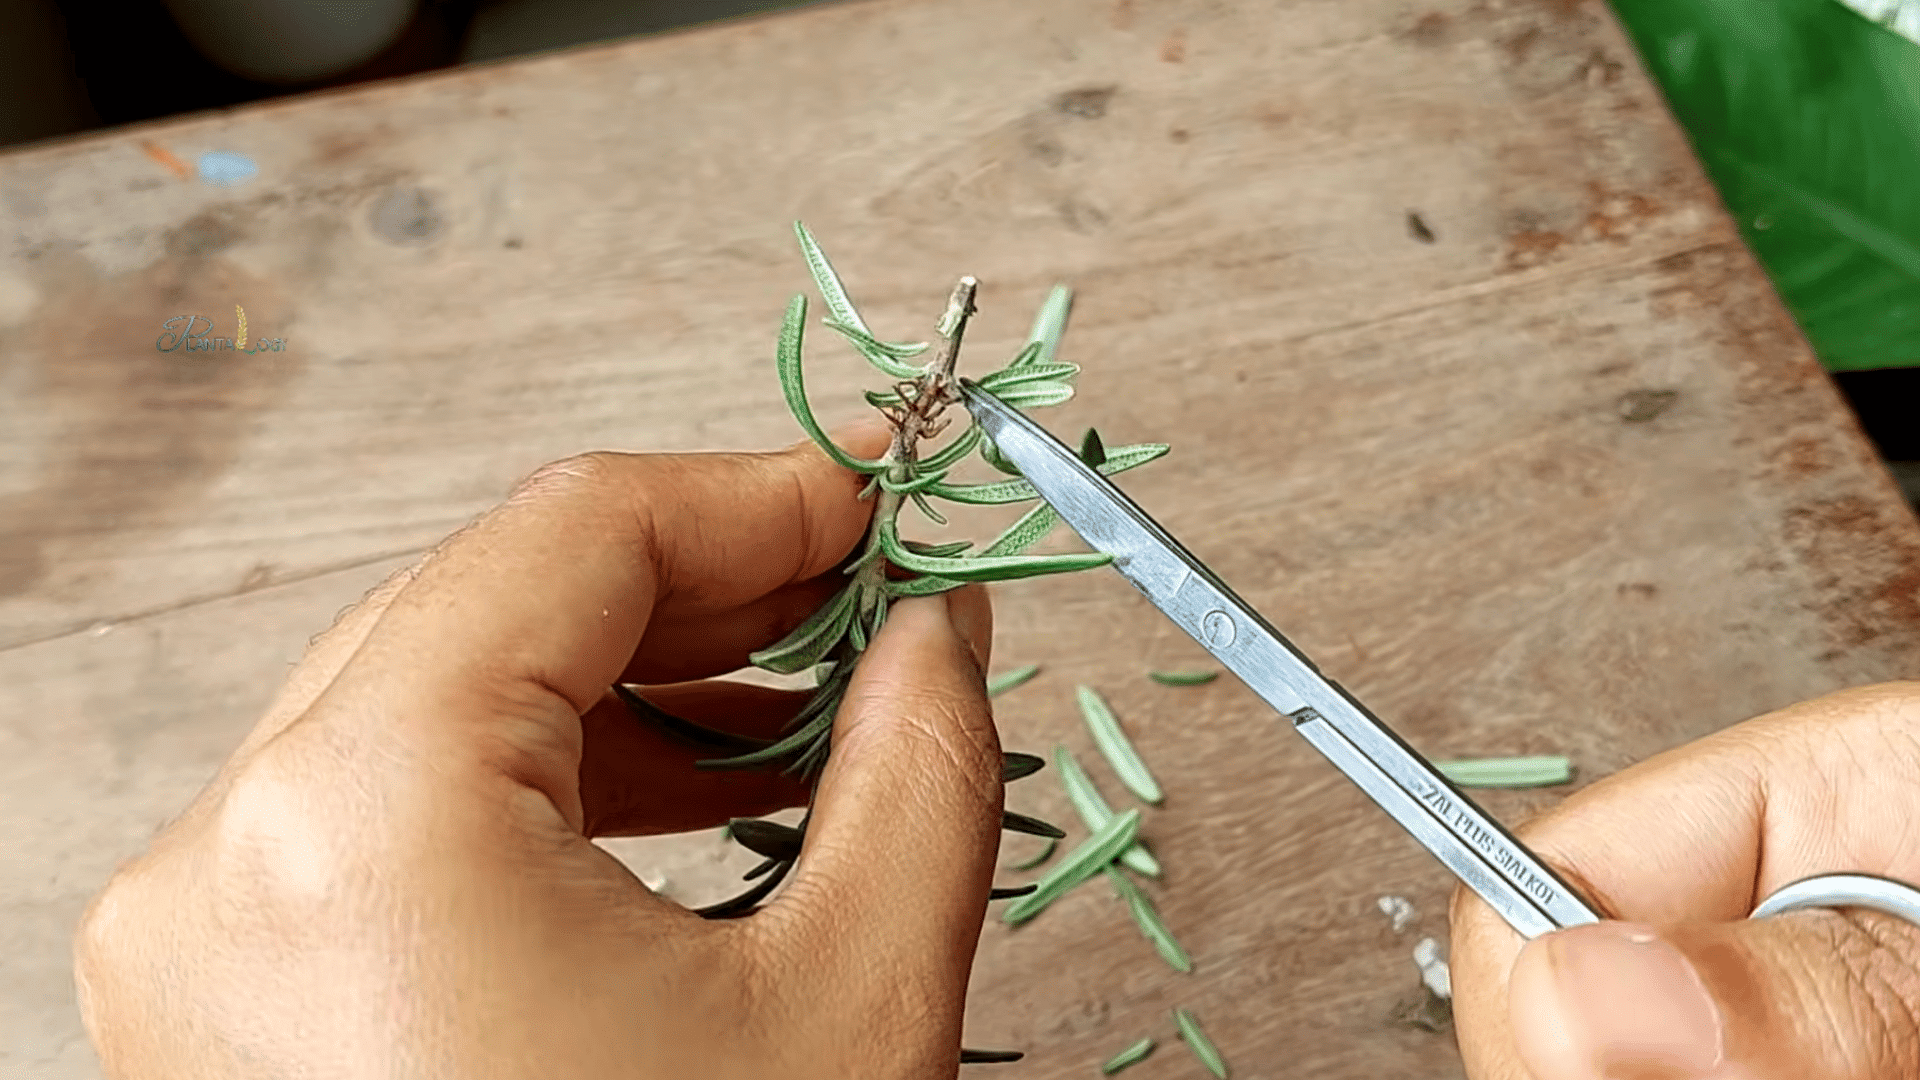
Before planting the rosemary cutting, remove the lower leaves from the stem. Leaves sitting in water or wet soil often rot quickly and may lead to fungal problems that damage the cutting before roots can grow.
Keep a few healthy leaves at the top part of the stem because they help the plant continue making energy from sunlight.
This energy supports root growth and keeps the cutting healthy during the early stages.
Make sure you remove the leaves gently so you do not damage the soft stem. A clean and prepared cutting has a better chance of rooting successfully.
Step 3: Growing Rosemary from Cuttings in water
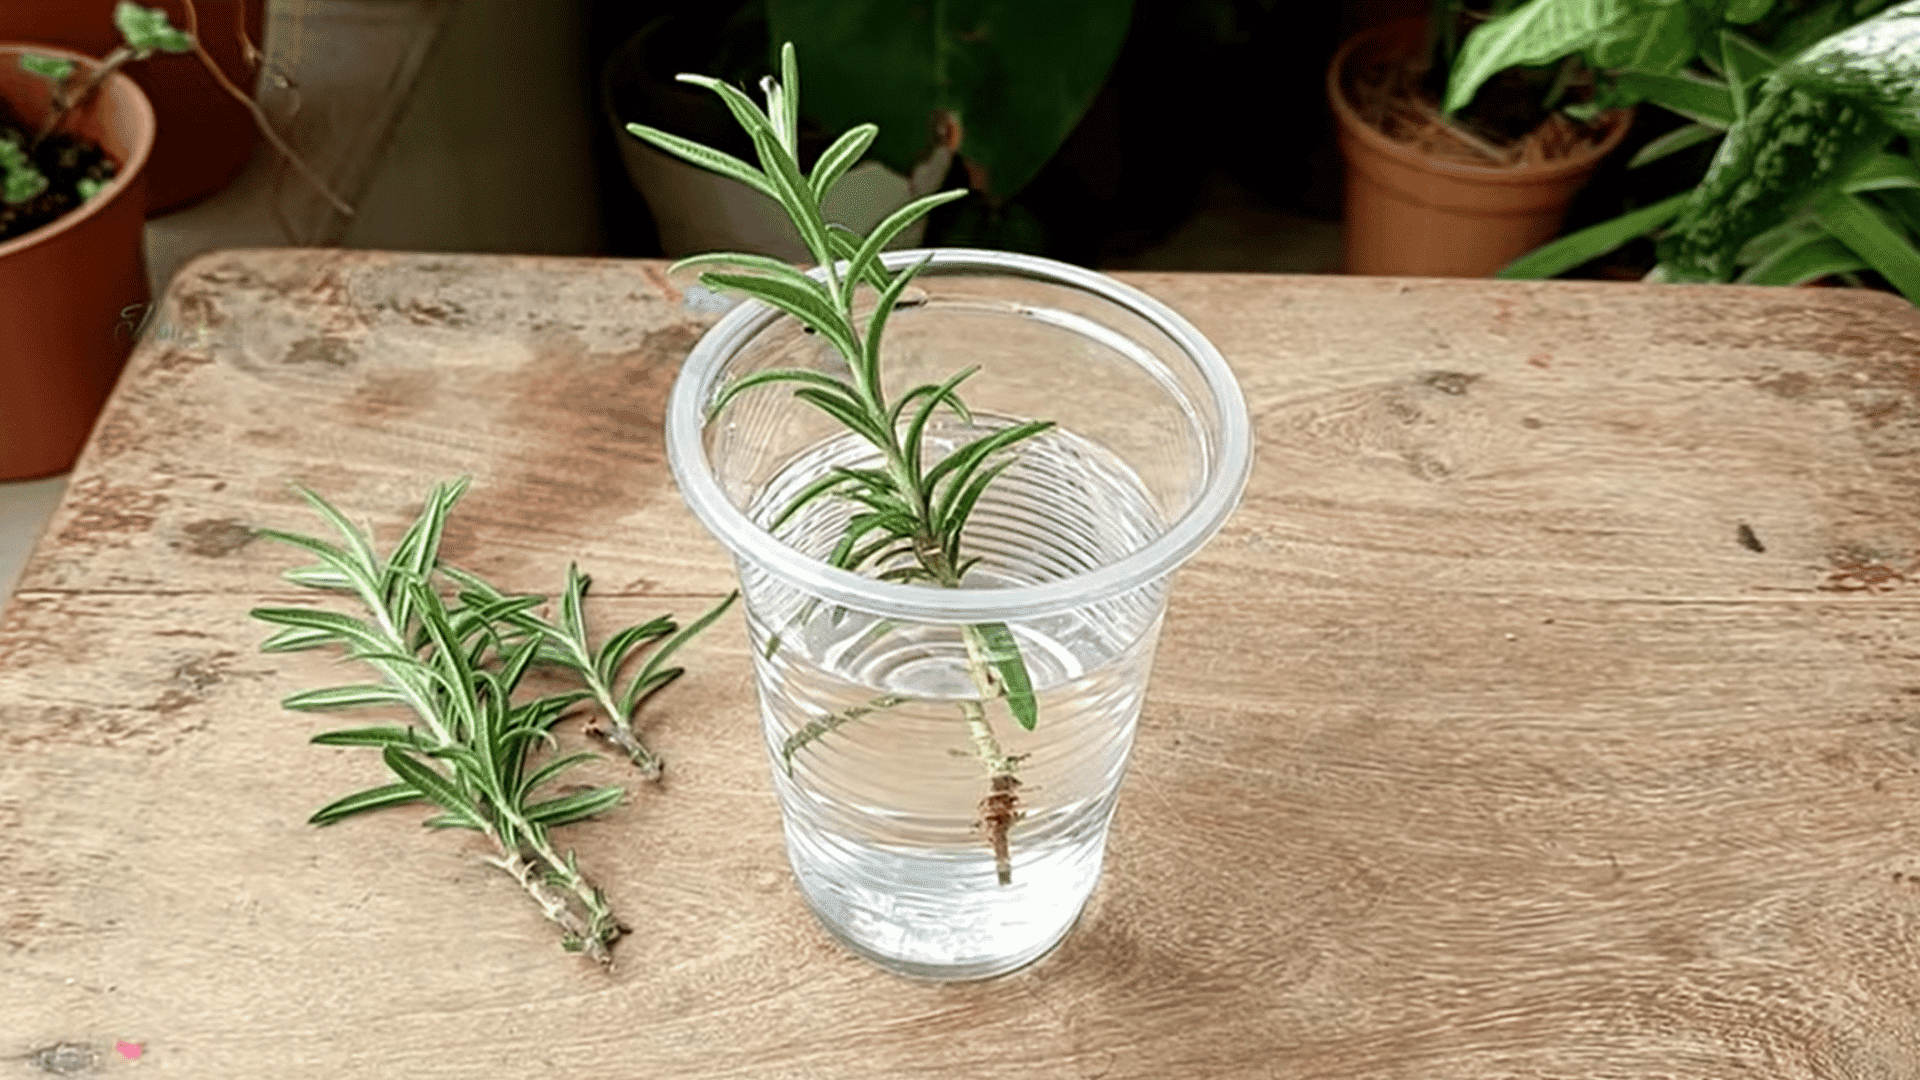
Growing rosemary in water is a simple method for beginners because you can easily see the roots forming before moving the plant into soil.
Start by filling a clean, clear glass with fresh, room-temperature water.
A transparent container helps you check root growth and notice when the water needs changing.
Next, place the rosemary cutting into the glass after removing the lower leaves from the stem. This step is important because leaves sitting in water can rot and harm the cutting.
Keep the glass in a bright area with indirect sunlight while the roots slowly begin to grow.
Pro Tip: Use filtered or distilled water if possible.
Step 3: Growing Rosemary from Cuttings in Soil
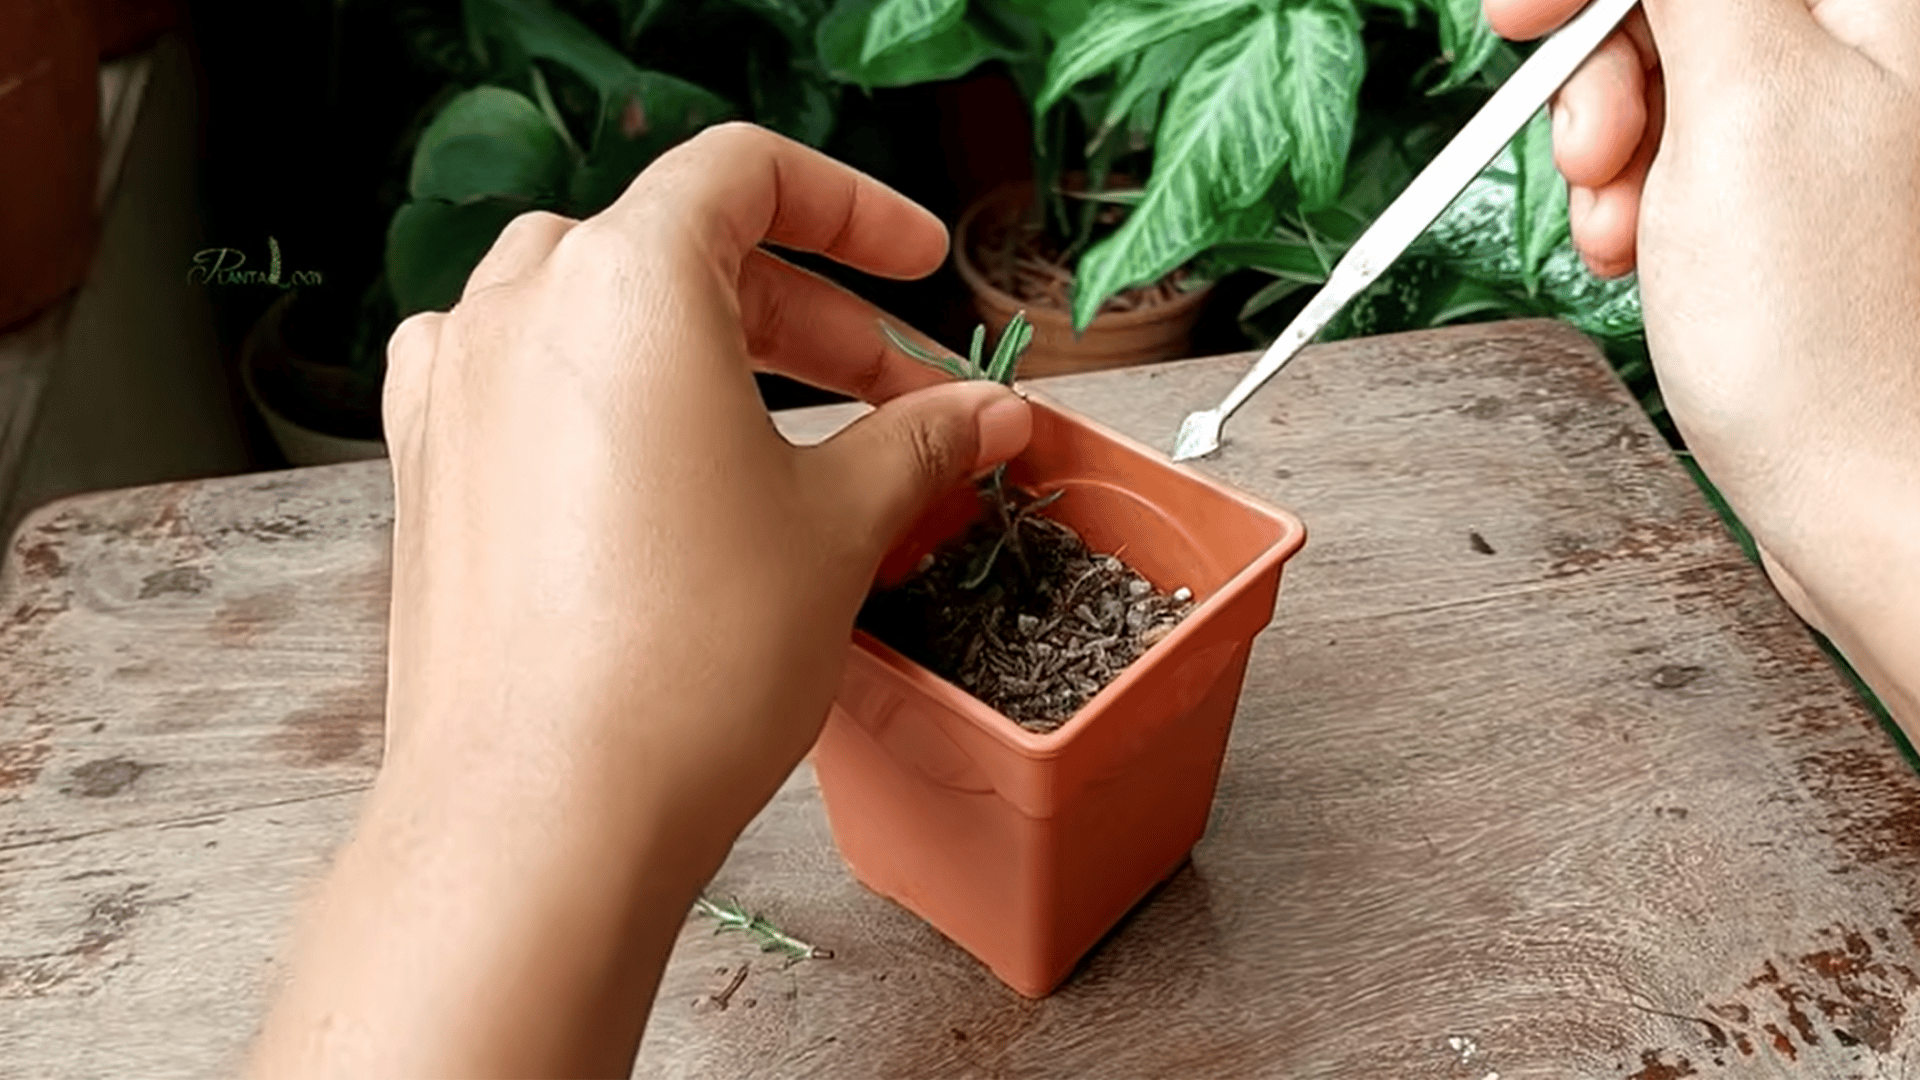
Growing rosemary directly in soil helps the plant develop stronger roots and adjust better to long-term growing conditions.
Start by using well-draining cactus mix or sandy soil because rosemary does not grow well in heavy, wet soil. If you want, dip the cutting in rooting hormone to support faster root growth and improve success.
Next, gently place the cutting into the soil and press lightly around the base to keep it steady.
After planting, add a small amount of water to keep the soil lightly moist. Avoid overwatering because soggy soil can damage the young roots.
Pro Tip: Mix a small amount of crushed eggshells into the soil to improve drainage.
Watch this quick video by Plantology to learn three simple ways to propagate rosemary cuttings using water, LECA, and soil methods successfully.
Troubleshooting: Why Rosemary Cuttings Fail
Even with the right technique, some cuttings do not take. Knowing the most common failure points helps you catch problems early and adjust before losing the cutting entirely.
| Problem | Likely Cause | Fix |
| The stem turns black at the base | Rots from overwatering or contaminated water | Change water immediately; trim affected base; repot in a drier medium |
| Leaves are yellowing and dropping | Too little light or cold temperatures | Move to a brighter spot; keep above 60°F |
| No roots after 5 weeks | Cutting taken from an old woody stem | Take a new cutting from a soft, green, younger stem |
| Wilting after transplant | Roots disturbed or damaged during transplanting | Shade for one week; water sparingly; do not disturb again |
| Mold on the soil surface | Overwatering combined with low airflow | Reduce watering; add perlite; improve ventilation |
How to Harden Off and Transplant Outdoors?
Before moving rosemary outdoors, harden it off slowly so the plant can adjust to sunlight, wind, and changing temperatures.
Start by placing the pot outside for a few hours each day in a shaded spot. Bring it back inside at night.
Over the next 7 to 10 days, slowly increase outdoor time and give the plant more morning sunlight. This process helps prevent shock, drooping, or leaf damage.
Once the rosemary looks healthy outdoors all day, transplant it into well-draining soil in a sunny area.
Dig a hole slightly larger than the root ball and place the plant carefully into the ground. Water lightly after planting. Avoid overwatering because rosemary grows better in slightly dry soil.
Best Growing Conditions for Rosemary
Give your rosemary the right setup from the start, and it will reward you with steady growth and a strong, fresh scent.
- Bright Indirect Sunlight: Rosemary Grows Best with 3 to 4 Hours of Bright Indirect Sunlight Daily Because Steady Light Supports Healthy Leaf Growth While Protecting the Plant from Intense Heat and Drying.
- Warm Climate: Rosemary Prefers Warm Temperatures and Grows Well in Mild Climates with Good Airflow Because Cold Weather and Frost Can Slow Growth and Damage Young Plants.
- Well-Draining Soil: Loose, Well-Draining Soil Helps Prevent Excess Water Buildup Around the Roots, keeping Rosemary Healthy and reducing the Risk of Root Rot.
- Low Moisture: Rosemary thrives in Slightly Dry Conditions, so Avoid Soggy Soil Because Too Much Moisture Can Weaken Roots and lead to Fungal Diseases or Plant Decay.
When and How to Harvest Rosemary?
Once the rosemary plant becomes full and healthy, you can begin harvesting fresh stems for cooking or drying. Regular trimming also helps the plant stay bushy and encourages new growth over time.
Wait until the plant is at least 6 to 8 inches tall before cutting any stems. Use clean scissors or pruning shears and trim soft green stems from the outer part of the plant.
Avoid cutting too much at once because heavy trimming can slow future growth.
The best time to harvest rosemary is in the morning after the dew dries because the leaves hold the strongest flavor and oils during this time.
After harvesting, rinse the stems gently and use them fresh or dry them in a cool place for later use. Proper harvesting keeps rosemary healthy and productive for years.
How to Prune Rosemary?
Regular trimming helps the plant stay full, healthy, and easier to manage over time. Light pruning also encourages fresh stems and improves airflow around the plant.
- Use Clean Pruning Shears: Always trim rosemary with clean, sharp scissors or pruning shears to prevent stem damage and reduce the spread of plant disease.
- Trim Soft Green Stems: Cut fresh green growth instead of old woody stems because soft stems recover faster and support healthier new growth.
- Do Not Overprune: Remove only a small part of the plant at one time because heavy pruning can slow growth and weaken the rosemary plant.
- Prune After Active Growth: The best time to prune rosemary is during spring or after new growth appears because the plant heals more quickly.
- Shape the Plant Gently: Trim uneven or long stems lightly to help the plant grow in a fuller and more balanced shape.
- Remove Dead or Dry Parts: Cut away brown, dry, or damaged stems to keep the plant healthy and improve airflow around the leaves.
Easy Rosemary Care Tips for Every Method
No matter which rooting method you choose, consistent light and careful watering habits are what separate cuttings that root from cuttings that rot.
| Water | LECA | Soil |
| Keep in bright indirect light for healthy rooting. | Keep the pebbles lightly moist. | Let the soil dry slightly between watering. |
| Do not overfill the container with water. | Place in bright indirect sunlight. | Avoid overwatering to prevent root rot. |
| Transplant once roots reach 3–4 inches long. | Rinse pebbles sometimes to remove salt buildup. | Keep the pot in bright indirect light. |
| Roots usually grow in 3–4 weeks. | Roots grow best in warm conditions. | Roots usually form within 3–4 weeks. |
Signs Your Rosemary Cutting Is Rooting Successfully
Healthy growth changes usually appear slowly during the rooting process. Watching for these small signs can help you know the cutting is developing properly.
- New Leaf Growth: Fresh green leaves forming near the top often show that the cutting is healthy and beginning to establish roots.
- Visible White Roots: Small white roots appearing in water, LECA, or drainage holes are one of the clearest signs of successful rooting.
- Firm and Upright Stem: A healthy cutting usually stays firm and upright instead of becoming soft, weak, or droopy.
- Stronger Leaf Color: Bright green leaves often mean the cutting is receiving enough light and supporting healthy root development.
- Resistance When Gently Pulled: A rooted cutting may feel slightly anchored in the soil because new roots are starting to hold the plant in place.
- No Yellowing or Rotting: Healthy stems and leaves without black spots, mushy areas, or yellowing usually indicate good growing conditions.
Conclusion
Growing rosemary from cuttings is a simple and rewarding way to grow fresh, healthy plants at home.
Water, LECA, or soil, each method can work well with the right balance of light, moisture, and patience.
One of the best parts is watching tiny roots slowly appear and grow stronger each day, and that’s what makes rosemary propagation feel so satisfying, especially for beginners.
With a little care and regular attention, your rosemary can grow into a strong, fragrant herb plant that lasts for years.
If you try any of these methods, share your results or favorite tips in the comments below.
Frequently Asked Questions
Can Rosemary Cuttings Be Taken in Fall?
Yes, rosemary cuttings can be taken in the fall, but rooting is slower. Keep cuttings indoors in warm temperatures with bright indirect light.
Does Rosemary Help with Nerve Pain?
Rosemary May Help Reduce Nerve Pain Because It Contains Anti-Inflammatory Compounds and Improves Circulation, but More Medical Research Is Still Needed.
Does Rosemary Grow Better in Pots or the Ground?
Rosemary Grows Well in Both Pots and The Ground, but Pots Offer Better Drainage and Easier Control Over Moisture Levels.
What Not to Plant Around Rosemary?
Avoid Planting Rosemary Near Moisture-Loving Plants Like Mint, Basil, or Cucumbers, as Rosemary Prefers Drier Soil and Better Drainage.
What Pests Does Rosemary Repel?
Rosemary naturally repels pests like mosquitoes, cabbage moths, carrot flies, and some beetles due to its strong, fragrant oils.