

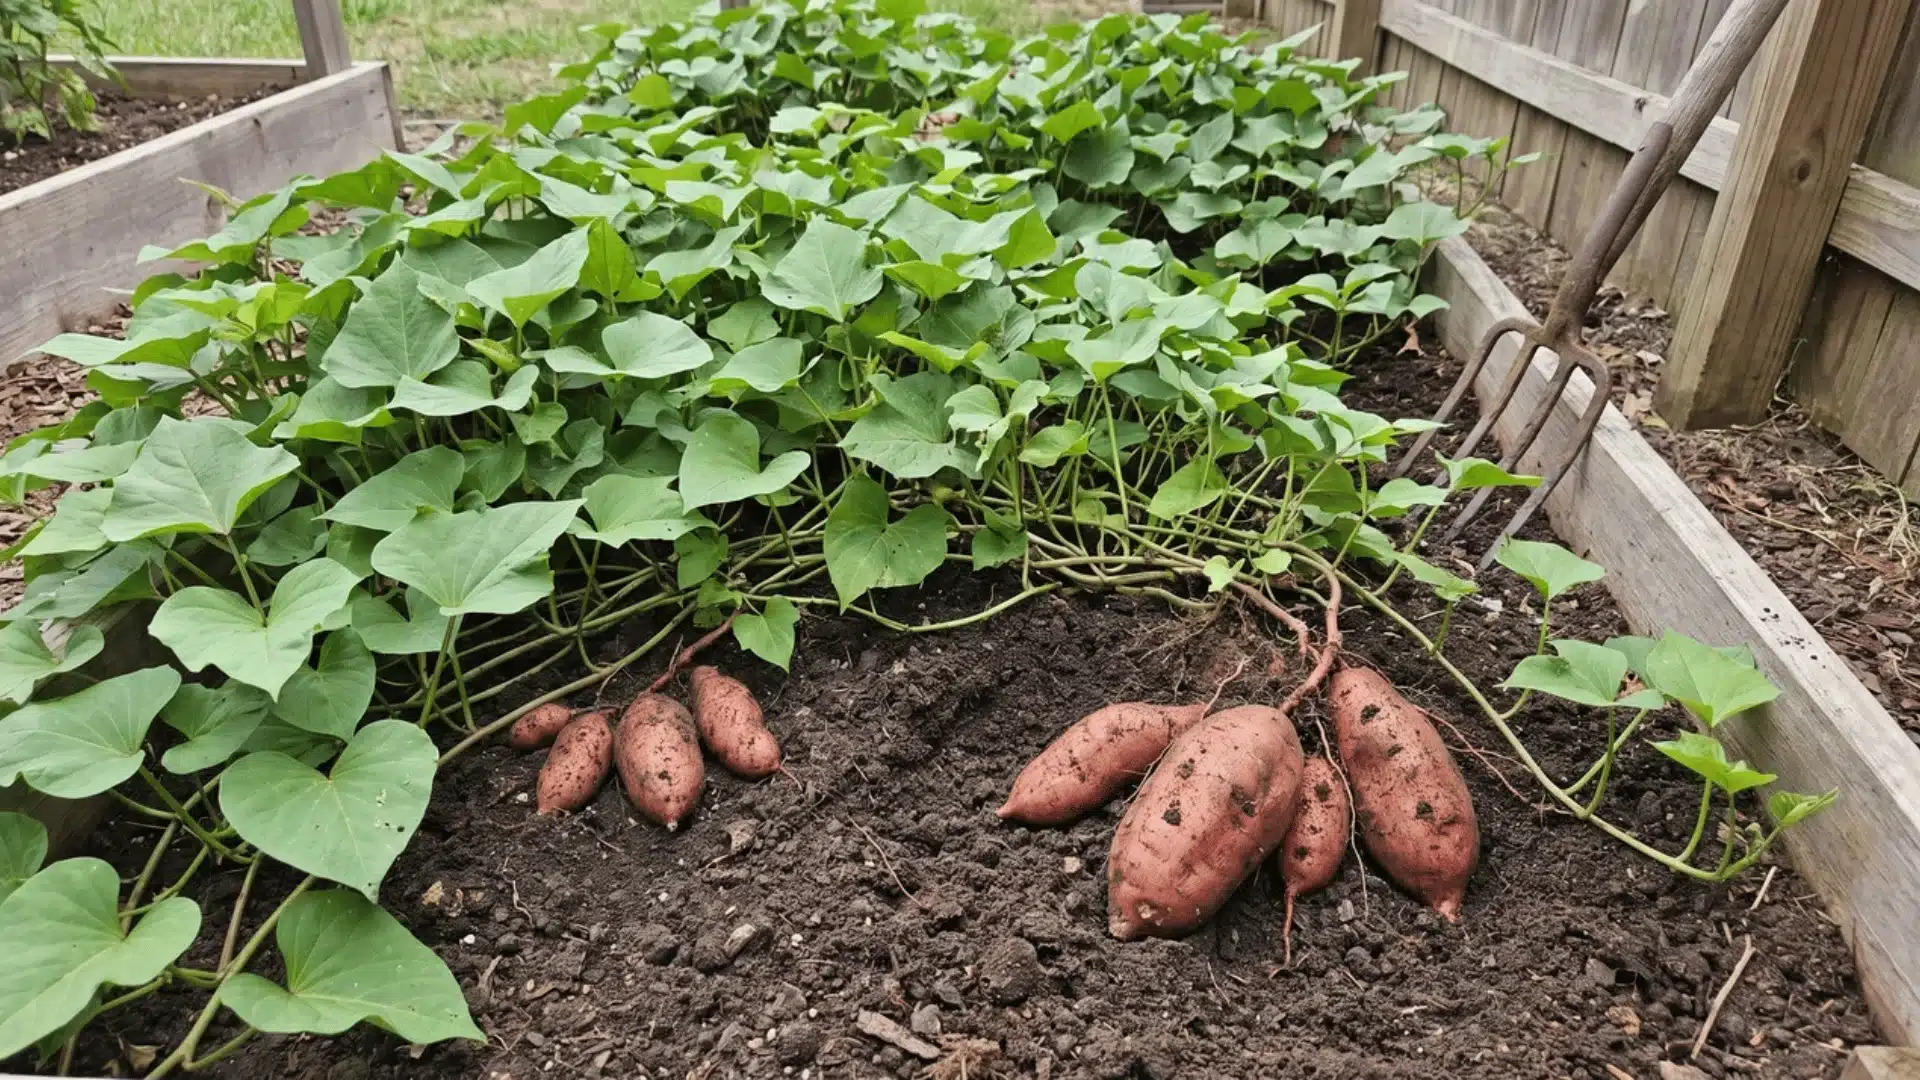
Sweet potatoes need warm soil, direct sun, and enough time to form full roots. I find the process easier once one key fact is clear: gardeners plant rooted shoots called slips, not whole tubers.
My planting plan starts after frost danger has passed, when the soil feels warm and drains well. From there, steady moisture helps young plants settle in, while light feeding keeps leafy growth under control.
Learning how to grow sweet potatoes also means knowing when to ease back on water, lift the roots without bruising them, and cure the crop before storage. Following the sweet potato growing stages in order makes each task easier to time, from slip preparation to harvest.
Understanding Sweet Potato Plant Growth
Sweet potatoes are warm-season plants that form edible storage roots beneath the soil. They are not grown like regular potatoes, which are commonly planted as pieces of seed potato. A sweet potato crop begins with a slip: a leafy shoot removed from a mature tuber and rooted before planting.
Each slip produces trailing vines above ground and roots below it. Some roots thicken as the season continues, becoming the sweet potatoes harvested later. The vines naturally spread across the ground, so they do not need a trellis. They may, however, take up several feet of garden space.
Most varieties need about 90 to 120 days of warm growing weather. Check the variety’s stated maturity period before choosing one for an area with a short summer.
When to Plant Sweet Potatoes
Plant slips after the final spring frost, once the soil reaches about 65°F to 70°F. Cold soil slows root development and can damage young plants. In many areas, the right planting date falls several weeks after spring tomato timing, since both crops wait out the same cold snaps.
Work backward when producing slips at home. They often need six to eight weeks to sprout and develop roots. Starting too early can leave gardeners managing long, tangled shoots indoors, while a late start shortens the time available for root growth.
Local frost dates provide a useful starting point, but soil temperature matters more than the month on the calendar. Wait a little longer if nights remain cold or the garden soil stays damp and chilly.
How to Grow Sweet Potatoes Step by Step
Getting the process right from the start saves a lot of frustration later. These steps take you from a single tuber all the way to harvest.
Tools and Materials List
Before starting the sweet potato growing process, gather the right tools and supplies to prepare the slips, support healthy growth, and make planting easier.
- Blender or food processor (for preparing vitamin C solution, optional)
- Knife or scissors
- Measuring cup
- Small containers, jars, or cups
- Watering can or spray bottle
- Garden trowel
- Garden shovel
- Organic sweet potato
- Potting soil or potting mix
- Small pots or growing containers
- Clear jars or cups for rooting slips
- Vitamin C tablets (optional for rot prevention)
- Water
- Garden space with loose soil
- Fertilizer (optional)
Step 1: Choose Your Sweet Potato and Prepare It
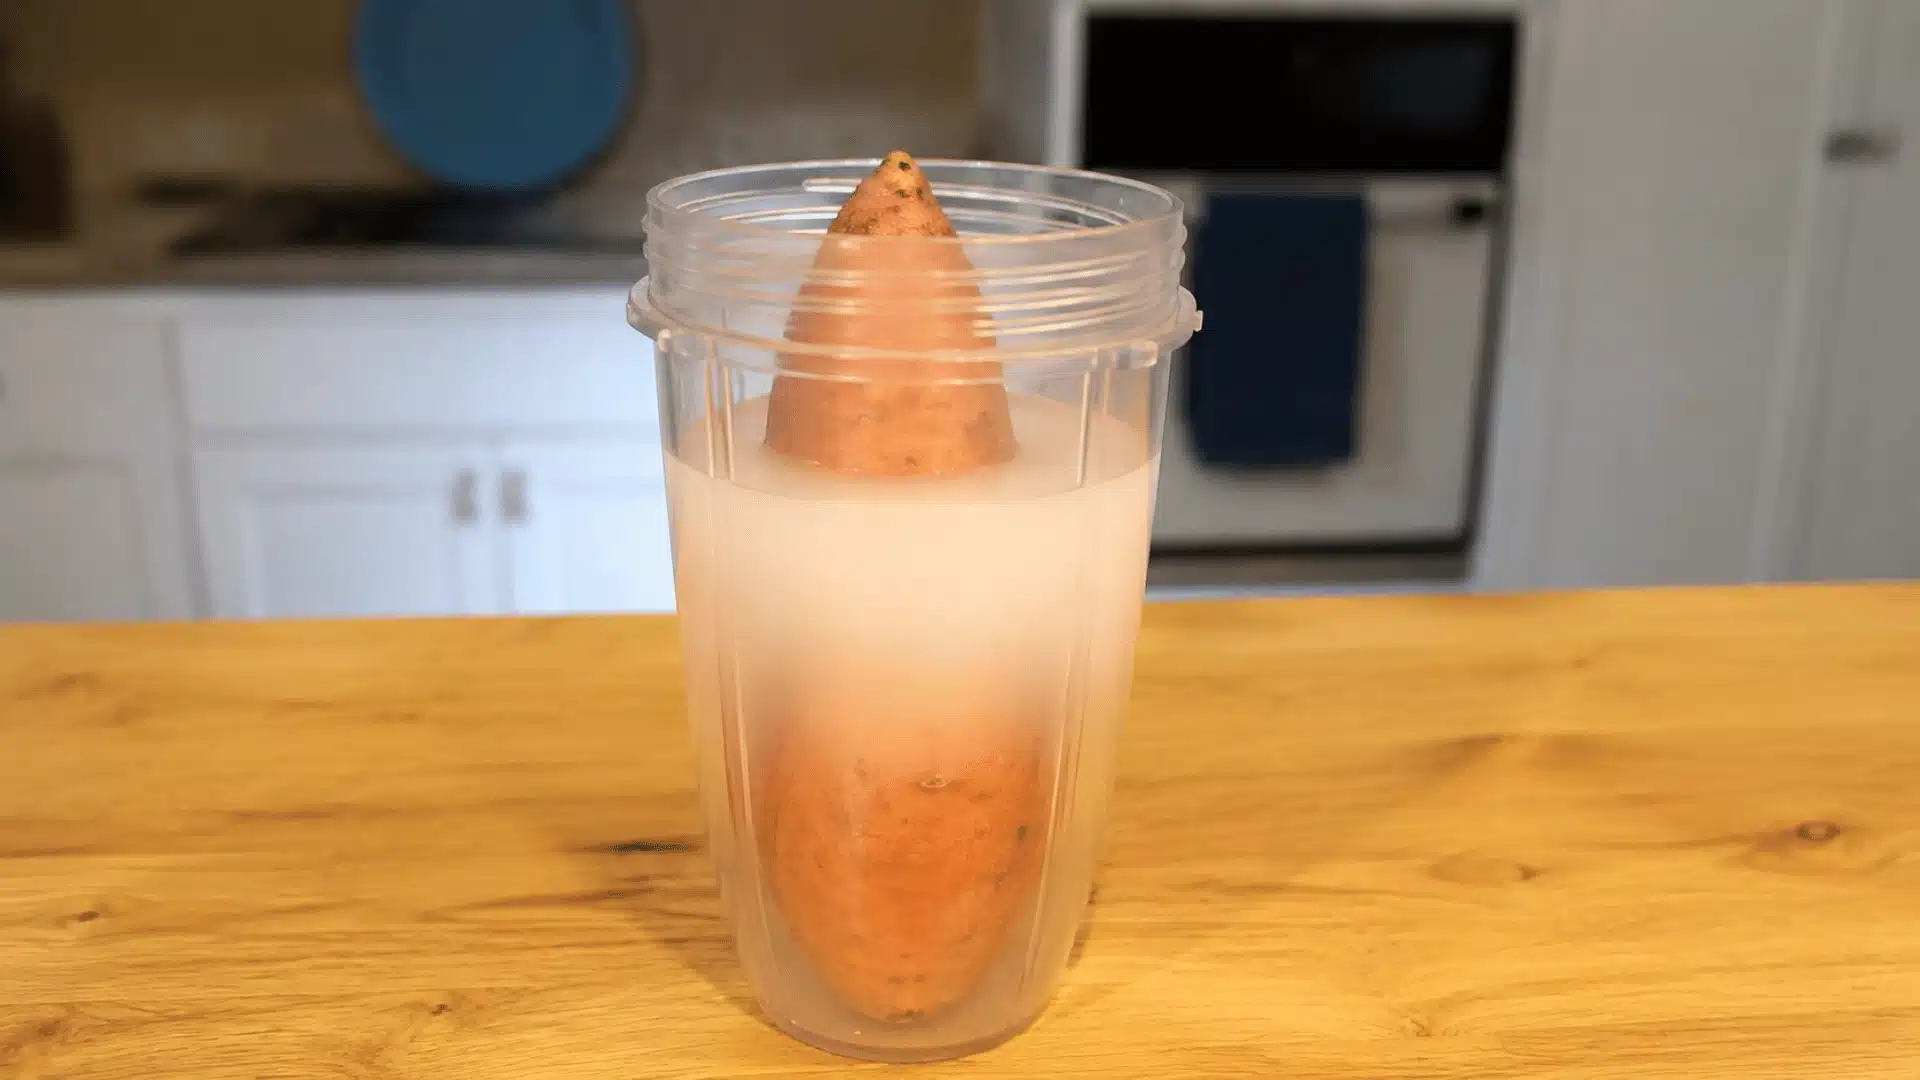
Start with a healthy organic sweet potato, from your garden or a grocery store. Conventional ones are often treated to block sprouting, the same issue home cooks run into when raising sprouting garlic bulbs from store-bought cloves.
I always soak mine in a vitamin C solution before starting. Crush two 1,000mg tablets into 1½ cups of water and soak for 15 minutes.
One tuber is enough to produce multiple slips. You’re not planting the whole potato; you’re using it to grow individual starts.
Step 2: Grow Slips Using the Right Method
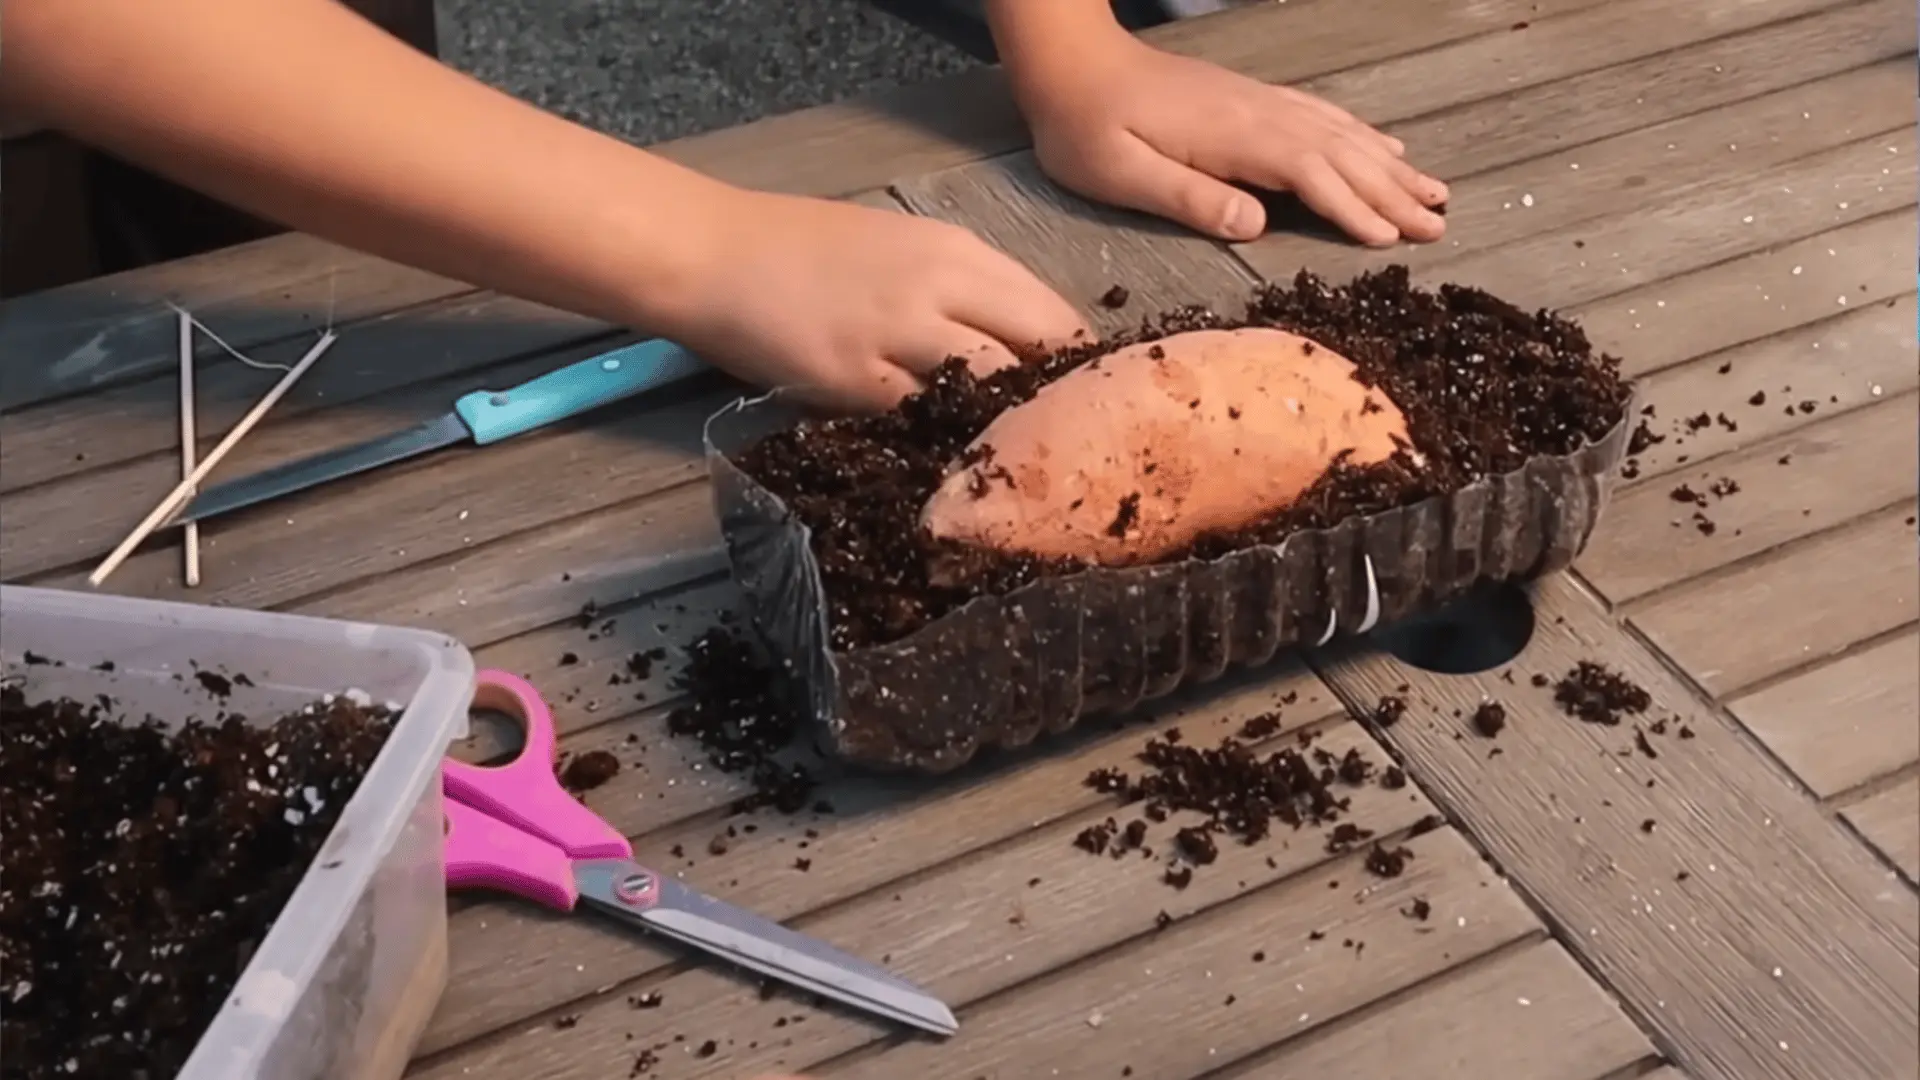
Place the sweet potato on its side in pre-moistened potting soil. Leave the top exposed and keep the soil moist, not waterlogged.
I’ve tried water and perlite methods before; it wins every time. It keeps the tuber firm longer and pushes out stronger shoots.
Wait several weeks for shoots to reach 6–8 inches before removing anything. Short slips don’t establish well; patience here pays off later.
Step 3: Remove and Root the Slips
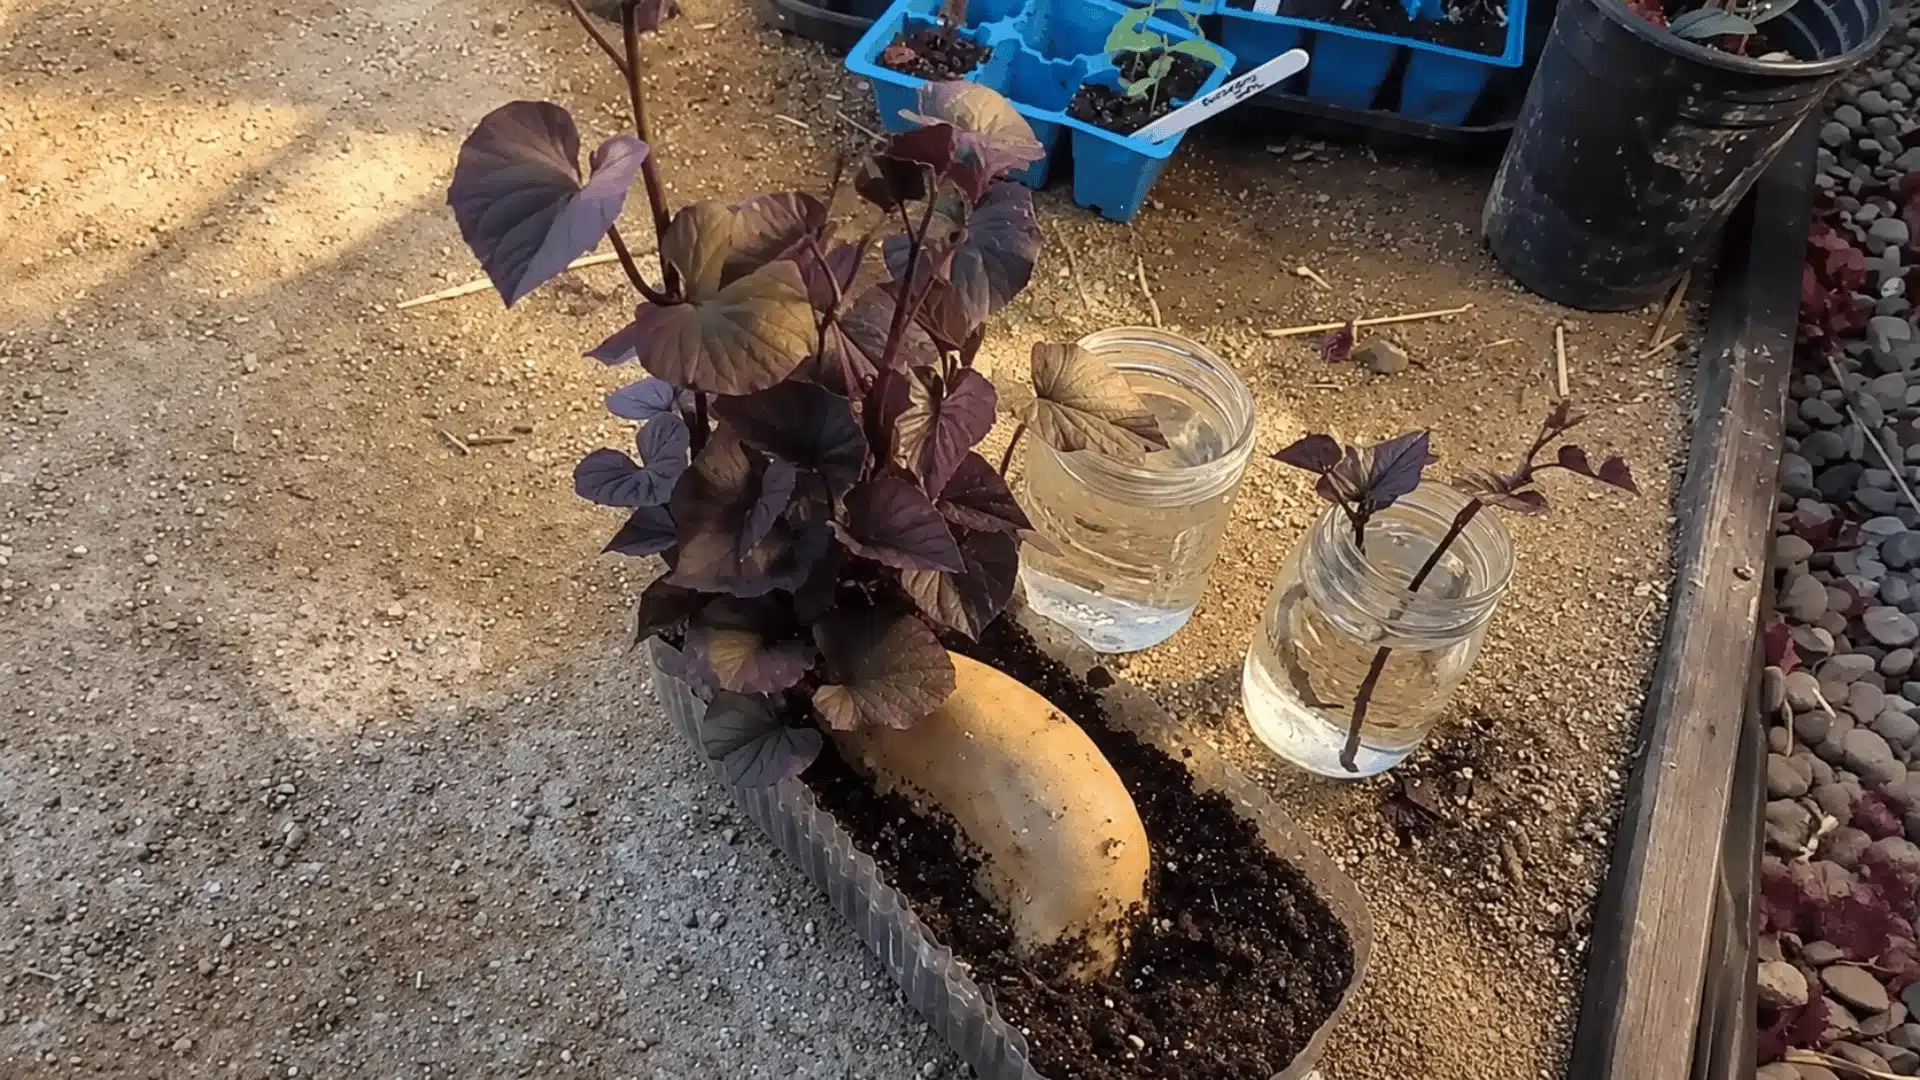
Once shoots hit 6 inches, snap them off carefully and remove the lower leaves. Keep the top leaves intact and place slips in jars of water.
Some slips may already have roots forming from the soil; those can go straight into small pots with fresh potting mix.
I wait until roots reach 1–2 inches before moving anything outside. Planting before that point causes more failures than any other mistake I’ve seen.
Step 4: Prepare the Bed and Plant
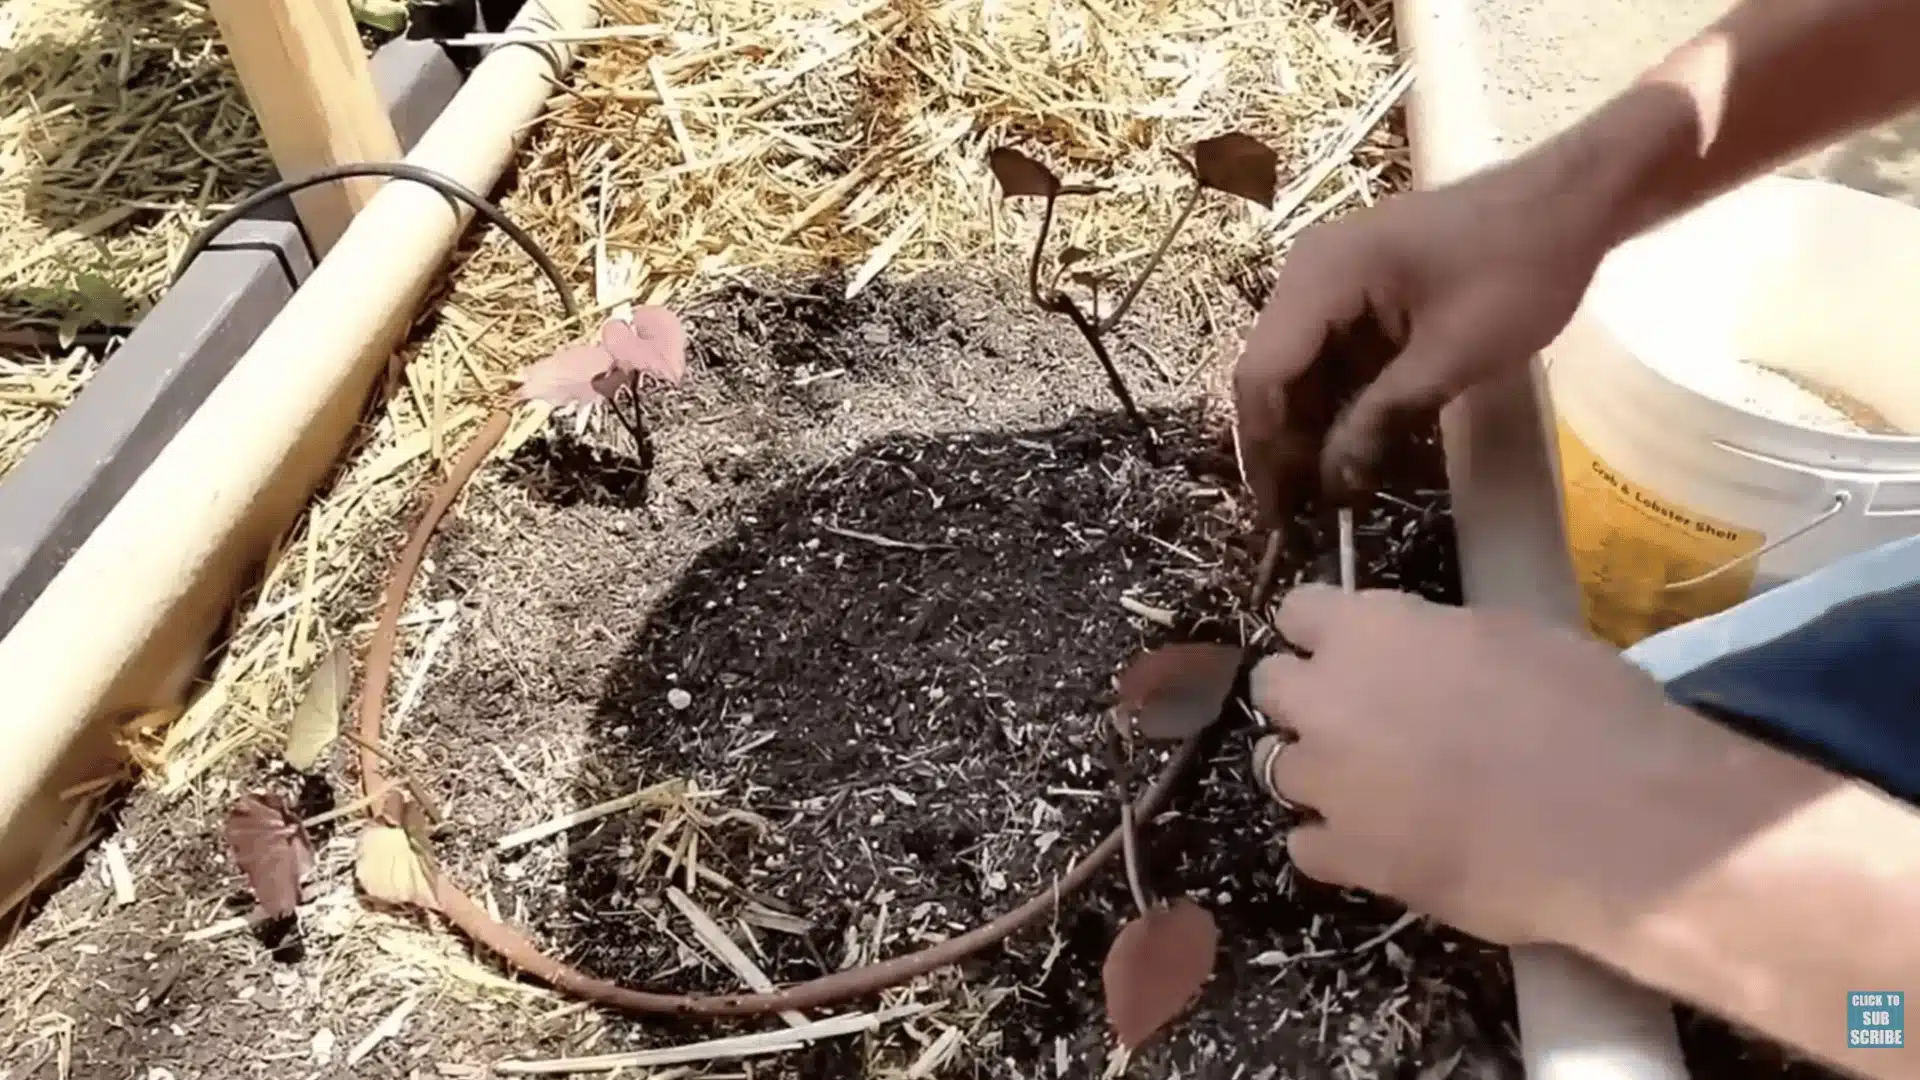
Soil temperature is the real trigger for timing, not the calendar date. Wait until the soil holds steady at 70°F before anything goes in.
If your soil is heavy or compacted, backyard raised beds aren’t optional. Dense soil physically blocks tuber growth regardless of how well you’ve timed everything.
Plant slips 12–18 inches apart, 3–4 inches deep, with 3 feet between rows. Leave the top leaves exposed and water daily for the first week.
Step 5: Care for Plants Through the Season
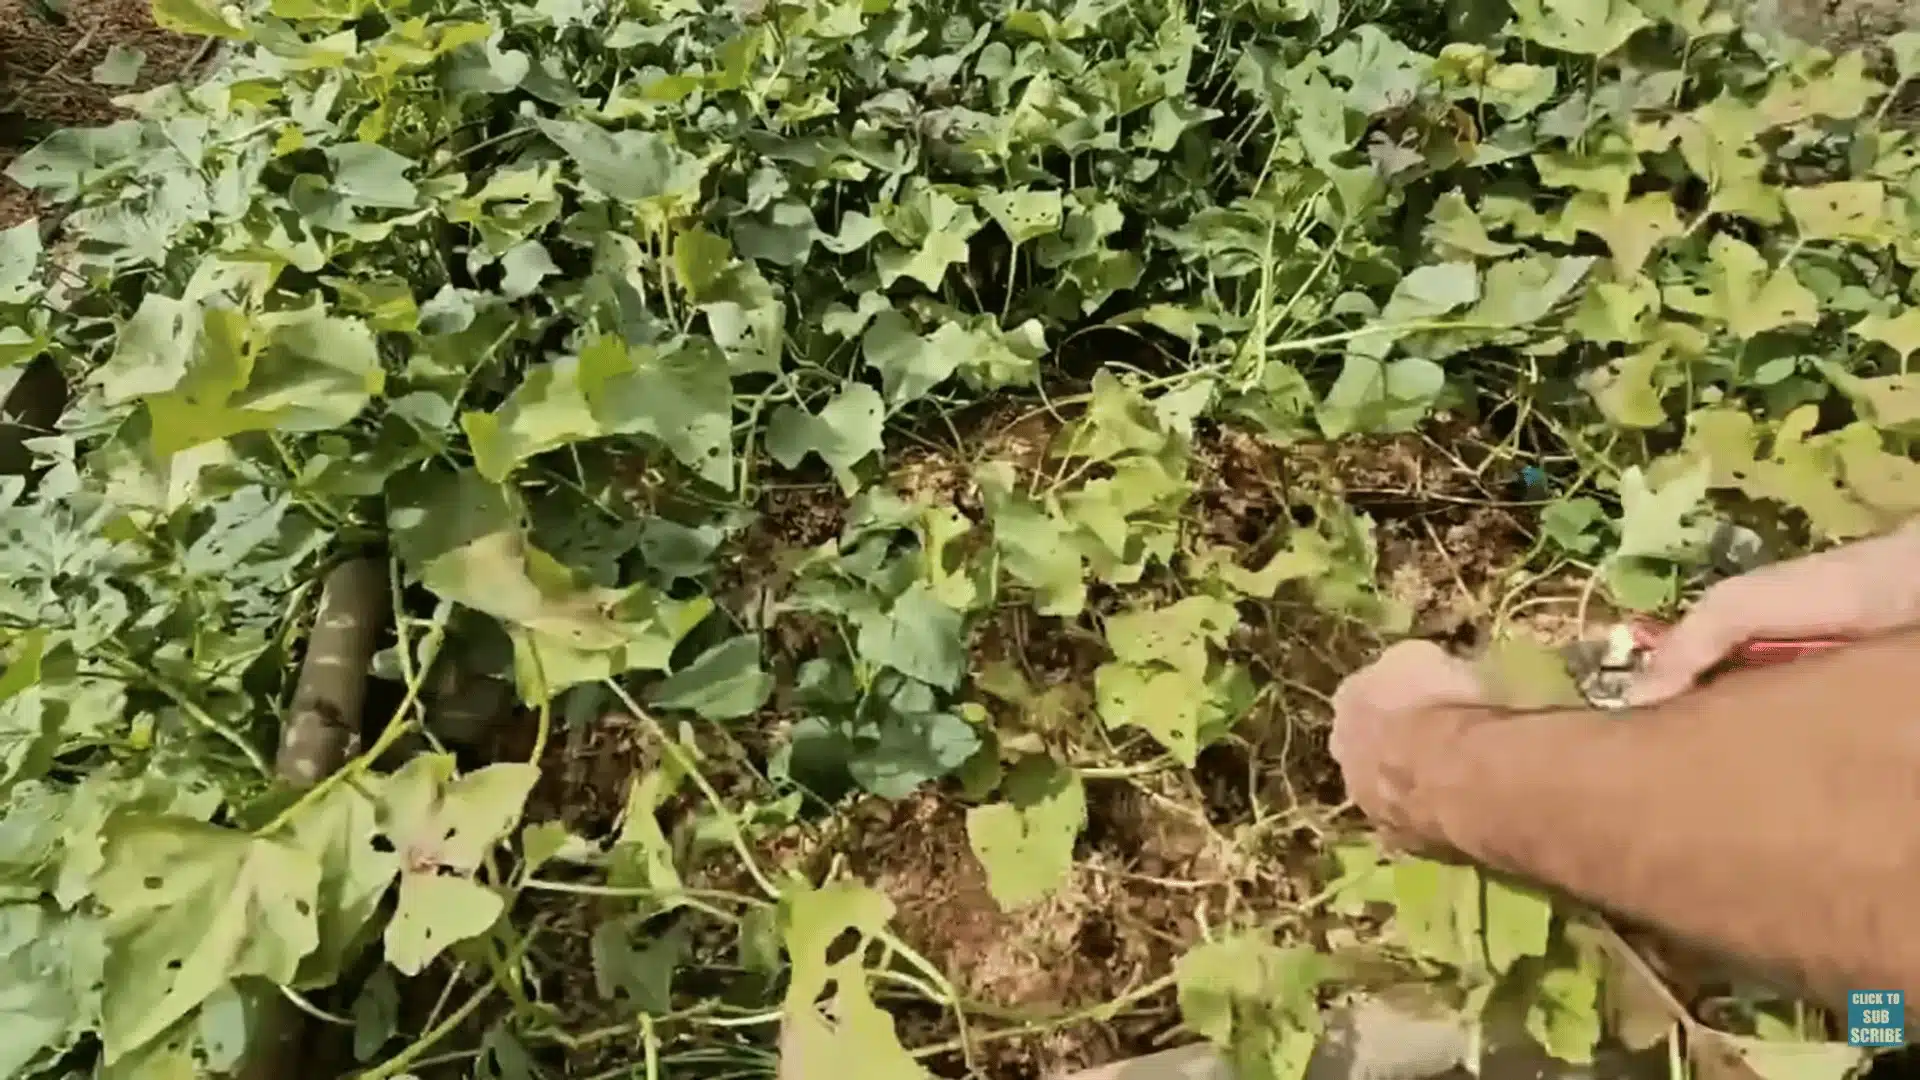
Sweet potato vines spread wide and fast; don’t let that catch you off guard. What matters most is happening underground, completely out of sight.
I check mine occasionally by feel rather than sight. Consistent moisture, no excess feeding, and genuine patience are all this stage really needs.
After establishment, sweet potatoes are surprisingly drought-tolerant. Overwatering causes more problems than underwatering; cracked tubers show up at harvest with no warning.
Step 6: Harvest and Cure
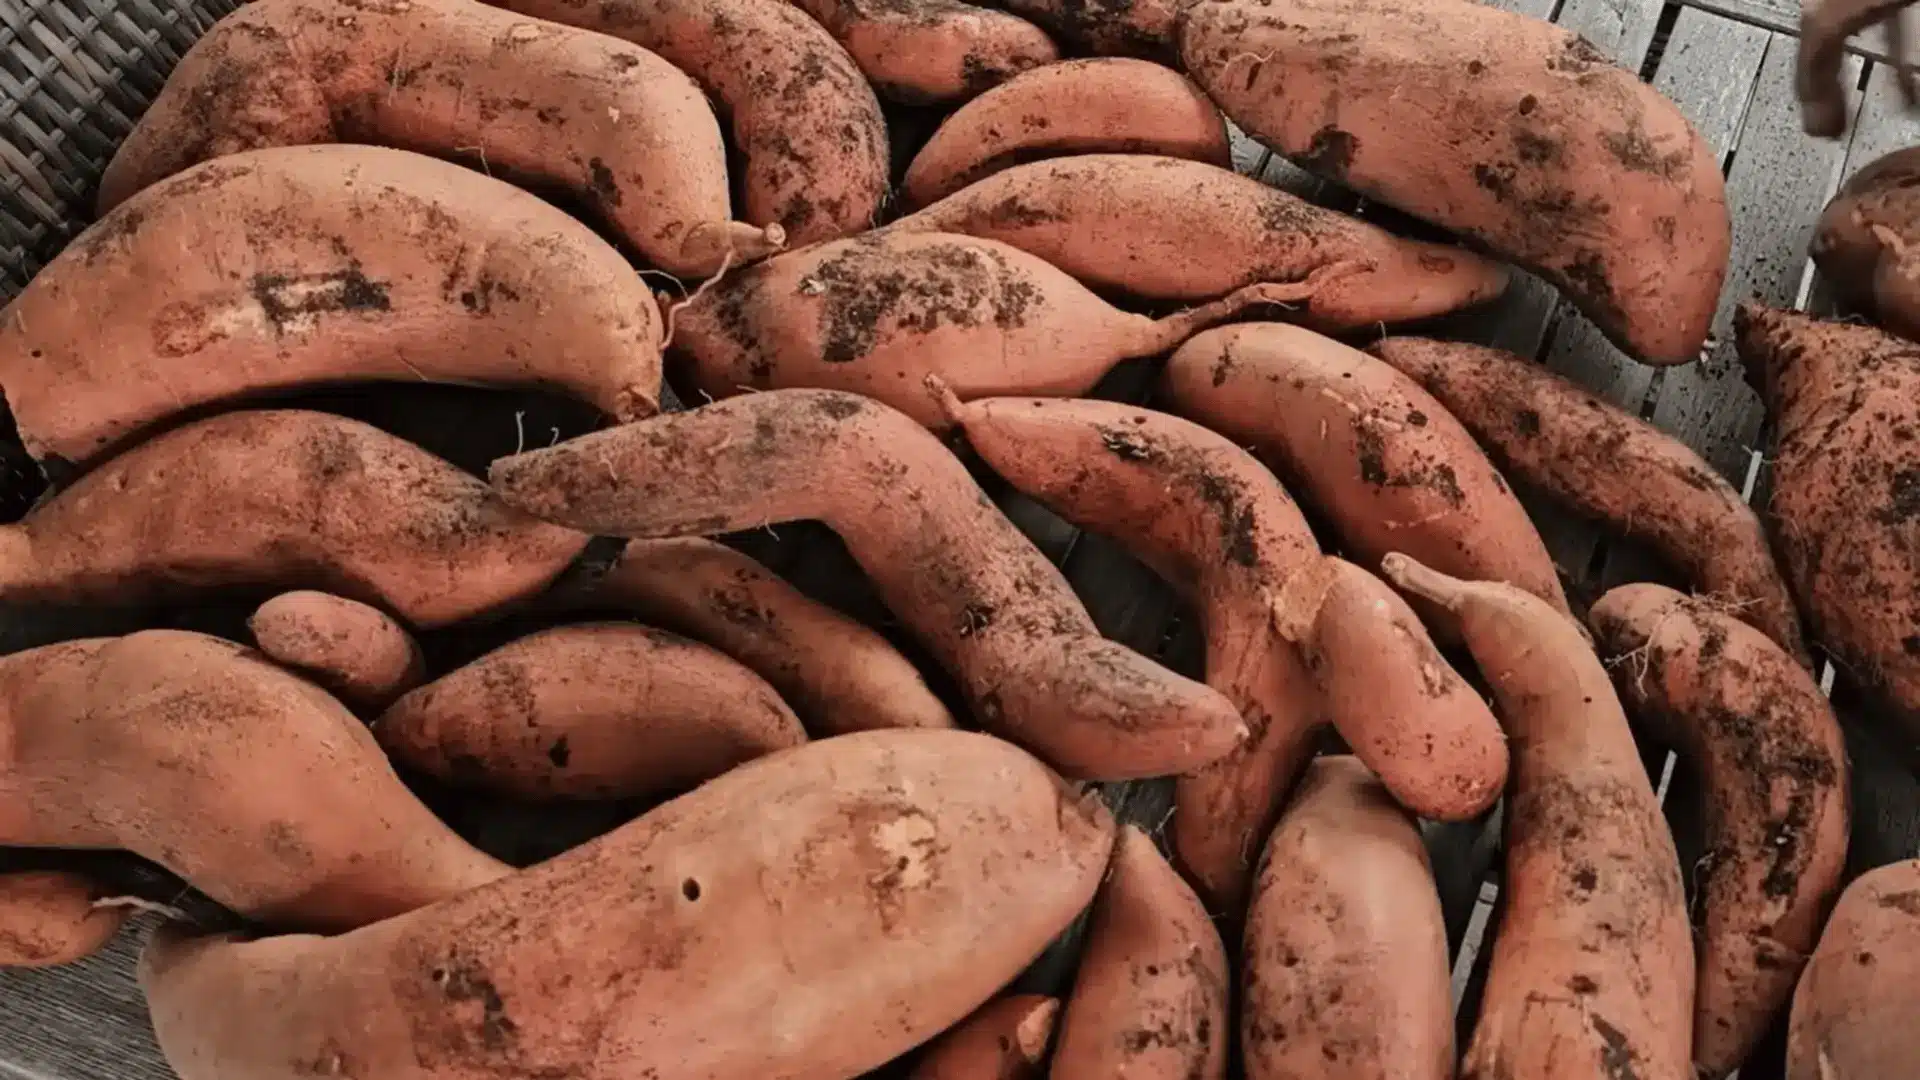
Watch for slowing vines and yellowing leaves; that’s your signal to start checking. Gently expose one tuber to confirm size before committing to a full dig.
Dig carefully around each plant to avoid bruising. Bruised skin won’t cure properly, and damaged tubers won’t store anywhere near as long.
Cure harvested tubers for 10–14 days in a warm, humid spot. That window is what turns a starchy root into the sweet potato worth waiting for.
Choosing and Preparing the Planting Area
A sunny location with loose, warm soil gives sweet potato roots enough space and the right conditions for healthy development.
- Direct Sunlight: Choose a site receiving six to eight hours of direct sunlight each day for steady vine and root growth.
- Loose Soil: Use deep, well-draining soil so the storage roots can expand without becoming twisted, stunted, or misshapen.
- Better Drainage: Create raised rows in heavy soil to improve drainage, increase warmth, and reduce the risk of root rot.
- Bed Preparation: Loosen the soil eight to twelve inches deep, removing stones, hard clods, old roots, and other obstructions.
- Organic Matter: Add finished compost when needed, but limit manure and high-nitrogen fertilizer because they encourage excessive vine growth.
- Soil pH: Aim for a slightly acidic pH between 5.5 and 6.5, using a soil test to identify necessary amendments.
Proper site and soil preparation support stronger plants, well-formed roots, and a more productive sweet potato crop at harvest time.
How to Plant Sweet Potato Slips
Planting sweet potato slips at the right depth and spacing helps them settle quickly, form strong roots, and produce healthy vines throughout the season.
- Choose Planting Time: Plant on an overcast day or during the cooler afternoon hours to reduce heat stress on young slips.
- Space the Slips: Leave 12 to 18 inches between slips and about three feet between rows for root growth and easy access.
- Prepare Each Hole: Make each planting hole four to six inches deep, depending on the length of the rooted stem.
- Position the Slip: Bury the roots and lower stem nodes, but keep the leafy tip exposed above the soil.
- Firm the Soil: Press the soil gently around each stem to remove large air pockets without damaging the young roots.
- Water Thoroughly: Soak the planting area after planting and keep the soil evenly moist during the first week.
- Check New Growth: Inspect slips daily and replace any plant that collapses, rots, or fails to recover after several days.
Consistent moisture during the first week supports root growth, while early checks make it easier to replace weak or damaged slips before gaps develop.
Growing Sweet Potatoes in Containers
A grow bag or large pot works well where garden space is limited. Use a container holding at least 15 to 20 gallons with several open drainage holes. One slip has ample room in that size; two may work in a wide 20-gallon container, but crowding often leads to smaller roots.
Fill the container with loose potting mix made for outdoor pots. Native garden soil can compact inside a container and drain poorly. Mix in a modest amount of compost, then leave an inch or two below the rim so water does not run straight over the edge.
Set the container in direct sun and allow the vines to trail over its sides. Check moisture more often than in an in-ground bed because pots dry quickly in hot weather. Water once the upper inch of mix begins to feel dry.
Watering and Feeding the Plants
After the first week, provide about one inch of water each week, including rainfall. Deep watering is more useful than frequent light sprinkling because it encourages roots to grow farther into the soil. During very hot or dry periods, check the bed before assuming the usual schedule is enough.
Avoid keeping the ground saturated. Standing water limits oxygen around the roots and raises the chance of decay. Mulch can help hold moisture and limit weeds, but keep it slightly away from the main stems.
Sweet potatoes generally need little extra fertilizer in prepared soil. If a soil test indicates a need, select a product with less nitrogen and apply it at the labeled rate.
I avoid feeding plants simply because the vines look small during their first few weeks; root growth may be progressing before the top fills out.
Managing Vines, Weeds, and Pests
Pull weeds while they are small, taking care not to dig deeply near the plants. Once the vines cover the bed, their leaves shade much of the soil and reduce new weed growth.
Redirect vines that spread into paths or smother nearby crops. Cutting them back repeatedly can reduce the leaf area needed to feed developing roots. In small beds, I gently turn the stems toward open ground instead.
Common troublemakers include flea beetles, wireworms, and sweet potato weevils. Damage varies by region, so identify the insect before choosing a treatment. Crop rotation, clean slips, weed control, and removal of old plant material help reduce future problems. Avoid planting sweet potatoes in the same spot year after year.
Yellow leaves near harvest can be normal. Yellowing early in the season may point to cold soil, excess water, nutrient trouble, or root disease. Long, healthy-looking vines paired with a poor crop often indicate excess nitrogen, crowded planting, shade, or a growing season that ended too soon.
When and How to Harvest Sweet Potatoes
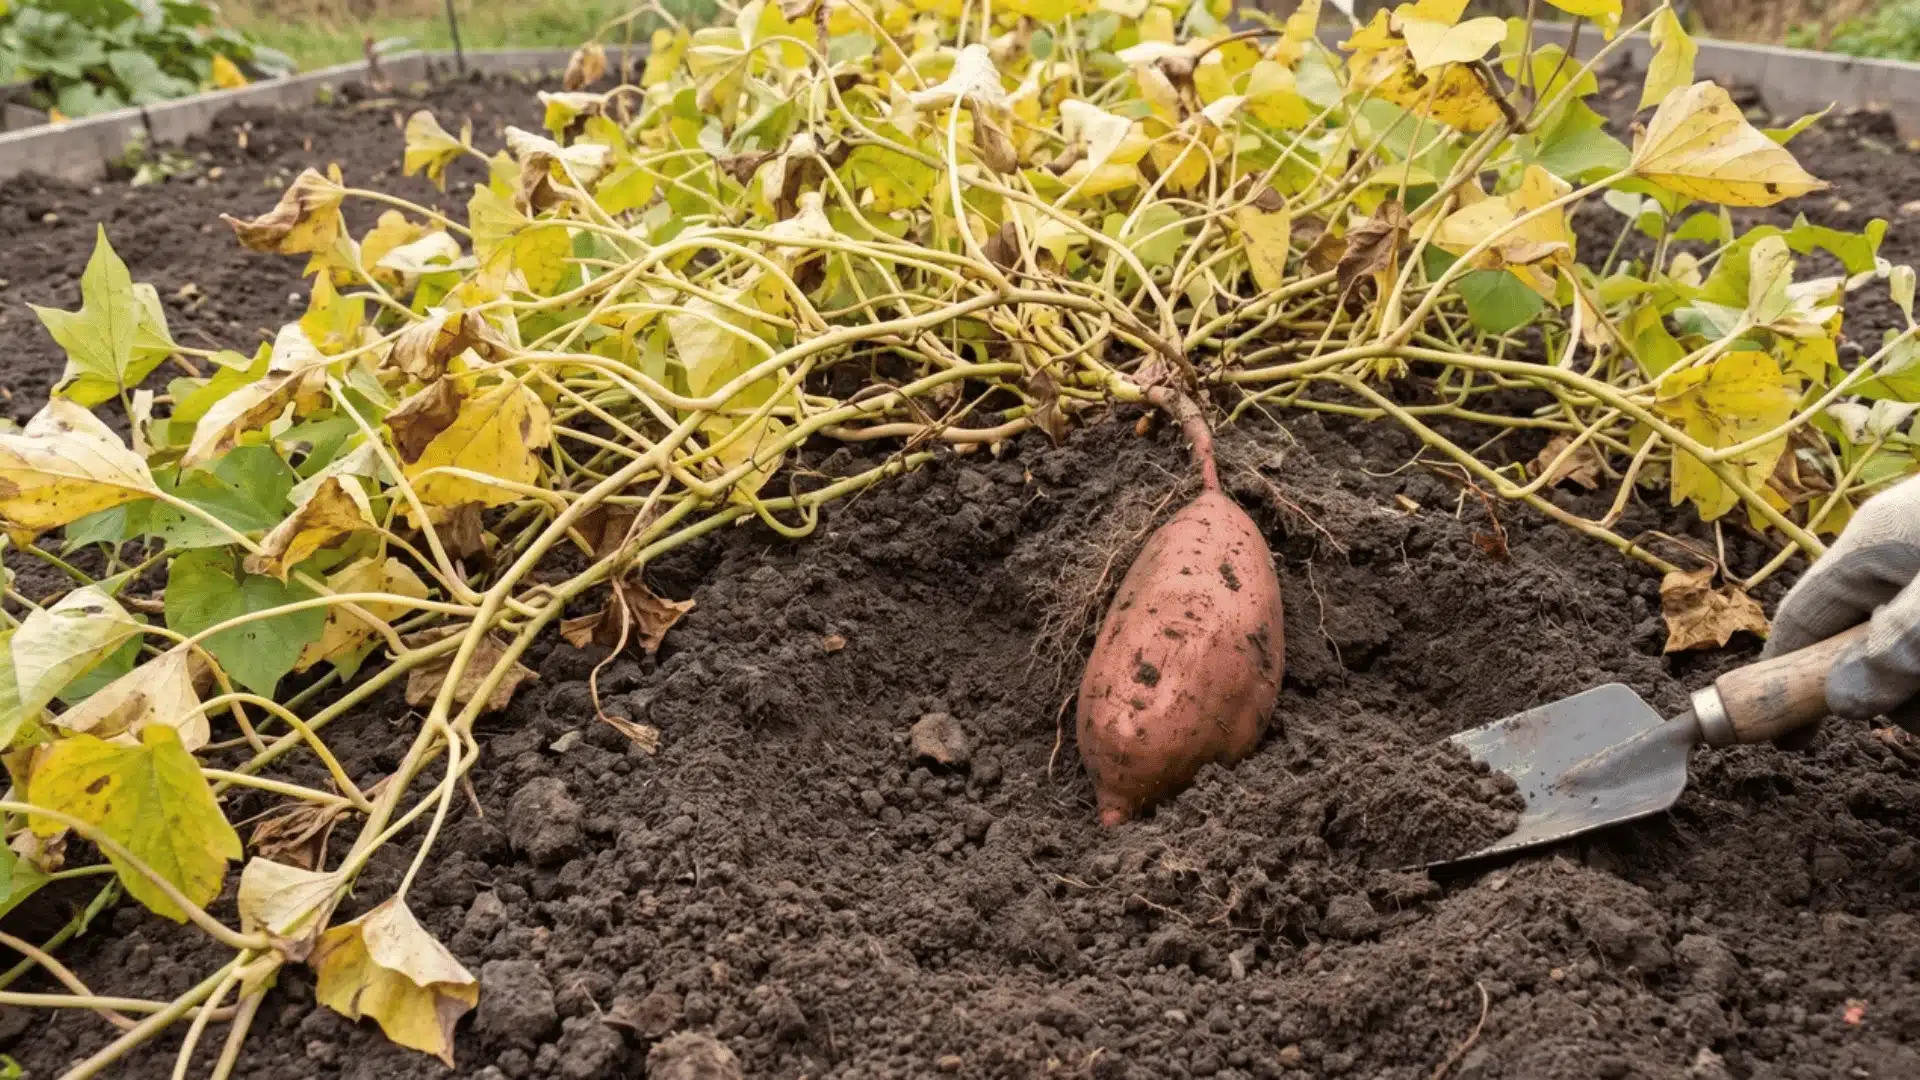
Use the variety’s maturity period as the main harvest marker. Yellowing foliage can offer another clue, but do not wait for a hard frost. Cold injury can damage the roots and shorten their storage life.
Reduce watering about two weeks before the planned harvest if the weather permits. Drier soil is easier to loosen and less likely to cling heavily to the thin skins.
Cut back the vines so the base of each plant is visible. Insert a garden fork well away from the crown, loosen the soil, and lift slowly. Search the surrounding area by hand because some roots may form beyond the main cluster.
Freshly dug sweet potatoes bruise and scrape easily. Set them on the soil rather than throwing them into a container. Keep damaged roots separate and use them first, as cuts make long-term storage less reliable.
How to Cure and Store Sweet Potatoes
Do not wash the harvested roots. Brush away only loose soil, then place them in a warm, humid, ventilated area for about 7 to 14 days. A temperature near 80°F to 85°F with high humidity supports good curing, though home conditions may require a practical compromise.
Curing helps minor skin injuries close and allows starches to convert into sugars, improving flavor. Afterward, move sound roots to a dark, ventilated location around 55°F to 60°F. Refrigeration can affect their texture and taste.
Store the roots in a single layer or in shallow containers that allow airflow. Check them regularly and remove any that become soft, wet, or mouldy. Properly cured, undamaged roots can remain usable for several months under suitable conditions.
Common Mistakes That Reduce the Harvest
A few errors account for many disappointing crops:
-
Planting Too Early: Cold ground delays establishment and may cause slips to rot.
-
Using Dense Soil: Compacted soil restricts expansion and produces small or misshapen roots.
-
Adding Excess Nitrogen: Heavy feeding supports vine growth instead of storage-root development.
-
Crowding the Plants: Tight spacing leaves less soil volume for each root system.
-
Watering Shallowly: Light surface watering does not support deep, steady root growth.
-
Harvesting Carelessly: Fork cuts and scraped skins shorten storage life.
-
Skipping the Cure: Uncured roots are less sweet and more vulnerable during storage.
What Soil, Water, and Fertilizer Do Sweet Potatoes Actually Need?
Sweet potatoes need very little once they’re established. But one mid-season mistake can quietly destroy your harvest before you notice anything wrong.
Before planting, work compost into loose, well-draining soil. That’s all the prep you need. Poor drainage means raised beds or mounded rows.
High-nitrogen fertilizer is the mistake most growers make. It pushes energy into vines and leaves; berries barely develop below ground.
Use a low-nitrogen, phosphorus-forward fertilizer after establishment. Or skip feeding entirely. Sweet potatoes don’t need much once they’re growing.
Watering has two phases. Daily for the first week, ten moist but not wet. Overwatering causes cracked tubers, and you won’t know until harvest.
How Do You Know When Sweet Potatoes Are Ready to Harvest?
Most first-time growers pull too early or miss the frost window entirely. Knowing which signal to watch fixes both problems.
Here’s what to look for before you dig:
- Vines slow down and start to yellow, usually 90–120 days after planting
- Gently expose one tuber to check size before committing to a full harvest
- Hard frost is the hard deadline; harvests before it hits, no exceptions
- Frost-killed vines mean you have 24–48 hours before soil damage begins
- Tubers can stay longer to size up after 120 days
- Flavor doesn’t improve much past that point
- Skin becomes harder to cure evenly the longer the berries stay in the ground
When vines slow and yellowing starts, that’s your signal. Don’t wait for something more obvious. It won’t come.
Why Does Curing Matter and How Do You Do It?
Most growers dig their sweet potatoes and expect them to taste like the ones from the store. Fresh out of the ground, they don’t, and curing is why.
A freshly harvested sweet potato is starchy and bland. Curing triggers the conversion of starches into sugar, but only if the conditions are right:
- Temperature, 80–85°F throughout the curing window
- Humidity around 85–90% for the full duration
- Time,10–14 days minimum, no shortcuts
Get those three conditions right, and the flavor upgrades. Miss any one of them and the process stalls. Skin hardening happens during this same window. That’s not cosmetic; thin or damaged skin shortens shelf life significantly.
Handle freshly dug tubers carefully. They bruise easily,y and bruised skin won’t heal properly.
Conclusion
Knowing how to grow sweet potatoes comes down to timing and soil conditions more than constant maintenance. Start with healthy rooted slips, wait for warm ground, and give each plant sunny space in loose soil.
I keep water steady during active growth, limit nitrogen, and handle the thin-skinned harvest gently. My final step is curing the roots before moving them into cooler storage, since that improves both flavor and keeping quality.
Pick a variety suited to the local warm season, count back six to eight weeks for slip production, and set a planting date based on frost and soil temperature.
Frequently Asked Questions
Can I Grow Sweet Potatoes from A Sweet Potato I Bought at The Grocery Store?
Ye, but only if it’s organic or labeled untreated. Conventional sweet potatoes are often treated with sprout inhibitors to extend shelf life. Treated tubers produce few or no slips. One organic sweet potato from a grocery store or farmers’ market is a reliable starting point.
How Many Sweet Potatoes Does One Plant Produce?
A healthy plant typically yields 3–5 tubers. Well-amended, loose soil and a full growing season can push that higher. Yield drops sharply in compacted soil, with high-nitrogen fertilizer, or when plants are pulled before 90 days. Soil quality and timing matter more than variety.
Do Sweet Potato Vines Need Support or Can They Spread on The Ground?
They spread on the ground, with trellising needed. Vines can run 6–10 feet and will root at nodes where they touch moist soil. That doesn’t harm the main plant, but it spreads the root system further than most growers expect. Redirecting vines occasionally keeps the bed manageable.
What Happens if I Leave Sweet Potatoes in The Ground Too Long?
In frost-free climates, extra time adds size but not much flavor past 120 days. Skin also becomes harder to cure evenly. Where frost is a risk, once vines are killed, you have 24–48 hours before tubers start to rot in the ground.